und Bedienungsanleitung für den Garagentorantrieb ... - Rademacher
und Bedienungsanleitung für den Garagentorantrieb ... - Rademacher
und Bedienungsanleitung für den Garagentorantrieb ... - Rademacher

Erfolgreiche ePaper selbst erstellen
Machen Sie aus Ihren PDF Publikationen ein blätterbares Flipbook mit unserer einzigartigen Google optimierten e-Paper Software.
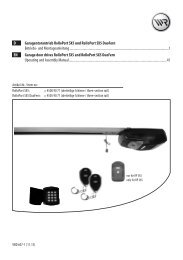
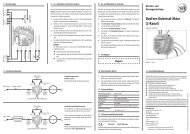
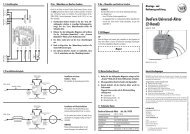
(A) Installation of the header bracket (1)GBNOTEThe header bracket (1) must be aligned with the midpointof the door.213 41.2.3.Mark out the position of the header bracket(1) and drill the mounting holes (e.g.with a 10 mm masonry drill bit).Screw the header bracket (1) tight withthe enclosed hexagon screws (8 x 60 mm).Then fix the rail (4) with the enclosedhexagon screw (6 x 80 mm) to the headerbracket (1).Key1 = Header bracket2 = Screw (6 x 80 mm) with hexagon nut3 = Hexagon screw (8 x 60 mm)4 = Rail(B) Installation of the fixing bracket (5) at the door operator head (7)1.Push the fixing bracket (5) onto the rail(4), as close to the door operator head(7) as possible.452.Mark the mounting holes for the fixingbracket (5).In order to do so, lift the entire construction and pushit against the ceiling.NOTEEnsure that the rail (4) is aligned with the centre ofthe door.673.4.Drill the mounting holes (e.g. with a 10mm masonry drill bit).Finally screw the fixing bracket (5) to thegarage ceiling with the enclosed hexagonscrews (8 x 60 mm).Key4 = Rail5 = Fixing bracket6 = Hexagon screw (8 x 60 mm)7 = Door operator head43