elliptical - Horizon Fitness
elliptical - Horizon Fitness
elliptical - Horizon Fitness

You also want an ePaper? Increase the reach of your titles
YUMPU automatically turns print PDFs into web optimized ePapers that Google loves.
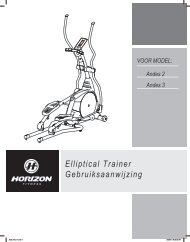
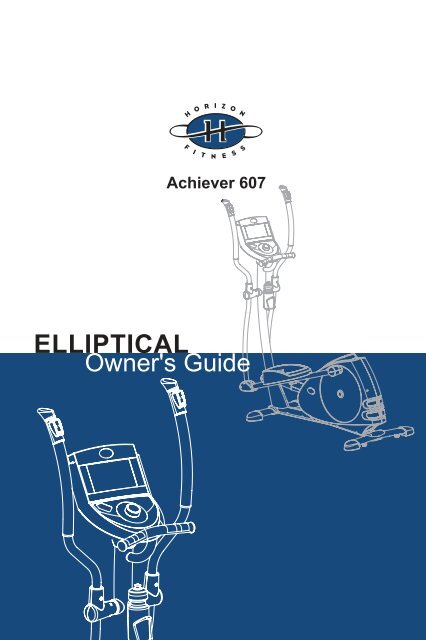
ELLIPTICAL<br />
Achiever 607
SAFETY INSTRUCTIONS<br />
GETTING STARTED/POWER<br />
MOVING/FOOT POSITION<br />
KNOW YOUR ELLIPTICAL<br />
QUICK START UP<br />
PROGRAMMING<br />
DISPLAY<br />
PROGRAM PROFILES<br />
USING YOUR HRC PROGRAM<br />
USING YOUR FIT-TEST PROGRAM<br />
USING YOUR STEP-TEST PROGRAM<br />
USING YOUR WATTS CONTROL PROGRAM<br />
USING YOUR CUSTOM PROGRAMS<br />
USING YOUR GAME PROGRAM<br />
MONITORING YOUR HEART RATE<br />
TARGET HEART RATE ZONE<br />
TROUBLESHOOTING<br />
COMMON PRODUCT QUESTIONS<br />
EXERCISE GUIDELINES<br />
ROUTINE MAINTENANCE<br />
DEVELOPING A FITNESS PROGRAM<br />
THE IMPORTANCE OF WARM UP AND COOL DOWN<br />
ACHIEVING YOUR FITNESS GOALS<br />
WEEKLY LOG SHEET<br />
MONTHLY LOG SHEET<br />
LIMITED HOME USE WARRANTY<br />
CAUTION<br />
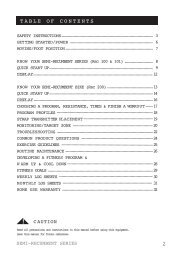
T A B L E O F C O N T E N T S<br />
Read all precautions and instructions in this manual before using this equipment.<br />
Save this manual for future reference.<br />
3<br />
6<br />
7<br />
8<br />
9<br />
10<br />
11<br />
12<br />
14<br />
15<br />
16<br />
17<br />
18<br />
19<br />
20<br />
21<br />
22<br />
24<br />
25<br />
26<br />
28<br />
28<br />
29<br />
30<br />
31<br />
32<br />
2
I M P O R T A N T S A F E T Y I N S T R U C T I O N S<br />
SAVE THESE INSTRUCTIONS<br />
When using an electrical product, basic precautions should always be followed. Read<br />
all instructions before using this exercise product.<br />
WARNING !<br />
To reduce the risk of burns, fire, electrical shock or injury to persons:<br />
• Use this exercise product for its intended use as described in this Owner's guide.<br />
Do not use attachments not recommended by the manufacturer.<br />
• Never drop or insert any object into any opening.<br />
• Do not remove the <strong>elliptical</strong> trainer's side covers.<br />
• Never operate this <strong>elliptical</strong> trainer if it has a damaged cord or plug, if it is not<br />
working properly, if it has been damaged, or immersed in water.<br />
• Keep the cord away from heated surfaces.<br />
• Do not use outdoors.<br />
• Only use the power cord provided with your <strong>Horizon</strong> <strong>Fitness</strong> Elliptical Trainer.<br />
• Never place the power cord under carpeting or place any object on top of the<br />
power cord, which may pinch or damage it.<br />
• Unplug your <strong>Horizon</strong> <strong>Fitness</strong> Elliptical Trainer before moving it.<br />
Information to the check after German Institute for Standardization EN<br />
957:<br />
• Brake system dependent on speed<br />
• Watt announcement is calibrated and opposed after EN 957-5<br />
• Device class H<br />
• User's Weight Limit 130kgs<br />
3
OTHER SAFETY TIPS FOR YOUR HORIZON FITNESS ELLIPTICAL TRAINER<br />
CAUTION!<br />
• If you experience chest pains, nausea, dizziness or shortness of breath, stop exercising<br />
immediately and consult your physician before continuing.<br />
• Do not turn pedal arms by hand.<br />
• Do not wear clothing that might catch on any part of the <strong>elliptical</strong> trainer.<br />
• Make sure handlebars are secure before each use.<br />
• Read the owner's guide before operating this <strong>elliptical</strong> trainer.<br />
• Maintain a comfortable pace. Do not 'sprint' above 80 rpms on this machine.<br />
• To maintain balance it is recommended to keep a grip on the handlebars while<br />
exercising, mounting or dismounting the machine.<br />
OPERATION<br />
It is essential that your <strong>elliptical</strong> trainer is used only indoors, in a climate controlled<br />
room. If your <strong>elliptical</strong> trainer has been exposed to colder temperatures or high<br />
moisture climates, it is strongly recommended that the <strong>elliptical</strong> trainer is warmed up<br />
to room temperature before first time use. Failure to do so may cause premature<br />
electronic failure.<br />
CHILDREN<br />
• Keep children off of your <strong>elliptical</strong> trainer at all times.<br />
• When the <strong>elliptical</strong> is in use, young children and pets should be kept at least 10<br />
feet away.<br />
CLEANING<br />
• Clean with soap with a slightly damp cloth only. Never use solvents.<br />
4
CONGRATULATIONS! on choosing a <strong>Horizon</strong> <strong>Fitness</strong> Elliptical Trainer.<br />
You've taken an important step in developing and sustaining an exercise program!<br />
Your <strong>Horizon</strong> <strong>Fitness</strong> <strong>elliptical</strong> trainer is a tremendously effective tool for achieving<br />
your personal fitness goals. Regular use of your <strong>Horizon</strong> <strong>Fitness</strong> <strong>elliptical</strong> trainer can<br />
improve the quality of your life in so many ways.<br />
Here are just a few of the health benefits of aerobic exercise<br />
• W eight Loss<br />
• A Healthier Heart<br />
• Improved Muscle Tone<br />
• Increased Daily Energy Levels<br />
• Reduced Stress<br />
• Help in Countering Anxiety and Depression<br />
• An Improved Self Image<br />
The key to reaping these benefits is to develop the exercise habit. Your new <strong>Horizon</strong><br />
<strong>Fitness</strong> <strong>elliptical</strong> trainer will help you eliminate the obstacles that prevent you from<br />
getting in your exercise time. Inclement weather and darkness won't interfere with<br />
your workout when you use your <strong>Horizon</strong> <strong>Fitness</strong> <strong>elliptical</strong> trainer in the comfort of<br />
your home. This manual provides you with basic information for using and enjoying<br />
your new machine. A more complete knowledge of your new <strong>Horizon</strong> <strong>Fitness</strong> <strong>elliptical</strong><br />
trainer will assist you in realizing your goal of a healthy lifestyle.<br />
CAUTION: BEFORE BEGINNING ANY EXERCISE PROGRAM, ALWAYS CONSULT YOUR<br />
PHYSICIAN. IF YOU EXPERIENCE CHEST PAINS, NAUSEA, DIZZINESS OR SHORTNESS OF<br />
BREATH, STOP EXERCISING AND CONSULT YOUR PHYSICIAN BEFORE CONTINUING.<br />
IMPORTANT: PLEASE READ BEFORE USE!<br />
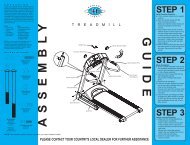
ASSEMBLY<br />
CAUTION! There are several areas during the assembly process of a <strong>Horizon</strong> <strong>Fitness</strong><br />
<strong>elliptical</strong> trainer that special attention must be paid. It is very important to follow the<br />
assembly instructions correctly and to make sure all parts are firmly tightened. If the<br />
assembly instructions are not followed correctly, the <strong>elliptical</strong> trainer could have<br />
frame parts that are not tightened and will seem loose and may cause irritating noises.<br />
To prevent damage to the <strong>elliptical</strong> trainer, the assembly instructions must be<br />
reviewed and corrective actions should be taken.<br />
5
POWER<br />
G E T T I N G S T A R T E D<br />
Your Achiever 607 Elliptical Trainer is self-powered. It can alse be powered by a<br />
power supply. The power supply must be plugged into the power jack.which is<br />
located in the front of machine near the front foot tube.<br />
Power jack<br />
LEVELLING<br />
The <strong>elliptical</strong> trainer should be level for optimum use. Once you have placed the<br />
<strong>elliptical</strong> trainer where you intend to use it, raise or lower the adjustable levellers<br />
located on the outside of each pedal arm. Once you have levelled the <strong>elliptical</strong> trainer,<br />
lock the levellers in place by tightening the wing nuts against the frame.<br />
6
MOVING<br />
Your <strong>Horizon</strong> <strong>Fitness</strong> <strong>elliptical</strong> trainer has a pair of transport wheels built into the<br />
front or the frame. To move, firmly grasp the rear foot tube carefully lift and roll.<br />
CAUTION!<br />
Our <strong>elliptical</strong> trainers are well built and heavy, weighting up to 150lbs! Use care and<br />
additional help in necessary when moving.<br />
FOOT POSITION<br />
When using your <strong>elliptical</strong> trainer, you may notice that your heel raises off of the<br />
foot pad. This is a natural walking or running motion and you should not try to prevent<br />
this.<br />
7
K N O W Y O U R E L L I P T I C A L T R A I N E R<br />
8
QUICK START UP<br />
Your Elliptical Trainer is self-powered, It can also be powered by a adaptor.<br />
1. Grasp the handlebars and step up onto the foot pedals.<br />
2. Press the 'START' button to begin exercising.<br />
To set the timer to count up as you exercise.<br />
Push and hold Clear button to clear any existing data.<br />
To count up from zero simply start pedalling. Note: if you stop pedalling your data<br />
will be retained even if the console shuts down after a period of time unless you<br />
push the Clear button.<br />
To set the timer for a fixed period of time to exercise.<br />
Push and hold the button to scroll the minutes up to your desired length of time.<br />
Releasing the button will start the count down.<br />
3. Begin moving your feet. Gradually increase your pace to your target heart rate or<br />
perceived exertion level. Warning! Try not to exceed 140 rpms on this machine. The<br />
amount of pedalling resistance can be adjusted by pressing the plus + , or minus -<br />
buttons or tuning the controller clockwise or anti - clockwise. (easiest #25w through<br />
to hardest # 400w, with 5w up or down/click.<br />
9<br />
Mute<br />
Stumm<br />
Clear<br />
Loschen
STARTING YOUR WORKOUT<br />
Press the ' START ' button to begin exercising<br />
FINISHING YOUR WORKOUT<br />
P R O G R A M M I N G<br />
Remember to gradually slow down your pace before stopping your workout. The<br />
machine will not stop moving if you stop your feet abruptly. After you have finished<br />
your workout, the console will `beep' several times to let you know that your workout<br />
has finished.<br />
10
LEVEL<br />
Show your exercise<br />
RPM<br />
Shown as your rotational speed per minute<br />
TIME<br />
D I S P L A Y<br />
Shown as Minutes: Seconds. View the time remaining or the time elapsed in your<br />
workout.<br />
DISTANCE<br />
Shown as miles or kilometers. View the accumulated distance during your workout.<br />
SPEED<br />
Shown as your speed in miles or kilometers per hour.<br />
CALORIES<br />
Shown as your total accumulated calories burned during your workout.<br />
HR<br />
Shown as Beats Per Minute. Used to monitor your heart rate during your workout<br />
(displayed when contact is made with both grips. Pulse can only be viewed while on<br />
the pulse screen).<br />
WATT<br />
A measurement of your expending energy. May be used to evaluate and quantify<br />
your fitness progress over time.<br />
11
Watts Control<br />
P R O G R A M P R O F I L E S<br />
Exercise at a set work level. As you increase<br />
your pedal rate(RPM), your resistance will<br />
decrease; if you decrease your pedal rate<br />
(RPM), your resistance will increase<br />
Interval<br />
Improves your strength, speed, and<br />
endurance by raising and lowering the resistance<br />
levels throughout your workout to<br />
involve both your heart and muscles.<br />
Rolling<br />
Maintains weight by gradually raising and<br />
lowering the resistance level to gradually raise<br />
and lower your heart rate.<br />
Weight Loss<br />
Promotes weight loss by raising and lowering<br />
the resistance level, while keeping you in your<br />
fat burning zone.<br />
Foot Hill<br />
Improve heart and lung capacity by continuing<br />
exercise.<br />
Mountain<br />
Improves performance and stamina by raising<br />
the resistance level to high peaks to simulate<br />
the most difficult outdoor terrains.<br />
12
HRC 1.2.3.4<br />
Benefits weight loss by maintaining an optimum<br />
exercise level to burn fat, while adjusting<br />
the resistance to keep you in your target<br />
heart rate zone.<br />
Fit-Test<br />
Test your current lenel of physical fitness.At<br />
completion of the program,it will provide<br />
feedbacd regarding your fitness level for you<br />
to monitor your progress<br />
Step test<br />
Short Description for Step-Test Improves your<br />
endurance by raising the wattage.Wordout<br />
time is 30 minutes.<br />
CUSTOM 1.2.3.4.5<br />
Customized workout, time defaults to 15<br />
minutes.<br />
GAME<br />
Warm up be fore your exercise by motivational<br />
game program.<br />
13
U S I N G Y O U R H R C P R O G R A M<br />
Once you have selected one of the Heart Rate control Programs, Program 7, 8, 9 or 10,<br />
confirm by pressing the controller. You will see the target heart rate flashing on a figure,<br />
this is the default value. (this figure will vary from 90 to 120 beats per minute,<br />
pending which program you select) Using the chart on page 21, you can determine a<br />
guideline target heart rate. Please note this is only a guide, and we advise you consult<br />
your GP first to seek their advice.<br />
1) Choose your target heart rate by turning the controller either to increase “+” or to<br />
decrease “-“. Once you have found the correct figure, select by pressing the controller<br />
(Settings between 50 to 190 beat per minute)<br />
2) Next you will be required to set the length of time of the program. The default time<br />
is 20 minutes, but you can set from 15 to 99 minutes.<br />
3) Use the plus + or minus - buttons or turn the controller to adjust your weight. The<br />
default weight setting will be 68kgs (150lbs), with the range being 20 to 150kgs (50-<br />
400lbs).<br />
Please press the “Select” or the controller to confirm the user weight.<br />
4) Press the “Start” button or the controller and begin your workout.<br />
5) Use the clear button to return to the previous step of your set up procedure.<br />
The “THR Zone” program will have a 5 minute warm up period, before the program<br />
will start. After the warm up period, the resistance level will increase gradually to get<br />
the user to the desired “target heart rate zone”. Once the user reaches their “target<br />
heart rate zone” (plus or minus 5 beats) the resistance level will remain constant. If<br />
your heart rate either falls below or above the target heart rate setting, the resistance<br />
will adjust automatically to keep you within your training zone. If your heart rate goes<br />
above, the resistance will lowered to maintain your constant heart rate. If it falls<br />
below, the resistance will increase to again keep you working within your zone.<br />
The last 5 minutes of your heart rate program, you will begin a cool down period. At<br />
this time, the program will gradually decrease in resistance, to give the user a smooth<br />
cool down to their program.<br />
Note: The Chest Strap Transmitter is required to use the HRC Program correctly.<br />
logo<br />
14
USING YOUR FIT-TEST PROGRAM<br />
Your Fit Test Program is designed for you to test your current level of physical fitness.<br />
Upon completion of the program, it will provide feedback regarding a guide to your<br />
fitness level, which you monitor and plot your progress. To use your Fit-Test Program,<br />
follow these instructions:<br />
1) Choose the "Fit-Test" program (Program P16) using the - or + keys or turn the controller,<br />
then press “Select” or the controller.<br />
2) Press the - or + keys or turn the controller to choose the desired Watts set up.<br />
The default Watts set up is 150 W, and the Watts range is 25 ~ 400W. Next, press<br />
the "Select" key or the controller to confirm your Watts setting.<br />
3) Press the - or + keys or turn the controller to choose the gender of the user, Male<br />
or Female, but will be listed as “Men or Women”. Once you have selected confirm by<br />
pressing “Select” or the controller.<br />
4) Press the - or + keys or turn the controller to select your Age. The default setting<br />
for the Age of the user is 30, with a range setting of 20 ~ 70 years old. Please press<br />
the "Select" key or the controller to confirm the users Age.<br />
5) Press the - or + keys or turn the controller to choose the desired Time set up. The<br />
default Time set is 10 minutes, with the time range being 5 ~ 15 minutes for the<br />
<strong>Fitness</strong> Test. For an optimum Fit Test, the recommended program Time set up is 10<br />
minutes. Next, please press the "Select" key or the controller to confirm the Time setting.<br />
6) Press the - or + keys or turn the controller to choose your User Weight. The<br />
default Weight set up is 68kg/150lbs, with the weight range being 20 ~ 150kg /<br />
50~ 400lbs. Please press the "Select" key or the controller to confirm, once you have<br />
selected your Weight.<br />
7) Press the "Start" key or the controller to begin your Fit-Test Program.<br />
8) After you have completed your Fit-Test Program, on screen you will be shown<br />
guideline feedback regarding your current level of physical fitness (in relation to the<br />
program you have just completed). This will be displayed as five different levels,<br />
which are Low, Fair, Average, Good, or Excellent.<br />
9) Please remember, you are unable to adjust the Resistance Level when using the<br />
Fit-Test Program, as this must remain constant to ascertain a guideline level.<br />
15
USING YOUR STEP-TEST PROGRAM<br />
1) Choose the Step - Test program (Program 17) by pressing the – or + keys or turning<br />
the controller, then press “Select” key or the controller to confirm.<br />
2) Press the – or + keys or turn the controller to select your desired Starts-Watts set<br />
up. The Start-Watt values are 25, 50, 75, 100W.<br />
• 25 Watt Beginning<br />
• 50 Watt Intermediate<br />
• 75 Watt Advanced<br />
• 100 Watt Athlete<br />
Once selected press the “Select” key or the controller to confirm your Watts setting.<br />
3) Press the – or + keys or controller to choose your Weight. The default Weight set<br />
up is 68kg/150lbs, and the Weight range is 20-150kg/50-400lbs.<br />
4) Next, please press “Start” key or the knob to start the Step Test.<br />
The default time for this is 30 minutes. This can be a difficult workout, so at any<br />
stage you feel fatigued or tired, please stop your exercise (It is recommended to consult<br />
your GP to seek advice before attempting any programs). This program is<br />
designed to increase your endurance and stamina. Once you have completed your<br />
workout, you will receive feedback about your training performance whilst in this<br />
Step Test program.<br />
16
USING YOUR WATTS CONTROL PROGRAM<br />
Your Watts Control Program (Program 1) is designed for you to exercise at a set<br />
workout level. The resistance level (Watts setting) will increase or decrease according<br />
to the pedal rate (RPM) in order to achieve your desired Watts set. The lower the<br />
RPM the higher the watts setting, the higher number of revolutions per minute you<br />
do the lower the watts settings.<br />
To use your Watts Control Program, follow these instructions:<br />
1) Choose the “Watts Control” program by pressing the – or + keys or turning the<br />
controller, then press “Select” key or the controller to confirm.<br />
2) Press the - or + keys or turn the controller to choose the desired Watts set up.<br />
The default Watts set up is 25W, with the Watts range being 25 ~ 400W. Next, press<br />
the “Select” key or the controller to confirm the Watts setting.<br />
3) Press the - or + keys or turn the controller to choose the desired Time set up. The<br />
default Time set up is 0 minutes, so you can select a time range from 0 ~ 99 minutes.<br />
Once selected, press the “Select” key or controller to confirm your Time setting.<br />
4) Press the - or + keys or turn the controller to choose your User Weight. The<br />
default Weight set up is 68kg/150lbs, and the weight range is 20 ~ 150kg / 50 ~<br />
400lbs. Once selected press the “Select” key or the controller to confirm your Weight<br />
setting.<br />
5) Press the “Start” key or the controller to begin your Watts Control Program.<br />
17
USING YOUR CUSTOM PROGRAMS<br />
Your Custom Programs are designed to allow you to create your own programming,<br />
with the ability to save this program settings for future workouts. Programs 11, 12,<br />
13, 14 and 15, allow up to five users to store this data and have their own personal<br />
programs.<br />
To use your Custom Program, follow these instructions:<br />
1) Once the Custom Program has been selected ( Either program P11, P12, P13, P14,<br />
P15 ) press the “Select” key or the controller to confirm.<br />
2) To choose your desired time of your program, press the – or + keys or by turning<br />
the controller, once you have reached the time setting required press the “Select” key<br />
or the controller. The default time of this program is 15 minutes, but you can choose<br />
from 5 to 99 minutes.<br />
3) Choose your desired wattage level by pressing the – or + keys or turning the knob,<br />
then press “select” key or the controller. This process will have to be repeated, as you<br />
will need to select a wattage level for all 15 segments of your custom program to create<br />
your program profile.<br />
Remember, 15 settings must be entered, and confirmed, once this is completed press<br />
the “select” key or the controller to confirm all.<br />
4) Next press the - or + keys or turn the controller to choose your Weight. The default<br />
Weight set up is 68kg/150lbs, and the weight range is 20 ~ 150kg / 50 ~ 4000lbs.<br />
Once selected press the “select” key or the controller to confirm your Weight.<br />
5) Then to make your workout personalized, you will need to input your name, to<br />
choose your desired letters use the + and – keys or turn the controller and press the<br />
“select” key or the controller. Once you have chosen all the letters of your desired<br />
name (which must be no more than 9 letters) then press the Clear button to save your<br />
name.<br />
If at any stage through this process you need to change any letters, press the Sound<br />
button this will allow you to modify the last letter.<br />
6) Press “Select” key or the controller to begin your program. At this time, your program<br />
has been successfully saved into memory, and can be used for future workouts.<br />
7) To reset your program information and delete it from memory, Press and hold the<br />
“clear” button for 3 seconds once you have selected your Custom Program from the<br />
start menu.<br />
8) Please note, at any stage whilst using your saved custom program, you are able to<br />
adjust the watt level / resistance level, but these changes will not be saved, for future<br />
workouts.<br />
18
USING YOUR GAME PROGRAM<br />
This program is a specially designed warm up program, which creates a little bit fun<br />
before you start your main workout. The Game Program is P18.<br />
In order to be successful, you need to control the RPM of your workout to change vertical<br />
position of your “ship”, as you navigate through the moving maze. If you maintain<br />
your RPM, you will continue in a straight line, if you increase your RPM you will<br />
rise vertically, and if lower your RPM you fall vertically. So a combination of pedal<br />
speeds, allows you to navigate through all the moving mazes.<br />
To use your Game Program, follow these instructions:<br />
1) Once the Game Program has been selected, press the “Select” key or the controller.<br />
2) Choose your desired wattage / resistance level by pressing the – or + keys or turning<br />
the controller, then press the “select” key or the controller. The default value is 25<br />
watts but you can vary from 25 – 400, to make the game even harder.<br />
3) Next, you will need to select a game level from 1 to 5, (1 being the easiest and 5<br />
the hardest, in both speed and complexity of the moving mazes) by pressing the – or<br />
+ keys or turning the controller, then press “select” key or the controller to confirm.<br />
4) Next press the - or + keys or turn the controller to choose your Weight. The default<br />
Weight set up is 68kg/150lbs, and the weight range is 20 ~ 150kg / 50 ~ 400lbs. Press<br />
the “select” key or the controller to confirm your Weight.<br />
5) Press the "Start" key or the controller to begin your Game Program Workout.<br />
Please remember there are many different variations you can introduce into this preprogram<br />
warm up, whether that be the degree of difficulty or energy level input –<br />
wattage setting you pedal at.<br />
19
M O N I T O R I N G Y O U R H E A R T R A T E<br />
Feedback<br />
Your <strong>Horizon</strong> <strong>Fitness</strong> <strong>elliptical</strong> trainer offers two heart rate feedback options. You<br />
maychoose to use the heart rate handlebars, or the chest transmitter for a hands<br />
free workout.<br />
Heart Rate Handlebar<br />
Place the palm of your hands directly on the heart rate handlebars. Both hands must<br />
grip the bars for your heart rate to register. When griping the handlebars, do not<br />
grip tightly. Holding the grips tightly may elevate your blood pressure. Try to maintain<br />
moderate pressure while holding onto the heart rate handlebars. It is recommended<br />
thatyou hold the handlebars only long enough the see your heart rate readout<br />
on the console. You may experience an erratic readout if consistently holding the<br />
handlebars.<br />
Telemetric Chest Transmitter<br />
Prior to wearing the chest transmitter on your chest, moisten the two rubber electrodeswith<br />
water. Center the chest strap just below the breast or pectoral muscles,<br />
directly overyour stermum, with the <strong>Horizon</strong> <strong>Fitness</strong> logo facing out Note:The chest<br />
strap must betight and properly placed to receive an accurate and consistent readout.<br />
If the cheststrap is too loose, or positioned improperly, you may receive an erratic or<br />
inconsistentheart rate readout.If you have any problems with the heart rate function<br />
please refer to pages 22 & 23 inthe troubleshooting section.<br />
Warning!<br />
The heart rate function is not a medical device. Various factors may affect the accuracy<br />
of your heart rate reading. The heart rate reading is intended only as an exercise<br />
aid.<br />
20
T A R G E T H E A R T R A T E Z O N E<br />
Your `Target Heart Rate Zone' is a percentage of your maximum heart rate. Target<br />
Zoneswill vary for each individual, depending on age, current level of conditioning,<br />
and personal fitness goals. The American Heart Association recommends workingout<br />
at a`Target Heart Rate Zone' of between 60% and 75% of your maximum heart<br />
rate. See thechart below for convenient reference. Example for a 42-year old user:<br />
find age along thebottom of the chart (round to 40), follow age column up to the<br />
target zone bar. Results:60% of maximum Heart Rate = 108 Beats Per Minute, 75%<br />
of maximum Heart Rate = 135Beats Per Minute.<br />
21<br />
Heart Rate Chart
TROUBLESHOOTING YOUR ELLIPTICAL TRAINER<br />
Your <strong>Horizon</strong> <strong>Fitness</strong> <strong>elliptical</strong> is designed to be reliable and maintenance free.<br />
However, if you do experience problems with your <strong>elliptical</strong>, please reference the<br />
troubleshooting guide listed below.<br />
PROBLEM: There is no display on the console.<br />
SOLUTION: Remove the console and verify that the console cable is attached properly,<br />
making sure that the cable is securely inserted into the console.<br />
PROBLEM: The <strong>elliptical</strong> trainer makes a squeaking or chirping noise.<br />
SOLUTION: Loosen all bolts attached during the assembly process, grase the<br />
threads and tighten again.<br />
PROBLEM: The resistance levels seem to be incorrect, seeming too hard or too easy.<br />
SOLUTION: Reset the console and allow the resistance to reset to the default position.<br />
Restart the console and retry the resistance levels.<br />
H E A R T R A T E T R O U B L E S H O O T I N G<br />
PROBLEM: There is no heart rate reading<br />
SOLUTION: If you are using the chest strap, there may be a poor connection<br />
between the electrodes and the skin. Remoisten the electrodes with water.<br />
SOLUTION: The chest strap may not be positioned properly. Reposition the chest<br />
strap. It may be necessary to experiment with the fit and position of the chest strap.<br />
SOLUTION: Verify that the distance between the chest strap and the console is not<br />
beyond the recommended range of 36 inches.<br />
SOLUTION: The battery in the chest strap may be dead. Take the chest strap to a<br />
jewelry store or return to <strong>Horizon</strong> <strong>Fitness</strong> for a battery replacement.<br />
22
PROBLEM: Erratic or inconsistent Readout.<br />
SOLUTION: This is often caused by dry electrodes or a loose chest strap. Moisture<br />
on the rubber electrodes is required for proper operation. Try a more generous coating<br />
of water on the electrodes and tightening the chest strap.<br />
Chest your exercise environment for sources of interference such as high power lines,<br />
large motors, etc.<br />
You may experience an erratic readout under the following conditions:<br />
• Gripping the heart rate handlebars too tight. Try to maintain moderate pressure<br />
while holding onto the heart rate handlebars.<br />
• Constant movement and vibration due to constantly holding the heart rate grips<br />
while exercising.<br />
• When you are breathing heavily during a workout.<br />
• When you hands are constricted by wearing a ring.<br />
• When you hands are dry or cold. Try moistening your palms or rubbing them<br />
together to warm.<br />
• Anyone with heavy arrhythmia.<br />
• Anyone with arteriosclerosis or peripheral circulation disorder.<br />
• Anyone whose skin on the measuring palms is especially thick.<br />
Note: Outside interference sources such as computers, motors and fluorescent<br />
lights may cause the heart rate reading to be erratic.<br />
23<br />
If the above thoubleshooting section does not remedy the problem,<br />
discontinue use and turn the power off.<br />
Please contact your local dealer for further assistance.
C O M M O N P R O D U C T Q U E S T I O N S<br />
ARE THE SOUNDS MY ELLIPTICAL MAKES NORMAL?<br />
Our Elliptical Trainer are some of the quietest available because they use belt drives<br />
and friction free magnetic resistance. We use the highest grade bearings and belts to<br />
minimize noise. However, because the resistance system itself is so quiet, you will<br />
occasionally hear other slight mechanical noises. Unlike older, louder technologies,<br />
there are no fans, friction belts, or alternator noises to mask these sounds on our<br />
Elliptical Trainer. These mechanical noises, which may or may not be intermittent, are<br />
normal and are caused by the transfer of significant amounts of energy to a rapidly<br />
spinning flywheel. All bearings, belts and other rotating parts will generate some noise<br />
which will transmit through the casing and frame. It is also normal for these sounds<br />
to change slightly during a workout and over time because of thermal expansion of<br />
the parts.<br />
WHY IS THE ELLIPTICAL TRAINER I HAD DELIVERED LOUDER THAN THE<br />
ONE AT THE STORE?<br />
All fitness products seem quieter in a large store showroom because there is generally<br />
more background noise than in your home. Also, there will be less reverberation on<br />
a carpeted concrete floor than on a wood overlay floor. Sometimes a heavy rubber mat<br />
will help reduce reverberation through the floor. If a fitness product is placed close to<br />
a wall, there will be more reflected noise.<br />
HOW LONG WILL THE DRIVE BELT LAST?<br />
The computer modeling we have done indicated virtually thousands of maintenance<br />
free hours. Belts are now commonly used in far more demanding applications such as<br />
motorcycle drives.<br />
CAN I MOVE THE ELLIPTICAL TRAINER EASIER ONCE IT IS ASSEMBLED?<br />
Your <strong>Horizon</strong> <strong>Fitness</strong> ELLiptical has a pair of transport wheels built into the front foot.<br />
It is easy to move your ELLiptical by rolling it on the front transport wheels.<br />
It is important that you place your <strong>Horizon</strong> <strong>Fitness</strong> ELLiptical in a comfortable and<br />
inviting room. Your ELLiptical is designed to use minimal floor space. Many people will<br />
place their ELLiptical facing the TV or a picture window. If at all possible, avoid putting<br />
your ELL! ptical in a unfinished basement. To make exercise a desirable daily activity<br />
for you, the Elliptical Trainer should be in an attractive setting.<br />
24
E X E R C I S E G U I D E L I N E S<br />
Always consult your physician before beginning an exercise program.<br />
HOW OFTEN?<br />
The American Heart Association recommends that you exercise at least 3 to 4 days per<br />
week to maintain cardiovascular fitness. If you have other goals such as weight or fat<br />
loss, you will achieve your goal faster with more frequent exercise. Whether It's 3 days<br />
or 6 days, remember that your ultimate goal should be to make exercise a lifetime<br />
habit. Many people are successful staying with a fitness program if they set aside a<br />
specific time of day to exercise. It doesn't matter whether it's in the morning before<br />
your shower, during your lunch hour or while watching the evening news. What's<br />
more important is that it's a time that allows you to keep a schedule, and a time when<br />
you won't be interrupted. If you are to be successful with your fitness program, you<br />
have to make it a priority in your life. So decide on a time, pull out your day planner<br />
and pencil in your exercise times for the next month!<br />
HOW LONG?<br />
For aerobic exercise benefits, it's recommended that you exercise from between 24 and<br />
32 minutes per session. But start slowly and gradually increase your exercise times. If<br />
you've been sedentary during the past year, it may be a good idea to keep your exercise<br />
times to as little as five minutes initially. Your body will need time to adjust to the<br />
new activity. If your goal is weight loss, a longer exercise session at lower intensities<br />
has been found to be most effective. A workout time of 48 minutes or more is recommended<br />
for best weight loss results.<br />
25
R O U T I N E M A I N T E N A N C E<br />
WHAT KIND OF ROUTINE MAINTENANCE IS REQUIRED?<br />
We use sealed bearings throughout our Elliptical Trainer so lubrication is not needed.<br />
The most important maintenance step is to simply wipe your perspiration off the trainer<br />
after each use.<br />
HOW DO I CLEAN MY HORIZON FITNESS ELLIPTICAL TRAINER?<br />
Clean with soap and water cleaners only. Never use solvents on plastic parts.<br />
Cleanliness of your <strong>Horizon</strong> <strong>Fitness</strong> <strong>elliptical</strong> trainer and its operating environment will<br />
keep maintenance problems and service calls to a minimum. For this reason, <strong>Horizon</strong><br />
<strong>Fitness</strong> recommends that the following preventative maintenance schedule be followed.<br />
AFTER EACH USE (DAILY)<br />
Turn off the <strong>elliptical</strong> trainer with the on/off switch, and unplug the power cord from<br />
the wall outlet.<br />
WARNING!<br />
To remove power from the <strong>elliptical</strong>, the power cord must be disconnected from the<br />
wall outlet.<br />
• Wipe down the <strong>elliptical</strong> trainer with a damp cloth. Never use solvents, as they can<br />
cause damage to the <strong>elliptical</strong>.<br />
• Inspect the power cord. If the power cord is damaged contact <strong>Horizon</strong> <strong>Fitness</strong>.<br />
• Make sure the power cord is not underneath the <strong>elliptical</strong> trainer or in any other area<br />
where it can become pinched or cut.<br />
EVERY WEEK<br />
Clean underneath the <strong>elliptical</strong>, following these steps:<br />
• Turn off the <strong>elliptical</strong> trainer with the on/off switch.<br />
• Then unplug the power cord at the wall outlet.<br />
• Move the <strong>elliptical</strong> trainer to a remote location.<br />
• Wipe or vacuum any dust particles or other objects that may have accumulated<br />
underneath the <strong>elliptical</strong>.<br />
• Return the <strong>elliptical</strong> trainer to its previous position.<br />
26
EVERY MONTH<br />
• Inspect all assembly bolts and pedals on the machine for proper tightness.<br />
HOW HARD?<br />
How hard you workout is also determined by your goals. If you use your <strong>Horizon</strong><br />
<strong>Fitness</strong> Elliptical Trainer to prepare for a 5K run, you will probably work out at a higher<br />
intensity than if your goal is general fitness. Regardless of your long term goals,<br />
always begin an exercise program at low intensity. Aerobic exercise does not have to<br />
be painful to be beneficial! There are two ways to measure your exercise intensity. The<br />
first is by monitoring your heart rate (see page 20), and the second is by evaulating<br />
your perceived exertion level (this is simpler than it sounds!).<br />
Note: Always consult your physician before beginning an exercise program.<br />
PERCEIVED EXERTION LEVEL<br />
The second and simpler way to gauge your exercise intensity is to evaluate your perceived<br />
exertion level. While exercising, if you are too winded to maintain a conversation<br />
without gasping, you are working out too hard. A good rule of thumb is to work<br />
to the point of exhilaration, not exhaustion. If you cannot catch your breath, it's time<br />
to slow down. Always be aware of other warning signs of overexertion.<br />
27
D E V E L O P I N G A F I T N E S S P R O G R A M<br />
STRETCH FIRST<br />
Before using your <strong>Horizon</strong> <strong>Fitness</strong> product, it is best to take a few minutes doing a few<br />
gentle stretching exercises. Stretching prior to exercise will improve flexibility and<br />
reduce chances of exercise related injury. Ease into each of these stretches with a slow<br />
gentle motion. Do not stretch to the point of pain. Make sure not to bounce while<br />
doing these stretches.<br />
WALL PUSH<br />
Stand near a wall with the toes of one foot about 18" from the wall, and the other<br />
foot about 12" behind the other foot. Lean forward, pushing against the wall with<br />
your palms. Keep your heels flat and hold this position for a count of 15 seconds. Make<br />
sure that you do not bounce while stretching. Alternate positions of your feet and<br />
repeat for a total of 8 repetitions.<br />
STANDING QUADRICEPS STRETCH<br />
Using a wall to provide balance, grasp your left ankle with your left hand and hold<br />
your foot against the back of your thigh for a count of 15 seconds. Repeat with your<br />
right ankle and hand, and continue alternating for a total of 8 repetitions.<br />
SEATED TOE TOUCH<br />
Sit on the floor with your legs together and straight out in front of you. Do not lock<br />
your knees. Extend your fingers towards your toes and hold for a count of 15 seconds.<br />
Make sure that you do not bounce while stretching. Sit upright again. Repeat for a<br />
total of 8 repetitions.<br />
THE IMPORTANCE OF WARM UP AND COOL DOWN<br />
WARM UP<br />
The first 2 to 5 minutes of a workout should be devoted to warming up. The warmup<br />
will limber your muscles and prepare them for more strenuous exercise. Make sure<br />
that you warm-up on your <strong>Horizon</strong> <strong>Fitness</strong> product at a slow pace.<br />
COOL DOWN<br />
Never stop exercising suddenly! A cool-down period allows your heart to readjust to<br />
the decreased demand. Make sure that your cool down period consists of a very slow<br />
pace to allow your heart rate to lower. After the cool-down, repeat the stretching exercises<br />
listed above to loosen and relax your muscles.<br />
28
A C H I E V I N G Y O U R F I T N E S S G O A L S<br />
An important step in developing a long term fitness program is to determine your<br />
goals. Is your primary goal for exercising on your <strong>Horizon</strong> <strong>Fitness</strong> Elliptical Trainer to<br />
lose weight? Improve muscle? Burn Stress? Prepare for the spring racing schedule?<br />
Knowing what your goals are will help you develop a more successful exercise program.<br />
Below are some common exercise goals:<br />
• Weight Loss • Weight Maintenance<br />
• Improve Body Shape and Tone • Strengthen Leg Muscles<br />
• Increased Energy Level • Improved Sleep Patterns<br />
• Improved Sports Performance • Stress Reduction<br />
• Improved Cardiovascular Endurance<br />
If possible try to define your personal goals in precise, measurable terms, and then put<br />
your goals in writing. The more specific you can be, the easier it will be to track your<br />
progress. If your goals are long term, divide them up into monthly and weekly segments.<br />
Longer term goals can lose some of the immediate motivation benefits. Short<br />
term goals are easier to achieve. Your <strong>Horizon</strong> <strong>Fitness</strong> Elliptical Trainer console provides<br />
you with several readouts that can be used to record your progress. You can track<br />
Distance, Calories or Time. Time is the most important and useful of test functions.<br />
KEEPING AN EXERCISE DIARY<br />
Photocopy the weekly and monthly log sheets on the following pages to make your<br />
personal exercise log book. As time goes by you'll be able to look back with pride at<br />
the work you've done. As your fitness improves, you can look back and see how far<br />
you've come.<br />
29
WEEK#<br />
DAY<br />
SUN<br />
MON<br />
TUES<br />
WED<br />
THUR<br />
FRI<br />
SAT<br />
WEEKLY TOTALS<br />
WEEK#<br />
DAY<br />
SUN<br />
MON<br />
TUES<br />
WED<br />
THUR<br />
FRI<br />
SAT<br />
WEEKLY TOTALS<br />
W E E K L Y L O G S H E E T<br />
WEEKLY GOAL:<br />
DATE DISTANCE CALORIES TIME COMMENTS<br />
WEEKLY GOAL:<br />
DATE DISTANCE CALORIES TIME COMMENTS<br />
30
31<br />
MONTH<br />
MONTHLY GOAL:<br />
WEEK# DISTANCE CALORIES TIME<br />
MONTHLY TOTALS<br />
MONTH<br />
MONTHLY GOAL:<br />
WEEK# DISTANCE CALORIES TIME<br />
MONTHLY TOTALS<br />
M O N T H L Y L O G S H E E T
L I M I T E D H O M E U S E W A R R A N T Y<br />
FRAME-LIFETIME<br />
<strong>Horizon</strong> <strong>Fitness</strong> warrants the frame against defects in workmanship and materials for<br />
the lifetime of the original owner.<br />
ELECTRONICS & PARTS<br />
<strong>Horizon</strong> <strong>Fitness</strong> warrants the electronic components and all original parts for a period<br />
from the date of original purchase, so long as the device remains in the possession of<br />
the original owner.<br />
Labour<br />
<strong>Horizon</strong> <strong>Fitness</strong> shall cover the labour cost for the repair of the device for a period from<br />
the date of the original purchase, so long as the device remains in the possession of<br />
the original owner.<br />
EXCLUSIONS AND LIMITATIONS<br />
This warranty applies only to the original owner and is not transferable. This warranty<br />
is expressly limited to the repair or replacement of a defective frame, electronic component,<br />
or defective part and is the sole remedy of the warranty. The warranty does<br />
not cover normal wear and tear, improper assembly or maintenance, or installation of<br />
parts or accessories not originally intended or compatible with the <strong>elliptical</strong> trainer as<br />
sold. The warranty does not apply to damage or failure due to accident, abuse, corrosion,<br />
discoloration of paint or plastic, or neglect. <strong>Horizon</strong> <strong>Fitness</strong> shall not be responsible<br />
for incidental or consequential damages. All returns must be pre-authorized by<br />
<strong>Horizon</strong> <strong>Fitness</strong>. <strong>Horizon</strong> <strong>Fitness</strong>' obligation under this warranty is limited to replacing<br />
or repairing, at <strong>Horizon</strong> <strong>Fitness</strong>' option, the product at one of its authorized service<br />
centers. An <strong>Horizon</strong> <strong>Fitness</strong> authorized service center must receive all products for<br />
which a warranty claim is made. These products must be received with all freight and<br />
other transportation charges prepaid, accompanied by sufficient proof of purchase.<br />
Parts and electronic components reconditioned to As New Condition by <strong>Horizon</strong><br />
<strong>Fitness</strong> or its vendors may sometimes be supplied as warranty replacement parts and<br />
constitute fulfillment of warranty terms.<br />
Please consult your local dealer for more warranty details.<br />
32
V2.0