


You also want an ePaper? Increase the reach of your titles
YUMPU automatically turns print PDFs into web optimized ePapers that Google loves.
48<br />
tion in the currently specified time<br />
units (Samples, Min:Sec:ms, SMPTE,<br />
or Bars|Beats)<br />
+ or - = indicates positive or negative<br />
phase<br />
BPM = beats per minute<br />
The time format displayed in this field depends on which<br />
time format (Samples, Min:Sec:ms, SMPTE, or<br />
Bars|Beats) you have chosen with the Time Units <strong>com</strong>mand<br />
under the Preference menu.<br />
Transport Window<br />
The Transport window is a floating, re-sizable window. It<br />
contains three areas: a time display showing elapsed<br />
time, the Transport controls (Return to Zero, Stop, Play,<br />
Go to End, Record, and Loop during playback), and<br />
audio level meters with clip/peak indicators.<br />
Time Display<br />
The Time Display is like a counter. It shows elapsed time<br />
and tracks the “playback head” as audio plays. Clicking<br />
on the waveform when playback is stopped will cause<br />
the current cursor location to appear in the Time<br />
Display. This display will also show the time remaining<br />
while performing Open, Save or DSP processing actions.<br />
Clicking on the counter will bring up the Go To Time dialog,<br />
allowing you to type in a time location – when you<br />
click OK, <strong>Peak</strong>’s playhead cursor is inserted at the<br />
<strong>Peak</strong> User’s <strong>Guide</strong><br />
desired time location in the audio waveform.<br />
Meters<br />
<strong>Peak</strong>’s meters are much like the VU or LED meters on a<br />
mixing board or tape recorder. They are bar graph<br />
meters that show the relative volume or loudness in<br />
decibels (dB), of audio as it plays. They are also<br />
designed to show peak volume and whether the signal<br />
has “clipped,” or distorted.<br />
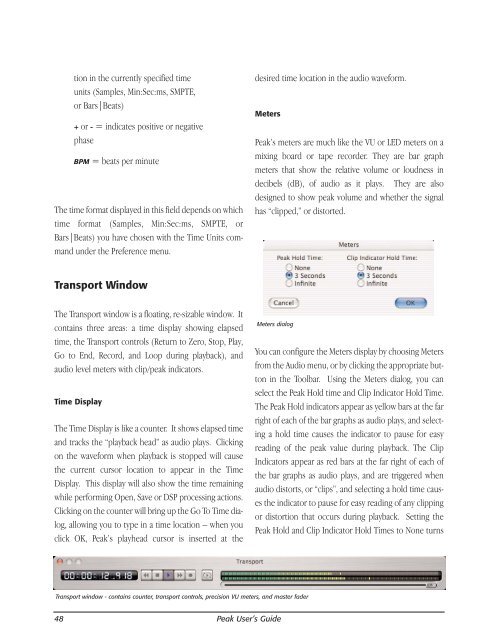
Meters dialog<br />
Transport window - contains counter, transport controls, precision VU meters, and master fader<br />
You can configure the Meters display by choosing Meters<br />
from the Audio menu, or by clicking the appropriate button<br />
in the Toolbar. Using the Meters dialog, you can<br />
select the <strong>Peak</strong> Hold time and Clip Indicator Hold Time.<br />
The <strong>Peak</strong> Hold indicators appear as yellow bars at the far<br />
right of each of the bar graphs as audio plays, and selecting<br />
a hold time causes the indicator to pause for easy<br />
reading of the peak value during playback. The Clip<br />
Indicators appear as red bars at the far right of each of<br />
the bar graphs as audio plays, and are triggered when<br />
audio distorts, or “clips”, and selecting a hold time causes<br />
the indicator to pause for easy reading of any clipping<br />
or distortion that occurs during playback. Setting the<br />
<strong>Peak</strong> Hold and Clip Indicator Hold Times to None turns


