

Operator's Manual 10 in. COMPOUND MITER SAW WITH ... - Sears
Operator's Manual 10 in. COMPOUND MITER SAW WITH ... - Sears
Operator's Manual 10 in. COMPOUND MITER SAW WITH ... - Sears

You also want an ePaper? Increase the reach of your titles
YUMPU automatically turns print PDFs into web optimized ePapers that Google loves.
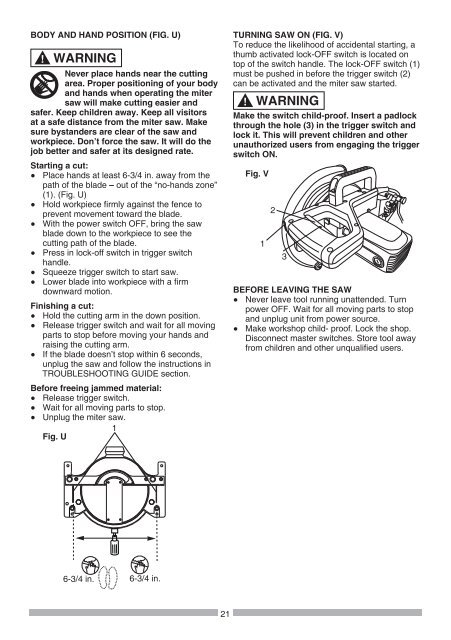
BODY AND HAND POSITION (FIG. U)<br />
WARNING<br />
!<br />
Never place hands near the cutt<strong>in</strong>g<br />
area. Proper position<strong>in</strong>g of your body<br />
and hands when operat<strong>in</strong>g the miter<br />
saw will make cutt<strong>in</strong>g easier and<br />
safer. Keep children away. Keep all visitors<br />
at a safe distance from the miter saw. Make<br />
sure bystanders are clear of the saw and<br />
workpiece. Don’t force the saw. It will do the<br />
job better and safer at its designed rate.<br />
Start<strong>in</strong>g a cut:<br />
● Place hands at least 6-3/4 <strong>in</strong>. away from the<br />
path of the blade – out of the “no-hands zone”<br />
(1). (Fig. U)<br />
● Hold workpiece firmly aga<strong>in</strong>st the fence to<br />
prevent movement toward the blade.<br />
● With the power switch OFF, br<strong>in</strong>g the saw<br />
blade down to the workpiece to see the<br />
cutt<strong>in</strong>g path of the blade.<br />
● Press <strong>in</strong> lock-off switch <strong>in</strong> trigger switch<br />
handle.<br />
● Squeeze trigger switch to start saw.<br />
● Lower blade <strong>in</strong>to workpiece with a firm<br />
downward motion.<br />
F<strong>in</strong>ish<strong>in</strong>g a cut:<br />
● Hold the cutt<strong>in</strong>g arm <strong>in</strong> the down position.<br />
● Release trigger switch and wait for all mov<strong>in</strong>g<br />
parts to stop before mov<strong>in</strong>g your hands and<br />
rais<strong>in</strong>g the cutt<strong>in</strong>g arm.<br />
● If the blade doesn’t stop with<strong>in</strong> 6 seconds,<br />
unplug the saw and follow the <strong>in</strong>structions <strong>in</strong><br />
TROUBLESHOOTING GUIDE section.<br />
Before free<strong>in</strong>g jammed material:<br />
● Release trigger switch.<br />
● Wait for all mov<strong>in</strong>g parts to stop.<br />
● Unplug the miter saw.<br />
1<br />
Fig. U<br />
6-3/4 <strong>in</strong>. 6-3/4 <strong>in</strong>.<br />
21<br />
TURNING <strong>SAW</strong> ON (FIG. V)<br />
To reduce the likelihood of accidental start<strong>in</strong>g, a<br />
thumb activated lock-OFF switch is located on<br />
top of the switch handle. The lock-OFF switch (1)<br />
must be pushed <strong>in</strong> before the trigger switch (2)<br />
can be activated and the miter saw started.<br />
!<br />
WARNING<br />
Make the switch child-proof. Insert a padlock<br />
through the hole (3) <strong>in</strong> the trigger switch and<br />
lock it. This will prevent children and other<br />
unauthorized users from engag<strong>in</strong>g the trigger<br />
switch ON.<br />
Fig. V<br />
1<br />
2<br />
3<br />
BEFORE LEAVING THE <strong>SAW</strong><br />
● Never leave tool runn<strong>in</strong>g unattended. Turn<br />
power OFF. Wait for all mov<strong>in</strong>g parts to stop<br />
and unplug unit from power source.<br />
● Make workshop child- proof. Lock the shop.<br />
Disconnect master switches. Store tool away<br />
from children and other unqualified users.


