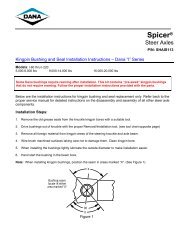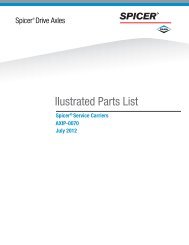
Spicer Tandem Drive Axles Service Manual
Spicer Tandem Drive Axles Service Manual
Spicer Tandem Drive Axles Service Manual

Create successful ePaper yourself
Turn your PDF publications into a flip-book with our unique Google optimized e-Paper software.
Make a Preliminary Investigation<br />
These steps consist of external inspections and observations<br />
that will be valuable when combined with the results of the<br />
parts examination.<br />
5<br />
Look for leaks, cracks or other damage that can<br />
point to the cause of the failure.<br />
Make note of obvious leaks around plugs and seals.<br />
A missing fill or drain plug would be an obvious<br />
cause for concern.<br />
Look for cracks in the carrier housing (harder to see,<br />
but sometimes visible).<br />
Does the general mechanical condition of the vehicle<br />
indicate proper maintenance or are there signs of<br />
neglect?<br />
Are the tires in good condition and do the sizes<br />
match?<br />
If equipped with a torque-limiting device, is it working<br />
properly?<br />
During the preliminary investigation, write down anything<br />
out of the ordinary for later reference. Items that appear<br />
insignificant now may take on more importance when the<br />
subassemblies are torn down.<br />
Prepare the Parts for Inspection<br />
After the preliminary investigation, locate the failure and prepare<br />
the part for examination. In carrier failure analysis, it may<br />
be necessary to disassemble the unit.<br />
When disassembling subassemblies and parts, do<br />
not clean the parts immediately since cleaning may<br />
destroy some of the evidence.<br />
When tearing down the drive axle, do it in the recommended<br />
manner. Minimize any further damage to the<br />
unit.<br />
Ask more questions when examining the interior of<br />
the carrier. Does the lubricant meet the manufacturer<br />
specifications regarding quality, quantity and viscosity?<br />
As soon as you have located the failed part, take<br />
time to analyze the data.<br />
Inspection<br />
Find the Cause of the Failure<br />
Here begins the real challenge to determine the exact cause of<br />
the failure. Keep in mind that there is no benefit to replacing a<br />
failed part without determining the cause of the failure. For<br />
example, after examining a failed part and finding that the failure<br />
is caused by a lack of lubrication, you must determine if<br />
there was an external leak. Obviously, if there is an external<br />
leak, just replacing the failed gear is not going to correct the<br />
situation.<br />
Another important consideration is to determine the specific<br />
type of failure which can be a valuable indicator for the cause<br />
of failure. The following pages show different types of failures<br />
and possible causes. Use this as a guide in determining types<br />
of failures and to correct problems.<br />
Correct the Cause of the Problem<br />
Once the cause of the problem has been determined, refer to<br />
the appropriate service manual to perform the repairs.