RMX 1500 Hardware Guide.book - Polycom
RMX 1500 Hardware Guide.book - Polycom
RMX 1500 Hardware Guide.book - Polycom

You also want an ePaper? Increase the reach of your titles
YUMPU automatically turns print PDFs into web optimized ePapers that Google loves.
Chapter 1-<strong>Hardware</strong> Description<br />
1-18<br />
Table 1-7 <strong>RMX</strong> <strong>1500</strong> Rear Panel - RTM IP <strong>1500</strong> Component Description<br />
Item Description<br />
MAIN/RTM Selection of the connection type for the RS-232 Port.<br />
When the switch is up - the serial port connects to the<br />
MPMx card.<br />
When the switch is down, connects to the RTM IP.<br />
Standby button Toggle button. Use this button to either perform<br />
Diagnostics or Software Recovery on the <strong>RMX</strong>.<br />
Short press (2 seconds) - MPMx Diagnostics.<br />
Long press - (10 seconds) Media and RTM IP <strong>1500</strong><br />
Software Recovery.<br />
RTM ISDN <strong>1500</strong><br />
The RTM ISDN <strong>1500</strong> connects directly to the built-in MPMx. The RTM<br />
ISDN card routes data between the MPMx card and components of the<br />
system, converts ISDN T1/E1 media to IP packets and provides<br />
connectivity to external ISDN networks.<br />
The RTM ISDN card is installed on the rear panel of the <strong>RMX</strong> interfaces<br />
between the <strong>RMX</strong> unit and the ISDN/PSTN switch.<br />
With the <strong>RMX</strong> <strong>1500</strong>, you can either have a dedicated E1 or T1 Type Network<br />
Service. It is not possible to have a mixed E1 and T1 ISDN Network Service.<br />
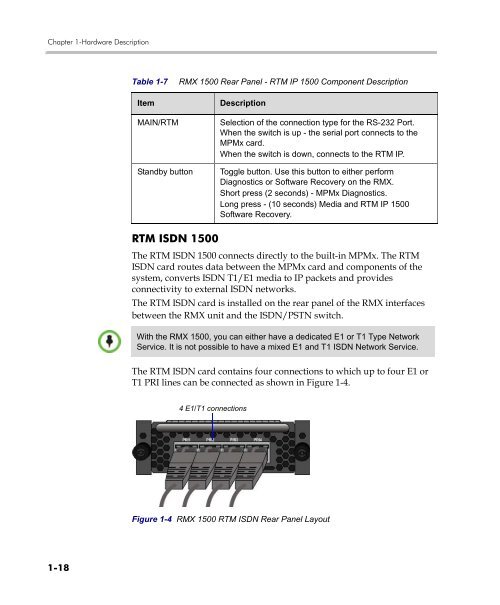
The RTM ISDN card contains four connections to which up to four E1 or<br />
T1 PRI lines can be connected as shown in Figure 1-4.<br />
4 E1/T1 connections<br />
Figure 1-4 <strong>RMX</strong> <strong>1500</strong> RTM ISDN Rear Panel Layout