Create successful ePaper yourself
Turn your PDF publications into a flip-book with our unique Google optimized e-Paper software.
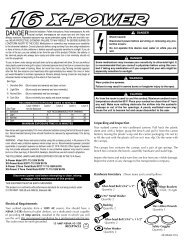
30063-01A<br />
Opening / Replacing Acrylics<br />
The bench acrylic is secured in place by 2<br />
screws at the front corners. Use a Phillips<br />
screwdriver to remove the screws. The acrylic<br />
will lift up in front. On the inside of the<br />
bench, along the front, are two supports for<br />
the bench acrylic. Swing them up to hold<br />
the bench acrylic open.<br />
To remove the bench acrylic, simply pull it<br />
out of the channel at the back.<br />
The canopy acrylic is secured by 5 screws<br />
along the front edge of the canopy. Use a<br />
Phillips screwdriver to unscrew all 5 screws<br />
and the aluminum channel will swing down<br />
to release the acrylic. The screws will remain<br />
captive in the channel. Swing the channel<br />
open fully and the front edge of the canopy<br />
acrylic will drop down.<br />
To remove the canopy acrylic, disconnect<br />
the exciters and lift it out of the channel<br />
along the back edge.<br />
When you are fi nished, reverse the above<br />
directions to secure the acrylic shields.<br />
Acrylics vary greatly over time in their ability<br />
to effectively transmit UV light. Acrylics<br />
sold by ETS have been life tested to ensure<br />
proper transmission throughout their useful<br />
life.<br />
Replace any acrylic that appears damaged.<br />
This includes deep scratches, many small<br />
scratches, gouges and cracks.<br />
WARNING<br />
Shock hazard.<br />
Disconnect power before removing<br />
any protective covers.<br />
Removing / Replacing Fluorescent<br />
Lamps<br />
After opening the acrylics, replace lamps as<br />
follows.<br />
1. Grasp the lamp at one end and at the<br />
middle and turn the lamp one quarter<br />
turn. Gently remove the lamp from its<br />
holders.<br />
2. Reinstall the lamp by inserting the pins<br />
located on the ends of the lamp into the<br />
slots on top of the lamp holders and turn<br />
the lamp a quarter turn. It should click<br />
in place.<br />
Replacement Lamps<br />
To be assured of maximum tanning effectiveness,<br />
change lamps after approximately<br />
600-800 hours of use. Lamps used longer<br />
than that begin to lose their tanning effectiveness<br />
even though they continue to light.<br />
We re<strong>com</strong>mend using the lamps specifi ed<br />
below. Use of uncertifi ed lamps is a violation<br />
of Federal regulations and will void<br />
your warranty.<br />
The following lamps have been certifi ed for<br />
use in your tanning <strong>bed</strong>:<br />
BRONZING SUN Wolff® Model<br />
BS71-T12-160W VS-R BI-PIN<br />
Heraeus OH C 400 EF<br />
(facial unit)<br />
Ultimate Envy 434 Assembly and User Manual - 45