Advanced Manual
Advanced Manual
Advanced Manual

Create successful ePaper yourself
Turn your PDF publications into a flip-book with our unique Google optimized e-Paper software.
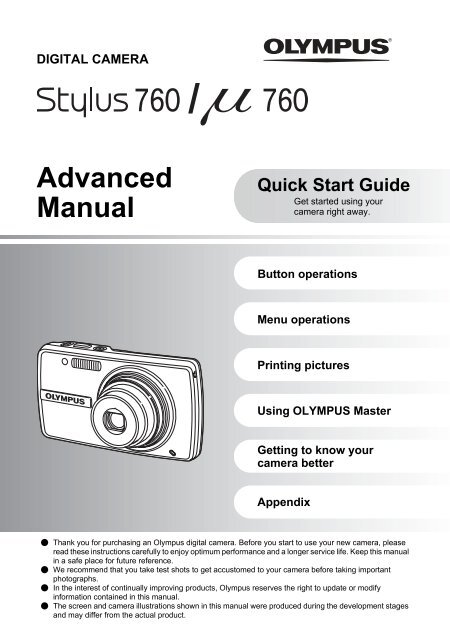
DIGITAL CAMERA<br />
<strong>Advanced</strong><br />
<strong>Manual</strong><br />
Quick Start Guide<br />
Get started using your<br />
camera right away.<br />
Button operations<br />
Menu operations<br />
Printing pictures<br />
Using OLYMPUS Master<br />
Getting to know your<br />
camera better<br />
Appendix<br />
( Thank you for purchasing an Olympus digital camera. Before you start to use your new camera, please<br />
read these instructions carefully to enjoy optimum performance and a longer service life. Keep this manual<br />
in a safe place for future reference.<br />
( We recommend that you take test shots to get accustomed to your camera before taking important<br />
photographs.<br />
( In the interest of continually improving products, Olympus reserves the right to update or modify<br />
information contained in this manual.<br />
( The screen and camera illustrations shown in this manual were produced during the development stages<br />
and may differ from the actual product.
2 EN<br />
Contents<br />
Quick Start Guide P. 3<br />
Button operations<br />
Menu operations<br />
Printing pictures<br />
Getting to know your camera<br />
better<br />
Appendix<br />
P. 10<br />
P. 18<br />
P. 36<br />
Using OLYMPUS Master P. 42<br />
P. 50<br />
P. 60<br />
Test out the functions of the camera<br />
buttons by following along with the<br />
illustrations.<br />
Learn about the menus that control<br />
the functions and settings for basic<br />
operation.<br />
Learn how to print pictures you have<br />
taken.<br />
Learn how to transfer and save<br />
pictures to a computer.<br />
Find out more about camera<br />
operations and how to take better<br />
pictures.<br />
Read about convenient functions and<br />
safety precautions on how to use your<br />
camera more effectively.
Quick Start Guide<br />
Gather these items (box contents)<br />
Digital Camera Strap LI-42B<br />
Lithium Ion Battery<br />
LI-40C<br />
Battery Charger<br />
USB Cable AV Cable OLYMPUS Master<br />
Software CD-ROM<br />
Items not shown: <strong>Advanced</strong> <strong>Manual</strong> (this manual), Basic <strong>Manual</strong>, warranty card. Contents<br />
may vary depending on purchase location.<br />
Attach the strap<br />
( Pull the strap tight so that it does not come loose.<br />
Quick Start Guide<br />
EN 3
Quick Start Guide<br />
4 EN<br />
Prepare the battery<br />
a. Charge the battery<br />
2<br />
AC Wall Outlet<br />
( Battery comes partially charged.<br />
b. Insert the battery in the camera<br />
1<br />
5<br />
Power Cable<br />
2<br />
4<br />
( You can shoot pictures with this camera even without using an optional xD-<br />
Picture Card (hereinafter referred to as “the card”). For details on inserting<br />
the card, please refer to “Inserting and removing the card” (P. 62).<br />
1<br />
3<br />
Lithium Ion Battery<br />
Battery<br />
Charger<br />
Charging Indicator<br />
Light On (Red): Charging<br />
Light Off: Charging complete<br />
(Charging time: Approx. 5 hours)<br />
3<br />
( Insert the battery from<br />
the side.<br />
Battery lock knob<br />
• To remove the battery, slide<br />
the battery lock knob in the<br />
direction of the arrow.
Turn the camera on<br />
This explains how to turn on the camera in shooting mode.<br />
a. Set the mode dial to K.<br />
Still picture shooting modes<br />
K This function allows you to shoot with the camera’s automatic settings.<br />
s This function allows you to shoot pictures by selecting a scene according to the<br />
shooting condition.<br />
g This function allows you to set the target items by following the shooting guide<br />
displayed on the screen.<br />
b. Press the o button.<br />
o Button<br />
When shooting still pictures (shooting mode)<br />
When shooting movies<br />
(shooting mode)<br />
When viewing pictures<br />
(playback mode)<br />
( To turn off the camera, press the o button once again.<br />
X<br />
Y M D TIME T I M E<br />
----.--.-- --:--<br />
CANCEL MENU<br />
Y/M/D Y / M / D<br />
• When the date and time have<br />
not yet been set, this screen will<br />
appear.<br />
Quick Start Guide<br />
EN 5
Quick Start Guide<br />
6 EN<br />
Set date and time<br />
About the date and time setting screen<br />
X<br />
Y M D TIME T I M E<br />
----.--.-- --:--<br />
CANCEL MENU<br />
Exits a setting.<br />
Y/M/D Y / M / D<br />
a. Press the 1F button and the 2Y button to select [Y].<br />
• The first two digits of the year are fixed.<br />
b. Press the 3# button.<br />
c. Press the 1F button and the 2Y<br />
button to select [M].<br />
d. Press the 3# button.<br />
Y-M-D (Year-Month-Day)<br />
Hour<br />
Minute<br />
Date formats (Y-M-D, M-D-Y, D-M-Y)<br />
1F Button<br />
2Y Button<br />
3# Button<br />
X<br />
Y M D TIME T I M E<br />
CANCEL MENU<br />
X<br />
Y M D TIME T I M E<br />
CANCEL MENU<br />
Y/M/D Y / M / D<br />
Y/M/D Y / M / D
e. Press the 1F button and the 2Y<br />
button to select [D].<br />
f. Press the 3# button.<br />
g. Press the 1F button and the 2Y<br />
button to select the hours and minutes.<br />
• The time is displayed in the 24-hour format.<br />
h. Press the 3# button.<br />
i. Press the 1F button and the 2Y<br />
button to select [Y/M/D].<br />
CANCEL MENU<br />
Set date and time<br />
j. After all items have been set, press the o button.<br />
• For precise time setting, press the o button as the time signal strikes 00 seconds.<br />
o Button<br />
X<br />
X<br />
Y M D TIME T I M E<br />
CANCEL MENU<br />
SET<br />
X<br />
Y M D TIME T I M E<br />
Y M D TIME T I M E<br />
CANCEL MENU<br />
SET<br />
P<br />
[ ]<br />
HQ 3072 3072×2304 2304<br />
Y/M/D Y / M / D<br />
Y/M/D Y / M / D<br />
OK<br />
Y/M/D Y / M / D<br />
OK<br />
[IN IN]<br />
4<br />
Quick Start Guide<br />
EN 7
Quick Start Guide<br />
8 EN<br />
Take a picture<br />
a. Hold the camera<br />
b. Focus<br />
c. Shoot<br />
Horizontal grip Vertical grip<br />
Shutter Button<br />
(Pressed<br />
halfway)<br />
Shutter Button<br />
(Pressed<br />
completely)<br />
Place this mark over your<br />
subject.<br />
P<br />
[ ]<br />
HQ 3072 3072×2304 2304<br />
[IN IN]<br />
4<br />
The number of storable<br />
still pictures is displayed.<br />
The green lamp indicates the focus<br />
and exposure are locked.<br />
The card access lamp blinks.
View pictures<br />
a. Set the mode dial to q.<br />
Arrow Pad<br />
Prev. Picture<br />
o Button<br />
Erase pictures<br />
Next Picture<br />
Mode Dial<br />
[IN IN]<br />
'07.07.26 12:30<br />
100-0001<br />
1<br />
a. Press the 4& button and the 3# button to display the picture<br />
that you want to erase.<br />
b. Press the /S button.<br />
/S Button<br />
c. Press the 1F button to select [YES] and press the o button<br />
to erase the picture.<br />
1F Button<br />
o Button<br />
ERASE<br />
BACK MENU<br />
ERASE<br />
BACK MENU<br />
YES<br />
NO<br />
SET<br />
YES<br />
NO<br />
SET<br />
HQ<br />
[IN]<br />
OK<br />
OK<br />
Quick Start Guide<br />
EN 9
Button operations<br />
10 EN<br />
Button operations<br />
6<br />
a<br />
e<br />
8<br />
5 0<br />
Shooting mode<br />
Self-timer<br />
c<br />
9<br />
d<br />
Macro mode/<br />
Super macro mode<br />
1 o button Turning the camera on and off<br />
Power on: Shooting mode<br />
• Lens extends<br />
• Monitor turns on<br />
P<br />
Flash mode<br />
[ ]<br />
1 2<br />
HQ 3072 3072×2304 2304<br />
[IN IN]<br />
4<br />
Playback mode<br />
• Monitor turns on<br />
2 Shutter button Shooting pictures<br />
Shooting still pictures<br />
Set the mode dial to K, s or g, and lightly press the shutter button (halfway). The<br />
green lamp lights when the focus and exposure are locked (focus lock). Now press the shutter<br />
button all the way (completely) to shoot a picture.<br />
Green lamp<br />
Focus lock - Locking the focus and then composing the<br />
shot<br />
P<br />
Compose your picture with the focus locked, and then fully<br />
press the shutter button to shoot a picture.<br />
[ ]<br />
• If the green lamp blinks, the focus is not adjusted properly.<br />
Try locking the focus again.<br />
HQ 3072 3072×2304 2304<br />
[IN IN]<br />
4<br />
b<br />
7<br />
3<br />
4<br />
Shooting modes<br />
Playback mode
AF Lock - Locking the focus position<br />
When the scene is k H, you can lock the focus position by<br />
pressing 2. Press 2 again to cancel the AF lock.<br />
g “s Shoot pictures by selecting a scene mode<br />
according to the situation” (P. 11)<br />
• AF lock is automatically canceled after one shot.<br />
Recording movies<br />
Set the mode dial to n, and lightly press the shutter button to lock the focus, and then press<br />
the shutter button completely to start recording. Press the shutter button again to stop<br />
recording.<br />
3 Mode dial Switching between shooting and playback modes<br />
Set the mode dial to the desired shooting or playback mode.<br />
K Shooting still pictures<br />
The camera determines the optimum settings for the shooting conditions automatically.<br />
s Shoot pictures by selecting a scene mode according to the situation<br />
You can shoot pictures by selecting a scene mode according to the situation.<br />
Select a scene mode/change another scene mode to another one<br />
•Press m to select [SCN] from the top menu, and change it to another scene mode.<br />
• By switching to another scene mode, most settings will be changed to the default settings of<br />
each scene mode.<br />
g Follow the shooting guide for setting<br />
1<br />
2<br />
3<br />
4<br />
5<br />
k<br />
AF lock mark<br />
[ ]<br />
HQ 3072 3072×2304 2304<br />
[IN IN]<br />
4<br />
SHOOTING GUIDE 1/3<br />
Brightening subject.<br />
Shooting into backlight.<br />
Set particular lighting.<br />
Blurring background.<br />
Adjusting area in focus.<br />
SET<br />
OK<br />
n Recording movies<br />
Audio is recorded with the movie.<br />
A<br />
00:36<br />
Follow the shooting guide displayed on the screen to set the<br />
target items.<br />
• Press m to display the shooting guide again.<br />
• To change the setting without using the shooting guide, set<br />
the shooting mode to another one.<br />
• The content set using the shooting guide will change to the<br />
default setting by pressing m or changing the mode using<br />
the mode dial.<br />
This icon lights red during movie recording.<br />
The remaining recording time is displayed.<br />
When the remaining recording time reaches 0,<br />
recording will stop automatically.<br />
Button operations<br />
EN 11
Button operations<br />
12 EN<br />
q Viewing still pictures/Selecting playback mode<br />
The last picture taken is displayed.<br />
• Press the arrow pad to view other pictures.<br />
• Use the zoom button to switch between close-up playback, index display and calendar<br />
display.<br />
• Press o to hide the information displayed on the screen for 3 seconds during single-frame<br />
playback.<br />
g “MOVIE PLAY Playing back movies” (P. 26)<br />
P Viewing “My Favorite”<br />
My Favorite<br />
SLIDE-<br />
SHOW<br />
EXIT MENU<br />
Erasing pictures from “My Favorite”<br />
YES/ NO<br />
My Favorite<br />
ADD<br />
FAVORITE<br />
SET OK<br />
The still pictures registered in “My Favorite” are displayed.<br />
• Press the arrow pad to view other pictures.<br />
• Use the zoom button to switch among close-up playback and<br />
index display.<br />
Press m during “My Favorite” playback to display the top<br />
menu, and then select [SLIDESHOW] or [ADD FAVORITE].<br />
g “SLIDESHOW Playing back pictures automatically” (P. 25)<br />
“ADD FAVORITE Adding favorite images” (P. 26)<br />
• Use the arrow pad to select the picture you want to erase, and press S. Select [YES], and<br />
press o.<br />
• Erasing a picture from “My Favorite” does not erase the original picture recorded in the<br />
internal memory or to the card.<br />
4 Arrow pad (1243)<br />
Use the arrow pad to select scenes, playback picture, and the items on the menus.<br />
5<br />
o button (OK/FUNC)<br />
Displays the function menu which contains the functions and settings used during shooting.<br />
This button is also used to confirm your selection.<br />
The functions you can set with the function menu<br />
P/AUTO ..................................................................... Shooting pictures with automatic settings<br />
Select the shooting mode when you have set the mode dial to K.<br />
P (Program auto) The camera automatically sets the optimum aperture value and shutter<br />
speed for the brightness of the subject.<br />
AUTO (Full auto mode) The camera automatically sets white balance and ISO sensitivity in<br />
addition to the aperture and shutter speed.
Other functions you can set with the function menu<br />
g “WB Adjusting the color of a picture” (P. 22)<br />
“ISO Changing the ISO sensitivity” (P. 22)<br />
“DRIVE Using sequential (continuous) shooting” (P. 22)<br />
“ESP/n Changing the area for measuring the brightness of a subject” (P. 23)<br />
Function menu<br />
P<br />
P<br />
WB<br />
AUTO<br />
ISO<br />
AUTO<br />
o P/AUTO<br />
ESP P h<br />
43: Select a setting, and press o.<br />
12: Select the function to be set.<br />
6 m button (MENU) Displaying the top menu<br />
Displays the top menu.<br />
7 Zoom button Zooming while shooting/close-up playback<br />
Shooting mode: Zooming in on your subject<br />
Optical zoom ratio: 3×<br />
Zoom out:<br />
Press W on the<br />
zoom button.<br />
P<br />
[ ]<br />
HQ 3072 3072×2304 2304<br />
[IN IN]<br />
4<br />
P<br />
[ ]<br />
HQ 3072 3072×2304 2304<br />
[IN IN]<br />
4<br />
Zoom in:<br />
Press T on the<br />
zoom button.<br />
Button operations<br />
EN 13
Button operations<br />
14 EN<br />
Playback mode: Changing the picture display<br />
[IN IN]<br />
[IN IN]<br />
1 2<br />
3<br />
1 2 3<br />
4 5 6<br />
7 8 9<br />
[IN IN]<br />
[IN]<br />
4<br />
[IN IN]<br />
'07.07.26 12:30<br />
100-0004<br />
4<br />
8 1F button Changing picture brightness<br />
+ 2.0<br />
P<br />
SET OK<br />
T<br />
T<br />
T<br />
T<br />
Activate the setting.<br />
W<br />
W<br />
W<br />
W<br />
Single-frame playback<br />
• Use the arrow pad to browse pictures.<br />
HQ<br />
Index display<br />
• Use the arrow pad to select a<br />
picture for playback, and press<br />
o to play back the singleframe<br />
of the picture selected.<br />
W<br />
Close-up playback<br />
• Press T to incrementally enlarge<br />
the picture up to 10 times the<br />
original size. Press W to reduce<br />
the size.<br />
• Use the arrow pad during closeup<br />
playback to scroll around the<br />
picture.<br />
• Press o to return to single-frame<br />
playback.<br />
Calendar display<br />
• Use the arrow pad to select the<br />
date, and press o or T on the<br />
zoom button to display the picture<br />
on the date selected.<br />
Press 1F in shooting mode, and then use the arrow pad 43 to<br />
adjust the exposure and press o to confirm the setting.<br />
• Adjustable from -2.0EV to +2.0 EV<br />
3: Brighten<br />
4: Darken<br />
T<br />
W
9 3# button Flash shooting<br />
Press 3# in shooting mode to select the flash setting.<br />
Press o to confirm your selection.<br />
AUTO (Auto-flash) The flash fires automatically in low light or backlight conditions.<br />
! Red-eye reduction flash This emits pre-flashes to reduce the occurrence of red-eye in<br />
your pictures.<br />
# Fill-in flash The flash fires regardless of the available light.<br />
$ Flash off The flash does not fire even in low light conditions.<br />
0 2Y button Self-timer shooting<br />
Press 2Y in shooting mode to select on and off for the self-timer.<br />
Press o to confirm your selection.<br />
Y OFF Cancel the self-timer.<br />
Y ON Set the self-timer.<br />
• After pressing the shutter button completely, the self-timer lamp lights for approximately 10<br />
seconds, blinks for approximately 2 seconds, and then the picture is taken.<br />
• To cancel the self-timer, press 2Y.<br />
• Self-timer shooting is automatically canceled after one shot.<br />
a 4& button Shooting pictures close to the subject<br />
Press 4& in shooting mode to select the macro mode.<br />
Press o to confirm your selection.<br />
OFF Macro mode is deactivated.<br />
& Macro mode This mode lets you shoot as close as 20 cm/7.9 in. (wide) and<br />
50 cm/19.7 in. (tele) from your subject.<br />
% Super macro mode This mode lets you shoot as close as 8 cm/3.2 in. from your<br />
subject.<br />
• Zoom and flash cannot be used in super macro mode.<br />
b<br />
h button Shooting pictures using the image stabilizer<br />
Press h in shooting mode to turn the image stabilizer on or off. Press o to confirm your<br />
selection.<br />
h OFF Image stabilizer is deactivated.<br />
h ON Image stabilizer is activated.<br />
• It is recommended to make the image stabilizer inactive, when mounted on a tripod.<br />
• At very slow shutter speeds (for example when taking night photographs), some images may<br />
not acquire the proper stabilization effect.<br />
• If the camera is severely shaken, digital images may not be stabilized properly.<br />
Button operations<br />
EN 15
Button operations<br />
16 EN<br />
c q/< button Viewing pictures/Printing pictures<br />
q Viewing pictures immediately<br />
Press q in shooting mode to switch to playback mode and display the last picture taken.<br />
Press q again or press the shutter button halfway to return to shooting mode.<br />
g “q Viewing still pictures/Selecting playback mode” (P. 12)<br />
< Printing pictures<br />
When a printer is connected to the camera, display the picture you want to print in playback<br />
mode and press
e d button Changing the information on display/Display the menu guide/Checking the time<br />
Changing the information displays<br />
Press d to change the display in the following order.<br />
Shooting mode<br />
P<br />
P<br />
[ ]<br />
[ ]<br />
+2.0<br />
$<br />
ISO<br />
1600<br />
%<br />
l R<br />
j<br />
'07.07.26 12:30<br />
k[IN IN]<br />
100-0004<br />
n<br />
HQ 3072 3072×2304 2304<br />
4<br />
+2.0<br />
$<br />
ISO<br />
1600<br />
l R<br />
j<br />
k[IN IN]<br />
n<br />
HQ 3072 3072×2304 2304<br />
%<br />
P<br />
ISO<br />
1600<br />
%<br />
j<br />
n<br />
HQ<br />
[ ]<br />
[ ]<br />
*1 Not displayed in case of n.<br />
4<br />
4<br />
+2.0<br />
$<br />
l R<br />
k[IN<br />
IN]<br />
Normal display<br />
Simple display *1<br />
Frame assist *1<br />
Displaying the menu guide<br />
With menu items selected, hold down d to display the menu<br />
ure brightness<br />
pictures.<br />
4<br />
Histogram display *1<br />
Playback mode<br />
guide. Release d to close the menu guide.<br />
Checking the time<br />
While the camera is off, press d to display the set alarm time (when [ALARM CLOCK] is set)<br />
and the current time for 3 seconds.<br />
[IN IN]<br />
HQ<br />
[IN IN]<br />
HQ<br />
3072 3072×2304 2304<br />
F3.5 1/1000 1000 +2.0<br />
[IN IN]<br />
ISO 400<br />
'07.07.26 12:30<br />
100-0004<br />
4<br />
HQ<br />
F3.5<br />
1/1000 1000<br />
+2.0<br />
ISO 400<br />
'07.07.26 12:30<br />
4<br />
Normal display<br />
Detailed display<br />
No information<br />
display<br />
Histogram<br />
display *1<br />
Button operations<br />
EN 17
Menu operations<br />
18 EN<br />
Menu operations<br />
m button<br />
Arrow pad<br />
(1243)<br />
About the menus<br />
Pressing m displays the top menu on the monitor.<br />
• The items displayed on the top menu differ according to the mode.<br />
RESET<br />
IMAGE<br />
QUALITY<br />
CAMERA<br />
MENU<br />
• When [CAMERA MENU], [PLAYBACK MENU], [EDIT], [ERASE], or [SETUP] is selected,<br />
the menu corresponding to the respective functions is displayed.<br />
• When your camera is set according to the shooting guide with the mode dial set at g,<br />
press m to display the shooting guide screen.<br />
Operation guide<br />
o button<br />
Top menu (in still picture shooting mode)<br />
SETUP<br />
SILENT<br />
MODE<br />
DIGITAL ZOOM<br />
ESP<br />
OFF<br />
EXIT MENU<br />
SET OK<br />
BACK MENU<br />
SET OK<br />
During menu operations, the buttons and their respective functions are displayed at the bottom<br />
of the monitor. Follow these guides to navigate the menus.<br />
RESET<br />
IMAGE<br />
QUALITY<br />
CAMERA<br />
MENU<br />
EXIT MENU<br />
SET<br />
Operation<br />
guide m<br />
button<br />
1243 on<br />
the arrow pad<br />
SETUP<br />
SILENT<br />
MODE<br />
OK<br />
o<br />
1<br />
2<br />
CAMERA MENU<br />
WB AUTO<br />
ISO AUTO<br />
DRIVE o<br />
BACK MENU : Returns to the previous menu.<br />
EXIT MENU : Exits the menu.<br />
: Press 1243 to select a setting.<br />
SET OK : Sets the selected item.
Using the menus<br />
This explains how to use the menus with the [AF MODE] setting as an example.<br />
1 Set the mode dial to K.<br />
2 Press m to display the top menu. Select<br />
[CAMERA MENU] and press o to confirm your<br />
selection.<br />
• [AF MODE] is one of the selections on the [CAMERA MENU].<br />
Press o to confirm your selection.<br />
3 Use the arrow pad 12 to select [AF MODE],<br />
and press o.<br />
• Some settings may not be available, depending on the<br />
shooting/scene mode.<br />
• When pressing 4 on this screen, the cursor moves to the<br />
page display. Press 12 to change the page. To select an<br />
item or function, press 3 or o.<br />
Page display:<br />
The page display mark is displayed when<br />
there are additional menu items on the next<br />
page.<br />
4 Use the arrow pad 12 to select [iESP] or<br />
[SPOT], and press o.<br />
• The menu item is set and the previous menu is displayed.<br />
Press m repeatedly to exit the menu.<br />
• To cancel changes and continue menu operation, press<br />
m before pressing o.<br />
RESET<br />
IMAGE<br />
QUALITY<br />
CAMERA<br />
MENU<br />
EXIT MENU<br />
SET<br />
1<br />
2<br />
SETUP<br />
SILENT<br />
MODE<br />
WB AUTO<br />
ISO AUTO<br />
DRIVE o<br />
ESP<br />
DIGITAL ZOOM OFF<br />
BACK MENU<br />
SET<br />
1 AF MODE SPOT<br />
2 R<br />
PANORAMA<br />
OFF<br />
BACK MENU<br />
SET<br />
OK<br />
OK<br />
OK<br />
The selected item is displayed<br />
in a different color.<br />
1 AF MODE<br />
2 R<br />
PANORAMA<br />
BACK MENU<br />
iESP<br />
SPOT<br />
SET<br />
OK<br />
Menu operations<br />
EN 19
Menu operations<br />
20 EN<br />
Shooting mode menu K s<br />
2<br />
• Some functions are not available according to the selected mode.<br />
g “Functions available in shooting modes and scene modes” (P. 58)<br />
g “SETUP menus” (P. 30)<br />
• The factory default settings are displayed in gray ( ).<br />
1<br />
IMAGE QUALITY Changing the image quality<br />
Still picture image quality and their applications<br />
Image quality/Image size Compression Application<br />
SHQ 3072 × 2304 Low • This is useful for printing large images on A3-<br />
compression size (16.5 × 11.7 in.) paper.<br />
HQ 3072 × 2304 Standard<br />
compression<br />
SQ1 2560 × 1920 Standard<br />
2304 × 1728<br />
2048 × 1536<br />
compression<br />
SQ2 1600 × 1200 Standard<br />
1280 × 960<br />
compression<br />
1024 × 768<br />
Movie image quality<br />
1<br />
RESET<br />
IMAGE<br />
QUALITY<br />
CAMERA<br />
MENU SETUP<br />
SILENT<br />
MODE<br />
EXIT MENU<br />
SET OK<br />
3<br />
640 × 480 Low<br />
compression<br />
• This is useful for performing computer image<br />
processing, such as contrast adjustment and<br />
red-eye correction.<br />
• This is useful for A3 (16.5 × 11.7 in.) /A4<br />
(11.7 × 8.5 in.)-size prints.<br />
• This is useful for computer editing such as<br />
rotating or adding text to a picture.<br />
• This is useful for postcard-sized (6 × 4 in.)<br />
prints.<br />
• This is useful for viewing pictures on a<br />
computer.<br />
• This is useful for sending as e-mail<br />
attachments.<br />
16:9 1920 × 1080 Standard • This is useful for expressing the broadness of a<br />
compression subject such as landscapes and for viewing<br />
pictures on a wide-screen television.<br />
Image quality/Image size<br />
SHQ 640 × 480<br />
HQ 320 × 240<br />
SQ 160 × 120<br />
4<br />
5<br />
4 CAMERA MENU<br />
WB<br />
ISO<br />
DRIVE<br />
ESP/n<br />
DIGITAL ZOOM<br />
AF MODE<br />
R<br />
PANORAMA *<br />
* An Olympus xD-Picture Card is required.
2 RESET Restoring default settings<br />
NO /YES<br />
It restores shooting functions back to default settings. The mode dial must not be set to<br />
g.<br />
Functions restored to the factory default settings<br />
Function Factory default setting Ref. Page<br />
F 0.0 P. 14<br />
# AUTO P. 15<br />
Y YOFF P. 15<br />
& OFF P. 15<br />
IMAGE STABILIZER OFF P. 15<br />
IMAGE QUALITY HQ P. 20<br />
WB AUTO P. 22<br />
ISO AUTO P. 22<br />
DRIVE o P. 22<br />
ESP/n ESP P. 23<br />
DIGITAL ZOOM OFF P. 23<br />
AF MODE SPOT P. 23<br />
R OFF P. 23<br />
3 s (Scene) Selecting a scene mode according to the shooting situation<br />
PORTRAIT / LANDSCAPE / LANDSCAPE+PORTRAIT / NIGHT SCENE *1 /<br />
NIGHT+PORTRAIT *1 / SPORT / INDOOR / CANDLE *1 / SELF PORTRAIT /<br />
AVAILABLE LIGHT *1 / SUNSET *1 / FIREWORKS *1 / CUISINE / BEHIND GLASS /<br />
DOCUMENTS / AUCTION / SHOOT & SELECT1 *2 / SHOOT & SELECT2 *3 /<br />
BEACH & SNOW / UNDER WATER WIDE1 / UNDER WATER WIDE2 *4 /<br />
UNDER WATER MACRO<br />
The scene mode selection screen displays sample images as<br />
well as a description of the shooting situation for which it is<br />
designed. It can be set only when the mode dial is set to s.<br />
g “Mode dial Switching between shooting and playback<br />
modes” (P. 11)<br />
• By switching to another scene mode, most settings will be<br />
changed to the default settings of each scene mode.<br />
*1 When the subject is dark, noise reduction is automatically<br />
activated. This approximately doubles the shooting time, during<br />
which the next picture can be taken.<br />
*2 The focus is locked at the first frame.<br />
*3 The camera focuses for each frame.<br />
*4 The focus distance is fixed at approximately 5.0 m (16.4 ft.).<br />
Scene mode selection screen<br />
B<br />
F<br />
D<br />
G<br />
U<br />
1 PORTRAIT<br />
BACK MENU<br />
SET<br />
OK<br />
Set the scene mode.<br />
Menu operations<br />
EN 21
Menu operations<br />
22 EN<br />
[e SHOOT & SELECT1]/[f SHOOT & SELECT2]<br />
• These scene modes allow you to take sequential pictures by holding down the shutter<br />
button. After shooting the pictures, select the ones you want to erase by marking them with<br />
a R and press S to erase them.<br />
e<br />
BACK MENU OK GO S<br />
4<br />
CAMERA MENU<br />
WB................................................................................................. Adjusting the color of a picture<br />
AUTO The white balance is adjusted automatically for natural color,<br />
regardless of the light source.<br />
5 Sunny day For shooting under a clear sky.<br />
3 Cloudy day For shooting under a cloudy sky.<br />
1 Tungsten light For shooting under tungsten lighting.<br />
w Fluorescent<br />
lamp 1<br />
x Fluorescent<br />
lamp 2<br />
y Fluorescent<br />
lamp 3<br />
For shooting under daylight fluorescent lighting. (This type of lamp is<br />
mainly used in homes.)<br />
For shooting under a neutral white fluorescent lamp. (This type of<br />
lamp is mainly used in desk lamps.)<br />
For shooting under a white fluorescent lamp. (This type of lamp is<br />
mainly used in offices.)<br />
ISO......................................................................................................Changing the ISO sensitivity<br />
AUTO Sensitivity is automatically adjusted according to the conditions of the<br />
subject.<br />
80/100/200/<br />
400/800/1600<br />
Selected picture.<br />
Press 43 to scroll through the pictures.<br />
Pictures with a R mark are erased.<br />
Press o to mark the pictures to be erased.<br />
A low value lowers the sensitivity for daylight shooting of clear, sharp<br />
pictures. The higher the value, the better the camera’s light sensitivity and<br />
ability to shoot with a fast shutter speed and in low light conditions. However,<br />
high sensitivity introduces noise into the resulting picture, which may give it<br />
a grainy appearance.<br />
DRIVE.............................................................................Using sequential (continuous) shooting<br />
o Shoots 1 frame at a time when the shutter button is pressed.<br />
j Focus and exposure are locked at the first frame. The sequential shooting<br />
speed varies depending on the image quality setting.<br />
W Pictures can be taken at a faster speed than normal sequential shooting.
You can take a sequence of pictures at one time by holding down the shutter button. The<br />
camera will take pictures continuously until you release the shutter button.<br />
•In [W], the settings change as follows.<br />
• The flash mode is fixed at [$].<br />
• [ISO] is fixed at [AUTO].<br />
• [IMAGE QUALITY] is limited to [2048 × 1536] and lower.<br />
ESP/n ..................................... Changing the area for measuring the brightness of a subject<br />
ESP Meters the brightness at the center of the monitor and the surrounding area<br />
separately to capture an image with balanced brightness. When taking<br />
pictures against strong backlight, the center of the picture may appear dark.<br />
n Only the center of the monitor is metered. Recommended for taking a picture<br />
against strong backlight.<br />
DIGITAL ZOOM .............................................................................. Zooming in on your subject<br />
OFF /ON<br />
The digital zoom can be used to take close-up shots with stronger magnification when<br />
combined with optical zoom. (Optical Zoom × Digital Zoom: maximum 15×)<br />
P<br />
Optical zoom Digital zoom<br />
AF MODE.......................................................................................... Changing the focusing area<br />
iESP The camera determines which subject within the screen to focus on. Even<br />
when the subject is not in the center of the screen, focusing is possible.<br />
SPOT Focus selection is based on the subject within the AF target mark.<br />
R.............................................................................................. Recording sound with still pictures<br />
OFF /ON<br />
[ ]<br />
HQ 3072 3072×2304 2304<br />
[IN IN]<br />
4<br />
When activated [ON], the camera will record about 4 seconds of audio after the picture is<br />
taken.<br />
When recording, aim the camera microphone at the source of the sound you want to record.<br />
P<br />
[ ]<br />
HQ 3072 3072×2304 2304<br />
[IN IN]<br />
4<br />
Zoom bar<br />
White area: The optical zoom area<br />
Red area: The digital zoom area<br />
Menu operations<br />
EN 23
Menu operations<br />
24 EN<br />
PANORAMA ..................................................................................Creating a panoramic picture<br />
Panorama shooting lets you create a panoramic picture, using the OLYMPUS Master software<br />
from the provided CD-ROM. An Olympus xD-Picture Card is required for panorama shooting.<br />
Connects pictures<br />
from left to right<br />
3: The next picture is connected at the<br />
right edge.<br />
4: The next picture is connected at the<br />
left edge.<br />
Use the arrow pad to specify at which edge you want to connect the pictures, and then<br />
compose your shots so that the edges of the pictures overlap. The part of the previous picture<br />
that will be combined will not remain in the frame. Remember the frame displayed on the<br />
monitor as a rough indication, then compose the shot so that the edges of the previous picture<br />
in the frame overlap with the next shot.<br />
• Press o to exit panorama shooting.<br />
• Panorama shooting is possible for up to 10 pictures. After 10 pictures have been shot, a<br />
warning mark (C) is displayed.<br />
5<br />
SILENT MODE Setting to turn off operational sounds<br />
OFF /ON<br />
Connects pictures<br />
from bottom to top<br />
1: The next picture is connected at the<br />
top.<br />
2: The next picture is connected at the<br />
bottom.<br />
This function allows you to turn off operational sounds that occur during shooting and<br />
playback, warning beeps, shutter sounds, etc.<br />
It cannot be set when the mode dial is set to g.
Playback mode menu q<br />
Q<br />
REDEYE FIX<br />
BLACK & WHITE<br />
SEPIA<br />
FRAME<br />
LABEL<br />
CALENDAR<br />
BRIGHTNESS<br />
SATURATION<br />
INDEX<br />
5 EDIT<br />
When a still picture is selected<br />
SLIDE-<br />
SHOW<br />
ADD PLAYBACK<br />
FAVORITE<br />
MENU<br />
CALENDAR ERASE<br />
SILENT<br />
MODE<br />
EXIT MENU<br />
SET OK<br />
MOVIE<br />
PLAY<br />
EDIT<br />
EDIT<br />
ADD PLAYBACK<br />
FAVORITE<br />
MENU<br />
PRINT<br />
ORDER<br />
SETUP<br />
PRINT<br />
ORDER<br />
SETUP<br />
CALENDAR ERASE<br />
SILENT<br />
MODE<br />
EXIT MENU<br />
SET OK<br />
g “SETUP menus” (P. 30)<br />
“SILENT MODE Setting to turn off operational sounds” (P. 24)<br />
• The factory default settings are displayed in gray ( ).<br />
1 SLIDESHOW Playing back pictures automatically<br />
SLIDESHOW<br />
BGM<br />
TYPE<br />
BACK MENU<br />
5 EDIT 6 *1<br />
OFF<br />
ON<br />
SET<br />
[ IN] ]<br />
OK<br />
1<br />
3<br />
4<br />
2<br />
4<br />
• Set [BGM] to [ON] or [OFF].<br />
• Select the transition effect between pictures from [TYPE].<br />
BGM ON / OFF<br />
TYPE NORMAL<br />
FADER<br />
SLIDE<br />
ZOOM<br />
• Only the first frame of each movie is displayed.<br />
• After setting [BGM] and [TYPE], press o to start the slideshow.<br />
•Press o or m to cancel the slideshow.<br />
5<br />
8 7<br />
When a movie is selected<br />
5<br />
87<br />
7 PLAYBACK MENU<br />
0<br />
y *2<br />
R *2<br />
*1 A card is required.<br />
*2 This is not displayed<br />
when a movie is<br />
selected.<br />
Menu operations<br />
EN 25
Menu operations<br />
2 MOVIE PLAY Playing back movies<br />
Select [MOVIE PLAY] from the top menu, and press o to play back the movie. You can also<br />
playback a movie by selecting a picture with the movie icon (n) and pressing o.<br />
[IN IN]<br />
'07.07.26 12:30<br />
100-0004<br />
MOVIE PLAY OK<br />
4<br />
Operations during movie playback<br />
[IN IN]<br />
'07.07.26 12:30<br />
100-0004<br />
00:00 00:36<br />
3: Each time you press the button, the playback speed changes in the<br />
following order: 2×; 20×; and back to 1×.<br />
4: Plays the movie in reverse. Each time you press the button, the playback<br />
speed changes in the following order: 1×; 2×; 20×; and back to 1×.<br />
• Press o to pause the playback.<br />
Operations during pause<br />
[IN IN]<br />
00:05 00:36<br />
3: Displays the next frame.<br />
4: Displays the previous frame.<br />
• To resume the movie, press o.<br />
• To cancel the playback of the movie in the middle of it or during pause, press m.<br />
3 ADD FAVORITE Adding favorite images<br />
This function registers your favorite still pictures as separate still pictures. You can register up<br />
to 9 favorite pictures.<br />
g “P Viewing “My Favorite”” (P. 12)<br />
• Use the arrow pad to select a picture, and press o.<br />
ADD FAVORITE<br />
BACK MENU<br />
SET<br />
OK<br />
26 EN<br />
Playing time/Total recording time<br />
1: Increases the volume.<br />
2: Reduces the volume.<br />
1: Displays the first frame.<br />
2: Displays the last frame.
• Registered pictures cannot be erased even by formatting the internal memory.<br />
• A registered picture can be used as the startup screen picture or menu screen background<br />
picture.<br />
g “PW ON SETUP Setting the startup screen and volume” (P. 31)<br />
“MENU THEME Setting the menu screen color and background” (P. 31)<br />
Note<br />
• Registered pictures cannot be edited, printed, copied to a card, transferred to a computer, or<br />
played back on a computer.<br />
4 CALENDAR Playing back the pictures in a calendar format<br />
This function lets you playback the pictures in a calendar format, organized by the date the<br />
images were recorded.<br />
5 EDIT<br />
Q .................................................................................................... Changing the size of pictures<br />
640 × 480 /320 × 240<br />
This changes the image size of a picture and saves it as a new file.<br />
REDEYE FIX ................................................................................. Fixing the red-eye in pictures<br />
This function corrects the red-eye look that often occurs when taking pictures with a flash and<br />
saves the picture as a new file.<br />
BLACK & WHITE...........................................................Changing pictures to black and white<br />
This changes the picture to black and white and saves it as a new file.<br />
SEPIA .......................................................................................Changing pictures to a sepia tone<br />
This changes the picture to sepia and saves it as a new file.<br />
FRAME................................................................................Synthesize the frame and the picture<br />
This function lets you select a frame, integrate the frame with an image, and save it as a new<br />
picture.<br />
FRAME<br />
O W T MOVE SET<br />
OK<br />
• Select a frame with 43 and press o.<br />
• Select the picture to be synthesized with the frame with 43, and<br />
press o. (Press 12 to turn the picture 90 degrees clockwise<br />
or 90 degrees counterclockwise.)<br />
• Press the arrow pad and the zoom button to adjust the position<br />
and size of the picture, and press o.<br />
LABEL.................................................................................................. Add a label to your picture<br />
This function lets you select a label, integrate the label with an image, and save it as a new<br />
picture.<br />
LABEL<br />
• Select the picture with 43, and press o.<br />
• Select the label with 43, and press o. (Press 12 to turn the<br />
label 90 degrees clockwise or 90 degrees counterclockwise.)<br />
• Press the arrow pad and the zoom button to adjust the position<br />
and size of the picture, and press o.<br />
• Set the color of the label with the arrow pad, and press o.<br />
SET OK<br />
Menu operations<br />
EN 27
Menu operations<br />
28 EN<br />
CALENDAR ..................................................................... Create a calendar print with a picture<br />
This function lets you select a calendar format, integrate the calendar with a picture, and save<br />
it as a new file.<br />
CALENDAR<br />
• Select the picture with 43, and press o.<br />
• Select the calendar with 43, and press o. (Press 12 to turn<br />
the picture 90 degrees clockwise or 90 degrees<br />
counterclockwise.)<br />
• Set the date of the calendar, and press o.<br />
SET OK<br />
BRIGHTNESS ..................................................................Change the brightness of the picture<br />
This function lets you adjust the brightness of a picture and save it as a new picture.<br />
• Select the picture with 43, and press o.<br />
• Adjust the brightness with 12, and press o.<br />
BACK MENU SET OK<br />
SATURATION ....................................................................Change the vividness of the picture<br />
This function lets you adjust the vividness of the picture, and store it as a new picture.<br />
• Select the picture with 43, and press o.<br />
• Adjust the vividness with 12, and press o.<br />
BACK MENU SET OK<br />
INDEX................................................................................ Making an index picture from a movie<br />
This function extracts 9 frames from a movie and saves them as a new picture (INDEX)<br />
containing thumbnails of each frame.<br />
INDEX<br />
BACK MENU<br />
[ xD] ]<br />
SET OK<br />
• Select a movie with 43, and press o.<br />
• The [BUSY] bar will be temporarily displayed.<br />
6<br />
PRINT ORDER Making print reservations (DPOF)<br />
This function allows you to save printing data (the number of prints and the date and time<br />
information) with the pictures stored on the card.<br />
g “Print settings (DPOF)” (P. 39)
7 PLAYBACK MENU<br />
0 .....................................................................................................................Protecting pictures<br />
0<br />
OFF /ON<br />
Protected pictures cannot be erased with [ERASE], [SEL.IMAGE],<br />
or [ALL ERASE], but they are all erased by formatting.<br />
• Select the picture with 43, and protect it by selecting [ON] with<br />
12. You can protect several frames in succession. 9 is<br />
displayed when the picture is protected.<br />
y ...........................................................................................................................Rotating pictures<br />
+90°/ 0° /-90°<br />
Pictures taken with the camera held vertically are displayed horizontally during playback. This<br />
function lets you rotate such pictures so that they are displayed vertically on the monitor, and<br />
the new picture orientations will be saved even after the power is turned off.<br />
Select a picture with 43, and use 12 to select [+90°], [0°], or [-90°]. You can rotate several<br />
frames in succession.<br />
R........................................................................................................Adding sound to still pictures<br />
R<br />
y<br />
BACK MENU<br />
YES /NO<br />
OFF<br />
ON<br />
[ IN] ]<br />
EXIT OK<br />
+90°<br />
YES<br />
NO<br />
[IN]<br />
EXIT OK<br />
[ IN] ]<br />
SET OK<br />
EXIT OK<br />
0° -90°<br />
EXIT OK<br />
Sound is recorded for about 4 seconds.<br />
• Select a picture with 43, and use 12 to select [YES] to begin<br />
recording.<br />
• The [BUSY] bar will be temporarily displayed.<br />
8<br />
ERASE Erase selected pictures/Erase all pictures<br />
Protected pictures cannot be erased. Cancel protection before erasing protected pictures.<br />
Once erased, pictures cannot be restored. Check each picture before erasing to avoid<br />
accidentally erasing pictures you want to keep.<br />
• When erasing the picture in the internal memory, do not insert the card into the camera.<br />
• When erasing the picture from the card, insert a card into the camera in advance.<br />
[IN]<br />
y<br />
[IN]<br />
Menu operations<br />
EN 29
Menu operations<br />
30 EN<br />
SEL. IMAGE........................................................................ Erase by selecting the single-frame<br />
SEL. IMAGE [ IN] ]<br />
BACK MENU OK GO S<br />
• Select [YES], and press o.<br />
• Use the arrow pad to select the picture, and press o to add R.<br />
•Press o again to cancel the selection.<br />
• When all individual pictures to be erased have been marked,<br />
press S.<br />
• Select [YES], and press o.<br />
ALL ERASE ..................................... Erase all the pictures in the internal memory or the card<br />
SETUP menus<br />
RESET<br />
IMAGE<br />
QUALITY<br />
CAMERA<br />
MENU<br />
EXIT MENU<br />
SET<br />
SLIDE-<br />
SHOW SHOW<br />
Shooting mode<br />
EDIT<br />
ADD PLAYBACK<br />
FAVORITE<br />
MENU<br />
SETUP<br />
SILENT<br />
MODE<br />
Playback mode<br />
OK<br />
PRINT<br />
ORDER<br />
SETUP<br />
CALENDAR ERASE<br />
SILENT<br />
MODE MODE<br />
EXIT MENU<br />
SET OK<br />
*1 A card is required.<br />
*2 This feature is not available in [SILENT<br />
MODE].<br />
g “SILENT MODE Setting to turn off<br />
operational sounds” (P. 24)<br />
SETUP<br />
MEMORY FORMAT<br />
(FORMAT *1 )<br />
BACKUP *1<br />
W<br />
PW ON SETUP<br />
MENU THEME<br />
BEEP *2<br />
8 *2<br />
SHUTTER SOUND *2<br />
VOLUME *2<br />
REC VIEW<br />
FILE NAME<br />
PIXEL MAPPING<br />
s<br />
X<br />
DUALTIME<br />
ALARM CLOCK<br />
VIDEO OUT<br />
POWER SAVE<br />
MEMORY FORMAT (FORMAT)........................... Formatting the internal memory or card<br />
All existing data, including protected pictures, are erased when the internal memory or card is<br />
formatted. Make sure that you save or transfer important data to a computer before formatting<br />
the internal memory or card.<br />
• Make sure there is no card inserted in the camera when formatting the internal memory.<br />
• When the internal memory is formatted, the data of the frames and labels downloaded with<br />
the provided OLYMPUS Master software will be deleted.<br />
• Be sure that the card is inserted in the camera when formatting the card.<br />
• Before using non-Olympus cards or cards which have been formatted on a computer, you<br />
must format them with this camera.
BACKUP .................................................. Copying pictures in the internal memory to the card<br />
Insert the optional card into the camera. Copying data does not erase the pictures in the<br />
internal memory.<br />
• It takes some time to back up data. Check if the battery is not empty before starting the copy,<br />
or use the AC adapter.<br />
W ................................................................................................. Selecting a display language<br />
You can select a language for on-screen display. Available languages vary depending on the<br />
area where you purchased this camera.<br />
You can add other languages to your camera with the provided OLYMPUS Master software.<br />
PW ON SETUP ............................................................. Setting the startup screen and volume<br />
SCREEN OFF (No picture is displayed.) / 1 / 2 /MY FAVORITE<br />
VOLUME OFF (No sound) / LOW / HIGH<br />
• Select [2] and press 3 to set a still picture in the internal memory or card as the startup<br />
screen.<br />
• Select [MY FAVORITE] and press 3 to set a still picture registered in “My Favorite” as the<br />
startup screen.<br />
g “ADD FAVORITE Adding favorite images” (P. 26)<br />
• [VOLUME] cannot be set in the following cases.<br />
• When [SCREEN] is set to [OFF]<br />
• When [SILENT MODE] is set to [ON]<br />
MENU THEME................................................Setting the menu screen color and background<br />
NORMAL / BLUE / BLACK / PINK / MY FAVORITE<br />
• Select [MY FAVORITE] and press 3 to set a still picture registered in “My Favorite” as the<br />
background.<br />
g “ADD FAVORITE Adding favorite images” (P. 26)<br />
BEEP ........................................... Adjusting the volume of the beep when buttons are pressed<br />
OFF (No sound) / LOW / HIGH<br />
8 ................................................................Adjusting the volume of the camera warning sound<br />
OFF (No sound) / LOW / HIGH<br />
SHUTTER SOUND ................................................. Selecting the sound of the shutter button<br />
OFF (No sound)<br />
1 LOW / HIGH<br />
2 LOW / HIGH<br />
3 LOW / HIGH<br />
VOLUME ......................................................................... Adjusting the volume during playback<br />
OFF (No sound) / LOW / HIGH<br />
Menu operations<br />
EN 31
Menu operations<br />
32 EN<br />
REC VIEW ................................................... Viewing pictures immediately after they are taken<br />
OFF The picture being recorded is not displayed. This is useful when you want to<br />
prepare for your next shot while the previous picture is being recorded.<br />
ON The picture being recorded is displayed. This is useful for making a brief check of<br />
the picture you have just taken. You can resume shooting while the picture is still<br />
being displayed.<br />
FILE NAME .........................................................................Resetting the file names of pictures<br />
RESET This method is useful when grouping files on separate cards.<br />
The file number and folder number are reset every time a new card is inserted in<br />
the camera. The folder number returns to [No. 100] and the file number returns<br />
to [No. 0001].<br />
AUTO This method is useful when you want to manage all your files with sequential<br />
numbers.<br />
Even if a new card is inserted, the folder number and file number are retained<br />
from the previous card. This helps you to manage multiple cards.<br />
File names and their folder names for recorded pictures are automatically generated by the<br />
camera. File names and folder names respectively include file numbers (0001 to 9999) and<br />
folder names (100 to 999), and are named as follows.<br />
Folder name<br />
File name<br />
\DCIM\***OLYMP\Pmdd****.jpg<br />
Folder No. Month (1 – C) File No.<br />
(100 – 999)<br />
(0001 – 9999)<br />
Day (01 – 31)<br />
Month: Jan. – Sep. = 1 – 9, Oct. = A, Nov. = B, Dec. = C<br />
PIXEL MAPPING .....................................................Adjusting the image processing function<br />
The pixel mapping feature allows the camera to check and adjust the CCD and image<br />
processing functions. It is not necessary to operate this function frequently. Approximately<br />
once a year is recommended. Wait at least one minute after taking or viewing pictures to allow<br />
the pixel mapping function to perform properly. If you turn the camera off during pixel mapping,<br />
start again.<br />
Select [PIXEL MAPPING]. When [START] is displayed, press o.<br />
s......................................................................................... Adjusting the brightness of monitor<br />
s<br />
BACK MENU<br />
SET<br />
OK<br />
Press o to confirm your selection.<br />
1: Brightens the monitor. 2: Darkens the monitor.
X ............................................................................................................Setting the date and time<br />
The date and time is saved with each image, and is used in the file name.<br />
Y-M-D (Year-Month-Day)<br />
X<br />
Y M D TIME T I M E<br />
----.--.-- --:--<br />
CANCEL MENU<br />
Cancels the setting.<br />
Y/M/D Y / M / D<br />
• The first two digits of the year are fixed.<br />
• The time is displayed in the 24-hour format.<br />
• To set the time precisely, with the cursor at either “minute” or [Y/M/D], press o as the time<br />
signal strikes 00 seconds.<br />
DUALTIME ...................................................... Setting the date and time for another time zone<br />
OFF Switches to the date and time set in [X]. Pictures are recorded with the date and<br />
time set in [X].<br />
ON Switches to the date and time set in [DUALTIME]. When setting the dual time,<br />
select [ON], and then set the time. Pictures are recorded with the date and time set<br />
in [DUALTIME].<br />
DUALTIME<br />
Y M D TTIME I M E<br />
CANCEL MENU<br />
• The date format is the same as that set with [X].<br />
• The first two digits of the year are fixed.<br />
• The time is displayed in the 24-hour format.<br />
Hour<br />
Minute<br />
Date formats (Y-M-D, M-D-Y, D-M-Y)<br />
m: Cancels the setting.<br />
ALARM CLOCK ....................................................................................................Setting alarms<br />
OFF No alarm is set or alarm is canceled.<br />
ONE TIME Alarm is activated once. After the alarm goes off, the setting is canceled.<br />
DAILY Alarm is activated daily at the set time.<br />
• When [X] has not been set, [ALARM CLOCK] is not available.<br />
• When [SILENT MODE] is set to [ON], the alarm will not sound.<br />
• When [DUALTIME] is set to [ON], the alarm sounds according to the dual time date and time<br />
setting.<br />
Menu operations<br />
EN 33
Menu operations<br />
34 EN<br />
Setting an alarm<br />
ALARM CLOCK<br />
TIME 09:00 0 9 : 0 0<br />
SNOOZE<br />
ALARM SOUND<br />
MOVE<br />
SET<br />
OK<br />
• Select [ONE TIME] or [DAILY], and set the alarm time.<br />
• You can set snooze or alarm sounds and volume.<br />
TIME Sets the alarm time.<br />
SNOOZE OFF No snooze is set.<br />
ON Alarm is activated every 5 minutes, up to 7 times.<br />
ALARM SOUND 1 LOW / MID / HIGH<br />
2 LOW / MID / HIGH<br />
3 LOW / MID / HIGH<br />
Operating, shutting off and checking the alarm<br />
• Operating the alarm:<br />
Turn off the camera. The alarm only operates when the camera is off.<br />
• Shutting off the alarm:<br />
While the alarm is sounding, press any button to shut off the alarm and turn off the camera.<br />
Note that pressing o will turn the camera on.<br />
When [SNOOZE] is [OFF], the alarm stops automatically and the camera turns off after 1<br />
minute of no operation.<br />
• Checking the alarm settings:<br />
While the camera is off, press d to display the current and alarm set times. Times will be<br />
displayed for 3 seconds.<br />
VIDEO OUT...................................................................................Playing back pictures on a TV<br />
NTSC / PAL<br />
The factory default settings differ according to the region where the camera is sold.<br />
To play back camera images on a TV, set the video output according to your TV’s video signal<br />
type.<br />
• TV video signal types differ by country/region. Check the video signal type before connecting<br />
the camera to the TV.<br />
NTSC: North America, Taiwan, Korea, Japan<br />
PAL: European countries, China
Playing back pictures on a TV<br />
Turn off the camera and the TV before connecting.<br />
Multi-connector<br />
Settings on the camera<br />
Press o in playback mode to turn the<br />
camera on.<br />
• The last picture taken is displayed on the<br />
TV. Use the arrow pad to select the<br />
picture you want to display.<br />
POWER SAVE ..................................................... Setting the camera to the power save mode<br />
OFF /ON<br />
Connector cover<br />
AV cable (provided)<br />
Connect to the TV’s video<br />
input (yellow) and audio<br />
input (white) terminals.<br />
Settings on the TV<br />
Turn the TV on, and set it to video input<br />
mode.<br />
• For details of switching to video input,<br />
refer to your TV’s instruction manual.<br />
• Images and the information displayed on<br />
the screen may become cropped<br />
depending on the TV’s settings.<br />
When no operation has been performed for approximately 10 seconds while in shooting mode,<br />
the monitor automatically shuts off. Pressing the zoom button or other buttons restores the<br />
camera from power save mode.<br />
Menu operations<br />
EN 35
Printing pictures<br />
36 EN<br />
Printing pictures<br />
Direct printing (PictBridge)<br />
Using the direct printing function<br />
By connecting the camera to a PictBridge-compatible printer, you can print out pictures<br />
directly. Select the pictures you want to print and the number of prints on the camera’s monitor.<br />
To find out if your printer is compatible with PictBridge, refer to the printer’s instruction manual.<br />
What is PictBridge?<br />
A standard for connecting digital cameras and printers of different makers and printing out pictures directly.<br />
• Available printing modes, paper sizes, etc., vary depending on the printer you use. Refer<br />
to the instruction manual for your printer.<br />
• For details of printing paper types, ink cassettes, etc., refer to the printer’s instruction<br />
manual.<br />
EASY PRINT<br />
[EASY PRINT] can be used to print out the picture displayed on the monitor.<br />
The selected picture is printed using the standard settings of your printer. The date and file<br />
name are not printed.<br />
STANDARD<br />
All printers that support PictBridge have standard print settings. If [STANDARD] is selected on the settings<br />
screens (P. 38), pictures are printed according to these settings. Refer to the printer’s instruction manual for<br />
its standard settings or contact the printer manufacturer.<br />
1 In playback mode, display the picture you want to print out on the<br />
monitor.<br />
2 Turn the printer on and plug the USB cable provided with the camera into<br />
the multi-connector of the camera and the printer’s USB port.<br />
Multi-connector<br />
Connector cover<br />
USB cable<br />
• The easy print start screen is displayed.<br />
• For details of how to turn the printer on and the location of the USB port, refer to the printer’s<br />
instruction manual.
3 Press
Printing pictures<br />
38 EN<br />
Selecting a print mode<br />
PRINT MODE SELECT [ IN] ]<br />
PRINT<br />
ALL PRINT<br />
MULTI PRINT<br />
ALL INDEX<br />
EXIT MENU<br />
SET<br />
OK<br />
Setting the print paper<br />
PRINTPAPER<br />
BACK MENU<br />
[ IN] ]<br />
SIZE BORDERLESS<br />
STANDARD<br />
STANDARD<br />
SET OK<br />
Note<br />
• If the [PRINTPAPER] screen is not displayed, [SIZE], [BORDERLESS] and [PICS/SHEET] are<br />
set to the standard.<br />
Selecting the picture to print<br />
PRINT Prints the selected picture.<br />
ALL PRINT Prints all the pictures stored in the internal<br />
memory or the card.<br />
MULTI PRINT Prints one picture in multiple layout format.<br />
ALL INDEX Prints an index of all the pictures stored in the<br />
internal memory or the card.<br />
PRINT ORDER Prints the pictures according to the print<br />
reservation data on the card. If no print<br />
reservations have been made, this option is not<br />
available.<br />
g “Print settings (DPOF)” (P. 39)<br />
SIZE Choose from the available paper sizes on your<br />
printer.<br />
BORDERLESS Select with or without borders. In [MULTI PRINT]<br />
mode, you cannot print with a border.<br />
OFF ( ) The picture is printed inside a blank frame.<br />
ON ( ) The picture is printed filling the entire page.<br />
PICS/SHEET Available in [MULTI PRINT] mode only. The<br />
number of prints that can be printed vary<br />
depending on the printer.<br />
[IN IN] PRINT Prints one copy of the selected picture. When<br />
[SINGLE PRINT] or [MORE] has been selected,<br />
a single copy or more copies are printed.<br />
100-0004 SINGLE PRINT Makes a print reservation for the displayed<br />
SINGLEPRINT<br />
PRINT OK<br />
MORE<br />
MORE<br />
picture.<br />
Sets the number of prints and data to be printed<br />
for the displayed picture.<br />
Press 43 to select the picture you want to print. You can also use the zoom button and select<br />
a picture from the index display.<br />
Setting the number of prints and data to be printed<br />
PRINT INFO<br />
4 Select [OK], and press o.<br />
• Printing starts.<br />
• When printing is finished, the [PRINT MODE SELECT] screen is<br />
displayed.<br />
To cancel printing<br />
TRANSFERRING<br />
CANCEL OK<br />
Screen during data transfer<br />
5 In the [PRINT MODE SELECT] screen, press m.<br />
• A message is displayed.<br />
6 Disconnect the USB cable from the camera.<br />
7 Disconnect the USB cable from the printer.<br />
Print settings (DPOF)<br />
Press o.<br />
How to make print reservations<br />
SET OK<br />
PRINT [ IN] ]<br />
OK<br />
CANCEL<br />
BACK MENU<br />
SET OK<br />
Print reservation allows you to save printing data (the number of prints and the date and time<br />
information) with the pictures stored on the card.<br />
With print reservation, you can print out pictures easily either at home using a personal DPOFcompatible<br />
printer or at a photo store that supports DPOF. DPOF is a standard format used to<br />
record automatic print information from digital cameras.<br />
Only the images stored on the card can be reserved to print. Insert a card with recorded<br />
pictures into the camera before making print reservations.<br />
Pictures with print reservations can be printed using the following procedures.<br />
Printing using a DPOF-compatible photo store.<br />
You can print the pictures using the print reservation data.<br />
Printing using a DPOF-compatible printer.<br />
Printing is possible directly from a card containing print reservation data, without using a<br />
computer. For more details, refer to the printer’s instruction manual. A PC card adapter<br />
may also be necessary.<br />
PRINT<br />
CONTINUE<br />
CANCEL<br />
Note<br />
• DPOF reservations set by another device cannot be changed by this camera. Make changes<br />
using the original device. If a card contains DPOF reservations set by another device, entering<br />
reservations using this camera may overwrite the previous reservations.<br />
• You can make DPOF print reservations for up to 999 images per card.<br />
• Not all functions may be available on all printers, or at all photo stores.<br />
[ IN] ]<br />
Select<br />
[CANCEL], and<br />
press o.<br />
PRINT MODE SELECT [ IN] ]<br />
PRINT<br />
ALL PRINT<br />
MULTI PRINT<br />
ALL INDEX<br />
EXIT MENU<br />
SET<br />
OK<br />
Printing pictures<br />
EN 39
Printing pictures<br />
40 EN<br />
To use print services without using DPOF<br />
• Pictures stored in the internal memory cannot be printed at a photo store. The pictures need<br />
to be copied to a card before taking them.<br />
g“BACKUP Copying pictures in the internal memory to the card” (P. 31)<br />
Single-frame reservation<br />
Follow the operation guide to make a print reservation for a selected picture.<br />
1 Press m in the playback mode and display the top menu.<br />
2 Select [PRINT ORDER] [
All-frame reservation<br />
Reserves all the pictures stored on the card. The number of prints is set at one print per<br />
picture.<br />
1 Press m in the playback mode and display the top menu.<br />
2 Select [PRINT ORDER] [U], and press o.<br />
3 Select the date and time setting, and press o.<br />
NO The pictures are printed without the date and time.<br />
DATE All pictures are printed with the shooting date.<br />
TIME All pictures are printed with the shooting time.<br />
4 Select [SET], and press o.<br />
Resetting print reservation data<br />
You can reset all the print reservation data or just for selected pictures.<br />
1 Select top menu [PRINT ORDER], and press o.<br />
To reset the print reservation data for all the pictures<br />
2 Select [
Using OLYMPUS Master<br />
42 EN<br />
Using OLYMPUS Master<br />
Overview<br />
Using the USB cable provided with your camera, you can connect the camera and computer<br />
and download (transfer) the images to your computer using the OLYMPUS Master software,<br />
also provided with the camera.<br />
Prepare the following items<br />
before starting.<br />
OLYMPUS Master 2<br />
CD-ROM<br />
USB cable<br />
Computer equipped with a USB port<br />
Using OLYMPUS Master<br />
What is OLYMPUS Master?<br />
Install the OLYMPUS Master software gP. 43<br />
Connect the camera to the computer using the<br />
USB cable<br />
OLYMPUS Master is a software application for managing your digital images on your<br />
computer. Installing it on your computer lets you do the following:<br />
( Download images from the camera or other<br />
media<br />
( View images and movies<br />
• You can run a slideshow and play back sound.<br />
( Manage images<br />
• Manage images in an album or folder.<br />
Downloaded images are automatically sorted<br />
by date, allowing you to search for images<br />
quickly.<br />
( Edit images<br />
• You can rotate images, trim them and change<br />
the size.<br />
( Edit images with the filter and correction<br />
functions<br />
gP. 45<br />
Start up the OLYMPUS Master software gP. 46<br />
Download image files to the computer gP. 46<br />
Disconnect the camera from the computer gP. 47<br />
( Print images<br />
• You can easily print images.<br />
( Make panoramic images<br />
• You can make panoramic images using<br />
pictures taken in panorama mode.<br />
( Update the version of your camera’s<br />
firmware.<br />
For details of other functions and operations, refer<br />
to the “Help” guide in the OLYMPUS Master<br />
reference manual.
Install the OLYMPUS Master software<br />
Before installing the OLYMPUS Master software, please confirm that your computer is<br />
compatible with the following system requirements.<br />
For newer operating systems, please refer to the Olympus web site as shown on the back<br />
cover of this manual.<br />
Operating environment<br />
Windows<br />
OS Windows 2000 Professional/XP Home Edition/XP Professional/Vista<br />
CPU Pentium III 500 MHz or later<br />
RAM 256 MB or more<br />
Hard disk capacity 500 MB or more<br />
Monitor 1,024 × 768 pixels or more<br />
65,536 colors or more (16.77 million colors or more recommended)<br />
Other USB port or IEEE 1394 port<br />
Internet Explorer 6 or later<br />
QuickTime 7 or later recommended<br />
DirectX 9 or later recommended<br />
Note<br />
• Windows 98/98SE/Me are not supported.<br />
• Use a computer with a pre-installed operating system. Operations are not guaranteed on<br />
home-built computers or computers with an updated operating system.<br />
• Operations are not guaranteed when using an added USB port or IEEE 1394 port.<br />
• To install the software, you must log on as a user with administrators’ privileges.<br />
Macintosh<br />
OS Mac OS X v10.3 or later<br />
CPU Power PC G3 500 MHz or later<br />
Intel Core Solo/Duo 1.5 GHz or later<br />
RAM 256 MB or more<br />
Hard disk capacity 500 MB or more<br />
Monitor 1,024 × 768 pixels or more<br />
32,000 colors or more (16.77 million colors or more recommended)<br />
Other USB port or IEEE 1394 port (FireWire)<br />
Safari 1.0 or later (1.3 or later recommended)<br />
QuickTime 6 or later<br />
Note<br />
• Mac versions earlier than OS X 10.3 are not supported.<br />
• Operations are not guaranteed when using an added USB or IEEE 1394 (FireWire) port.<br />
• To install the software, you must log on as a user with administrators’ privileges.<br />
• Be sure to remove the media (drag & drop onto the trash icon) before performing the following<br />
operations. Failure to do so could result in unstable computer operation and the need to<br />
reboot.<br />
• Disconnect the cable connecting the camera to the computer<br />
• Turn off the camera<br />
• Open the camera’s battery/card compartment cover<br />
Using OLYMPUS Master<br />
EN 43
Using OLYMPUS Master<br />
44 EN<br />
Windows<br />
1 Insert the CD-ROM into the CD-ROM drive.<br />
• The OLYMPUS Master setup screen is displayed.<br />
• If the screen is not displayed, double-click the “My<br />
Computer” icon and click the CD-ROM icon.<br />
2 Select the display language and click the<br />
“OLYMPUS Master 2” button.<br />
• When the component installation screen is displayed,<br />
click “OK”.<br />
3 Click “Next” and follow the on-screen<br />
instructions.<br />
• When the OLYMPUS Master licensing agreement is<br />
displayed, read the agreement and click “Yes” to proceed<br />
with the installation.<br />
4 When the user information screen is<br />
displayed, enter your “Name”, select your<br />
“Region” and click “Next”.<br />
5 When the setup type selection screen is<br />
displayed, click “Install”.<br />
• To select the components to install, select “Custom”.<br />
• The installation begins. The screen confirming that setup<br />
is completed is displayed. Click “Close”.<br />
• Next, the screen confirming whether to install OLYMPUS<br />
muvee theaterPack Trial Version is displayed. To install<br />
this software, click “Install”.
Macintosh<br />
1 Insert the CD-ROM into the CD-ROM drive.<br />
• The CD-ROM window is displayed.<br />
• If the CD-ROM window is not displayed, double-click the CD-ROM<br />
icon on the desktop.<br />
2 Double-click the “Setup” icon on the desktop.<br />
• The OLYMPUS Master installation screen is displayed.<br />
• Follow the on-screen instructions.<br />
• When the OLYMPUS Master licensing agreement is displayed, read<br />
the agreement and click “Continue” and then “Continue” to proceed<br />
with the installation.<br />
• The screen confirming that installation is completed is displayed.<br />
• You must restart your computer before using OLYMPUS Master.<br />
Connecting the camera to a computer<br />
1 Make sure the camera is turned off.<br />
• The monitor is off.<br />
• The lens is retracted.<br />
2 Connect the multi-connector on the camera to<br />
the USB port on the computer using the<br />
provided USB cable.<br />
• Refer to your computer’s instruction manual to locate the<br />
position of the USB port.<br />
• The camera turns on automatically.<br />
• The monitor turns on and the selection screen for the USB<br />
connection is displayed.<br />
3 Select [PC], and press o.<br />
Multi-connector<br />
Monitor<br />
Connector cover<br />
USB<br />
PC<br />
EASY PRINT<br />
CUSTOM PRINT<br />
EXIT<br />
SET<br />
[ IN] ]<br />
OK<br />
Using OLYMPUS Master<br />
EN 45
Using OLYMPUS Master<br />
46 EN<br />
4 The camera is recognized by the computer.<br />
• Windows<br />
When you connect the camera to your computer for the first time, the computer attempts to<br />
recognize the camera. Click “OK” to exit the message that is displayed. The camera is<br />
recognized as a “Removable Disk”.<br />
• Macintosh<br />
The iPhoto program is the default application for managing digital images. When you connect<br />
your digital camera for the first time, the iPhoto application starts automatically, so close this<br />
application and start OLYMPUS Master.<br />
Note<br />
• The camera functions are disabled while the camera is connected to a computer.<br />
• Connecting the camera to a computer via a USB hub may cause unstable operation. In this<br />
case, do not use a hub, but connect the camera directly to the computer.<br />
• Images cannot be transferred to your computer with OLYMPUS Master if [PC] is selected in<br />
Step 3, 3 is pressed and [MTP] is selected.<br />
Start up the OLYMPUS Master software<br />
Windows<br />
1 Double-click the “OLYMPUS Master 2” icon on the desktop.<br />
Macintosh<br />
1 Double-click the “OLYMPUS Master 2” icon in the “OLYMPUS<br />
Master 2” folder.<br />
• The browse window is displayed.<br />
• When OLYMPUS Master is started up for the first time after installation, the OLYMPUS Master<br />
initial setting screen and user registration screen are displayed before the browse window.<br />
Follow the on-screen instructions.<br />
To exit OLYMPUS Master<br />
1 Click “Exit” on any window.<br />
• OLYMPUS Master is exited.<br />
Displaying camera images on a computer<br />
Downloading and saving images<br />
1 Click “Transfer Images” on the browse<br />
window, and then click “From Camera” .<br />
• The window for selecting the pictures you want to transfer from<br />
the camera is displayed. All the images in the camera are<br />
displayed.<br />
2 Select “New Album” and enter an album name.<br />
3 Select the image files and click “Transfer<br />
Images”.<br />
• A window indicating that the download is complete is displayed.
4 Click “Browse images now”.<br />
• The downloaded images are displayed in the browse window.<br />
To disconnect the camera<br />
1 Make sure that the card access lamp has stopped<br />
blinking.<br />
2 Make the following preparations for<br />
disconnecting the USB cable.<br />
Windows<br />
1 Click the “Unplug or Eject Hardware” icon in the system<br />
tray.<br />
2 Click the message that is displayed.<br />
3 When a message is displayed saying that the hardware can<br />
be ejected safely, click “OK”.<br />
Macintosh<br />
1 The trash icon changes to the eject icon when the “Untitled”<br />
or “NO_NAME” icon on the desktop is dragged. Drag and<br />
drop it on the eject icon.<br />
3 Disconnect the USB cable from the camera.<br />
Card access lamp<br />
Note<br />
• Windows: When you click “Unplug or Eject Hardware”, a warning message may be displayed.<br />
Make sure that image data is not being downloaded from the camera and that all applications<br />
are closed. Click the “Unplug or Eject Hardware” icon again and disconnect the cable.<br />
Using OLYMPUS Master<br />
EN 47
Using OLYMPUS Master<br />
48 EN<br />
Viewing still pictures and movies<br />
1 Click the “Album” tab on the browse window and<br />
select the album that you want to view.<br />
• The selected album image is displayed in the thumbnail area.<br />
2 Double-click the still picture thumbnail that you<br />
want to view.<br />
• OLYMPUS Master switches to the image edit window and the<br />
picture is enlarged.<br />
• Click “Back” to return to the browse window.<br />
To view a movie<br />
Thumbnail<br />
1 Double-click the movie thumbnail that you want to see in the browse<br />
window.<br />
• OLYMPUS Master switches to the edit window and the first frame of the movie is displayed.<br />
2 To play back the movie, click “Play” at the<br />
bottom of the screen.<br />
To download and save images to a computer without using<br />
OLYMPUS Master<br />
This camera is compatible with USB mass storage. You can connect the camera to your<br />
computer using the USB cable provided with the camera to download and save images without<br />
using OLYMPUS Master. The following environment is required to use the USB cable to<br />
connect the camera to your computer.<br />
Windows: Windows 98SE/Me/2000 Professional/XP Home Edition/XP Professional/Vista<br />
Macintosh: Mac OS 9.0 to 9.2/X<br />
Note<br />
• If your computer is running Windows 98SE, you will need to install the USB driver. Before<br />
connecting the camera to your computer with the USB cable, double-click the files from the<br />
following folders on the provided OLYMPUS Master CD-ROM.<br />
(Drive name): \win98usb\INSTALL.EXE<br />
• If your computer is running Windows Vista, you can select [PC] in Step 3 on P. 45, press 3,<br />
and select [MTP] to use Windows Photo Gallery.<br />
• Data transfer is not guaranteed in the following environments, even if your computer is<br />
equipped with a USB port.<br />
• Windows 95/98/NT 4.0<br />
• Windows 98SE upgrades from Windows 95/98<br />
• Mac OS 8.6 or earlier<br />
• Computers with a USB port added by means of an extension card, etc.<br />
• Computers without a factory-installed OS and home-built computers
To increase the number of languages<br />
Please take care that your battery is fully charged!<br />
1 Make sure that your computer is connected to the Internet.<br />
2 Plug the USB cable into the USB port on the computer.<br />
3 Plug the other end of the USB cable into the camera’s USB connector.<br />
• The camera turns on automatically.<br />
• The monitor turns on and the selection screen for the USB connection is displayed.<br />
4 Select [PC], and press o.<br />
5 In the browse window, select “Camera”, then “Update Camera/Add<br />
Display Language”.<br />
• The confirmation window for updating is displayed.<br />
6 Click “OK”.<br />
• The updating the camera window is displayed.<br />
7 Click “Add Language” in the updating<br />
camera display.<br />
• The “Add Display Language of Camera” window<br />
is displayed.<br />
8 Click and select a language.<br />
9 Click “Add”.<br />
• The new language is downloaded to your camera.<br />
Please do not remove any cable or the battery while the<br />
camera is processing.<br />
10After the download procedure the camera<br />
display will show “OK”. You can remove the cables and turn power off.<br />
After restarting the camera you will be able to choose the new language<br />
from [SET UP].<br />
Using OLYMPUS Master<br />
EN 49
Getting to know your camera better<br />
Getting to know your camera better<br />
Shooting tips and information<br />
Tips before you start taking pictures<br />
The camera does not turn on even when a battery is loaded<br />
The battery is not fully charged<br />
• Charge the battery with the charger.<br />
The battery is temporarily unable to function because of the cold<br />
• Battery performance declines in low temperatures, and the charge may not be sufficient to<br />
turn on the camera. Remove the battery and warm it by putting it in your pocket for a while.<br />
No picture is taken when the shutter button is pressed<br />
The camera is in sleep mode<br />
• To save battery power, the camera automatically goes into sleep mode and the monitor<br />
turns off if there is no operation when the camera is turned on (when the lens is extended<br />
and the monitor is on). No picture is taken even if the shutter button is fully pressed in this<br />
mode. Operate the zoom button or other buttons to restore the camera from sleep mode<br />
before taking a picture. If the camera is left for 15 minutes, it automatically turns off (the lens<br />
retracts and the monitor turns off). Press o to turn the camera on.<br />
The mode dial is set to q or P<br />
• This is the playback mode for displaying pictures on the monitor. Set the mode dial to a<br />
shooting mode.<br />
The mode dial is in the position of g<br />
• No pictures can be taken when the shooting guide is being displayed. Take pictures after<br />
setting target terms by following the shooting guide or set it to the setting other than g<br />
in shooting mode.<br />
The flash is charging<br />
• Wait until the # (flash charge) mark stops blinking before taking the picture.<br />
The memory gauge is full<br />
• No pictures can be taken when the memory gauge is full. Wait until there is space in the<br />
memory gauge.<br />
Shoot Shoot Shoot<br />
a b c d<br />
Before taking any<br />
pictures<br />
(Off)<br />
After taking one<br />
picture<br />
(Lit)<br />
The date and time have not been set<br />
After taking several<br />
pictures<br />
(Lit)<br />
Wait<br />
Maximum<br />
reached<br />
(All lit)<br />
The camera has been used in the same conditions from the time of purchase<br />
• No date and time have been set for the camera at the time of purchase. Set the date and<br />
time before using the camera.<br />
g “Turn the camera on” (P. 5)<br />
“X Setting the date and time” (P. 33)<br />
The battery has been pulled out of the camera<br />
• The date and time settings will be returned to the factory default settings if the camera is left<br />
without battery for approximately 1 day. Also, the date and time setting will be canceled<br />
earlier than this if the battery has been in the camera for a short period of time. Before taking<br />
50 EN important pictures, check that the date and time settings are correct.
Shooting tips<br />
Focusing on the subject<br />
There are several ways to focus, depending on the subject.<br />
When the subject is not in the center of the frame<br />
• Place the subject in the center of the frame, lock the focus on the subject, and then<br />
recompose your picture.<br />
• Set [AF MODE] to [iESP].<br />
g “AF MODE Changing the focusing area” (P. 23)<br />
The subject is moving quickly<br />
• Focus the camera on a point roughly the same distance away as the subject you want to<br />
shoot and lock the focus (by pressing the shutter button halfway). Then recompose your<br />
picture and press the shutter button completely as the subject enters the frame.<br />
Subjects that are difficult to focus on<br />
• Under certain types of conditions, it is difficult to focus using auto focus. The green lamp on<br />
the monitor lights, allowing you to check if the focus is locked.<br />
The green lamp<br />
blinks.<br />
The subject cannot be<br />
brought into focus.<br />
The green lamp lights,<br />
but the subject cannot<br />
be brought into focus.<br />
Subject with low<br />
contrast<br />
Subjects at different<br />
distances<br />
Subject with an<br />
extremely bright area<br />
in the center of the<br />
frame<br />
Subject without<br />
vertical lines<br />
Fast-moving subject The subject is not in<br />
the center of the frame<br />
In these cases, focus (focus lock) on an object with high contrast at the same distance as<br />
the intended subject, recompose your shot and then take the picture. If the subject has no<br />
vertical lines, hold the camera vertically and focus the camera using the focus lock function<br />
by pressing the shutter button halfway, and then return the camera to the horizontal position<br />
while keeping the button pressed halfway and take the picture.<br />
Prevent blur by using image stabilization<br />
Be sure to hold the camera firmly with both hands and press the shutter button slowly so as to<br />
avoid moving the camera. You can also reduce the blurring by pressing h before shooting<br />
the picture.<br />
g “h button Shooting pictures using the image stabilizer” (P. 15)<br />
The digital images are not stabilized when:<br />
• images are shot at a high-magnification zoom setting, i.e. using both optical zoom and digital<br />
zoom functions,<br />
• the object is dark and the shutter speed is slow, or<br />
• scene modes where the flash is turned off and/or the shutter speed is slow.<br />
Getting to know your camera better<br />
EN 51
Getting to know your camera better<br />
52 EN<br />
Taking stabilized pictures without the flash<br />
The flash is activated automatically when there is insufficient light, or when the camera is<br />
shaken. To take pictures with no flash in dark places, set the flash mode to [$] and set as<br />
follows:<br />
Increase the [ISO] setting<br />
g “ISO Changing the ISO sensitivity” (P. 22)<br />
The picture is too grainy<br />
There are several factors that can cause the picture to appear grainy.<br />
Using the digital zoom to take close-up pictures<br />
• With the digital zoom, part of the image is cropped and enlarged. The greater the<br />
magnification, the grainier the picture appears.<br />
g “DIGITAL ZOOM Zooming in on your subject” (P. 23)<br />
Increasing the ISO sensitivity<br />
• When you increase the [ISO] setting, “noise”, which appears as spots of unwanted color or<br />
unevenness in the color, can be introduced and give the picture a grainy appearance. This<br />
camera is equipped with a function to allow shooting at high sensitivity while suppressing<br />
noise; however, increasing the ISO sensitivity can result in some noise, depending on the<br />
shooting conditions.<br />
g “ISO Changing the ISO sensitivity” (P. 22)<br />
Taking pictures with the correct color<br />
• The reason why there are sometimes differences between the actual colors and the colors<br />
recorded in a picture is related to the light source illuminating the subject. [WB] is the<br />
function that helps the camera determine the true colors. Normally, the [AUTO] setting<br />
provides the optimal white balance, but depending on the subject, results may be better if<br />
you manually adjust the [WB] setting.<br />
• When the subject is in the shade on a sunny day<br />
• When the subject is illuminated by both natural light and indoor lighting, such as when<br />
near a window<br />
• When there is no white in the center of the frame<br />
g “WB Adjusting the color of a picture” (P. 22)<br />
Taking pictures of a white beach or snow scene<br />
• Take pictures with K in s mode. Suitable for taking pictures on a sunny day at the<br />
beach or in the snow.<br />
g “s (Scene) Selecting a scene mode according to the shooting situation” (P. 21)<br />
• Often, bright subjects (such as snow) turn out darker than their natural colors. Use 1F to<br />
adjust toward [+] to make these subjects closer to their true shades. Conversely, when you<br />
are shooting dark subjects, it can be effective to adjust toward the [–]. Sometimes, using the<br />
flash may not produce the brightness (exposure) that was intended.<br />
g “1F button Changing picture brightness” (P. 14)<br />
Taking pictures of a subject against backlight<br />
• With [ESP/n] set to [n], the picture can be taken based on the brightness at the center<br />
of the monitor without being affected by the light in the background.<br />
g “ESP/n Changing the area for measuring the brightness of a subject” (P. 23)<br />
• Set the flash to [#] to activate fill-in-flash. You can shoot a subject against backlight without<br />
the face of the subject appearing dark. [#] is effective for shooting against backlight and<br />
under fluorescent and other artificial lighting.<br />
g “3# button Flash shooting” (P. 15)
Additional shooting tips and information<br />
Increasing the number of pictures that can be taken<br />
There are two ways to record the pictures you take with this camera.<br />
Recording pictures to the internal memory<br />
• Pictures are recorded to the internal memory, and when the number of storable still pictures<br />
reaches 0, you must connect the camera to a computer to download the pictures, and then<br />
erase the pictures from the internal memory.<br />
Using a card (optional)<br />
• Pictures are recorded to the card when inserted in the camera. When the card is full, you<br />
download the pictures to a computer, and then either erase the pictures from the card or use<br />
a new card.<br />
• Pictures are not recorded to the internal memory when a card is inserted in the camera.<br />
Pictures in the internal memory can be copied to the card using the [BACKUP] function.<br />
g “BACKUP Copying pictures in the internal memory to the card” (P. 31)<br />
“The card” (P. 61)<br />
Number of storable still pictures and recording length of movies<br />
Still pictures<br />
Image quality Image size Number of storable still pictures<br />
Internal memory Using a 512 MB card<br />
Movie<br />
With sound Without<br />
sound<br />
With sound Without<br />
sound<br />
SHQ 3072 × 2304 4 4 145 147<br />
HQ 3072 × 2304 8 8 287 293<br />
SQ1<br />
2560 × 1920 12 12 409 420<br />
2304 × 1728 14 15 499 515<br />
2048 × 1536 18 19 626 652<br />
1600 × 1200 22 23 743 779<br />
SQ2<br />
1280 × 960<br />
1024 × 768<br />
33<br />
49<br />
36<br />
55<br />
1141<br />
1681<br />
1229<br />
1879<br />
640 × 480 75 90 2458 2905<br />
16:9 1920 × 1080 27 28 913 968<br />
Image quality Image size Recording length<br />
Internal memory Using a 512 MB card<br />
SHQ<br />
HQ<br />
SQ<br />
Using a new card<br />
640 × 480<br />
(15 frames/sec.)<br />
320 × 240<br />
(15 frames/sec.)<br />
160 × 120<br />
(15 frames/sec.)<br />
16 sec. 9 min. 18 sec.<br />
38 sec. 21 min. 47 sec.<br />
1 min. 35 sec. 53 min. 45 sec.<br />
• If you use a non-Olympus card or a card used for another application, such as for a<br />
computer, the message [CARD ERROR] is displayed. To use this card with this camera, use<br />
the [FORMAT] function to format the card.<br />
g “MEMORY FORMAT (FORMAT) Formatting the internal memory or card” (P. 30)<br />
Getting to know your camera better<br />
EN 53
Getting to know your camera better<br />
54 EN<br />
Lamp indicators<br />
This camera uses several lamps to indicate the camera status.<br />
Lamp Status<br />
Self-timer lamp The lamp lights for approximately 10 seconds, blinks for approximately<br />
2 seconds, and then the picture is taken.<br />
Card access lamp Blinking: An image or movie is being recorded or downloaded (when<br />
connected to a computer).<br />
• Do not do any of the following while the card access lamp is blinking.<br />
Doing so may prevent the image data from being saved and render<br />
the internal memory or card unusable.<br />
• Open the battery/card compartment cover.<br />
• Remove the battery.<br />
• Connect or disconnect the AC adapter.<br />
Green lamp of the monitor Lit: The focus and exposure are locked.<br />
Blinking: The focus and exposure are not locked.<br />
• Release your finger from the shutter button, re-position the AF target<br />
mark on the subject and press the shutter button halfway again.<br />
Extending the useful life of the battery<br />
• Performing any of the following operations when not actually taking pictures can deplete the<br />
battery power.<br />
• Repeatedly pressing the shutter button halfway<br />
• Repeatedly using the zoom<br />
• To minimize the battery consumption, set [POWER SAVE] to [ON] and turn off the camera<br />
whenever it is not in use.<br />
g “POWER SAVE Setting the camera to the power save mode” (P. 35)<br />
Functions that cannot be selected from menus<br />
• Some items may not be selectable from the menus when using the arrow pad.<br />
• Items that cannot be set with the current shooting mode<br />
• Items that cannot be set because of an item that has already been set:<br />
[%], Flash Mode, etc.<br />
• Items used to edit pictures taken with another camera.<br />
• Some functions cannot be used when there is no card in the camera.<br />
[PANORAMA], [PRINT ORDER], [FORMAT], [BACKUP]<br />
Selecting the appropriate image quality<br />
A record mode expresses a combination of desired image size and compression level. Use<br />
the following examples to help determine the optimal record mode when shooting.<br />
To make high quality prints on full-size paper such as A3/To edit and process images<br />
on a computer<br />
• [SHQ] or [HQ]<br />
To print A3/A4-size images<br />
• [SQ1]<br />
To print postcard-size images/To send as an e-mail attachment or post on a web site<br />
• [SQ2]<br />
To express the broadness of a subject such as landscapes/To view pictures on a widescreen<br />
television<br />
• [16:9]<br />
g “IMAGE QUALITY Changing the image quality” (P. 20)
Restoring default settings<br />
• This camera retains the settings (except for s) even after the power is turned off. To<br />
return the settings to default settings, execute [RESET].<br />
g “RESET Restoring default settings” (P. 21)<br />
Confirming the exposure when the monitor is difficult to see outdoors<br />
The monitor may be difficult to see and the exposure difficult to confirm when shooting<br />
outdoors.<br />
Press d repeatedly to display the histogram<br />
• Set the exposure so that the graph is concentrated on the outer edges and the graph is<br />
balanced on both sides.<br />
How to read the histogram<br />
1 If the peak fills too much of the frame, the image will appear<br />
mostly black.<br />
2 If the peak fills too much of the frame, the image will appear<br />
mostly white.<br />
3 The part indicated in green in the histogram shows the luminance<br />
distribution within the AF target mark.<br />
g “d button Changing the information on display/Display the menu guide/Checking the time”<br />
(P. 17)<br />
Playback help and troubleshooting tips<br />
The red-eye cannot be fixed<br />
• Depending on the picture, the red-eye may not be fixed. Also, parts except the eye may be<br />
fixed.<br />
Playback tips<br />
Playing back the picture in the internal memory<br />
• When a card has been inserted in the camera, the picture in the internal memory cannot be<br />
played back. Pull out the card before operating the camera.<br />
Understanding the settings and other information of pictures taken<br />
• Play back a picture, and press d. Press d repeatedly to change the amount of<br />
information displayed.<br />
g “d button Changing the information on display/Display the menu guide/Checking the time”<br />
(P. 17)<br />
Quickly displaying a desired picture<br />
• Press W on the zoom button to view the pictures as thumbnails (index display) or in a<br />
calendar format (calendar display).<br />
g “Zoom button Zooming while shooting/close-up playback” (P. 13)<br />
Erasing sound recorded to still pictures<br />
• Once sound is added to a picture, it is not possible to erase the sound. In this case, make a<br />
re-recording with silence. Sound recording is not possible if there is insufficient space in the<br />
internal memory or on the card.<br />
g “R Adding sound to still pictures” (P. 29)<br />
3<br />
1<br />
2<br />
Getting to know your camera better<br />
EN 55
Getting to know your camera better<br />
56 EN<br />
Viewing pictures on a computer<br />
Viewing the entire picture on a computer screen<br />
The size of the picture displayed on a computer screen changes depending on the computer<br />
settings. When the monitor setting is 1,024 × 768 and you are using Internet Explorer to view<br />
a picture with an image size of 2,048 × 1,536 at 100%, the entire picture cannot be viewed<br />
without scrolling. There are several ways you can view the entire picture on the computer<br />
screen.<br />
View the picture using image browsing software<br />
• Install the OLYMPUS Master software from the provided CD-ROM.<br />
Change the monitor setting<br />
• The icons on the computer desktop may be rearranged. For details of changing the settings<br />
on your computer, refer to the computer’s instruction manual.
When you get an error message on the camera...<br />
Monitor indication Possible cause Corrective action<br />
q<br />
CARD ERROR<br />
q<br />
WRITE-PROTECT<br />
><br />
MEMORY FULL<br />
q<br />
CARD FULL<br />
L<br />
NO PICTURE<br />
r<br />
PICTURE ERROR<br />
r<br />
THE IMAGE<br />
CANNOT BE<br />
EDITED<br />
CARD-COVER<br />
OPEN<br />
g<br />
BATTERY EMPTY<br />
CARD SETUP<br />
POWER OFF<br />
FORMAT<br />
MEMORY SETUP<br />
SET OK<br />
NO CONNECTION<br />
NO PAPER<br />
[IN]<br />
POWER OFF<br />
MEMORY FORMAT<br />
SET OK<br />
There is a problem with the<br />
card.<br />
Writing to the card is<br />
prohibited.<br />
The internal memory has no<br />
available memory and<br />
cannot store any new data.<br />
The card has no available<br />
memory and cannot store<br />
any new data.<br />
There are no pictures in the<br />
internal memory or on the<br />
card.<br />
There is a problem with the<br />
selected picture and it cannot<br />
be played back on this<br />
camera.<br />
Pictures taken by other<br />
cameras, taken in [16:9], or<br />
previously edited or<br />
corrected pictures cannot be<br />
edited or fixed.<br />
The battery/card<br />
compartment cover is open.<br />
The battery is empty. Charge the battery.<br />
This card cannot be used in<br />
this camera. Or, the card is<br />
not formatted.<br />
There is an error in the<br />
internal memory.<br />
The camera is not connected<br />
to the computer or printer<br />
correctly.<br />
There is no paper in the<br />
printer.<br />
This card cannot be used. Insert a new card.<br />
The recorded image has been protected<br />
(read-only) on a computer. Download the<br />
image to a computer and cancel the readonly<br />
setting.<br />
Insert a card or erase unwanted data.<br />
Before erasing, back up the data of<br />
important pictures using the card, or<br />
download such pictures to a computer.<br />
Replace the card or erase unwanted data.<br />
Before erasing, download important<br />
pictures to a computer.<br />
The internal memory or the card contains no<br />
pictures.<br />
Record pictures.<br />
Use image processing software to view the<br />
picture on a computer. If that cannot be<br />
done, the image file is damaged.<br />
Use image processing software to edit the<br />
pictures.<br />
Close the battery/card compartment cover.<br />
Format the card or replace.<br />
• Select [POWER OFF] and press o.<br />
Insert a new card.<br />
• Select [FORMAT] [YES] and press o.<br />
All data on the card is erased.<br />
Select [MEMORY FORMAT] [YES] and<br />
press o. All data in the internal memory is<br />
erased.<br />
Disconnect the camera and connect it again<br />
correctly.<br />
Load some paper in the printer.<br />
Getting to know your camera better<br />
EN 57
Getting to know your camera better<br />
58 EN<br />
Monitor indication Possible cause Corrective action<br />
NO INK<br />
JAMMED<br />
SETTINGS<br />
CHANGED<br />
PRINT ERROR<br />
r<br />
CANNOT PRINT<br />
Some functions cannot be set in certain shooting modes. For more details, refer to the table<br />
below.<br />
indicates a restriction to the respective function of each s mode.<br />
g “Functions with restrictions in shooting scenes” (P. 59)<br />
Functions available in shooting modes<br />
The printer has run out of ink. Replace the ink cartridge in the printer.<br />
The paper is jammed. Remove the jammed paper.<br />
The printer’s paper tray has<br />
been removed or the printer<br />
has been operated while<br />
changing settings on the<br />
camera.<br />
There is a problem with the<br />
printer and/or camera.<br />
Pictures recorded on other<br />
cameras may not be printed<br />
on this camera.<br />
Do not operate the printer while changing<br />
settings on the camera.<br />
Turn off the camera and printer. Check the<br />
printer and remedy any problems before<br />
turning the power on again.<br />
Use a computer to print.<br />
Functions available in shooting modes and scene modes<br />
Function<br />
Shooting mode<br />
P<br />
K<br />
AUTO<br />
s n<br />
F <br />
# —<br />
&/% <br />
Y <br />
Image stabilizer —<br />
Optical zoom *<br />
WB — <br />
ISO — —<br />
DRIVE — —<br />
ESP/n — <br />
IMAGE QUALITY <br />
SILENT MODE <br />
DIGITAL ZOOM — <br />
AF MODE — —<br />
R — —<br />
PANORAMA — —<br />
* The optical zoom is not available during movie recording. Set [DIGITAL ZOOM] to [ON] to enable<br />
the zoom function for shooting.
Functions with restrictions in shooting scenes<br />
s B<br />
C<br />
F<br />
K<br />
D<br />
V<br />
N<br />
G<br />
U<br />
W<br />
c<br />
*1 Excluding [!].<br />
*2 [%] is not available.<br />
*3 AF lock is on.<br />
*4 [W] cannot be selected.<br />
*5 Only a image quality at [2048 × 1536] or lower is available.<br />
*6 The image quality is fixed to [640 × 480].<br />
R S X P<br />
d<br />
i e f k<br />
H l<br />
Function<br />
# — — — — — — *1 <br />
&/% *2 *2 *2 *2 — — —<br />
Y — — — *3 —<br />
Optical zoom — —<br />
ISO — — — — — — — — — — — <br />
DRIVE *4 *4 — — *4 — — *4 — — — *4 *4<br />
ESP/n — <br />
IMAGE QUALITY *5 — *6 *5 <br />
DIGITAL ZOOM — — — —<br />
AF MODE — — —<br />
R — — — <br />
PANORAMA — — — — <br />
Getting to know your camera better<br />
EN 59
Appendix<br />
60 EN<br />
Appendix<br />
Camera care<br />
Cleaning the camera<br />
Exterior:<br />
• Wipe gently with a soft cloth. If the camera is very dirty, soak the cloth in mild soapy water and wring well.<br />
Wipe the camera with the damp cloth and then dry it with a dry cloth. If you have used the camera at the<br />
beach, use a cloth soaked in clean water and wrung well.<br />
Monitor:<br />
• Wipe gently with a soft cloth.<br />
Lens:<br />
• Blow dust off the lens with a commercial blower, then wipe gently with a lens cleaner.<br />
Battery/Charger:<br />
• Wipe gently with a soft, dry cloth.<br />
Note<br />
• Do not use strong solvents such as benzene or alcohol, or chemically treated cloth.<br />
• Mold may form on the lens surface if the lens is left dirty.<br />
Storage<br />
• When storing the camera for extended periods, remove the battery, AC adapter and card, and keep in a<br />
cool, dry place that is well ventilated.<br />
• Periodically insert the battery and test the camera functions.<br />
Note<br />
• Avoid leaving the camera in places where chemical products are handled since this may result<br />
in corrosion.<br />
Battery and charger<br />
( This camera uses one Olympus lithium ion battery (LI-42B or LI-40B). No other type of batteries<br />
can be used.<br />
( Power consumption by the camera varies depending on which functions are used.<br />
( During the conditions described below, power is consumed continuously and the battery becomes<br />
exhausted quickly.<br />
• The zoom is used repeatedly.<br />
• The shutter button is pressed halfway repeatedly in shooting mode, activating the auto focus.<br />
• A picture is displayed on the monitor for an extended period of time.<br />
• The camera is connected to a computer or printer.<br />
( Using an exhausted battery may cause the camera to turn off without displaying the battery level<br />
warning.<br />
( The rechargeable battery is not fully charged at the time of purchase. Charge the battery fully with<br />
the LI-40C charger before use.<br />
( The provided rechargeable battery usually takes approximately 5 hours to charge.<br />
( This camera uses a charger specified by Olympus. Do not use any other type of charger.<br />
( The charger can be used within the range of AC 100 V to AC 240 V (50/60 Hz). When using the<br />
charger abroad, you may need a plug adapter to convert the plug to the shape of the AC wall<br />
outlet. For details, ask at your local electrical shop or travel agent.<br />
( Do not use travel voltage converters as they could damage your charger.
Useful use of the accessories<br />
The card<br />
Pictures can be recorded on the optional card.<br />
The internal memory and card are the camera’s media for recording pictures, similar to film in a film camera.<br />
Pictures recorded to the internal memory or card can be easily erased on the camera or processed using a<br />
computer.<br />
Unlike portable storage media, the internal memory cannot be removed or exchanged.<br />
The number of recordable pictures can be increased by using a card with a larger capacity.<br />
1 Index area<br />
You can use this space to write the contents of the card.<br />
2 Contact area<br />
The part where the data transferred from the camera enters the card.<br />
Compatible cards<br />
xD-Picture Card 16MB – 2GB (TypeH/M, Standard)<br />
Using the internal memory or card<br />
You can confirm on the monitor whether the internal memory or card is being used during shooting and<br />
playback operations.<br />
Shooting mode Playback mode<br />
P<br />
[<br />
]<br />
HQ 3072 3072×2304 2304<br />
[IN IN]<br />
4<br />
[IN IN]<br />
Memory indicator<br />
[IN]: When using the internal memory<br />
[xD]: When using a card<br />
HQ<br />
'07.07.26 12:30<br />
100-0004<br />
4<br />
1<br />
2<br />
Appendix<br />
EN 61
Appendix<br />
62 EN<br />
Inserting and removing the card<br />
1 Turn off the camera.<br />
2 Open the battery/card compartment<br />
cover.<br />
Inserting the card<br />
3 Orient the card as shown, and insert it<br />
into the card slot as shown in the<br />
illustration.<br />
• Insert the card straight in.<br />
• Insert the card until it clicks into place.<br />
Removing the card<br />
4 Push the card all the way in and release slowly.<br />
• The card protrudes slightly and stops. • Grasp the card and remove.<br />
5 Close the battery/card compartment<br />
cover.<br />
Notch<br />
Battery/card compartment cover<br />
Contact area
Note<br />
• Do not open the battery/card compartment cover while the card<br />
access lamp is blinking, as this indicates that data is being read<br />
or written. Doing so may damage the data in the internal memory<br />
or the card and render the internal memory or card unusable.<br />
AC adapter<br />
An AC adapter is useful for time-consuming tasks such as image downloads to a computer or<br />
when running a slideshow for a long period of time. To use an AC adapter for this camera, the<br />
multi-adapter (CB-MA1/accessory) is required.<br />
Do not use any other AC adapter with this camera.<br />
SAFETY PRECAUTIONS<br />
Weatherproof feature<br />
This camera is weatherproof, but it cannot be used underwater. Olympus will not assume any<br />
responsibility for malfunction of the camera caused by water getting inside as a result of<br />
misuse by the user. The camera is weatherproof and is not damaged by water spray from any<br />
direction.<br />
Observe the following precautions when using the camera.<br />
( Do not wash the camera<br />
with water.<br />
Water may get inside the camera if the battery/card compartment cover or connector<br />
cover are not firmly closed.<br />
Battery/Card Compartment Cover<br />
( Do not drop the camera<br />
into water.<br />
( Do not take pictures<br />
underwater.<br />
Card access lamp<br />
Connector<br />
Cover<br />
( If the camera gets splashed, wipe the water off as soon as possible with a dry cloth.<br />
( Do not open or close the battery/card compartment cover or connector cover while the<br />
camera is wet.<br />
( The rechargeable battery and other camera accessories are not weatherproof.<br />
Appendix<br />
EN 63
Appendix<br />
64 EN<br />
General Precautions<br />
CAUTION<br />
RISK OF ELECTRIC SHOCK<br />
DO NOT OPEN<br />
CAUTION: TO REDUCE THE RISK OF ELECTRICAL SHOCK, DO NOT<br />
REMOVE COVER (OR BACK). NO USER-SERVICEABLE PARTS INSIDE.<br />
REFER SERVICING TO QUALIFIED OLYMPUS SERVICE PERSONNEL.<br />
An exclamation mark enclosed in a triangle alerts you to important operating and<br />
maintenance instructions in the documentation provided with the product.<br />
DANGER If the product is used without observing the information given under this symbol, serious<br />
injury or death may result.<br />
WARNING If the product is used without observing the information given under this symbol, injury or<br />
death may result.<br />
CAUTION If the product is used without observing the information given under this symbol, minor<br />
personal injury, damage to the equipment, or loss of valuable data may result.<br />
WARNING!<br />
TO AVOID THE RISK OF FIRE OR ELECTRICAL SHOCK, NEVER DISASSEMBLE, EXPOSE<br />
THIS PRODUCT TO WATER OR OPERATE IN A HIGH HUMIDITY ENVIRONMENT.<br />
Read All Instructions — Before you use the product, read all operating instructions. Save all<br />
manuals and documentation for future reference.<br />
Cleaning — Always unplug this product from the wall outlet before cleaning. Use only a damp cloth<br />
for cleaning. Never use any type of liquid or aerosol cleaner, or any type of organic solvent to clean<br />
this product.<br />
Attachments — For your safety, and to avoid damaging the product, use only accessories<br />
recommended by Olympus.<br />
Water and Moisture — For precautions on products with weatherproof designs, read the<br />
weatherproofing sections.<br />
Location — To avoid damage to the product, mount the product securely on a stable tripod, stand,<br />
or bracket.<br />
Power Source — Connect this product only to the power source described on the product label.<br />
Lightning — If a lightning storm occurs while using an AC adapter, remove it from the wall outlet<br />
immediately.<br />
Foreign Objects — To avoid personal injury, never insert a metal object into the product.<br />
Heat — Never use or store this product near any heat source such as a radiator, heat register, stove,<br />
or any type of equipment or appliance that generates heat, including stereo amplifiers.
Handling the Camera<br />
WARNING<br />
( Do not use the camera near flammable or explosive gases.<br />
( Do not use the flash and LED on people (infants, small children, etc.) at<br />
close range.<br />
• You must be at least 1 m (3 ft.) away from the faces of your subjects. Firing the flash too close<br />
to the subject’s eyes could cause a momentary loss of vision.<br />
( Keep young children and infants away from the camera.<br />
• Always use and store the camera out of the reach of young children and infants to prevent the<br />
following dangerous situations which could cause serious injury:<br />
• Becoming entangled in the camera strap, causing strangulation.<br />
• Accidentally swallowing the battery, cards or other small parts.<br />
• Accidentally firing the flash into their own eyes or those of another child.<br />
• Accidentally being injured by the moving parts of the camera.<br />
( Do not look at the sun or strong lights with the camera.<br />
( Do not use or store the camera in dusty or humid places.<br />
( Do not cover the flash with a hand while firing.<br />
CAUTION<br />
( Stop using the camera immediately if you notice any unusual odors,<br />
noise, or smoke around it.<br />
• Never remove the batteries with bare hands, which may cause a fire or burn your hands.<br />
( Never hold or operate the camera with wet hands.<br />
( Do not leave the camera in places where it may be subject to extremely<br />
high temperatures.<br />
• Doing so may cause parts to deteriorate and, in some circumstances, cause the camera to<br />
catch fire. Do not use the charger or AC adapter if it is covered (such as a blanket). This could<br />
cause overheating, resulting in fire.<br />
( Handle the camera with care to avoid getting a low-temperature burn.<br />
• When the camera contains metal parts, overheating can result in a low-temperature burn. Pay<br />
attention to the following:<br />
• When used for a long period, the camera will get hot. If you hold on to the camera in this<br />
state, a low-temperature burn may be caused.<br />
• In places subject to extremely cold temperatures, the temperature of the camera’s body may<br />
be lower than the environmental temperature. If possible, wear gloves when handling the<br />
camera in cold temperatures.<br />
( Be careful with the strap.<br />
• Be careful with the strap when you carry the camera. It could easily catch on stray objects -<br />
and cause serious damage.<br />
Battery Handling Precautions<br />
Follow these important guidelines to prevent batteries from leaking, overheating, burning,<br />
exploding, or causing electrical shocks or burns.<br />
DANGER<br />
• The camera uses a lithium ion battery specified by Olympus. Charge the battery with the specified<br />
charger. Do not use any other chargers.<br />
• Never heat or incinerate batteries.<br />
• Take precautions when carrying or storing batteries to prevent them from coming into contact with<br />
any metal objects such as jewelry, pins, fasteners, etc.<br />
• Never store batteries where they will be exposed to direct sunlight, or subjected to high<br />
temperatures in a hot vehicle, near a heat source, etc.<br />
Appendix<br />
EN 65
Appendix<br />
66 EN<br />
• To prevent causing battery leaks or damaging their terminals, carefully follow all instructions<br />
regarding the use of batteries. Never attempt to disassemble a battery or modify it in any way, by<br />
soldering, etc.<br />
• If battery fluid gets into your eyes, flush your eyes immediately with clear, cold running water and<br />
seek medical attention immediately.<br />
• Always store batteries out of the reach of small children. If a child accidentally swallows a battery,<br />
seek medical attention immediately.<br />
WARNING<br />
• Keep batteries dry at all times.<br />
• To prevent batteries from leaking, overheating, or causing a fire or explosion, use only batteries<br />
recommended for use with this product.<br />
• Insert the battery carefully as described in the operating instructions.<br />
• If rechargeable batteries have not been recharged within the specified time, stop charging them and<br />
do not use them.<br />
• Do not use a battery if it is cracked or broken.<br />
• If a battery leaks, becomes discolored or deformed, or becomes abnormal in any other way during<br />
operation, stop using the camera.<br />
• If a battery leaks fluid onto your clothing or skin, remove the clothing and flush the affected area with<br />
clean, running cold water immediately. If the fluid burns your skin, seek medical attention<br />
immediately.<br />
• Never subject batteries to strong shocks or continuous vibration.<br />
CAUTION<br />
• Before loading, always inspect the battery carefully for leaks, discoloration, warping, or any other<br />
abnormality.<br />
• The battery may become hot during prolonged use. To avoid minor burns, do not remove it<br />
immediately after using the camera.<br />
• Always unload the battery from the camera before storing the camera for a long period.<br />
Caution for Usage Environment<br />
• To protect the high-precision technology contained in this product, never leave the camera in the places<br />
listed below, no matter if in use or storage:<br />
• Places where temperatures and/or humidity are high or go through extreme changes. Direct sunlight,<br />
beaches, locked cars, or near other heat sources (stove, radiator, etc.) or humidifiers.<br />
• In sandy or dusty environments.<br />
• Near flammable items or explosives.<br />
• In wet places, such as bathrooms or in the rain. When using products with weatherproof designs, read<br />
their manuals as well.<br />
• In places prone to strong vibrations.<br />
• Never drop the camera or subject it to severe shocks or vibrations.<br />
• When mounted on a tripod, adjust the position of the camera with the tripod head. Do not twist the camera.<br />
• Do not touch electric contacts on cameras.<br />
• Do not leave the camera pointed directly at the sun. This may cause lens or shutter curtain damage, color<br />
failure, ghosting on the CCD, or may possibly cause fires.<br />
• Do not push or pull severely on the lens.<br />
• Before storing the camera for a long period, remove the battery. Select a cool, dry location for storage to<br />
prevent condensation or mold from forming inside the camera. After storage, test the camera by turning it<br />
on and pressing the shutter release button to make sure that it is operating normally.<br />
• Always observe the operating environment restrictions described in the camera’s manual.
Battery Handling Precautions<br />
• This camera uses a lithium ion battery specified by Olympus. Do not use any other type of battery. For safe<br />
and proper use, read the battery’s instruction manual carefully before using it.<br />
• If the battery’s terminals get wet or greasy, camera contact failure may result. Wipe the battery well with a<br />
dry cloth before use.<br />
• Always charge a battery when using it for the first time, or if it has not been used for a long period.<br />
• When operating the camera with battery power at low temperatures, try to keep the camera and spare<br />
battery as warm as possible. A battery that has run down at low temperatures may be restored after it is<br />
warmed at room temperature.<br />
• The number of pictures you can take may vary depending on the shooting conditions or battery.<br />
• Before going on a long trip, and especially before traveling abroad, purchase extra batteries. A<br />
recommended battery may be difficult to obtain while traveling.<br />
• Please recycle batteries to help save our planet’s resources. When you throw away dead batteries, be sure<br />
to cover their terminals and always observe local laws and regulations.<br />
Monitor<br />
• Do not push the monitor forcibly; otherwise the image may become vague, resulting in a playback mode<br />
failure or damage to the monitor.<br />
• A strip of light may appear on the top/bottom of the monitor, but this is not a malfunction.<br />
• When a subject is viewed diagonally in the camera, the edges may appear zigzagged on the monitor. This<br />
is not a malfunction; it will be less noticeable in playback mode.<br />
• In places subject to low temperatures, the monitor may take a long time to turn on or its color may change<br />
temporarily. When using the camera in extremely cold places, it is a good idea to occasionally place it in a<br />
warm place. A monitor exhibiting poor performance due to low temperatures will recover in normal<br />
temperatures.<br />
• The LCD used for the monitor is made with high-precision technology. However, black spots or bright spots<br />
of light may appear constantly on the Monitor. Due to its characteristics or the angle at which you are<br />
viewing the monitor, the spot may not be uniform in color and brightness. This is not a malfunction.<br />
Legal and Other Notices<br />
• Olympus makes no representations or warranties regarding any damages, or benefit expected by using this<br />
unit lawfully, or any request from a third person, which are caused by the inappropriate use of this product.<br />
• Olympus makes no representations or warranties regarding any damages or any benefit expected by using<br />
this unit lawfully which are caused by erasing picture data.<br />
Disclaimer of Warranty<br />
• Olympus makes no representations or warranties, either expressed or implied, by or concerning any content<br />
of these written materials or software, and in no event shall be liable for any implied warranty of<br />
merchantability or fitness for any particular purpose or for any consequential, incidental or indirect damages<br />
(including but not limited to damages for loss of business profits, business interruption and loss of business<br />
information) arising from the use or inability to use these written materials or software or equipment. Some<br />
countries do not allow the exclusion or limitation of liability for consequential or incidental damages, so the<br />
above limitations may not apply to you.<br />
• Olympus reserves all rights to this manual.<br />
Warning<br />
Unauthorized photographing or use of copyrighted material may violate applicable copyright laws. Olympus<br />
assumes no responsibility for unauthorized photographing, use or other acts that infringe upon the rights of<br />
copyright owners.<br />
Copyright Notice<br />
All rights reserved. No part of these written materials or this software may be reproduced or used in any form<br />
or by any means, electronic or mechanical, including photocopying and recording or the use of any type of<br />
information storage and retrieval system, without the prior written permission of Olympus. No liability is<br />
assumed with respect to the use of the information contained in these written materials or software, or for<br />
damages resulting from the use of the information contained therein. Olympus reserves the right to alter the<br />
features and contents of this publication or software without obligation or advance notice.<br />
Appendix<br />
EN 67
Appendix<br />
68 EN<br />
FCC Notice<br />
• Radio and Television Interference<br />
• Changes or modifications not expressly approved by the manufacturer may void the user’s authority to<br />
operate this equipment. This equipment has been tested and found to comply with the limits for a Class B<br />
digital device, pursuant to Part 15 of the FCC Rules. These limits are designed to provide reasonable<br />
protection against harmful interference in a residential installation.<br />
• This equipment generates, uses, and can radiate radio frequency energy and, if not installed and used in<br />
accordance with the instructions, may cause harmful interference to radio communications.<br />
• However, there is no guarantee that interference will not occur in a particular installation. If this equipment<br />
does cause harmful interference to radio or television reception, which can be determined by turning the<br />
equipment off and on, the user is encouraged to try to correct the interference by one or more of the<br />
following measures:<br />
- Adjust or relocate the receiving antenna.<br />
- Increase the distance between the camera and receiver.<br />
- Connect the equipment to an outlet on a circuit different from that to which the receiver is connected.<br />
- Consult your dealer or an experienced radio/TV technician for help. Only the OLYMPUS-supplied USB<br />
cable should be used to connect the camera to USB enabled personal computers (PC).<br />
Any unauthorized changes or modifications to this equipment would void the user’s authority to operate.<br />
For customers in North and South America<br />
For customers in USA<br />
Declaration of Conformity<br />
Model Number : Stylus 760/µ 760<br />
Trade Name : OLYMPUS<br />
Responsible Party :<br />
Address : 3500 Corporate Parkway, P.O. Box 610, Center Valley,<br />
PA 18034-0610, U.S.A.<br />
Telephone Number : 484-896-5000<br />
Tested To Comply With FCC Standards<br />
FOR HOME OR OFFICE USE<br />
This device complies with Part 15 of the FCC rules. Operation is subject to the following two conditions:<br />
(1) This device may not cause harmful interference.<br />
(2) This device must accept any interference received, including interference that may cause undesired<br />
operation.<br />
For customers in Canada<br />
This Class B digital apparatus meets all requirements of the Canadian Interference-Causing Equipment<br />
Regulations.
For customers in Europe<br />
“CE” mark indicates that this product complies with the European requirements for<br />
safety, health, environment and customer protection. “CE” mark cameras are<br />
intended for sales in Europe.<br />
This symbol [crossed-out wheeled bin WEEE Annex IV] indicates separate collection<br />
of waste electrical and electronic equipment in the EU countries.<br />
Please do not throw the equipment into the domestic refuse.<br />
Please use the return and collection systems available in your country for the disposal<br />
of this product.<br />
Use Only Dedicated Rechargeable Battery and Battery Charger<br />
We strongly recommend that you use only the genuine Olympus dedicated rechargeable<br />
battery and battery charger with this camera.<br />
Using a non-genuine rechargeable battery and/or battery charger may result in fire or personal<br />
injury due to leakage, heating, ignition or damage to the battery. Olympus does not assume<br />
any liability for accidents or damage that may result from the use of a battery and/or battery<br />
charger that are not genuine Olympus accessories.<br />
Provisions of warranty<br />
1. If this product proves to be defective, although it has been used properly (in accordance with the<br />
written Handling Care and Operating instructions supplied with it), during a period of two years<br />
from the date of purchase from an authorized Olympus distributor within the business area of<br />
Olympus Imaging Europa GmbH as stipulated on the website: http://www.olympus.com this<br />
product will be repaired, or at Olympus’s option replaced, free of charge. To claim under this<br />
warranty the customer must take the product and this Warranty Certificate before the end of the<br />
two year warranty period to the dealer where the product was purchased or any other Olympus<br />
service station within the business area of Olympus Imaging Europa GmbH as stipulated on the<br />
website: http://www.olympus.com. During the one year period of the World Wide Warranty the<br />
customer may turn the product in at any Olympus service station. Please notice that not in all<br />
countries such Olympus service station exists.<br />
2. The customer shall transport the product to the dealer or Olympus authorized service station at his<br />
own risk and shall be responsible for any costs incurred in transporting the product.<br />
3. This warranty does not cover the following and the customer will be required to pay repair charge,<br />
even for defects occurring within the warranty period referred to above.<br />
(a) Any defect that occurs due to mishandling (such as an operation performed that is not<br />
mentioned in the Handling Care or other sections of the instructions, etc.)<br />
(b) Any defect that occurs due to repair, modification, cleaning, etc. performed by anyone other<br />
than Olympus or an Olympus authorized service station.<br />
(c) Any defect or damage that occurs due to transport, a fall, shock, etc. after purchase of the<br />
product.<br />
(d) Any defect or damage that occurs due to fire, earthquake, flood damage, thunderbolt, other<br />
natural disasters, environmental pollution and irregular voltage sources.<br />
(e) Any defect that occurs due to careless or improper storage (such as keeping the product under<br />
conditions of high temperature and humidity, near insect repellents such as naphthalene or<br />
harmful drugs, etc.), improper maintenance, etc.<br />
(f) Any defect that occurs due to exhausted batteries, etc.<br />
(g) Any defect that occurs due to sand, mud, etc. entering the inside of the product casing.<br />
(h) When this Warranty Certificate is not returned with the product.<br />
(i) When any alterations whatsoever are made to the Warranty Certificate regarding the year,<br />
month and date of purchase, the customer’s name, the dealer’s name, and the serial number.<br />
(j) When proof of purchase is not presented with this Warranty Certificate.<br />
4. This Warranty applies to the product only; the Warranty does not apply to any other accessory<br />
equipment, such as the case, strap, lens cap and batteries.<br />
5. Olympus’s sole liability under this warranty shall be limited to repairing or replacing the product.<br />
Any liability for indirect or consequential loss or damage of any kind incurred or suffered by the<br />
customer due to a defect of the product, and in particular any loss or damage caused to any lenses,<br />
films, other equipment or accessories used with the product or for any loss resulting from a delay<br />
in repair or loss of data, is excluded. Compelling regulations by law remain unaffected by this.<br />
Appendix<br />
EN 69
Appendix<br />
70 EN<br />
Notes regarding warranty maintenance<br />
1. This warranty will only be valid if the Warranty Certificate is duly completed by Olympus or an<br />
authorized dealer or other documents contain sufficient proof. Therefore, please make sure that<br />
your name, the name of the dealer, the serial number and the year, month and date of purchase<br />
are all completed or the original invoice or the sales receipt (indicating the dealer’s name, the date<br />
of purchase and product type) is attached to this Warranty Certificate. Olympus reserves the right<br />
to refuse free-of-charge service if neither Warranty Certificate is completed nor the above<br />
document is attached or if the information contained in it is incomplete or illegible.<br />
2. Since this Warranty Certificate will not be re-issued, keep it in a safe place.<br />
• Please refer to the list on the web site: http://www.olympus.com for the authorized international<br />
Olympus service network.<br />
Trademarks<br />
• IBM is a registered trademark of International Business Machines Corporation.<br />
• Microsoft and Windows are registered trademarks of Microsoft Corporation.<br />
• Macintosh is a trademark of Apple Computer Inc.<br />
• xD-Picture Card is a trademark.<br />
• All other company and product names are registered trademarks and/or trademarks of their<br />
respective owners.<br />
• The standards for camera file systems referred to in this manual are the “Design Rule for Camera<br />
File System/DCF” standards stipulated by the Japan Electronics and Information Technology<br />
Industries Association (JEITA).
SPECIFICATIONS<br />
(Camera<br />
Product type<br />
Recording system<br />
: Digital camera (for recording and playback)<br />
Still pictures : Digital recording, JPEG (in accordance with Design<br />
rule for Camera File system (DCF))<br />
Applicable standards : Exif 2.2, Digital Print Order Format (DPOF), PRINT Image<br />
Matching III, PictBridge<br />
Sound with still<br />
pictures<br />
: Wave format<br />
Movies : AVI Motion JPEG<br />
Memory : Internal memory<br />
xD-Picture Card 16 MB to 2 GB (TypeH/M, Standard)<br />
No. of pictures<br />
: Approx. 200<br />
(when fully charged)<br />
(based on CIPA battery life measurement standards)<br />
No. of effective pixels : 7,110,000 pixels<br />
Image pickup device : 1/2.33" CCD (primary color filter), 7,380,000 (gross)<br />
Lens : Olympus lens 6.5 to 19.5 mm, f3.4 to 5.7<br />
(equivalent to 37 to 111 mm on a 35 mm camera)<br />
Photometric system : Digital ESP metering, spot metering system<br />
Shutter speed : 4 to 1/1000 sec.<br />
Shooting range : 0.6 m (2.0 ft.) to ) (W/T) (normal)<br />
0.2 m (0.7 ft.) to ) (W), 0.5 m (1.6 ft.) to ) (T) (macro mode)<br />
0.08 m (3.2 in.) to 0.6 m (2.0 ft.) (W only) (super macro mode)<br />
Monitor : 2.5" TFT color LCD display, 230,000 pixels<br />
Flash charge time : Approx. 4 sec. (for full flash discharge at room temperature using<br />
a new fully charged battery)<br />
Outer connectors : DC-IN jack, USB connector, A/V OUT jack (multi-connector)<br />
Automatic calendar system<br />
Water resistance<br />
: 2000 up to 2099<br />
Type : Equivalent to IEC Standard publication 529 IPX4 (under<br />
OLYMPUS test conditions)<br />
Meaning<br />
Operating environment<br />
: Camera is not damaged by water spray from any direction.<br />
Temperature : 0°C to 40°C (32°F to 104°F) (operation),<br />
-20°C to 60°C (-4°F to 140°F) (storage)<br />
Humidity : 30% to 90% (operation)/10% to 90% (storage)<br />
Power supply : One Olympus lithium ion battery (LI-42B/LI-40B) or Olympus AC<br />
adapter<br />
Dimensions : 99 mm (W) × 54 mm (H) × 24.4 mm (D) (3.9 × 2.1 × 1.0 in.)<br />
(excluding protrusions)<br />
Weight : 120 g (4.2 oz) (excluding battery and card)<br />
Appendix<br />
EN 71
Appendix<br />
72 EN<br />
(Lithium ion battery (LI-42B)<br />
Product type : Lithium ion rechargeable battery<br />
Standard voltage : DC 3.7 V<br />
Standard capacity : 740 mAh<br />
Battery life : Approx. 300 full charges (varies on usage)<br />
Operating environment<br />
Temperature : 0°C to 40°C (32°F to 104°F) (charging)/<br />
-10°C to 60°C (14°F to 140°F) (operation)/<br />
-20°C to 35°C (-4°F to 95°F) (storage)<br />
Dimensions : 31.5 × 39.5 × 6 mm (1.2 × 1.5 × 0.2 in.)<br />
Weight : Approx. 15 g (0.5 oz)<br />
(Battery charger (LI-40C)<br />
Power requirements : AC 100 to 240 V (50 to 60 Hz)<br />
3.2 VA (100 V) to 5.0 VA (240 V)<br />
Output : DC 4.2 V, 200 mA<br />
Charging time : Approx. 300 min.<br />
Operating environment<br />
Temperature : 0°C to 40°C (32°F to 104°F) (operation)/<br />
-20°C to 60°C (-4°F to 140°F) (storage)<br />
Dimensions : 62 × 23 × 90 mm (2.4 × 0.9 × 3.5 in.)<br />
Weight : Approx. 65 g (2.2 oz)<br />
Design and specifications subject to change without notice.
CAMERA DIAGRAM<br />
Camera<br />
Multi-Connector<br />
(P. 35, 36, 45)<br />
Self-Timer Lamp<br />
(P. 15, 54)<br />
Strap Eyelet<br />
(P. 3)<br />
Connector Cover<br />
(P. 35, 36, 45)<br />
Monitor (P. 32, 74)<br />
Card Access Lamp<br />
(P. 47, 54, 63)<br />
Shutter Button<br />
(P. 8, 10)<br />
h button<br />
(Image stabilizer)<br />
(P. 15)<br />
Speaker<br />
o Button<br />
(P. 5, 10)<br />
Flash (P. 15)<br />
Lens<br />
(P. 10, 60)<br />
Zoom Button (P. 13)<br />
Mode Dial<br />
(P. 5, 9, 11)<br />
q/< button<br />
(Playback/Print) (P. 16)<br />
Arrow Pad (1243)<br />
(P. 12)<br />
o Button (P. 12)<br />
/S Button (Erase)<br />
(P. 9, 16)<br />
d Button (P. 17)<br />
m Button<br />
(P. 13)<br />
Battery/Card Compartment<br />
Cover<br />
(P. 4, 62)<br />
Tripod Socket<br />
Microphone<br />
(P. 23)<br />
Appendix<br />
EN 73
Appendix<br />
74 EN<br />
Monitor Symbols & Icons<br />
(Monitor - Shooting mode<br />
2<br />
3<br />
4<br />
5<br />
6<br />
7<br />
8<br />
9<br />
1 23 22 21<br />
P<br />
( #<br />
[<br />
+2.0<br />
$<br />
ISO<br />
1600<br />
%<br />
j<br />
l R<br />
k[IN IN]<br />
n<br />
HQ 3072 3072×2304 2304<br />
]<br />
4<br />
10 11 12 13 14<br />
Still picture<br />
20<br />
19<br />
18<br />
17<br />
16<br />
15<br />
A<br />
(<br />
+2.0<br />
$<br />
Item Indication Ref. Page<br />
1 Shooting modes h, P, B, F, D, G, etc. P. 11,<br />
12, 21<br />
2 Battery check e = full power, f = low power P. 57<br />
3 Green lamp = Auto Focus Lock P. 8<br />
10, 54<br />
4 Flash standby # (Lit) P. 50<br />
Camera movement warning/ #<br />
flash charge<br />
(Blinks)<br />
5 Digital Image Stabilization h P. 15<br />
6 White balance 5, 3, 1, w – y P. 22<br />
7 ISO ISO 80 – ISO 1600 P. 22<br />
8 Drive j, W P. 22<br />
9 Spot metering 5 P. 23<br />
10 Macro mode<br />
&<br />
P. 15<br />
Super macro mode %<br />
11 Image quality SHQ, HQ, SQ1, SQ2, 16:9, SQ P. 20<br />
12 Image size 3072 × 2304, 2560 × 1920, 640 × 480, etc. P. 20<br />
13 AF target mark [ ] P. 8, 23<br />
14 Number of storable still<br />
pictures<br />
4<br />
P. 53<br />
Remaining recording time 00:36<br />
15 Memory gauge a, b, c, d (maximum reached) P. 50<br />
16 Current memory [IN] (Recording pictures to the internal memory),<br />
[xD] (Recording pictures to the card)<br />
P. 61<br />
17 Sound record R P. 23<br />
18 Dualtime l P. 33<br />
19 Alarm k P. 33<br />
20 Flash mode !, #, $ P. 15<br />
21 Exposure compensation -2.0 – +2.0 P. 14<br />
22 Self-timer Y P. 15<br />
23 Silent mode U P. 24<br />
3<br />
6<br />
9<br />
2 1 23 22 21<br />
n<br />
%<br />
HQ<br />
[<br />
]<br />
l R<br />
kk[IN<br />
[IN IN] IN]<br />
00:36<br />
10 11 13<br />
14<br />
Movie<br />
20<br />
19<br />
18<br />
17<br />
16
(Monitor - Playback mode<br />
16<br />
9<br />
10<br />
1 2 3 4 5<br />
[IN IN] ×10 10<br />
HQ<br />
3072 3072×2304 2304<br />
F3.5 1/1000<br />
+2.0<br />
ISO 1600<br />
'07.07.26 12:30<br />
100-0004<br />
Still picture<br />
4<br />
15<br />
6<br />
7<br />
8<br />
11<br />
12<br />
13<br />
14<br />
1 2 3 4 5<br />
[IN IN]<br />
HQ<br />
320 320×240 240<br />
'07.07.26 12:30<br />
100-0004<br />
00:00 00:36<br />
Item Indication Ref. Page<br />
1 Battery check e = full power, f = low power P. 57<br />
2 Current memory [IN] (Playing back the picture in the internal memory),<br />
[xD] (Playing back the picture in the card)<br />
P. 61<br />
3 Print reservation/Number of
Index<br />
d button .....................................................17<br />
/S button (erase) ....................................16<br />
1F button (exposure compensation)........14<br />
3# button (flash mode) ..............................15<br />
4& button (macro)......................................15<br />
o button (OK/FUNC) ..................................12<br />
q/< button (playback/print) ......................16<br />
2Y button (self-timer) ...............................15<br />
16:9 ..............................................................20<br />
A<br />
AC adapter ...................................................63<br />
ADD FAVORITE.....................................12, 26<br />
Adding sound to still pictures R....................29<br />
AF lock .........................................................11<br />
AF MODE.....................................................23<br />
ALARM CLOCK k.......................................33<br />
ALL ERASE R ...........................................30<br />
ALL INDEX...................................................38<br />
ALL PRINT ...................................................38<br />
All-frame reservation U ..............................41<br />
Arrow pad (1243)..................................12<br />
AUTO (Auto-flash)........................................15<br />
AUTO (Full auto mode) ................................12<br />
AUTO (ISO)..................................................22<br />
AUTO (WB) WB AUTO ................................22<br />
Auto focus ....................................................51<br />
AV cable...................................................3, 35<br />
B<br />
BACKUP ......................................................31<br />
Battery......................................................4, 60<br />
Battery charger.....................................3, 4, 60<br />
Battery check ...............................................74<br />
Battery/card compartment cover ..............4, 62<br />
BEEP............................................................31<br />
BGM .............................................................25<br />
BLACK & WHITE .........................................27<br />
BRIGHTNESS..............................................28<br />
C<br />
CALENDAR..................................................28<br />
Calendar display ....................................14, 27<br />
CAMERA MENU ....................................20, 22<br />
Card ...........................................24, 30, 61, 62<br />
Card access lamp ............................47, 54, 63<br />
CCD .............................................................32<br />
Close-up playback U...................................14<br />
Cloudy day 3.............................................22<br />
Compression ................................................20<br />
Connector cover...............................35, 36, 45<br />
CUSTOM PRINT..........................................37<br />
D<br />
Date and time X ....................................6, 33<br />
DIGITAL ZOOM ...........................................23<br />
Direct printing ...............................................36<br />
Display language W ...............................31<br />
DPOF ...........................................................39<br />
76 EN<br />
DRIVE ..........................................................22<br />
DUALTIME l..............................................33<br />
E<br />
EASY PRINT................................................36<br />
EDIT.............................................................27<br />
ERASE.........................................................29<br />
Erase........................................................9, 16<br />
Error message .............................................57<br />
ESP..............................................................23<br />
ESP/n .......................................................23<br />
EV ................................................................14<br />
Exposure......................................................14<br />
Exposure compensation F ...................14, 75<br />
F<br />
FILE NAME ............................................32, 38<br />
File name .....................................................33<br />
Fill-in flash # ...............................................15<br />
Flash ............................................................15<br />
Flash charge ..........................................50, 74<br />
Flash mode #........................................10, 15<br />
Flash off $..................................................15<br />
Fluorescent lamp1/2/3 wxy..................22<br />
Focus ...............................8, 10, 11, 22, 51, 54<br />
Focus lock....................................................10<br />
FORMAT......................................................30<br />
Format..........................................................30<br />
FRAME ........................................................27<br />
FRAME ASSIST...........................................17<br />
Frame number .............................................75<br />
Function menu .............................................12<br />
G<br />
Green lamp ..................................8, 10, 51, 54<br />
g (Shooting guide).........................5, 11<br />
H<br />
High speed sequential shooting W ............22<br />
Histogram display...................................17, 55<br />
HQ................................................................20<br />
I<br />
iESP .............................................................23<br />
IMAGE QUALITY .........................................20<br />
Image size....................................................20<br />
Image stabilizer h.....................................15<br />
INDEX ..........................................................28<br />
Index display G ..........................................14<br />
Information displays .....................................17<br />
Internal memory .....................................30, 61<br />
ISO...............................................................22<br />
L<br />
LABEL..........................................................27<br />
Lens .......................................................10, 60<br />
Lithium ion battery................................3, 4, 60<br />
Low compression .........................................20
M<br />
Macro mode & ......................................10, 15<br />
MEMORY FORMAT .....................................30<br />
Memory gauge .............................................50<br />
Menu ............................................................18<br />
m button (MENU) ..................................13<br />
Menu guide...................................................17<br />
MENU THEME .............................................31<br />
Microphone...................................................23<br />
Mode dial..............................................5, 9, 11<br />
Monitor ...................................................32, 74<br />
Monitor brightness adjustment s ..............32<br />
Monitor Symbols & Icons..............................74<br />
MOVIE PLAY................................................26<br />
MULTI PRINT...............................................38<br />
Multi-connector.................................35, 36, 45<br />
N<br />
NTSC............................................................34<br />
Number of storable still pictures ...................53<br />
O<br />
OLYMPUS Master....................................3, 42<br />
Operation guide................................18, 37, 40<br />
Optical zoom ..........................................13, 23<br />
P<br />
P (Program auto)..........................................12<br />
P/AUTO ........................................................12<br />
PAL...............................................................34<br />
PANORAMA.................................................24<br />
PC ................................................................45<br />
PictBridge .....................................................36<br />
Picture rotation y ........................................29<br />
PIXEL MAPPING..........................................32<br />
Play “My Favorite” P ..................................12<br />
PLAYBACK MENU.................................25, 29<br />
Playback mode q...........9, 10, 12, 14, 17, 30<br />
Playback on a TV .........................................35<br />
Playing time/Total recording time .................26<br />
o button ..........................................5, 10<br />
POWER SAVE .............................................35<br />
Press completely ......................................8, 10<br />
Press halfway ...........................................8, 10<br />
PRINT ORDER
VH834401