DDS RUT500 Router
DDS RUT500 Router
DDS RUT500 Router

You also want an ePaper? Increase the reach of your titles
YUMPU automatically turns print PDFs into web optimized ePapers that Google loves.
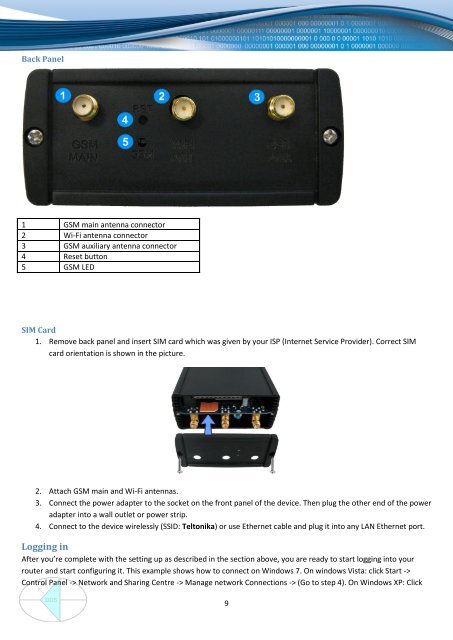
Back Panel<br />
1 GSM main antenna connector<br />
2 Wi-Fi antenna connector<br />
3 GSM auxiliary antenna connector<br />
4 Reset button<br />
5 GSM LED<br />
SIM Card<br />
1. Remove back panel and insert SIM card which was given by your ISP (Internet Service Provider). Correct SIM<br />
card orientation is shown in the picture.<br />
2. Attach GSM main and Wi-Fi antennas.<br />
3. Connect the power adapter to the socket on the front panel of the device. Then plug the other end of the power<br />
adapter into a wall outlet or power strip.<br />
4. Connect to the device wirelessly (SSID: Teltonika) or use Ethernet cable and plug it into any LAN Ethernet port.<br />
Logging in<br />
After you’re complete with the setting up as described in the section above, you are ready to start logging into your<br />
router and start configuring it. This example shows how to connect on Windows 7. On windows Vista: click Start -><br />
Control Panel -> Network and Sharing Centre -> Manage network Connections -> (Go to step 4). On Windows XP: Click<br />
9<br />
www.ddszevenbergen.nl