Pre-Lab 13 Assignment: Radioactive Decay
Pre-Lab 13 Assignment: Radioactive Decay
Pre-Lab 13 Assignment: Radioactive Decay
You also want an ePaper? Increase the reach of your titles
YUMPU automatically turns print PDFs into web optimized ePapers that Google loves.
<strong>Radioactive</strong> <strong>Decay</strong> v 0.1<br />
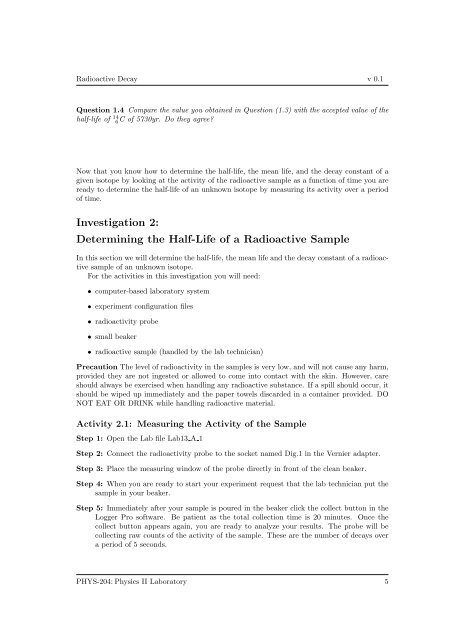
Question 1.4 Compare the value you obtained in Question (1.3) with the accepted value of the<br />
half-life of 14 6C of 5730yr. Do they agree?<br />
Now that you know how to determine the half-life, the mean life, and the decay constant of a<br />
given isotope by looking at the activity of the radioactive sample as a function of time you are<br />
ready to determine the half-life of an unknown isotope by measuring its activity over a period<br />
of time.<br />
Investigation 2:<br />
Determining the Half-Life of a <strong>Radioactive</strong> Sample<br />
In this section we will determine the half-life, the mean life and the decay constant of a radioactive<br />
sample of an unknown isotope.<br />
For the activities in this investigation you will need:<br />
• computer-based laboratory system<br />
• experiment configuration files<br />
• radioactivity probe<br />
• small beaker<br />
• radioactive sample (handled by the lab technician)<br />
<strong>Pre</strong>caution The level of radioactivity in the samples is very low, and will not cause any harm,<br />
provided they are not ingested or allowed to come into contact with the skin. However, care<br />
should always be exercised when handling any radioactive substance. If a spill should occur, it<br />
should be wiped up immediately and the paper towels discarded in a container provided. DO<br />
NOT EAT OR DRINK while handling radioactive material.<br />
Activity 2.1: Measuring the Activity of the Sample<br />
Step 1: Open the <strong>Lab</strong> file <strong>Lab</strong><strong>13</strong> A 1<br />
Step 2: Connect the radioactivity probe to the socket named Dig.1 in the Vernier adapter.<br />
Step 3: Place the measuring window of the probe directly in front of the clean beaker.<br />
Step 4: When you are ready to start your experiment request that the lab technician put the<br />
sample in your beaker.<br />
Step 5: Immediately after your sample is poured in the beaker click the collect button in the<br />
Logger Pro software. Be patient as the total collection time is 20 minutes. Once the<br />
collect button appears again, you are ready to analyze your results. The probe will be<br />
collecting raw counts of the activity of the sample. These are the number of decays over<br />
a period of 5 seconds.<br />
PHYS-204:Physics II <strong>Lab</strong>oratory 5


