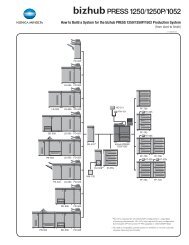
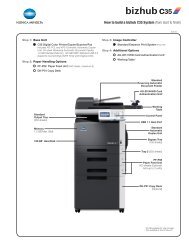
![Quick Guide [Print Operations]](https://img.yumpu.com/25068750/40/500x640/quick-guide-print-operations.jpg)
Quick Guide [Print Operations]
Quick Guide [Print Operations]
Quick Guide [Print Operations]

You also want an ePaper? Increase the reach of your titles
YUMPU automatically turns print PDFs into web optimized ePapers that Google loves.
Installing the printer driver<br />
2<br />
Selecting a printer<br />
For Mac OS X<br />
After connecting this machine to a Macintosh computer, it can be used as a<br />
printer by selecting it in <strong>Print</strong> Center or the <strong>Print</strong>er Setup Utility as the printer<br />
to be used.<br />
1 Open <strong>Print</strong> Center or <strong>Print</strong>er Setup Utility, located in “Applications”−<br />
“Utilities” of “Hard Disk”.<br />
2 When the Add <strong>Print</strong>er dialog box appears, click the [Add] button. When<br />
the printer list appears, click the [Add] button.<br />
If usable printers have already been set up, the Add <strong>Print</strong>er dialog box<br />
does not appear.<br />
3 Select the applicable connection method and printer name.<br />
– You can check the printer name from AppleTalk in PageScope Web<br />
Connection. For details, refer to “<strong>Print</strong>ing with Macintosh” of the<br />
User’s <strong>Guide</strong> [<strong>Print</strong> <strong>Operations</strong>].<br />
The following procedure is an example of when AppleTalk was selected<br />
by the connection method.<br />
4 Select “KONICA MINOLTA” from the “<strong>Print</strong>er Model” drop-down list.<br />
5 Select “KONICA MINOLTA 350/250/200 PS”, and then click the [Add]<br />
button.<br />
The selected printer is registered in the printer list.<br />
200/250/350 2-13
![User's Guide [Facsimile Operations]](https://img.yumpu.com/25068839/1/184x260/users-guide-facsimile-operations.jpg?quality=85)