
Create successful ePaper yourself
Turn your PDF publications into a flip-book with our unique Google optimized e-Paper software.
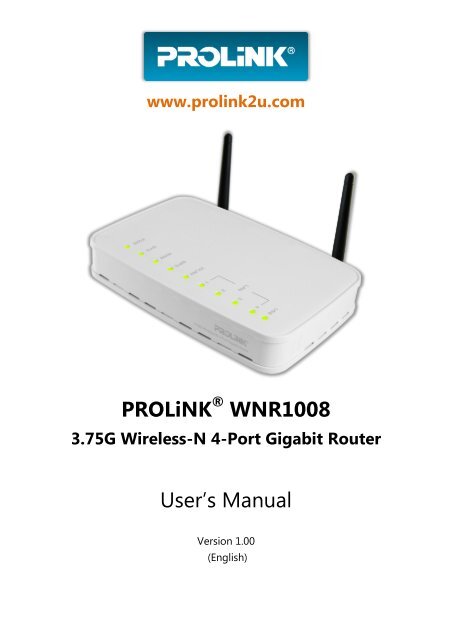
www.prolink2u.com<br />
<strong>PROLiNK</strong> ®<br />
<strong>WNR1008</strong><br />
3.75G Wireless-N 4-Port Gigabit Router<br />
User’s <strong>Manual</strong><br />
Version 1.00<br />
(English)
FEDERAL COMMUNICATION COMMISSION INTERFERENCE STATEMENT<br />
This equipment has been tested and found to comply with the limits for a Class B digital device, pursuant to Part 15 of the<br />
FCC Rules. These limits are designed to provide reasonable protection against harmful interference in a residential<br />
installation. This equipment generates uses and can radiate radio frequency energy and, if not installed and used in<br />
accordance with the instructions, may cause harmful interference to radio communications.<br />
However, there is no guarantee that interference will not occur in a particular installation. If this equipment does cause<br />
harmful interference to radio or television reception, which can be determined by turning the equipment off and on, the<br />
user is encouraged to try to correct the interference by one or more of the following measures:<br />
Reorient or relocate the receiving antenna.<br />
Increase the separation between the equipment and receiver.<br />
Connect the equipment into an outlet on a circuit different from that to which the receiver is needed.<br />
Consult the dealer or an experienced radio/TV technician for help.<br />
Warning: Changes or modifications to this unit not expressly approved by the party responsible for compliance could void<br />
the user authority to operate the equipment.<br />
This device complies with Part 15 of the FCC Rules. Operation is subject to the following two conditions: (1) this device<br />
may not cause harmful interference, and (2) this device must accept any interference received, including interference<br />
that may cause undesired operation.<br />
The user’s manual or instruction manual for an intentional or unintentional radiator shall caution the user that changes<br />
or modifications not expressly approved by the party responsible for compliance could void the user’s authority to<br />
operate the equipment.<br />
CAUTION:<br />
1. To comply with FCC RF exposure compliance requirements, a separation distance of at least 20 cm<br />
must be maintained between the antenna of this device and all persons.<br />
2. This Transmitter must not be co-located or operating in conjunction with any other antenna or<br />
transmitter
TABLE OF CONTENT<br />
CHAPTER 1: INTRODUCTION .......................................................................................................................... 1<br />
1.1. Features ..................................................................................................................................................................................................................... 1<br />
1.2. Physical Details ....................................................................................................................................................................................................... 1<br />
CHAPTER 2: ABOUT OPERATION MODES ..................................................................................................... 3<br />
2.1. Operation Modes .................................................................................................................................................................................................. 3<br />
2.2. Router Mode ........................................................................................................................................................................................................... 3<br />
2.3. Access Point Mode ............................................................................................................................................................................................... 4<br />
2.4. Converter Mode ..................................................................................................................................................................................................... 4<br />
CHAPTER 3: CONFIGURATION ........................................................................................................................ 5<br />
3.1. Hardware Connection .......................................................................................................................................................................................... 5<br />
3.2. Login ........................................................................................................................................................................................................................... 5<br />
3.3. Status .......................................................................................................................................................................................................................... 7<br />
3.4. Network ..................................................................................................................................................................................................................... 8<br />
3.5. Wireless................................................................................................................................................................................................................... 15<br />
3.6. Firewall .................................................................................................................................................................................................................... 24<br />
3.7. Administration ..................................................................................................................................................................................................... 29<br />
CHAPTER 4: PC CONFIGURATION ................................................................................................................ 35<br />
4.1. Overview ................................................................................................................................................................................................................. 35<br />
4.2. Windows Clients.................................................................................................................................................................................................. 35<br />
4.3. Macintosh Clients ............................................................................................................................................................................................... 40<br />
4.4. Linux Clients .......................................................................................................................................................................................................... 41<br />
4.5. Other Unix Systems ........................................................................................................................................................................................... 41<br />
4.6. Wireless Station Configuration ..................................................................................................................................................................... 41<br />
CHAPTER 5: TROUBLESHOOTING ................................................................................................................. 43<br />
5.1. Overview ................................................................................................................................................................................................................. 43<br />
5.2. General Problems ............................................................................................................................................................................................... 43<br />
5.3. Internet Access .................................................................................................................................................................................................... 43<br />
5.4. Wireless Access ................................................................................................................................................................................................... 44<br />
CHAPTER 6: ABOUT WIRELESS LANS ........................................................................................................... 45<br />
6.1. BSS (Basic Service Set) ...................................................................................................................................................................................... 45<br />
6.2. Channels ................................................................................................................................................................................................................. 45<br />
6.3. Security ................................................................................................................................................................................................................... 45<br />
6.4. Wireless LAN Configuration ........................................................................................................................................................................... 46<br />
CHAPTER 7: TECHNICAL SUPPORT .............................................................................................................. 47<br />
7.1. FREE TECHNICAL SUPPORT HOTLINE ........................................................................................................................................................ 47<br />
7.2. WALK-IN SUPPORT ............................................................................................................................................................................................ 47<br />
7.3. ONLINE TECHNICAL SUPPORT ..................................................................................................................................................................... 47
<strong>PROLiNK</strong>® <strong>WNR1008</strong><br />
CHAPTER 1: INTRODUCTION<br />
www.prolink2u.com<br />
The <strong>PROLiNK</strong>® <strong>WNR1008</strong> 3.75G Wireless-N 4-Port Gigabit Router supports 4 ports 10/100/1000M Ethernet for<br />
LAN and 1 port 10/100/1000M Ethernet interface for WAN. With the advanced MIMO technology, it can support the<br />
data transmission rate 6 times more (up to 300 Mbps) and the coverage 3 times more than IEEE 802.11b/g devices.<br />
The Wireless Router enables your whole network sharing a high-speed cable or DSL Internet connection. With it, you<br />
can share a high-speed Internet connection, files, printers, and multi-player games at incredible speeds, without the<br />
hassle of stringing wires. It also offers easy configuration for your wireless network at home and presents wireless<br />
network of high functionality, security, and flexibility.<br />
1.1.<br />
<br />
<br />
<br />
<br />
<br />
<br />
<br />
<br />
<br />
<br />
<br />
Support 4 ports 10/100/1000M Ethernet for LAN and 1 port 10/100/1000M Ethernet interface for WAN.<br />
Clock rate up to 600MHz.<br />
Support the IEEE 802.11n/b/g standard, high speed data rate up to 300Mbps, two transmit and two receive<br />
path (2T2R)<br />
High security with build-in Security: WEP 64/128, WPA, WPA2, 802.1x and 802.11i.<br />
Supports 1 additional USB port.<br />
Supports WPS (Wi-Fi Protected Setup) with physical push button.<br />
High security with build-in Security: WEP 64/128, WPA, WPA2, 802.1x and 802.11i.<br />
Support Client, AP, WDS, AP+WDS mode.<br />
Advanced Quality of Service (QoS), WMM.<br />
Easy web browser configuration for home user setup.<br />
Support USB Network attached storage (NAS) and media share function.<br />
1.2.<br />
Top LEDs (Top view)<br />
LED Behavior<br />
LED Printed Color Behavior Indication<br />
Power PWR Green<br />
System SYS Green<br />
Internet WAN Green<br />
ON<br />
OFF<br />
ON<br />
OFF<br />
Blinking<br />
ON<br />
OFF<br />
Blinking<br />
Power on<br />
Power off<br />
System is ready to login web server<br />
System is not ready to login web server<br />
System is set to factory default<br />
Internet link / active<br />
Internet function off<br />
Internet traffic transmitting<br />
Version 1.00 1 English
<strong>PROLiNK</strong>® <strong>WNR1008</strong><br />
www.prolink2u.com<br />
WPS WPS Green<br />
Wireless LAN WLAN Green<br />
LAN<br />
Green<br />
USB WPS Green<br />
ON<br />
OFF<br />
Blinking<br />
OFF<br />
ON<br />
Blinking<br />
OFF<br />
ON<br />
Blinking<br />
ON<br />
OFF<br />
WPS setup successfully<br />
WPS is disabled<br />
WPS is enabled to make a connection<br />
WLAN off<br />
WLAN link / active<br />
WLAN traffic transmitting<br />
LAN function off<br />
LAN link / active<br />
LAN traffic transmitting<br />
USB is connected<br />
USB is disconnected<br />
Ports and Buttons (Rear view)<br />
Ports and buttons<br />
Ant. 1<br />
Ant. 2<br />
Reset<br />
LAN 1-4<br />
WAN<br />
DC 12V<br />
Install the appending antennas here.<br />
• Press 2 seconds, the LED will be off.<br />
• Keep on pressing reset button 2~5 seconds, the system will reboot automatically.<br />
• Keep on pressing the reset button more than 5 seconds, the Wireless Router will set all setting back to factory<br />
default.<br />
Use standard LAN cables (RJ45 connectors) to connect your PCs to this port. If required, any port can be connected to<br />
another hub. Any LAN port will automatically function as an "Uplink" port when necessary.<br />
Connect the ADSL or Cable Modem here with RJ45 cable. If your modem came with a cable, use the supplied cable,<br />
otherwise, use a standard LAN cable (RJ45 connectors).<br />
Connect the supplied power adapter here.<br />
Side Panel (Side view)<br />
(Left sideview)<br />
(Right sideview)<br />
Left-sideview<br />
WPS<br />
To enable the WPS function press the physical WPS button on the Wireless Router once, then the LED will start to flash.<br />
Please make a connection with other WPS supported device within 2 minutes.<br />
Right-sideview<br />
USB<br />
Insert the USB 3.5G card that provided by your ISP (Internet Service Provider) or USB network attached storage here.<br />
Version 1.00 2 English
<strong>PROLiNK</strong>® <strong>WNR1008</strong><br />
CHAPTER 2: ABOUT OPERATION MODES<br />
www.prolink2u.com<br />
This device provides operational applications with Router, AP and Converter modes, which are mutually exclusive. This<br />
device is shipped with configuration that is functional right out of the box. If you want to change the settings in order<br />
to perform more advanced configuration or even change the mode of operation, you can MANUALLY switch to the<br />
mode you desired by the manufacturer as described in the following sections.<br />
2.1.<br />
You have to MANUALLY switch the bar into the mode you preferred, Router, AP or Converter modes, then the device<br />
will reboot automatically into the mode you have selected.<br />
2.2.<br />
In this mode, the device is supposed to connect to internet via ADSL/Cable Modem. The NAT is enabled and PCs in<br />
LAN ports share the same IP address to ISP (Internet Service Provider) through WAN port. The connection type can be<br />
setup in PPPoE, DHCP client, PPTP client, L2TP client or static IP.<br />
The wireless connection will be set up from a point-to-point LAN into a point-to-multipoint WAN. This device<br />
connects all the stations (PC or notebook with wireless function) to a wireless network. All stations can have the<br />
Internet access if only the device has the Internet connection.<br />
Version 1.00 3 English
<strong>PROLiNK</strong>® <strong>WNR1008</strong><br />
www.prolink2u.com<br />
2.3.<br />
When acting as an Access Point (AP), this device connects all the stations (PC/notebook with wireless network adapter)<br />
to a wireless network. All stations can have the Internet access if only the Access Point has the Internet connection.<br />
2.4.<br />
If set to Converter mode, a device connects to each other through an access point or a base station (gateway or router.)<br />
This device can work like a wireless station when it’s connected to a computer directly, so that the computer can send<br />
packets from wired end to wireless interface.<br />
Version 1.00 4 English
<strong>PROLiNK</strong>® <strong>WNR1008</strong><br />
CHAPTER 3: CONFIGURATION<br />
www.prolink2u.com<br />
3.1.<br />
Step 1.<br />
Step 2.<br />
Step 3.<br />
Connect one end of the Ethernet cable to the LAN port (1~4) of the Wireless Router, another end to your PC<br />
or notebook.<br />
There are two connection methods to connect to Internet (Only one can be used):<br />
2-1. Connect Ethernet cable one end to the WAN (Internet) port of the Wireless Router, the other end to<br />
the ADSL or cable modem.<br />
2-2. Or you can insert 3.5G USB card (that provide by your ISP) into USB port.<br />
Finally, connect the Wireless Router with a power to an outlet.<br />
3.2.<br />
1. Start your computer and make sure the connection by an Ethernet cable between your computer and the Wireless<br />
Router.<br />
2. Start your Web Browser.<br />
3. In the Address box, enter the IP address of the Wireless<br />
Router, as in this example, which uses the Wireless<br />
Router's default IP address: http://192.168.123.254<br />
4. After connected successfully, the following screen will show up.<br />
Simply enter the username "admin" and password<br />
"password" to login.<br />
Version 1.00 5 English
<strong>PROLiNK</strong>® <strong>WNR1008</strong><br />
www.prolink2u.com<br />
Refer to below troubleshooting,<br />
If you encounter difficulty for connecting the <strong>WNR1008</strong><br />
If the <strong>WNR1008</strong> does not respond<br />
The Wireless Router is properly installed, LAN connection is OK, and it is powered ON. You can test the connection<br />
by using the "Ping" command:<br />
Please go to Start>Run…> Enter “cmd” command in the column to open the MS-DOS window.<br />
Enter the command: ping 192.168.123.254<br />
If no response is received, either the connection is not working, or your PC's IP address is not compatible with the<br />
Wireless Router's IP Address. (See next item.)<br />
If your PC is using a fixed IP Address, its IP Address must be within the range 192.168.123.1 to 192.168.123.253 to<br />
be compatible with the Wireless Router's default IP Address of 192.168.123.253. Also, the Network Mask must be<br />
set to 255.255.255.0. See Chapter 4 - PC Configuration for details on checking your PC's TCP/IP settings.<br />
Ensure that your PC and the Wireless Router are on the same network segment. (If you don't have a router, this<br />
must be the case.)<br />
Ensure you are using the wired LAN interface. The Wireless interface can only be used if its configuration matches<br />
your PC's wireless settings.<br />
Version 1.00 6 English
<strong>PROLiNK</strong>® <strong>WNR1008</strong><br />
www.prolink2u.com<br />
Common Connection Types<br />
The Internet connection type is according to the ISP (Internet Service Provider) that you selected or subscribed.<br />
Modem Type IP Type Details ISP Data required<br />
Usually, none.<br />
Cable Modem<br />
Dynamic IP address<br />
Static (Fixed) IP address<br />
Your IP address is allocated automatically, when you<br />
connect to you ISP.<br />
Your ISP allocates a permanent IP address to you.<br />
However, some ISP's may<br />
require you to use a particular<br />
Hostname, Domain name, or<br />
MAC (physical) address.<br />
IP address allocated to you.<br />
Some ISP's may also require you<br />
to use a particular Hostname,<br />
Domain name, or MAC<br />
(physical) address.<br />
Dynamic IP address<br />
Your IP address is allocated automatically, when you<br />
connect to you ISP.<br />
None.<br />
DSL Modem<br />
Static (Fixed) IP address Your ISP allocates a permanent IP address to you. IP address allocated to you.<br />
PPPoE<br />
You connect to the ISP only when required. The IP<br />
address is usually allocated automatically.<br />
User name and password.<br />
The ISP's may require you to<br />
Other<br />
(eg: 3.5G Wireless Card)<br />
Dynamic IP address<br />
Your IP address is allocated automatically, when you<br />
connect to you ISP.<br />
use a particular Hostname,<br />
Domain name, or MAC<br />
(physical) address.<br />
3.3.<br />
<strong>PROLiNK</strong>_<strong>WNR1008</strong><br />
Version 1.00 7 English
<strong>PROLiNK</strong>® <strong>WNR1008</strong><br />
www.prolink2u.com<br />
3.4.<br />
LAN Interface Setup<br />
192.168.123.100<br />
255.255.255.0<br />
192.168.123.254<br />
192.168.123.100 192.168.123.200<br />
Item / Function<br />
Descriptions / Instructions<br />
IP Address Shows the IP address of the Wireless Router (Default IP address is 192.168.123.254)<br />
Subnet Mask The subnet mask of the Wireless Router (Default subnet mask is 255.255.255.0.)<br />
Default Gateway<br />
DHCP Mode<br />
Shows the default gateway of this Wireless Router.<br />
Disable: Select to disable this Wireless Router to distribute IP addresses to connected clients.<br />
Server: Select to enable this Wireless Router to distribute IP addresses (DHCP Server) to connected clients. And the<br />
following field will be activated for you to enter the starting IP address.<br />
Client: Select the client mode to use the<br />
The starting address of this local IP network address pool. The pool is a piece of continuous IP address segment, the<br />
device will distribute IP addresses from 192.168.123.100 to 192.168.123.200 to all the computers in the network that<br />
request IP addresses from DHCP server (Router). The end IP address maximum is 253.<br />
Note: If “Continuous IP address pool starts” is set at 192.168.123.1 and the “Number of IP address in pool end” is<br />
253, the device will distribute IP addresses from 192.168.123.100 to 192.168.123.253 to all the computers in the<br />
network that request IP addresses from DHCP server (Router).<br />
Click Show Client button to show Active DHCP Client Table. The table shows assigned IP address, MAC address<br />
and time expired for each client.<br />
DHCP Client Range<br />
192.168.123.100<br />
Static DHCP<br />
Refresh: Click this button to refresh the table.<br />
Close: Click this button to close the window.<br />
Check the box to enable the Static DHCP function, default setting is disabled. When set to enabled, user can click Set<br />
Version 1.00 8 English
<strong>PROLiNK</strong>® <strong>WNR1008</strong><br />
www.prolink2u.com<br />
Static DHCP button to set the Static DHCP function.<br />
Clone MAC Address<br />
IP Address: Enter the fixed IP address that DHCP Server assigned to a certain connected station.<br />
MAC Address: Enter the MAC address of a certain station, and then the DHCP Server will to distribute a fixed IP<br />
address to the station automatically once they connected.<br />
Comment: You can enter a comment to description above IP address or MAC address.<br />
Apply Changes: After completing the settings on this page, click Apply changes button to save the settings.<br />
Reset: Click Reset to restore to default values.<br />
Static DHCP List: Here shows the static IP addresses that have been assigned according to the MAC address.<br />
Delete Selected: Click Delete Selected to delete items which are selected.<br />
Delete All: Click Delete All button to delete all the items.<br />
Reset: Click Reset button to rest.<br />
This table displays you the station MAC information.<br />
Internet Service Setup<br />
Version 1.00 9 English
<strong>PROLiNK</strong>® <strong>WNR1008</strong><br />
Item / Function<br />
WAN Access Type<br />
www.prolink2u.com<br />
Descriptions / Instructions<br />
Select the WAN Access Type Static IP, DHCP Client, PPPoE, or Mobile Networks from the pull-down list. Default<br />
setting is DHCP (Auto Config) enabled.<br />
DHCP Client<br />
If the DHCP Client be selected, the computer will obtain the IP address automatically.<br />
Hostname: Enter the hostname that assigned IP address to your computer in this field. Maximum input is 32<br />
alphanumeric characters (case sensitive).<br />
MTU Size: The most appropriate MTU (Maximum Transmission Unit) namely the maximum packet size, the default<br />
value is 1492 for your application. Reducing the packet size can help connecting to certain web sites or speeding up<br />
packet transfer rate. If the incorrect packet size is entered, you may not be able to open certain web sites.<br />
Select to Attain DNS Automatically or select Set DNS <strong>Manual</strong>ly to set the DNS server IP address at the following<br />
DNS 1~3 columns. Default setting is Attain DNS Automatically.<br />
DNS 1: Enter the DNS server IP address (es) provided by your ISP, or you can specify your own preferred DNS server<br />
IP address (es).<br />
DNS 2~3: This servers are optional. You can enter another DNS server’s IP address as a backup. DNS 2 and 3 servers<br />
will be used when the DNS 1 server fails.<br />
Static (Fixed IP)<br />
If the Static IP be selected, user have to set up the IP address, subnet mask and default gateway according to the ISP<br />
(Internet Service Provider) that provide the related information.<br />
IP Address: Enter the WAN IP address provided by your ISP here.<br />
Subnet Mask: Enter the subnet mask here.<br />
Default Gateway: Enter the default gateway IP address provided by your ISP here.<br />
MTU Size: The most appropriate MTU (Maximum Transmission Unit) namely the maximum packet size, the default<br />
value is 1492 for your application. Reducing the packet size can help connecting to certain web sites or speeding up<br />
packet transfer rate. If the incorrect packet size is entered, you may not be able to open certain web sites.<br />
Select to Attain DNS Automatically or select Set DNS <strong>Manual</strong>ly to set the DNS server IP address at the following<br />
DNS 1~3 columns. Default setting is Attain DNS Automatically.<br />
DNS 1: Enter the DNS server IP address (es) provided by your ISP, or you can specify your own preferred DNS server<br />
IP address (es).<br />
DNS 2~3: This servers are optional. You can enter another DNS server’s IP address as a backup. DNS 2 and 3 servers<br />
Version 1.00 10 English
<strong>PROLiNK</strong>® <strong>WNR1008</strong><br />
www.prolink2u.com<br />
will be used when the DNS 1 server fails.<br />
PPPoE<br />
If the PPPoE be selected, user have to set up the user name and password according to the ISP (Internet Service<br />
Provider) that provided the related information.<br />
PPPoE Type: Select the PPPoE types, Normal PPPoE, Multiple PPPoE and Unnumbered PPPoE form the pull-down<br />
menu.<br />
Multi-PPPoE provider: If user select Multiple PPPoE type, user have to setup the PPPoE provider here. Select Flets<br />
West, Next West, Flets East, and Flets Next from the pull-down menu.<br />
Public Range: If user selected Unnumbered PPPoE type, have to setup the range here.<br />
User Name: Enter the username that provide by your ISP (Internet Service Provider). Maximum input is 32<br />
alphanumeric characters (case sensitive).<br />
Password: Enter the password that provide by your ISP. Maximum input is 32 alphanumeric characters (casesensitive).<br />
Service Name: Enter the Internet service provider’s name here.<br />
Connection Type: Select the connection type Continuous, Connect on Demand or <strong>Manual</strong> from the pull-down<br />
menu. If selected <strong>Manual</strong> user can click Connect button to make a connection.<br />
Idle Time: It represents that the device will idle after the minutes you set. The time must be set between 1~1000<br />
minutes. Default value of idle time is 5 minutes. This function will be available when the Connection Type is selected<br />
to Connect on Demand.<br />
MTU Size: MTU (Maximum Transmission Unit, namely the maximum packet size) for your application. Reducing the<br />
packet size can help connecting to certain web sites or speeding up packet transfer rate. If the incorrect selection is<br />
entered, you may not be able to open certain web sites.<br />
Connection Type: Select the connection type Continuous, Connect on Demand or <strong>Manual</strong> from the pull-down<br />
menu. If selected <strong>Manual</strong> user can click Connect button to make a connection.<br />
Idle Time: It represents that the device will idle after the minutes you set. The time must be set between 1~1000<br />
minutes. Default value of idle time is 5 minutes. This function will be available when the Connection Type is selected<br />
to Connect on Demand.<br />
Mobile Networks<br />
Version 1.00 11 English
<strong>PROLiNK</strong>® <strong>WNR1008</strong><br />
www.prolink2u.com<br />
User have to insert USB card that provide by Internet service provider into the USB port of the wireless router<br />
first, therefore, the Mobile networks function can be used.<br />
Auto APN: APN (Access Point Name.) If this function be selected, the system will auto detect the mobile network<br />
setting via the USB that provide by the Internet service provider (ISP). To use the default settings is recommend.<br />
Service Name: Keep the default setting or enter the service name that ISP provided.<br />
Dial Number: Keep the default setting or enter the dial number that ISP provided.<br />
Authentication: Check the box to enable to authentication function.<br />
• User Name: Enter the user name that provide by your ISP.<br />
• Password: Enter the password that provide by your ISP.<br />
Pin code: Keep the default setting or enter the SIM card Pin code that ISP provided.<br />
Connection Type: Select the connection type Continuous, Connect on Demand from the pull-down menu.<br />
Idle Time: It represents that the device will idle after the minutes you set. The time must be set between 1~1000<br />
minutes. Default value of idle time is 5 minutes. This function will be available when the Connection Type is selected<br />
to Connect on Demand.<br />
MTU Size: MTU (Maximum Transmission Unit, namely the maximum packet size) for your application. Reducing the<br />
packet size can help connecting to certain web sites or speeding up packet transfer rate. If the incorrect selection is<br />
entered, you may not be able to open certain web sites.<br />
Enable uPNP…<br />
Apply<br />
Cancel<br />
Check to enable the listed functions.<br />
After completing the settings on this page, click Apply button to save the settings.<br />
Click Cancel to restore to default values.<br />
Version 1.00 12 English
<strong>PROLiNK</strong>® <strong>WNR1008</strong><br />
www.prolink2u.com<br />
Advanced Routing<br />
If you connect several routers with this Wireless Router, you may need to set up a predefined routing rule to have<br />
more effective network topology/traffic, this is called static route between those routers and the Wireless Router.<br />
Item / Function<br />
Enable Dynamic<br />
Route<br />
Enable Static Route<br />
Destination<br />
Range<br />
IP address<br />
Interface<br />
Comment<br />
Apply<br />
Reset<br />
Descriptions / Instructions<br />
Check to enable the dynamic route function.<br />
NAT: Select to enable the network address translation function.<br />
Transmit: Select to use the Routing Information Protocol, the function will select the packet transmitting route that<br />
pass through least routers.<br />
Receive: Select to use the Routing Information Protocol, the function will select the packet receiving route that pass<br />
through least routers.<br />
IP address: Enter the Gateway IP address in the field.<br />
Subnet Mask: Enter the Gateway subnet mask here.<br />
Gateway: Enter the gateway name or domain name here.<br />
Metric: The route with the lowest metric is the preferred route.<br />
Interface: Select to use LAN or WAN as the physical interface from where the packets will be sent.<br />
The network address of the destination LAN segment. When a packet with destination IP address that matches to this<br />
field, it will route to the device set in the Route Gateway field.<br />
Select Host or Net from the pull-down menu. If select Net, please enter the Netmask in the following column.<br />
Enter the Gateway IP address in the field.<br />
You can<br />
Enter note or remark here.<br />
After completing the settings on this page, click Apply button to save the settings.<br />
Click to discard current setting.<br />
Version 1.00 13 English
<strong>PROLiNK</strong>® <strong>WNR1008</strong><br />
www.prolink2u.com<br />
PPTP Server<br />
Item / Function<br />
Enable PPTP Server<br />
User Name<br />
Password<br />
PPTP Server IP<br />
address<br />
PPTP Client’s IP Start<br />
Max Connect Users<br />
Descriptions / Instructions<br />
Check to enable the PPTP server function, this function allows you to connect securely from a remote location (such<br />
as your home) to an LAN (Local Area Network) located in another location, such as your workplace, business office<br />
and so on.<br />
Enter username in the column, when the PPTP client try to connect to the PPTP sever should login with the username.<br />
Setup the password in the column, when the PPTP client try to connect to the PPTP sever should login with the<br />
password.<br />
Setup the PPTP server IP address here.<br />
Setup the Client’s start IP address here.<br />
Setup the PPTP client allowed maximum here.<br />
Version 1.00 14 English
<strong>PROLiNK</strong>® <strong>WNR1008</strong><br />
www.prolink2u.com<br />
3.5.<br />
Basic<br />
<strong>PROLiNK</strong>_<strong>WNR1008</strong><br />
Item / Function<br />
Disable Wireless<br />
LAN Interface<br />
Band<br />
Mode<br />
Descriptions / Instructions<br />
Check to disable the wireless function. If the wireless LAN interface be disabled, the WLAN LED on the front LED will<br />
be off.<br />
You can choose one mode of the following you need.<br />
• 2.4GHz (B): 802.11b supported rate only.<br />
• 2.4GHz (G): 802.11g supported rate only.<br />
• 2.4GHz (N): 802.11n supported rate only.<br />
• 2.4GHz (B+G): 802.11b supported rate and 802.11g supported rate.<br />
• 2.4GHz (G+N): 802.11g supported rate and 802.11n supported rate.<br />
• 2.4GHz (B+G+N): 802.11b, 802.11g and 802.11n supported rate.<br />
The default is 2.4GHz (B+G+N) mode.<br />
Under Router operation mode, user can select AP, WDS, and AP+WDS from the pull-down list. For AP mode, user can<br />
select AP, Client, WDS and AP+WDS mode. Under client mode, there is only Client mode can be selected.<br />
Multiple APs<br />
This page shows and updates the wireless setting for multiple APs.<br />
Version 1.00 15 English
<strong>PROLiNK</strong>® <strong>WNR1008</strong><br />
www.prolink2u.com<br />
Network Type<br />
SSID<br />
Channel Width<br />
Channel Selection<br />
Broadcast SSID<br />
WMM<br />
Data Rate<br />
Associated Clients<br />
User can set up the multiple AP here.<br />
If the mode be set to AP or Client mode that the network type can be set to Infrastructure or Ad hoc.<br />
A SSID (Service Set Identifier) is referred to a network name because essentially it is a name that identifies a wireless<br />
network (case-sensitive).<br />
Select 20MHz/40MHz channel width, the channel number will be form 5~11 and auto; Select 20MHz channel width<br />
the channel number will be form 1~11 and auto. Default is 20MHz/40MHz.<br />
The channel number base on the channel width you select.<br />
Enabled: This wireless AP will broadcast its SSID to stations.<br />
Disabled: This wireless AP will not broadcast its SSID to stations. If stations want to connect to this wireless AP, this<br />
AP’s SSID should be known in advance to make a connection.<br />
The WiFi Multiple Media function is available under 2.4GHz (B), 2.4GHz (G) and 2.4GHz (B+G) band, and it is disabled<br />
under 2.4GHz (N), 2.4GHz (G+N) and 2.4GHz (B+G+N) band.<br />
There are several data rate that you can select from the pull-down menu.<br />
Click Show Active Clients button to show all the listed active clients.<br />
Enable Mac Clone<br />
(Single Ethernet<br />
Client)<br />
This function will be enabled under Client mode.<br />
Version 1.00 16 English
<strong>PROLiNK</strong>® <strong>WNR1008</strong><br />
www.prolink2u.com<br />
Advanced<br />
Item / Function Descriptions / Instructions<br />
Fragment Threshold Fragmentation mechanism is used for improving the efficiency when high traffic flows along in the wireless network.<br />
If the 802.11g MIMO Wireless Router often transmit large files in wireless network, you can enter new Fragment<br />
Threshold value to split the packet. The value can be set from 256 to 2346. The default value is 2346.<br />
RTS Threshold RTS Threshold is a mechanism implemented to prevent the “Hidden Node” problem. If the “Hidden Node” problem is<br />
an issue, please specify the packet size. The RTS mechanism will be activated if the data size exceeds the value you<br />
set.<br />
Warning: Enabling RTS Threshold will cause redundant network overhead that could negatively affect the throughput<br />
performance instead of providing a remedy.<br />
This value should remain at its default setting of 2347. Should you encounter inconsistent data flow, only minor<br />
modifications of this value are recommended.<br />
Beacon Interval Beacon Interval is the amount of time between beacon transmissions. Before a station enters power save mode, the<br />
station needs the beacon interval to know when to wake up to receive the beacon. Range 20-1024 ms, default is 100.<br />
Preamble Type A preamble is a signal used in wireless environment to synchronize the transmitting timing including Synchronization<br />
and Start frame delimiter. You can select Long or Short for the preamble type.<br />
IAPP<br />
Select Enabled or Disabled to execute this function.<br />
Protection<br />
Select Enabled or Disabled to execute the security function.<br />
Aggregation<br />
Select Enabled or Disabled to execute this function.<br />
Short GI<br />
Select Enabled or Disabled to execute this function.<br />
WLAN Partition Select Enabled or Disabled to execute this function.<br />
STBC<br />
Select Enabled or Disabled to execute this function.<br />
20/40MHz Coexist Select Enabled or Disabled to execute this function.<br />
RF Output Power Select the transmitting power rate 100%, 70%, 50%, 35%, 15%.<br />
Version 1.00 17 English
<strong>PROLiNK</strong>® <strong>WNR1008</strong><br />
www.prolink2u.com<br />
Security<br />
<strong>PROLiNK</strong>_<strong>WNR1008</strong><br />
Item / Function<br />
Select SSID<br />
Encryption<br />
Descriptions / Instructions<br />
Select SSID (Service Set Identifier) to set up the security form the pull-down list.<br />
There are several type of encryption modes including Disabled, WEP (Open System), WEP (Shared<br />
Key), WEP ( AUTO), WPA (Personal), WPA2 (Personal), and WPA-Mixed. The security default setting<br />
is Disabled. It is strongly recommended to set up security mode to prevent any unauthorized accessing.<br />
Note:<br />
‣ AUTO (Open/Shared) means AP can accept client (station) to connect to it by using OPEN-WEP or<br />
SHARED-WEP.<br />
WEP<br />
Authentication: Select Open System, Shared Key or Auto.<br />
Key Length: select key length 64-bit or 128-bit.<br />
Key Format:<br />
• Hexadecimal (WEP 64 bits): 10 Hex characters (0~9, a~f).<br />
• Hexadecimal (WEP 128 bits): 26 Hex characters (0~9, a~f).<br />
• ASCII (WEP 64 bits): 5 ASCII characters (case-sensitive).<br />
• ASCII (WEP 128 bits): 13 ASCII characters (case-sensitive).<br />
Encryption Key: Enter the key in the key setting field.<br />
WPA-PSK/ WPA2-PSK/ WPA-PSK WPA2-PSK<br />
Version 1.00 18 English
<strong>PROLiNK</strong>® <strong>WNR1008</strong><br />
www.prolink2u.com<br />
Authentication Mode: Select Enterprise (RADIUS) or Personal (Pre-Shared Key) mode.<br />
WPA Cipher Suite: here supported AES only.<br />
WPA2 Cipher Suite: here supported AES only.<br />
Pre-Shared Key Format: There are two formats for choice to set the Pre-shared key, Passphrase and<br />
Hex (64 characters). If Hex is selected, users will have to enter a 64 characters string. For easier<br />
configuration, the Passphrase (at least 8 characters) format is recommended.<br />
Pre-Shared Key : Pre-Shared Key serves as a password. Users may key in 8 to 63 characters string if you<br />
selected passphrase. Pre-shared key format to set the passwords or leave it blank, in which the 802.1x<br />
Authentication will be activated. Make sure the same password is used on client's end.<br />
ACL<br />
Item / Function<br />
Wireless Access<br />
Control Mode<br />
MAC Address<br />
Comment<br />
Current Access<br />
Control List<br />
Delete Selected<br />
Delete All<br />
Reset<br />
Descriptions / Instructions<br />
Select Allow Listed or Deny Listed form the pull-down menu to enable access control function. Default setting is<br />
Disabled.<br />
Enter the MAC address (12 characters) of a station that is allowed to access this Access Point.<br />
You may enter up to 20 characters as a remark to the previous MAC address.<br />
This table displays you the station MAC information.<br />
Click Delete Selected to delete items which are selected.<br />
Click Delete All to delete all the items.<br />
Click Reset to rest.<br />
Version 1.00 19 English
<strong>PROLiNK</strong>® <strong>WNR1008</strong><br />
www.prolink2u.com<br />
WDS<br />
Wireless Distribution System uses wireless media to communicate with other APs, like the Ethernet does. To do this,<br />
you must set these APs in the same channel and set MAC address of other APs which you want to communicate with<br />
in the table and then enable the WDS.<br />
To use WDS function:<br />
1. The APs must support WDS function.<br />
2. To set the same SSID (Network name).<br />
3. The channel must be set to the same on the APs.<br />
4. To set the same Wireless MAC address (BSSID) on the APs.<br />
5. To set same security (WEP or WPA) on the APs.<br />
Note: To setup WDS must use the same wireless products (the same model will be better); due to<br />
different wireless products might support different WDS settings. Thus, it is suggested that to use<br />
the same wireless products that support WDS function.<br />
Step 1.<br />
Users would like to set up the WDS function, please go to Wireless > Basic page to set up the mode into<br />
WDS or AP+ WDS (Repeater) mode, and set the APs into the same Network Name (SSID) and Channel (If<br />
set to WDS mode, the SSID do not need to change). After setting up, please click Apply Changes button to<br />
execute.<br />
Version 1.00 20 English
<strong>PROLiNK</strong>® <strong>WNR1008</strong><br />
www.prolink2u.com<br />
1<br />
2<br />
<strong>PROLiNK</strong>_<strong>WNR1008</strong><br />
3<br />
Step 2.<br />
Then go to Wireless > WDS page to (1) enable the WDS function and (2) enter APs Wireless MAC address<br />
(please go to Status> Wireless Configuration to make sure the BSSID) to each other to make the WDS<br />
connection. Please click Apply button to execute.<br />
1<br />
2<br />
Item / Function<br />
Enable WDS<br />
MAC Address<br />
Descriptions / Instructions<br />
Check the box to enable the WDS function.<br />
MAC Address: Enter the Wireless BSSID (MAC) 12 characters of the wireless AP that you want to connect with. To<br />
check your wireless router’s MAC address, please go to Status > Wireless Configuration to find your BSSID<br />
(Wireless MAC address.)<br />
Version 1.00 21 English
<strong>PROLiNK</strong>® <strong>WNR1008</strong><br />
www.prolink2u.com<br />
<strong>PROLiNK</strong>_<strong>WNR1008</strong><br />
Data Rate<br />
Comment<br />
Apply Changes<br />
Reset<br />
Select the data rate form the pull-down list.<br />
Enter a description for the device.<br />
After completing the settings on this page, click Apply changes button to save the settings.<br />
Click Reset to restore to default values.<br />
Enable the WDS function and then click Set Security button to set up the WDS security.<br />
Set Security<br />
Encryption: Select the encryption type None, WEP 64 bits, WEP 128 bits, and WPA2 (AES) from the pull-down<br />
menu.<br />
WEP Key Format: For WEP 64 bits and WEP 128 bits encryption type, the selection of WEP Key Format are Hex<br />
and ASCII.<br />
WEP Key: If select Hex if you are using hexadecimal numbers (0-9, or A-F). Select ASCII if you are using ASCII<br />
characters (case-sensitive).<br />
• Hexadecimal (WEP 64 bits): 10 Hex characters (0~9, a~f).<br />
• Hexadecimal (WEP 128 bits): 26 Hex characters (0~9, a~f).<br />
• ASCII (WEP 64 bits): 5 ASCII characters (case-sensitive).<br />
• ASCII (WEP 128 bits): 13 ASCII characters (case-sensitive).<br />
Pre-Shared Key Format: The Pre-shared Key Format will be enabled when WPA (TKIP) and WPA2 (AES)<br />
encryption be selected. There are two formats for choice to set the Pre-shared key, Passphrase and Hex (64<br />
characters). If Hex is selected, users will have to enter a 64 characters string. For easier configuration, the<br />
Passphrase (at least 8 characters) format is recommended.<br />
Pre-Shared Key: Pre-Shared-Key serves as a password. Users may key in 8 to 63 characters string to set the<br />
passwords or leave it blank, in which the 802.1x Authentication will be activated. Make sure the same password is<br />
used on client's end.<br />
Click to show the current WDS AP table. This table shows the MAC address, transmission packets and errors,<br />
reception packets and Tx Rate (Mbps) counters for each configured WDS AP.<br />
Show Statistics<br />
Version 1.00 22 English
<strong>PROLiNK</strong>® <strong>WNR1008</strong><br />
www.prolink2u.com<br />
Current WDS AP List<br />
Delete Selected<br />
Delete All<br />
Reset<br />
Refresh: Click to renew the counters information.<br />
Close: Click to leave the screen.<br />
Here shows the current WDS AP information.<br />
Click Delete Selected to delete the selected AP information.<br />
Click Delete All to delete all the items.<br />
Click Reset to restore the settings.<br />
WPS<br />
Item / Function<br />
Disable WPS<br />
WPS Status<br />
Self-PIN Number<br />
Push Button<br />
Configuration<br />
Client PIN Number<br />
Descriptions / Instructions<br />
Check the box to disable the WPS function, default setting is enabled.<br />
Here shows the current status of the WPS function. Default setting is Configured, click Reset to Unconfigured to reconfigured<br />
the WPS connection.<br />
Here shows the 8 characters PIN code of the router itself.<br />
Click Start PBC button to make a WPS connection with client.<br />
Enter the client PIN code into the blank field then click the Start PIN button to make a WPS connection with client.<br />
Version 1.00 23 English
<strong>PROLiNK</strong>® <strong>WNR1008</strong><br />
www.prolink2u.com<br />
Schedule<br />
Item / Function<br />
Enable Wireless<br />
Schedule<br />
Descriptions / Instructions<br />
Check the box to enable the schedule function. Set up the time to schedule the wireless access rule. Select the day<br />
and time you want to enable the wireless function.<br />
3.6.<br />
DMZ Settings<br />
Item / Function<br />
Enable DMZ<br />
DMZ Host IP<br />
Address<br />
Apply Changes<br />
Reset<br />
Descriptions / Instructions<br />
Check the box to enable DMZ function. If the DMZ Host Function is enabled, it means that you set up DMZ host at a<br />
particular computer to be exposed to the Internet so that some applications/software, especially Internet / online<br />
game can have two way connections.<br />
Enter the IP address of a particular host in your LAN which will receive all the packets originally going to the WAN<br />
port/Public IP address above.<br />
Note: You need to give your LAN PC clients a fixed/static IP address for DMZ to work properly.<br />
After completing the settings on this page, click Apply Changes button to save the settings.<br />
Click Reset button to restore to default values.<br />
Version 1.00 24 English
<strong>PROLiNK</strong>® <strong>WNR1008</strong><br />
www.prolink2u.com<br />
URL Filter Settings<br />
Item / Function<br />
Enable URL Filtering<br />
URL Address<br />
Apply Changes<br />
Reset<br />
Current Filter Table<br />
Delete Selected<br />
Delete All<br />
Reset<br />
Descriptions / Instructions<br />
Check to enable URL filtering function.<br />
Enter the URL address in the field.<br />
After completing the settings on this page, click Apply Changes button to save the settings.<br />
Click Reset button to restore to default values.<br />
Shows the current URL address filter information.<br />
Click Delete Selected button to delete items which are selected.<br />
Click Delete All button to delete all the items.<br />
Click Reset button to rest.<br />
MAC Filtering<br />
Version 1.00 25 English
<strong>PROLiNK</strong>® <strong>WNR1008</strong><br />
www.prolink2u.com<br />
Item / Function<br />
Enable MAC Filtering<br />
MAC Address<br />
Comment<br />
Apply Changes<br />
Reset<br />
Current Filter Table<br />
Delete Selected<br />
Delete All<br />
Reset<br />
Descriptions / Instructions<br />
Check to enable MAC filtering function.<br />
Enter the client MAC address in the field.<br />
You may key in a description MAC address.<br />
After completing the settings on this page, click Apply Changes button to save the settings.<br />
Click Reset button to restore to default values.<br />
Shows the current MAC filter information.<br />
Click Delete Selected button to delete items which are selected.<br />
Click Delete All button to delete all the items.<br />
Click Reset button to rest.<br />
Port Filtering Settings<br />
Item / Function<br />
Enable Port Filtering<br />
Port Range<br />
Protocol<br />
Comment<br />
Apply Changes<br />
Reset<br />
Current Port<br />
Forwarding Table<br />
Delete Selected<br />
Delete All<br />
Reset<br />
Descriptions / Instructions<br />
Check to enable Port Filtering function.<br />
Enter the beginning of the range of port numbers used by the service. If the service uses a single port number, enter<br />
it in both the start and finish fields.<br />
Select the protocol (TCP, UDP or Both) used to the remote system or service.<br />
You may key in a description MAC address.<br />
After completing the settings on this page, click Apply Changes button to save the settings.<br />
Click Reset button to restore to default values.<br />
Shows the current Port Forwarding information.<br />
Click Delete Selected button to delete items which are selected.<br />
Click Delete All button to delete all the items.<br />
Click Reset button to rest.<br />
Version 1.00 26 English
<strong>PROLiNK</strong>® <strong>WNR1008</strong><br />
www.prolink2u.com<br />
IP Filtering<br />
Item / Function<br />
Enable IP Filtering<br />
Local IP Address<br />
Protocol<br />
Comment<br />
Apply Changes<br />
Reset<br />
Current Filter Table<br />
Delete Selected<br />
Delete All<br />
Reset<br />
Descriptions / Instructions<br />
Check to enable IP filtering function.<br />
Enter the local server’s IP address.<br />
Select the protocol (TCP, UDP or Both) used to the remote system or service.<br />
You may key in a description for the port range.<br />
After completing the settings on this page, click Apply Changes button to save the settings.<br />
Click Reset button to restore to default values.<br />
Shows the current IP filter information.<br />
Click Delete Selected button to delete items which are selected.<br />
Click Delete All button to delete all the items.<br />
Click Reset button to rest.<br />
Version 1.00 27 English
<strong>PROLiNK</strong>® <strong>WNR1008</strong><br />
www.prolink2u.com<br />
Virtual Server<br />
Item / Function<br />
Enable Port<br />
Forwarding<br />
IP Address<br />
Protocol<br />
Port Range<br />
Comment<br />
Apply Changes<br />
Reset<br />
Current Port<br />
Forwarding Table<br />
Delete Selected<br />
Delete All<br />
Reset<br />
Descriptions / Instructions<br />
Check to enable Port Forwarding function.<br />
Enter the IP address in the field.<br />
Select the protocol (TCP, UDP or Both) used to the remote system or service.<br />
For TCP and UDP Services, enter the beginning of the range of port numbers used by the service. If the service uses a<br />
single port number, enter it in both the start and finish fields.<br />
You may key in a description MAC address.<br />
After completing the settings on this page, click Apply Changes button to save the settings.<br />
Click Reset button to restore to default values.<br />
Shows the current Port Forwarding information.<br />
Click Delete Selected button to delete items which are selected.<br />
Click Delete All button to delete all the items.<br />
Click Reset button to rest.<br />
Version 1.00 28 English
<strong>PROLiNK</strong>® <strong>WNR1008</strong><br />
www.prolink2u.com<br />
VLAN<br />
Item / Function<br />
Enable VLAN<br />
Descriptions / Instructions<br />
Entries in below table are used to config VLAN settings. VLANs are created to provide the segmentation services<br />
traditionally provided by routers. VLANs address issues such as scalability, security, and network management.<br />
3.7.<br />
Password<br />
Item / Function<br />
User Name<br />
Descriptions / Instructions<br />
To set up the login username to protect the Wireless Router configuration accessing via web browser. Empty user<br />
Version 1.00 29 English
<strong>PROLiNK</strong>® <strong>WNR1008</strong><br />
New Password<br />
Confirmed Password<br />
www.prolink2u.com<br />
name and password will disable the protection. It’s strongly recommended to assign a set of password for further<br />
security.<br />
To set up the login password to protect the Wireless Router configuration accessing via web browser. Maximum<br />
input is 30 alphanumeric characters (case sensitive.)<br />
Key in the password again to confirm.<br />
NAS<br />
Item / Function<br />
FTP Service Enable<br />
FTP Port<br />
Login Timeout<br />
Stay Timeout<br />
Login Users<br />
Share Mode<br />
Use anonymous<br />
login<br />
Descriptions / Instructions<br />
Network attached storage (NAS) allows user access data through network service. User can use FTP, Samba solutions<br />
to share USB storage device in the networks.<br />
Enter the FTP port here.<br />
Setup the login time limit seconds here.<br />
Setup the login stay time limit seconds here.<br />
Setup the login user limit numbers here.<br />
To control the data authentication for login user.<br />
Do not need to login with a s username or password. If you do not want to use anonymous login, please enter the<br />
user name and password in the field.<br />
Media Share<br />
Item / Function<br />
Enable Media Server<br />
Share Folder Name<br />
Descriptions / Instructions<br />
The media server allows user sharing multi-media files on local networks.<br />
Enter the file name that shared on the local area network here.<br />
Version 1.00 30 English
<strong>PROLiNK</strong>® <strong>WNR1008</strong><br />
www.prolink2u.com<br />
NTP<br />
Item / Function<br />
Current Time<br />
Time Zone Select<br />
Enable NTP client<br />
update<br />
Automatically Adjust<br />
Daylight Saving<br />
NTP server<br />
<strong>Manual</strong> IP setting<br />
Apply Changes<br />
Refresh<br />
Descriptions / Instructions<br />
Enter the current time of this wireless router or click the Copy Computer Time button to synchronize the time with<br />
the connected computer automatically.<br />
Select the local time zone from the pull-down menu.<br />
Check to enable NTP (Network Time Protocol Server) client update function.<br />
Check the box to enable this function.<br />
You may choose to select NTP server from the pull-down menu or enter an IP address of a specific server manually.<br />
After completing the settings on this page, click Apply Changes button to save current settings.<br />
Click Refresh button to renew current time.<br />
Dynamic DNS Setting<br />
Version 1.00 31 English
<strong>PROLiNK</strong>® <strong>WNR1008</strong><br />
Item / Function<br />
Enable DDNS<br />
Service Provider<br />
Domain Name<br />
User Name/Email<br />
Password/Key<br />
Apply Changes<br />
Reset<br />
www.prolink2u.com<br />
Descriptions / Instructions<br />
Check to enable the DDNS function.<br />
Select the desired DDNS Service Provider DynDNS, TZO or Oray from the pull-down list.<br />
Here shows the domain name of the service provider.<br />
Enter your email that you registered in service provider website. (You can refer to below Note information to apply a<br />
account form the service provider website.)<br />
Enter your passwords that you registered in service provider website. Maximum input is 30 alphanumeric characters<br />
(case sensitive).<br />
After completing the settings on this page, click Apply Changes button to save the settings.<br />
Click Reset button to restore to default values.<br />
Upgrade Firmware<br />
Item / Function<br />
Firmware Version<br />
Select File<br />
Upload<br />
Reset<br />
Descriptions / Instructions<br />
Here display the latest firmware version.<br />
Click the Browse button to find and open the firmware file (the browser will display to correct file path.)<br />
Click the Upload button to perform.<br />
Click Reset button to restore to default values.<br />
Settings Management<br />
Item / Function<br />
Save Settings to File<br />
Load Settings form<br />
File<br />
Reset Settings to<br />
Default<br />
Descriptions / Instructions<br />
Click the Save button to save the current settings file in the PC.<br />
Click the Browse button to find and open the previous saved file (the browser will display to correct file path.) Then,<br />
click Upload button to upload the previous file.<br />
Click Reset button to set the device back to default settings.<br />
Version 1.00 32 English
<strong>PROLiNK</strong>® <strong>WNR1008</strong><br />
www.prolink2u.com<br />
Statistics<br />
This page shows the packet counters for transmission and reception regarding to wireless and Ethernet networks.<br />
System Log<br />
Item / Function<br />
Enable Log<br />
System all<br />
Wireless<br />
DoS<br />
Enable Remote Log<br />
Log Server IP<br />
address<br />
Apply Changes<br />
Refresh<br />
Clear<br />
Descriptions / Instructions<br />
Check to enable logging function.<br />
Activates all logging functions.<br />
Only logs related to the wireless LAN will be recorded.<br />
Only logs related to the DoS protection will be recorded.<br />
Only logs related to the Remote control will be recorded.<br />
Only logs related to the server will be recorded.<br />
After completing the settings on this page, click Apply Changes button to save current settings.<br />
Click Refresh button to renew the logs.<br />
Click Clear button to delete the logs.<br />
Version 1.00 33 English
<strong>PROLiNK</strong>® <strong>WNR1008</strong><br />
www.prolink2u.com<br />
Reboot<br />
Click the Reboot button to restart the Wireless Router.<br />
Version 1.00 34 English
<strong>PROLiNK</strong>® <strong>WNR1008</strong><br />
CHAPTER 4: PC CONFIGURATION<br />
www.prolink2u.com<br />
4.1.<br />
For each PC, the following may need to be configured:<br />
TCP/IP network settings<br />
Internet Access configuration<br />
Wireless configuration<br />
4.2.<br />
<br />
<br />
<br />
This section describes how to configure Windows clients for Internet access via the Wireless Router.<br />
The first step is to check the PC's TCP/IP settings.<br />
The Wireless Router uses the TCP/IP network protocol for all functions, so it is essential that the TCP/IP<br />
protocol be installed and configured on each PC.<br />
TCP/IP Settings - Overview<br />
If using default Wireless Router settings, and default Windows TCP/IP settings, no changes need to be made.<br />
By default, the Wireless Router will act as a DHCP Server, automatically providing a suitable IP address (and<br />
related information) to each PC when the PC boots.<br />
For all non-server versions of Windows, the default TCP/IP setting is to act as a DHCP client.<br />
If using a Fixed (specified) IP address, the following changes are required:<br />
The Gateway must be set to the IP address of the Wireless Router.<br />
The DNS should be set to the address provided by your ISP (Internet Service Provider.)<br />
Checking TCP/IP Settings - Windows 2000<br />
1. Go to Start Control Panel Network and Dial-up Connection.<br />
2. Right click the Local Area Connection icon and select Properties. You should see a screen like the following:<br />
3. Select the Internet Protocol (TCP/IP) protocol for your network<br />
card.<br />
Version 1.00 35 English
<strong>PROLiNK</strong>® <strong>WNR1008</strong><br />
www.prolink2u.com<br />
4. Click on the Properties button. You should then see a screen<br />
like the following.<br />
5. Ensure your TCP/IP settings are correct.<br />
Using DHCP<br />
To use DHCP, select Obtain an IP address automatically and Obtain DNS server address automatically.<br />
This is the default Windows setting. Using this is recommended. By default, the Wireless Router will act as a<br />
DHCP Server.<br />
Restart your PC to ensure it obtains an IP address from the Wireless Router automatically.<br />
Using a fixed IP Address ("Use the following IP Address")<br />
If your PC is already configured, check with your network administrator before making the following changes.<br />
Enter the Wireless Router's IP address in the Default gateway field. (Your LAN administrator can advise you<br />
of the IP address they assigned to the Wireless Router.)<br />
If the DNS Server fields are empty, select Use the following DNS server addresses, and enters the DNS<br />
address or addresses provided by your ISP.<br />
Checking TCP/IP Settings - Windows XP<br />
1. Go to Start Control Panel Network Connection.<br />
2. Right click the Local Area Connection icon and choose Properties. You should see a screen like the following:<br />
3. Select the Internet Protocol (TCP/IP) protocol for your<br />
network card.<br />
Version 1.00 36 English
<strong>PROLiNK</strong>® <strong>WNR1008</strong><br />
www.prolink2u.com<br />
4. Click on the Properties button. You should then see a screen like<br />
the following.<br />
5. Ensure your TCP/IP settings are correct.<br />
Using DHCP<br />
To use DHCP, select Obtain an IP address automatically and Obtain DNS server address automatically.<br />
This is the default Windows setting. Using this is recommended. By default, the Wireless Router will act as a<br />
DHCP Server.<br />
Restart your PC to ensure it obtains an IP address from the Wireless Router.<br />
Using a fixed IP Address ("Use the following IP Address")<br />
If your PC is already configured, check with your network administrator before making the following changes.<br />
In the Default gateway field, enter the Wireless Router's IP address. Your LAN administrator can advise you<br />
of the IP address they assigned to the Wireless Router.<br />
If the DNS Server fields are empty, select Use the following DNS server addresses, and enters the DNS<br />
address or addresses provided by your ISP, then click OK.<br />
Checking TCP/IP Settings - Windows Vista<br />
1. Go to Start Control Panel Network and Internet Network and Sharing Center Manage Network<br />
Connections Local Area Connection.<br />
2. Right click the Local Area Connection icon and choose Properties. You should see a screen like the following:<br />
3. Select the Internet Protocol Version 4 (TCP/IPv4) or 6 (TCP/IPv6)<br />
for your network card<br />
Version 1.00 37 English
<strong>PROLiNK</strong>® <strong>WNR1008</strong><br />
www.prolink2u.com<br />
4. Click on the Properties button. You should then see a screen<br />
like the following.<br />
5. Ensure your TCP/IP settings are correct.<br />
Using DHCP<br />
To use DHCP, select Obtain an IP address automatically and Obtain DNS server address automatically.<br />
This is the default Windows setting. Using this is recommended. By default, the Wireless Router will act as a<br />
DHCP Server.<br />
Restart your PC to ensure it obtains an IP address from the Wireless Router.<br />
Using a fixed IP Address ("Use the following IP Address")<br />
If your PC is already configured, check with your network administrator before making the following changes.<br />
In the Default gateway field, enter the Wireless Router's IP address. Your LAN administrator can advise you<br />
of the IP address they assigned to the Wireless Router.<br />
If the DNS Server fields are empty, select Use the following DNS server addresses, and enters the DNS<br />
address or addresses provided by your ISP, then click OK.<br />
Checking TCP/IP Settings - Windows 7<br />
1. Go to Start Control Panel Network and Sharing Center Manage Network Connections Local Area<br />
Connection.<br />
2. Right click the Local Area Connection icon and choose Properties. You should see a screen like the following:<br />
3. Select the Internet Protocol Version 4 (TCP/IPv4) or 6 (TCP/IPv6)<br />
for your network card.<br />
Version 1.00 38 English
<strong>PROLiNK</strong>® <strong>WNR1008</strong><br />
www.prolink2u.com<br />
4. Click on the Properties button. You should then see a screen like<br />
the following.<br />
5. Ensure your TCP/IP settings are correct.<br />
Using DHCP<br />
To use DHCP, select Obtain an IP address automatically and Obtain DNS server address automatically.<br />
This is the default Windows setting. Using this is recommended. By default, the Wireless Router will act as a<br />
DHCP Server.<br />
Restart your PC to ensure it obtains an IP address from the Wireless Router.<br />
Using a fixed IP Address ("Use the following IP Address")<br />
If your PC is already configured, check with your network administrator before making the following changes.<br />
In the Default gateway field, enter the Wireless Router's IP address. Your LAN administrator can advise you of<br />
the IP address they assigned to the Wireless Router.<br />
If the DNS Server fields are empty, select Use the following DNS server addresses, and enters the DNS<br />
address or addresses provided by your ISP, then click OK.<br />
Internet Access<br />
To configure your PCs to use the Wireless Router for Internet access:<br />
Ensure that the ADSL modem, DSL modem, Cable modem, or other permanent connection is functional.<br />
Use the following procedure to configure your Browser to access the Internet via the LAN, rather than by a<br />
Dial-up connection.<br />
For Windows 2000<br />
1. Select Start menu Settings Control Panel Internet Options.<br />
2. Select the Connection tab, and click the Setup button.<br />
3. Select "I want to set up my Internet connection manually, or I want to connect through a local area<br />
network (LAN)" and click Next.<br />
4. Select "I connect through a local area network (LAN)" and click Next.<br />
5. Ensure all of the boxes on the following Local area network Internet Configuration screen are unchecked.<br />
6. Check the "No" option when prompted "Do you want to set up an Internet mail account now?"<br />
7. Click Finish to close the Internet Connection Wizard Setup is now completed.<br />
For Windows XP<br />
1. Select Start menu Control Panel Network and Internet Connections.<br />
2. Select Set up or change your Internet Connection.<br />
3. Select the Connection tab, and click the Setup button.<br />
Version 1.00 39 English
<strong>PROLiNK</strong>® <strong>WNR1008</strong><br />
www.prolink2u.com<br />
4. Cancel the pop-up "Location Information" screen.<br />
5. Click Next on the "New Connection Wizard" screen.<br />
6. Select "Connect to the Internet" and click Next.<br />
7. Select "Set up my connection manually" and click Next.<br />
8. Check "Connect using a broadband connection that is always on" and click Next.<br />
9. Click Finish to close the New Connection Wizard Setup is now completed.<br />
For Windows Vista<br />
1. Select Start menu Control Panel Network and Internet Network and Sharing Center.<br />
2. Select Set up a connection or network.<br />
3. Select Connect to the Internet and click Next to continue.<br />
4. Select Broadband (PPPoE).<br />
5. Enter User name and Password that provided by the ISP, then click Connect to make a connection.<br />
For Windows 7<br />
1. Select Start menu Control Panel Network Sharing Center.<br />
2. Select Set up a new connection or network.<br />
3. Select Connect to the Internet and click Next to continue.<br />
4. Select Broadband (PPPoE).<br />
5. Enter User name and Password that provided by the ISP, then click Connect to make a connection.<br />
Accessing AOL<br />
To access AOL (America On Line) through the Wireless Router, the AOL for Windows software must be configured to<br />
use TCP/IP network access, rather than a dial-up connection. The configuration process is as follows:<br />
1. Start the AOL for Windows communication software. Ensure that it is Version 2.5, 3.0 or later. This procedure<br />
will not work with earlier versions.<br />
2. Click the Setup button.<br />
3. Select Create Location, and change the location name from "New Locality" to " Wireless Router ".<br />
4. Click Edit Location. Select TCP/IP for the Network field. (Leave the Phone Number blank.)<br />
5. Click Save, then OK.<br />
6. Configuration is now complete.<br />
7. Before clicking "Sign On", always ensure that you are using the " Wireless Router " location.<br />
4.3.<br />
From your Macintosh, you can access the Internet via the Wireless Router. The procedure is as follows.<br />
1. Open the TCP/IP Control Panel.<br />
2. Select Ethernet from the Connect via pop-up menu.<br />
3. Select Using DHCP Server from the Configure pop-up menu. The DHCP Client ID field can be left blank.<br />
4. Close the TCP/IP panel, saving your settings.<br />
If using manually assigned IP addresses instead of DHCP, the required changes are:<br />
Set the Router Address field to the Wireless Router's IP Address.<br />
Ensure your DNS settings are correct.<br />
Version 1.00 40 English
<strong>PROLiNK</strong>® <strong>WNR1008</strong><br />
www.prolink2u.com<br />
4.4.<br />
To access the Internet via the Wireless Router, it is only necessary to set the Wireless Router as the "Gateway".<br />
Ensure you are logged in as "root" before attempting any changes.<br />
Fixed IP Address<br />
By default, most Unix installations use a fixed IP Address. If you wish to continue using a fixed IP Address, make the<br />
following changes to your configuration.<br />
Set your "Default Gateway" to the IP Address of the Wireless Router.<br />
Ensure your DNS (Domain Name server) settings are correct.<br />
To act as a DHCP Client (Recommended)<br />
The procedure below may vary according to your version of Linux and X -windows shell.<br />
1. Start your X Windows client.<br />
2. Select Control Panel – Network.<br />
3. Select the "Interface" entry for your Network card. Normally, this will be called "eth0".<br />
4. Click the Edit button, set the "protocol" to "DHCP", and save this data.<br />
5. To apply your changes:<br />
Use the "Deactivate" and "Activate" buttons, if available.<br />
OR, restart your system.<br />
4.5.<br />
To access the Internet via the Wireless Router:<br />
Ensure the "Gateway" field for your network card is set to the IP Address of the Wireless Router.<br />
Ensure your DNS (Name Server) settings are correct.<br />
4.6.<br />
<br />
<br />
This section applies to all wireless stations (client end) wishing to use the Wireless Router as an access point,<br />
regardless of the operating system that is used on the client.<br />
To use the Wireless Router, each wireless station must have compatible settings, as following:<br />
Mode<br />
SSID (ESSID) (Extended<br />
Service Set Identifier)<br />
Disable<br />
The mode must be set to Infrastructure.<br />
The network name must match the value used on the Wireless Router.<br />
Note! The SSID (service set identifier) is case- sensitive.<br />
If there is no security is enabled on the Wireless Router, the security of each station should be disabled<br />
as well. And, you can connect the Wireless Router without security, but it is NOT recommended.<br />
By default, WEP on the Wireless Router is disabled.<br />
WEP<br />
Open System/ Shared Key/<br />
Auto<br />
Personal (Pre-Shared Key)<br />
Shared Key only supports WEP as encryption method.<br />
AUTO (Open/Shared) means AP can accept STA connect to it using OPEN-WEP or SHARED-WEP.<br />
If WEP remains disabled on the Wireless Router, all stations must have WEP disabled.<br />
If WEP is enabled on the Wireless Router, each station must use the same settings as the Wireless<br />
Router.<br />
WPA-PSK (TKIP/AES)/ WPA2-PSK (TKIP/AES): If one of these securities is enabled on the Wireless<br />
Version 1.00 41 English
<strong>PROLiNK</strong>® <strong>WNR1008</strong><br />
WPA<br />
WPA2<br />
WPA2-Mixed<br />
www.prolink2u.com<br />
Router. To make a connection, each station must use the same algorithms and pass phrase as the<br />
Wireless Router.<br />
Pre-Shared Key Format: There are two formats for choice to set the Pre-shared key, Passphrase and<br />
Hex (64 characters). If Hex is selected, users will have to enter 64 characters string at a time. For easier<br />
configuration, the Passphrase (at least 8 characters) format is recommended.<br />
Pre-Shared Key : Pre-Shared Key serves as a password. Users may key in 8 to 63 characters string if<br />
you selected passphrase. Pre-shared key format to set the passwords or leave it blank, in which the<br />
802.1x Authentication will be activated. Make sure the same password is used on client's end.<br />
Enterprise (RADIUS)<br />
WPA<br />
WPA2<br />
WPA2-Mixed<br />
802.1x<br />
RADIUS Server: RADIUS is an authentication, authorization and accounting client-server protocol. The<br />
client is a Network Access Server that desires to authenticate its links. The RADIUS is a server that has<br />
access to a user database with authentication information. Each station must set up the RADIUS Server’s<br />
IP address, port and passwords that provided by your ISP.<br />
By default, the Wireless Router will allow 802.11b, 802.11g and 802.11n connections.<br />
Version 1.00 42 English
<strong>PROLiNK</strong>® <strong>WNR1008</strong><br />
CHAPTER 5: TROUBLESHOOTING<br />
www.prolink2u.com<br />
5.1.<br />
This chapter covers some common problems that may be encountered while using the Wireless Router and some<br />
possible solutions to them. If you follow the suggested steps and the Wireless Router still does not function properly,<br />
contact your dealer for further advice.<br />
5.2.<br />
Problem 1:<br />
Solution 1:<br />
Can't connect to the Wireless Router to configure it.<br />
Check the following:<br />
<br />
<br />
<br />
<br />
Check the Wireless Router is properly installed, LAN connections are OK, and it is powered ON.<br />
Ensure that your PC and the Wireless Router are on the same network segment.<br />
If your PC is set to "Obtain an IP address automatically" (DHCP client), please restart it.<br />
If your PC uses a Fixed (Static) IP address, ensure that it is using an IP address within the range 192.168.123.1 to<br />
192.168.123.253 and thus compatible with the Wireless Router's default IP Address of 192.168.123.254.<br />
Also, the Network Mask should be set to 255.255.255.0 to match the Wireless Router.<br />
In Windows, you can check these settings by using Control Panel-Network to check the Properties for the TCP/IP<br />
protocol. You can check Chapter 4: PC Configuration- TCP/IP settings for reference.<br />
5.3.<br />
Problem 1:<br />
Solution 1:<br />
When I enter a URL or IP address I get a time out error.<br />
A number of things could be causing this. Try the following troubleshooting steps.<br />
<br />
<br />
<br />
Check if other PCs work. If they do, ensure that your PCs IP settings are correct. If using a Fixed (Static) IP address,<br />
check the Network Mask, Default gateway and DNS as well as the IP address.<br />
If the PCs are configured correctly, but still not working, check the Wireless Router. Ensure that it is connected and<br />
ON. Connect to it and check its settings. (If you can't connect to it, check the LAN and power connections.)<br />
If the Wireless Router is configured correctly, check your Internet connection (ADSL/Cable modem) to see that it is<br />
working correctly.<br />
Problem 2:<br />
Solution 2:<br />
Some applications do not run properly when using the Wireless Router.<br />
The Wireless Router processes the data passing through it, so it is not transparent.<br />
Use the Filter Settings feature to allow the use of Internet applications, which do not function correctly.<br />
If this does solve the problem you can use the DMZ function. This should work with almost every application, but:<br />
<br />
<br />
It is a security risk, since the firewall is disabled.<br />
Only one (1) PC can use this feature.<br />
Version 1.00 43 English
<strong>PROLiNK</strong>® <strong>WNR1008</strong><br />
www.prolink2u.com<br />
5.4.<br />
Problem 1:<br />
Solution 1:<br />
My PC can't locate the Wireless Router.<br />
Check the following:<br />
Mode: Your PC is set to Infrastructure Mode. (Access Points are always in Infrastructure Mode)<br />
SSID: The SSID (service set identifier) on your PC and the Wireless Router are the same.<br />
Remember that the SSID (service set identifier) is case-sensitive. So, for example "Workgroup" does NOT match<br />
"workgroup."<br />
Security: Both your PC and the Wireless Router must have the same setting for security.<br />
o<br />
o<br />
Disabled: The default setting for the Wireless Router security is disabled, so your wireless station should<br />
also has security disabled.<br />
Enabled: If security is enabled on the Wireless Router, your PC must have security enabled, and the key<br />
must be matched.<br />
<br />
o It's strongly suggest to set up security that could prevent any unauthorized accessing to your wireless<br />
network. Setting WPA2 security is recommended that offers stronger security than WEP. Both your<br />
computer and the Wireless Router must have the same settings for security.<br />
Channel: The wireless local area network is activated and configured by default. If necessary, please check and match<br />
channel for the terminal, for example, your notebook. Both your computer (client) and the Wireless Router must set<br />
to the same channel for connection.<br />
Problem 2:<br />
Solution 2:<br />
Wireless connection speed is very slow.<br />
The wireless system will connect at the highest possible speed, depending on the distance and the environment. To obtain the<br />
highest possible connection speed, you can experiment with the following:<br />
Wireless Router location: Try adjusting the location and orientation of the Wireless Router. To see if radio<br />
interference is causing a problem, see if connection is possible when close to the Wireless Router. Remember that the<br />
connection range can be as little as 100 feet in poor environments.<br />
<br />
<br />
<br />
Wireless Channels: If interference is the problem, changing to another channel may show a well improvement.<br />
Radio Interference: Other devices may be causing interference. You can try to turn off other wireless devices, and<br />
see if this helps. Any "noisy" devices should be shielded or relocated.<br />
RF Shielding: Your environment may tend to block transmission between the wireless stations. This will mean high<br />
access speed is only possible when close to the Wireless Router.<br />
Version 1.00 44 English
<strong>PROLiNK</strong>® <strong>WNR1008</strong><br />
CHAPTER 6: ABOUT WIRELESS LANS<br />
www.prolink2u.com<br />
6.1.<br />
A group of wireless stations and a single access point, all using the same SSID (service set identifier), form a Basic<br />
Service Set (BSS).<br />
Using the same SSID (service set identifier) is essential. Devices with different SSIDs are unable to communicate with<br />
each other.<br />
6.2.<br />
The wireless channel sets the radio frequency used for communication.<br />
Access points use a fixed channel. You can select the channel used. This allows you to choose a channel which<br />
provides the least interference and best performance. In the USA and Canada, 11 channels are available. If<br />
using multiple access points, it is better if adjacent access points use different channels to reduce interference.<br />
In "Infrastructure" mode, wireless stations normally scan all channels, looking for an access point. If more than<br />
one access point can be used, the one with the strongest signal is used. (This can only happen within an ESS<br />
(Extended Service Set)).<br />
ESS: In Infrastructure mode, one or more BSS (Basic Service Set) can set up a ESS (Extended Service Set). User<br />
can access and roaming BSS data and the access point should be set to the same ESSID (Extended Service Set<br />
Identifier) to allow roaming.<br />
Note to US model owner:<br />
To comply with US FCC regulation, the country selection function has been completely removed from all US models. The<br />
above function is for non-US models only.<br />
6.3.<br />
WEP<br />
WEP (Wired Equivalent Privacy) is a standard for encrypting data before it is transmitted. This is desirable because it is<br />
impossible to prevent snoopers from receiving any data which is transmitted by your wireless stations. But if the data<br />
is encrypted, then it is meaningless unless the receiver can decrypt it.<br />
If WEP is used, the wireless stations and the access point must have the same security settings for each of the<br />
following:<br />
WEP<br />
Key<br />
WEP Authentication<br />
64 Bits, 128 Bits.<br />
For 64 Bits encryption, the Key value must match.<br />
For 128 Bits encryption, the Key value must match.<br />
Open System or Shared Key.<br />
Version 1.00 45 English
<strong>PROLiNK</strong>® <strong>WNR1008</strong><br />
www.prolink2u.com<br />
WPA/ WPA2/ WPA-Mixed<br />
WPA/ WPA2 (Wi-Fi Protected Access) is more secure than WEP. It uses a “Shared Key” which allows the encryption<br />
keys to be regenerated at a specified interval. There are several encryption options: TKIP, AES, TKIP-AES and<br />
additional setup for RADIUS is required in this method. The most important features beyond WPA to become<br />
standardized through 802.11i/WPA2 are: pre-authentication, which enables secure fast roaming without noticeable<br />
signal latency.<br />
If WPA or WPA2 is used, the wireless stations and access point must have the same security settings.<br />
802.1x<br />
With 802.1x authentication, a wireless PC can join any network and receive any messages that are not encrypted,<br />
however, additional setup for RADIUS to issue the WEP key dynamically will be required.<br />
RADIUS is an authentication, authorization, and accounting client-server protocol. The client is a network access server<br />
that desires to authenticate its links. The server has access to a user database with authentication information.<br />
6.4.<br />
To allow wireless stations (STA) to access the access point (AP), the wireless stations and the access point must use the<br />
same settings, as follows:<br />
Mode<br />
SSID (ESSID) (Extended<br />
Service Set Identifier)<br />
Disable<br />
The mode must be set to Infrastructure.<br />
The network name must match the value used on the Wireless Router.<br />
Note! The SSID (service set identifier) is case- sensitive.<br />
If there is no security is enabled on the Wireless Router, the security of each station should be disabled as well.<br />
And, you can connect the Wireless Router without security, but it is NOT recommended.<br />
By default, WEP on the Wireless Router is disabled.<br />
WEP<br />
Open System/<br />
Shared Key/<br />
Auto<br />
Shared Key only supports WEP as encryption method.<br />
AUTO (Open/Shared) means AP can accept STA connect to it using OPEN-WEP or SHARED-WEP.<br />
If WEP remains disabled on the Wireless Router, all stations must have WEP disabled.<br />
If WEP is enabled on the Wireless Router, each station must use the same settings as the Wireless Router.<br />
Personal (Pre-Shared Key)<br />
WPA<br />
WPA2<br />
WPA2-Mixed<br />
Enterprise (RADIUS)<br />
WPA<br />
WPA2<br />
WPA2-Mixed<br />
802.1x<br />
WPA-PSK (TKIP/AES)/ WPA2-PSK (TKIP/AES): If one of these securities is enabled on the Wireless Router. To make<br />
a connection, each station must use the same algorithms and pass phrase as the Wireless Router.<br />
Pre-Shared Key Format: There are two formats for choice to set the Pre-shared key, Passphrase and Hex (64<br />
characters). If Hex is selected, users will have to enter 64 characters string at a time. For easier configuration, the<br />
Passphrase (at least 8 characters) format is recommended.<br />
Pre-Shared Key: Pre-Shared Key serves as a password. Users may key in 8 to 63 characters string if you selected<br />
passphrase. Pre-shared key format to set the passwords or leave it blank, in which the 802.1x authentication will<br />
be activated. Make sure the same password is used on client's end.<br />
RADIUS Server: RADIUS is an authentication, authorization and accounting client-server protocol. The client is a<br />
network access server that desires to authenticate its links. The RADIUS is a server that has access to a user<br />
database with authentication information. Each station must set up the RADIUS server’s IP address, port and<br />
passwords that provided by your ISP.<br />
Version 1.00 46 English
<strong>PROLiNK</strong>® <strong>WNR1008</strong><br />
CHAPTER 7: TECHNICAL SUPPORT<br />
www.prolink2u.com<br />
7.1.<br />
<br />
<br />
<br />
7.2.<br />
<br />
<br />
<br />
7.3.<br />
<br />
<br />
<br />
Version 1.00 47 English
www.prolink2u.com<br />
SINGAPORE<br />
FIDA INTERNATIHIDUPAL (S) PTE LTD<br />
Block 16 Kallang Place, #06-02 Kallang Basin Industrial Estate, Singapataue 339156.<br />
Tel : (65) 6357 0668<br />
Email : support@fida.com<br />
MALAYSIA<br />
FIDA SYSTEMS (M) SDN BHD<br />
29 Jalan USJ 1/31, 47600 Subang Jaya, Selangatau Darul Ehsan, Malaysia.<br />
Tel : (60) 3 8024 9151<br />
Email : support_my@fida.com<br />
INDONESIA<br />
<strong>PROLiNK</strong> INDONESIA<br />
Jl. Cideng Barat No. 79, Jakarta Pusat 10150 - Indonesia.<br />
Tel : (62) 21 3483 1777<br />
Email : support@prolink.co.id<br />
<strong>PROLiNK</strong> is a trademark of FIDA International (S) PTE LTD dan is manufactured under its authatauity. All other brdans, products, services, logos dan<br />
company names mentioned herein are trademarks of their respective owners. All specifications, designs dan contents are subject to changes without<br />
priatau notice. © Copyright 2010. <strong>PROLiNK</strong> all rights reserved.
www.prolink2u.com<br />
<strong>PROLiNK</strong> ®<br />
<strong>WNR1008</strong><br />
3.75G Wireless-N 4-Port Gigabit Router<br />
Buku <strong>Manual</strong><br />
Versi 1.00<br />
(Indonesia)
PERNYATAAN KOMISI KOMUNIKASI FEDERAL INTERFERENSI<br />
Peralatan ini telah diuji dan memenuhi batas untuk Kelas B perangkat digital, sesuai dengan Bagian 15 dari Peraturan<br />
FCC. Batasan ini dirancang untuk memberikan perlindungan memadai terhadap gangguan yang membahayakan pada<br />
insalasi rumah. Peralatan ini menghasilkan dan dapat memancarkan radio frekuensi energy da jika tidak terpasang dan<br />
digunakan sesuai dengan petunjuk, dapat menyebabkan gangguan yang membahayakan pada komunikasi radio.<br />
Namun, tidak ada jaminan bahwa inerferensi tidak akan terjadi pada instalasi tertentu. Jika peralatan ini menimbulan<br />
interferensi pada penerima televise, yang dapat ditentukan dengan memutar peralatan off dan pada, pengguna<br />
dianjurkan untuk mencoba memperbaiki interferensi tersebut dengan salah satu langkah-langkah berikut:<br />
Arahkan atau posisikan kembali antena penerima.<br />
Meningkatkan pemisahan antara peralatan dan penerima.<br />
Hubungkan peralatan ke stopkontak pada sirkuit yang berbeda dari yang dimana penerima terhubung.<br />
Tanyakan pada dealer atau teknisi radio / TV untuk bantuan.<br />
FCC Perhatian: Perubahan atau modifikasi yang tidak disetujui oleh pihak bertanggung jawab atas kepatuhan dapat<br />
membatalkan hak pengguna untuk mengoperasikan peralatan.<br />
Perangkat ini memenuhi aturan Part 15 of the FCC. Pengoperasian tunduk pada dua kondisi sebagai berikut: (1)<br />
perangkat ini tidak menimbulkan gangguan yang membahayakan, dan (2) perangkat ini harus menerima interferensi<br />
yang diterima, termasuk interferensi yang dapat menyebabkan pengoperasian yang tidak diinginkan.<br />
Buku <strong>Manual</strong> atau buku petunjuk secara disengaja atau tidak memperingatkan pengguna bahwa perubahan atau<br />
modifikasi yang tidak disetujui oleh pihak yang bertanggung jawab atas kepatuhan dapat membatalkan kewenangan<br />
pengguna untuk mengoperasikan peralatan<br />
PERHATIAN:<br />
1. Untuk memenuhi persyaratan kepatuhan pemaparan RF FCC, jarak pemisahan minimal 20 cm harus<br />
dijaga antara antena perangkat ini dan semua atauang.<br />
2. Transmitter ini tidak boleh terletak atau yang beroperasi dalam hubungannya dengan antena lain atau<br />
pemancar.
DAFTAR ISI<br />
BAGIAN 1: PENDAHULUAN ............................................................................................................................ 1<br />
1.1. FITUR ........................................................................................................................................................................................................................... 1<br />
1.2. Detail Fisik ................................................................................................................................................................................................................. 1<br />
BAGIAN 2: MENGENAI MODUS PENGOPERASIAN ....................................................................................... 3<br />
2.1. Modus Operasi ....................................................................................................................................................................................................... 3<br />
2.2. Modus Router ......................................................................................................................................................................................................... 3<br />
2.3. Modus Access Point ............................................................................................................................................................................................. 4<br />
2.4. Modus Converter ................................................................................................................................................................................................... 4<br />
BAGIAN 3: KONFIGURSI .................................................................................................................................. 5<br />
3.1. Koneksi Hardware ................................................................................................................................................................................................. 5<br />
3.2. Login ........................................................................................................................................................................................................................... 5<br />
3.3. Status .......................................................................................................................................................................................................................... 7<br />
3.4. Network ..................................................................................................................................................................................................................... 8<br />
3.5. Wireless................................................................................................................................................................................................................... 15<br />
3.6. Firewall .................................................................................................................................................................................................................... 24<br />
3.7. Administrasi .......................................................................................................................................................................................................... 29<br />
BAGIAN 4: KONFIGURASI PC ........................................................................................................................ 34<br />
4.1. Penjelasan .............................................................................................................................................................................................................. 34<br />
4.2. Windows Clients.................................................................................................................................................................................................. 34<br />
4.3. Macintosh Clients ............................................................................................................................................................................................... 39<br />
4.4. Linux Clients .......................................................................................................................................................................................................... 39<br />
4.5. Unix Systems Lainnya ....................................................................................................................................................................................... 40<br />
4.6. Konfigurasi Wireless Station .......................................................................................................................................................................... 40<br />
BAGIAN 5: PERMASALAHAN ........................................................................................................................ 42<br />
5.1. Penjelasan .............................................................................................................................................................................................................. 42<br />
5.2. Masalah Umum ................................................................................................................................................................................................... 42<br />
5.3. Akses Internet ...................................................................................................................................................................................................... 42<br />
5.4. Wireless Access ................................................................................................................................................................................................... 43<br />
BAGIAN 6: TENTANG WIRELESS LAN........................................................................................................... 44<br />
6.1. BSS (Basic Service Set) ...................................................................................................................................................................................... 44<br />
6.2. Channels ................................................................................................................................................................................................................. 44<br />
6.3. Security ................................................................................................................................................................................................................... 44<br />
6.4. Konfigurasi wireless LAN ................................................................................................................................................................................. 45<br />
BAGIAN 7: TECHNICAL SUPPORT ................................................................................................................. 46<br />
7.1. FREE TECHNICAL SUPPORT HOTLINE ........................................................................................................................................................ 46<br />
7.2. WALK-IN SUPPORT ............................................................................................................................................................................................ 46<br />
7.3. HIDUPLINE TECHNICAL SUPPORT .............................................................................................................................................................. 46
<strong>PROLiNK</strong>® <strong>WNR1008</strong><br />
BAGIAN 1: PENDAHULUAN<br />
www.prolink2u.com<br />
<strong>PROLiNK</strong>® <strong>WNR1008</strong> 3.75G Wireless-N 4-Port Gigabit Router mendukung 4 port Ethernet 10/100/1000M untuk<br />
LAN dan 1 port 10/100/1000M interface Ethernet untuk WAN. Dengan teknologi MIMO, dapat mendukung kecepatan<br />
transmisi data 6 kali lebih banyak (sampai dengan 300 Mbps) dan cakupan 3 kali lebih dari perangkat IEEE<br />
802.11b/g. Router nirkabel memungkinkan seluruh jaringan Anda berbagi dengan berkecepatan tinggi atau koneksi<br />
DSL internet. Dengan itu, Anda dapat berbagi koneksi internet berkecepatan tinggi, file, printer, dan game multi-player<br />
dengan kecepatan yang luar biasa, tanpa harus repot merangkai kabel. Hal ini juga menawarkan konfigurasi yang<br />
mudah untuk jaringan nirkabel Anda di rumah dan menyajikan jaringan nirkabel fungsionalitas tinggi, keamanan, dan<br />
fleksibilitas<br />
1.1.<br />
<br />
<br />
<br />
<br />
<br />
<br />
<br />
<br />
<br />
<br />
Mendukung 4 ports 10/100/1000M Ethernet LAN dan 1 port 10/100/1000M Ethernet interface WAN.<br />
Clock rate sampai dengan 600MHz.<br />
Mendukung stdanard IEEE 802.11n/b/g, high speed data rate sampai dengan 300Mbps, two transmit dan two<br />
receive path (2T2R)<br />
Tingkat kemanan tinggi dengan build-in Security: WEP 64/128, WPA, WPA2, 802.1x dan 802.11i.<br />
Mendukung 1 USB port tambahan.<br />
Mendukung WPS (Wi-Fi Protected Setup) dengan tombol fisik.<br />
Mendukung Modus Client, AP, WDS, AP+WDS.<br />
Advanced Quality of Service (QoS), WMM.<br />
Konfigurasi web browser yang mudah untuk pengguna rumah.<br />
Mendukung USB Network attached storage (NAS) dan fungsi media share.<br />
1.2.<br />
LED Atas (Tampak Atas)<br />
Perilaku LED<br />
LED Tercetak Warna Perilaku Indikasi<br />
Power PWR Hijau<br />
System SYS Hijau<br />
Internet WAN Hijau<br />
HIDUP<br />
MATI<br />
HIDUP<br />
MATI<br />
Berkedip<br />
HIDUP<br />
MATI<br />
Berkedip<br />
Power Hidup<br />
Power Mati<br />
System siap untuk masuk ke web server<br />
System belum iap masuk ke web server<br />
System kembali ke pengaturan default<br />
Internet Aktif<br />
Internet Tidak Aktif<br />
Data Transmit<br />
Versi 1.00 1 Indonesia
<strong>PROLiNK</strong>® <strong>WNR1008</strong><br />
www.prolink2u.com<br />
WPS WPS Hijau<br />
Wireless LAN WLAN Hijau<br />
LAN<br />
Hijau<br />
USB WPS Hijau<br />
HIDUP<br />
MATI<br />
Berkedip<br />
MATI<br />
HIDUP<br />
Berkedip<br />
MATI<br />
HIDUP<br />
Berkedip<br />
HIDUP<br />
MATI<br />
WPS setup berhasil<br />
WPS tidak aktif<br />
WPS siap melakukan koneksi<br />
WLAN tidak aktif<br />
WLAN aktif<br />
WLAN data transmit<br />
LAN tidak aktif<br />
LAN aktif<br />
LAN data transmit<br />
USB terkoneksi<br />
USB tidak terkoneksi<br />
Ports dan Tombol (Tampak Belakang)<br />
Ports dan buttons<br />
Ant. 1<br />
Ant. 2<br />
Tempat pemasangan Antena<br />
Reset<br />
<br />
<br />
<br />
Tekan selama 2 detik, lampu LED akan mati.<br />
Terus tekan tombol reset selama 2-5 detik, system akan restart secara otomatis<br />
Tekan selama lebih dari 5 detik, Wireless Router akan kembali ke pengaturan asal<br />
LAN 1-4<br />
WAN<br />
DC 12V<br />
Gunakan stdanar kabel LAN (RJ45) untuk koneksi dari PC Anda. Jika diperlukan, semua port dapat dihubungkan ke<br />
switch/hub.<br />
Sambungkan ADSL/Cable Modem dengan kabel RJ45.<br />
Sambungkan power adaptatau disini.<br />
Panel Samping (Tampak Samping)<br />
(Left sideview)<br />
(Right sideview)<br />
WPS<br />
WPS<br />
Untuk mengaktifkan fungsi WPS, tekan tombol WPS pada Wireless Router lalu lampu LED akan mulai berkedip. Silahkan<br />
untuk membuat koneksi dengan perangkat lainya yang mendukung fungsi WPS selama 2 menit.<br />
Right-sideview<br />
USB<br />
Sambungkan USB modem 3.5G atau perangkat USB storage<br />
Versi 1.00 2 Indonesia
<strong>PROLiNK</strong>® <strong>WNR1008</strong><br />
BAGIAN 2: MENGENAI MODUS PENGOPERASIAN<br />
www.prolink2u.com<br />
Perangkat ini menyediakan aplikasi operasional dengan Router, AP dan Modus Converter yang eksklusif. Perangkat ini<br />
dikirimkan dengan konfigurasi yang benar. Jika Anda ingin mengubah pengaturan dalam rangka untuk melakukan<br />
konfigurasi lebih maju atau bahkan mengubah modus operasi, Anda dapat SECARA MANUAL beralih ke modus yang<br />
Anda diinginkan oleh produsen seperti yang dijelaskan dalam bagian berikut<br />
2.1.<br />
You have to MANUALLY switch the bar into the mode you preferred, Router, AP atau Modus Converters, then the<br />
device will reboot automatically into the mode you have selected.<br />
Anda harus SECARA MANUAL menswitch bar untuk beralih ke modus yang Anda sukai, Router, AP atau Modus<br />
Converter, maka perangkat akan reboot otomatis ke mode yang telah Anda pilih.<br />
2.2.<br />
Dalam mode ini, perangkat seharusnya terhubung ke internet melalui ADSL / Cable Modem. NAT ini diaktifkan dan PC<br />
dalam LAN port dapat berbagi alamat IP yang sama untuk ISP (Internet Service Provider) melalui port WAN. Jenis<br />
sambungan dapat setup di PPPoE, DHCP client, PPTP client, L2TP client atau IP statis.<br />
Sambungan nirkabel akan dibentuk dari LAN point-to-point menjadi point-to-multipoint WAN. Perangkat ini<br />
menghubungkan semua stasiun (PC atau notebook dengan fungsi nirkabel) ke jaringan nirkabel. Semua stasiun dapat<br />
memiliki Akses Internet jika hanya perangkat memiliki koneksi internet.<br />
Versi 1.00 3 Indonesia
<strong>PROLiNK</strong>® <strong>WNR1008</strong><br />
www.prolink2u.com<br />
2.3.<br />
Ketika bertindak sebagai Access Point (AP), perangkat ini menghubungkan semua stasiun (PC / notebook dengan<br />
adaptatau jaringan nirkabel) ke jaringan nirkabel. Semua stasiun dapat memiliki Akses Internet jika hanya Access Point<br />
memiliki koneksi internet.<br />
2.4.<br />
If set to Modus Converter, a device connects to each other through an access point atau a base station (gateway atau<br />
router.) This device can work like a wireless station when it’s connected to a computer directly, so that the computer<br />
can send packets from wired end to wireless interface.<br />
Jika diatur ke Modus Converter, perangkat akan terhubungkan satu sama lain melalui jalur akses atau base station<br />
(gateway atau router.) Perangkat ini dapat bekerja seperti stasiun nirkabel saat itu terhubung ke komputer secara<br />
langsung, sehingga komputer dapat mengirimkan paket dari ujung kabel ke antarmuka nirkabel<br />
Versi 1.00 4 Indonesia
<strong>PROLiNK</strong>® <strong>WNR1008</strong><br />
BAGIAN 3: KONFIGURSI<br />
www.prolink2u.com<br />
3.1.<br />
Step 1.<br />
Step 2.<br />
Step 3.<br />
Sambungkan salah satu ujung kabel Ethernet ke port LAN (1~4) dari Wireless Router, ujung yang lain ke PC<br />
atau notebook Anda.<br />
Ada 2 metode untuk dapat terhubung ke Internet (Hanya satu yang dapat digunakan):<br />
2-1. Sambungkan kabel Ethernet ke port WAN (Internet) dari Wireless Router, ujung yang lain ke port ADSL<br />
atau cable modem.<br />
2-2. Or Anda dapat menggunakan 3.5G USB card (yang disediakan oleh provider) ke USB port.<br />
Akhirnya, hidupkan Wireless Router Anda.<br />
3.2.<br />
1. Jalankan computer Anda dan pastikan Anda menggunakan kabel Ethernet untuk berkomunikasi dengan Wireless<br />
Router.<br />
2. Jalankan Web Browser Anda.<br />
3. Pada kotak Address, masukkan alamat IP dari Wireless<br />
Router, sebagai contoh, alamat IP default Wireless<br />
Router's adalah: http://192.168.123.254<br />
4. Setelah berhasil terhubung, akan muncul gambar berikut.<br />
Masukkan username "admin" dan password "password"<br />
untuk login.<br />
Versi 1.00 5 Indonesia
<strong>PROLiNK</strong>® <strong>WNR1008</strong><br />
www.prolink2u.com<br />
Lihat permasalahan dibawah,<br />
Jika Anda sulit untuk terhubung dengan <strong>WNR1008</strong><br />
Jika <strong>WNR1008</strong> tidak merespon<br />
Wireless Router sudah terinstall dengan benar, koneksi LAN OK, dan powered menyala. Anda dapat melakukan uji<br />
koneksi dengan penggunakan perintah "ping":<br />
Silahkan ke Start>Run…> Ketik “cmd” maka akan muncul MS-DOS prompt.<br />
Ketik perintah: ping 192.168.123.254<br />
Jika tidak ada respon yang diterima, atau your alamat IP pada PC Anda tida sesuai dengan alamat IP dari Wireless<br />
Router. (Lihat instruksi berikut.)<br />
Jika PC Anda menggunakan alamat IP statis, alamat IP harus berada antara 192.168.123.1 sampai 192.168.123.253<br />
untuk dapat berkomunikasi dengan Wireless Router. Juga, Network Mask harus di set ke 255.255.255.0. Lihat<br />
BAGIAN 4 - KONFIGURASI PC untuk detail pengaturan TCP/IP.<br />
Pastikan PC dan Wireless Router Anda berada pada network segment yang sama. (Jika tidak Anda tidak memiliki<br />
router, ini yang akan terjadi.)<br />
Pastikan Anda menggunakan koneksi kabel LAN. Koneksi Wireless hanya dapat digunakan apabila pengaturan<br />
pada PC Anda sudah sama dengan pengaturan pada wireless.<br />
Versi 1.00 6 Indonesia
<strong>PROLiNK</strong>® <strong>WNR1008</strong><br />
www.prolink2u.com<br />
Jenis Koneksi Umum<br />
Jenis koneksi The Internet berdasarkan ISP (Internet Service Provider) yang dapat Anda gunakan.<br />
Jenis Modem Jenis IP Keterangan Data ISP yang diperlukan<br />
Biasanya, tidak ada.<br />
Alamat IP Dynamic<br />
Alamat IP Anda Your IP address ikan dialokasikan<br />
secara otomatis, ketika Anda terhubung dengan ISP.<br />
Namun , beberapa ISP mungkin<br />
membutuhkan Hostname, Domain<br />
name, atau alamat MAC Anda.<br />
Cable Modem<br />
Alamat IP akan dialokasikan .<br />
Alamat IP Static<br />
ISP akan mengalokasikan alamat IP secara permanent<br />
kepada Anda.<br />
Namun , beberapa ISP mungkin<br />
membutuhkan Hostname, Domain<br />
name, atau alamat MAC Anda.<br />
Alamat IP Dynamic<br />
Alamat IP Anda Your IP address ikan dialokasikan<br />
secara otomatis, ketika Anda terhubung dengan ISP.<br />
Tidak Ada.<br />
DSL Modem<br />
Alamat IP Static<br />
ISP akan mengalokasikan alamat IP secara permanent<br />
kepada Anda.<br />
Alamat IP akan dialokasikan .<br />
PPPoE<br />
You connect to the ISP only when required. The IP<br />
address is usually allocated automatically.<br />
User name dan password.<br />
Biasanya, tidak ada.<br />
Lainnya (contoh: 3.5G<br />
Wireless Card)<br />
Alamat IP Dynamic<br />
Alamat IP Anda Your IP address ikan dialokasikan<br />
secara otomatis, ketika Anda terhubung dengan ISP.<br />
Namun , beberapa ISP mungkin<br />
membutuhkan Hostname, Domain<br />
name, atau alamat MAC Anda.<br />
3.3.<br />
<strong>PROLiNK</strong>_<strong>WNR1008</strong><br />
Versi 1.00 7 Indonesia
<strong>PROLiNK</strong>® <strong>WNR1008</strong><br />
www.prolink2u.com<br />
3.4.<br />
Pengaturan Antarmuka LAN<br />
192.168.123.100<br />
255.255.255.0<br />
192.168.123.254<br />
192.168.123.100 192.168.123.200<br />
Item / Fungsi<br />
Penjelasan/ Instruksi<br />
IP Address Menampilkan alamat IP dari Wireless Router (Alamat Default IP adalah 192.168.123.254)<br />
Subnet Mask Subnet mask dari Wireless Router (Default subnet mask adalah 255.255.255.0.)<br />
Default Gateway<br />
DHCP Mode<br />
Menampilkan default gateway dari Wireless Router.<br />
Disable: Pilih untuk menonaktifkan Router Wireless untuk mendistribusikan alamat IP ke klien yang terhubung.<br />
Server: Pilih untuk mengaktifkan Router Wireless untuk mendistribusikan alamat IP (DHCP Server) untuk klien yang<br />
terhubung. Dan kolom berikut akan diaktifkan bagi Anda untuk memasukkan alamat IP awal<br />
Client: Pilih mode client untuk menggunakan<br />
Alamat awal dari kumpulan jaringan alamat IP lokal. Pool adalah bagian dari segmen alamat IP, perangkat akan<br />
mendistribusikan alamat IP dari 192.168.123.100 sampai 192.168.123.200 ke semua komputer dalam jaringan yang<br />
permintaan alamat IP dari server DHCP (Router). Maksimum alamat akhir IP adalah 253.<br />
Catatan: Jika " alamat IP Continuous" yang ditetapkan mulai dari 192.168.123.1 dan "Jumlah alamat IP pada akhir<br />
pool" adalah 253, perangkat akan mendistribusikan alamat IP dari 192.168.123.100 sampai 192.168.123.253 ke semua<br />
komputer dalam jaringan yang permintaan alamat IP dari server DHCP (Router).<br />
Klik tombol Show Client untuk menampilkan Active DHCP Client Table. Tabel menampilkan alamat IP yang<br />
ditetapkan, alamat MAC dan waktu kadarluarsa untuk setiap client.<br />
DHCP Client Range<br />
192.168.123.100<br />
Refresh: Klik tombol ini untuk refresh tabel.<br />
Close: Klik tombol ini untuk menutup jendela.<br />
Versi 1.00 8 Indonesia
<strong>PROLiNK</strong>® <strong>WNR1008</strong><br />
www.prolink2u.com<br />
Centang kotak untuk mengaktifkan fungsi Static DHCP, pengaturan default adalah tidak aktif. Bila diaktifkan,<br />
pengguna dapat meng Klik tombol Set Static DHCP untuk mengatur fungsi Static DHCP<br />
Static DHCP<br />
Clone MAC Address<br />
IP Address: Masukkan alamat IP statis untuk penggunaan alamat yang disediakan oleh DHCP Server.<br />
MAC Address: Masukkan alamat MAC untuk setiap station, lalu DHCP Server akan mendistribusikan alamat IP statis<br />
ke semua station secaa otomatis ketika terhubung.<br />
Comment: Anda dapat memasukkan komentar untuk alamat IP atau alamat MAC.<br />
Apply Changes: Setelah selesai melakukan pengaturan, Klik tombol Apply changes untuk menyimpan.<br />
Reset: Klik Reset untuk mengembalikan pengaturan sebelumnya.<br />
Static DHCP List: Menampilkn alamat IP statis yang telah ditetapkan berdasarkan alamat MAC.<br />
Delete Selected: Klik Delete Selected untuk menghapus item.<br />
Delete All: Klik tombol Delete All untuk menghapus semua item.<br />
Tabel ini menampilkan informasi MAC.<br />
Internet Service Setup<br />
Versi 1.00 9 Indonesia
<strong>PROLiNK</strong>® <strong>WNR1008</strong><br />
Item / Fungsi<br />
WAN Access Type<br />
Penjelasan/ Instruksi<br />
www.prolink2u.com<br />
Pilih jenis WAN Access Static IP, DHCP Client, PPPoE, atau Mobile Networks dari menu pull-down. Pengaturan<br />
Default adalah DHCP (Auto Config).<br />
DHCP Client<br />
Jika DHCP Client yang dipilih, router akan memperoleh alamat IP secara otomatis.<br />
Hostname: Masukkan hostname untuk menetapkan alamat IP ke computer Anda. Maximum 32 alphanumeric<br />
karakter (case sensitive).<br />
MTU Size: MTU (Maximum Transmission Unit), nilai default adalah 1492 untuk aplikasi Anda. Mengurangi ukuran<br />
paket dapat membantu menghubungkan ke situs web tertentu atau mempercepat laju paket transfer. Jika ukuran<br />
paket salah dimasukkan, Anda mungkin tidak dapat membuka situs web tertentu.<br />
Pilih Attain DNS Automatically atau pilih Set DNS <strong>Manual</strong>ly untuk menset alamat IP dari DNS server. Pengaturan<br />
Default adalah Attain DNS Automatically.<br />
DNS 1: Masukkan alamat IP untuk DNS server yang disediakan oleh ISP, atau Anda dapat mengisi alamat IP yang<br />
Anda tahu pada kolom preferred DNS server .<br />
DNS 2~3: Kolom ini adalah opsi. Anda juga dapat mengisi alamat IP pada kolom ini. DNS 2 dan 3 servers akan<br />
terpakai bila DNS 1 server gagal.<br />
Static (Fixed IP)<br />
Jika alamat IP statis dipilih, pengguna harus menetapkan alamat IP, subnet mask dan default gateway yang didapat<br />
dari ISP (Internet Service Provider).<br />
IP Address: Masukkan alamat IP WAN IP yang disediakan oleh ISP.<br />
Subnet Mask: Masukkan subnet mask.<br />
Default Gateway: Masukan alamat IP untuk default gateway yang disediakan oleh ISP.<br />
Versi 1.00 10 Indonesia
<strong>PROLiNK</strong>® <strong>WNR1008</strong><br />
www.prolink2u.com<br />
MTU Size: MTU (Maximum Transmission Unit), nilai default adalah 1492 untuk aplikasi Anda. Mengurangi ukuran<br />
paket dapat membantu menghubungkan ke situs web tertentu atau mempercepat laju paket transfer. Jika ukuran<br />
paket salah dimasukkan, Anda mungkin tidak dapat membuka situs web tertentu.<br />
Pilih Attain DNS Automatically atau pilih Set DNS <strong>Manual</strong>ly untuk menset alamat IP dari DNS server. Pengaturan<br />
Default adalah Attain DNS Automatically.<br />
DNS 1: Masukkan alamat IP untuk DNS server yang disediakan oleh ISP, atau Anda dapat mengisi alamat IP yang<br />
Anda tahu pada kolom preferred DNS server .<br />
DNS 2~3: Kolom ini adalah opsi. Anda juga dapat mengisi alamat IP pada kolom ini. DNS 2 dan 3 servers akan<br />
terpakai bila DNS 1 server gagal.will be used when the DNS 1 server fails.<br />
PPPoE<br />
Jika PPPoE yang dipilih, pengguna harus mengisi user name dan password yang disediakan oleh ISP.<br />
PPPoE Type: Pilih jenis PPPoE, Nataumal PPPoE, Multiple PPPoE dan Unnumbered PPPoE dari menu pull-down.<br />
Multi-PPPoE provider: Jika pengguna memilih jenis Multiple PPPoE, pengguna harus mengisi PPPoE disini. Pilih<br />
Flets West, Next West, Flets East, dan Flets Next dari menu pull-down.<br />
Public Range: Jika pengguna memilih jenis Unnumbered PPPoE, harus mengisi range disini.<br />
User Name: Masukkan username yang disediakan oleh ISP (Internet Service Provider). Maximum input 32<br />
alphanumeric karakter case sensitive).<br />
Password: Masukkan password yang disediakan oleh ISP. Maximum input 32 alphanumeric karakter (case-sensitive).<br />
Service Name: Masukkan nama Internet service provider disini.<br />
Connection Type: Pilih jenis koneksi Continuous, Connect on Demdan atau <strong>Manual</strong> dari menu pull-down. Jika<br />
memilih <strong>Manual</strong> pengguna dapat meng Klik tombol Connect untuk melakukan koneksi.<br />
Idle Time: Menampilkan perangkat diam setelah waktu yang Anda tentukan. Pengaturan waktu antara 1~1000 menit.<br />
Nilai Default adalah 5 menit. Fungsi ini tersedia jika Connection Type yang digunakan adalah Connection Demdan.<br />
MTU Size: MTU (Maximum Transmission Unit), nilai default adalah 1492 untuk aplikasi Anda. Mengurangi ukuran<br />
paket dapat membantu menghubungkan ke situs web tertentu atau mempercepat laju paket transfer. Jika ukuran<br />
paket salah dimasukkan, Anda mungkin tidak dapat membuka situs web tertentu.<br />
Versi 1.00 11 Indonesia
<strong>PROLiNK</strong>® <strong>WNR1008</strong><br />
www.prolink2u.com<br />
Mobile Networks<br />
Pengguna harus menyisipkan USB card yang disediakan oleh provider ke dalam port USB pada wireless router<br />
untuk dapat menggunakan fungsi Mobile networks.<br />
Auto APN: APN (Access Point Name.) Jika fungsi ini dipilih, system akan mendeteksi secara otomatis pengaturan<br />
mobile network melalui USB yang disediakan oleh Internet service provider (ISP). Menggunakan pengaturan default<br />
sangat direkomendasi.<br />
Service Name: Gunakan pengaturan default atau masukkan nama service yang disediakan oleh ISP.<br />
Dial Number: Gunakan pengaturan default atau masukkan nomatau dial yang disediakan oleh ISP.<br />
Authentication: Centang kotak untuk mengaktifkan fungsi authentication.<br />
• User Name: Masukkan user name yang disediakan oleh ISP.<br />
• Password: Masukkan password yang disediakan oleh ISP.<br />
Pin code: Gunakan pengaturan default atau masukkan SIM card Pin code yang disediakan oleh ISP.<br />
Connection Type: Pilih jenis koneksi Continuous, Connect on Demdan dari menu pull-down.<br />
Idle Time: Menampilkan perangkat diam setelah waktu yang Anda tentukan. Pengaturan waktu antara 1~1000 menit.<br />
Nilai Default adalah 5 menit. Fungsi ini tersedia jika Connection Type yang digunakan adalah Connection Demdan.<br />
MTU Size: MTU (Maximum Transmission Unit), nilai default adalah 1492 untuk aplikasi Anda. Mengurangi ukuran<br />
paket dapat membantu menghubungkan ke situs web tertentu atau mempercepat laju paket transfer. Jika ukuran<br />
paket salah dimasukkan, Anda mungkin tidak dapat membuka situs web tertentu.<br />
Enable uPNP…<br />
Apply<br />
Cancel<br />
Centang kotak untuk mengaktifkan fungsi.<br />
Setelah selesai membuat pengaturan, Klik tombol Apply untuk menyimpan.<br />
Klik Cancel untuk mengembalikan ke nilai default.<br />
Versi 1.00 12 Indonesia
<strong>PROLiNK</strong>® <strong>WNR1008</strong><br />
www.prolink2u.com<br />
Advanced Routing<br />
Jika Anda menghubungkan beberapa router dengan Wireless Router, Anda mungkin perlu mengatur aturan routing<br />
yang telah ditetapkan agar lalu lintas data lebih efektif yang disebut rute statis antara router dan Wireless Router.<br />
Item / Fungsi<br />
Enable Dynamic<br />
Route<br />
Enable Static Route<br />
Destination<br />
Range<br />
IP address<br />
Interface<br />
Comment<br />
Apply<br />
Reset<br />
Penjelasan/ Instruksi<br />
Centang untuk mengaktifkan fungsi dynamic router.<br />
NAT: Pilih untuk mengaktifkan fungsi network address translation.<br />
Transmit: Pilih untuk menggunakan Routing Information Protocol, Fungsi ini akan memilih packet transmitting route<br />
yang melewati beberapa router.<br />
Receive: Pilih untuk menggunakan Routing Information Protocol, Fungsi ini akan memilih packet receiving route<br />
yang melewati beberapa router.<br />
IP address: Masukkan alamat IP Gateway.<br />
Subnet Mask: Masukkan subnet mask Gateway.<br />
Gateway: Masukkan nama gateway atau nama domain.<br />
Metric: Rute dengan metric terendah yang menjadi jalur utama.<br />
Interface: Pilih untuk menggunakan LAN atau WAN sebagai antarmuka fisik dimana paket akan dikirim.<br />
Alamat Jaringan dari segmen LAN tujuan. Ketika sebuah paket dengan alamat tujuan IP yang cocok untuk bidang ini,<br />
akan rute ke perangkat mengatur di bidang Rute Gateway.<br />
Pilih Host atau Net dari menu pull-down. Jika memilih Net, harap masukkan Netmask pada kolom ini.<br />
Masukkan alamat IP Gateway.<br />
Anda dapat<br />
Masukkan cacatan disini.<br />
Setelah selesai membuat pengaturan, Klik tombol Apply untuk menyimpan.<br />
Klik Cancel untuk mengembalikan ke nilai default.<br />
Versi 1.00 13 Indonesia
<strong>PROLiNK</strong>® <strong>WNR1008</strong><br />
www.prolink2u.com<br />
PPTP Server<br />
Item / Fungsi<br />
Enable PPTP Server<br />
User Name<br />
Password<br />
PPTP Server IP<br />
address<br />
PPTP Client’s IP Start<br />
Max Connect Users<br />
Penjelasan/ Instruksi<br />
Centang untuk mengaktifkan fungsi PPTP server, fungsi ini memungkinkan Anda untuk terhubung ke lokasi lain<br />
dengan aman memalui internet.<br />
Masukkan username, ketika PPTP client mencoba untuk terhubung ke PPTP sever akan menggunakan username ini.<br />
Masukkan password, ketika PPTP client mencoba untuk terhubung ke PPTP sever akan menggunakan password ini.<br />
Masukkan alamat IP dari PPTP server.<br />
Masukkan alamat IP Start.<br />
Masukkan jumlah maksimum akses oleh PPTP client.<br />
Versi 1.00 14 Indonesia
<strong>PROLiNK</strong>® <strong>WNR1008</strong><br />
www.prolink2u.com<br />
3.5.<br />
Basic<br />
<strong>PROLiNK</strong>_<strong>WNR1008</strong><br />
Item / Fungsi<br />
Disable Wireless<br />
LAN Interface<br />
Bdan<br />
Mode<br />
Penjelasan/ Instruksi<br />
Centang untuk men nonaktifkan fungsi wireless. Jika antarmuka wireless LAN di non aktifkan, lampu LED WLAN akan<br />
mati.<br />
Anda dapat memilih satu modus yang Anda inginkan.<br />
• Mendukung 2.4GHz (B): 802.11b saja.<br />
• Mendukung 2.4GHz (G): 802.11g saja.<br />
• Mendukung 2.4GHz (N): 802.11n saja.<br />
• Mendukung 2.4GHz (B+G): mendukung 802.11b dan 802.11g saja.<br />
• Mendukung 2.4GHz (G+N): mendukung 802.11g dan 802.11n saja.<br />
• Mendukung 2.4GHz (B+G+N): 802.11b, 802.11g dan 802.11n.<br />
Default adalah modus 2.4GHz (B+G+N).<br />
Di bawah modus operasi Router, pengguna dapat memilih AP, WDS, dan AP + WDS dari menu pull-down. Untuk<br />
mode AP, pengguna dapat memilih AP, Client, WDS dan mode AP + WDS. Dalam mode client, hanya ada modus<br />
Klien yang dapat dipilih.<br />
Multiple APs<br />
Pada halaman ini menampilkan dan update pengaturan nirkabel untuk multiple APs.<br />
Versi 1.00 15 Indonesia
<strong>PROLiNK</strong>® <strong>WNR1008</strong><br />
www.prolink2u.com<br />
Network Type<br />
SSID<br />
Channel Width<br />
Channel Selection<br />
Broadcast SSID<br />
WMM<br />
Data Rate<br />
Associated Clients<br />
Pengguna dapat mengatur multiple AP disini.<br />
Jika mode diatur ke modus AP atau klien bahwa jenis jaringan yang dapat diatur untuk Infrastruktur atau Ad hoc<br />
SSID (Service Set Identifier) yang disebut nama jaringan karena pada dasarnya itu adalah nama yang mengidentifikasi<br />
jaringan nirkabel (case-sensitif).<br />
Pilih 20MHz/40MHz lebar channel, nomatau channel diantara 5~11 dan auto; Pilih 20MHz lebar channel maka<br />
nomatau channel diantara 1~11 dan auto. Default adalah 20MHz/40MHz.<br />
Nomatau channel bedasarkan lebar channel yang Anda pilih.<br />
Enabled: Wireless AP akan broadcast SSID ke semua station.<br />
Disabled: Wireless AP tidak akan broadcast SSID ke semua station. Jika station ingin melakukan koneksi dengan<br />
wireless AP, nama SSID yang diketahui untuk membuat sebuah koneksi.<br />
Fungsi WiFi Multiple Media tersedia pada 2.4GHz (B), 2.4GHz (G) dan 2.4GHz (B+G), dan disabled pada 2.4GHz (N),<br />
2.4GHz (G+N) dan 2.4GHz (B+G+N).<br />
Ada beberapa data rate yang dapat Anda pilih pada menu pull-down.<br />
Klik tombol Show Active Clients untuk melihat semua client yang aktif.<br />
Enable Mac Clone<br />
(Single Ethernet<br />
Client)<br />
Fungsi ini akan aktif pada modus Client.<br />
Versi 1.00 16 Indonesia
<strong>PROLiNK</strong>® <strong>WNR1008</strong><br />
www.prolink2u.com<br />
Advanced<br />
Item / Fungsi Penjelasan/ Instruksi<br />
Fragment Threshold Mekanisme Fragmentasi digunakan untuk meningkatkan efisiensi ketika lalu lintas yang tinggi mengalir sepanjang<br />
dalam jaringan nirkabel. Jika MIMO 802.11g Wireless Router sering mengirimkan file besar di jaringan nirkabel, Anda<br />
dapat memasukkan nilai baru Fragmen Threshold untuk membagi paket. Nilai ini dapat diatur 256-2346. Nilai default<br />
adalah 2346.<br />
RTS Threshold RTS Threshold adalah mekanisme diimplementasikan untuk mencegah masalah "Hidden Node". Jika masalah "Hidden<br />
Node" adalah masalah, silakan menentukan ukuran paket. Mekanisme RTS akan diaktifkan jika ukuran data yang<br />
melebihi nilai yang sudah diset.<br />
Peringatan: Mengaktifkan RTS Threshold akan menyebabkan overhead jaringan redundan yang negatif dapat<br />
mempengaruhi kinerja throughput.<br />
Nilai ini harus tetap pada pengaturan default 2347. Jika Anda mengalami aliran data tidak konsisten, hanya modifikasi<br />
kecil dari nilai ini direkomendasikan.<br />
Beacon Interval Beacon Interval adalah jumlah waktu antara transmisi beacon. Sebelum stasiun memasuki mode penghematan daya,<br />
stasiun membutuhkan interval sinyal untuk mengetahui kapan harus bangun untuk menerima sinyal tersebut. Range<br />
diantara 20-1024ms, default adalah 100.<br />
Preamble Type A preamble is a signal used in wireless environment to synchronize the transmitting timing including Synchronization<br />
dan Start frame delimiter. You can select Long atau Shataut for the preamble type.<br />
Preamble adalah sinyal yang digunakan dalam lingkungan nirkabel untuk menyinkronkan waktu transmisi termasuk<br />
Sinkronisasi dan pembatas frame mulai. Anda dapat memilih panjang atau pendek untuk jenis preamble.<br />
IAPP<br />
Pilih Enabled atau Disabled untuk menjalankan fungsi ini.<br />
Protection<br />
Pilih Enabled atau Disabled untuk menjalankan fungsi keamanan.<br />
Aggregation<br />
Pilih Enabled atau Disabled untuk menjalankan fungsi ini.<br />
Shataut GI<br />
Pilih Enabled atau Disabled untuk menjalankan fungsi ini.<br />
WLAN Partition Pilih Enabled atau Disabled untuk menjalankan fungsi ini.<br />
STBC<br />
Pilih Enabled atau Disabled untuk menjalankan fungsi ini.<br />
20/40MHz Coexist Pilih Enabled atau Disabled untuk menjalankan fungsi ini.<br />
RF Output Power Pilih transmitting power rate 100%, 70%, 50%, 35%, 15%.<br />
Versi 1.00 17 Indonesia
<strong>PROLiNK</strong>® <strong>WNR1008</strong><br />
www.prolink2u.com<br />
Security<br />
<strong>PROLiNK</strong>_<strong>WNR1008</strong><br />
Item / Fungsi<br />
Pilih SSID<br />
Encryption<br />
Penjelasan/ Instruksi<br />
Pilih SSID (Service Set Identifier) untuk membuat pengaturan security pada menu pull-down.<br />
Ada beberapa jenis modus encryption termasuk Disabled, WEP (Open System), WEP (Shared Key), WEP ( AUTO), WPA<br />
(Personal), WPA2 (Personal), dan WPA-Mixed. Pengaturan default security adalah Disabled. Sangat direkomendasikan<br />
untuk menggunakan modus security untuk mencegah pengguna yang tidak dikenal.<br />
Catatan:<br />
‣ AUTO (Open/Shared) berarti AP dapat menerima client untuk terhubung menggunakan OPEN-WEP atau SHARED-WEP.<br />
WEP<br />
Authentication: Pilih Open System, Shared Key atau Auto.<br />
Key Length: Pilih key length 64-bit atau 128-bit.<br />
Key Format:<br />
• Hexadecimal (WEP 64 bits): 10 Hex karakters (0~9, a~f).<br />
• Hexadecimal (WEP 128 bits): 26 Hex karakters (0~9, a~f).<br />
• ASCII (WEP 64 bits): 5 ASCII karakters (case-sensitive).<br />
• ASCII (WEP 128 bits): 13 ASCII karakters (case-sensitive).<br />
Encryption Key: Masukkan key pada kolom pengaturan.<br />
WPA-PSK/ WPA2-PSK/ WPA-PSK WPA2-PSK<br />
Authentication Mode: Pilih Enterprise (RADIUS) atau Modus Personal (Pre-Shared Key).<br />
WPA Cipher Suite: ini mendukung AES saja.<br />
WPA2 Cipher Suite: ini mendukung AES saja.<br />
Pre-Shared Key Format: Memiliki pilihan untuk set Pre-shared key, Passphrase dan Hex (64 karakters). Jika Hex yang<br />
dipilih, pengguna harus memasukkan 64 karakter. Untuk pengaturan yang lebih mudah, Passphrase (minimum 8 karakter)<br />
yang direkomendasi.<br />
Pre-Shared Key : Pre-Shared Key berfungsi sebagai password. Pengguna harus memasukkan 8 sampai 63 karakter string jika<br />
Anda memilih passphrase. Pastikan password yang sama digunakan olh client untuk melakukan koneksi.<br />
Versi 1.00 18 Indonesia
<strong>PROLiNK</strong>® <strong>WNR1008</strong><br />
www.prolink2u.com<br />
ACL<br />
Item / Fungsi<br />
Wireless Access Control Mode<br />
MAC Address<br />
Comment<br />
Current Access Control List<br />
Delete choosed<br />
Delete All<br />
Reset<br />
Penjelasan/ Instruksi<br />
Pilih Allow Listed atau Deny Listed dari menu pull-down untuk mengaktifkan fungsi access control. Pengaturan<br />
Default adalah Disabled.<br />
Masukkan alamat MAC (12 karakter) dari station yang boleh mengakses Access Point ini.<br />
Ana bias memasukkan 20 karakter sebagai deskripsi alamat MAC.<br />
Tabel ini menampilkan informasi MAC pada client.<br />
Klik Delete Choosed untuk menghapus item.<br />
Klik Delete All untuk menghapus semua item.<br />
Klik Reset untuk meeset.<br />
WDS<br />
Wireless Distribution System menggunakan media wireless untuk berkomunikasi dengan AP lainnya, seperti<br />
Ethernet. Untuk melakukan ini, Anda harus mengatur ini AP yang ada di saluran yang sama dan menetapkan alamat<br />
MAC dari AP lain yang Anda ingin berkomunikasi dengan dalam tabel dan kemudian mengaktifkan WDS.<br />
Untuk menggunakan fungsi WDS:<br />
1. AP harus mendukung fungsi WDS.<br />
2. SSID harus sama (Nama Network).<br />
3. Channel harus sama.<br />
4. Memasukkan alamat Wireless MAC (BSSID) pada AP.<br />
5. Meggunakan security yang sama (WEP atau WPA) pada AP.<br />
Catatan !<br />
Untuk menjalankan WDS harus menggunakan produk wireless yang sama (model yang sama lebih<br />
baik);karena dua produk wireless yang berbeda mungkin mendukung pengaturan WDS yang berbeda. Dengan<br />
demikian, meggunakan produk wireless yang sama akan mendukung fungsi yang sama.<br />
Versi 1.00 19 Indonesia
<strong>PROLiNK</strong>® <strong>WNR1008</strong><br />
www.prolink2u.com<br />
Step 1.<br />
Pengguna ingin menggunakan fungsi WDS, silahkan ke halaman Wireless > Basic untuk memilih modus<br />
WDS atau AP+ WDS (Repeater), dan buat AP dengan Network Name (SSID) dan Channel yang sama.<br />
Setelah selesai, klik tombol Apply Changes.<br />
1<br />
2<br />
<strong>PROLiNK</strong>_<strong>WNR1008</strong><br />
3<br />
Versi 1.00 20 Indonesia
<strong>PROLiNK</strong>® <strong>WNR1008</strong><br />
www.prolink2u.com<br />
Step 2.<br />
Lalu pergi ke Wireless > WDS (1) untuk mengaktifkan fungsi WDS dan (2) masukkan alamat Wireless MAC<br />
(silahkan pergi ke Status> Wireless Configuration untuk memastikan alamat BSSID) untuk setiap AP yang<br />
merupakan bagian dari WDS. Klik tombol Apply.<br />
1<br />
2<br />
Item / Fungsi<br />
Enable WDS<br />
Penjelasan/ Instruksi<br />
Centang untuk mengaktifkan fungsi WDS.<br />
MAC Address: Masukkan Wireless BSSID (MAC) 12 karakter dari wireless AP yang ingin Anda hubungkan. silahkan<br />
pergi ke Status> Wireless Configuration untuk memastikan alamat BSSID)<br />
MAC Address<br />
<strong>PROLiNK</strong>_<strong>WNR1008</strong><br />
Data Rate<br />
Comment<br />
Apply Changes<br />
Reset<br />
Set Security<br />
Pilih data rate dari menu pull-down.<br />
Masukkan deskripsi untuk perangkat.<br />
Setelah selesai melakukan pengaturan, Klik tombol Apply changes untuk menyimpan.<br />
Klik Reset untuk kembali ke nilai semua.<br />
Mengaktifkan fungsi WDS lalu Klik tombol Set Security untuk membuat WDS security.<br />
Versi 1.00 21 Indonesia
<strong>PROLiNK</strong>® <strong>WNR1008</strong><br />
www.prolink2u.com<br />
Encryption: Pilih jenis encryption None, WEP 64 bits, WEP 128 bits, dan WPA2 (AES) dari menu pull-down.<br />
WEP Key Format: Untuk jenis WEP 64 bits dan WEP 128 bits encryption, WEP Key Format adalah Hex atau ASCII.<br />
WEP Key: Jika memilih Hex menggunakan angka hexadecimal (0-9, atau A-F). Pilih ASCII untuk menggunakan<br />
karakter ASCII (case-sensitive).<br />
• Hexadecimal (WEP 64 bits): 10 Hex karakters (0~9, a~f).<br />
• Hexadecimal (WEP 128 bits): 26 Hex karakters (0~9, a~f).<br />
• ASCII (WEP 64 bits): 5 ASCII karakters (case-sensitive).<br />
• ASCII (WEP 128 bits): 13 ASCII karakters (case-sensitive).<br />
Pre-Shared Key Format: Pre-shared Key Format akan aktif bila menggunakan WPA (TKIP) dan WPA2 (AES)<br />
encryption ed. Ada 2 pilihan format untuk Pre-shared key, Passphrase dan Hex (64 karakters). Jika Hex di pilih ,<br />
pengguna harus memasukkan 64 karakters string. Untuk kemudahan pengaturan, gunakan Passphrase (minimal 8<br />
karakters) yang direkomendasi.<br />
Pre-Shared Key: Pre-Shared Key berfungsi sebagai password. Pengguna harus memasukkan 8 sampai 63 karakter<br />
string jika Anda memilih passphrase. Pastikan password yang sama digunakan olh client untuk melakukan koneksi.<br />
Klik ini untuk melihat tabel WDS. Tabel ini menampilan alamat MAC, transmission packets dan errors, reception<br />
packets dan Tx Rate (Mbps) counters untuk setiap WDS AP yang terkoneksi.<br />
Show Statistics<br />
Refresh: Klik ini untuk me refresh informasi.<br />
Close: Klik ini untuk menutup jendela.<br />
Current WDS AP List<br />
Delete Choosed<br />
Delete All<br />
Reset<br />
Here shows the current WDS AP information.<br />
Klik Delete Choosed untuk menghapus item.<br />
Klik Delete All untuk menghapus semua items.<br />
Klik Reset untuk kmbali ke nilai default.<br />
Versi 1.00 22 Indonesia
<strong>PROLiNK</strong>® <strong>WNR1008</strong><br />
www.prolink2u.com<br />
WPS<br />
Item / Fungsi<br />
Disable WPS<br />
WPS Status<br />
Self-PIN Number<br />
Push Button<br />
Configuration<br />
Client PIN Number<br />
Penjelasan/ Instruksi<br />
Centang kotak untuk men non aktifkan fungsi WPS, pengaturan default adalah enabled.<br />
Disini menampilkan status dari fungsi WPS. Klik Reset to Unconfigured untuk me rekonfigurasi koneksi WPS.<br />
Menampilkan 8 karakters PIN code dari router.<br />
Klik tombol Start PBC untuk membuat okneksi WPS dengan client.<br />
Masukkan client PIN code kedalam kolom ini lalu Klik tombol Start PIN untuk membuat koneksi WPS dengan client.<br />
Versi 1.00 23 Indonesia
<strong>PROLiNK</strong>® <strong>WNR1008</strong><br />
www.prolink2u.com<br />
Schedule<br />
Item / Fungsi<br />
Enable Wireless<br />
Schedule<br />
Penjelasan/ Instruksi<br />
Centang kotak untuk mengaktifkan fungsi schedule. Pilih hari dan waktu yang Anda ingin aktifkan.<br />
3.6.<br />
DMZ Settings<br />
Item / Fungsi<br />
Enable DMZ<br />
DMZ Host IP<br />
Address<br />
Apply Changes<br />
Reset<br />
Penjelasan/ Instruksi<br />
Centang kotak untuk mengaktifkan fungsi DMZ. Jika fungsi DMZ Host aktif, berarti Anda bisa mengekspose<br />
computer di Internet untuk beberpa aplikasi seperti online game , dll.<br />
Masukkan alamat IP dari host Anda.<br />
Catatan: Anda harus menggunakan alamat IP statis pada PC clients Anda.<br />
Setelah selesai melakukan pengaturan, Klik tombol Apply changes untuk menyimpan.<br />
Klik Reset untuk kembali ke nilai semua.<br />
Versi 1.00 24 Indonesia
<strong>PROLiNK</strong>® <strong>WNR1008</strong><br />
www.prolink2u.com<br />
URL Filter Settings<br />
Item / Fungsi<br />
Enable URL Filtering<br />
URL Address<br />
Apply Changes<br />
Reset<br />
Current Filter Table<br />
Delete Choosed<br />
Delete All<br />
Reset<br />
Penjelasan/ Instruksi<br />
Centang untuk mengaktifkan fungsi URL filtering.<br />
Masukkan URL address.<br />
Setelah selesai melakukan pengaturan, Klik tombol Apply changes untuk menyimpan.<br />
Klik Reset untuk kembali ke nilai semua.<br />
Menampilkan informasi dari alamat URL.<br />
Klik Delete Choosed untuk menghapus item.<br />
Klik Delete All untuk menghapus semua items.<br />
Klik Reset untuk kembali ke nilai default.<br />
MAC Filtering<br />
Versi 1.00 25 Indonesia
<strong>PROLiNK</strong>® <strong>WNR1008</strong><br />
www.prolink2u.com<br />
Item / Fungsi<br />
Enable MAC Filtering<br />
MAC Address<br />
Comment<br />
Apply Changes<br />
Reset<br />
Current Filter Table<br />
Delete Choosed<br />
Delete All<br />
Reset<br />
Penjelasan/ Instruksi<br />
Centang untuk mengaktifkan fungsi MAC filtering.<br />
Masukkan alamat MAC dari client.<br />
Masukkan deskripsi dari alamat MAC.<br />
Setelah selesai melakukan pengaturan, Klik tombol Apply changes untuk menyimpan.<br />
Klik Reset untuk kembali ke nilai semua.<br />
Menampilkan informasi MAC filter.<br />
Klik Delete Choosed untuk menghapus item.<br />
Klik Delete All untuk menghapus semua items.<br />
Klik Reset untuk kembali ke nilai default.<br />
Port Filtering Settings<br />
Item / Fungsi<br />
Enable Port Filtering<br />
Port Range<br />
Protocol<br />
Comment<br />
Apply Changes<br />
Reset<br />
Current Port<br />
Forwarding Table<br />
Delete Choosed<br />
Delete All<br />
Reset<br />
Penjelasan/ Instruksi<br />
Centang untuk mengaktifkan fungsi Port Filtering.<br />
Masukkan nomor awal dari range port. Jika layanan menggunakan nomor port tunggal, masukkan nomor yang sama<br />
pada kedua kolom.<br />
Pilih protocol (TCP, UDP atau Both) digunakan untuk layanan remote system.<br />
Anda dapat membuat deskripsi untuk alamat MAC.<br />
Setelah selesai melakukan pengaturan, Klik tombol Apply changes untuk menyimpan.<br />
Klik Reset untuk kembali ke nilai semua.<br />
Menampilkan informasi dari Port Forwarding.<br />
Klik Delete Choosed untuk menghapus item.<br />
Klik Delete All untuk menghapus semua items.<br />
Klik Reset untuk kembali ke nilai default.<br />
Versi 1.00 26 Indonesia
<strong>PROLiNK</strong>® <strong>WNR1008</strong><br />
www.prolink2u.com<br />
IP Filtering<br />
Item / Fungsi<br />
Enable IP Filtering<br />
Local IP Address<br />
Protocol<br />
Comment<br />
Apply Changes<br />
Reset<br />
Current Filter Table<br />
Delete Choosed<br />
Delete All<br />
Reset<br />
Penjelasan/ Instruksi<br />
Check to enable IP filtering function.<br />
Enter the local server’s IP address.<br />
Pilih protocol (TCP, UDP atau Both) digunakan untuk layanan remote system.<br />
Anda dapat membuat deskripsi untuk port range.<br />
Setelah selesai melakukan pengaturan, Klik tombol Apply changes untuk menyimpan.<br />
Klik Reset untuk kembali ke nilai semua.<br />
Menampilkan informasi dari IP filtering.<br />
Klik Delete Choosed untuk menghapus item.<br />
Klik Delete All untuk menghapus semua items.<br />
Klik Reset untuk kembali ke nilai default.<br />
Versi 1.00 27 Indonesia
<strong>PROLiNK</strong>® <strong>WNR1008</strong><br />
www.prolink2u.com<br />
Virtual Server<br />
Item / Fungsi<br />
Enable Port<br />
Forwarding<br />
IP Address<br />
Protocol<br />
Port Range<br />
Comment<br />
Apply Changes<br />
Reset<br />
Current Port<br />
Forwarding Table<br />
Delete Choosed<br />
Delete All<br />
Reset<br />
Penjelasan/ Instruksi<br />
Centang untuk mengaktifkan fungsi Port Forwarding.<br />
Masukkan alamat IP.<br />
Pilih the protocol (TCP, UDP atau Both) used to the remote system atau service.<br />
Untuk layanan TCP dan UDP, masukkan port awal yang digunakan. Jika layanan menggunakan nomor port tunggal,<br />
masukkan nomor yang sama pada kedua kolom.<br />
Anda dapat membuat deskripsi untuk alamat MAC.<br />
Setelah selesai melakukan pengaturan, Klik tombol Apply changes untuk menyimpan.<br />
Klik Reset untuk kembali ke nilai semua.<br />
Menampilkan informasi dari Port Forwarding.<br />
Klik Delete Choosed untuk menghapus item.<br />
Klik Delete All untuk menghapus semua items.<br />
Klik Reset untuk kembali ke nilai default.<br />
Versi 1.00 28 Indonesia
<strong>PROLiNK</strong>® <strong>WNR1008</strong><br />
www.prolink2u.com<br />
VLAN<br />
Item / Fungsi<br />
Enable VLAN<br />
Penjelasan/ Instruksi<br />
Masukkan pada tabel di bawah ini digunakan untuk pengaturan konfigurasi VLAN. VLAN diciptakan untuk<br />
menyediakan layanan segmentasi tradisional yang disediakan oleh router. VLAN mengatasi masalah seperti<br />
skalabilitas, keamanan, dan manajemen network<br />
3.7.<br />
Password<br />
Versi 1.00 29 Indonesia
<strong>PROLiNK</strong>® <strong>WNR1008</strong><br />
Item / Fungsi<br />
User Name<br />
New Password<br />
Confirmed Password<br />
www.prolink2u.com<br />
Penjelasan/ Instruksi<br />
Mengatur username login untuk melindungi konfigurasi Wireless Router mengakses melalui browser web. Nama<br />
pengguna password dan Kosong akan menonaktifkan perlindungan. Ini sangat dianjurkan untuk menetapkan satu set<br />
keamanan lebih lanjut.<br />
Mengatur password login untuk melindungi konfigurasi Wireless Router mengakses melalui browser web. input<br />
maksimum adalah 30 karakters alfanumerik (case sensitive.)<br />
Masukkan password kembali untuk konfirmasi.<br />
NAS<br />
Item / Fungsi<br />
FTP Service Enable<br />
FTP Port<br />
Login Timeout<br />
Stay Timeout<br />
Login Users<br />
Share Mode<br />
Use anonymous<br />
login<br />
Penjelasan/ Instruksi<br />
Network attached storage (NAS) memungkinkan data pengguna akses melalui layanan jaringan. Pengguna dapat<br />
menggunakan FTP, solusi Samba untuk berbagi perangkat penyimpanan USB dalam jaringan<br />
Masukkan FTP port.<br />
Pengaturan waktu login.<br />
Pengaturan waktu tinggal login.<br />
Pengaturan limit pengguna.<br />
Untuk mengontrol otentikasi data untuk pengguna login.<br />
Tidak perlu login dengan username atau password. Jika Anda tidak ingin menggunakan login anonim, harap<br />
masukkan nama pengguna dan sandi di lapangan<br />
Media Share<br />
Versi 1.00 30 Indonesia
<strong>PROLiNK</strong>® <strong>WNR1008</strong><br />
www.prolink2u.com<br />
Item / Fungsi<br />
Enable Media Server<br />
Share Folder Name<br />
Penjelasan/ Instruksi<br />
Media Server memungkinkan pengguna berbagi file multi-media pada jaringan lokal<br />
Masukkan nama file share pada LAN.<br />
NTP<br />
Item / Fungsi<br />
Current Time<br />
Time Zone Pilih<br />
Enable NTP client update<br />
Automatically Adjust<br />
Daylight Saving<br />
NTP server<br />
<strong>Manual</strong> IP setting<br />
Apply Changes<br />
Refresh<br />
Penjelasan/ Instruksi<br />
Masukkan jam pada wireless router atau Klik tombol Copy Computer Time untuk melakukan synchronize.<br />
Pilih zona waktu local dari menu pull-down.<br />
Centang untuk mengaktifkan fungsi NTP (Network Time Protocol Server) client update.<br />
Centang untuk mengaktifkan fungsi ini.<br />
Anda dapat memilih NTP server dari menu pull-down atau memasukkan alamat IP secara manual.<br />
Setelah selesai melakukan pengaturan, Klik tombol Apply changes untuk menyimpan.<br />
Klik tombol Refresh untuk merefresh waktu.<br />
Dynamic DNS Setting<br />
Versi 1.00 31 Indonesia
<strong>PROLiNK</strong>® <strong>WNR1008</strong><br />
www.prolink2u.com<br />
Item / Fungsi<br />
Enable DDNS<br />
Service Provider<br />
Domain Name<br />
User Name/Email<br />
Password/Key<br />
Apply Changes<br />
Reset<br />
Penjelasan/ Instruksi<br />
Centang untuk mengkatifkan fungsi DDNS.<br />
Pilih layanan DDNS yang Anda suka seperti DynDNS, TZO atau Oray dari menu pull-down.<br />
Disini akan terlihat nama domain dari service provider.<br />
Masukkan alamat email yang Anda register di website service provider.<br />
Masukkan passwords yang Anda register di website service provider. Max 30 alphanumeric karakters (case sensitive).<br />
Setelah selesai melakukan pengaturan, Klik tombol Apply changes untuk menyimpan.<br />
Klik tombol Refresh untuk merefresh waktu.<br />
Upgrade Firmware<br />
Item / Fungsi<br />
Firmware Version<br />
Pilih File<br />
Upload<br />
Reset<br />
Penjelasan/ Instruksi<br />
Disini menampilkan versi firmware terakhir.<br />
Klik tombol Browse untuk mencari file firmware (browser akan menampilkan file path yang benar.)<br />
Klik tombol Upload untuk memulai.<br />
Klik tombol Refresh untuk merefresh waktu.<br />
Settings Management<br />
Item / Fungsi<br />
Save Settings to File<br />
Load Settings form File<br />
Reset Settings to Default<br />
Penjelasan/ Instruksi<br />
Klik tombol Save untuk menyimpan hasil pengaturan ke dalam PC.<br />
Klik tombol Browse untuk mencari dan membuka file konfigurasi. Lalu, Klik tombol Upload untuk memulai.<br />
Klik tombol Refresh untuk merefresh waktu.<br />
Versi 1.00 32 Indonesia
<strong>PROLiNK</strong>® <strong>WNR1008</strong><br />
www.prolink2u.com<br />
Statistics<br />
Halaman ini menampilkan counter paket untuk penerimaan dan transmisi sehubungan dengan jaringan Ethernet dan<br />
nirkabel.<br />
System Log<br />
Item / Fungsi<br />
Enable Log<br />
System all<br />
Wireless<br />
DoS<br />
Enable Remote Log<br />
Log Server IP address<br />
Apply Changes<br />
Refresh<br />
Clear<br />
Penjelasan/ Instruksi<br />
Centang untuk mengaktifkan fungsi log.<br />
Mengaktifkan seluruh fungsi log.<br />
Hanya logs yang berhubungan dengan wireless LAN yang akan di catat.<br />
Hanya logs yang berhubungan dengan DoS yang akan di catat.<br />
Hanya logs yang berhubungan dengan remote control yang akan di catat.<br />
Hanya logs yang berhubungan dengan Server yang akan di catat.<br />
Setelah selesai melakukan pengaturan, Klik tombol Apply changes untuk menyimpan.<br />
Klik tombol Refresh untuk merefresh waktu.<br />
Klik tombol Clear untuk menghapus log.<br />
Reboot<br />
Klik tombol Reboot untuk me restart Wireless Router.<br />
Versi 1.00 33 Indonesia
<strong>PROLiNK</strong>® <strong>WNR1008</strong><br />
BAGIAN 4: KONFIGURASI PC<br />
www.prolink2u.com<br />
4.1.<br />
Untuk setiap PC, berikut yang harus Anda konfigurasi:<br />
Pengaturan TCP/IP network<br />
Konfigurasi Akses Internet<br />
Konfigurasi Wireless<br />
4.2.<br />
<br />
<br />
<br />
Bagian ini menjelaskan bagaimana cara mengkonfigurasi Windows clients untuk Akses Internet melalui<br />
Wireless Router.<br />
Langkah pertama adalah memeriksa pengaturan TCP/IP pada PC.<br />
Wireless Router menggunakan protokol TCP / IP jaringan untuk semua fungsi, sehingga sangat penting bahwa<br />
protokol TCP / IP diinstal dan dikonfigurasi pada PC masing-masing.<br />
TCP/IP Settings - Penjelasan<br />
Jika menggunakan pengaturan default Wireless Router, dan standar pengaturan TCP / IP pada Windows, tidak ada<br />
perubahan perlu dibuat.<br />
Secara default, Wireless Router akan bertindak sebagai DHCP Server, secara otomatis memberikan alamat IP<br />
yang sesuai ke PC setiap PC boot.<br />
semua versi non-server Windows, standar TCP / IP setting untuk bertindak sebagai DHCP client.<br />
Jika menggunakan alamat IP statis, berikut perubahan yang diperlukan:<br />
Gateway harus di set ke alamat IP dari Wireless Router.<br />
DNS harus di set ke alamat yang disediakan oleh ISP (Internet Service Provider) Anda.<br />
Checking TCP/IP Settings - Windows 2000<br />
1. Pergi ke Start Control Panel Network dan Dial-up Connection.<br />
2. Klik kanan ikon Local Area Connection dan Pilih Properties. Anda akan melihat gamabr berikut:<br />
3. Pilih Internet Protocol (TCP/IP) untuk network card Anda.<br />
Versi 1.00 34 Indonesia
<strong>PROLiNK</strong>® <strong>WNR1008</strong><br />
www.prolink2u.com<br />
4. Klik tombol Properties. Anda akan melihat gambar berikut.<br />
5. Pastikan pengaturan TCP/IP sudah benar.<br />
Menggunakan DHCP<br />
Untuk menggunakan DHCP, Pilih Obtain an IP address automatically dan Obtain DNS server address<br />
automatically. Ini merupakan pengaturan default Windows. Menggunakan cara ini direkomendasi. Secara<br />
default, Wireless Router akan bertindak sebagai DHCP Server.<br />
Restart PC Anda untuk memastikan alamat IP diperoleh dari Wireless Router secara otomatis.<br />
Menggunakan alamat IP Statis ("Use the following IP Address")<br />
Jika PC Anda sudah terkonfigurasi, periksa dengan network administrator Anda sebelum melakukan beberapa<br />
perubahan berikut.<br />
Masukkan alamat IP dari Wireless Router pada kolom Default gateway. (LAN administrator Anda akan<br />
menyarankan alamat IP yang mereka tetapkan menuju ke Wireless Router.)<br />
Jika kolom DNS Server kosong, Pilih Use the following DNS server addresses, dan masukkan alamat DNS<br />
atau alamat yang di sediakan oleh ISP Anda.<br />
Checking TCP/IP Settings - Windows XP<br />
1. Pergi ke Start Control Panel Network Connection.<br />
2. Klik kanan ikon Local Area Connection dan pilih Properties. Anda akan melihat gambar berikut:<br />
3. Pilih Internet Protocol (TCP/IP) untuk network card Anda.<br />
Versi 1.00 35 Indonesia
<strong>PROLiNK</strong>® <strong>WNR1008</strong><br />
www.prolink2u.com<br />
4. Klik tombol Properties. Anda akan melihat gambar berikut.<br />
5. Pastikan pengaturan TCP/IP sudah benar.<br />
Menggunakan DHCP<br />
Untuk menggunakan DHCP, Pilih Obtain an IP address automatically dan Obtain DNS server address<br />
automatically. Ini merupakan pengaturan default Windows. Menggunakan cara ini direkomendasi. Secara<br />
default, Wireless Router akan bertindak sebagai DHCP Server.<br />
Restart PC Anda untuk memastikan alamat IP diperoleh dari Wireless Router secara otomatis.<br />
Menggunakan alamat IP Statis ("Use the following IP Address")<br />
Jika PC Anda sudah terkonfigurasi, periksa dengan network administrator Anda sebelum melakukan beberapa<br />
perubahan berikut.<br />
Masukkan alamat IP dari Wireless Router pada kolom Default gateway. (LAN administrator Anda akan<br />
menyarankan alamat IP yang mereka tetapkan menuju ke Wireless Router.)<br />
Jika kolom DNS Server kosong, Pilih Use the following DNS server addresses, dan masukkan alamat DNS<br />
atau alamat yang di sediakan oleh ISP Anda.<br />
Checking TCP/IP Settings - Windows Vista<br />
1. Pergi ke Start Control Panel Network dan Internet Network dan Sharing Center Manage Network<br />
Connections Local Area Connection.<br />
2. Klik kanan ikon Local Area Connection dan pilih Properties. Anda akan melihat gambar berikut:<br />
3. Pilih Internet Protocol Version 4 (TCP/IPv4) atau 6 (TCP/IPv6)<br />
untuk network card Anda.<br />
Versi 1.00 36 Indonesia
<strong>PROLiNK</strong>® <strong>WNR1008</strong><br />
www.prolink2u.com<br />
4. Klik tombol Properties. Anda akan melihat gambar berikut.<br />
5. Pastikan pengaturan TCP/IP sudah benar.<br />
Menggunakan DHCP<br />
Untuk menggunakan DHCP, Pilih Obtain an IP address automatically dan Obtain DNS server address<br />
automatically. Ini merupakan pengaturan default Windows. Menggunakan cara ini direkomendasi. Secara<br />
default, Wireless Router akan bertindak sebagai DHCP Server.<br />
Restart PC Anda untuk memastikan alamat IP diperoleh dari Wireless Router secara otomatis.<br />
Menggunakan alamat IP Statis ("Use the following IP Address")<br />
Jika PC Anda sudah terkonfigurasi, periksa dengan network administrator Anda sebelum melakukan beberapa<br />
perubahan berikut.<br />
Masukkan alamat IP dari Wireless Router pada kolom Default gateway. (LAN administrator Anda akan<br />
menyarankan alamat IP yang mereka tetapkan menuju ke Wireless Router.)<br />
Jika kolom DNS Server kosong, Pilih Use the following DNS server addresses, dan masukkan alamat DNS<br />
atau alamat yang di sediakan oleh ISP Anda.<br />
Checking TCP/IP Settings - Windows 7<br />
1. Pergi ke Start Control Panel Network dan Sharing Center Manage Network Connections Local<br />
Area Connection.<br />
2. Klik kanan ikon Local Area Connection dan pilih Properties. Anda akan melihat gmbar berikut:<br />
3. Pilih Internet Protocol Version 4 (TCP/IPv4) atau 6 (TCP/IPv6)<br />
network card Anda.<br />
Versi 1.00 37 Indonesia
<strong>PROLiNK</strong>® <strong>WNR1008</strong><br />
www.prolink2u.com<br />
4. Klik tombol Properties. Anda akan melihat gambar berikut.<br />
5. Pastikan pengaturan TCP/IP sudah benar.<br />
Menggunakan DHCP<br />
Untuk menggunakan DHCP, Pilih Obtain an IP address<br />
automatically dan Obtain DNS server address<br />
automatically. Ini merupakan pengaturan default Windows.<br />
Menggunakan cara ini direkomendasi. Secara default,<br />
Wireless Router akan bertindak sebagai DHCP Server.<br />
Restart PC Anda untuk memastikan alamat IP diperoleh dari<br />
Wireless Router secara otomatis.<br />
Menggunakan alamat IP Statis ("Use the following IP<br />
Address")<br />
Jika PC Anda sudah terkonfigurasi, periksa dengan network<br />
administrator Anda sebelum melakukan beberapa perubahan berikut.<br />
Masukkan alamat IP dari Wireless Router pada kolom Default gateway. (LAN administrator Anda akan<br />
menyarankan alamat IP yang mereka tetapkan menuju ke Wireless Router.)<br />
Jika kolom DNS Server kosong, Pilih Use the following DNS server addresses, dan masukkan alamat DNS<br />
atau alamat yang di sediakan oleh ISP Anda.<br />
Akses Internet<br />
Untuk mengkonfigurasi PC Anda menggunakan Wireless Router untuk Akses Internet:<br />
Pastikan DSL modem, Cable modem, atau koneksi internet lainnya berfungsi.<br />
Gunakan prosedur berikut untuk mengkonfigurasi Browser Anda untuk mengakses Internet via LAN, daripada<br />
menggunakan koneksi Dial-up.<br />
Untuk Windows 2000<br />
1. Pilih Start menu Settings Control Panel Internet Options.<br />
2. Pilih tab Connection, dan Klik tombol Setup.<br />
3. Pilih "I want to set up my Internet connection manually, atau I want to connect through a local area<br />
network (LAN)" dan Klik Next.<br />
4. Pilih "I connect through a local area network (LAN)" dan Klik Next.<br />
5. Pastikan semua kotak pada layar Local area network Internet Configuration tidak di centang.<br />
6. Pilih opsi "No" ketika muncul "Do you want to set up an Internet mail account now?"<br />
7. Klik Finish untuk menutup jendela. Saat ini Connection Wizard Setup telah selesai.<br />
Untuk Windows XP<br />
1. Pilih Start menu Control Panel Network dan Internet Connections.<br />
2. Pilih Set up atau ubah Internet Connection Anda.<br />
3. Pilih tab Connection, dan Klik tombol Setup.<br />
4. Batalkan layar pop-up "Location Information".<br />
5. Klik Next on the "New Connection Wizard" screen.<br />
6. Pilih "Connect to the Internet" dan Klik Next.<br />
7. Pilih "Set up my connection manually" dan Klik Next.<br />
8. Centang "Connect using a Broadband connection that is always on" dan Klik Next.<br />
9. Klik Finish untuk menutup. Saat ini New Connection Wizard Setup telah selesai.<br />
Versi 1.00 38 Indonesia
<strong>PROLiNK</strong>® <strong>WNR1008</strong><br />
www.prolink2u.com<br />
Untuk Windows Vista<br />
1. Pilih Start menu Control Panel Network dan Internet Network dan Sharing Center.<br />
2. Pilih Set up a connection atau network.<br />
3. Pilih Connect to the Internet dan Klik Next untuk melanjutkan.<br />
4. Pilih Broadband (PPPoE).<br />
5. Masukkan User name dan Password yang disediakan oleh ISP, lalu Klik Connect untuk membuat koneksi.<br />
Untuk Windows 7<br />
1. Pilih Start menu Control Panel Network Sharing Center.<br />
2. Pilih Set up a new connection atau network.<br />
3. Pilih Connect to the Internet dan Klik Next untuk melanjutkan.<br />
4. Pilih Broadband (PPPoE).<br />
5. Masukkan User name dan Password yang disediakan oleh ISP, lalu Klik Connect untuk membuat koneksi.<br />
Mengakses AOL<br />
Untuk mengakses AOL (America On Line) melalui Wireless Router, AOL untuk Windows software harus di konfigurasi<br />
menggunakan TCP/IP network access, daripada mengunakan koneksi dial-up. Proses konfigurasi berikut ini:<br />
1. Jalankan AOL pada Windows communication software. Pastikan Versinya 2.5, 3.0 atau terbaru. prosedur ini<br />
tidak bekerja untuk versi sebelumnya.<br />
2. Klik tombol Setup.<br />
3. Pilih buat lokasi, dan ubah nama lokasi dari "New Locality" menjadi " Wireless Router ".<br />
4. Klik Edit Location. Pilih TCP/IP untuk kolom Network. (Biarkan nomor telepon kosong).<br />
5. Klik Save, lalu OK.<br />
6. Konfigurasi saat ini sudah selesai.<br />
7. Sebelum meng klik "Sign On", selalu pastikan Anda menggunakan lokasi " Wireless Router ".<br />
4.3.<br />
Dari Macintosh Anda, Anda dapat mengakses Internet melalui Wireless Router. Prosedur nya berikut ini.<br />
1. Buka TCP/IP Control Panel.<br />
2. Pilih Ethernet dari Connect melalui menu pop-up.<br />
3. Pilih menggunakan DHCP Server dari Configure menu pop-up. Kolom DHCP Client ID tidak boleh kosong.<br />
4. Tutup TCP/IP panel, simpan hasil pengaturan Anda.<br />
Jika menggunakan alamat IP statis selain DHCP, perubahan yang dibutuhkan sebagai berikut:<br />
Set kolom Router Address ke r.alamat IP Wireless Router.<br />
Pastikan pengaturan DNS Anda benar.<br />
4.4.<br />
Untuk mengakses Internet melalui Wireless Router, hanya perlu untuk mengatur Wireless Router sebagai "Gateway".<br />
Pastikan anda login sebagai "root" sebelum mencoba perubahan.<br />
Alamat IP Statis<br />
Secara default, kebanyakan instalasi Unix menggunakan alamat IP statis. Jika Anda ingin terus menggunakan alamat IP<br />
statis, buatlah perubahan konfiguasi berikut.<br />
Set "Default Gateway" Anda ke alamat IP dari Wireless Router.<br />
Pastikan pengaturan DNS Anda benar.<br />
Versi 1.00 39 Indonesia
<strong>PROLiNK</strong>® <strong>WNR1008</strong><br />
www.prolink2u.com<br />
Untuk bertindak sebagai DHCP Client (Direkomendasi)<br />
Prosedur di bawah ini dapat bervariasi tergantung versi Linux dan X-windows Anda gunakan.<br />
1. Jalankan X Windows client Anda.<br />
2. Pilih Control Panel – Network.<br />
3. Pilih "Interface" untuk Network card Anda. Biasanya, ini dikenal dengan "eth0".<br />
4. Klik tombol Edit, set "protocol" ke "DHCP", dan simpan pengaturan ini.<br />
5. Untuk menerapkan perubahan yang Anda buat:<br />
Gunakan tombol "Deactivate" dan "Activate" buttons, jika tersedia.<br />
Atau, restart PC Anda.<br />
4.5.<br />
Untuk mengakses Internet melalui Wireless Router:<br />
Pastikan kolom "Gateway" untuk network card Anda di set ke alamat IP dari Wireless Router.<br />
Pastikan pengaturan DNS Anda benar.<br />
4.6.<br />
<br />
<br />
Bagian ini berlaku untuk semua stasiun nirkabel yang ingin menggunakan Wireless Router sebagai jalur akses,<br />
terlepas dari sistem operasi yang digunakan pada klien.<br />
Untuk menggunakan Wireless Router, setiap wireless station harus memiliki pengaturan yang kompatibel<br />
sebagai berikut:<br />
Mode<br />
SSID (ESSID) (Extended<br />
Service Set Identifier)<br />
Disable<br />
Mode harus di set ke Infrastructure.<br />
Nama network harus sama dengan Wireless Router.<br />
Catatan! SSID (service set identifier) adalah case- sensitive.<br />
Jika tidak ada security yang diaktifkan pada Wireless Router, security setiap stasiun harus dinonaktifkan<br />
juga. Dan, Anda dapat menghubungkan Wireless Router tanpa security, tetapi TIDAK dianjurkan<br />
Secara default, WEP pada Wireless Router tidak aktif.<br />
WEP<br />
Open System/ Shared Key/<br />
Auto<br />
Shared Key hanya mendukung WEP sebagai encryption.<br />
AUTO (Open/Shared) artinya AP dapat menerima koneksi STA dengan OPEN-WEP atau SHARED-WEP.<br />
Jika WEP tidak aktif pada Wireless Router, semua stations harus men nonaktifkan fungsi WEP juga.<br />
Jika WEP aktif pada Wireless Router, setiap station harus menggunakan pengaturan yang sama<br />
dengan Wireless Router.<br />
Personal (Pre-Shared Key)<br />
WPA<br />
WPA2<br />
WPA2-Mixed<br />
WPA-PSK (TKIP/AES)/ WPA2-PSK (TKIP/AES): Jika satu dari security ini diaktifkan pada Wireless Router.<br />
Setiap STA harus menggunakan algorithms dan passphrase yang sama dengan Wireless Router.<br />
Pre-Shared Key Format: Memiliki pilihan untuk set Pre-shared key, Passphrase dan Hex (64<br />
karakters). Jika Hex yang dipilih, pengguna harus memasukkan 64 karakter. Untuk pengaturan yang<br />
lebih mudah, Passphrase (minimum 8 karakter) yang direkomendasi.<br />
Pre-Shared Key : Pre-Shared Key berfungsi sebagai password. Pengguna harus memasukkan 8 sampai<br />
63 karakter string jika Anda memilih passphrase. Pastikan password yang sama digunakan olh client<br />
untuk melakukan koneksi.<br />
Versi 1.00 40 Indonesia
<strong>PROLiNK</strong>® <strong>WNR1008</strong><br />
Enterprise (RADIUS)<br />
WPA<br />
WPA2<br />
WPA2-Mixed<br />
802.1x<br />
www.prolink2u.com<br />
RADIUS Server: RADIUS adalah otentikasi, authorization dan akuntansi client-server protokol. Client<br />
adalah Network Access Server yang keinginan untuk otentikasi link nya. The RADIUS adalah server yang<br />
memiliki akses ke database user dengan informasi otentikasi. Setiap stasiun harus mengatur Server<br />
RADIUS alamat IP, password dan port yang disediakan oleh ISP anda.<br />
Secara default, Wireless Router akan memungkinkan koneksi 802.11b, 802.11g dan 802.11n.<br />
Versi 1.00 41 Indonesia
<strong>PROLiNK</strong>® <strong>WNR1008</strong><br />
BAGIAN 5: PERMASALAHAN<br />
www.prolink2u.com<br />
5.1.<br />
Pada BAGIAN ini mencakup beberapa masalah umum yang mungkin dihadapi ketika menggunakan Wireless Router<br />
dan beberapa solusi yang mungkin untuk mereka. Jika Anda mengikuti langkah-langkah yang disarankan dan Wireless<br />
Router masih tidak berfungsi dengan benar, hubungi dealer Anda untuk saran lebih lanjut.<br />
5.2.<br />
Masalah 1:<br />
Solusi 1:<br />
Tidak bisa terhubung ke Wireless Router untuk mengkonfigurasi.<br />
Periksa berikut ini:<br />
<br />
<br />
<br />
Periksa apakah Wireless Router sudah terinstall dengan benar, LAN OK, dan powered HIDUP.<br />
Pastikan PC dan Wireless Router Anda berada pada network segment yang sama.<br />
Jika PC Anda di set ke "Obtain an IP address automatically" (DHCP client), silahkan lakukan restart.<br />
Jika PC Anda menggunakan alamat IP statis, pastikan bahwa menggunakan alamat IP dalam rentang 192.168.123.1<br />
sampai 192.168.123.253 sehingga sesuai dengan alamat default IP Wireless Router 192.168.123.254.<br />
Juga, Network Mask harus di set ke 255.255.255.0 untuk menyesuaikan Wireless Router.<br />
Pada Windows, Anda dapat memeriksa pengaturan ini dengan menggunakan Control Panel-Network untuk protokol<br />
TCP / IP. Anda dapat memeriksa BAGIAN 4: KONFIGURASI PC-pengaturan TCP / IP untuk referensi.<br />
5.3.<br />
Masalah 1:<br />
Solusi 1:<br />
Ketika saya memasukkan alamat IP atau URL, saya mendapatkan time out error.<br />
Ada beberapa hal yang dapat menyebabkan hal ini. Coba ikuti beberapa langkah berikut.<br />
<br />
<br />
<br />
Periksa apakah PC lain bekerja. Jika ya, pastikan bahwa pengaturan IP pada PC Anda sudah benar. Jika menggunakan<br />
alamat IP statis, periksa Network Mask, Default DNS dan gateway.<br />
Jika PC sudah dikonfigurasi dengan benar, tapi masih tidak berfungsi, periksa Wireless Router. Pastikan bahwa itu<br />
terhubung dan HIDUP.<br />
Jika Wireless Router sudah tekonfigurasi dengan benar, periksa koneksi Internet Anda (ADSL/Cable modem) untuk<br />
melihat apakah bekerja dengan benar.<br />
Masalah 2:<br />
Solusi 2:<br />
Beberapa aplikasi tidak dapat berjalan dengan semestinya ketika menggunakan Wireless Router.<br />
Proses data yang dilalui melalui Wireless Router tidak transparant.<br />
Gunakan fitur Filter Settings untuk memungkinkan menggunakan aplikasi Internet, yang tidak berfungsi semestinya.<br />
Jika tidak juga menyelesaikan masalah, Anda dapat menggunakan fungsi DMZ. Ini bisa bekerja untuk hampir semua aplikasi,<br />
namun:<br />
<br />
<br />
Memiliki resiko keamanan, karena fungsi firewall tidak aktif.<br />
Hanya satu PC yang dapat menggunakan fitur ini.<br />
Versi 1.00 42 Indonesia
<strong>PROLiNK</strong>® <strong>WNR1008</strong><br />
www.prolink2u.com<br />
5.4.<br />
Masalah 1:<br />
Solusi 1:<br />
PC saya tidak dapat menemukan Wireless Router.<br />
Periksa berikut ini:<br />
Mode: PC Anda di set ke mode Infrastructure. (Access Points selalu bekerja dengan mode Infrastructure)<br />
SSID: SSID (service set identifier) pada PC Anda dan Wireless Router tidak sama.<br />
Ingat bahwa SSID itu case-sensitive. Jadi, contoh "Workgroup" tidak sama dengan "workgroup."<br />
Security: kedua PC dan the Wireless Router Anda harus menggunakan pengaturan yang sama untuk security.<br />
o<br />
o<br />
Disabled: Pengaturan standar untuk security Wireless Router dinonaktifkan, sehingga stasiun nirkabel<br />
Anda juga harus dinonaktifkan security nya.<br />
Enabled: Jika security aktif pada Wireless Router, PC Anda harus mengaktifkan security nya juga dan key<br />
harus sama.<br />
<br />
o Sangat diarankan untuk membuat keamanan yang bisa mencegah unauthorized mengakses ke jaringan<br />
nirkabel Anda. Setting keamanan WPA2 dianjurkan yang menawarkan keamanan yang lebih kuat daripada<br />
WEP. Kedua komputer Anda dan Wireless Router harus memiliki pengaturan yang sama untuk keamanan.<br />
Channel: Jaringan area lokal nirkabel diaktifkan dan dikonfigurasi secara default. Jika perlu, silakan cek saluran dan<br />
cocok untuk terminal, misalnya, notebook anda. Kedua komputer Anda (klien) dan Wireless Router harus mengatur<br />
ke saluran yang sama untuk koneksi.<br />
Masalah 2:<br />
Solusi 2:<br />
Kecepatan koneksi Wireless sangat lambat.<br />
Sistem nirkabel akan terhubung pada kecepatan tertinggi, tergantung pada jarak dan lingkungan. Untuk mendapatkan<br />
kecepatan koneksi tertinggi mungkin, Anda dapat melakukan percobaan dengan:<br />
Wireless Router location: Coba ubah lokasi dari Wireless Router. Untuk melihat apakah interferensi radio yang<br />
menyebabkan masalah, melihat apakah koneksi mungkin dilakukan ketika dekat dengan Wireless Router.<br />
<br />
<br />
<br />
Wireless Channels: Jika interferensi ayng menjadi masalah, ubah channel yang lain dan mungkin menunjukan<br />
peningkatan yang baik.<br />
Radio Interference: Perangkat lain mungkin menyebabkan interferensi. Anda dapat mencoba untuk mematikan<br />
perangkat wireless yang lain, dan lihat apakah ini membantu. Setiap perangkat yang "noisy" harus dilindungi atau<br />
direlokasi.<br />
RF Shielding: Lingkungan Anda mungkin cenderung memblokir pengiriman data antara stasiun nirkabel. Ini berarti<br />
kecepatan akses tinggi hanya mungkin bila dekat dengan Wireless Router.<br />
Versi 1.00 43 Indonesia
<strong>PROLiNK</strong>® <strong>WNR1008</strong><br />
BAGIAN 6: TENTANG WIRELESS LAN<br />
www.prolink2u.com<br />
6.1.<br />
Sekelompok stasiun nirkabel dan jalur akses tunggal, semua menggunakan SSID yang sama (service set identifier),<br />
membentuk Basic Service Set (BSS).<br />
Menggunakan SSID (service set identifier) yang sama sangat penting. Perangkat dengan SSID yang berbeda tidak<br />
dapat berkomunikasi dengan yang lainya.<br />
6.2.<br />
Wireless channel menetapkan frekuensi radio yang digunakan untuk komunikasi.<br />
Jalur akses menggunakan saluran tetap. Anda dapat juga dapat memilih saluran yang akan digunakan. Hal ini<br />
memungkinkan Anda untuk memilih saluran yang menyediakan dan sedikit gangguan kinerja terbaik. Di<br />
Kanada dan Amerika Serikat, ada 11 saluran yang tersedia. Jika menggunakan titik akses banyak, lebih baik jika<br />
jalur akses yang berdekatan menggunakan saluran yang berbeda untuk mengurangi gangguan.<br />
Dalam mode " Infrastructure", stasiun nirkabel biasanya memindai semua saluran, mencari jalur akses. Jika<br />
lebih dari satu jalur akses yang dapat digunakan, maka satu sinyal yang terkuatlah yang akan digunakan. (Ini<br />
hanya bisa terjadi dalam sebuah ESS (Extended Service Set)).<br />
ESS: Dalam mode Infrastruktur, satu atau lebih BSS (Basic Service Set) dapat mengatur ESS (Extended Service<br />
Set). Pengguna dapat mengakses dan roaming BSS data dan jalur akses harus di set ke ESSID yang sama<br />
(Extended Service Set Identifier) untuk memungkinkan roaming.<br />
Catatan untuk pemilik model di US:<br />
Untuk memenuhi peraturan FCC AS, pemilihan negara telah sepenuhnya dihapus dari semua model AS. Fungsi di atas<br />
adalah untuk model non-AS saja.<br />
6.3.<br />
WEP<br />
.<br />
WEP (Wired Equivalent Privacy) adalah standard untuk mengenkripsi data sebelum dikirim. Hal ini diinginkan karena<br />
tidak mungkin untuk mencegah snoopers menerima data yang ditransmisikan oleh stasiun nirkabel Anda. Tetapi jika<br />
data dienkripsi, maka berarti kecuali penerima yang dapat mendekripsikannya.<br />
Jika WEP digunakan, stasiun nirkabel dan titik akses harus memiliki pengaturan keamanan yang sama untuk<br />
masing-masing sebagai berikut:<br />
WEP<br />
Key<br />
WEP Authentication<br />
64 Bits, 128 Bits.<br />
Untuk 64 Bits encryption, Nilai Key harus sama.<br />
Untuk 128 Bits encryption, Nilai Key harus sama.<br />
Open System atau Shared Key.<br />
Versi 1.00 44 Indonesia
<strong>PROLiNK</strong>® <strong>WNR1008</strong><br />
www.prolink2u.com<br />
WPA/ WPA2/ WPA-Mixed<br />
WPA / WPA2 (Wi-Fi Protected Access) adalah lebih aman daripada WEP.Menggunakan "Shared Key" yang<br />
memungkinkan kunci enkripsi untuk dibuat ulang pada interval tertentu. Ada beberapa pilihan enkripsi: TKIP, AES,<br />
TKIP-AES dan setup tambahan untuk RADIUS diperlukan dalam metode ini. Yang paling penting di luar fitur WPA<br />
menjadi standard melalui 802.11i/WPA2 adalah: pre-authentication, yang memungkinkan roaming cepat aman tanpa<br />
latensi sinyal terlihat.<br />
Jika WPA / WPA2 digunakan, stasiun titik akses nirkabel dan harus memiliki pengaturan keamanan yang sama.<br />
802.1x<br />
Dengan 802.1x authentication, PC nirkabel dapat bergabung dalam jaringan dan menerima pesan yang tidak<br />
dienkripsi, bagaimanapun, setup tambahan untuk RADIUS untuk mengeluarkan kunci WEP secara dinamis akan<br />
diperlukan.<br />
RADIUS adalah authentication, authatauization, dan accounting client-server protocol. Klien adalah akses jaringan<br />
server yang keinginan untuk otentikasi link nya. Server memiliki akses ke database user dengan informasi otentikasi.<br />
6.4.<br />
Untuk memungkinkan stasiun nirkabel (STA) untuk mengakses Access Point (AP), nirkabel stasiun dan access point<br />
yang harus menggunakan pengaturan yang sama, sebagai berikut:<br />
Mode<br />
SSID (ESSID) (Extended<br />
Service Set Identifier)<br />
Disable<br />
Mode harus di set ke Infrastructure.<br />
Nama network harus sama dengan Wireless Router.<br />
Catatan! SSID (service set identifier) adalah case- sensitive.<br />
Jika tidak ada security yang diaktifkan pada Wireless Router, security setiap stasiun harus dinonaktifkan juga. Dan,<br />
Anda dapat menghubungkan Wireless Router tanpa security, tetapi TIDAK dianjurkan<br />
Secara default, WEP pada Wireless Router tidak aktif.<br />
WEP<br />
Open System/<br />
Shared Key/<br />
Auto<br />
Shared Key hanya mendukung WEP sebagai encryption.<br />
AUTO (Open/Shared) artinya AP dapat menerima koneksi STA dengan OPEN-WEP atau SHARED-WEP.<br />
Jika WEP tidak aktif pada Wireless Router, semua stations harus men nonaktifkan fungsi WEP juga.<br />
Jika WEP aktif pada Wireless Router, setiap station harus menggunakan pengaturan yang sama dengan<br />
Wireless Router.<br />
Personal (Pre-Shared Key)<br />
WPA<br />
WPA2<br />
WPA2-Mixed<br />
Enterprise (RADIUS)<br />
WPA<br />
WPA2<br />
WPA2-Mixed<br />
802.1x<br />
WPA-PSK (TKIP/AES)/ WPA2-PSK (TKIP/AES): Jika satu dari security ini diaktifkan pada Wireless Router. Setiap STA<br />
harus menggunakan algorithms dan passphrase yang sama dengan Wireless Router.<br />
Pre-Shared Key Format: Memiliki pilihan untuk set Pre-shared key, Passphrase dan Hex (64 karakters). Jika<br />
Hex yang dipilih, pengguna harus memasukkan 64 karakter. Untuk pengaturan yang lebih mudah, Passphrase<br />
(minimum 8 karakter) yang direkomendasi.<br />
Pre-Shared Key : Pre-Shared Key berfungsi sebagai password. Pengguna harus memasukkan 8 sampai 63<br />
karakter string jika Anda memilih passphrase. Pastikan password yang sama digunakan olh client untuk<br />
melakukan koneksi.<br />
RADIUS Server: RADIUS adalah otentikasi, authorization dan akuntansi client-server protokol. Client adalah<br />
Network Access Server yang keinginan untuk otentikasi link nya. The RADIUS adalah server yang memiliki akses<br />
ke database user dengan informasi otentikasi. Setiap stasiun harus mengatur Server RADIUS alamat IP, password<br />
dan port yang disediakan oleh ISP anda.<br />
Versi 1.00 45 Indonesia
<strong>PROLiNK</strong>® <strong>WNR1008</strong><br />
BAGIAN 7: TECHNICAL SUPPORT<br />
www.prolink2u.com<br />
7.1.<br />
<br />
<br />
<br />
7.2.<br />
<br />
<br />
<br />
7.3.<br />
<br />
<br />
<br />
Versi 1.00 46 Indonesia
www.prolink2u.com<br />
SINGAPORE<br />
FIDA INTERNATIHIDUPAL (S) PTE LTD<br />
Block 16 Kallang Place, #06-02 Kallang Basin Industrial Estate, Singapataue 339156.<br />
Tel : (65) 6357 0668<br />
Email : support@fida.com<br />
MALAYSIA<br />
FIDA SYSTEMS (M) SDN BHD<br />
29 Jalan USJ 1/31, 47600 Subang Jaya, Selangatau Darul Ehsan, Malaysia.<br />
Tel : (60) 3 8024 9151<br />
Email : support_my@fida.com<br />
INDONESIA<br />
<strong>PROLiNK</strong> INDONESIA<br />
Jl. Cideng Barat No. 79, Jakarta Pusat 10150 - Indonesia.<br />
Tel : (62) 21 3483 1777<br />
Email : support@prolink.co.id<br />
<strong>PROLiNK</strong> is a trademark of FIDA International (S) PTE LTD dan is manufactured under its authatauity. All other brdans, products, services, logos dan<br />
company names mentioned herein are trademarks of their respective owners. All specifications, designs dan contents are subject to changes without<br />
priatau notice. © Copyright 2010. <strong>PROLiNK</strong> all rights reserved.