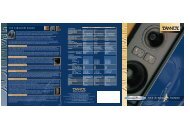
PowerLinx Multi-channel Sound Reinforcement Systems - Tannoy
PowerLinx Multi-channel Sound Reinforcement Systems - Tannoy
PowerLinx Multi-channel Sound Reinforcement Systems - Tannoy

You also want an ePaper? Increase the reach of your titles
YUMPU automatically turns print PDFs into web optimized ePapers that Google loves.
POWERLINX PLM-4 MIXER/PREAMPLIFIER<br />
{<br />
13<br />
Installation<br />
Before applying power to the system, insure that all audio connections are properly<br />
terminated and all level controls are set to minimum.<br />
For optimum performance, the PLM-4 should be connected to the <strong>PowerLinx</strong> controller through its balanced XLR output<br />
to the controller's balanced Phoenix-type inputs (Belden 82761 or equivalent). As a stand-alone unit the PLM-4 may be<br />
connected to the balanced or unbalanced input of an audio system amplifier.<br />
A microphone with an on/off switch is recommended so it can be left in the "Off" position when not in use for<br />
announcements. In this way, background noise in the vicinity of the microphone won't be heard through the system and<br />
won't trigger the ducking feature. To a void feedback, be sure not to place your microphone too close to your audio system's<br />
loudspeakers, and use shielded cables for all audio connections.<br />
SET-UP<br />
1) Plug the AC adaptor into the +9-15V AC/DC input on the rear of the PLM-4 and then into a power outlet.<br />
Turn on the power to the PLM-4 and your other equipment.<br />
2) Set the MASTER control to about mid position.<br />
3) Adjust the STEREO 1, 2, and 3 level controls on the PLM-4 for your music playback source(s) to comfortable<br />
listening levels.<br />
4) Set your MIC level control to a suitable level for announcements.<br />
5) Select your preferred ducking setting. The three-position DUCKING switch is located below the microphone<br />
level control. You can select "NONE" for no ducking, "DIM" for an automatic 10 dB level reduction of the back<br />
ground music while speaking into the microphone , or "MUTE" to shut the music off completely while you're<br />
speaking into the microphone. .<br />
6) If you chose DIM or MUTE, adjust the SENS. trim with a small screwdriver. Set it so that speaking into the<br />
microphone in a normal voice triggers ducking , but whispering or rustling papers nearby doesn't. Now if you<br />
wish to make an announcement, the background music volume will be reduced while you speak, and will<br />
automatically increase to its previous level after the announcement ends.<br />
7) The MASTER level control should now be adjusted to provide a suitable level to your PLC4.1 or other following<br />
audio equipment. This level should be as high as possible for best noise characteristics but not so high as to<br />
overdrive the following inputs. Usually a position of 5 to 7 is optimum.<br />
8) If any hum or buzz is noted in your audio systems output, try switching the GND LIFT switch. Note that ground<br />
loops or other interferences may occur at any point in the chain of your equipment.<br />
Since the PLM-4 is an end-user adjustable device , the mix may be readjusted at any time. However the MASTER setting<br />
should be carefully made and retained as it has a direct effect on the headroom, audio quality , and system protection of<br />
the PLA305 and its associated loudspeakers.