Axiocam ERc 5s Operating Instructions - Carl Zeiss
Axiocam ERc 5s Operating Instructions - Carl Zeiss
Axiocam ERc 5s Operating Instructions - Carl Zeiss

You also want an ePaper? Increase the reach of your titles
YUMPU automatically turns print PDFs into web optimized ePapers that Google loves.
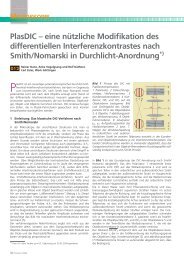
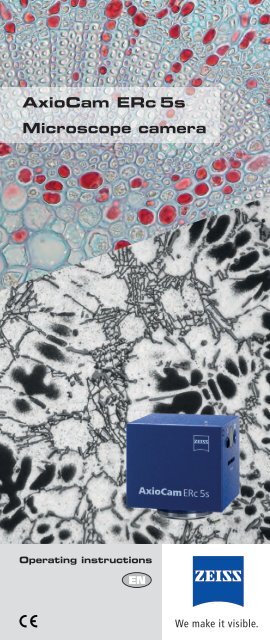
AxioCam <strong>ERc</strong> <strong>5s</strong><br />
Microscope camera<br />
<strong>Operating</strong> instructions
Control elements, indicators and connections<br />
1<br />
2 3<br />
4<br />
5<br />
Front of camera:<br />
1 LED indicator<br />
2 Manual acquisition<br />
3 AWB: Automatic<br />
white/gray balance<br />
4 Receiver for IR remote<br />
control<br />
5 Card slot for SD/SDHC<br />
memory cards<br />
1<br />
2<br />
3<br />
Back of camera:<br />
1 USB port for data<br />
transfer and power<br />
supply<br />
2 DVI signal via HDMI<br />
port for monitor, TV<br />
or beamer<br />
3 S-Video connection for<br />
recorder or monitor<br />
Definitions<br />
SD memory card: Digital storage medium for recording image data and<br />
other information. On SD cards an amount of 4 GB of data can be stored;<br />
up to 32 GB on new SDHC cards (HC=high capacity). SD cards should be<br />
formatted on a PC to FAT32 format.<br />
C-mount adapter: The C-mount is a standardized mounting thread<br />
for camera lenses. In microscopy the C-mount is used to connect digital<br />
cameras. So it is guaranteed that the image produced by the microscope<br />
objective is large enough to illuminate the small camera sensors.<br />
AWB (Automatic White Balance): The purpose of the white balance is<br />
to calibrate the camera to the color temperature of the incident light and<br />
thereby prevent color cast. However, the automatic white balance that is<br />
normally used does not work, or does not work sufficiently well, in the case<br />
of technical surfaces or macros. This is because these objects often do not<br />
have any defined pure-white or color-neutral surfaces that the automatic<br />
white balance can take as a basis for the calibration. Instead it uses the<br />
average values of the individual red, green and blue (RGB) color channels<br />
for reference. It is therefore necessary to perform the white balance<br />
manually using defined color-neutral objects.<br />
Parfocality: According to Professor A. Köhler, the focus plane set should<br />
be retained when eyepieces or objectives are changed on the microscope.<br />
Ideally, the object should appear just as sharp as it did before the eyepiece<br />
or objective was changed. Today, this also applies to the phototube for the<br />
acquisition of images using a digital camera: the sharpness of the camera’s<br />
images should correspond to that of the image you see when you look<br />
through the eyepiece. It is possible to set the parfocality of the camera even<br />
with the help of a reticle in the intermediate image of the eyepiece or with<br />
the help of an adapted monitor.
Find what you need quickly with the Infoflip<br />
The Infoflip contains all the information and instructions you need to produce<br />
the best possible photos using the camera and imaging software.<br />
Further information can be found in the online help of the programs supplied<br />
(F1 key) and in additional documentation on the DVD provided. We also offer<br />
tips and tricks on the camera and programs on our Internet site.<br />
Who the Infoflip is for<br />
Ideally, you will have a good knowledge of microscope technology, educational<br />
and routine microscopy and image analysis. The camera should only be<br />
installed and operated by trained individuals who have been informed about<br />
the possible risks associated with microscopy and the area of application in<br />
question.<br />
Your sales partner will also be happy to install the camera and the software.<br />
Maintenance and repairs should only be carried out by trained personnel, e.g.<br />
your sales partner or qualified personnel authorized by <strong>Carl</strong> <strong>Zeiss</strong>.<br />
Before installing the camera, you must read the safety instructions on the<br />
flap and the Functional description / use tab, which contains essential<br />
information relating to the camera system.<br />
We wish you every success in your day-to-day work with the camera system!
Symbols used<br />
!<br />
i<br />
Danger!<br />
This symbol warns you about physical dangers! It is possible for injuries to be<br />
sustained, including fatal injuries. The instructions that follow this symbol must<br />
be observed!<br />
!<br />
Caution!<br />
In these situations damage may be caused to the microscope and camera. It is<br />
also possible that imperfect imaging results may be achieved. Please observe the<br />
instructions!<br />
!<br />
i<br />
Note:<br />
Here you will find tips and tricks to help you achieve the best results.<br />
For your safety<br />
Please ! observe all operating instructions and instructions for use relating to<br />
all devices that may be used in connection with the camera (microscopes,<br />
microscope accessories, PC, etc.). Also take any safety instructions and<br />
requirements that apply within your working environment into account.<br />
!<br />
Danger!<br />
Fatal injuries! <strong>Operating</strong> the camera in areas where there is an explosion risk,<br />
in the presence of volatile anesthetic agents or in the presence of flammable<br />
solvents, such as alcohol, gasoline or similar substances, can result in explosions<br />
or deflagrations. Do not operate the camera in such environments!<br />
Permanent damage to eyesight! The light beam at the uncovered<br />
microscope port can be so bright as to cause permanent damage to the retina if<br />
you look into it, which can lead to complete blindness. Please do not look into<br />
the microscope port under any circumstances while the microscope’s light source<br />
is switched on!<br />
Cuts and bruises! The edges of the camera housing and the corners are sharp.<br />
Handle the camera carefully to avoid injuring yourself! Avoid letting the camera<br />
fall onto unprotected feet! Warn colleagues in the vicinity of the attached<br />
camera against touching the housing!<br />
Death and serious injury due to electric shock! The mains power adapter<br />
works i with high voltage that can cause fatal injury. When using the mains power<br />
adapter for the camera, you must check regularly that the power adapter’s<br />
housing, its wall plug and the wall socket are not damaged. Handle the power<br />
adapter with care and never let it fall onto hard surfaces!<br />
!<br />
Caution!<br />
Damage and imperfect results with incompatible microscopes!<br />
Not all commercially available microscopes are suitable to be connected to<br />
the camera. Please check this by consulting with the manufacturer concerned!<br />
Always follow the instructions for the microscopes when it comes to connecting<br />
and operating external cameras.<br />
Damage ! due to short circuit! If the cable of the mains power adapter is<br />
damaged, this can lead to a short circuit or loose connection; the camera will<br />
then no longer function, or will no longer function reliably. Handle the power<br />
adapter’s cable with care!<br />
Damage due to defective connections! The standardized connectors<br />
and ports for establishing connections to the camera are very small and can be<br />
damaged if the connectors are inserted incorrectly. Check that the connector is<br />
correctly aligned with the port before you insert it! Never insert the connector<br />
forcefully or with a jolt! Never remove connectors by pulling on the cable –<br />
always pull the connector itself!<br />
Artifacts on photos due to dirt! Dust particles and fluff on the camera’s<br />
filter glass show up in photos as spots and black points. Always store the camera<br />
with the dust cap on. Make sure the environment is free of dust when you attach<br />
the camera. Never touch the filter glass with your bare hands.
Functional description / use<br />
Brief description of the camera system<br />
The AxioCam <strong>ERc</strong> <strong>5s</strong> CMOS camera is intended as a camera for connection to<br />
microscopes and produces photos with a size of up to 5 megapixels. The image<br />
data can be<br />
• saved to a memory card (stand-alone operation),<br />
• immediately viewed on a connected monitor, or<br />
• immediately displayed via the configuration program and processed further<br />
on a PC using the AxioVision programs (LE or full version).<br />
Various standard analog and digital data interfaces make it possible to connect<br />
the camera to different output devices for co-observation or recording.<br />
The camera quality is configured and optimized by means of settings in the<br />
configuration program supplied. This ensures that the settings are applied<br />
during stand-alone operation – without connection to a PC.<br />
Purpose<br />
The AxioCam <strong>ERc</strong> <strong>5s</strong> is a microscope camera that is suitable for use as an<br />
accessory for educational and routine microscopy in laboratory environments<br />
and for use by trained laboratory personnel.<br />
• The camera must be permanently connected to <strong>Carl</strong> <strong>Zeiss</strong> light microscopes<br />
or suitable light microscopes of other manufacturers by means of suitable<br />
adapters.<br />
• The camera must be connected to microscope ports intended for this<br />
purpose; it must not be connected to the eyepiece.<br />
• The camera is not suitable for fluorescence microscopy.<br />
• The camera is configured and controlled by means of the PC software<br />
supplied, which also allows the photos to be further processed and saved.<br />
• The camera can be connected to co-observation and recording devices<br />
by means of various standardized data interfaces. Only pre-fabricated,<br />
standard connection cables may be used.<br />
Obligations, assurances and exclusions<br />
The envisaged uses of the camera system are general tasks and applications in the fields<br />
of microscopy and image analysis.<br />
This Infoflip and other information on the camera system provide only a general<br />
description of technical procedures and instructions. It may not be appropriate to follow<br />
the instructions in each individual case. Please contact the <strong>Carl</strong> <strong>Zeiss</strong> support team if in<br />
doubt!<br />
All user information on the camera system and this Infoflip are protected by copyright.<br />
<strong>Carl</strong> <strong>Zeiss</strong> has reserved all rights to this information. The production of copies or partial<br />
copies and translation into other languages are also not permitted without specific<br />
written consent. Copies intended for personal use are excluded from this.<br />
<strong>Carl</strong> <strong>Zeiss</strong> would like to point out that the details contained in all the user information<br />
relating to the camera system are updated on an ongoing basis in line with any technical<br />
changes that may be necessary. This Infoflip therefore only reflects the technical status<br />
of the camera system at the time of going to print. You will find up-to-date information<br />
relating to the instructions and the camera system on our website!<br />
Before installing and operating the camera system, make sure you have read and<br />
understood all the information in this Infoflip and in the other accompanying documents!<br />
<strong>Carl</strong> <strong>Zeiss</strong> does not assume any liability or give a warranty for applications other than<br />
those described here. The same applies to procedures that are not described in this<br />
Infoflip and do not produce the desired result, or even result in damage.<br />
Functional description / use
Included with product<br />
Included in standard package<br />
• AxioCam <strong>ERc</strong> <strong>5s</strong> camera with dust cap<br />
• A to Mini B type USB cable<br />
1 Camera<br />
2 USB cable<br />
In addition:<br />
• DVD containing the configuration program and the AxioVision LE imaging<br />
software (upgrade to full version available as an option)<br />
• <strong>Operating</strong> instructions (this Infoflip)<br />
i<br />
Note:<br />
A C-mount adapter for the transition between the camera and microscope is not<br />
supplied! Order the adapter separately based on the required magnification and<br />
the necessary adaptation to your microscope (also applies to microscopes from<br />
third-party manufacturers). <strong>Carl</strong> <strong>Zeiss</strong> offers various camera adapter interfaces for<br />
its own microscope lines. The smaller the numerical value printed on these different<br />
adapters, the more of the image observed through the eyepiece is covered by the<br />
camera ! image. In all cases the frame visible in the photo will be smaller than the<br />
image observed through the eyepiece.<br />
!<br />
Included in stand-alone package (optional)<br />
This package can be ordered as an option in addition to the standard package.<br />
It is useful for situations when you want to operate the camera without a<br />
connection to a PC. In this case the image data are saved to a memory card.<br />
• Mains power supply with country-specific plug adapters<br />
• IR remote control to trigger the camera remotely<br />
• SDHC type memory card with a capacity of 4 GB, incl. protective case<br />
• Card reader for this memory card<br />
• HDMI to DVI video adapter to connect PC monitors or beamers<br />
i<br />
1 Power supply (with<br />
country-specific<br />
adapters)<br />
2 Remote control<br />
3 Memory card<br />
4 Card reader<br />
5 Video adapter<br />
!<br />
Caution!<br />
Imaging errors due to damage caused in transit! In spite of the padded outer<br />
packaging, it is possible that damage may be caused to the camera. Check that the<br />
outer packaging or camera packaging does not appear to be damaged! Report any<br />
obvious damage to the carrier and vendor.<br />
!<br />
Included with product
Specifications<br />
Camera<br />
Sensor Micron MT9P031, 5 megapixels (resolution 2560 x 1920),<br />
type: CMOS<br />
Sensor size 5.7 mm x 4.28 mm, equivalent: 1/2.5“, diagonal: 7.1 mm<br />
Spectral approx. 400-700 nm, IR blocking filter<br />
sensitivity<br />
Exposure time 10 µs to 2 s, max. 13 fps at 800 x 600 pixels<br />
Color resolution 3 x 8 bit<br />
Interfaces 1 x SD/SDHC slot, 1 x Mini USB 2.0,<br />
1 x AV (S-Video), 1 x DVI (HDMI)<br />
Optical interface C-mount, with corresponding adapters<br />
Power supply via USB<br />
Operation Dual color LED, red/green, flashing<br />
indicator<br />
Control Button for image acquisition, button for white balance<br />
elements<br />
Dimensions 65 mm x 65 mm x 63 mm (W x D x H)<br />
Weight 250 g<br />
Ambient<br />
conditions<br />
+5°C to +45°C, max. 80% relative humidity,<br />
no condensation, free air circulation necessary for cooling<br />
Stand-alone package (optional)<br />
Power adapter Connection: Mini USB 2.0<br />
Output: 5 V / 1 A<br />
Input: 100-240 VAC, 50-60 Hz, with country-specific<br />
plug adapters<br />
Remote control IR remote trigger<br />
Memory card SDHC type with a capacity of 4 GB, in protective case<br />
Card reader USB connection on PC side, suitable for SD and SDHC cards<br />
Video adapter HDMI to DVI<br />
Relative spectral sensitivity AxioCam <strong>ERc</strong> <strong>5s</strong> (incl. IR filter)<br />
Relative spectral sensitivity<br />
Wavelength (nm)
Installation of the camera<br />
Attaching the camera to the microscope<br />
Screwing the C-mount adapter onto the camera<br />
i<br />
Note:<br />
Select the C-mount adapter that offers the required scale of magnification and is<br />
suitable for your microscope. The C-mount adapter is not included with the camera<br />
and must be ordered from <strong>Carl</strong> <strong>Zeiss</strong>.<br />
!<br />
1 The room should be free of dust to ensure that<br />
the camera interior remains dust-free. Use a<br />
table with a padded surface that will prevent<br />
damage to the camera and C-mount adapter in<br />
the event that they are dropped.<br />
2 Remove the dust cap from the sensor opening.<br />
i<br />
3 ! Ensure the C-mount adapter is placed onto the<br />
camera thread straight so that the thread is not<br />
damaged when you screw it on.<br />
4 Carefully screw the threaded end of the C-mount adapter into the thread<br />
on the camera housing. Screw the adapter in hand-tight.<br />
!<br />
Screwing the camera with adapter onto<br />
the microscope<br />
!<br />
Danger!<br />
Permanent damage to eyesight! Switch off the microscope illumination!<br />
1 Remove any dust cap that may be present from the microscope’s<br />
phototube.<br />
2 Place the unit comprising the camera and C-mount adapter onto the<br />
microscope’s phototube.<br />
3 Align the camera by rotating it so that<br />
the front of the housing (where the<br />
model name is shown) is parallel to the<br />
front of the microscope, i.e. is pointing<br />
towards the eyepiece (see image<br />
on right).<br />
4 Fasten the camera:<br />
––<br />
In the case of adapters that are fastened<br />
to the interface using 3 set screws: using<br />
a 3 mm hex key (as supplied with ZEISS<br />
microscopes), carefully turn the screws<br />
hand-tight, one after the other, on the<br />
flange of the microscope (see image at<br />
bottom right).<br />
––<br />
In the case of adapters with outer thread:<br />
place camera onto interface, align it and<br />
fasten it to the microscope by turning the<br />
outer thread.<br />
5<br />
i<br />
When you acquire your first photos,<br />
check the correct alignment and<br />
sharpness of the camera via live image on an adapted monitor or PC.<br />
If necessary, repeat the procedure.<br />
!<br />
Caution!<br />
Filter holder on the camera can come loose, meaning parfocality is lost! Before<br />
correcting the alignment, you must loosen the adapter so that the camera can be<br />
turned easily.<br />
!<br />
Installation of the camera
Operation without PC connection<br />
<strong>Operating</strong> the camera without PC connection<br />
In this operating mode you trigger the acquisition of images manually using a control<br />
button on the camera or by means of the optional remote control. The camera then saves<br />
the image data to an SD card in the card slot on the camera. For this you need:<br />
• SD memory card<br />
• Mains power adaptor with USB cable and Mini type connector<br />
• Remote control (optional)<br />
These components are all part of the stand-alone package, which is available as an<br />
option.<br />
Connecting the power supply<br />
1 Insert the mains power adapter into a wall socket.<br />
2 Insert the Mini USB connector on the<br />
mains power adaptor’s connection cable<br />
into the small port on the bottom left of<br />
the back of the camera. Make sure that<br />
the connector is aligned correctly, the<br />
wider edge must be at the top!<br />
The LED on the top lights up red for around<br />
ten seconds while the camera is initializing.<br />
As soon as the LED turns green, the camera<br />
is ready.<br />
Inserting memory card for operation without PC<br />
1 New memory cards must first be<br />
formatted on a PC. Select the FAT32<br />
filesystem format.<br />
2 Slide the SD or SDHC memory card<br />
gently into the horizontal card slot with<br />
the gold contacts to the front and<br />
pointing downwards. As soon as it<br />
clicks, the card is in place.<br />
If you later wish to remove the memory<br />
card, press it further into the card slot and it<br />
will then spring out again automatically.<br />
Acquiring your first image<br />
1 Switch on the microscope’s illumination again.<br />
2 Place the desired object onto the slide.<br />
3 Focus on a color-neutral structure on the object, in such a way that it fills the<br />
image.<br />
4 On the camera, press the button on the right above the card slot, labeled AWB,<br />
to perform the white balance. This is done within a second and can be used<br />
immediately.<br />
5 Set your desired frame.<br />
6 Press the button labeled with the camera symbol.The camera acquires the image,<br />
the LED flashes green briefly and the image is saved.<br />
7 Remove the memory card by pressing it in further.<br />
8 Insert the memory card into your PC’s SD card reader or the accessory card reader.<br />
9 Start an image processing program of your choice that can read JPEG files, load the<br />
image from the memory card and process your image as you wish.<br />
i<br />
Note:<br />
Activate the optical path for the camera when either using AWB or acquiring images.<br />
If you have problems with the AWB please use a conversion filter to adjust the color<br />
temperature of the illumination to the camera limit.<br />
!<br />
Operation without PC connection
Operation with PC connection and software<br />
Configuring and controlling the camera from<br />
the PC<br />
i<br />
Connecting the power supply and establishing a PC<br />
connection<br />
To control the camera from a PC it must be connected to the PC by means of a<br />
USB cable. The PC also provides the power supply for the camera via this cable,<br />
meaning that there is no need for a separate power supply.<br />
!<br />
Caution!<br />
Serious damage to the camera as a result of power spikes and electrostatics! When<br />
you connect the PC and camera, serious damage can be caused to the camera.<br />
In order to avoid this, please observe the following sequence when inserting the<br />
connectors!<br />
!<br />
1 Switch off the PC in order to prevent damage caused by power spikes and<br />
electrostatics.<br />
2 Check the USB cable for any signs of external damage.<br />
3 Plug the flat USB connector into a free USB port on the PC.<br />
4 Insert the Mini USB connector into the small port on the bottom left of the<br />
back of the camera. Make sure that the connector is aligned correctly, the<br />
wider edge must be at the top!<br />
5 Now switch the PC back on.<br />
If you later wish to disconnect the PC and camera again, proceed as follows<br />
(always hold the connector while pulling, not the cable!):<br />
6 First disconnect the connector from the camera housing.<br />
7 Then pull the connector out of the PC port.<br />
Installing configuration program and AxioVision LE<br />
A DVD with a setup program is supplied. The setup gives you the option of<br />
installing the configuration program for the camera, the free imaging software<br />
AxioVision LE or both together.<br />
To do so, follow the instructions in the dialog boxes on the screen.<br />
When you perform the setup, the camera driver will also be installed at<br />
the same time. In addition, when AxioVision LE is installed a check will be<br />
performed to see whether an older version of the program already exists. If it<br />
does, this will be updated.<br />
A manual and online help for AxioVision LE can also be found on the DVD.<br />
Configuring the camera<br />
It is possible to configure the camera from the PC using the configuration<br />
program. This allows a range of processes that take place in the camera to<br />
be preset in detail. These settings are then saved onto the camera from the<br />
configuration program.<br />
With the help of the configuration program it is possible for the stand-alone<br />
operation of the AxioCam <strong>ERc</strong> <strong>5s</strong> to be individually configured. This means<br />
that, using this configuration program, you can change various settings for<br />
the images that you save directly onto the SD card when the button on the<br />
camera is pressed. When the program is closed the parameters that have been<br />
changed can be transferred onto the camera as presets (user settings) and used<br />
automatically for your next images.<br />
If the camera is used in stand-alone mode, these settings determine how the<br />
camera stores the photos onto the memory card, even without a PC connection.<br />
Operation with PC connection and software
Configuration program<br />
Basic functions and settings<br />
The configuration program offers numerous functions for processing<br />
photomicrographs and for configuring camera ports. All changes made in the<br />
configuration program are immediately visible in the live image in the large<br />
field on the right.<br />
The basic settings have been optimized in such a way for your first photographs<br />
that most photos should already be usable.<br />
The most important basic functions are explained below.<br />
2<br />
3<br />
4 1<br />
Online help using F1 function key<br />
All functions are described in detail in the online help.<br />
[1] User settings<br />
Saving of several individual presettings. These can be retrieved at any time, e.g.<br />
for different employees/specimens.<br />
[2] Automatic adjustment of the exposure time<br />
Deactivation of the automatic adjustment of the exposure time. The value used<br />
most recently is used as a basic setting. This is helpful for very dark or bright<br />
objects, e.g. in the case of darkfield images.<br />
[3] Saving and closing<br />
This button gives you the option of transferring the settings currently specified<br />
on the property pages to the camera’s internal memory and then closes the<br />
program.<br />
[4] White balance<br />
Balance for a neutral color display that is close to reality (see also Definitions<br />
on the cover!) To achieve this, set a color-neutral scene without a specimen<br />
under the microscope. This should be illuminated as homogeneously as possible.<br />
It should not be too bright and should on no account be a pure white tone!<br />
Auto: Starts the measurement. This method only works if the object has colorneutral<br />
gray or white surfaces.<br />
Interactive: Allows you to define an individual reference point for the white<br />
balance using the mouse pointer. Click on a color-neutral gray/white area.<br />
3200 K: Basic setting for white balance. This setting has been optimized for a<br />
light temperature of halogen light at 3200 K, which leads to image reproduction<br />
that is closest to the impression of the image in the microscope’s eyepiece.<br />
Configuration program
Configuration program (continued)<br />
“Extras” property page<br />
Sharpness<br />
Emphasizes the object’s contrast edges.<br />
A slight enhancement of sharpness<br />
has been preset. This compensates for<br />
the lack of sharpness that occurs in all<br />
digital cameras due to the principles<br />
behind their operation. Excessive<br />
sharpness can, however, make the<br />
image look unnatural!<br />
Review Time<br />
Defines the duration for which moving<br />
images or object movements are<br />
displayed. This varies between 1, 2, 5 or<br />
10 seconds.<br />
Calibration<br />
Improves the image quality of acquired images by correcting defective sensor<br />
pixels and defining the black reference. The camera’s calibration process takes<br />
several minutes.<br />
Note:<br />
i<br />
When you perform this function, the camera should already have been switched on<br />
for at least fifteen minutes. The camera must see an image that is completely black.<br />
To achieve this, close the light path to the camera on the microscope. It is better to<br />
detach the camera from the microscope for this calibration process and to cover the<br />
sensor opening so that it is impermeable to light.<br />
!<br />
“Saving” property page<br />
!<br />
Naming<br />
Enter a prefix into the text field that will<br />
appear in front of the image number in<br />
the file name on the memory card.<br />
Resolution<br />
Determines the image resolution, file<br />
size and quality with which the detail is<br />
reproduced.<br />
Image Compression<br />
The higher the quality, the more space<br />
the image takes up on the memory card.<br />
“Live Image” property page<br />
An external monitor can be connected to the AxioCam <strong>ERc</strong> <strong>5s</strong> to enable coobservation.<br />
This can either take place via the analog S-Video interface or the<br />
digital HDMI interface.<br />
The HDMI signals can be displayed on a standard PC monitor as a DVI signal<br />
via the video adapter, which is available as an option.<br />
i<br />
Note:<br />
It is not possible to display an HD signal (1080p/i or 720p/i) via the digital<br />
interface. Furthermore, only one of the interfaces (analog or digital) can be used.<br />
Co-observation in parallel to the PC is, however, possible and the camera can be<br />
controlled via the software. The settings in the configuration program also have a<br />
direct influence here on the display on the connected monitor.<br />
!<br />
Configuration program (continued)
Configuration program (continued)<br />
Select the desired interface and the format:<br />
HDMI SVGA: display via HDMI port, resolution 800 x 600 pixels<br />
HDMI VGA: display via HDMI port, resolution 640 x 480 pixels<br />
S-Video PAL: display via analog interface in European television format<br />
S-Video NTSC: display via analog interface in US television format<br />
“General Settings” property page<br />
Reload Factory Defaults<br />
Resets camera to a defined status.<br />
i<br />
Note:<br />
Your individual settings will be lost during<br />
this process!<br />
!<br />
Time And Date<br />
Setting Factory default<br />
Autom. exposure activated<br />
Sharpness level 0<br />
Image preview 5 s<br />
Prefix<br />
image<br />
Resolution 2560 x 1920<br />
!<br />
Synchronizes camera with the date and<br />
time indicated on your PC.<br />
For your notes<br />
Configuration program (continued)
AxioVision software<br />
Software products<br />
AxioVision (LE) is the free imaging software available from <strong>Carl</strong> <strong>Zeiss</strong>.<br />
The program is installed in the manner described in the section “Installing<br />
configuration program and AxioVision LE” on the “Operation with PC<br />
connection and software” tab.<br />
AxioVision (full version) is the standard software available from <strong>Carl</strong> <strong>Zeiss</strong><br />
for image acquisition, analysis, processing and archiving.<br />
Acquiring your first image<br />
The steps below describe the process for acquiring a simple image. You can<br />
access the online help for each function using the F1 function key.<br />
1 Start the AxioVision software (LE or full version).<br />
2 If you have several cameras connected to the system, select the desired<br />
camera in the Acquisition menu | Select Camera.<br />
3 Switch the microscope’s light path to the phototube.<br />
4 In order to display the camera’s live image, click on the Live button (or the<br />
F3 key).<br />
5 To adjust the camera and the live image display, click on the Properties<br />
button. Enter the desired settings on the Display, Adjust, Frame and<br />
General property pages.<br />
––<br />
Set the exposure time: Adjust property page, Measure button<br />
––<br />
Focus the camera image<br />
––<br />
Select the frame<br />
––<br />
Select the appropriate scaling for the objective: Pixel drop-down list<br />
6 Acquire a single image using the Snap button.<br />
7 To adjust the image subsequently, click on the Properties button and then<br />
on the Display property page.<br />
––<br />
Adjust the image individually: Brightness and Contrast sliders<br />
––<br />
Set brightness and contrast automatically: Min/Max button<br />
––<br />
Undo changes: Linear button<br />
––<br />
Show scale bars in the image: Scale bar button<br />
––<br />
Generating annotations: Draw in annotations button<br />
––<br />
Adjust live image size: Navigator button<br />
8 Save the image (ZVI image format) using the Save button or export the<br />
image to an image format of your choice via the File menu | Export.<br />
i<br />
Note:<br />
The AxioCam <strong>ERc</strong> <strong>5s</strong> differs from other AxioCam cameras from <strong>Carl</strong> <strong>Zeiss</strong> on account<br />
of a number of functions. For example, the AxioCam <strong>ERc</strong> <strong>5s</strong> already works with a<br />
color profile in the live image. This means that it is no longer necessary to perform<br />
an adjustment to the gamma value of the monitor.<br />
!<br />
Additional software modules<br />
Amongst the wide range of AxioVision software modules (LE and full version),<br />
the following are particularly useful for the AxioCam <strong>ERc</strong> <strong>5s</strong>:<br />
!<br />
Module<br />
HDR Imaging<br />
Interactive<br />
Measurement<br />
Description<br />
Extends the camera’s dynamic range. By acquiring a series of<br />
exposures and merging the individual images to form one image it is<br />
possible to achieve finer brightness gradations in the resulting image<br />
and a wider contrast range.<br />
Collection of measurement tools for analyzing images directly within<br />
AxioVision. The results are displayed in tabular form or can be<br />
embedded in special report templates.<br />
AxioVision software
Troubleshooting<br />
Problem Cause Solution<br />
LED not<br />
illuminating<br />
LED flashing red<br />
LED illuminated<br />
red<br />
Acquisition and<br />
AWB buttons do<br />
not respond<br />
Firmware update<br />
does not work<br />
No live image<br />
of the camera<br />
is visible in<br />
AxioVision<br />
Newly acquired<br />
photos are not<br />
visible on the<br />
memory card<br />
in Microsoft ®<br />
Windows<br />
Explorer<br />
The file names<br />
for new photos<br />
are counting up<br />
from 1 again<br />
The camera<br />
“forgets” the<br />
settings<br />
The camera is not<br />
receiving power via<br />
the USB cable<br />
USB cable is not<br />
connected to a<br />
suitable power<br />
adapter<br />
Unsuitable USB cable<br />
The camera is<br />
indicating an error<br />
The camera is not<br />
ready for operation<br />
The buttons are<br />
disabled while<br />
AxioVision is open<br />
An SD card must<br />
be inserted for an<br />
update to take place<br />
The camera is not<br />
recognized by<br />
AxioVision<br />
Microsoft ® Windows<br />
Explorer has not<br />
updated the content<br />
of the card<br />
The internal counter<br />
in the camera has<br />
been set to 1<br />
The battery inside<br />
the camera is empty<br />
Connect the camera to a PC that is running<br />
or to the plugged-in mains power adapter via<br />
the USB port.<br />
Requirements: output of at least 5 V DC at no<br />
less than 500 mA.<br />
Use the original USB cable supplied by <strong>Carl</strong><br />
<strong>Zeiss</strong>.<br />
SD card is full: insert new card or delete<br />
images from the card being used.<br />
SD card is write-protected: slide the tab on<br />
the card to the “unlocked” position.<br />
SD card is defective or not formatted: format<br />
card; replace if error is not resolved.<br />
Wait until initialization is completed (approx.<br />
ten seconds).<br />
Disconnect USB cable for ten seconds and<br />
then re-connect; wait until initialization is<br />
completed.<br />
Activate acquisition from AxioVision or close<br />
AxioVision.<br />
Insert a formatted, unprotected SD card with<br />
at least 10 MB of free memory space.<br />
Several cameras have been connected to<br />
the PC: select the AxioCam <strong>ERc</strong> <strong>5s</strong> from the<br />
camera selection menu.<br />
The configuration program may have been<br />
opened in parallel: close both programs and<br />
then reopen AxioVision only.<br />
Take the memory card out of the camera,<br />
wait for three seconds, then reinsert it;<br />
Microsoft ® Windows Explorer will now reread<br />
the content of the card.<br />
Check the setting in the configuration<br />
program!<br />
Note: each time the memory card is<br />
formatted the counter is reset to 1.<br />
The camera contains a lithium battery with<br />
a service life of around five years. After this<br />
time it must be replaced by the service team.<br />
Troubleshooting
Care / Maintenance / Disposal<br />
Care<br />
Cleaning the camera housing<br />
You can clean the camera housing from time to time using a dry or slightly<br />
dampened, lint-free cloth. The housing is not water-tight, however. Do not use<br />
harsh cleaning agents or solvents.<br />
Cleaning the filter glass<br />
Only use suitable agents for cleaning the filter glass! Dust on the filter glass<br />
can be removed using an optical brush, blower brush, cotton swab, optical<br />
paper or a lint-free cotton cloth. Please refer to the brochure “The Clean<br />
Microscope” (www.zeiss.de/mikro - enter “The Clean Microscope” into the<br />
search field) for further information.<br />
Maintenance<br />
Never open the camera housing! There are no components or control or<br />
maintenance elements on the camera housing or inside the camera that the<br />
user would be able to repair him/herself. If you are unable to resolve a problem<br />
using the troubleshooting table on the back of this Infoflip, please contact the<br />
support team! You will find the support address at www.zeiss.de/axiocam.<br />
Disposal<br />
The product and its accessories comply with EU directives 2002/95/EC (RoHS)<br />
and 2002/96/EC (WEEE).<br />
We have implemented a take-back and recycling process that ensures that<br />
proper recycling is carried out in accordance with the aforementioned EU<br />
directives.<br />
Please contact your <strong>Carl</strong> <strong>Zeiss</strong> sales/service organization for details relating to<br />
disposal and recycling.<br />
This product must not be disposed of with domestic waste or using municipal<br />
waste disposal services. In the event of resale, the seller must inform the buyer<br />
of the need to dispose of the product appropriately.<br />
For your notes<br />
Care / Maintenance / Disposal
Marketer and support:<br />
<strong>Carl</strong> <strong>Zeiss</strong> MicroImaging GmbH<br />
07740 Jena, Germany<br />
BioSciences | Göttingen Location<br />
Tel.: +49 551 5060 660<br />
Fax: +49 551 5060 646<br />
E-mail: micro@zeiss.de<br />
www.zeiss.de/axiocam<br />
M 60-3-0034 e - printed 09.2010<br />
Infoflip is a registered trademark. This Infoflip is Made in Germany by Infoflip Ulm e. K. IF.G.13.00617.E.01