Chapter 1 Routine maintenance and servicing
Chapter 1 Routine maintenance and servicing
Chapter 1 Routine maintenance and servicing

You also want an ePaper? Increase the reach of your titles
YUMPU automatically turns print PDFs into web optimized ePapers that Google loves.
18 000 Mile / 18 Month Service<br />
18 000 Mile / 18 Month Service 1•17<br />
18 Hinge <strong>and</strong> lock lubrication<br />
1<br />
Note: On models from 1994, the maker’s<br />
specified interval for this procedure is<br />
36 000 miles (60 000 km).<br />
1 Work around the vehicle, <strong>and</strong> lubricate the<br />
hinges of the bonnet, doors <strong>and</strong> tailgate with a<br />
light machine oil.<br />
2 Lightly lubricate the bonnet release<br />
mechanism <strong>and</strong> exposed section of inner<br />
cable with a smear of grease.<br />
3 Check carefully the security <strong>and</strong> operation<br />
of all hinges, latches <strong>and</strong> locks, adjusting<br />
them where required. Check the operation of<br />
the central locking system (if fitted).<br />
4 Check the condition <strong>and</strong> operation of the<br />
tailgate struts, renewing them if either is<br />
leaking or is no longer able to support the<br />
tailgate securely when raised.<br />
19 Air conditioning refrigerant<br />
check<br />
1<br />
Note: On models from 1994, the maker’s<br />
specified interval for this procedure is<br />
18 000 miles (30 000 km).<br />
Warning: Do not attempt to<br />
open the refrigerant circuit.<br />
Refer to the precautions given<br />
in <strong>Chapter</strong> 3.<br />
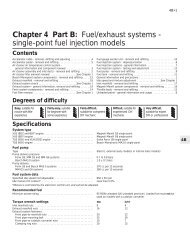
1 In order to check the condition of the<br />
refrigerant, a humidity indicator <strong>and</strong> a sight<br />
glass are provided on top of the drier bottle,<br />
located in the front, left-h<strong>and</strong> corner of the<br />
engine compartment (see illustration).<br />
Refrigerant humidity check<br />
2 Check the colour of the humidity indicator.<br />
Blue indicates that the condition of the<br />
refrigerant is satisfactory. Pink indicates that<br />
19.1 Air conditioning system drier bottle<br />
sight glass (1) <strong>and</strong> humidity indicator (2)<br />
the refrigerant is saturated with humidity. If<br />
the indicator shows red, the system should be<br />
drained <strong>and</strong> recharged, <strong>and</strong> a new drier bottle<br />
should be fitted. Note: The system should be<br />
drained <strong>and</strong> recharged only by a Peugeot<br />
dealer or air conditioning specialist. Do not<br />
attempt to carry out the work yourself, as the<br />
refrigerant is a highly-dangerous substance<br />
(refer to <strong>Chapter</strong> 3).<br />
Refrigerant flow check<br />
3 Run the engine, <strong>and</strong> switch on the air<br />
conditioning.<br />
4 After a few minutes, inspect the sight glass,<br />
<strong>and</strong> check the fluid flow. Clear fluid should be<br />
visible - if not, the following will help to<br />
diagnose the problem:<br />
a) Clear fluid flow - the system is functioning<br />
correctly.<br />
b) No fluid flow - have the system checked<br />
for leaks by a Peugeot dealer or air<br />
conditioning specialist.<br />
c) Continuous stream of clear air bubbles in<br />
fluid - refrigerant level low - have the<br />
system recharged by a Peugeot dealer or<br />
air conditioning specialist.<br />
d) Milky air bubbles visible - high humidity<br />
(see paragraph 2).<br />
1<br />
24 000 Mile / 2 Year Service<br />
20 Coolant renewal<br />
2<br />
Note: On models from 1994, the maker’s<br />
specified interval for this procedure is every<br />
2 years, regardless of mileage.<br />
Cooling system draining<br />
Warning: Wait until the engine is<br />
cold before starting this<br />
procedure. Do not allow<br />
antifreeze to come in contact<br />
with your skin, or with the painted<br />
surfaces of the vehicle. Rinse off spills<br />
immediately with plenty of water. Never<br />
leave antifreeze lying around in an open<br />
container, or in a puddle in the driveway<br />
or on the garage floor. Children <strong>and</strong> pets<br />
are attracted by its sweet smell, but<br />
antifreeze can be fatal if ingested.<br />
1 With the engine completely cold, remove<br />
the expansion tank filler cap. Turn the cap<br />
anti-clockwise until it reaches the first stop.<br />
Wait until any pressure remaining in the<br />
system is released, then push the cap down,<br />
turn it anti-clockwise to the second stop, <strong>and</strong><br />
lift it off.<br />
2 Position a suitable container beneath the<br />
coolant drain outlet at the lower left-h<strong>and</strong> side<br />
of the radiator.<br />
3 Loosen the drain plug (there is no need to<br />
remove it completely) <strong>and</strong> allow the coolant to<br />
drain into the container. If desired, a length of<br />
tubing can be fitted to the drain outlet to<br />
direct the flow of coolant during draining (see<br />
illustration).<br />
20.3 Radiator drain outlet (arrowed)<br />
4 To assist draining, open the cooling system<br />
bleed screws. On all except 1.4 litre engines,<br />
the bleed screws are located in the thermostat<br />
cover <strong>and</strong> thermostat housing. On 1.4 litre<br />
engines, the bleed screws are located in the<br />
thermostat housing, <strong>and</strong> in the cylinder head<br />
coolant bypass hose. Additionally, on 2.0 litre<br />
XU10J4 engines, there is a bleed screw<br />
located in the coolant bypass hose behind the<br />
cylinder head. All models also have a bleed<br />
screw located at the top left-h<strong>and</strong> corner of<br />
the radiator (see illustrations).<br />
20.4a Cooling system bleed screws on<br />
thermostat housing <strong>and</strong> cover (arrowed) -<br />
1.6 litre engine shown