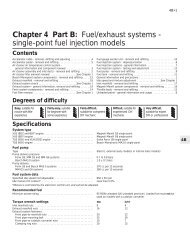
Chapter 1 Routine maintenance and servicing
Chapter 1 Routine maintenance and servicing
Chapter 1 Routine maintenance and servicing

Create successful ePaper yourself
Turn your PDF publications into a flip-book with our unique Google optimized e-Paper software.
1•18 24 000 Mile / 2 Year Service<br />
20.4b Coolant bypass hose bleed screw<br />
(arrowed) - 1.4 litre engine<br />
20.5a Cylinder block drain plug location<br />
(arrowed) - 1.4 litre engine<br />
5 On 1.4 litre <strong>and</strong> 2.0 litre engines, when the<br />
flow of coolant stops, reposition the container<br />
below the cylinder block drain plug. On<br />
1.4 litre engines, the drain plug is located at<br />
the front left-h<strong>and</strong> end of the cylinder<br />
block. On 2.0 litre engines, the drain plug is<br />
located at the rear left-h<strong>and</strong> end of the<br />
cylinder block, next to the rear engine<br />
mounting (see illustrations). On 1.6, 1.8 <strong>and</strong><br />
1.9 litre engines, no cylinder block drain plug<br />
is fitted.<br />
6 Where applicable, remove the cylinder<br />
block drain plug, <strong>and</strong> allow the coolant to<br />
drain into the container.<br />
7 If the coolant has been drained for a reason<br />
other than renewal, then provided it is clean<br />
<strong>and</strong> less than two years old, it can be re-used,<br />
though this is not recommended.<br />
8 Refit <strong>and</strong> tighten the radiator <strong>and</strong> cylinder<br />
block drain plugs, as applicable, on<br />
completion of draining.<br />
Cooling system flushing<br />
9 If coolant renewal has been neglected, or if<br />
the antifreeze mixture has become diluted,<br />
then in time, the cooling system may gradually<br />
lose efficiency, as the coolant passages<br />
become restricted due to rust, scale deposits,<br />
<strong>and</strong> other sediment. The cooling system<br />
efficiency can be restored by flushing the<br />
system clean.<br />
10 The radiator should be flushed<br />
independently of the engine, to avoid<br />
unnecessary contamination.<br />
Radiator flushing<br />
11 To flush the radiator, first tighten the<br />
20.4c Radiator bleed screw (arrowed)<br />
20.5b Cylinder block drain plug location<br />
(arrowed) - 2.0 litre engine<br />
radiator drain plug, <strong>and</strong> the radiator bleed<br />
screw, where applicable.<br />
12 Disconnect the top <strong>and</strong> bottom hoses <strong>and</strong><br />
any other relevant hoses from the radiator,<br />
with reference to <strong>Chapter</strong> 3.<br />
13 Insert a garden hose into the radiator top<br />
inlet. Direct a flow of clean water through the<br />
radiator, <strong>and</strong> continue flushing until clean<br />
water emerges from the radiator bottom<br />
outlet.<br />
14 If after a reasonable period, the water still<br />
does not run clear, the radiator can be flushed<br />
with a good proprietary cleaning agent. It is<br />
important that the manufacturer’s instructions<br />
are followed carefully. If the contamination is<br />
particularly bad, insert the hose in the radiator<br />
bottom outlet, <strong>and</strong> reverse-flush the radiator.<br />
Engine flushing<br />
15 To flush the engine, first refit <strong>and</strong> tighten<br />
the cylinder block drain plug (where<br />
applicable), <strong>and</strong> tighten the cooling system<br />
bleed screws.<br />
16 Remove the thermostat as described in<br />
<strong>Chapter</strong> 3, then temporarily refit the<br />
thermostat cover.<br />
17 With the top <strong>and</strong> bottom hoses<br />
disconnected from the radiator (see <strong>Chapter</strong> 3<br />
- it may be preferable to disconnect the<br />
bottom hose from the engine), insert a garden<br />
hose into the radiator top hose. Direct a clean<br />
flow of water through the engine, <strong>and</strong><br />
continue flushing until clean water emerges<br />
from the radiator bottom hose.<br />
18 On completion of flushing, refit the<br />
thermostat <strong>and</strong> reconnect the hoses with<br />
reference to <strong>Chapter</strong> 3.<br />
Cooling system filling<br />
19 Before attempting to fill the cooling<br />
system, make sure that all hoses <strong>and</strong> clips are<br />
in good condition, <strong>and</strong> that the clips are tight.<br />
Note that an antifreeze mixture must be used<br />
all year round, to prevent corrosion of the<br />
engine components (see following sub-<br />
Section). Also check that the radiator <strong>and</strong><br />
cylinder block drain plugs, as applicable, are<br />
in place <strong>and</strong> tight.<br />
20 Remove the expansion tank cap.<br />
21 Open all the cooling system bleed screws<br />
(see paragraph 4).<br />
22 Some of the cooling system hoses are<br />
positioned at a higher level than the top of the<br />
radiator expansion tank. It is therefore<br />
necessary to use a “header tank” when<br />
refilling the cooling system, to reduce the<br />
possibility of air being trapped in the system.<br />
Although Peugeot dealers use a special<br />
header tank, the same effect can be achieved<br />
by using a suitable bottle, with a seal between<br />
the bottle <strong>and</strong> the expansion tank (see<br />
illustration <strong>and</strong> Haynes Hint).<br />
23 Fit the “header tank” to the expansion<br />
tank <strong>and</strong> slowly fill the system. Coolant will<br />
emerge from each of the bleed screws in turn,<br />
starting with the lowest screw. As soon as<br />
coolant free from air bubbles emerges from<br />
the lowest screw, tighten that screw, <strong>and</strong><br />
watch the next bleed screw in the system.<br />
Repeat the procedure until the coolant is<br />
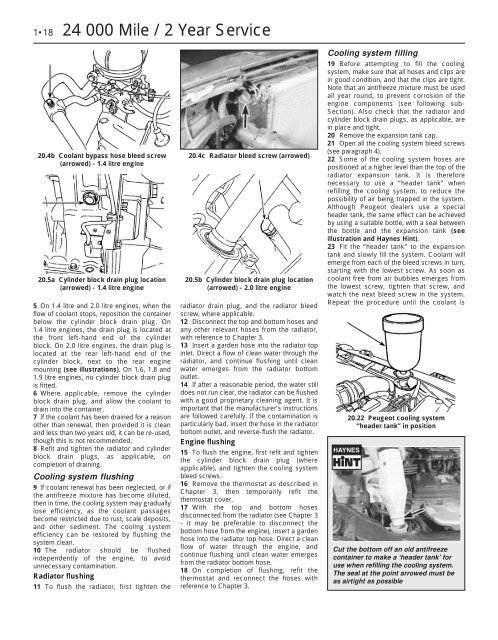
20.22 Peugeot cooling system<br />
“header tank” in position<br />
Cut the bottom off an old antifreeze<br />
container to make a ‘header tank’ for<br />
use when refilling the cooling system.<br />
The seal at the point arrowed must be<br />
as airtight as possible