Chapter 1 Routine maintenance and servicing
Chapter 1 Routine maintenance and servicing
Chapter 1 Routine maintenance and servicing

You also want an ePaper? Increase the reach of your titles
YUMPU automatically turns print PDFs into web optimized ePapers that Google loves.
24 000 Mile / 2 Year Service 1•21<br />
24 Brake fluid renewal<br />
2<br />
Note: On models from 1994, the maker’s<br />
specified interval for this procedure is every<br />
2 years, regardless of mileage.<br />
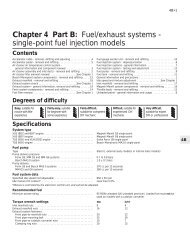
22.9 The rotor arm is a push fit on the<br />
distributor shaft<br />
ensure that the arm is securely pressed onto<br />
the shaft, <strong>and</strong> tighten the cap retaining screws<br />
securely.<br />
10 Even with the ignition system in first class<br />
condition, some engines may still occasionally<br />
experience poor starting, attributable to damp<br />
ignition components. To disperse moisture, a<br />
water-dispersant aerosol can be very<br />
effective.<br />
Ignition timing check <strong>and</strong> adjustment<br />
11 Check the ignition timing as described in<br />
<strong>Chapter</strong> 5B.<br />
Static (distributorless)<br />
ignition systems<br />
General component check<br />
12 On all except 1998 cc 16-valve models,<br />
check the condition of the HT leads as<br />
described above. On 1998 cc 16-valve<br />
models, there are no HT leads, so the only<br />
relevant check is that all the primary (LT)<br />
circuit wiring connectors are clean <strong>and</strong> free of<br />
corrosion.<br />
Ignition timing check <strong>and</strong> adjustment<br />
13 Refer to <strong>Chapter</strong> 5B.<br />
23 Automatic transmission fluid<br />
renewal 2<br />
Note: On models from 1994, the maker’s<br />
specified interval for this procedure is<br />
18 000 miles (30 000 km).<br />
1 Take the vehicle on a short run, to warm the<br />
transmission up to normal operating<br />
temperature.<br />
2 Park the car on level ground, then switch off<br />
the ignition <strong>and</strong> apply the h<strong>and</strong>brake firmly.<br />
For improved access, jack up the front of the<br />
car <strong>and</strong> support it securely on axle st<strong>and</strong>s<br />
(see “Jacking <strong>and</strong> Vehicle Support”). Note<br />
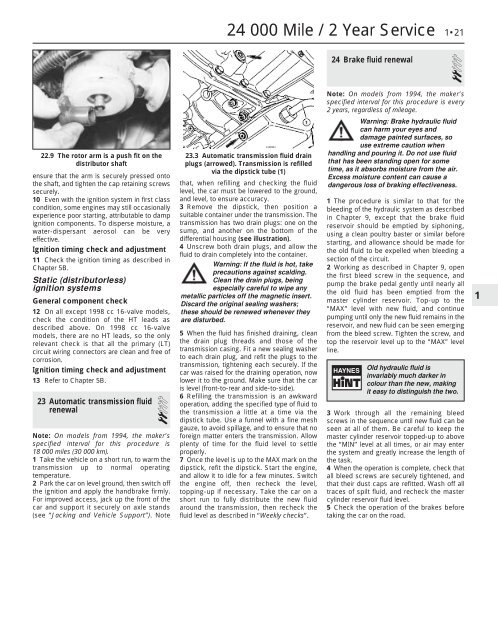
23.3 Automatic transmission fluid drain<br />
plugs (arrowed). Transmission is refilled<br />
via the dipstick tube (1)<br />
that, when refilling <strong>and</strong> checking the fluid<br />
level, the car must be lowered to the ground,<br />
<strong>and</strong> level, to ensure accuracy.<br />
3 Remove the dipstick, then position a<br />
suitable container under the transmission. The<br />
transmission has two drain plugs: one on the<br />
sump, <strong>and</strong> another on the bottom of the<br />
differential housing (see illustration).<br />
4 Unscrew both drain plugs, <strong>and</strong> allow the<br />
fluid to drain completely into the container.<br />
Warning: If the fluid is hot, take<br />
precautions against scalding.<br />
Clean the drain plugs, being<br />
especially careful to wipe any<br />
metallic particles off the magnetic insert.<br />
Discard the original sealing washers;<br />
these should be renewed whenever they<br />
are disturbed.<br />
5 When the fluid has finished draining, clean<br />
the drain plug threads <strong>and</strong> those of the<br />
transmission casing. Fit a new sealing washer<br />
to each drain plug, <strong>and</strong> refit the plugs to the<br />
transmission, tightening each securely. If the<br />
car was raised for the draining operation, now<br />
lower it to the ground. Make sure that the car<br />
is level (front-to-rear <strong>and</strong> side-to-side).<br />
6 Refilling the transmission is an awkward<br />
operation, adding the specified type of fluid to<br />
the transmission a little at a time via the<br />
dipstick tube. Use a funnel with a fine mesh<br />
gauze, to avoid spillage, <strong>and</strong> to ensure that no<br />
foreign matter enters the transmission. Allow<br />
plenty of time for the fluid level to settle<br />
properly.<br />
7 Once the level is up to the MAX mark on the<br />
dipstick, refit the dipstick. Start the engine,<br />
<strong>and</strong> allow it to idle for a few minutes. Switch<br />
the engine off, then recheck the level,<br />
topping-up if necessary. Take the car on a<br />
short run to fully distribute the new fluid<br />
around the transmission, then recheck the<br />
fluid level as described in “Weekly checks”.<br />
Warning: Brake hydraulic fluid<br />
can harm your eyes <strong>and</strong><br />
damage painted surfaces, so<br />
use extreme caution when<br />
h<strong>and</strong>ling <strong>and</strong> pouring it. Do not use fluid<br />
that has been st<strong>and</strong>ing open for some<br />
time, as it absorbs moisture from the air.<br />
Excess moisture content can cause a<br />
dangerous loss of braking effectiveness.<br />
1 The procedure is similar to that for the<br />
bleeding of the hydraulic system as described<br />
in <strong>Chapter</strong> 9, except that the brake fluid<br />
reservoir should be emptied by siphoning,<br />
using a clean poultry baster or similar before<br />
starting, <strong>and</strong> allowance should be made for<br />
the old fluid to be expelled when bleeding a<br />
section of the circuit.<br />
2 Working as described in <strong>Chapter</strong> 9, open<br />
the first bleed screw in the sequence, <strong>and</strong><br />
pump the brake pedal gently until nearly all<br />
the old fluid has been emptied from the<br />
master cylinder reservoir. Top-up to the<br />
“MAX” level with new fluid, <strong>and</strong> continue<br />
pumping until only the new fluid remains in the<br />
reservoir, <strong>and</strong> new fluid can be seen emerging<br />
from the bleed screw. Tighten the screw, <strong>and</strong><br />
top the reservoir level up to the “MAX” level<br />
line.<br />
Old hydraulic fluid is<br />
invariably much darker in<br />
colour than the new, making<br />
it easy to distinguish the two.<br />
3 Work through all the remaining bleed<br />
screws in the sequence until new fluid can be<br />
seen at all of them. Be careful to keep the<br />
master cylinder reservoir topped-up to above<br />
the “MIN” level at all times, or air may enter<br />
the system <strong>and</strong> greatly increase the length of<br />
the task.<br />
4 When the operation is complete, check that<br />
all bleed screws are securely tightened, <strong>and</strong><br />
that their dust caps are refitted. Wash off all<br />
traces of spilt fluid, <strong>and</strong> recheck the master<br />
cylinder reservoir fluid level.<br />
5 Check the operation of the brakes before<br />
taking the car on the road.<br />
1