Chapter 1 Routine maintenance and servicing
Chapter 1 Routine maintenance and servicing
Chapter 1 Routine maintenance and servicing

Create successful ePaper yourself
Turn your PDF publications into a flip-book with our unique Google optimized e-Paper software.
1•22 36 000 Mile / 3 Year Service<br />
36 000 Mile / 3 Year Service<br />
25 Timing belt renewal<br />
4<br />
Note: On models from 1994, the maker’s<br />
specified interval for this procedure is<br />
72 000 miles (120 000 km).<br />
Refer to the relevant Part of <strong>Chapter</strong> 2.<br />
26 Manual transmission<br />
oil level check 2<br />
Note: On models from 1994, the maker’s<br />
specified interval for this procedure is<br />
36 000 miles (60 000 km).<br />
Note: A suitable square-section wrench may<br />
be required to undo the transmission<br />
filler/level plug on some models. These<br />
wrenches can be obtained from most motor<br />
factors or your Peugeot dealer.<br />
Haynes Hint: It may be possible to use the<br />
square end fitting on a ratchet h<strong>and</strong>le (as<br />
found in a typical socket set) to undo the<br />
plug.<br />
1 Park the car on a level surface. The oil level<br />
must be checked before the car is driven, or<br />
at least 5 minutes after the engine has been<br />
switched off. If the oil level is checked<br />
immediately after driving the car, some of the<br />
oil will remain distributed around the<br />
transmission components, resulting in an<br />
inaccurate level reading.<br />
2 Turn the steering wheel on full left-h<strong>and</strong><br />
lock, then where applicable remove the cover<br />
for access to the left-h<strong>and</strong> side of the<br />
transmission.<br />
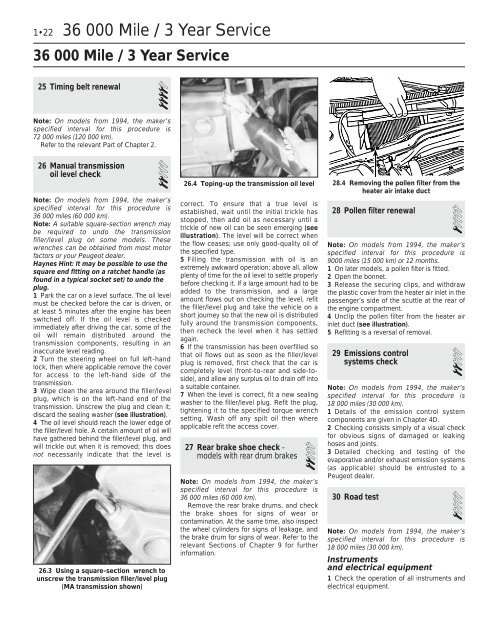
3 Wipe clean the area around the filler/level<br />
plug, which is on the left-h<strong>and</strong> end of the<br />
transmission. Unscrew the plug <strong>and</strong> clean it;<br />
discard the sealing washer (see illustration).<br />
4 The oil level should reach the lower edge of<br />
the filler/level hole. A certain amount of oil will<br />
have gathered behind the filler/level plug, <strong>and</strong><br />
will trickle out when it is removed; this does<br />
not necessarily indicate that the level is<br />
26.3 Using a square-section wrench to<br />
unscrew the transmission filler/level plug<br />
(MA transmission shown)<br />
26.4 Toping-up the transmission oil level<br />
correct. To ensure that a true level is<br />
established, wait until the initial trickle has<br />
stopped, then add oil as necessary until a<br />
trickle of new oil can be seen emerging (see<br />
illustration). The level will be correct when<br />
the flow ceases; use only good-quality oil of<br />
the specified type.<br />
5 Filling the transmission with oil is an<br />
extremely awkward operation; above all, allow<br />
plenty of time for the oil level to settle properly<br />
before checking it. If a large amount had to be<br />
added to the transmission, <strong>and</strong> a large<br />
amount flows out on checking the level, refit<br />
the filler/level plug <strong>and</strong> take the vehicle on a<br />
short journey so that the new oil is distributed<br />
fully around the transmission components,<br />
then recheck the level when it has settled<br />
again.<br />
6 If the transmission has been overfilled so<br />
that oil flows out as soon as the filler/level<br />
plug is removed, first check that the car is<br />
completely level (front-to-rear <strong>and</strong> side-toside),<br />
<strong>and</strong> allow any surplus oil to drain off into<br />
a suitable container.<br />
7 When the level is correct, fit a new sealing<br />
washer to the filler/level plug. Refit the plug,<br />
tightening it to the specified torque wrench<br />
setting. Wash off any spilt oil then where<br />
applicable refit the access cover.<br />
27 Rear brake shoe check -<br />
models with rear drum brakes 2<br />
Note: On models from 1994, the maker’s<br />
specified interval for this procedure is<br />
36 000 miles (60 000 km).<br />
Remove the rear brake drums, <strong>and</strong> check<br />
the brake shoes for signs of wear or<br />
contamination. At the same time, also inspect<br />
the wheel cylinders for signs of leakage, <strong>and</strong><br />
the brake drum for signs of wear. Refer to the<br />
relevant Sections of <strong>Chapter</strong> 9 for further<br />
information.<br />
28.4 Removing the pollen filter from the<br />
heater air intake duct<br />
28 Pollen filter renewal<br />
1<br />
Note: On models from 1994, the maker’s<br />
specified interval for this procedure is<br />
9000 miles (15 000 km) or 12 months.<br />
1 On later models, a pollen filter is fitted.<br />
2 Open the bonnet.<br />
3 Release the securing clips, <strong>and</strong> withdraw<br />
the plastic cover from the heater air inlet in the<br />
passenger’s side of the scuttle at the rear of<br />
the engine compartment.<br />
4 Unclip the pollen filter from the heater air<br />
inlet duct (see illustration).<br />
5 Refitting is a reversal of removal.<br />
29 Emissions control<br />
systems check 2<br />
Note: On models from 1994, the maker’s<br />
specified interval for this procedure is<br />
18 000 miles (30 000 km).<br />
1 Details of the emission control system<br />
components are given in <strong>Chapter</strong> 4D.<br />
2 Checking consists simply of a visual check<br />
for obvious signs of damaged or leaking<br />
hoses <strong>and</strong> joints.<br />
3 Detailed checking <strong>and</strong> testing of the<br />
evaporative <strong>and</strong>/or exhaust emission systems<br />
(as applicable) should be entrusted to a<br />
Peugeot dealer.<br />
30 Road test<br />
1<br />
Note: On models from 1994, the maker’s<br />
specified interval for this procedure is<br />
18 000 miles (30 000 km).<br />
Instruments<br />
<strong>and</strong> electrical equipment<br />
1 Check the operation of all instruments <strong>and</strong><br />
electrical equipment.