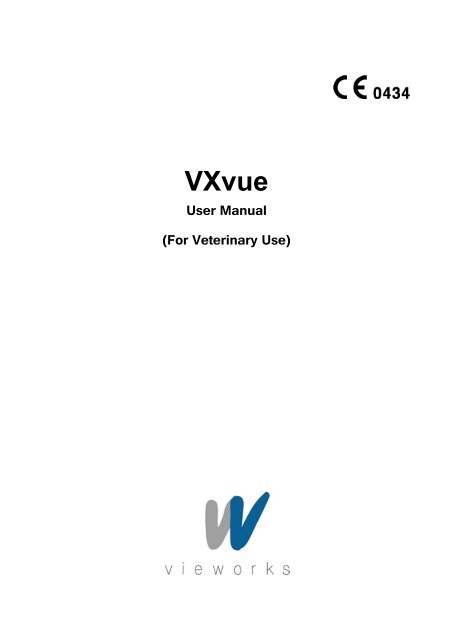
VXvue User Manual for Veterinary Use_V1.1_EN.pdf
VXvue User Manual for Veterinary Use_V1.1_EN.pdf
VXvue User Manual for Veterinary Use_V1.1_EN.pdf

You also want an ePaper? Increase the reach of your titles
YUMPU automatically turns print PDFs into web optimized ePapers that Google loves.
<strong>VXvue</strong><br />
<strong><strong>Use</strong>r</strong> <strong>Manual</strong><br />
(For <strong>Veterinary</strong> <strong>Use</strong>)
<strong>VXvue</strong> <strong><strong>Use</strong>r</strong> <strong>Manual</strong><br />
Revision History<br />
Version Date Description<br />
1.0 2012-06-15 Initial Release<br />
1.1<br />
2012-08-11<br />
2012-10-22<br />
• Modified<br />
<strong>VXvue</strong> log-in UI<br />
<strong><strong>Use</strong>r</strong> interface layout screen<br />
Image reject<br />
Reject study<br />
Image Convert / Export<br />
Viewer setting panel UI<br />
Procedure panel<br />
Queue panel UI<br />
MWL panel UI<br />
MPPS panel UI / contents<br />
• Added<br />
ER(Emergency) Mode<br />
Worklist panel UI / contents<br />
Exposure Mode panel UI / contents<br />
Image Processing Mode UI / contents<br />
Storage panel<br />
Storage Commitment panel UI / contents<br />
Reject<br />
Rejected List panel UI / contents<br />
Reason panel UI / contents<br />
• Added<br />
Appendix A<br />
Appendix B<br />
Appendix C<br />
Page 2 of 181<br />
RA20-129-035
<strong>VXvue</strong> <strong><strong>Use</strong>r</strong> <strong>Manual</strong><br />
Contents<br />
Safety and Regulatory ....................................................................................................... 8<br />
Safety Notice ............................................................................................................................................. 8<br />
1. Introduction ................................................................................................................. 9<br />
1.1 Getting Started .......................................................................................................................... 9<br />
1.2 How to use Mouse .................................................................................................................. 10<br />
2. <strong><strong>Use</strong>r</strong> Interface Layout ................................................................................................ 11<br />
3. Work Mode ................................................................................................................. 12<br />
3.1 Worklist Panel ......................................................................................................................... 12<br />
3.1.1 Search Conditions ............................................................................................................. 13<br />
3.1.2 Search ............................................................................................................................... 14<br />
3.1.3 Clear Search Conditions ................................................................................................... 14<br />
3.1.4 Save to Local .................................................................................................................... 14<br />
3.1.5 Start Study ........................................................................................................................ 14<br />
3.1.6 Register Emergency Study ............................................................................................... 15<br />
3.1.7 Search Results List ........................................................................................................... 15<br />
3.2 New Study Panel ..................................................................................................................... 19<br />
3.2.1 Register Study .................................................................................................................. 20<br />
3.3 Local Panel .............................................................................................................................. 22<br />
3.3.1 Search Conditions ............................................................................................................. 22<br />
3.3.2 Search ............................................................................................................................... 23<br />
3.3.3 Clear Search Conditions ................................................................................................... 23<br />
3.3.4 Start Study ........................................................................................................................ 24<br />
3.3.5 Register Emergency Study ............................................................................................... 24<br />
3.3.6 Modify Order In<strong>for</strong>mation .................................................................................................. 24<br />
3.3.7 Deleting Order In<strong>for</strong>mation ............................................................................................... 25<br />
3.3.8 Search Results List ........................................................................................................... 25<br />
4. Exposure Mode .......................................................................................................... 26<br />
4.1 Exposure ................................................................................................................................. 26<br />
4.1.1 Study Tab .......................................................................................................................... 27<br />
4.1.2 Detector and Detector Status In<strong>for</strong>mation ........................................................................ 27<br />
4.1.3 Step Registration Window ................................................................................................ 28<br />
4.1.4 Patient Size Slide .............................................................................................................. 29<br />
4.1.5 Thumbnail and Step .......................................................................................................... 30<br />
Page 3 of 181<br />
RA20-129-035
<strong>VXvue</strong> <strong><strong>Use</strong>r</strong> <strong>Manual</strong><br />
4.1.6 Image Manipulation Mode Button ..................................................................................... 31<br />
4.1.7 Image Manipulation Tools ................................................................................................. 31<br />
4.1.8 Exposure View .................................................................................................................. 31<br />
4.2 Image Manipulation Mode ...................................................................................................... 32<br />
4.2.1 Button <strong>for</strong> Switching to Exposure Mode ............................................................................ 33<br />
4.2.2 Process Panel ................................................................................................................... 33<br />
4.2.3 Tools Panel ....................................................................................................................... 35<br />
4.2.4 Label Panel ....................................................................................................................... 70<br />
5. Database Mode .......................................................................................................... 74<br />
5.1 Search Condition .................................................................................................................... 75<br />
5.2 Search Menu ........................................................................................................................... 76<br />
5.2.1 Search ............................................................................................................................... 76<br />
5.2.2 Clear Search Conditions ................................................................................................... 76<br />
5.2.3 New Study ......................................................................................................................... 76<br />
5.2.4 Insert ................................................................................................................................. 77<br />
5.2.5 Move Image ...................................................................................................................... 77<br />
5.2.6 Modify Study In<strong>for</strong>mation .................................................................................................. 78<br />
5.3 Database Menu ....................................................................................................................... 79<br />
5.3.1 Open ................................................................................................................................. 79<br />
5.3.2 Reject Study ...................................................................................................................... 80<br />
5.3.3 Export ................................................................................................................................ 81<br />
5.3.4 Stitch ................................................................................................................................. 83<br />
5.3.5 Send .................................................................................................................................. 84<br />
5.3.6 Print ................................................................................................................................... 84<br />
5.4 Searched Study List ............................................................................................................... 85<br />
5.5 Thumbnail ................................................................................................................................ 86<br />
6. Viewer Mode ............................................................................................................... 88<br />
Page 4 of 181<br />
RA20-129-035
<strong>VXvue</strong> <strong><strong>Use</strong>r</strong> <strong>Manual</strong><br />
7. Print Mode .................................................................................................................. 89<br />
7.1 Printer and Page Setup .......................................................................................................... 90<br />
7.2 Image Manipulation Buttons ................................................................................................. 91<br />
7.2.1 Select ................................................................................................................................ 91<br />
7.2.2 Zoom ................................................................................................................................. 91<br />
7.2.3 Panning ............................................................................................................................. 92<br />
7.2.4 Window/Level .................................................................................................................... 92<br />
7.2.5 Pick W/L (Window Level) .................................................................................................. 92<br />
7.2.6 Magic Glass ...................................................................................................................... 92<br />
7.2.7 Crop .................................................................................................................................. 92<br />
7.2.8 Invert ................................................................................................................................. 92<br />
7.2.9 Clockwise Rotation ........................................................................................................... 93<br />
7.2.10 Counterclockwise Rotation ............................................................................................... 93<br />
7.2.11 Flip .................................................................................................................................... 93<br />
7.2.12 Mirror ................................................................................................................................. 93<br />
7.2.13 Fit to Screen ...................................................................................................................... 93<br />
7.2.14 Delete Image ..................................................................................................................... 94<br />
7.2.15 Delete All ........................................................................................................................... 94<br />
7.2.16 Image Swap ...................................................................................................................... 94<br />
7.2.17 Print ................................................................................................................................... 94<br />
7.2.18 Distance ............................................................................................................................ 95<br />
7.2.19 Angle ................................................................................................................................. 95<br />
7.2.20 Arrow ................................................................................................................................. 95<br />
7.2.21 Rectangle .......................................................................................................................... 95<br />
7.2.22 Ellipse ............................................................................................................................... 95<br />
7.2.23 Displaying ROI In<strong>for</strong>mation ............................................................................................... 95<br />
7.2.24 Text Note ........................................................................................................................... 96<br />
7.2.25 Delete Annotations ............................................................................................................ 96<br />
8. Setting Mode .............................................................................................................. 97<br />
8.1 System Settings ...................................................................................................................... 97<br />
8.1.1 System Panel .................................................................................................................... 97<br />
8.1.2 Account Panel ................................................................................................................. 100<br />
8.1.3 Miscellaneous Panel ....................................................................................................... 101<br />
8.1.4 Log Panel ........................................................................................................................ 104<br />
Page 5 of 181<br />
RA20-129-035
<strong>VXvue</strong> <strong><strong>Use</strong>r</strong> <strong>Manual</strong><br />
8.2 Work Settings ........................................................................................................................ 105<br />
8.2.1 New Study ....................................................................................................................... 105<br />
8.2.2 Unit .................................................................................................................................. 106<br />
8.2.3 Default Tab ...................................................................................................................... 106<br />
8.3 Exposure Settings ................................................................................................................ 107<br />
8.3.1 Category ......................................................................................................................... 107<br />
8.3.2 Shortcut ........................................................................................................................... 108<br />
8.4 Viewer Settings ..................................................................................................................... 109<br />
8.4.1 Image Overlay .................................................................................................................. 110<br />
8.4.2 Monitor LUT ..................................................................................................................... 111<br />
8.4.3 Interpolation Mode ........................................................................................................... 111<br />
8.4.4 Window Level Option ....................................................................................................... 111<br />
8.4.5 Crop Option ...................................................................................................................... 111<br />
8.5 LUT Settings........................................................................................................................... 112<br />
8.6 Procedure Settings ................................................................................................................ 113<br />
8.6.1 Procedure Panel .............................................................................................................. 113<br />
8.6.2 Step Panel ....................................................................................................................... 114<br />
8.6.3 Body Part/Projection Panel ............................................................................................. 129<br />
8.6.4 Species Code .................................................................................................................. 130<br />
8.6.5 Breed Code ..................................................................................................................... 131<br />
8.6.6 Breed Registration Code ................................................................................................ 132<br />
8.7 Backup Settings ................................................................................................................... 133<br />
8.7.1 Backup Panel .................................................................................................................. 133<br />
8.7.2 Clean Panel .................................................................................................................... 135<br />
8.7.3 Restore Panel ................................................................................................................. 136<br />
8.8 DICOM Settings .................................................................................................................... 137<br />
8.8.1 Queue Panel ................................................................................................................... 137<br />
8.8.2 MWL Panel ...................................................................................................................... 138<br />
8.8.3 MPPS Panel .................................................................................................................... 141<br />
8.8.4 Storage Panel ................................................................................................................. 143<br />
8.8.5 Storage Commitment Panel ............................................................................................ 146<br />
8.8.6 Print Panel ...................................................................................................................... 148<br />
8.9 Setting Reject ........................................................................................................................ 152<br />
8.9.1 Rejected List Panel ......................................................................................................... 152<br />
8.9.2 Reason Panel ................................................................................................................. 153<br />
Page 6 of 181<br />
RA20-129-035
<strong>VXvue</strong> <strong><strong>Use</strong>r</strong> <strong>Manual</strong><br />
Appendix A. Cursor and Icon List ............................................................................. 154<br />
A.1 Tool Cursors .......................................................................................................................... 154<br />
A.2 Annotation Cursors .............................................................................................................. 154<br />
A.3 Status Bar Icons ................................................................................................................... 155<br />
A.4 Listed Icons in Database Mode ........................................................................................... 155<br />
A.5 Thumbnail Status Icons ....................................................................................................... 156<br />
A.6 Detector in<strong>for</strong>mation Icons .................................................................................................. 157<br />
A.7 Detector Status Icons ........................................................................................................... 158<br />
Appendix B. Image Process Guide (HS2) ................................................................. 159<br />
B.1 HS2 Basic .............................................................................................................................. 160<br />
B.2 Contrast slope (0~50) ........................................................................................................... 161<br />
B.3 Contrast point (0~100).......................................................................................................... 162<br />
B.4 Mean Point (1~100) ............................................................................................................... 163<br />
B.5 Skin correct (0~100) ............................................................................................................. 164<br />
B.6 OPPoint (1000~100): TBD .................................................................................................... 165<br />
B.7 Compensation ....................................................................................................................... 166<br />
B.8 Compression ......................................................................................................................... 167<br />
B.9 Denoise .................................................................................................................................. 168<br />
B.10 Gamma ................................................................................................................................... 169<br />
B.11 Fine Edge ............................................................................................................................... 171<br />
B.12 Middle Edge........................................................................................................................... 172<br />
B.13 Large Edge ............................................................................................................................ 173<br />
B.14 Huge Edge ............................................................................................................................. 174<br />
Appendix C. Exposure Index ..................................................................................... 175<br />
C.1 Flowchart (Exposure Index Setting) ................................................................................... 175<br />
C.2 Exposure Index (E.I) and Deviation Index (D.I) Display .................................................... 176<br />
C.3 Set Target Exposure Index ( EI<br />
t ) in Step Panel ................................................................ 177<br />
C.4 Exposure Index Formula ...................................................................................................... 178<br />
C.4.1 Definition ......................................................................................................................... 178<br />
C.4.2 Range ............................................................................................................................. 178<br />
C.5 Deviation Index (Relative Index) Formula .......................................................................... 179<br />
C.5.1 Definition ......................................................................................................................... 179<br />
C.5.2 Range ............................................................................................................................. 179<br />
C.6 The Recommended Target Exposure Index ( EI<br />
t ) ............................................................ 180<br />
Page 7 of 181<br />
RA20-129-035
<strong>VXvue</strong> <strong><strong>Use</strong>r</strong> <strong>Manual</strong><br />
Safety and Regulatory<br />
Safety Notice<br />
The following safety notices are used to emphasize certain safety instructions. Follow the safety instructions<br />
in this manual along with warnings and cautions symbols. Ignoring such warnings or cautions while handling<br />
the product may results in serious injury or accident. It is important <strong>for</strong> you to read and understand the<br />
contents of this manual be<strong>for</strong>e attempting to use the product.<br />
Symbols<br />
Descriptions<br />
Indicates a potentially hazardous situation which may cause minor personal injury or<br />
property damage if the instructions are ignored.<br />
Provides additional in<strong>for</strong>mation that is helpful to you. It may emphasize certain in<strong>for</strong>mation<br />
regarding special tools or items to check be<strong>for</strong>e operating the product.<br />
Page 8 of 181<br />
RA20-129-035
<strong>VXvue</strong> <strong><strong>Use</strong>r</strong> <strong>Manual</strong><br />
1. Introduction<br />
1.1 Getting Started<br />
The following login dialog will be displayed when you run <strong>VXvue</strong>.exe. To log in to <strong>VXvue</strong>, you need to enter<br />
registered ID and password.<br />
Figure 1.1 <strong>VXvue</strong> login dialog<br />
When you sign in using your ID and password with the Remember ID checkbox checked, the login ID will be<br />
remembered so that you can sign in without entering the ID.<br />
<strong><strong>Use</strong>r</strong> permissions <strong>for</strong> software features vary depending on the group of user accounts.<br />
For more in<strong>for</strong>mation about user rights <strong>for</strong> each user group, refer to chapter 8.1.2<br />
"Account Panel”.<br />
When you click the ER button, you can directly access to the ER mode without entering your ID and<br />
password.<br />
In the ER mode, you can use the Work and Exposure modes only.<br />
The following buttons will be disabled in the ER mode.<br />
- Patient Edit and Delete buttons in the Local panel of the Work mode.<br />
- Image Process, Send and Print buttons in the Exposure mode.<br />
Page 9 of 181<br />
RA20-129-035
<strong>VXvue</strong> <strong><strong>Use</strong>r</strong> <strong>Manual</strong><br />
1.2 How to use Mouse<br />
Mouse is a device to move cursor to choose an object on the screen.<br />
Followings are the instruction <strong>for</strong> using Mouse.<br />
• Left button click: Choose an image, menu or button to activate certain feature.<br />
• Right button click: Display option menus <strong>for</strong> the selected menu.<br />
• Ctrl key+ left button click: Choose multiple objects.<br />
• Left button double click: Execute special functions on each menu.<br />
• Scroll: Roll the mouse wheel (if applicable) up and down to switch between images<br />
when multiple images are selected.<br />
• Drag: Drag with the left mouse button pressed <strong>for</strong> adjusting parameters, changing<br />
object’s size or moving an object.<br />
Drag with the right mouse button pressed <strong>for</strong> adjusting Window Level on the<br />
main image window.<br />
Up<br />
Left<br />
Right<br />
Down<br />
Drag the mouse with pressing right button can be used with other features simultaneously.<br />
When it is active, the mouse cursor will be changed to<br />
Increasing and decreasing of Window Level can be mapped as four directions<br />
(Left/Right/Up/Down) when moving a mouse. Cursor speed also can be set.<br />
For more in<strong>for</strong>mation, refer to chapter 8.4 “Viewer Settings”.<br />
The basic and configurable action Window Level are as follows;<br />
- W1/W2 (basic action): W1/W2 is start/end value of Window to be displayed.<br />
- Contrast<br />
- Brightness<br />
Page 10 of 181<br />
RA20-129-035
<strong>VXvue</strong> <strong><strong>Use</strong>r</strong> <strong>Manual</strong><br />
2. <strong><strong>Use</strong>r</strong> Interface Layout<br />
2<br />
1<br />
Figure 2.1 <strong>VXvue</strong> <strong><strong>Use</strong>r</strong> Interface Layout<br />
1. Mode Tab: You can change the mode by clicking on each tab.<br />
2. Status Bar: Display currently logged in account, free space of hard drive, data transfer status<br />
to DICOM Storage or DICOM Print server, current time and date.<br />
<br />
Status of hard drive capacity<br />
Transmit status to DICOM Storage server. (success / total / fail)<br />
Transmit status to DICOM Print server. (success / total / fail)<br />
• Refer to Appendix A <strong>for</strong> in<strong>for</strong>mation of “Cursor and Icon List”.<br />
• Refer to the descriptions of each mode <strong>for</strong> the rest of layout.<br />
Click the transmit status icon of DICOM Storage or DICOM Print server to move to Queue<br />
panel (also available Setting > DICOM > Queue) where you can check the queues to<br />
DICOM Storage and DICOM Print server.<br />
Page 11 of 181<br />
RA20-129-035
<strong>VXvue</strong> <strong><strong>Use</strong>r</strong> <strong>Manual</strong><br />
3. Work Mode<br />
3.1 Worklist Panel<br />
Figure 3.1 Worklist Panel<br />
To use DICOM Worklist server, you must register the server (SCP) on “MWL Panel”<br />
described in chapter 8.8.2.<br />
Page 12 of 181<br />
RA20-129-035
<strong>VXvue</strong> <strong><strong>Use</strong>r</strong> <strong>Manual</strong><br />
3.1.1 Search Conditions<br />
You can search the scheduled orders from DICOM Worklist server configured and selected in MWL panel<br />
with the following conditions.<br />
• Patient ID: Input a patient ID to search.<br />
• Patient Name: Input a patient name to search.<br />
• Accession Number: Input accession number of study to search.<br />
• Station Name: Input a station name to search.<br />
• Modality: Select a modality to search.<br />
• Scheduled Date Range: Select a specific period of time to search.<br />
Select the checkbox on the left side of Station Name to use it. The default value <strong>for</strong><br />
Station Name can be modified on “System Panel” described in chapter 8.1.1. Modifying in<br />
Worklist Panel will affect only the current field but not change the default value.<br />
The special characters available to enter patient ID, name, accession number and station<br />
name are limited to ‘-, _, =, +, (,)’.<br />
Select the checkbox on the left side of Modality to use it. The selectable modalities are<br />
CR, DX and DR.<br />
3.1.1.1 Period Search Button<br />
• Today<br />
Search scheduled orders on today with entered search conditions immediately.<br />
• Week<br />
Search the latest scheduled orders within a week with entered search conditions immediately.<br />
• Month<br />
Search the latest scheduled orders within a month with entered search conditions immediately.<br />
Page 13 of 181<br />
RA20-129-035
<strong>VXvue</strong> <strong><strong>Use</strong>r</strong> <strong>Manual</strong><br />
3.1.2 Search<br />
Execute a search <strong>for</strong> scheduled order with entered search conditions.<br />
Search results from the selected sever are displayed among configured DICOM Worklist<br />
servers. For more in<strong>for</strong>mation about DICOM Worklist server setting, refer to chapter 8.8.2<br />
“MWL Panel”.<br />
3.1.3 Clear Search Conditions<br />
Clear all search conditions entered previously.<br />
To search without search conditions, click the Search button after clicking the Clear<br />
Search Conditions button.<br />
3.1.4 Save to Local<br />
Register the selected order to local database. You can check the saved orders in the local panel.<br />
3.1.5 Start Study<br />
Initiate study with the selected order.<br />
You can register both selected order and its related orders when patient ID and name are<br />
same.<br />
Page 14 of 181<br />
RA20-129-035
<strong>VXvue</strong> <strong><strong>Use</strong>r</strong> <strong>Manual</strong><br />
3.1.6 Register Emergency Study<br />
Register emergency study using patient in<strong>for</strong>mation automatic created.<br />
Emergency study’s patient ID will be entered in the <strong>for</strong>m of EM-YYMMDD-HHMMSS<br />
based on the current date and time. The emergency study’s patient name is entered as<br />
‘Urgent Patient’.<br />
3.1.7 Search Results List<br />
Search results will be displayed on the list.<br />
3.1.7.1 Sort<br />
You can sort by clicking on the header of each column.<br />
Figure 3.2 Sort<br />
Page 15 of 181<br />
RA20-129-035
<strong>VXvue</strong> <strong><strong>Use</strong>r</strong> <strong>Manual</strong><br />
3.1.7.2 Modifying Column<br />
You can modify which fields to be displayed on the search results by clicking the right mouse button, and<br />
then the More… button.<br />
Figure 3.3 Modifying Search Result Field (continuous)<br />
Figure 3.4 Modifying Search Result Field<br />
• Check Box: Indicate whether to display the field on the list of search results.<br />
• Move Up: Move the selected field upward in the list.<br />
• Move Down: Move the selected field downward in the list.<br />
• Show: Display the selected field on the list of search results.<br />
• Hide: Do not display the selected field on the list of search results.<br />
• Width: Adjust the size of selected column to be displayed on the search results.<br />
Check Box and Show/Hide buttons have same function.<br />
Page 16 of 181<br />
RA20-129-035
<strong>VXvue</strong> <strong><strong>Use</strong>r</strong> <strong>Manual</strong><br />
If there is no result value on DICOM Worklist server, the fields’ result is not displayed even the relevant fields<br />
are showed on the list.<br />
You can edit the following fields.<br />
• Scheduled Date/Time<br />
• Acc. No.<br />
• Patient ID<br />
• Patient Name<br />
• Sex<br />
• Age<br />
• Birth Date<br />
• Modality<br />
• Requested Procedure ID<br />
• Scheduled Procedure Step Desc.<br />
• Patient Comments<br />
• Study Description<br />
• Referring Physician<br />
• Species Description<br />
• Species Code Sequence<br />
• Breed Description<br />
• Breed Code Sequence<br />
• Breed Registration Number<br />
• Breed Registration Code Sequence<br />
• Responsible Person<br />
• Responsible Person Role<br />
• Responsible Organization<br />
• Sex Neutered<br />
• Scheduled Station AE Title<br />
• Requested Contrast Agent<br />
• Scheduled Per<strong>for</strong>ming Physician’s Name<br />
• Scheduled Station Name<br />
• Scheduled Procedure Step ID<br />
• Requested Procedure Description<br />
• Requested Procedure Code Sequence<br />
• Study Instance ID<br />
• Study Date/Time<br />
• Requested Procedure priority<br />
• Patient Transport Arrangements<br />
Page 17 of 181<br />
RA20-129-035
<strong>VXvue</strong> <strong><strong>Use</strong>r</strong> <strong>Manual</strong><br />
• Requested Procedure Location<br />
• Requesting Service<br />
• Visit Status ID<br />
• Patient Institution Residence<br />
• Current Patient Location<br />
• Admitting Diagnosis Description<br />
• Other Patient IDs<br />
• Other Patient Names<br />
• Patient Birth Time<br />
• Patient Size<br />
• Patient Weight<br />
• Ethnic Group<br />
• Occupation<br />
• Patient Address<br />
• Patient Telephone Numbers<br />
• Confidentiality Constraint on Patient<br />
• Additional Patient History<br />
• Patient State<br />
• Pregnancy Status<br />
• Medical Alerts<br />
• Allergies<br />
• Special Needs<br />
Page 18 of 181<br />
RA20-129-035
<strong>VXvue</strong> <strong><strong>Use</strong>r</strong> <strong>Manual</strong><br />
3.2 New Study Panel<br />
Figure 3.5 New Study Panel<br />
You can enter patient in<strong>for</strong>mation manually and then start study.<br />
For more in<strong>for</strong>mation about how to configure mandatory and optional registration fields,<br />
refer to chapter 8.2 “Work Settings”.<br />
The optional fields are displayed in white while required fields are displayed in green.<br />
Page 19 of 181<br />
RA20-129-035
<strong>VXvue</strong> <strong><strong>Use</strong>r</strong> <strong>Manual</strong><br />
3.2.1 Register Study<br />
Input the following in<strong>for</strong>mation to register studies.<br />
• Scheduled Date Time<br />
• Acc.No<br />
• Patient ID<br />
• Patient Name<br />
• Birth Date<br />
• Age / Sex<br />
• Size / Weight<br />
• Procedure: Bundle of steps<br />
• Referring Physician: Physician name who requested the study<br />
• Species Description<br />
• Species Code Sequence<br />
• Breed Description<br />
• Breed Code Sequence<br />
• Breed Registration Number<br />
• Breed Registration Code Sequence<br />
• Responsible Person<br />
• Responsible Person Role<br />
• Responsible Organization<br />
• Sex Neutered<br />
• Patient Comments<br />
• Study Description<br />
• When you move to the other field after entering patient ID, the patient’s in<strong>for</strong>mation is<br />
entered automatically if there is a patient registered with that patient ID. The related<br />
field to the in<strong>for</strong>mation is patient name, birth date, sex and patient’s comments.<br />
• You cannot register a study if you change the automatically entered patient<br />
in<strong>for</strong>mation (name, birth date and sex) in the previous registered study.<br />
• The patient’s age is calculated automatically using the birth date and current date.<br />
• Age is classified into Y (year), M (month) and D (day) and Sex is classified into M<br />
(male), F (female) and O (Other: unsettled or unidentified).<br />
• The units of size / weight are Metric (kg / cm) and English (lb / ft).<br />
• Refer to chapter 8.2 “Work Settings” <strong>for</strong> detailed in<strong>for</strong>mation.<br />
Page 20 of 181<br />
RA20-129-035
<strong>VXvue</strong> <strong><strong>Use</strong>r</strong> <strong>Manual</strong><br />
For more in<strong>for</strong>mation about how to configure Procedure, refer to chapter 8.6 “Procedure<br />
Settings”.<br />
The special characters available <strong>for</strong> Patient ID, Patient Name, Accession Number and<br />
Referring Physician are limited to ‘-, _, =, +, (,)’.<br />
3.2.1.1 Register Emergency Study<br />
Register Emergency Study using patient in<strong>for</strong>mation automatic created.<br />
Emergency patient’s ID will be entered in the <strong>for</strong>m of EM-YYMMDD-HHMMSS based on<br />
the current date and time. The emergency patient’s name is entered as ‘Urgent Patient’,<br />
whereas the currently inputted in<strong>for</strong>mation will not be saved.<br />
3.2.1.2 Add to Local<br />
Register the entered order in<strong>for</strong>mation to local database.<br />
3.2.1.3 Start Study<br />
Initiate study with entered order in<strong>for</strong>mation.<br />
When the study starts, the panel moves to the Exposure mode automatically.<br />
Page 21 of 181<br />
RA20-129-035
<strong>VXvue</strong> <strong><strong>Use</strong>r</strong> <strong>Manual</strong><br />
3.3 Local Panel<br />
Figure 3.6 Local Panel<br />
3.3.1 Search Conditions<br />
You can search a previously registered order entered in the local panel using the options below.<br />
• Patient ID: Input a patient ID of order to search.<br />
• Patient Name: Input a patient name of order to search.<br />
• Accession Number: Input accession number of order to search.<br />
• Patient Age: Input patient’s age of order to search. (Y: year, M: month, D: day)<br />
Input infant age on month or day unit. (younger than 1 year)<br />
• Patient Sex: Input a patient’s gender of order to search.<br />
(F: Female, M: Male, O: Other (unsettled or unidentified))<br />
• Scheduled Date Range: Input a specific period of time of order to search.<br />
Page 22 of 181<br />
RA20-129-035
<strong>VXvue</strong> <strong><strong>Use</strong>r</strong> <strong>Manual</strong><br />
3.3.1.1 Today<br />
Search the local order entered and registered today with the input search conditions immediately.<br />
3.3.1.2 Week<br />
Search the latest local order entered and registered within a week with the input search conditions<br />
immediately.<br />
3.3.1.3 Month<br />
Search the latest local order entered and registered within a month with the input search conditions<br />
immediately.<br />
3.3.2 Search<br />
Execute a search on local database with entered search conditions.<br />
Search results will be retrieved from local database.<br />
3.3.3 Clear Search Conditions<br />
Clear all search conditions entered previously.<br />
To search without search conditions, click the Search button after clicking this button.<br />
Page 23 of 181<br />
RA20-129-035
<strong>VXvue</strong> <strong><strong>Use</strong>r</strong> <strong>Manual</strong><br />
3.3.4 Start Study<br />
Initiate study with the selected order.<br />
3.3.5 Register Emergency Study<br />
Register the study of emergency study using patient in<strong>for</strong>mation automatic created.<br />
The patient ID of emergency study will be entered in the <strong>for</strong>m of EM-YYMMDD-HHMMSS<br />
based on the current date and time. The patient name of emergency study is entered as<br />
‘Urgent Patient’.<br />
3.3.6 Modify Order In<strong>for</strong>mation<br />
Modify order in<strong>for</strong>mation registered on local database.<br />
Changing order in<strong>for</strong>mation on local database will not change previously per<strong>for</strong>med study<br />
in<strong>for</strong>mation.<br />
Page 24 of 181<br />
RA20-129-035
<strong>VXvue</strong> <strong><strong>Use</strong>r</strong> <strong>Manual</strong><br />
3.3.7 Deleting Order In<strong>for</strong>mation<br />
Delete order in<strong>for</strong>mation saved on local database.<br />
Deleting order in<strong>for</strong>mation on local database will not delete previously per<strong>for</strong>med study<br />
in<strong>for</strong>mation.<br />
3.3.8 Search Results List<br />
When you select multiple items from the searched result list, the Patient Edit button will be<br />
disabled.<br />
For more in<strong>for</strong>mation, refer to chapter 3.1.7 “Search Results List”.<br />
Page 25 of 181<br />
RA20-129-035
<strong>VXvue</strong> <strong><strong>Use</strong>r</strong> <strong>Manual</strong><br />
4. Exposure Mode<br />
Exposure Mode allows you to acquire and process images <strong>for</strong> the registered study.<br />
4.1 Exposure<br />
You can acquire an image <strong>for</strong> registered study.<br />
You can quickly switch to Exposure Mode by double clicking the acquired image in the<br />
Image Processing Mode. Refer to chapter 4.2 “Image Manipulation Mode” <strong>for</strong> more<br />
in<strong>for</strong>mation.<br />
Study Tab<br />
Image Manipulation Tools<br />
Image Manipulation Mode Button<br />
Patient Size Slide<br />
Detector and Detector Status In<strong>for</strong>mation<br />
Thumbnail and Step<br />
Step Registration Window<br />
Exposure View<br />
Figure 4.1 Exposure Mode<br />
Page 26 of 181<br />
RA20-129-035
<strong>VXvue</strong> <strong><strong>Use</strong>r</strong> <strong>Manual</strong><br />
4.1.1 Study Tab<br />
• Swap between studies.<br />
• Close selected study.<br />
Patient Name, Patient ID, Accession Number and Study Description are marked in the<br />
study tab.<br />
4.1.2 Detector and Detector Status In<strong>for</strong>mation<br />
• The yellow selective frame is applied when a detector <strong>for</strong> exposure is selected.<br />
• Status in<strong>for</strong>mation of detector is displayed on its button.<br />
• Right click the detector mode button or press and hold the left button <strong>for</strong> 1.5 seconds to display detailed<br />
status in<strong>for</strong>mation of the detector.<br />
Figure 4.2 Detector Status In<strong>for</strong>mation<br />
• The type and status in<strong>for</strong>mation of detector are as follows.<br />
Detectors<br />
- 1717 wired detector (static)<br />
- 1417 wired detector (portable)<br />
- 1417 wireless detector (portable)<br />
- 1417 wireless detector connected with tether interface (portable)<br />
Page 27 of 181<br />
RA20-129-035
<strong>VXvue</strong> <strong><strong>Use</strong>r</strong> <strong>Manual</strong><br />
Status<br />
- Detector connected<br />
- Detector disconnected<br />
- Detector selected (yellow selective frame applied)<br />
- Detector in sleep mode (1417 portable wireless detector)<br />
- Images are not transmitted to the detector. (1417 potable wireless detector)<br />
- Updated in<strong>for</strong>mation in the detector<br />
You can check the following in<strong>for</strong>mation on the detector Info dialog.<br />
- Detector connection status<br />
- Detector temperature status<br />
- Battery in<strong>for</strong>mation (1417 portable wireless detector)<br />
- Wireless signal strength (1417 portable wireless detector)<br />
Refer to Appendix A “Cursor and Icon List” <strong>for</strong> icons of each status.<br />
4.1.3 Step Registration Window<br />
Register steps <strong>for</strong> scheduled study.<br />
Shape provides two types of shortcut.<br />
• Body Part Shortcut: When you click the Body Part shortcut, the Projection buttons appear on<br />
each side of Step Registration window. To register the step as a scheduled<br />
study, click the Projection button again.<br />
• Step Shortcut: When you click the Step shortcut, the step will be registered as a scheduled<br />
study immediately.<br />
Step is a combination of Body part and its projection. Refer to chapter 8.6.2 “Step Panel”<br />
<strong>for</strong> setting it.<br />
• For more in<strong>for</strong>mation about registering the shortcut, refer to the chapter 8.3<br />
“Exposure Settings”<br />
• For more in<strong>for</strong>mation about registering Projection, refer to the chapter 8.6.2 “Step<br />
Panel”.<br />
Page 28 of 181<br />
RA20-129-035
<strong>VXvue</strong> <strong><strong>Use</strong>r</strong> <strong>Manual</strong><br />
• Category: You can change the category of study.<br />
1. Click the left mouse button on the category area.<br />
2. Choose a category option you want on the pop-up window.<br />
Refer to chapter 8.3.1 “Category” <strong>for</strong> registering category.<br />
4.1.4 Patient Size Slide<br />
Select the size of patient with thickness. The setting value of image processing <strong>for</strong> each patient size is<br />
applied.<br />
The image processing can be applied <strong>for</strong> each combination of Body part, Projection and<br />
Size. Refer to chapter 8.6.2 “Step Panel” <strong>for</strong> setting image processing.<br />
Page 29 of 181<br />
RA20-129-035
<strong>VXvue</strong> <strong><strong>Use</strong>r</strong> <strong>Manual</strong><br />
4.1.5 Thumbnail and Step<br />
• Display the images of current study and the registered step <strong>for</strong> acquiring images.<br />
• Select a step to be exposed among the registered steps.<br />
Figure 4.3 Thumbnail and Step<br />
• The yellow framed item is the selected image that displayed on the thumbnail.<br />
• The step of item marked with is applied after acquiring images.<br />
The status in<strong>for</strong>mation of images displayed on thumbnail is as follows;<br />
- Backed up<br />
- Cleaned<br />
- Sent to the DICOM Print server.<br />
- Sent to the DICOM Storage server.<br />
- Rejected<br />
Refer to Appendix A “Cursor and Icon List” <strong>for</strong> icons of each status.<br />
Page 30 of 181<br />
RA20-129-035
<strong>VXvue</strong> <strong><strong>Use</strong>r</strong> <strong>Manual</strong><br />
4.1.6 Image Manipulation Mode Button<br />
View the images of current study in the image processing mode.<br />
4.1.7 Image Manipulation Tools<br />
You can control the image by clicking the image control button.<br />
The tools are synchronized to the image manipulation buttons of Process panel.<br />
The buttons added on “Tools Panel” in chapter 4.2.3 can be deleted, except the default<br />
buttons. Choose Remove from Image Process Tab message by clicking the right mouse<br />
button on added buttons you want to delete.<br />
• The default buttons cannot be deleted.<br />
Select, Zoom, Pan, Magic Glass, Crop<br />
For more in<strong>for</strong>mation about each button’s function, add and setting, refer to the chapter<br />
4.2.3 “Tools Panel”.<br />
4.1.8 Exposure View<br />
• Verify the acquired images.<br />
• Display in<strong>for</strong>mation of images.<br />
• Adjust Window Level by dragging the mouse while pressing and holding the right mouse button.<br />
Page 31 of 181<br />
RA20-129-035
<strong>VXvue</strong> <strong><strong>Use</strong>r</strong> <strong>Manual</strong><br />
4.2 Image Manipulation Mode<br />
• Per<strong>for</strong>m image processing <strong>for</strong> acquired images using various parameters.<br />
• Add annotations to the acquired images.<br />
• Manipulate the acquired images.<br />
• Stitch the acquired images to make a composed image.<br />
• Transfer the acquired images to DICOM Storage or DICOM Print server.<br />
Figure 4.4 Image Manipulation Mode<br />
Page 32 of 181<br />
RA20-129-035
<strong>VXvue</strong> <strong><strong>Use</strong>r</strong> <strong>Manual</strong><br />
4.2.1 Button <strong>for</strong> Switching to Exposure Mode<br />
Exit from the image Manipulation mode and switch back to the previous exposure mode.<br />
4.2.2 Process Panel<br />
Image Processing Parameter<br />
Image Manipulation buttons<br />
Parameter History<br />
Figure 4.5 Process Panel<br />
Page 33 of 181<br />
RA20-129-035
<strong>VXvue</strong> <strong><strong>Use</strong>r</strong> <strong>Manual</strong><br />
Image Reprocessing<br />
Per<strong>for</strong>m various image reprocessing <strong>for</strong> acquired images by selecting HS1 or HS2 algorithm.<br />
• Click the Change Step button to modify Step of the image. Then image will be reprocessed with image<br />
processing parameters which are associated with the selected step.<br />
• Click the Enhance Image button to reprocess the image with the image processing parameters which<br />
are associated with the selected step.<br />
• Click the Reset button to reprocess the image with the image processing parameters which are<br />
associated with the current image’s step.<br />
• Modify the parameter values in the Simple Image Processing Panel and click the Process button to<br />
reprocess the image.<br />
• When the image is reprocessed by changing parameter values, the values are added to the parameter<br />
history.<br />
• Double click the left mouse button on the list of the parameter history to reprocess the image with<br />
previously applied parameters.<br />
Image Manipulation Button<br />
You can manipulate images by clicking image manipulation buttons.<br />
The tools are synchronized to the image manipulation buttons of Process panel.<br />
The buttons added on “Tools Panel” in chapter 4.2.3 can be deleted except the default<br />
buttons. Choose Remove from Image Process Tab message by clicking the right mouse<br />
button on buttons you want to delete.<br />
• The default buttons cannot be deleted.<br />
Select, Zoom, Pan, Magic glass, Crop.<br />
For more in<strong>for</strong>mation about each button’s function, add and setting, refer to the chapter<br />
4.2.3 “Tools Panel”.<br />
Page 34 of 181<br />
RA20-129-035
<strong>VXvue</strong> <strong><strong>Use</strong>r</strong> <strong>Manual</strong><br />
The following buttons become deactivated when selecting backed up images.<br />
- Change Step, Enhance Image, Reset, Process<br />
4.2.3 Tools Panel<br />
Tools panel are organized with buttons of image manipulation, screen layout, annotations and specialized<br />
functions.<br />
Image Manipulation tools<br />
Screen Layout tools<br />
Annotations<br />
Specialized functions<br />
Figure 4.6 Tools Panel<br />
You can add / delete buttons of Tools panel to Image manipulation tools in the Exposure<br />
mode in chapter 4.1 and to Process panel of the Image manipulation mode in chapter<br />
4.2.2.<br />
Page 35 of 181<br />
RA20-129-035
<strong>VXvue</strong> <strong><strong>Use</strong>r</strong> <strong>Manual</strong><br />
• Choose Add from Image Process Tab message to add buttons by clicking the right<br />
mouse button on them.<br />
• The previously added buttons can be deleted by selecting Remove from Image<br />
Process Tab message by clicking right mouse button on the added buttons.<br />
The default buttons of Image manipulation tools in the Exposure mode in chapter 4.1 and Process panel of<br />
the Image manipulation mode in chapter 4.2.2 cannot be added.<br />
- Default Button: Select, Zoom, Pan, Magic glass, Crop.<br />
The screen layout buttons cannot be added.<br />
A yellow frame is not displayed on the following buttons as their functions are applied<br />
immediately. Previously selected buttons is not deactivated by clicking these buttons.<br />
- Inv., CW, CCW, flip, mirror, fit, 1:1, R Label, L Label, image process, convert raw, send to<br />
the DICOM Storage, send to the DICOM Print server, stitch, reject image, close study,<br />
close all study, edit patient.<br />
If you choose the following buttons, the shape of cursor is changed.<br />
- Select, zoom, magic glass, pan, W/L, crop, distance, angle, arrow, rectangle, ellipse,<br />
Rect ROI, Text.<br />
Refer to Appendix A “Cursor and Icon List” <strong>for</strong> cursor shape of each button.<br />
The following buttons become disabled when selecting backed up images.<br />
- Inv., Arrow, Rectangle, Ellipse, Rect ROI, Text, Image process, Stitch, Convert raw, reject<br />
Image.<br />
Page 36 of 181<br />
RA20-129-035
<strong>VXvue</strong> <strong><strong>Use</strong>r</strong> <strong>Manual</strong><br />
4.2.3.1 Select<br />
This is the default mouse cursor state.<br />
Click the Select button to choose other images in the current study or annotations in the selected image.<br />
The selected image in main image window and thumbnail images are synchronized and yellow frames are<br />
applied.<br />
Figure 4.7 Selected Study Image<br />
If you click the Select button on the Tools panel, the functions of previously selected<br />
buttons are deactivated.<br />
Page 37 of 181<br />
RA20-129-035
<strong>VXvue</strong> <strong><strong>Use</strong>r</strong> <strong>Manual</strong><br />
4.2.3.2 Select All<br />
Select all images in the current study.<br />
Figure 4.8 Selected All Images<br />
You can apply the following image manipulation functions to all selected images at once.<br />
• Inv., CW, CCW, flip vertical, flip horizontal, fit, 1:1, R label, L label, image process,<br />
send, print, stitch, convert raw image, reject image.<br />
• The other functions (annotations, etc.) are applied to selected images after clicking<br />
relevant buttons. At this time, the multi selecting is deactivated and a yellow frame<br />
is displayed on the relevant image only.<br />
The 1:1 can be applied only to the images displayed on the current screen.<br />
Page 38 of 181<br />
RA20-129-035
<strong>VXvue</strong> <strong><strong>Use</strong>r</strong> <strong>Manual</strong><br />
4.2.3.3 Zoom<br />
Enable interactive zooming by dragging the mouse with clicking the left mouse button.<br />
To zoom in and zoom out,<br />
• Click the Zoom button on the Tools Panel.<br />
• Move the mouse cursor to the main image window then the cursor will be changed to magic glass shape.<br />
• Drag the mouse with clicking left mouse button on the image to control zooming.<br />
Zoom in – Drag the mouse upward on the image.<br />
Zoom out – Drag the mouse downward on the image.<br />
• Release the mouse button to finish zooming.<br />
The maximum zoom ratio is 3200% and the minimum is 5%.<br />
An annotation added on the image is enlarged and reduced when you zoom in / out the<br />
image.<br />
4.2.3.4 Panning<br />
Per<strong>for</strong>m panning the image.<br />
To per<strong>for</strong>m panning,<br />
• Click the Pan button on the Tools Panel.<br />
• Move the mouse cursor to the main image window then the cursor will be changed to hand shape.<br />
• Drag the mouse with clicking left mouse button while panning the image to the desired position.<br />
Page 39 of 181<br />
RA20-129-035
<strong>VXvue</strong> <strong><strong>Use</strong>r</strong> <strong>Manual</strong><br />
4.2.3.5 Window / Level<br />
Change the window level – brightness and contrast of an image.<br />
The changed window level values are marked in Histogram in<strong>for</strong>mation on the image display window.<br />
Set Histogram in Image Overlay to display Histogram in<strong>for</strong>mation on the main image<br />
window. Refer to chapter 8.4 “Viewer Settings” <strong>for</strong> more in<strong>for</strong>mation.<br />
To adjust the window level of an image,<br />
• Click the W/L button on the Tools Panel.<br />
• Move the mouse cursor into the image area then the cursor will be changed.<br />
• Drag the mouse while clicking the left button to the desired Window/Level.<br />
Refer to chapter 1.2 “How to <strong>Use</strong> Mouse” <strong>for</strong> adjusting the window level by mouse<br />
dragging. It is the same drag function with a right mouse button.<br />
4.2.3.6 Pick W/L (Window / Level)<br />
Change the window level - brightness and contrast of the image based on the selected region of interest.<br />
The changed window level values are marked in Histogram in<strong>for</strong>mation on the image display window.<br />
Set Histogram in Image Overlay to display Histogram in<strong>for</strong>mation on the image display<br />
window. Refer to chapter 8.4 “Viewer Settings” <strong>for</strong> more in<strong>for</strong>mation.<br />
Page 40 of 181<br />
RA20-129-035
<strong>VXvue</strong> <strong><strong>Use</strong>r</strong> <strong>Manual</strong><br />
4.2.3.7 Magic Glass<br />
Magnify a specific region of interest.<br />
An annotation added on the image is enlarged and reduced when you zoom in / out the<br />
image.<br />
To magnify a local region of interest<br />
• Click the Magic Glass button on the Tools Panel.<br />
• Move the mouse cursor into the image area then the cursor will be changed to a magic glass shape.<br />
• Drag the mouse with clicking left button while dragging it to specific region of interest in the image that<br />
you want to magnify. The image in rectangle area around the position of the mouse cursor appears<br />
enlarged by 2 times to the current image scale.<br />
Figure 4.9 Magic Glass<br />
Page 41 of 181<br />
RA20-129-035
<strong>VXvue</strong> <strong><strong>Use</strong>r</strong> <strong>Manual</strong><br />
4.2.3.8 Crop<br />
Crop an image.<br />
To crop an image<br />
• Click the Crop button, then the rectangle shutter will be displayed in green dotted line.<br />
• The previously cropped image is displayed on the main image window same as the original image size,<br />
and the image out of a rectangle shutter frame becomes slightly darker.<br />
Figure 4.10 Crop<br />
• Locate the mouse cursor on the dotted lines or edges of square.<br />
• Drag the mouse with clicking left mouse button on the dotted line or edge to adjust shutter size.<br />
• Click the Select button to finish cropping of the image.<br />
• The cropped image is displayed as enlarged or reduced automatically as fitting it to the main image<br />
window.<br />
Page 42 of 181<br />
RA20-129-035
<strong>VXvue</strong> <strong><strong>Use</strong>r</strong> <strong>Manual</strong><br />
Figure 4.11 Crop<br />
To move rectangle shutter<br />
• Locate the mouse cursor inside of green dotted line.<br />
• Drag the mouse while clicking the left button to the desired region of image.<br />
To make dotted line of shutter to fit to the entire image size, locate the mouse cursor<br />
inside of the line and double-click the left mouse button.<br />
The shutter size is displayed inside of green dotted line by inch when resizing or moving<br />
the square shutter.<br />
Page 43 of 181<br />
RA20-129-035
<strong>VXvue</strong> <strong><strong>Use</strong>r</strong> <strong>Manual</strong><br />
4.2.3.9 Invert<br />
Invert black and white of an image.<br />
To invert an image<br />
• Click the Invert icon on the Tools Panel.<br />
Figure 4.12 Invert<br />
4.2.3.10 Clockwise Rotation<br />
Rotate an image by 90˚ clockwise.<br />
Figure 4.13 Clockwise Rotation<br />
Page 44 of 181<br />
RA20-129-035
<strong>VXvue</strong> <strong><strong>Use</strong>r</strong> <strong>Manual</strong><br />
4.2.3.11 Counterclockwise Rotation<br />
Rotate an image by 90˚ counterclockwise.<br />
Figure 4.14 Counterclockwise Rotation<br />
4.2.3.12 Flip<br />
Flip an image vertically.<br />
Figure 4.15 Flip<br />
Page 45 of 181<br />
RA20-129-035
<strong>VXvue</strong> <strong><strong>Use</strong>r</strong> <strong>Manual</strong><br />
4.2.3.13 Mirror<br />
Flip an image horizontally.<br />
Figure 4.16 Mirror<br />
4.2.3.14 Fit to Screen<br />
Fit an image to the main image window size.<br />
If the image is cropped, the cropped area of the image will be fit to the window.<br />
Page 46 of 181<br />
RA20-129-035
<strong>VXvue</strong> <strong><strong>Use</strong>r</strong> <strong>Manual</strong><br />
4.2.3.15 1:1 (Actual Size View)<br />
Display an image in its actual size.<br />
Figure 4.17 Actual Size View<br />
You must configure the pixel size of the monitor as described in chapter 8.1.3<br />
“Miscellaneous Panel”. This function may malfunction if the pixel size of the monitor is<br />
configured incorrectly or not configured.<br />
4.2.3.16 R/L Mark<br />
Add the green R (right) / L (left) label to the left and right top of the image.<br />
Figure 4.18 Add R/L Mark<br />
Page 47 of 181<br />
RA20-129-035
<strong>VXvue</strong> <strong><strong>Use</strong>r</strong> <strong>Manual</strong><br />
To add R / L label<br />
• Click the R (Right) / L (Left) Label button.<br />
To move R / L label<br />
• Click the Select button.<br />
• Drag the mouse with clicking left mouse button on the label while moving it to the area you want.<br />
To delete R / L label<br />
• Click the Select button<br />
• Click the Delete button after choosing the label to be deleted.<br />
When you click the R / L label button, R / L label is displayed on the left / right top’s<br />
appointed position at the main image window. If R / L label already exists on the image, it<br />
is changed with a new one on the appointed area ignoring its moving and changes.<br />
To set color, font and size of R / L label, refer to ‘Annotation Font & Color’ in chapter 8.4<br />
“Viewer Settings”.<br />
4.2.3.17 1×1 Layout<br />
Display one image on the main image window.<br />
Figure 4.19 1×1 Layout<br />
Page 48 of 181<br />
RA20-129-035
<strong>VXvue</strong> <strong><strong>Use</strong>r</strong> <strong>Manual</strong><br />
4.2.3.18 2×2 Layout<br />
Display four images on the main image window.<br />
Figure 4.20 2×2 Layout<br />
4.2.3.19 3×3 Layout<br />
Display nine images on the main image window.<br />
Figure 4.21 3×3 Layout<br />
Page 49 of 181<br />
RA20-129-035
<strong>VXvue</strong> <strong><strong>Use</strong>r</strong> <strong>Manual</strong><br />
4.2.3.20 <strong><strong>Use</strong>r</strong> Defined Layout<br />
Allow to customize the image layout within 4x4 layout (maximum) displayed on the main image window.<br />
Ex) 4x1, 1x2..<br />
To customize image layout<br />
• Click the <strong><strong>Use</strong>r</strong> Defined Layout button on the Tools Panel then the following dialog box will appear.<br />
Figure 4.22 Dialog of <strong><strong>Use</strong>r</strong> Defined Layout<br />
• Select the image layout by dragging the mouse over the grid until the right numbers of rows and<br />
columns are highlighted.<br />
• Click the OK button. Then the layout will be changed.<br />
Page 50 of 181<br />
RA20-129-035
<strong>VXvue</strong> <strong><strong>Use</strong>r</strong> <strong>Manual</strong><br />
4.2.3.21 Distance<br />
Measure distances between two points on the image.<br />
You must configure Pixel Spacing option <strong>for</strong> each detector exactly through VXSetup.<br />
Otherwise, discrepancies may occur between the measured distance and the actual<br />
distance.<br />
To draw a line and measure distance<br />
• Click the Distance button on the Tools Panel.<br />
• Move the mouse cursor to the main image window, then the cursor will be changed to the ruler shape.<br />
• Drag the mouse with clicking left button while moving it from starting point (A) you want to measure<br />
distance to another B point to draw a line.<br />
• The distance between two points (A and B) will be calculated and displayed automatically.<br />
To modify and move measurements<br />
• Click the Select button and select the distance annotation.<br />
• Click the measured line (AB), select the point of line (A or B), and then drag the mouse with clicking left<br />
button while moving it to the position you want to re-measure, then the value of angle will be calculated<br />
and displayed automatically.<br />
• Move the mouse into a red frame and drag it with clicking left mouse button to move the measured value<br />
mark.<br />
• Drag the mouse with clicking left button on the line (AB) to move the distance annotation.<br />
Figure 4.23 Distance<br />
Page 51 of 181<br />
RA20-129-035
<strong>VXvue</strong> <strong><strong>Use</strong>r</strong> <strong>Manual</strong><br />
To delete a line,<br />
• Click the Select icon.<br />
• Choose the distance annotation and press the Delete key.<br />
4.2.3.22 Angle<br />
Measure the angle between three points over an image. When you complete drawing an angle, the value of<br />
the angle will be computed and displayed automatically.<br />
To draw an angle<br />
• Click the Angle button on the Tools Panel.<br />
• Move the mouse cursor to the main image window then the cursor will be changed.<br />
• Drag the mouse with clicking left button while moving it from A point you want to measure angle to<br />
another B point to draw a line<br />
• Then a virtual line from A to C point is drawn when clicking C point with the left mouse button, and the<br />
measured angle will be calculated and displayed automatically on the initial point (A) where line (AB)<br />
and line (AC) are met.<br />
To modify and move an angle<br />
• Click the Select button and select the distance annotation.<br />
• Choose a point to be re-measured among 3 points. (A, B, C) Drag the mouse with clicking left button<br />
while moving it to the other point, then the value of angle will be calculated and displayed automatically.<br />
• Drag the mouse with clicking left button while moving it into the red frame to move the measured value<br />
mark.<br />
• Drag the mouse with clicking left button on the line (AB or AC) to move the angle annotation.<br />
Figure 4.24 Angle<br />
Page 52 of 181<br />
RA20-129-035
<strong>VXvue</strong> <strong><strong>Use</strong>r</strong> <strong>Manual</strong><br />
To delete an angle annotation<br />
• Click the Select icon.<br />
• Select the angle annotation and press the Delete key.<br />
4.2.3.23 Arrow<br />
Draw an arrow on the image.<br />
To draw an arrow<br />
• Click the Arrow button on the Tools Panel.<br />
• Move the mouse cursor to the main image window and then the cursor will be changed to arrow shape.<br />
• Drag the mouse with clicking left button while moving mouse from one point to another to draw an arrow.<br />
To move an arrow annotation<br />
• Click the Select button, move the mouse cursor on the arrow and then drag the mouse with clicking left<br />
button.<br />
Figure 4.25 Arrow<br />
To resize an arrow annotation<br />
• Click the Select button and select the arrow annotation.<br />
• Drag the mouse with clicking left button on one end of the arrow and drag it to the desired size.<br />
To delete an arrow annotation<br />
• Click the Select button.<br />
• Select the arrow annotation and then press the Delete key.<br />
Page 53 of 181<br />
RA20-129-035
<strong>VXvue</strong> <strong><strong>Use</strong>r</strong> <strong>Manual</strong><br />
4.2.3.24 Rectangle<br />
Draw a rectangle over an image to indicate a region of interest.<br />
To draw a rectangle<br />
• Click the Rect icon on the Tools Panel.<br />
• Move the mouse cursor to the main image window, and then the cursor will be changed to rectangle<br />
shape.<br />
• Drag the mouse with clicking left button from one point to draw rectangle to other point of diagonal<br />
direction.<br />
To move the rectangle annotation<br />
• Click the Select button and select the rectangle annotation.<br />
• Locate the mouse cursor on the one line of the rectangle, and then drag the mouse with clicking left<br />
button to move rectangle annotation.<br />
Figure 4.26 Rectangle<br />
To resize the rectangle annotation<br />
• Click the Select button and select the rectangle annotation.<br />
• Locate the mouse cursor on the corner of the rectangle and then drag the mouse with clicking left button<br />
to the desired size.<br />
To delete the rectangle<br />
• Click the Select icon.<br />
• Select the rectangle annotation, and then press the Delete key.<br />
Page 54 of 181<br />
RA20-129-035
<strong>VXvue</strong> <strong><strong>Use</strong>r</strong> <strong>Manual</strong><br />
4.2.3.25 Ellipse<br />
Draw an ellipse (including circle) over an image <strong>for</strong> indicating a region of interest.<br />
To draw an ellipse<br />
• Click the Ellipse icon on the Tools Panel.<br />
• Move the mouse cursor to the main image window, and then the mouse pointer will be changed to an<br />
ellipse shape.<br />
• Drag the mouse with clicking left button from one point to draw ellipse to other point of diagonal direction<br />
To move the ellipse<br />
• Click the Select button and select the annotation of ellipse.<br />
• Move the mouse cursor around the rectangle line of ellipse, and then drag the mouse with clicking left<br />
button to move ellipse annotation.<br />
To resize the ellipse<br />
• Click the Select button and select the annotation of ellipse.<br />
• Drag the mouse with clicking left button on one corner of the rectangle around the ellipse to the desired<br />
size.<br />
Figure 4.27 Ellipse<br />
To delete the ellipse<br />
• Click the Select icon.<br />
• Select the ellipse annotation and then press the Delete key.<br />
Page 55 of 181<br />
RA20-129-035
<strong>VXvue</strong> <strong><strong>Use</strong>r</strong> <strong>Manual</strong><br />
4.2.3.26 Displaying ROI In<strong>for</strong>mation (Rect. ROI)<br />
Draw a rectangle on the image and Insert in<strong>for</strong>mation of ROI (Rectangular Region of Interest) in it.<br />
The displayed in<strong>for</strong>mation in the rectangle is minimum value, maximum value, average value and standard<br />
deviation.<br />
Figure 4.28 Displaying ROI In<strong>for</strong>mation<br />
To move a rectangle<br />
• Click the Select button and move the mouse cursor to the line of rectangle, then drag the mouse with<br />
clicking left button.<br />
To resize the rectangle<br />
• Click the Select button and select the Rect. ROI annotation.<br />
• Locate the mouse cursor on the corner of the rectangle and then drag the mouse with clicking left button<br />
to the desired size.<br />
To delete the rectangle<br />
• Click the Select button and select the rectangle<br />
• Press the Delete key.<br />
Page 56 of 181<br />
RA20-129-035
<strong>VXvue</strong> <strong><strong>Use</strong>r</strong> <strong>Manual</strong><br />
4.2.3.27 Text Annotation<br />
Attach text annotation to the image.<br />
To add a text annotation<br />
• Click the Text button on the Tools Panel.<br />
• Move the mouse cursor to the main image window, and then the cursor will be changed to T shape.<br />
• Drag the mouse with clicking left button to the desired rectangular box size where you want to add a text<br />
annotation.<br />
• Click in the text box and type text annotation.<br />
• If the entered text is longer than the length of text box, it moves to the next line automatically.<br />
Press the Enter key if you want to move to the next line.<br />
• To finish typing, move the mouse cursor out of the text box.<br />
To move the text annotation<br />
• Click the Select button and move the mouse cursor in the text box, then drag the mouse with clicking<br />
left button.<br />
Figure 4.29 Text Annotation<br />
To resize the text box<br />
• Click the Select button and locate mouse cursor on each corner of the text box, then drag the mouse<br />
with clicking left button to the desired size.<br />
To delete the text annotation<br />
• Click the Select button and select text annotation.<br />
• Press the Delete key.<br />
Page 57 of 181<br />
RA20-129-035
<strong>VXvue</strong> <strong><strong>Use</strong>r</strong> <strong>Manual</strong><br />
To modify the text annotation<br />
• Click the Select button and select text annotation.<br />
• Double click the left mouse button in the selected text box to change with text input status.<br />
• Change or add text annotation.<br />
• To finish typing, move the mouse cursor out of the text box.<br />
4.2.3.28 Show/Hide Annotations (Hide Ann.)<br />
Show or hide all annotations on the image.<br />
To show/hide annotations<br />
• Click the Hide Ann button on the Tools Panel.<br />
• If the Hide Ann button is deactivated, the annotations will be displayed on the image.<br />
• If the Hide Ann button is activated, the annotation will be hidden.<br />
Figure 4.30 Show/Hide Ann<br />
If you add an annotation when the Hide Ann button is activated, the Hide Ann button will<br />
be automatically deactivated.<br />
Page 58 of 181<br />
RA20-129-035
<strong>VXvue</strong> <strong><strong>Use</strong>r</strong> <strong>Manual</strong><br />
4.2.3.29 Delete Annotations (Delete Ann.)<br />
Delete the selected annotations.<br />
To delete annotations<br />
• Click the Select button, select an annotation and then click the Delete Ann. button.<br />
• To delete multiple annotations, click the Select button.<br />
• Multi-select annotations with the Ctrl key and then click the Delete key or the Delete Ann. button.<br />
If you drag the mouse while clicking the left button on the point where there is no<br />
annotation and draw boxes, all annotations in the box are selected when the Select<br />
button is activated.<br />
Figure 4.31 Delete Annotations<br />
Page 59 of 181<br />
RA20-129-035
<strong>VXvue</strong> <strong><strong>Use</strong>r</strong> <strong>Manual</strong><br />
4.2.3.30 Image Process<br />
Change image process parameters and apply them to the currently selected image.<br />
To process images<br />
• Click the Select button and select an image to reprocess.<br />
• Click the Image Process button and then the image process pop-up widow is displayed.<br />
• The previously step applied on the selected image has been added to Selected Step List, and the<br />
relevant parameter is displayed.<br />
• If you want to reprocess the image with other step, select a step in the Step list to apply it on the current<br />
selected image. Then the step will be added to Selected Step List.<br />
• Change the image process parameter and click the Process button to reprocess with these parameters.<br />
• Click the Update button to save the changed parameter to apply it on the selected step.<br />
• Click the Reset button to change with default parameter as a latest saved one.<br />
Figure 4.32 Image Process Parameters<br />
Page 60 of 181<br />
RA20-129-035
<strong>VXvue</strong> <strong><strong>Use</strong>r</strong> <strong>Manual</strong><br />
For more in<strong>for</strong>mation, refer to chapter 8.6.2 “Step Panel”.<br />
Drag the mouse with clicking left button on a title bar in the image process pop-up window<br />
to other desired location.<br />
4.2.3.31 Transfer<br />
Transfer images to DICOM Storage server.<br />
The image will be transferred to all servers which are registered on DICOM Storage<br />
configuration.<br />
You can select All image or Selected in the selected study when sending images to<br />
DICOM Storage server.<br />
Page 61 of 181<br />
RA20-129-035
<strong>VXvue</strong> <strong><strong>Use</strong>r</strong> <strong>Manual</strong><br />
4.2.3.32 Print<br />
Select the image to print and click the Print button to add images to Print Mode. The mode is switched to<br />
“Print Mode” described in chapter 7 automatically.<br />
You can select All image or Selected in the selected study which sends images to<br />
DICOM print server.<br />
Click the Print button in Print Mode to print images by DICOM print server after<br />
manipulating image and adjusting layout.<br />
Page 62 of 181<br />
RA20-129-035
<strong>VXvue</strong> <strong><strong>Use</strong>r</strong> <strong>Manual</strong><br />
4.2.3.33 Stitch<br />
Figure 4.33 Image stitching<br />
To combine images<br />
• Select images in the same study.<br />
• Click the Stitch button, and then the Image Stitching dialog will appear.<br />
• Adjust the border.<br />
• Align orders of image by moving images.<br />
• Move and align the area of images to be stitched.<br />
• Adjust brightness of each image and click the Blend button to blend brightness of the images you want<br />
to stitch if needed.<br />
• Check the adjustment and result of combined images with Zoom View, Pan, W/L, Crop and Reset button.<br />
• Click the OK button.<br />
• Assign step, then new study will be created with stitched image in database.<br />
• The maximum numbers of images to be stitched are six.<br />
• You cannot stitch the previous stitched image to another image.<br />
• Only the raw images with same size can be stitched.<br />
Page 63 of 181<br />
RA20-129-035
<strong>VXvue</strong> <strong><strong>Use</strong>r</strong> <strong>Manual</strong><br />
• Make enough caution when taking images to stitch correctly.<br />
• Overlapped region between images should be longer than 10 cm.<br />
• Prevent or minimize the movement of patient during the whole process of taking<br />
images <strong>for</strong> stitch.<br />
• The proper shift of detector or tube is necessary during the whole process of taking<br />
images <strong>for</strong> stitch.<br />
Border Adjust Menu<br />
• Crop unnecessary area from the image.<br />
• After adjusting, click the Border Confirm button to apply adjusted border.<br />
To adjust border<br />
• Click the Border Adjust button.<br />
• Click the image and drag the green dotted line to crop.<br />
• Click the Border Confirm button.<br />
Sort Image Menu<br />
• Set the position of the images.<br />
To sort images<br />
• Click the image.<br />
• Click ▲ to move image upward or click ▼ to move image downward.<br />
Page 64 of 181<br />
RA20-129-035
<strong>VXvue</strong> <strong><strong>Use</strong>r</strong> <strong>Manual</strong><br />
Auto Stitch Menu<br />
• Click the Auto Stitch button, align images to the matched region by matching the same image pattern<br />
automatically and adjust brightness.<br />
• Click the Setting button to change parameters <strong>for</strong> Auto Stitch.<br />
Figure 4.34 Auto Stitch Menu<br />
Maximum search rate of height: Set the maximum height rate to search same patterns in each<br />
image <strong>for</strong> stitching. (Recommended rate: 25~35%)<br />
Height rate of overlapped region: Set the height rate of overlapped region between images to be<br />
stitched. (Recommended rate: 5~10%)<br />
Width rate of overlapped region: Set the width rate of overlapped region between images to be<br />
stitched. (Recommended rate: 80%)<br />
Resample strength: Set re-sampling strength of the stitched area.<br />
(Recommended value: 5~20 pixels)<br />
Scan level: Set the pixel block unit to be scanned to search the stitched area.<br />
(Recommended value: 10~30 pixels)<br />
When you use the Auto Stitch function, we recommend checking the alignment of images.<br />
You have to align images and adjust brightness manually <strong>for</strong> fine alignment.<br />
Page 65 of 181<br />
RA20-129-035
<strong>VXvue</strong> <strong><strong>Use</strong>r</strong> <strong>Manual</strong><br />
Position Menu<br />
Align images by moving images manually.<br />
To align images<br />
• Click the image.<br />
• Set speed of moving the image.<br />
• Put image to front or back.<br />
• Click ▲ to move image upward.<br />
• Click ▼ to move image downward.<br />
• Click ◀ to move image right.<br />
• Click ▶ to move image left.<br />
Brightness Menu<br />
Adjust offset of brightness <strong>for</strong> the image to match brightness of images.<br />
• Click the image.<br />
• Set speed of brightness adjustment.<br />
• Click + or - button to adjust.<br />
+: Increase brightness offset.<br />
-: Decrease brightness offset.<br />
Blend<br />
Blend the brightness of each border to eliminate the difference in brightness.<br />
Reset<br />
Reset all adjustments and manipulation of images to initial state.<br />
The stitched image will be added to the study which original images belong to.<br />
Image in<strong>for</strong>mation such as patient, study and series in<strong>for</strong>mation will be inherited from the<br />
original images<br />
Page 66 of 181<br />
RA20-129-035
<strong>VXvue</strong> <strong><strong>Use</strong>r</strong> <strong>Manual</strong><br />
4.2.3.34 Convert to Raw Image<br />
Restore the processed images to raw images.<br />
4.2.3.35 Image Reject<br />
Reject selected images.<br />
To reject images<br />
• Select images to be rejected.<br />
• Click the Reject button.<br />
• Enter password of the current login account<br />
• In the Reason options, select the preset reason or enter your own reason.<br />
Page 67 of 181<br />
RA20-129-035
<strong>VXvue</strong> <strong><strong>Use</strong>r</strong> <strong>Manual</strong><br />
• The Reason input item is displayed only when setting Reason function to use.<br />
• The user input reason is registered automatically and displayed in the list when you<br />
reject images next time.<br />
• The rejected image can be restored. Refer to chapter 8.9 “Setting Reject” <strong>for</strong><br />
restoration process and reason configuration.<br />
4.2.3.36 Close Study<br />
Close the current study.<br />
4.2.3.37 Close All Study<br />
Close all open studies.<br />
Page 68 of 181<br />
RA20-129-035
<strong>VXvue</strong> <strong><strong>Use</strong>r</strong> <strong>Manual</strong><br />
4.2.3.38 Modifying Study In<strong>for</strong>mation<br />
Modify patient and study in<strong>for</strong>mation on the current study.<br />
To modify study in<strong>for</strong>mation<br />
• Click the Edit Patient button, then the Edit Patient dialog will appear to modify study in<strong>for</strong>mation.<br />
Figure 4.35 Modifying Study In<strong>for</strong>mation<br />
• Modify study in<strong>for</strong>mation and click the Edit button.<br />
• You should input value in the green fields. If one of these fields is blank, you cannot<br />
modify the study in<strong>for</strong>mation.<br />
• For more in<strong>for</strong>mation about configuring mandatory and optional fields, refer to<br />
chapter 8.2 “Work Settings”.<br />
Page 69 of 181<br />
RA20-129-035
<strong>VXvue</strong> <strong><strong>Use</strong>r</strong> <strong>Manual</strong><br />
4.2.4 Label Panel<br />
Figure 4.36 Label Panel<br />
All buttons of the Label panel are deactivated and and cannot be used if the selected<br />
image is backed up.<br />
Page 70 of 181<br />
RA20-129-035
<strong>VXvue</strong> <strong><strong>Use</strong>r</strong> <strong>Manual</strong><br />
4.2.4.1 R/L Label<br />
Put green R (right) / L (left) Label on the image.<br />
Figure 4.37 R/L Label<br />
To put R/L label<br />
• Choose the position to put R/L label from the Insert Position dropdown list.<br />
• Click the Right or Left button.<br />
To move the label<br />
• Click the Select button on the Tools panel.<br />
• Drag the mouse while clicking the left button on the label and move it to the desired position.<br />
To remove the label<br />
• Click the Select button on the Tools panel.<br />
• Select the label and press the Delete key.<br />
When you click the R/L label button, R/L label is displayed on the selected position<br />
among left top, right top, left bottom and right bottom at the main image window.<br />
If R/L label already exists on the image, it is changed with a new one on the appointed<br />
area ignoring its moving and changes.<br />
To set color, font and size of R/L label, refer to ‘Annotation Font & Color’ in chapter 8.4<br />
“Viewer Settings”.<br />
Page 71 of 181<br />
RA20-129-035
<strong>VXvue</strong> <strong><strong>Use</strong>r</strong> <strong>Manual</strong><br />
R/L label has the same function of “R/L Mark”, described in chapter 4.2.3.16<br />
4.2.4.2 Image Laterality<br />
Set body parts of the image as unity, right / left or both (defined by DICOM).<br />
To input unity, right / left or both labels of the body part<br />
• Click the U, L, R, or B button to select unity, left, right and both of body part in the image.<br />
• Click the Set button to apply.<br />
Figure 4.38 Image Laterality<br />
To display Laterality, refer to ‘Image Overlay’ in chapter 8.4 “Viewer Settings”.<br />
Page 72 of 181<br />
RA20-129-035
<strong>VXvue</strong> <strong><strong>Use</strong>r</strong> <strong>Manual</strong><br />
4.2.4.3 Patient Orientation<br />
Set the patient orientation<br />
To input patient orientation<br />
• Click the Orientation button.<br />
• Input patient orientation on the top and left area of the exposed image. (Defined by DICOM)<br />
• Click the Set button <strong>for</strong> configuring patient orientation.<br />
• The patient orientations configured on each top / bottom / left / right of the image are displayed with “[ ]”<br />
labels and the bottom and right orientations are displayed as symmetric directions automatically.<br />
Figure 4.39 Patient Orientation<br />
Page 73 of 181<br />
RA20-129-035
<strong>VXvue</strong> <strong><strong>Use</strong>r</strong> <strong>Manual</strong><br />
5. Database Mode<br />
Database Mode allows you to review past studies.<br />
Figure 5.1 Database Mode<br />
Page 74 of 181<br />
RA20-129-035
<strong>VXvue</strong> <strong><strong>Use</strong>r</strong> <strong>Manual</strong><br />
5.1 Search Condition<br />
You can search the past studies using the following conditions on database.<br />
Figure 5.2 Database Search<br />
• Patient ID: Input a patient ID of study to search.<br />
• Patient Name: Input a patient name of study to search.<br />
• Accession Number: Input a patient’s accession number of study to search.<br />
• Body Part: Input a body part of study to search.<br />
• Patient Age: Input a patient’s age of study as year, month and day <strong>for</strong>m. (Y, M, D)<br />
• Patient Sex: Input a patient sex of study to search. (F, M. O)<br />
• Study Date: Choose the date of study to search.<br />
To search with search conditions<br />
• Enter the search conditions such as patient ID, name, accession number, Body Part, sex, age, etc, and<br />
then click the Search button in the search menu.<br />
To search with date range<br />
• Input a specific period of time to search and click the Search button in the search menu.<br />
Period search buttons<br />
• Today: Search the study examined today with the entered condition immediately.<br />
• Week: Search the study examined within a week with the entered condition immediately.<br />
• Month: Search the study examined within a month with the entered condition immediately.<br />
Page 75 of 181<br />
RA20-129-035
<strong>VXvue</strong> <strong><strong>Use</strong>r</strong> <strong>Manual</strong><br />
5.2 Search Menu<br />
5.2.1 Search<br />
Execute a search in the local database using search conditions.<br />
Check search result on the local database.<br />
5.2.2 Clear Search Conditions<br />
Clear all search conditions entered previously.<br />
To search all without search conditions, click the Search button after clicking the Clear<br />
Search Conditions button.<br />
5.2.3 New Study<br />
Register a new study in the Exposure mode using the patient in<strong>for</strong>mation of previous studies.<br />
To create new study<br />
• Select a study in the searched study list.<br />
• Click the New Study button and then the screen is changed to “Exposure Mode” described in chapter 4.<br />
• A new study created by patient in<strong>for</strong>mation of the selected study is registered and ready to be acquired.<br />
• A new image is acquired in the Exposure mode.<br />
• Close the study by closing the Study tab in the Exposure mode or pressing the Close study button.<br />
Page 76 of 181<br />
RA20-129-035
<strong>VXvue</strong> <strong><strong>Use</strong>r</strong> <strong>Manual</strong><br />
5.2.4 Insert<br />
Register a previous study in the Exposure mode to acquire additional images.<br />
To insert images into the study<br />
• Select a study that needs additional exposure in the searched study list.<br />
• Click the Insert button and then the screen is changed to “Exposure Mode” described in chapter 4.<br />
• The selected study is open and ready to be acquired in Exposure Mode.<br />
• A new image is acquired in the Exposure mode.<br />
• Close the study by closing the Study tab in the Exposure mode or pressing the Close study button.<br />
This button becomes disabled when selecting backup study or studies displaying on other<br />
modes.<br />
5.2.5 Move Image<br />
Move partial or total images of the selected study in searched studies to other studies.<br />
To move images<br />
• Select a study in the searched study list to move images.<br />
• Select multiple images in the thumbnail to move partial images of the selected study.<br />
• Click the Move Image button.<br />
• Select All Image or Selected on the pop-up message.<br />
Page 77 of 181<br />
RA20-129-035
<strong>VXvue</strong> <strong><strong>Use</strong>r</strong> <strong>Manual</strong><br />
• Select a target study in the pop-up searched study list and click the OK button.<br />
The source study including images to move will not be displayed on the target study list.<br />
Figure 5.3 Searched Study List<br />
• A target study is automatically selected in the searched study list after completing moving images.<br />
Check the moved image from thumbnail or open the target study to check its result.<br />
• A study without images can be rejected as they are moved to other studies.<br />
• The Move Image button becomes disabled when selecting backup study or studies<br />
displaying on other modes.<br />
5.2.6 Modify Study In<strong>for</strong>mation<br />
Modify study in<strong>for</strong>mation of the selected previous study.<br />
The in<strong>for</strong>mation of the previous study with same patient ID is modified if you change the<br />
patent in<strong>for</strong>mation.<br />
This button becomes disabled when selecting backup study or studies displaying on other<br />
modes.<br />
Page 78 of 181<br />
RA20-129-035
<strong>VXvue</strong> <strong><strong>Use</strong>r</strong> <strong>Manual</strong><br />
5.3 Database Menu<br />
Figure 5.4 Database Menu<br />
5.3.1 Open<br />
Open the selected study.<br />
To open a study<br />
• Select a study from the searched study list.<br />
• Click the Open button.<br />
• The screen is changed to Viewer Mode and the selected study is opened.<br />
• The first image of the selected study is displayed on the main image window.<br />
• Double click the mouse on the searched result list to open the selected study.<br />
• Double click the mouse on the image displayed on the thumbnail to open the selected<br />
study and to display the selected image on the main image window.<br />
Page 79 of 181<br />
RA20-129-035
<strong>VXvue</strong> <strong><strong>Use</strong>r</strong> <strong>Manual</strong><br />
5.3.2 Reject Study<br />
Reject the selected study.<br />
To reject a study<br />
• Select a study from the searched results.<br />
• Click the Reject button.<br />
• Enter password of the current login account.<br />
• Select the preset reason in Reason, or input your own reason.<br />
• The Reason input item is displayed only when setting Reason function to use.<br />
• The user input reason is registered automatically and displayed in the list when<br />
rejecting images next time.<br />
• Refer to chapter 8.9 “Setting Reject” <strong>for</strong> restoration process and Reason<br />
configuration.<br />
Page 80 of 181<br />
RA20-129-035
<strong>VXvue</strong> <strong><strong>Use</strong>r</strong> <strong>Manual</strong><br />
5.3.3 Export<br />
Convert images to various <strong>for</strong>mats from selected studies and save/export them to the local storage, external<br />
storage device (USB stick, HDD) or optical media. (CD/DVD)<br />
Figure 5.5 Converting/Exporting Image<br />
Page 81 of 181<br />
RA20-129-035
<strong>VXvue</strong> <strong><strong>Use</strong>r</strong> <strong>Manual</strong><br />
• Patient ID: Display the patient ID of study to export.<br />
If you select multiple studies, some IDs are displayed as ‘….’<br />
• Name: Display the patient name of study to export.<br />
If you select multiple studies, some names are displayed as ‘….’<br />
• Target Image: Select an image to be exported.<br />
All Image: Export all images in the selected studies.<br />
Selected Image: Export selected images in the selected study.<br />
The option is disabled when more than two studies are selected.<br />
• Processing<br />
Raw: Export with unprocessed images.<br />
Processed: Export with processed images.<br />
• Image Format Selection: Select a file <strong>for</strong>mat to save the image<br />
Compression: Select the image compression type when exporting to DICOM or<br />
DICOMDIR.<br />
Compression ratio: Select compression ratio when choosing image compression type as<br />
‘JEPG2000 lossy’ only. The ratio is highest when choosing 99, but the<br />
image quality is not good.<br />
• Burned in Annotation: The image is exported with burning annotations on it when choosing YES.<br />
• Burned in in<strong>for</strong>mation: The image is exported with burning in<strong>for</strong>mation on it when choosing YES.<br />
• Software Collimation: Select option to apply on the image when exports it.<br />
NONE: The original size image without applying Crop is exported.<br />
CUT: Images with cutting CROP area as much as possible are exported.<br />
FILL: Images filled the outside of Crop area with black color are exported.<br />
• Target Directory: Select the location to export images.<br />
Select <strong><strong>Use</strong>r</strong> Directory to save the image in the local database.<br />
Select the available optical drive list to save the image to ODD.<br />
• <strong><strong>Use</strong>r</strong> Directory: The selected path is displayed after selecting the local path to export the image.<br />
• Language: Select Encoding to be applied to the DICOM or DICOMDIR type.<br />
• The changeable image <strong>for</strong>mats are as follows;<br />
BMP, JPEG, TIF-8Bit, TIF-16Bit, Raw, DICOM, DICOMDIR.<br />
• Each image <strong>for</strong>mat can be selected multiply, but TIF <strong>for</strong>mat has only 8Bit or 16Bit<br />
options.<br />
• You can select “Include DICOMDIR Viewer” only when selecting DICOMDIR <strong>for</strong>mat.<br />
The available compression types are as follows;<br />
- No Compression, JPEG2000 lossless, JPEG2000 lossy.<br />
Page 82 of 181<br />
RA20-129-035
<strong>VXvue</strong> <strong><strong>Use</strong>r</strong> <strong>Manual</strong><br />
The available language encodings are as follows;<br />
5.3.4 Stitch<br />
Stitch the images from the selected study.<br />
To stitch images<br />
• Select two or more images from the selected study.<br />
• Click the Stitch button.<br />
• Stitch images. For more in<strong>for</strong>mation, refer to chapter 4.2.3.33 “Stitch”.<br />
Page 83 of 181<br />
RA20-129-035
<strong>VXvue</strong> <strong><strong>Use</strong>r</strong> <strong>Manual</strong><br />
5.3.5 Send<br />
Send selected images to the DICOM Storage server.<br />
Refer to chapter 4.2.3.31 “Transfer” <strong>for</strong> detailed in<strong>for</strong>mation of sending images.<br />
You can send more than two images together.<br />
5.3.6 Print<br />
Click the print button and select images to print, then selected study images are added to Print Mode<br />
described in chapter 7 and switched to the Print mode automatically.<br />
Refer to chapter 4.2.3.32 “Print” <strong>for</strong> detailed in<strong>for</strong>mation of sending images.<br />
You can add more than two studies to Print Mode.<br />
Page 84 of 181<br />
RA20-129-035
<strong>VXvue</strong> <strong><strong>Use</strong>r</strong> <strong>Manual</strong><br />
5.4 Searched Study List<br />
The searched study list with selected or entered conditions is displayed<br />
The following buttons are disabled when selecting more than two studies.<br />
- Insert, Move Image, Modify study in<strong>for</strong>mation, Stitch.<br />
• Double click the mouse on the searched result list to open the selected study.<br />
• Double click the mouse on the image displayed on the thumbnail to open the selected<br />
study and to display selected images on the main image window.<br />
Page 85 of 181<br />
RA20-129-035
<strong>VXvue</strong> <strong><strong>Use</strong>r</strong> <strong>Manual</strong><br />
5.5 Thumbnail<br />
Display the selected images of study and steps.<br />
Figure 5.6 Thumbnail<br />
Double click the mouse on the image displayed on the thumbnail to open the selected<br />
study and to display selected images on the main image window.<br />
Page 86 of 181<br />
RA20-129-035
<strong>VXvue</strong> <strong><strong>Use</strong>r</strong> <strong>Manual</strong><br />
You can preview each page of images displayed on thumbnail using a mouse wheel and<br />
thumbnail move buttons (up/down) quickly.<br />
• The status in<strong>for</strong>mation displayed on thumbnail is as follows;<br />
- Backup, Deleted, Printed with the DICOM Print server, Sent to the DICOM Storage<br />
server, Rejected.<br />
• Refer to Appendix A ‘Cursor and Icon List’ <strong>for</strong> icons of each status.<br />
Page 87 of 181<br />
RA20-129-035
<strong>VXvue</strong> <strong><strong>Use</strong>r</strong> <strong>Manual</strong><br />
6. Viewer Mode<br />
Viewer Mode allows you to open the study selected on Database Mode and display it on the main image<br />
window.<br />
Figure 6.1 Viewer Mode<br />
For more in<strong>for</strong>mation about Viewer Mode, refer to chapter 4.2 “Image Processing”.<br />
Page 88 of 181<br />
RA20-129-035
<strong>VXvue</strong> <strong><strong>Use</strong>r</strong> <strong>Manual</strong><br />
7. Print Mode<br />
Print Mode allows you to print images added from Exposure, Database and Viewer modes using DICOM<br />
Print server.<br />
Figure 7.1 Print Mode<br />
Page 89 of 181<br />
RA20-129-035
<strong>VXvue</strong> <strong><strong>Use</strong>r</strong> <strong>Manual</strong><br />
7.1 Printer and Page Setup<br />
Figure 7.2 Printer and Page Setup<br />
• Printer Name: Name of DICOM Print server to be used <strong>for</strong> printing<br />
• FilmSize: Size of printed materials<br />
• Number of Copies: Number of copies to print<br />
• Image Layout: Type of image layout<br />
• Orientation: Type of image orientation<br />
• Values displayed in red color are different from the values configured on “Print Panel”<br />
described in chapter 8.8.6. These modifications are not saved.<br />
• For more in<strong>for</strong>mation about configuring DICOM print server, refer to chapter 8.8.6<br />
“Print Panel”.<br />
Page 90 of 181<br />
RA20-129-035
<strong>VXvue</strong> <strong><strong>Use</strong>r</strong> <strong>Manual</strong><br />
7.2 Image Manipulation Buttons<br />
Figure 7.3 Image Manipulation Buttons<br />
Refer to chapter 4.2.3 “Tools Panel” <strong>for</strong> more in<strong>for</strong>mation of image control buttons.<br />
7.2.1 Select<br />
This is the default mouse cursor state.<br />
Clicking the Select button on the Tools Panel will deactivate the currently activated functions.<br />
7.2.2 Zoom<br />
Enable interactive zooming by dragging the mouse with clicking left button.<br />
Page 91 of 181<br />
RA20-129-035
<strong>VXvue</strong> <strong><strong>Use</strong>r</strong> <strong>Manual</strong><br />
7.2.3 Panning<br />
Per<strong>for</strong>m panning the image.<br />
7.2.4 Window/Level<br />
Adjust the window level – brightness and contrast of an image.<br />
7.2.5 Pick W/L (Window Level)<br />
Adjust the window level - brightness and contrast of the image based on the selected region of interest.<br />
7.2.6 Magic Glass<br />
Magnify a selected region of interest more than twice than the current image ratio.<br />
7.2.7 Crop<br />
Crop an image.<br />
7.2.8 Invert<br />
Invert black and white of an image.<br />
Page 92 of 181<br />
RA20-129-035
<strong>VXvue</strong> <strong><strong>Use</strong>r</strong> <strong>Manual</strong><br />
7.2.9 Clockwise Rotation<br />
Rotate an image by 90˚ clockwise.<br />
7.2.10 Counterclockwise Rotation<br />
Rotate an image by 90˚ counterclockwise.<br />
7.2.11 Flip<br />
Flip an image vertically.<br />
7.2.12 Mirror<br />
Flip an image horizontally.<br />
7.2.13 Fit to Screen<br />
Fit an image to the main image window size.<br />
If the image is cropped, the cropped area of the image will be fit to the window.<br />
Page 93 of 181<br />
RA20-129-035
<strong>VXvue</strong> <strong><strong>Use</strong>r</strong> <strong>Manual</strong><br />
7.2.14 Delete Image<br />
Delete selected images from the printing list.<br />
7.2.15 Delete All<br />
Delete all images from the printing list.<br />
7.2.16 Image Swap<br />
Swap the position of selected two images.<br />
7.2.17 Print<br />
Print images according to configured options.<br />
Page 94 of 181<br />
RA20-129-035
<strong>VXvue</strong> <strong><strong>Use</strong>r</strong> <strong>Manual</strong><br />
7.2.18 Distance<br />
Measure distances between two points on the image.<br />
7.2.19 Angle<br />
Measure the angle between three points over an image. When you complete drawing an angle, the value of<br />
the angle will be computed and displayed automatically.<br />
7.2.20 Arrow<br />
Draw an arrow on the image.<br />
7.2.21 Rectangle<br />
Draw a rectangle over an image to indicate a region of interest.<br />
7.2.22 Ellipse<br />
Draw an ellipse over an image <strong>for</strong> indicating a region of interest.<br />
7.2.23 Displaying ROI In<strong>for</strong>mation<br />
Draw in<strong>for</strong>mation of rectangular region of interest.<br />
Page 95 of 181<br />
RA20-129-035
<strong>VXvue</strong> <strong><strong>Use</strong>r</strong> <strong>Manual</strong><br />
7.2.24 Text Note<br />
Attach text notes to the image.<br />
7.2.25 Delete Annotations<br />
Delete the selected annotations.<br />
Page 96 of 181<br />
RA20-129-035
<strong>VXvue</strong> <strong><strong>Use</strong>r</strong> <strong>Manual</strong><br />
8. Setting Mode<br />
Setting Mode allows you to configure options <strong>for</strong> the device and Viewer.<br />
To access Setting Mode, you must be logged on as a member of the Admin or Service<br />
group.<br />
• To apply the setting options, you should click the Update button<br />
• Some options are applied by restarting the program.<br />
8.1 System Settings<br />
8.1.1 System Panel<br />
Figure 8.1 System Panel<br />
You can configure the system properties on System Panel.<br />
Page 97 of 181<br />
RA20-129-035
<strong>VXvue</strong> <strong><strong>Use</strong>r</strong> <strong>Manual</strong><br />
Make sure to enter the in<strong>for</strong>mation configured in System since it is included as DICOM<br />
in<strong>for</strong>mation.<br />
8.1.1.1 Institution<br />
• Institution Name: Input the hospital name.<br />
• Institution Address: Input the hospital address.<br />
• Institution Department Name: Input the Institution Department Name.<br />
8.1.1.2 Equipment<br />
• Manufacturer: Input the equipment manufacturer’s name<br />
• Manufacturer Model Name: Input a model name of the product.<br />
• Software Version: Display the software version. (only display is available)<br />
• Serial Number: Input serial numbers of the product.<br />
8.1.1.3 System<br />
• Station Name<br />
• Station AE Title<br />
• Language: Change a language used on the software.<br />
• Station Name inputted on System Panel will be used <strong>for</strong> searching studies described<br />
in chapter 3.1 “Worklist Panel”.<br />
• Station AE Title inputted on System Panel will be used <strong>for</strong> querying Worklist, sending<br />
or printing images.<br />
Changed language is applied after restarting the program.<br />
Page 98 of 181<br />
RA20-129-035
<strong>VXvue</strong> <strong><strong>Use</strong>r</strong> <strong>Manual</strong><br />
1. If you want to add other languages to default set languages, please open Language.txt<br />
with only Excel software to support Unicode text from a language folder in database<br />
folder (D:\Database or user defined folder) which is made during the program installation.<br />
2. Add a language title and translated words or sentences at the next column, then you<br />
can select the title added on this panel.<br />
3. If you want to change the language of existing words or sentences, change them in<br />
column of the language title in the same way.<br />
4. Save the changed language.txt on the language folder with Unicode txt <strong>for</strong>mat as<br />
below.<br />
Page 99 of 181<br />
RA20-129-035
<strong>VXvue</strong> <strong><strong>Use</strong>r</strong> <strong>Manual</strong><br />
8.1.2 Account Panel<br />
Figure 8.2 Account Panel<br />
You can manage login accounts on Account Panel.<br />
More permission is granted <strong><strong>Use</strong>r</strong>, Admin and Service group in order.<br />
• You cannot create an account which has more permissions than the currently logged<br />
in account.<br />
• Currently logged in account cannot be removed.<br />
• You must have an account of Admin and Service group each.<br />
You can access to the following panels from Setting Mode if you log in with the user<br />
account.<br />
- Account panel configured in System.<br />
- Log panel configured in System.<br />
- Procedure panel configured in Procedure settings. (the Delete button is hidden)<br />
- Queue panel configured in DICOM setting.<br />
Page 100 of 181<br />
RA20-129-035
<strong>VXvue</strong> <strong><strong>Use</strong>r</strong> <strong>Manual</strong><br />
8.1.3 Miscellaneous Panel<br />
Figure 8.3 Miscellaneous Panel<br />
8.1.3.1 Storage Free Space Alarm<br />
• Set alarm threshold <strong>for</strong> free space on hard disk.<br />
• When the space is down to Warning level, the following window is displayed.<br />
Page 101 of 181<br />
RA20-129-035
<strong>VXvue</strong> <strong><strong>Use</strong>r</strong> <strong>Manual</strong><br />
• When the space is down to Critical level, the following window is displayed and you can end the study<br />
immediately.<br />
• To per<strong>for</strong>m the study continuously, the hard disk space should be enough as the<br />
images are stored in it.<br />
• Make the alarm check the storage capacity <strong>for</strong> warning/ critical messages<br />
automatically be<strong>for</strong>e studying.<br />
• If free space on hard disk falls less than critical level, you cannot acquire images.<br />
8.1.3.2 Custom Setting<br />
• Send to storage servers when closing studies: All images in the study are sent to the registered DICOM<br />
Storage servers automatically when closing the study in Exposure Mode.<br />
• Allow multi-studies: You can register a number of studies in Exposure Mode at the same time to per<strong>for</strong>m<br />
multiple studies.<br />
8.1.3.3 Monitor Pixel Pitch<br />
• Set the pixel size of the monitor.<br />
• Measure the diagonal line on the screen with a ruler and enter the value in millimeters.<br />
If the pixel size of the monitor is configured incorrectly or not configured, the Actual Size<br />
View may malfunction described in chapter 4.2.3.15 “1:1 (Actual Size View)”.<br />
You also have to configure the pixel size again when you change the monitor.<br />
Page 102 of 181<br />
RA20-129-035
<strong>VXvue</strong> <strong><strong>Use</strong>r</strong> <strong>Manual</strong><br />
8.1.3.4 Export/Import<br />
You can export or import setting values in Setting Mode.<br />
• Click the Export button to save settings as ‘xlm’ <strong>for</strong>mat file to the local system.<br />
• Click the Import button to load settings from ‘xlm’ <strong>for</strong>mat file in the local system.<br />
The exportable or importable settings are as follows.<br />
• Modifiable values on “System Panel”<br />
• All settings on “Miscellaneous Panel”<br />
• All settings on “Work Settings”<br />
• “Exposure Settings”<br />
• “Viewer Settings”<br />
• “LUT Settings”<br />
• All settings on “Procedure Panel”<br />
• All settings on “Step Panel”<br />
• All settings on “Body Part/Projection Panel”<br />
• All settings on “MWL Panel”<br />
• “Storage Panel”<br />
• “Print Panel”<br />
• Header settings on “Worklist Panel”<br />
• Header settings on “Local Panel”<br />
• Header settings on “Database Mode”<br />
Account in<strong>for</strong>mation cannot be exported or imported.<br />
Page 103 of 181<br />
RA20-129-035
<strong>VXvue</strong> <strong><strong>Use</strong>r</strong> <strong>Manual</strong><br />
8.1.4 Log Panel<br />
Figure 8.4 Log Panel<br />
You can check the status of the system on Log Panel. <strong>VXvue</strong> can display up to 300 logs on Log Panel.<br />
To delete the currently displayed logs, click the Clear button.<br />
The displayed contents on Log Panel are saved to a log folder in the database folder<br />
(D:\Database or user defined folder) which is made during program installation.<br />
Page 104 of 181<br />
RA20-129-035
<strong>VXvue</strong> <strong><strong>Use</strong>r</strong> <strong>Manual</strong><br />
8.2 Work Settings<br />
Figure 8.5 Work Settings<br />
8.2.1 New Study<br />
New Study allows to configuring items to use <strong>for</strong> registering studies manually.<br />
• Items on the right side are added to the left side by clicking the triangle button (◀).<br />
• Selected Items on the left side are removed by clicking the triangle button (▶).<br />
• Fields added / listed on the left side will be displayed on “New Study Panel” described in chapter 3.2.<br />
• Checked items on the list indicate the mandatory items <strong>for</strong> registering studies manually.<br />
• Blue items cannot be removed.<br />
• Click the Up or Down button to change the order of the displayed items.<br />
Page 105 of 181<br />
RA20-129-035
<strong>VXvue</strong> <strong><strong>Use</strong>r</strong> <strong>Manual</strong><br />
You can add or remove the following fields on the list at the left side.<br />
• Acc. No<br />
• Birth Date<br />
• Age / Sex<br />
• Size / Weight<br />
• Procedure<br />
• Referring Physician<br />
• Species Description<br />
• Species Code Sequence<br />
• Breed Description<br />
• Breed Code Sequence<br />
• Breed Registration Number<br />
• Breed Registration Code Sequence<br />
• Responsible Person<br />
• Responsible Person Role<br />
• Responsible Organization<br />
• Sex Neutered<br />
• Patient Comments<br />
• Study Description<br />
8.2.2 Unit<br />
You can specify the unit of height or weight to be used when registering study manually.<br />
8.2.3 Default Tab<br />
You can select a default tab to be displayed on the Work Mode among Worklist tab, New Study tab and Local<br />
tab.<br />
Page 106 of 181<br />
RA20-129-035
<strong>VXvue</strong> <strong><strong>Use</strong>r</strong> <strong>Manual</strong><br />
8.3 Exposure Settings<br />
Figure 8.6 Exposure Settings<br />
8.3.1 Category<br />
Insert categories that allow registering shortcuts described in chapter 4.1.3 “Step Registration Window”.<br />
• Click the Add button and register the name, background image file and description of category in the<br />
following window.<br />
• You can select background image files from a BodypartCategory folder in the<br />
database folder (D:\Database or user defined folder) which is made during program<br />
installation.<br />
• Default image files are Bird, Cat, Dog and Exotics.<br />
• If you want to add or change other background image files to use images in the<br />
category, please copy BMP <strong>for</strong>mat image (346X463 size) to the BodypartCategory<br />
folder in the database folder.<br />
Page 107 of 181<br />
RA20-129-035
<strong>VXvue</strong> <strong><strong>Use</strong>r</strong> <strong>Manual</strong><br />
8.3.2 Shortcut<br />
You can register shortcuts described in chapter 4.1.3 “Step Registration window”.<br />
Shortcut has the following two types.<br />
• Body Part: Register body parts shortcut to use when you registers steps <strong>for</strong> study.<br />
• Step: Register step (combination of body part and its projection) shortcuts to use when you register<br />
steps <strong>for</strong> study.<br />
• ◀, ▶ button: Items are added on the left list from the right list by clicking the triangle button (◀).<br />
Items on the left list are removed by clicking the triangle button (▶).<br />
For more in<strong>for</strong>mation about each shortcut, refer to chapter 4.1.3 “Step Registration<br />
window”.<br />
Page 108 of 181<br />
RA20-129-035
<strong>VXvue</strong> <strong><strong>Use</strong>r</strong> <strong>Manual</strong><br />
8.4 Viewer Settings<br />
Figure 8.7 Viewer Settings<br />
Page 109 of 181<br />
RA20-129-035
<strong>VXvue</strong> <strong><strong>Use</strong>r</strong> <strong>Manual</strong><br />
8.4.1 Image Overlay<br />
Configure the list of in<strong>for</strong>mation to overlay on displayed images at the main image window<br />
• ◀, ▶ button Items are added on the left list from the right list by clicking the triangle button (◀).<br />
Items on the left list are removed by clicking the triangle button (▶).<br />
The following in<strong>for</strong>mation can be configured to display on the left/right top and left/right<br />
bottom of the image display window.<br />
• Patient ID, Patient Name, Birthdate, Sex/Age, Height, Weight<br />
• Bodypart, Projection, Laterality<br />
• Per<strong>for</strong>ming Physician, Referring Physician<br />
• Study Date, Study Time, Accession number<br />
• Series Number, Instance Number, Exposure Time<br />
• Dose kVp, Dose mA, Dose ms, Dose mAs, DAP<br />
• Exposure Index, Deviation Index, Target Exposure Index<br />
• Pixel Value, Histogram, Zoom Ratio<br />
• Institutional Name, Institutional Address, Institutional Department Name<br />
• Manufacturer, Manufacturer Model Name, Station Name, Modality.<br />
• Image Overlay Font & Color<br />
Configure color, size and font of the overlay in<strong>for</strong>mation to be displayed at the main image window<br />
on the image viewer.<br />
- When you select the Absolute Font Size checkbox, fonts always appear to be the same size<br />
regardless of main image window’s layout.<br />
- When you deselect the Absolute Font Size checkbox, the font size will be automatically<br />
adjusted according to the main image window’s layout. Also, the font size will be adjusted by<br />
referring the inputted font size.<br />
• Annotation Font & Color<br />
Configure color, size and font of annotation.<br />
- Annotation Size: Configure annotation size.<br />
- Label Size: Configure R/L label’s size.<br />
Page 110 of 181<br />
RA20-129-035
<strong>VXvue</strong> <strong><strong>Use</strong>r</strong> <strong>Manual</strong><br />
8.4.2 Monitor LUT<br />
Configure LUT to correct monitor’s gamma <strong>for</strong> displaying images consistently regardless of a monitor to be<br />
used.<br />
Refer to chapter 8.5 “LUT Settings” <strong>for</strong> more in<strong>for</strong>mation about LUT setting.<br />
8.4.3 Interpolation Mode<br />
Configure interpolation types to be use when image is displayed on monitor.<br />
The interpolation types are as follows;<br />
- Nearest Neighbor, Bilinear, High Quality Bilinear, Bicubic, High Quality Bicubic, GDI.<br />
8.4.4 Window Level Option<br />
• Speed: Configure the speed of actions. The default value is 10.<br />
• Left: Select the changed way of W/L basic configured actions when moving a mouse to the left.<br />
The default value is W1 decrease.<br />
• Up: Select the changed way of W/L basic configured actions when moving a mouse to up.<br />
The default value is W2 increase.<br />
• Right: The changed way of W/L action that configured automatically in the opposite way of Left when<br />
moving a mouse to the right.<br />
• Down: The changed way of W/L action that configured automatically in the opposite way of Up when<br />
moving a mouse to the bottom.<br />
The basic and configurable action of Window Level are as follows;<br />
- W1/W2 (basic action): W1/W2 is start/end value of Window to be displayed.<br />
- Contrast<br />
- Brightness<br />
8.4.5 Crop Option<br />
It is recommended to register Crop size preset when clicking the right mouse button on the main image<br />
window.<br />
Page 111 of 181<br />
RA20-129-035
<strong>VXvue</strong> <strong><strong>Use</strong>r</strong> <strong>Manual</strong><br />
8.5 LUT Settings<br />
Figure 8.8 LUT Settings<br />
Look Up Table (LUT) is used to apply gamma values to images while displaying, processing or sending the<br />
images to DICOM Storage server and DICOM Print server.<br />
You can register LUT to be applied to the settings described in following chapters.<br />
• 8.4 “Viewer Settings”<br />
• 8.6.2 “Step Panel”<br />
• 8.8.4 “Storage Panel”<br />
• 8.8.6 “Print Panel”<br />
Page 112 of 181<br />
RA20-129-035
<strong>VXvue</strong> <strong><strong>Use</strong>r</strong> <strong>Manual</strong><br />
8.6 Procedure Settings<br />
8.6.1 Procedure Panel<br />
Figure 8.9 Procedure Panel<br />
• Add / Delete button: Manage procedures which are multiple steps to be exposed in the registered study.<br />
• You can import a CSV <strong>for</strong>mat files made with the following way when clicking the Import button.<br />
Name1, Code1, Description1<br />
Name 2, Code2, Description2<br />
…<br />
• If you register multiple steps to the procedure, these steps will be automatically registered to that study<br />
when you register patients.<br />
• Click the Up or Down button to change the order of steps in the procedure.<br />
• Input codes of the procedure should be matched to the tag value described in chapter<br />
8.8.2.5 “Procedure Tag Selection”<br />
• Code’ means a study code in the DICOM worklist server. (or hospital in<strong>for</strong>mation<br />
system) You can input Name and Description to apart from code without restriction.<br />
Page 113 of 181<br />
RA20-129-035
<strong>VXvue</strong> <strong><strong>Use</strong>r</strong> <strong>Manual</strong><br />
When the studies register with in<strong>for</strong>mation from DICOM Worklist server described in<br />
chapter 3.1 “Worklist Panel”, the procedure matched with the code from DICOM worklist<br />
server is searched and steps assigned to the procedure are added automatically without<br />
selecting step.<br />
• The procedures registered on the Procedure panel will be displayed in the “New Study<br />
Panel” in chapter 3.2.<br />
• Contents of Description are added to Study Description when selecting procedures<br />
manually in the New study tab.<br />
8.6.2 Step Panel<br />
Figure 8.10 Step Panel<br />
Page 114 of 181<br />
RA20-129-035
<strong>VXvue</strong> <strong><strong>Use</strong>r</strong> <strong>Manual</strong><br />
• Register steps.<br />
• Adjust image processing parameters.<br />
• Configure label, rotation, shutter and auto crop to be applied <strong>for</strong> exposure.<br />
You can hide or show each item with the Hide / Show buttons.<br />
Hide<br />
Show<br />
ex)<br />
8.6.2.1 Select Image Process Algorithm<br />
You can select HS1 by applying HS1 Basic, Boost, Pre Filter, MLDC Range and Pre LUT or HS2 applied only<br />
to HS2 Basic.<br />
Page 115 of 181<br />
RA20-129-035
<strong>VXvue</strong> <strong><strong>Use</strong>r</strong> <strong>Manual</strong><br />
8.6.2.2 Step List<br />
Figure 8.11 Step List<br />
• Show All: Display all configurable body parts. If it is not checked, only configured steps are displayed.<br />
• Step List is a list of image process parameter combined Body Part and Projection.<br />
8.6.2.3 Selected Step List<br />
Figure 8.12 Selected Step List<br />
• Shows the list of steps selected from Step List.<br />
Insert: Add a new step.<br />
Delete: Delete a selected step.<br />
Page 116 of 181<br />
RA20-129-035
<strong>VXvue</strong> <strong><strong>Use</strong>r</strong> <strong>Manual</strong><br />
8.6.2.4 Copy<br />
Figure 8.13 Copy<br />
• From DB: Copy the image process parameter of other steps from the database.<br />
• From File: Copy the image process parameter of other steps from the exported XLM file.<br />
XML files used in ‘From File’ option are exported from “Export/Import” described in chapter<br />
8.1.3.4.<br />
8.6.2.5 Command<br />
Figure 8.14 Command<br />
• Reset: Reset the last saved image process parameter.<br />
• Process: Apply the image process parameter to images <strong>for</strong> checking image processing result.<br />
• Update: Save the changed parameters.<br />
• When you change the parameter value, it is displayed in red color be<strong>for</strong>e clicking the<br />
Update button to save the value.<br />
• The changed value in red color is restored with the previously saved value by<br />
clicking the Reset button.<br />
Page 117 of 181<br />
RA20-129-035
<strong>VXvue</strong> <strong><strong>Use</strong>r</strong> <strong>Manual</strong><br />
8.6.2.6 HS1 Basic<br />
Figure 8.15 HS1 Basic<br />
• Set basic parameters <strong>for</strong> HS1 image processing algorithm.<br />
Sharpness<br />
Enhance the edge of the image. The bigger the value is, the more enhanced the edge is.<br />
Contrast<br />
Enhance the contrast of the image. The bigger the value is, the more enhanced the contrast is.<br />
Denoise<br />
Remove noise of the image. The bigger the value is, the stronger the noise removal is. The image<br />
will become soft if this value is set to high.<br />
Freq Layer<br />
Convert the image to domain areas and divide each area into 10 frequency layers <strong>for</strong> image<br />
processing. This parameter is used to determine the number of frequency layers to be used <strong>for</strong><br />
image processing. The bigger the value is, the wider the image processing is per<strong>for</strong>med, even to<br />
the extent of low frequency level.<br />
LUT<br />
Select lookup table that is used to invert black and white or to expand histogram of the image.<br />
Page 118 of 181<br />
RA20-129-035
<strong>VXvue</strong> <strong><strong>Use</strong>r</strong> <strong>Manual</strong><br />
8.6.2.7 Boost<br />
Figure 8.16 Boost<br />
• Set basic boost <strong>for</strong> HS1 image processing algorithm.<br />
Sharpness<br />
The sharpness value set in HS1 basic will be applied to all frequency layers equally.<br />
These parameters are to adjust sharpness of each frequency layer additionally.<br />
L1 ~ L10 stands <strong>for</strong> each frequency layer of the image. The number followed by ‘L’ is frequency<br />
layer index. High frequency layer index means low frequency layer of the image.<br />
Default value is 100. The range of value is 0 to 1000. 100 mean no additional sharpness adjustment.<br />
At the value lower than 100, sharpness enhancement is stronger. At the value higher than 100,<br />
sharpness enhancement is weaker.<br />
Page 119 of 181<br />
RA20-129-035
<strong>VXvue</strong> <strong><strong>Use</strong>r</strong> <strong>Manual</strong><br />
<br />
(Sharpness) Slope<br />
Adjust the sharpness enhancement strength of all frequency layers to the sharpness value set in<br />
HS1 Basic.<br />
Default value is 100. The range of value is 0 to 1000. 100 mean no additional sharpness adjustment.<br />
At the value lower than 100, sharpness enhancement on high frequency layer of the image is<br />
stronger than that on low frequency layer of the image.<br />
At the value higher than 100, sharpness enhancement on low frequency layer of the image is<br />
stronger than that on high frequency layer of the image.<br />
<br />
Contrast<br />
The contrast value set in HS1 Basic will be applied to all frequency layers equally.<br />
These parameters are to adjust contrast of each frequency layer additionally. L1 to L10 stands <strong>for</strong><br />
each frequency layer of the image. The number followed by ‘L’ is frequency layer index. High<br />
frequency layer index means low frequency layer of the image.<br />
Default value is 100. The range of value is 0 to 1000. 100 mean no additional contrast adjustment.<br />
At the value lower than 100, contrast enhancement is weaker. At the value higher than 100, contrast<br />
enhancement is stronger.<br />
<br />
(Contrast) Slope<br />
This parameter is used to adjust contrast of all frequency layers to the contrast value set in HS1<br />
Basic. Default value is 0. The range of value is 0 to 1000. 0 means no additional contrast<br />
adjustment.<br />
At the value higher than 0, contrast enhancement on low frequency layer of the image is stronger<br />
than that on high frequency layer of the image.<br />
Page 120 of 181<br />
RA20-129-035
<strong>VXvue</strong> <strong><strong>Use</strong>r</strong> <strong>Manual</strong><br />
8.6.2.8 Pre Filter<br />
Figure 8.17 Pre Filter<br />
• Apply following filters be<strong>for</strong>e doing Multi-Layer Dynamic Range Compression (MLDC) <strong>for</strong> HS1 image<br />
processing algorithm.<br />
None<br />
No filter applied.<br />
High Pass<br />
Apply high pass filter to improve clarity of the image.<br />
The range of value is 0 to 1000. Higher value makes image sharper.<br />
Low Pass<br />
Apply low pass filter to make image smoother.<br />
The range of value is 0 to 1000.<br />
- 0: No filter applied.<br />
- 1 – 9: value × value Average Filter applied.<br />
- 10 – 1000: Higher value makes image smoother.<br />
Page 121 of 181<br />
RA20-129-035
<strong>VXvue</strong> <strong><strong>Use</strong>r</strong> <strong>Manual</strong><br />
8.6.2.9 MLDC Range<br />
Figure 8.18 MLDC Range<br />
• Configure a range of image input and out applied MLDC.<br />
In<br />
Input range of the image data.<br />
The range of image data is 0 to 16383.<br />
Out<br />
Output range of the image data.<br />
The range of image data is 0 to 16383.<br />
8.6.2.10 Pre LUT<br />
Figure 8.19 Pre LUT<br />
• Apply Pre Lookup table be<strong>for</strong>e doing MLDC <strong>for</strong> HS1 image processing algorithm.<br />
Page 122 of 181<br />
RA20-129-035
<strong>VXvue</strong> <strong><strong>Use</strong>r</strong> <strong>Manual</strong><br />
8.6.2.11 HS2 Basic<br />
Figure 8.20 HS2 Basic<br />
• Set basic parameter <strong>for</strong> HS2 image processing algorithm.<br />
Contrast Slope<br />
Set the overall contrast of the image. The default value is 0. (<strong>Use</strong> calculated value automatically)<br />
The range of value is 0 to 50.<br />
Contrast Point<br />
Set the point to apply Contrast Slope. Default value is 0. (<strong>Use</strong> calculated value automatically)<br />
The range of value is 0 to 100.<br />
Mean Point<br />
Set the intermediate point <strong>for</strong> image processing. Default value is 1.<br />
The range of value is 1 to 100<br />
Skin Correct<br />
Correct skin of the image.<br />
Default value is 1. The range of value is 0 to 100.<br />
OPPoint (TBD)<br />
Compensation<br />
Compensate the strengthened background area by Compression.<br />
Default value is 100. The range of value is 0 to 100.<br />
Compression<br />
Control dynamic range of image. The bigger the value is, the more enhanced the edge of skin and<br />
bones. Default value is 5. The range of value is 0 to 20.<br />
Denoise<br />
Reduce noise of the image. The bigger the value is, the stronger the noise reduction is and the<br />
image becomes soft. Default value is 5. The range of value is 0 to 14<br />
Page 123 of 181<br />
RA20-129-035
<strong>VXvue</strong> <strong><strong>Use</strong>r</strong> <strong>Manual</strong><br />
<br />
<br />
<br />
<br />
<br />
Gamma<br />
Set gamma curve level. The bigger the value is, the overall image becomes darker.<br />
Default value is 2. The range of value is 0 to 9.<br />
Fine Edge<br />
Enhance the fine edge contrast of the image. The bigger the value is, the more enhanced the fine<br />
edge contrast is. Default value is 3. The range of value is 0 to 20.<br />
Middle Edge<br />
Enhance the middle edge contrast of the image. The bigger the value is, the more enhanced the<br />
middle edge contrast is. Default value is 3. The range of value is 0 to 20.<br />
Large Edge<br />
Enhance the large edge contrast of the image. The bigger the value is, the more enhanced the<br />
large edge contrast is. Default value is 0. The range of value is 0 to 20.<br />
Huge Edge<br />
Enhance the huge edge contrast of the image. The bigger the value is, the more enhanced the<br />
huge edge contrast is. Default value is 0. The range of value is 0 to 20.<br />
Refer to Appendix B “Image Process Guide (HS2)” <strong>for</strong> image processing and its result<br />
using HS2.<br />
Page 124 of 181<br />
RA20-129-035
<strong>VXvue</strong> <strong><strong>Use</strong>r</strong> <strong>Manual</strong><br />
8.6.2.12 Post LUT<br />
Figure 8.21 Post LUT<br />
• Apply Post Lookup table after doing MLDC.<br />
Apply Range<br />
The data range set in this field will be used <strong>for</strong> post-lookup conversion.<br />
- <strong>Manual</strong><br />
Set range manually by entering low / high value. The range of value is 0~16383.<br />
- Min/Max<br />
Set range automatically using default algorithm. The low/high offset adjustment will be<br />
applied.<br />
- Auto<br />
Set range automatically using auto algorithm. The low/high offset adjustment will be applied.<br />
- Low Offset<br />
Adjust the lowest value of the automatic calculated range as much as entered percentage (%)<br />
additionally. The range of value is -100~100.<br />
- High Offset<br />
- Adjust the highest value of the automatic calculated range as much as entered percentage<br />
(%) additionally. The range of value is -100~100.<br />
LUT Type<br />
Select LUT to be applied to Post LUT.<br />
For more in<strong>for</strong>mation about how to register LUT available from LUT Type, refer to chapter<br />
8.5 “LUT Settings”.<br />
Page 125 of 181<br />
RA20-129-035
<strong>VXvue</strong> <strong><strong>Use</strong>r</strong> <strong>Manual</strong><br />
8.6.2.13 Display ROI<br />
Figure 8.22 Display ROI<br />
• Set data range of image that is to be displayed on the monitor by default.<br />
<strong>Manual</strong><br />
Set range manually by entering low / high value. The range of value is 0~16383.<br />
Min/Max<br />
Set range automatically using default algorithm. The low/high offset adjustment will be applied.<br />
Auto<br />
Set range automatically using auto algorithm. The low/high offset adjustment will be applied.<br />
Low Offset<br />
Adjust the lowest value of the automatic calculated range as much as entered percentage (%)<br />
additionally. The range of value is -100~100.<br />
High Offset<br />
Adjust the highest value of the automatic calculated range as much as entered percentage (%)<br />
additionally. The range of value is -100~100.<br />
Page 126 of 181<br />
RA20-129-035
<strong>VXvue</strong> <strong><strong>Use</strong>r</strong> <strong>Manual</strong><br />
8.6.2.14 Label<br />
Figure 8.23 Label<br />
• Auto Label: Set Label that is to be displayed on the acquired image automatically.<br />
L/R Label<br />
Set text of L/R label.<br />
Position<br />
Set position of L/R label. Available positions are TopLeft, TopRight, BottomLeft, and BottomRight.<br />
• Rotation: Set the direction to be applied when acquiring image<br />
• Flip<br />
Flip an image vertically.<br />
Mirror<br />
Flip an image horizontally.<br />
Rotation<br />
Rotate the image in the following options.<br />
None, CCW90, CCW 180, CCW270, CW90, CW 180 and CW270<br />
• Shutter<br />
Set width and height of shutter size. Set the length by selecting the value from 8~17 inch.<br />
• Auto Crop<br />
Set the offset of Auto Crop applied to the image automatically. It will crop the image as much as the<br />
offset value (unit: pixel), more inward than the calculated crop region. The range of value is 0~500.<br />
You cannot set both Shutter and Auto Crop functions at the same time.<br />
Page 127 of 181<br />
RA20-129-035
<strong>VXvue</strong> <strong><strong>Use</strong>r</strong> <strong>Manual</strong><br />
8.6.2.15 E.I (Exposure Index)<br />
Figure 8.24 E.I<br />
• E.I (Exposure Index) is a setting that check whether the proper x-ray exposure is made or not by<br />
comparing the target E.I (<br />
EI<br />
t ) and the calculated E.I.<br />
Target<br />
<br />
Set the target E.I (<br />
EI<br />
t ) of the selected Step. The range of value is 100 to 5000.<br />
Area<br />
Set the area to calculate E.I. The range of value is 10 to 50.<br />
Page 128 of 181<br />
RA20-129-035
<strong>VXvue</strong> <strong><strong>Use</strong>r</strong> <strong>Manual</strong><br />
8.6.3 Body Part/Projection Panel<br />
Figure 8.25 Body Part/Projection Panel<br />
• You can manage Body parts and projections to use <strong>for</strong> registering study on Exposure mode.<br />
• Click the Add Button of Body part category <strong>for</strong> registering new Body Part to use.<br />
• Click the Hide Button of Body part category <strong>for</strong> hiding Body part not in use.<br />
• Click the Add Button of Projection category <strong>for</strong> registering new Projection to use.<br />
• Click the Hide Button of Projection category <strong>for</strong> hiding Projection not in use.<br />
• Both Body Part and Projection panels support Show/Hide function, not the delete function.<br />
• You cannot combine Steps by hidden Body Part or Projection.<br />
The registered item cannot be deleted.<br />
You can see the hidden items by checking the Show All checkbox.<br />
• You can use Alias field name instead of Meaning field name by modifying Alias field.<br />
• The name of designator is “99VW” <strong>for</strong> the items you add. Value (code) made with U<br />
and 4digit numbers are increasing like as U-0001, and U-0002.<br />
• You can freely modify the added items.<br />
• You cannot modify the default item of SRT designator. You can only modify the Alias<br />
field.<br />
• You can register steps by combining registered Body Part and Projection on “Step<br />
Panel” described in chapter 8.6.2.<br />
Page 129 of 181<br />
RA20-129-035
<strong>VXvue</strong> <strong><strong>Use</strong>r</strong> <strong>Manual</strong><br />
8.6.4 Species Code<br />
Figure 8.26 Species Code Panel<br />
• You can manage species codes to use <strong>for</strong> registering study on Exposure mode<br />
• Click the Add Button <strong>for</strong> registering new species codes to use.<br />
• Click the Hide Button <strong>for</strong> hiding species codes not in use.<br />
• Species Code panel supports Show/Hide function, not the delete function.<br />
The registered item cannot be deleted.<br />
You can see the hidden items by checking the Show All checkbox.<br />
• The name of designator is “99VW” <strong>for</strong> the items you add. Value (code) made with U<br />
and 4digit numbers are increasing like as U-0001, and U-0002.<br />
• You can freely modify the added items.<br />
• You cannot modify the default item of SRT designator. You can only modify the Alias<br />
field.<br />
You can use species code on “New Study Panel” described in chapter 3.2.<br />
Page 130 of 181<br />
RA20-129-035
<strong>VXvue</strong> <strong><strong>Use</strong>r</strong> <strong>Manual</strong><br />
8.6.5 Breed Code<br />
Figure 8.27 Breed Code Panel<br />
• <strong><strong>Use</strong>r</strong> can manage breed codes to use <strong>for</strong> registering study on Exposure mode<br />
• Click the Add Button <strong>for</strong> registering new breed codes to use.<br />
• Click the Hide Button <strong>for</strong> hiding breed codes not in use.<br />
• Breed Code panel supports Show/Hide function, not the delete function.<br />
The registered item cannot be deleted.<br />
You can see the hidden items by checking the Show All checkbox.<br />
• The name of designator is “99VW” <strong>for</strong> the items you add. Value (code) made with U<br />
and 4digit numbers are increasing like as U-0001, and U-0002.<br />
• You can freely modify the added items.<br />
• You cannot modify the default item of SRT designator. You can only modify the Alias<br />
field.<br />
You can use breed code on “New Study Panel” described in chapter 3.2.<br />
Page 131 of 181<br />
RA20-129-035
<strong>VXvue</strong> <strong><strong>Use</strong>r</strong> <strong>Manual</strong><br />
8.6.6 Breed Registration Code<br />
Figure 8.28 Breed Reg. Code Panel<br />
• You can manage breed reg. codes to use <strong>for</strong> registering study on Exposure mode.<br />
• Click the Add Button <strong>for</strong> registering new breed reg. codes to use.<br />
• Click the Hide Button <strong>for</strong> hiding breed reg. codes to not in use.<br />
• Breed reg. Code support Show/Hide function, not the delete function.<br />
The registered item cannot be deleted.<br />
You can see the hidden items by checking the Show All checkbox.<br />
• The name of designator is “99VW” <strong>for</strong> the items you add. Value (code) made with U<br />
and 4digit numbers are increasing like as U-0001, and U-0002.<br />
• You can freely modify the added items.<br />
• You cannot modify the default item of DCM designator. You can only modify the Alias<br />
field.<br />
You can use Breed Reg code on “New Study Panel” described in chapter 3.2.<br />
Page 132 of 181<br />
RA20-129-035
<strong>VXvue</strong> <strong><strong>Use</strong>r</strong> <strong>Manual</strong><br />
8.7 Backup Settings<br />
8.7.1 Backup Panel<br />
Figure 8.29 Backup Panel<br />
• Insert writable optical storage media (CD/DVD) to the optical drive or connect external storage device<br />
(USB stick, HDD) to the local system to make it accessible.<br />
• Select the corresponding drive to use from the Location dropdown list.<br />
• Click the Refresh button to search studies to back up in order of the oldest studies.<br />
System will automatically select studies to be backed up depending on the selected drive capacity and<br />
display them on the list.<br />
• Click the Archive button. Backup will be preceded and the progress window will appear.<br />
• When the backup is complete, a notification window will be displayed with a name (label) provided to the<br />
backed up media as shown below.<br />
Page 133 of 181<br />
RA20-129-035
<strong>VXvue</strong> <strong><strong>Use</strong>r</strong> <strong>Manual</strong><br />
• As instructed, it is recommended to keep the backed up media by writing a label on it.<br />
• To open the backed up study, insert optical storage media (CD/DVD) to the optical drive or connect<br />
external storage device (USB stick, HDD) to the local system to make it accessible.<br />
<strong>VXvue</strong> recognizes backed up optical storage media (CD/DVD) or external storage device<br />
(USB stick, HDD) with its label and serial number. If you copy this media to another device<br />
manually, <strong>VXvue</strong> cannot recognize them because they have the same label but have<br />
different serial numbers.<br />
Medical recode is very important. You should keep these backed up optical storage media<br />
(CD/DVD) or external storage device (USB stick, HDD) safely not to lose images.<br />
For keeping the media safely, we recommend to use optical storage media (CD/DVD) or<br />
external storage device. (USB stick, HDD)<br />
You cannot backup the previous backed up study again. Only the restored study after<br />
deleting from the local system can be backed up again.<br />
• When the backup is completed to the optical storage media (CD/DVD), you cannot<br />
use the media <strong>for</strong> backup again even if there is free space.<br />
• You can backup studies to other media if there is no free space in the external<br />
storage device. (USB stick, HDD)<br />
Page 134 of 181<br />
RA20-129-035
<strong>VXvue</strong> <strong><strong>Use</strong>r</strong> <strong>Manual</strong><br />
8.7.2 Clean Panel<br />
Figure 8.30 Clean Panel<br />
• When you select Clean tab, the backed up studies list are automatically displayed.<br />
• Select studies by clicking left mouse button with Ctrl or Shift key on the lists and click the Clean button<br />
to delete selected studies on the local system permanently.<br />
• Click the Clean All button to delete all studies of the lists on the local system permanently.<br />
You can only delete the backup studies permanently.<br />
Page 135 of 181<br />
RA20-129-035
<strong>VXvue</strong> <strong><strong>Use</strong>r</strong> <strong>Manual</strong><br />
8.7.3 Restore Panel<br />
Figure 8.31 Restore Panel<br />
• The cleaned studies are displayed on the list automatically by clicking the Restore tab.<br />
• Select studies by clicking left mouse button with Ctrl or Shift key and click the Restore button to restore<br />
studies on the list.<br />
• Click the Restore All button to restore all studies in the list.<br />
• To restore the permanently deleted study from the local system, Insert the backed up optical storage<br />
media to the optical drive (CD/DVD) or connect the external storage device (USB stick, HDD) to the<br />
local system to make it accessible.<br />
• The studies revert to the status be<strong>for</strong>e backup by copying them from the backed up optical storage<br />
media and external storage device to the local system.<br />
• Restore function can restore all studies from all accessible optical storage media and<br />
external storage devices at a time.<br />
• You can back up the restored studies to the optical storage media and external<br />
storage device.<br />
Page 136 of 181<br />
RA20-129-035
<strong>VXvue</strong> <strong><strong>Use</strong>r</strong> <strong>Manual</strong><br />
8.8 DICOM Settings<br />
8.8.1 Queue Panel<br />
Figure 8.32 Queue Panel<br />
• Check the queue list of image transfer to the server and transfer status when sending images to DICOM<br />
Storage server or DICOM Print server. The transfer status are as follows;<br />
Pending: Standby<br />
Failed: Transfer failed.<br />
Sending: Transferring<br />
Stopped: Transfer stopped.<br />
Done: Transfer is done.<br />
• Select the failed transfer items by clicking left mouse button with Ctrl or Shift key and Click the Retry<br />
button to resend the items altogether.<br />
• Click the Delete button to remove Pending, Done and Failed transfer items altogether after clicking left<br />
mouse button with Ctrl or Shift key.<br />
Page 137 of 181<br />
RA20-129-035
<strong>VXvue</strong> <strong><strong>Use</strong>r</strong> <strong>Manual</strong><br />
8.8.2 MWL Panel<br />
Figure 8.33 MWL Panel<br />
Configure SCP (DICOM Worklist server) to get study in<strong>for</strong>mation.<br />
• Click the Add button to add New DICOM Worklist server and then input the in<strong>for</strong>mation on the Basic<br />
In<strong>for</strong>mation.<br />
• Specify the DICOM tags of in<strong>for</strong>mation to be searched from SCP.<br />
• Select the Procedure tag (including code) to be used on “Procedure Panel” described in chapter 8.6.1.<br />
• Click the Update button to save the changed in<strong>for</strong>mation<br />
• Click the Echo button to verify the communication with a selected server.<br />
8.8.2.1 SCP List:<br />
The registered SCP is listed and you can select a SCP to use.<br />
• Add Add new SCP<br />
• Delete Delete the selected SCP.<br />
• Check Select a SCP to use with a checked mark on the use field.<br />
Page 138 of 181<br />
RA20-129-035
<strong>VXvue</strong> <strong><strong>Use</strong>r</strong> <strong>Manual</strong><br />
8.8.2.2 Verification:<br />
Display the results after verifying communication with the selected SCP<br />
• Echo: Verify the communication with the selected SCP.<br />
8.8.2.3 Basic In<strong>for</strong>mation<br />
Configure properties of SCP when the registered SCP is selected on the SCP List.<br />
• Name: Set the SCP name.<br />
• AE Title: Set the AE title of the SCP.<br />
• IP Address: Set IP address of the SCP.<br />
• Port: Set port number of the SCP.<br />
• Max PDU: Set Max PDU size to use while communicating with the selected SCP.<br />
If Max PDU size is not checked, the communication is made by using the setting value<br />
from SCP.<br />
The speed of communication can be too low if Max PDU is not configured. In this case,<br />
change MAX PDU with various values and enter one of the values that communicated<br />
successfully.<br />
8.8.2.4 Tag Selection<br />
Specify the DICOM tags having in<strong>for</strong>mation to be retrieved from SCP.<br />
If you encounter a problem searching on SCP (DICOM Worklist server) due to<br />
unsupported tags from the SCP, deselect them to solve the problem and refer to DICOM<br />
Con<strong>for</strong>mance Statement of that SCP.<br />
8.8.2.5 Procedure Tag Selection<br />
Select the Procedure tag (including code) to be used on “Procedure Panel” described in chapter 8.6.1.<br />
Select a tag which has codes that classifying studies from the DICOM Worklist panel and<br />
use it as procedure codes value.<br />
Page 139 of 181<br />
RA20-129-035
<strong>VXvue</strong> <strong><strong>Use</strong>r</strong> <strong>Manual</strong><br />
The available DICOM tags are as follows;<br />
- Requested Procedure ID<br />
- Requested Procedure Description<br />
- Requested Procedure Code Sequence<br />
- Scheduled Procedure Step Description<br />
- Scheduled Procedure Step ID<br />
Refer to chapter 8.6.1 “Procedure Panel” <strong>for</strong> more in<strong>for</strong>mation about procedure.<br />
Page 140 of 181<br />
RA20-129-035
<strong>VXvue</strong> <strong><strong>Use</strong>r</strong> <strong>Manual</strong><br />
8.8.3 MPPS Panel<br />
Figure 8.34 MPPS Panel<br />
• Configure the SCP. (DICOM Modality Per<strong>for</strong>med Procedure Step server)<br />
• Click the Echo button to verify the communication with selected SCP.<br />
• When the study starts or finishes, the procedure in<strong>for</strong>mation per<strong>for</strong>med in that study is sent to the SCP.<br />
8.8.3.1 SCP List<br />
You can select a SCP to use when the registered SCP is listed.<br />
• Add Add new SCP<br />
• Delete Delete the selected SCP.<br />
8.8.3.2 Verification<br />
Display results after verifying communication with the selected SCP.<br />
• Echo: Verify the communication with the selected SCP.<br />
Page 141 of 181<br />
RA20-129-035
<strong>VXvue</strong> <strong><strong>Use</strong>r</strong> <strong>Manual</strong><br />
8.8.3.3 Basic In<strong>for</strong>mation<br />
Configure properties of SCP when the registered SCP is selected on the SCP List<br />
• Name: Set the SCP name.<br />
• AE Title: Set the AE title of the SCP.<br />
• IP Address: Set IP address of the SCP.<br />
• Port: Set port number of the SCP.<br />
• Max PDU: Set Max PDU to use while communicating with the selected SCP.<br />
If Max PDU size is not checked, the communication is made by using the setting value<br />
from SCP.<br />
The speed of communication can be too low if Max PDU is not configured. In this case,<br />
change MAX PDU with various values and enter one of the values that communicated<br />
successfully.<br />
8.8.3.4 Options<br />
Language:<br />
Select an encoding of language applied when transferring procedure per<strong>for</strong>med in<strong>for</strong>mation.<br />
Page 142 of 181<br />
RA20-129-035
<strong>VXvue</strong> <strong><strong>Use</strong>r</strong> <strong>Manual</strong><br />
8.8.4 Storage Panel<br />
Figure 8.35 Storage Panel<br />
• Configure the SCP. (DICOM Storage server)<br />
• Click the Echo button to verify the communication with the selected SCP.<br />
• Configure various options to be used <strong>for</strong> sending the images to the selected SCP.<br />
Make sure to enter the Station AE Title. The image transfer can be failed if Station AE Tilte<br />
entered in “System Panel” described in chapter 8.1.1 is different with “Calling AE Title” on<br />
the specific SCP because some SCP rejects to receive images from unregistered SCU.<br />
(Client)<br />
8.8.4.1 SCP List<br />
You can select a SCP to use when the registered SCP is listed.<br />
• Add Add new SCP<br />
• Delete Delete the selected SCP.<br />
8.8.4.2 Verification<br />
Display the results after verifying communication with the selected SCP<br />
• Echo: Verify the communication with the selected SCP.<br />
Page 143 of 181<br />
RA20-129-035
<strong>VXvue</strong> <strong><strong>Use</strong>r</strong> <strong>Manual</strong><br />
8.8.4.3 Basic In<strong>for</strong>mation<br />
Configure properties of SCP.<br />
When the registered SCP is selected on the SCP List, the properties of SCP are displayed and can be<br />
configured.<br />
• Name: Set the SCP name.<br />
• AE Title: Set the AE title of the SCP.<br />
• IP Address: Set IP address of the SCP.<br />
• Port: Set port number of the server.<br />
• Max PDU: Set Max PDU to use while communicating with the selected SCP.<br />
• Timeout: Set the waiting time to receive response from the selected SCP<br />
when the system tries to communicate with the selected SCP (Unit: second).<br />
If no response is received during that time, it is treated with communication failure.<br />
If Max PDU size is not checked, the communication is made by using the setting value<br />
from SCP.<br />
The speed of communication can be too low if Max PDU is not configured. In this case,<br />
change MAX PDU with various values and enter one of the values that communicated<br />
successfully.<br />
Page 144 of 181<br />
RA20-129-035
<strong>VXvue</strong> <strong><strong>Use</strong>r</strong> <strong>Manual</strong><br />
8.8.4.4 Options<br />
Configure LUT, Modality, image compression and other options to be used <strong>for</strong> sending images.<br />
• LUT: Choose LUT applied when sending the images to the selected SCP.<br />
• Modality: Choose the Modality value applied when sending the images to the selected SCP.<br />
The Modality value recorded when exposing images is applied if choosing the current<br />
modality.<br />
• Software Collimation: Select option to apply on the image when image is sent.<br />
NONE: Images as its original size without applying Crop are sent.<br />
CUT: Images cut as much as CROP area are sent.<br />
FILL: Images filled the outside of Crop area with black color are sent.<br />
• Burned in Annotation: The annotation is exported by recording in the image when choose YES.<br />
• Burned in In<strong>for</strong>mation: Patient in<strong>for</strong>mation is exported by recording in the image when choose YES<br />
• Transfer Syntax: Select communication protocol when sending images to the selected SCP.<br />
• Language: Select an encoding of language applied when sending images to the selected<br />
SCP.<br />
• Compression: Select the compression protocol. If it is selected, the image compressed<br />
with the selected compression protocol is sent to the selected SCP.<br />
If you select JPEG2000 lossless or JPEG2000 lossy as a compression protocol, image<br />
transfer may fail due to unsupported protocol from the selected SCP. (DICOM Storage<br />
server) Select No compression to send images if that SCP doesn’t support any<br />
compression protocol.<br />
Page 145 of 181<br />
RA20-129-035
<strong>VXvue</strong> <strong><strong>Use</strong>r</strong> <strong>Manual</strong><br />
8.8.5 Storage Commitment Panel<br />
Figure 8.36 Storage Commitment Panel<br />
• Configure the SCP. (DICOM Storage Commitment server)<br />
• Click the Echo button to verify the communication with the selected SCP.<br />
• When the image transfer is finished to DICOM Storage server, the transfer in<strong>for</strong>mation is sent to the<br />
registered SCP.<br />
8.8.5.1 SCP List<br />
You can select a SCP to use when the registered SCP is listed.<br />
• Add Add new SCP<br />
• Delete Delete the selected SCP.<br />
8.8.5.2 Verification<br />
Display the results after verifying communication with the selected SCP<br />
• Echo: Verify the communication with the selected SCP.<br />
Page 146 of 181<br />
RA20-129-035
<strong>VXvue</strong> <strong><strong>Use</strong>r</strong> <strong>Manual</strong><br />
8.8.5.3 Basic In<strong>for</strong>mation Verification<br />
Configure properties of SCP.<br />
When the registered SCP is selected on SCP List, the properties of SCP are displayed and can be<br />
configured.<br />
• Name: Set the SCP name.<br />
• AE Title: Set the AE title of server.<br />
• IP Address: Set IP address of server.<br />
• Port: Set port number of server.<br />
• Max PDU: Set Max PDU to use while communicating with the selected SCP.<br />
If Max PDU size is not checked, the communication is made by using the setting value<br />
from SCP.<br />
The speed of communication can be too low if Max PDU is not configured. In this case,<br />
change MAX PDU with various values and enter one of the values that communicated<br />
successfully.<br />
Page 147 of 181<br />
RA20-129-035
<strong>VXvue</strong> <strong><strong>Use</strong>r</strong> <strong>Manual</strong><br />
8.8.6 Print Panel<br />
Figure 8.37 Print Panel<br />
• Configure the SCP. (DICOM Print server)<br />
• Click the Echo button to verify the communication with the selected SCP.<br />
• Specify in<strong>for</strong>mation to be printed on the film.<br />
Make sure to enter the Station AE Title. The image transfer can be failed if Station AE Tilte<br />
entered in “System Panel” of chapter 8.1.1 is different with “Calling AE Title” on the<br />
specific SCP because some SCP rejects to receive images from unregistered SCU.<br />
(Client)<br />
Page 148 of 181<br />
RA20-129-035
<strong>VXvue</strong> <strong><strong>Use</strong>r</strong> <strong>Manual</strong><br />
8.8.6.1 SCP List<br />
The registered SCP is listed and <strong><strong>Use</strong>r</strong> can select a SCP to use.<br />
• Add Add new SCP<br />
• Delete Delete the selected SCP.<br />
8.8.6.2 Verification<br />
Display of the results after verifying communication with the selected SCP<br />
• Echo: Verify the communication with the selected SCP.<br />
8.8.6.3 Basic In<strong>for</strong>mation Verification<br />
Configure properties of SCP.<br />
When the registered SCP is selected on SCP List, the properties of SCP are displayed and can be<br />
configurable.<br />
• Name: Set the SCP name.<br />
• AE Title: Set the AE title of server.<br />
• IP Address: Set IP address of server.<br />
• Port: Set port number of sever.<br />
• Max PDU: Set Max PDU size to use while communicating with the selected SCP.<br />
• Timeout: Set the waiting time to receive response from the selected SCP.when tried to communicate<br />
with the select SCP. (Unit: second) If no response is received during that time, it is treated<br />
with communication failure.<br />
• LUT: Choose LUT applied when sending the images to the selected SCP.<br />
If Max PDU size is not checked, the communication is made by using the setting value<br />
from SCP.<br />
The speed of communication can be too low if Max PDU is not configured. In this case,<br />
change MAX PDU with various values and enter one of the values that communicated<br />
successfully.<br />
Page 149 of 181<br />
RA20-129-035
<strong>VXvue</strong> <strong><strong>Use</strong>r</strong> <strong>Manual</strong><br />
8.8.6.4 Printer Format<br />
Configure properties of DICOM Print server.<br />
• Size: Select the film size.<br />
• Orientation: Configure the printed direction. (Portrait / Landscape)<br />
• Format: Configure the layout of images printed on film.<br />
• Medium Type: Configure the medium type of print. (Clear film, Blue film, ect.)<br />
• Film Destination: Configure the film destination of print. (Magazine / Processor / BIN_1~BIN_9)<br />
• Priority: Configure the priority of printing.<br />
• Trim: Configure the use of Trim. (Yes / No)<br />
• Min Density: Configure minimum density of print.<br />
• Max Density: Configure maximum density of print.<br />
• Magnification Type: Configure the image interpolation method printed on a film.<br />
(Replicate/Bilinear/Cubic)<br />
• Request Resolution: Configure the requested resolution of print. (Standard /High)<br />
• Num of Copy: Configure number of copy.<br />
Uncheck the unsupported tags if SCP (DICOM Print server) fails to operate due to those<br />
tags. Refer to DICOM Con<strong>for</strong>mance Statement of that SCP <strong>for</strong> more in<strong>for</strong>mation.<br />
8.8.6.5 Layout Items<br />
• Header font & color: Configure color, font and its size <strong>for</strong> texts to be displayed on the header.<br />
Color: Configure color of the text displayed on the header.<br />
Font: Configure font of the text displayed on the header.<br />
Size: Configure size of the text displayed on the header.<br />
Position: Set the position of header.<br />
Layout: Set the layout of items displayed on the header.<br />
• Image overlay font & color: Configure color, font and its size <strong>for</strong> texts to be displayed on the image.<br />
Color: Configure color of the text displayed on the image.<br />
Font: Configure font of the text displayed on the image.<br />
Size: Configure size of the text displayed on the image.<br />
Absolute Font Size:<br />
- When you select the Absolute Font Size checkbox, font always display to be the same size<br />
regardless of image layout on the film.<br />
- When you deselect the Absolute Font Size checkbox, the font size will be automatically<br />
adjusted according to image layout on the film. Also, the font size will be adjusted by referring<br />
the inputted font size.<br />
Page 150 of 181<br />
RA20-129-035
<strong>VXvue</strong> <strong><strong>Use</strong>r</strong> <strong>Manual</strong><br />
• Annotation font & color:<br />
Configure color, font and its size <strong>for</strong> texts of annotation to be displayed on the image.<br />
Color: Configure color of the text displayed on the image<br />
Font: Configure font of the text displayed on the image.<br />
Size: Configure size of the text displayed on the image.<br />
• Header: Specify the items to be displayed on the header.<br />
▲, ▼ button: add/delete the items to be displayed on the header from item category.<br />
• Top Left, Bottom Left, Top Right, and Bottom Right:<br />
Specify the items to be displayed on each position of the image.<br />
• ▶, ◀ button: add/delete the items to be displayed on the each position from item category.<br />
• Item: The list of in<strong>for</strong>mation that can be displayed on the header or the image.<br />
The list of in<strong>for</strong>mation displayed on the header or the image is as follows.<br />
• Patient ID, Patient Name, Birthdate, Sex/Age, Height, Weight<br />
• Bodypart, Projection, Laterality<br />
• Per<strong>for</strong>ming Physician, Referring Physician<br />
• Study Date, Study Time, Accession number<br />
• Series Number, Instance Number, Exposure Time<br />
• Dose kVp, Dose mA, Dose ms, Dose mAs, DAP<br />
• Exposure Index, Deviation Index, Target Exposure Index<br />
• Pixel Value, Histogram, Zoom Ratio<br />
• Institutional Name, Institutional Address, Institutional Department Name<br />
• Manufacturer, Manufacturer Model Name, Station Name, Modality<br />
Page 151 of 181<br />
RA20-129-035
<strong>VXvue</strong> <strong><strong>Use</strong>r</strong> <strong>Manual</strong><br />
8.9 Setting Reject<br />
8.9.1 Rejected List Panel<br />
Figure 8.38 Rejected List Panel<br />
• Search the rejected study or images.<br />
• Click Restore to restore selected study or image.<br />
• Click Delete to remove selected study or image.<br />
Page 152 of 181<br />
RA20-129-035
<strong>VXvue</strong> <strong><strong>Use</strong>r</strong> <strong>Manual</strong><br />
8.9.2 Reason Panel<br />
Figure 8.39 Reason Panel<br />
Register reasons to be used when reject study or image.<br />
• <strong>Use</strong> rejection reason: Check to enter ‘reject reason’ when rejecting study or images.<br />
• Always display image: Check to display the rejected study or image with other study/image.<br />
Page 153 of 181<br />
RA20-129-035
<strong>VXvue</strong> <strong><strong>Use</strong>r</strong> <strong>Manual</strong><br />
Appendix A.<br />
Cursor and Icon List<br />
A.1 Tool Cursors<br />
Crop<br />
Zoom<br />
Magic Glass<br />
Window Level<br />
Pan<br />
Move<br />
A.2 Annotation Cursors<br />
Angle<br />
Arrow<br />
Distance<br />
Window Level<br />
Ellipse<br />
Rectangle<br />
Text<br />
Page 154 of 181<br />
RA20-129-035
<strong>VXvue</strong> <strong><strong>Use</strong>r</strong> <strong>Manual</strong><br />
A.3 Status Bar Icons<br />
More than local HDD<br />
Under the configured warning space of local HDD<br />
Under 33% compared to the total capacity of local HDD<br />
Under 66% compared to the total capacity of local HDD<br />
Under 100% compared to the total capacity of local HDD<br />
In DICOM Storage status<br />
In DICOM Print status<br />
A.4 Listed Icons in Database Mode<br />
Backed up<br />
Deleted<br />
Sent to the DICOM Print server<br />
Sent to the DICOM Storage server<br />
Page 155 of 181<br />
RA20-129-035
<strong>VXvue</strong> <strong><strong>Use</strong>r</strong> <strong>Manual</strong><br />
A.5 Thumbnail Status Icons<br />
Backed up<br />
Deleted<br />
Sent to the DICOM Print server<br />
Sent to the DICOM Storage server<br />
Rejected image<br />
Currently selected step<br />
Page 156 of 181<br />
RA20-129-035
<strong>VXvue</strong> <strong><strong>Use</strong>r</strong> <strong>Manual</strong><br />
A.6 Detector in<strong>for</strong>mation Icons<br />
The battery capacity is under 100%<br />
The battery capacity is under 75%<br />
The battery capacity is under 50%<br />
The battery capacity is under 25%<br />
Need battery charge<br />
Errors in detector connection<br />
Detector connected<br />
Detector disconnected<br />
Temperature error in the detector<br />
Low temperature in the detector<br />
High temperature in the detector<br />
The Wi-Fi signal strength is under 100%<br />
The Wi-Fi signal strength is under 75%<br />
The Wi-Fi signal strength is under 50%<br />
The Wi-Fi signal strength is under 25%<br />
Wi-Fi error<br />
Page 157 of 181<br />
RA20-129-035
<strong>VXvue</strong> <strong><strong>Use</strong>r</strong> <strong>Manual</strong><br />
A.7 Detector Status Icons<br />
Disconnected<br />
Some images on the detector are not transferred<br />
Changed in<strong>for</strong>mation of detector status<br />
Sleep Mode<br />
FXRD-1717SA/SB detector<br />
FXRD-1417SA/SB detector<br />
FXRD-1417WA/WB detector is connected to Wi-Fi<br />
FXRD-1417WA/WB detector is connected to tether.<br />
Page 158 of 181<br />
RA20-129-035
<strong>VXvue</strong> <strong><strong>Use</strong>r</strong> <strong>Manual</strong><br />
Appendix B.<br />
Image Process Guide (HS2)<br />
Min. Max. Recommendation * Class Unit Comment<br />
Contrast Slope 0 50 5~30 Contrast - 0 : Auto<br />
↑ : Less<br />
Contrast Point 0 100 0 or 20~100 Contrast % 0 : Auto<br />
↑ : Less<br />
+ : Contrast Slope<br />
Mean Point 1 100 1 Contrast % ↑ : Less<br />
Skin Correct 0 100 0 or 5~20 Contrast % ↑ : Less<br />
+ : Compensation<br />
OPPoint 100 1000 1000 - ↑ : More<br />
Compensation 0 100 100 or<br />
Contrast % ↑ : More<br />
100↓: air region<br />
Compression ** 0 20 5~10 : extremity<br />
Contrast - ↑ : More<br />
0 : Body<br />
Denoise ** 0 14 5 : extremity<br />
Edge - ↑ : More<br />
10↑ : Body<br />
Gamma ** 0 9 2 Brightness - ↑ : Less<br />
Fine Edge ** 0 20 3 Edge - ↑ : More<br />
Middle Edge ** 0 20 3 Edge - ↑ : More<br />
Large Edge 0 20 0 Edge - ↑ : More<br />
Huge Edge 0 20 0 Edge - ↑ : More<br />
Post LUT 0 16383 Auto<br />
Brightness<br />
- or<br />
<strong>Manual</strong> : Pixel Value<br />
(Low: 0,High: 0)<br />
%<br />
Auto : %<br />
LUT Type Linear Curve Brightness -<br />
Display ROI 0 16383 Auto<br />
Brightness<br />
- or<br />
<strong>Manual</strong> : Pixel Value<br />
(Low: -10,High: 10)<br />
%<br />
Auto : %<br />
Note)<br />
* These values in ‘Recommendation’ column are just <strong>for</strong> the reference purposes, as they might need to be adjusted depending on anatomic regions,<br />
projection, patient size, dose conditions, environmental conditions, etc.<br />
* You need to make your own image processing parameters <strong>for</strong> each anatomic region and projection by referring to the values in ‘Recommendation’ column<br />
and sample parameters.<br />
** These five (5) kinds of image processing parameters can be easily adjusted by a user at process panel located at the right of the GUI of the software<br />
when the image is being displayed. (Exposure mode or Viewer mode)<br />
Page 159 of 181<br />
RA20-129-035
<strong>VXvue</strong> <strong><strong>Use</strong>r</strong> <strong>Manual</strong><br />
B.1 HS2 Basic<br />
Figure B.40 HS2 Basic<br />
Page 160 of 181<br />
RA20-129-035
<strong>VXvue</strong> <strong><strong>Use</strong>r</strong> <strong>Manual</strong><br />
B.2 Contrast slope (0~50)<br />
• Meaning: A slope which can determine the contrast of a whole image (data).<br />
• Effect: The lower the value of Contrast slope is, the more enhanced contrast you can get.<br />
• Additional effect: -<br />
• Range: 0~50<br />
• Recommended range: 5~30<br />
• Unit: -<br />
• Comment: “0” means that Contrast slope is automatically determined.<br />
• Risk: “1~4” is not recommended <strong>for</strong> use, as those values are not good <strong>for</strong> a proper image processing.<br />
Figure B.2 Contrast slope = 5 Figure B.3 Contrast slope = 50<br />
Page 161 of 181<br />
RA20-129-035
<strong>VXvue</strong> <strong><strong>Use</strong>r</strong> <strong>Manual</strong><br />
B.3 Contrast point (0~100)<br />
• Meaning: A point of gray value where Contrast slope is applied<br />
• Effect: To enhance the contrast at a wanted gray level. For instance, if you use the contrast slope at the lower gray level, you can get more contrast at such low gray level.<br />
(e.g. Bone-low, Abdomen-middle, background-High)<br />
• Additional effect: -<br />
• Range: 0~100<br />
• Recommended range: 0 or 20~100<br />
• Unit: %<br />
• Comment: “0” means that Contrast point is automatically determined.<br />
• Risk: “1~19” is not recommended <strong>for</strong> use, as those values are not good <strong>for</strong> a proper image processing.<br />
Figure B.4 Contrast Point = “20" Figure B.5 Contrast Point = “100"<br />
Page 162 of 181<br />
RA20-129-035
<strong>VXvue</strong> <strong><strong>Use</strong>r</strong> <strong>Manual</strong><br />
B.4 Mean Point (1~100)<br />
• Meaning: Mean point (in log scale) of gray value of the image <strong>for</strong> image processing.<br />
• Effect: To enhance clarity at a wanted gray level.<br />
• Caution: The higher the value of Mean Point is, the low level is compressed. (e.g. skin)<br />
• Range: 1~100<br />
• Recommended range: 1<br />
• Unit: %<br />
• Comment:<br />
• Risk: “31~100” is not recommended <strong>for</strong> use, as those values are not good <strong>for</strong> a proper image processing.<br />
Figure B.6 Mean Point = “1" Figure B.7 Mean Point = “50"<br />
Page 163 of 181<br />
RA20-129-035
<strong>VXvue</strong> <strong><strong>Use</strong>r</strong> <strong>Manual</strong><br />
B.5 Skin correct (0~100)<br />
• Meaning: A parameter to restore the gray level of the area compressed by Mean Point to a certain level.<br />
• Effect: The higher the value of Skin correct is, the more enhancement of edge between skin and background you can get.<br />
• Additional effect: -<br />
• Range: 0~100<br />
• Recommended range: 0 or 5~20<br />
• Unit: %<br />
• Comment: It is related to compensation. This parameter is valid when compensation is used.<br />
• Risk: -<br />
Figure B.8 Skin correct = “0" Figure B.9 Skin correct = “100"<br />
Page 164 of 181<br />
RA20-129-035
<strong>VXvue</strong> <strong><strong>Use</strong>r</strong> <strong>Manual</strong><br />
B.6 OPPoint (1000~100): TBD<br />
• Meaning: -<br />
• Effect: -<br />
• Additional effect: -<br />
• Range: 100~1000<br />
• Recommended range: 1000<br />
• Unit:<br />
• Comment: -<br />
• Risk: -<br />
Figure B.10 OPPoint = “100" Figure B.11 OPPoint = “1000"<br />
Page 165 of 181<br />
RA20-129-035
<strong>VXvue</strong> <strong><strong>Use</strong>r</strong> <strong>Manual</strong><br />
B.7 Compensation<br />
• Meaning: A parameter to determine a level of compensation <strong>for</strong> the area enhanced by Compression. (See ‘B.8. Compression’)<br />
• Effect: The higher the value of Compensation is, the more compensation you can get at the area untended to be enhanced by Compression.<br />
This parameter can be used <strong>for</strong> compensating the ‘background area’.<br />
• Additional effect: -<br />
• Range: 0~100<br />
• Recommended range: 100 <strong>for</strong> almost all anatomic regions. Less than 100 <strong>for</strong> specific anatomic regions full of air. (e.g. lung)<br />
• Unit: %<br />
• Comment: It is related to Compression.<br />
• Risk: -<br />
Figure B.12 Compensation = “0" Figure B.13 Compensation = “100"<br />
Page 166 of 181<br />
RA20-129-035
<strong>VXvue</strong> <strong><strong>Use</strong>r</strong> <strong>Manual</strong><br />
B.8 Compression<br />
• Meaning: A parameter to determine dynamic range of the image.<br />
• Effect: The higher the value of Compression is, the more enhanced contrast between skin and bone you can get.<br />
• Caution: The background area becomes brighter. In this case, you need to compensate the area by Compensation.<br />
• Range: 0~20<br />
• Recommended range: 5~10 <strong>for</strong> body except <strong>for</strong> extremities, 3~5 <strong>for</strong> extremities<br />
• Unit: -<br />
• Comment: This parameter can be easily adjusted by a user at the image processing panel.<br />
• Risk: -<br />
Figure B.14 Compression = “0" Figure B.15 Compression = “20"<br />
Page 167 of 181<br />
RA20-129-035
<strong>VXvue</strong> <strong><strong>Use</strong>r</strong> <strong>Manual</strong><br />
B.9 Denoise<br />
• Meaning: A parameter to determine the strength of noise reduction.<br />
• Effect: The higher the value of Denoise is, the more noise reduction you can get.<br />
• Caution: The higher level of noise reduction could make the image smoother.<br />
• Range: 0~14<br />
• Recommended range: More than 10 <strong>for</strong> body except <strong>for</strong> extremities, 5 <strong>for</strong> extremities<br />
• Unit: -<br />
• Comment: This parameter can be easily adjusted by a user at the image processing panel.<br />
• Risk: Details in the image could be sacrificed a bit.<br />
Figure B.16 Denoise = “0" Figure B.17 Denoise = “14"<br />
Page 168 of 181<br />
RA20-129-035
<strong>VXvue</strong> <strong><strong>Use</strong>r</strong> <strong>Manual</strong><br />
B.10 Gamma<br />
Figure B.18 Gamma Curve<br />
• Meaning: A parameter to determine the level of gamma curve after an image processing.<br />
• Effect: The lower level of Gamma could make the image brighter.<br />
• Additional effect: The lower value of Gamma is, the more details you can get at the lower level.<br />
• Range: 0~9<br />
• Recommended range: 2<br />
• Unit: -<br />
• Comment: This parameter can be easily adjusted by a user at the image processing panel.<br />
• Risk: -<br />
Page 169 of 181<br />
RA20-129-035
<strong>VXvue</strong> <strong><strong>Use</strong>r</strong> <strong>Manual</strong><br />
Figure B.19 Gamma = “0" Figure B.20 Gamma = “9"<br />
Page 170 of 181<br />
RA20-129-035
<strong>VXvue</strong> <strong><strong>Use</strong>r</strong> <strong>Manual</strong><br />
B.11 Fine Edge<br />
• Meaning: A parameter to determine the level of edge enhancement <strong>for</strong> the edge in the fine size.<br />
• Effect: Fine edge is sharpened.<br />
• Caution: It could also enhance the noise.<br />
• Range: 0~20<br />
• Recommended range: 3<br />
• Unit: -<br />
• Comment: This parameter can be easily adjusted by a user at the image processing panel.<br />
• Risk: -<br />
Figure B.21 Fine edge = “0" Figure B.22 Fine edge = “20"<br />
Page 171 of 181<br />
RA20-129-035
<strong>VXvue</strong> <strong><strong>Use</strong>r</strong> <strong>Manual</strong><br />
B.12 Middle Edge<br />
• Meaning: A parameter to determine the level of edge enhancement <strong>for</strong> the edge in the middle size.<br />
• Effect: Middle edge is more sharpened.<br />
• Caution: It could also enhance the noise.<br />
• Range : 0~20<br />
• Recommended range : 3<br />
• Unit : -<br />
• Comment: This parameter can be easily adjusted by a user at the image processing panel.<br />
• Risk: Smaller edge than this could be weakened.<br />
Figure B.23 Middle edge = “0" Figure B.24 Middle edge = “20"<br />
Page 172 of 181<br />
RA20-129-035
<strong>VXvue</strong> <strong><strong>Use</strong>r</strong> <strong>Manual</strong><br />
B.13 Large Edge<br />
• Meaning: A parameter to determine the level of edge enhancement <strong>for</strong> the edge in the large size.<br />
• Effect: Large edge is sharpened.<br />
• Caution: It could also enhance the noise.<br />
• Range : 0~20<br />
• Recommended range: 0<br />
• Unit: -<br />
• Comment:<br />
• Risk: Smaller edge than this could be weakened. It is not recommended to use the value higher than 15, as it is not good <strong>for</strong> a proper image processing.<br />
Figure B.25 Large edge = “0" Figure B.26 Large edge = “20"<br />
Page 173 of 181<br />
RA20-129-035
<strong>VXvue</strong> <strong><strong>Use</strong>r</strong> <strong>Manual</strong><br />
B.14 Huge Edge<br />
• Meaning: A parameter to determine the level of edge enhancement <strong>for</strong> the edge in the huge size.<br />
• Effect: Huge edge is sharpened.<br />
• Caution: It could also enhance the noise.<br />
• Range: 0~20<br />
• Recommended range: 0<br />
• Unit: -<br />
• Comment:<br />
• Risk: Smaller edge than this could be weakened. It is not recommended to use the value higher than 5, as it is not good <strong>for</strong> a proper image processing.<br />
Figure B.27 Huge edge = “0" Figure B.28 Huge edge = “20"<br />
Page 174 of 181<br />
RA20-129-035
<strong>VXvue</strong> <strong><strong>Use</strong>r</strong> <strong>Manual</strong><br />
Appendix C.<br />
Exposure Index<br />
C.1 Flowchart (Exposure Index Setting)<br />
Figure C.1 Flowchart<br />
Page 175 of 181<br />
RA20-129-035
<strong>VXvue</strong> <strong><strong>Use</strong>r</strong> <strong>Manual</strong><br />
C.2 Exposure Index (E.I) and Deviation Index (D.I) Display<br />
If you set to use Exposure Index, you will see EI and DI in “Image Overlay” area after exposure automatically.<br />
(Refer to 8.4.1 “Image Overlay”)<br />
You have to set the area to be calculated exposure index and proper target value ( EI ) per “Step (anatomic<br />
region and projection)” on Step panel. (Refer to 8.6.2.15 “E.I (Exposure Index)”)<br />
t<br />
Exposure Index Display<br />
Figure C.2 Exposure Index Display<br />
• You Can display the value of E.I. / D.I. / Target E.I according to “Viewer Settings”<br />
• D.I.’s Background’s Color<br />
• Green : Adequate Exposure<br />
• Orange : a little over/under adequate Exposure<br />
• Red : Over/Under Exposure<br />
Page 176 of 181<br />
RA20-129-035
<strong>VXvue</strong> <strong><strong>Use</strong>r</strong> <strong>Manual</strong><br />
C.3 Set Target Exposure Index ( EI<br />
t ) in Step Panel<br />
Exposure Index<br />
Figure C.3 Step Panel<br />
Enter the target exposure index (<br />
EI t<br />
) in the “Target” box and the area to calculate exposure index in the<br />
“Area” box.<br />
Page 177 of 181<br />
RA20-129-035
<strong>VXvue</strong> <strong><strong>Use</strong>r</strong> <strong>Manual</strong><br />
C.4 Exposure Index Formula<br />
C.4.1<br />
Definition<br />
EI = c g(<br />
v)<br />
c *<br />
0<br />
* =<br />
0<br />
K cal<br />
c<br />
0 ----- Constant, 100 μGy. -1<br />
K<br />
cal<br />
----- Air kerma that the image receptor received under calibrated conditions (Standard<br />
beam RQA5 with 21mm aluminum filtration), unit is μGy.<br />
v ----- Set ROI in Gain, dark, distortion corrected raw image, remove the background and get a<br />
Mean, Mode, or Median value of gray level.<br />
g(v)<br />
---- Inverse calibration function which is same with “linearity relationship” we said,<br />
determined from the relationship between the image receptor air kerma ( K ) and<br />
the value of interest ( v ).<br />
cal<br />
C.4.2<br />
Range<br />
0~10000 (It depends on individual detector, <strong>for</strong> example CsI-DR and GOS-DR have different maximum EI<br />
values).<br />
Page 178 of 181<br />
RA20-129-035
<strong>VXvue</strong> <strong><strong>Use</strong>r</strong> <strong>Manual</strong><br />
C.5 Deviation Index (Relative Index) Formula<br />
C.5.1<br />
Definition<br />
Deviation is a number quantifying the deviation of the actual Exposure index from the Target (Proper)<br />
Exposure Index.<br />
DI = 10 * log10<br />
EI<br />
EI T<br />
EI --- Actual Exposure Index<br />
EI<br />
t --- Expected value of the exposure index. It may depend on the type of detector, on the type<br />
of examination, on the diagnostic question and on other parameters.<br />
EI = c<br />
t<br />
* g(<br />
v<br />
0 T<br />
)<br />
C.5.2<br />
Range<br />
• -9.9~9.9<br />
If EI 10* EI DI<br />
t =9.9;<br />
Page 179 of 181<br />
RA20-129-035
<strong>VXvue</strong> <strong><strong>Use</strong>r</strong> <strong>Manual</strong><br />
C.6 The Recommended Target Exposure Index ( EI<br />
t )<br />
Bodypart Projection Target Exposure Index<br />
Default Default 1300<br />
Ankle AP/PA 1460<br />
LAT 2210<br />
Calcareous Axial 2310<br />
LAT 2250<br />
C-SPINE AP/PA 1280<br />
LAT 1120<br />
Chest LAT 980<br />
AP/PA 1430<br />
Clavicle AP/PA 1660<br />
LAT 860<br />
Elbow AP 2120<br />
LAT 2040<br />
Femur AP/PA 1940<br />
LAT 2370<br />
Finger AP/PA 2440<br />
LAT 2530<br />
Foot AP/PA 1880<br />
OBL 2140<br />
Forearm AP/PA 2270<br />
LAT 2430<br />
Hand AP/PA 2400<br />
LAT 2670<br />
OBL 2540<br />
Hip AP/PA 1760<br />
LAT 2580<br />
Knee AP/PA 1760<br />
LAT 1970<br />
Tibia AP/PA 1750<br />
LAT 1930<br />
L-SPINE AP/PA 1310<br />
LAT 1300<br />
Page 180 of 181<br />
RA20-129-035
<strong>VXvue</strong> <strong><strong>Use</strong>r</strong> <strong>Manual</strong><br />
Vieworks Co., Ltd.<br />
#107-108, 601-610, Suntechcity 2,<br />
52, Sagimakgol-ro (307-2, Sangdaewon-dong),<br />
Jungwon-gu, Seongnam-si, Gyeonggi-do, 462-736, South Korea<br />
Telephone: +82-70-7011-6161 FAX: +82-31-737-4954<br />
Website: http://www.vieworks.com<br />
European representative: DONGBANG ACUPRIME<br />
1 Forrest Units, Hennock Road East, Marsh Barton, Exeter EX2 8RU, UK<br />
Telephone: +44(0)-1392-829500<br />
Site: http://www.acuprime.com<br />
Page 181 of 181<br />
RA20-129-035