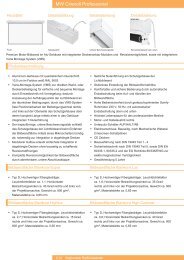
Digital Projection Highlite 12000Dsx / 8000Dsx ... - www.longdog.biz
Digital Projection Highlite 12000Dsx / 8000Dsx ... - www.longdog.biz
Digital Projection Highlite 12000Dsx / 8000Dsx ... - www.longdog.biz

You also want an ePaper? Increase the reach of your titles
YUMPU automatically turns print PDFs into web optimized ePapers that Google loves.
3. Projecting an Image<br />
This chapter describes how to turn on the Projector and to project<br />
a picture onto the screen.<br />
1 Turning on the Projector<br />
NOTE:<br />
• When plugging in or unplugging the supplied power cable, make sure that the<br />
main power switch is pushed to the off[O] position. Failure to do so may cause<br />
damage to the Projector.<br />
• The Projector has two power switches: main power switch and POWER button<br />
(POWER ON and OFF on the remote control)<br />
To turn on the main power to the Projector,<br />
press the Main Power switch to the<br />
ON position ( I ).<br />
2. Press the ENTER button to execute the selection.<br />
Standby<br />
Power ON<br />
ON/STAND BY<br />
POWER<br />
3. The Basic menu will be displayed in the language you have selected.<br />
POWER<br />
Steady orange<br />
light<br />
Steady green<br />
light<br />
Before you turn on your Projector, ensure that the computer or<br />
video source is turned on.<br />
Only after you press the ON/STAND BY button on the Projector<br />
cabinet or POWER ON button on the remote control for a minimum<br />
of 1 second will the power indicator turn to green and the<br />
Projector become ready to use.<br />
To close the menu, press the CANCEL button.<br />
Note on Startup screen (Menu Language Select screen)<br />
When you first turn on the Projector, you will get the Startup<br />
screen. This screen gives you the opportunity to select one of<br />
the seven menu languages: English, German, French, Italian,<br />
Spanish, Swedish and Japanese.<br />
To select a menu language, follow these steps:<br />
1. Use the SELECT G or H button to select one of the seven languages<br />
for the menu.<br />
After this has been done, you can proceed to the advanced menu<br />
operation.<br />
If you want, you can select the menu language later. See "Language"<br />
on page E-58.<br />
NOTE: To turn the Projector on by plugging in the power cable, first turn on the<br />
Main Power switch to ON and use the menu and enable the "Auto Start" feature.<br />
(See page E-60.)<br />
E-30