GNAV Pro Quick Reference Guide - NEC Corporation of America
GNAV Pro Quick Reference Guide - NEC Corporation of America
GNAV Pro Quick Reference Guide - NEC Corporation of America

You also want an ePaper? Increase the reach of your titles
YUMPU automatically turns print PDFs into web optimized ePapers that Google loves.
3-2 Configuring <strong>GNAV</strong> <strong>Pro</strong><br />
Entity Type<br />
Extension<br />
Node<br />
Pilot<br />
Split<br />
Team<br />
Trunk<br />
Trunk Group<br />
Description<br />
A telephone generally used for ACD work. There are three types<br />
<strong>of</strong> extensions referred to in <strong>GNAV</strong> <strong>Pro</strong>: analog, digital and<br />
business.<br />
• Analog and digital extensions allow agents to log on and receive<br />
ACD calls, as well as make and receive calls on a secondary<br />
(PBX) line.<br />
• Business extensions are extensions on a PBX that are not used<br />
to handle ACD calls.<br />
A physical switch and all entities related to that switch, including<br />
its agents, splits, pilots, trunks and extensions.<br />
A number used to receive all ACD calls. Calls coming to a pilot are<br />
automatically queued. The call follows pre-programmed steps<br />
called a CCV (Call Control Vector). The call, while associated with<br />
the pilot, can be presented to multiple splits before being passed<br />
to an agent for final handling.<br />
A queue through which ACD calls are distributed to agents logged<br />
on to that split. Splits generally are used to handle calls <strong>of</strong> a like<br />
type. For example, you can set up a split that only handles sales<br />
calls or support calls.<br />
A set <strong>of</strong> Splits grouped together to gather statistical information.<br />
A single incoming or outgoing line from the PBX, uniquely defined<br />
with a route and circuit number.<br />
A group <strong>of</strong> trunks based on route numbers.<br />
Accessing System Configuration<br />
Use the following steps to access the System Configuration:<br />
Step 1<br />
From the Start Menu, select <strong>Pro</strong>grams > <strong>NEC</strong> <strong>GNAV</strong> <strong>Pro</strong> > System<br />
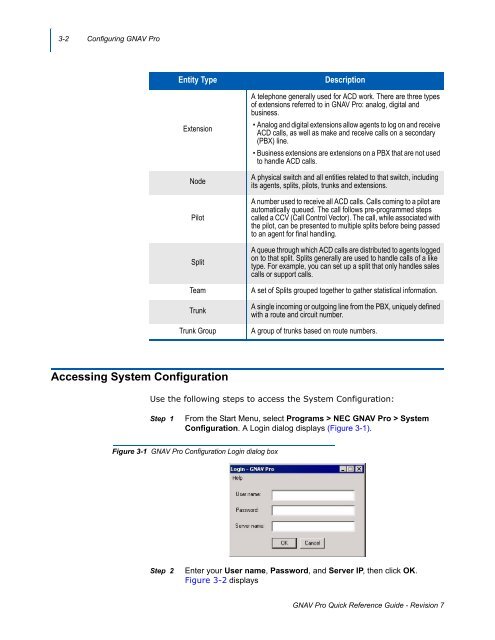
Configuration. A Login dialog displays (Figure 3-1).<br />
Figure 3-1 <strong>GNAV</strong> <strong>Pro</strong> Configuration Login dialog box<br />
Step 2<br />
Enter your User name, Password, and Server IP, then click OK. <br />
Figure 3-2 displays<br />
<strong>GNAV</strong> <strong>Pro</strong> <strong>Quick</strong> <strong>Reference</strong> <strong>Guide</strong> - Revision 7