VG BBA 1
VG BBA 1
VG BBA 1

You also want an ePaper? Increase the reach of your titles
YUMPU automatically turns print PDFs into web optimized ePapers that Google loves.
�<br />
Fax +32 2 359 95 50<br />
Copies of the I/B. Please reproduce them without any<br />
changes except under special instruction from Team<br />
International BELGIUM. The pages must be reproduced<br />
and folded in order to obtain a booklet A5 (+/- 148.5 mm<br />
width x 210 mm height). When folding, make sure you<br />
keep the good numbering when you turn the pages of<br />
the I/B. Don’t change the page numbering. Keep the<br />
language integrity.<br />
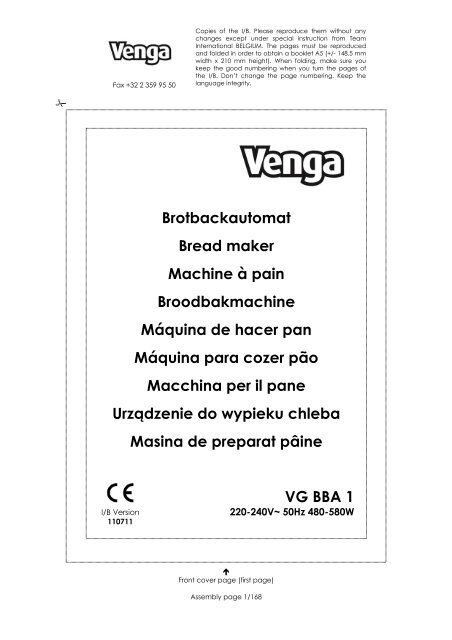
Brotbackautomat<br />
Bread maker<br />
Machine à pain<br />
Broodbakmachine<br />
Máquina de hacer pan<br />
Máquina para cozer pão<br />
Macchina per il pane<br />
Urządzenie do wypieku chleba<br />
I/B Version<br />
110711<br />
Masina de preparat pâine<br />
�<br />
Front cover page (first page)<br />
Assembly page 1/168<br />
<strong>VG</strong> <strong>BBA</strong> 1<br />
220-240V~ 50Hz 480-580W
�<br />
Fax +32 2 359 95 50<br />
Copies of the I/B. Please reproduce them without any<br />
changes except under special instruction from Team<br />
International BELGIUM. The pages must be reproduced<br />
and folded in order to obtain a booklet A5 (+/- 148.5 mm<br />
width x 210 mm height). When folding, make sure you<br />
keep the good numbering when you turn the pages of<br />
the I/B. Don’t change the page numbering. Keep the<br />
language integrity.<br />
2 <strong>VG</strong> <strong>BBA</strong> 1 - 110711<br />
Assembly page 2/168
�<br />
Fax +32 2 359 95 50<br />
D<br />
Gerät<br />
1. Deckel<br />
2. Sichtfenster<br />
3. Belüftungsgitter<br />
4. Knethaken<br />
5. Backform<br />
Bedienelement<br />
6. Start/Stop-Taste (0/1)<br />
7. Taste zur Regelung der Krustefarbe<br />
8. MENU-Knopf zur Einstellung eines<br />
Programms<br />
9. Taste zur Einstellung des Gewichtes<br />
10. Knopf um die Einstellung der Zeitschaltuhr<br />
zu steigern<br />
11. Knopf um die Einstellung der Zeitschaltuhr<br />
zu senken<br />
12. LCD-Display<br />
Zubehör<br />
13. Messbecher<br />
14. Messlöffel<br />
15. Haken<br />
GB<br />
Appliance<br />
1. Lid<br />
2. Viewing window<br />
3. Air vents<br />
4. Kneading blade<br />
5. Baking tin<br />
Control panel<br />
6. Start/Stop key (0/1)<br />
7. Crust colour key<br />
8. Menu key<br />
9. Loaf weight key<br />
10. Time up key<br />
11. Time down key<br />
12. LCD display<br />
Accessories<br />
13. Measuring cup<br />
14. Measuring spoon<br />
15. Hook<br />
Copies of the I/B. Please reproduce them without any<br />
changes except under special instruction from Team<br />
International BELGIUM. The pages must be reproduced<br />
and folded in order to obtain a booklet A5 (+/- 148.5 mm<br />
width x 210 mm height). When folding, make sure you<br />
keep the good numbering when you turn the pages of<br />
the I/B. Don’t change the page numbering. Keep the<br />
language integrity.<br />
FR<br />
Appareil<br />
1. Couvercle<br />
2. Fenêtre du couvercle<br />
3. Grille d'aération<br />
4. Pétrisseur<br />
5. Moule<br />
Panneau de commande<br />
6. Bouton start/stop (0/1)<br />
7. Bouton de réglage de la cuisson de la<br />
croûte<br />
8. Bouton de sélection des programmes<br />
(MENU)<br />
9. Bouton de réglage du poids du pain<br />
10. Bouton pour augmenter le délai de<br />
démarrage différé<br />
11. Bouton pour réduire le délai de<br />
démarrage différé<br />
12. Affichage LCD<br />
Accessoires<br />
13. Bol doseur<br />
14. Cuillère de dosage<br />
15. Crochet<br />
NL<br />
Toestel<br />
1. Deksel<br />
2. Kijkvenster<br />
3. Verluchtingsrooster<br />
4. Kneedhaak<br />
5. Bakvorm<br />
Bedieningspaneel<br />
6. Start/Stop-knop (0/1)<br />
7. Knop voor het instellen van de korstkleur<br />
8. MENU-knop voor het instellen van een<br />
programma<br />
9. Knop voor het instellen van het gewicht<br />
10. Knop van de tijdschakelaar om tijd toe<br />
te voegen<br />
11. Knop van de tijdschakelaar om tijd te<br />
reduceren<br />
12. LCD-display<br />
Accessoires<br />
13. Maatbeker<br />
14. Maatlepel<br />
15. Haak<br />
3 <strong>VG</strong> <strong>BBA</strong> 1 - 110711<br />
Assembly page 3/168
�<br />
Fax +32 2 359 95 50<br />
SP<br />
Aparato<br />
1. Tapa<br />
2. Ventana de la tapa<br />
3. Rejilla de aeración<br />
4. Amasadora<br />
5. Molde<br />
Panel de mandos<br />
6. Botón start/stop (encendido/apagado)<br />
(0/1)<br />
7. Botón de reglaje de la cocción de la<br />
corteza<br />
8. Botón de selección de los programas<br />
(MENU)<br />
9. Botón de reglaje del peso del pan<br />
10. Botón para aumentar el plazo de<br />
arranque diferido<br />
11. Botón para reducir el plazo de<br />
arranque diferido<br />
12. Pantalla LCD<br />
Accesorios<br />
13. Recipiente de dosificación<br />
14. Cuchara dosificadora<br />
15. Gancho<br />
P<br />
Aparelho<br />
1. Tampa<br />
2. Janela da tampa<br />
3. Grelha para ventilação<br />
4. Amassador<br />
5. Forma<br />
Painel com comandos<br />
6. Botão start/stop (ligado/desligado)<br />
(0/1)<br />
7. Botão para regular o cozimento da<br />
côdea do pão<br />
8. Botão de selecção dos programas<br />
(MENU)<br />
9. Botão para regular o peso do pão<br />
10. Botão para aumentar o prazo do<br />
arranque diferido<br />
11. Botão para reduzir o prazo do arranque<br />
diferido<br />
12. Écrã LCD<br />
Acessórios<br />
13. Taça medidora<br />
14. Colher doseadora<br />
15. Gancho<br />
Copies of the I/B. Please reproduce them without any<br />
changes except under special instruction from Team<br />
International BELGIUM. The pages must be reproduced<br />
and folded in order to obtain a booklet A5 (+/- 148.5 mm<br />
width x 210 mm height). When folding, make sure you<br />
keep the good numbering when you turn the pages of<br />
the I/B. Don’t change the page numbering. Keep the<br />
language integrity.<br />
I<br />
Apparecchio<br />
1. Coperchio<br />
2. Finestra del coperchio<br />
3. Griglia di aerazione<br />
4. Impastatrice<br />
5. Forma<br />
Pannello di controllo<br />
6. Pulsante start/stop (acceso/spento)<br />
(0/1)<br />
7. Pulsante di regolamento della cottura<br />
della crosta<br />
8. Pulsante di selezione dei programmi<br />
(MENU)<br />
9. Pulsante di regolamento del peso del<br />
pane<br />
10. Pulsante per aumentare il termine di<br />
avviamento differito<br />
11. Pulsante per ridurre il termine di<br />
avviamento differito<br />
12. Schermo LCD<br />
Accessori<br />
13. Misura<br />
14. Cucchiaio dosatore<br />
15. Gancio<br />
PL<br />
Urządzenie<br />
1. Pokrywa<br />
2. Okienko<br />
3. Otwory wentylacyjne<br />
4. Łopatki do wyrabiania ciasta<br />
5. Miska do pieczenia<br />
Panel sterowanial<br />
6. Przycisk Start/Stop (0/1)<br />
7. Przycisk zabrązowienia<br />
8. Przycisk menu<br />
9. Przycisk wagi bohenka<br />
10. Przycisk do zwiększania czasu<br />
11. Przycisk do redukcji czasu<br />
12. Wyświetlacz LCD<br />
Akcesoria dodatkowe<br />
13. Kubek-miarka<br />
14. Łyżeczka-miarka<br />
15. Haczyk<br />
4 <strong>VG</strong> <strong>BBA</strong> 1 - 110711<br />
Assembly page 4/168
�<br />
Fax +32 2 359 95 50<br />
RO<br />
Aparatul<br />
1. Capac<br />
2. Vizor<br />
3. Aerisire<br />
4. Lama pentru framantat<br />
5. Vasul pentru coacere<br />
Panoul de comanda<br />
6. Butonul de start/stop (0/1)<br />
7. Butonul pentru controlul culorii crustei<br />
8. Butonul pentru selectia programelor<br />
(menu)<br />
9. Butonul pentru reglarea greutatii painii<br />
10. Butonul pentru marirea perioadei de<br />
intarziere a pornirii<br />
11. Butonul pentru reducerea perioadei de<br />
intarziere a pornirii<br />
12. Afisaj LCD<br />
Accesorii<br />
13. Bol pentru masurare<br />
14. Lingura pentru masurare<br />
15. Carlig<br />
Copies of the I/B. Please reproduce them without any<br />
changes except under special instruction from Team<br />
International BELGIUM. The pages must be reproduced<br />
and folded in order to obtain a booklet A5 (+/- 148.5 mm<br />
width x 210 mm height). When folding, make sure you<br />
keep the good numbering when you turn the pages of<br />
the I/B. Don’t change the page numbering. Keep the<br />
language integrity.<br />
5 <strong>VG</strong> <strong>BBA</strong> 1 - 110711<br />
Assembly page 5/168
�<br />
Fax +32 2 359 95 50<br />
WICHTIGE SICHERHEITSVORSCHRIFTEN<br />
Copies of the I/B. Please reproduce them without any<br />
changes except under special instruction from Team<br />
International BELGIUM. The pages must be reproduced<br />
and folded in order to obtain a booklet A5 (+/- 148.5 mm<br />
width x 210 mm height). When folding, make sure you<br />
keep the good numbering when you turn the pages of<br />
the I/B. Don’t change the page numbering. Keep the<br />
language integrity.<br />
Lesen Sie aufmerksam die Gebrauchsanleitung, bevor Sie Ihr Gerät benutzen, und befolgen Sie<br />
immer die Sicherheitsvorschriften und die Gebrauchsanweisung.<br />
Wichtig: Personen (einschließlich Kinder), die aufgrund ihrer physischen, sensorischen oder<br />
geistigen Fähigkeiten oder ihrer Unerfahrenheit oder Unkenntnis nicht in der Lage sind, das<br />
Gerät sicher zu benutzen, sollten dieses Gerät nicht ohne Aufsicht oder Anweisung durch eine<br />
verantwortliche Person benutzen. Kinder sollten beaufsichtigt werden, um sicherzustellen, dass<br />
sie nicht mit dem Gerät spielen.<br />
� Kontrollieren Sie, ob die Netzspannung mit der auf dem Gerät vermerkten Spannung<br />
übereinstimmt, bevor Sie das Gerät benutzen.<br />
� Lassen Sie Ihr Gerät niemals beim Gebrauch unbeaufsichtigt.<br />
� Überprüfen Sie regelmäßig die Anschlussleitung und das Gerät auf Beschädigungen. Bei<br />
Beschädigungen an Anschlussleitung oder Gerät, darf das Gerät aus Sicherheitsgründen<br />
nicht mehr benutzt werden. Für Reparaturen wenden Sie sich an einen Fachmann (*).<br />
� Benutzen Sie das Gerät nur zu Haushaltszwecken, wie in der Bedienungsanleitung<br />
angegeben.<br />
� Tauchen Sie das Gerät niemals in Wasser oder andere Flüssigkeiten, weder zum Reinigen,<br />
noch zu einem anderen Zweck. Geben Sie das Gerät niemals in die Spülmaschine.<br />
� Seien Sie nach dem Backvorgang äußerst vorsichtig, da das Gerät während des<br />
Backvorganges sehr heiß wird. Warten Sie, bis es völlig erkaltet hat, und ziehen Sie immer<br />
den Stecker aus der Steckdose, bevor Sie es reinigen oder wegräumen.<br />
� Benutzen Sie das Gerät nicht in der Nähe einer Wärmequelle.<br />
� Benutzen Sie das Gerät nicht im Freien und bewahren Sie es an einem trockenen Platz auf.<br />
� Benutzen Sie nur Zubehör, welches vom Lieferanten empfohlen wurde. Anderes Zubehör<br />
stellt eine Gefahr für den Benutzer dar und das Gerät könnte dadurch beschädigt<br />
werden.<br />
� Ziehen Sie niemals an der Anschlussleitung, um das Gerät zu bewegen. Achten Sie darauf,<br />
dass zufälligerweise die Anschlussleitung nicht irgendwo hängen bleibt und dies zum Fall<br />
des Gerätes führen könnte. Wickeln Sie die Anschlussleitung nicht um das Gerät oder<br />
knicken Sie diese nicht.<br />
� Stellen Sie das Gerät auf einen Tisch oder auf eine ebene Fläche damit es nicht umfällt.<br />
� Achten Sie darauf, dass die Anschlussleitung nicht mit den heiβen Teilen des Gerätes in<br />
Kontakt kommt.<br />
� Achten Sie darauf, dass die heiβen Teile nicht mit leicht entflammbarem Material, wie<br />
Gardinen, Tischdecken, usw. in Berührung kommen. Brandgefahr!<br />
� Während des Gebrauchs können zugängliche Teile des Gerätes eine sehr hohe<br />
Temperatur erreichen. Berühren Sie diese Teile nicht während des Gebrauchs, sondern<br />
betätigen Sie nur die Regelknöpfe. Wenn das Symbol auf einer gewissenen Fläche<br />
des Gerätes geklebt ist, ist es eine Warnung. Dieses Symbol bedeutet: ACHTUNG, diese<br />
Fläche könnte während des Gebrauches heiß werden.<br />
� Achten Sie darauf, dass die Beschichtung der Backform und des Knethakens nicht<br />
abgekratzt wird, da ansonsten die Antihaftbeschichtung beschädigt werden könnte.<br />
� Überschreiten Sie niemals die Mengen Mehl und Hefe, die in dieser Bedienungsanleitung<br />
empfohlen werden, da der Teig sonst aus der Backform überlaufen würde.<br />
� Decken Sie das Gerät niemals ab (z.B. mit einem Tuch), da dies den Dampfaustritt<br />
behindern würde.<br />
� Um elektrische Schläge zu vermeiden, und um die Backform nicht zu beschädigen,<br />
Stecken Sie keine Gegenstände in die Backform.<br />
� Ihr Gerät darf niemals über eine externe Zeitschaltuhr oder irgendein anderes, separates<br />
Fernbedienungssystem eingeschaltet werden.<br />
6 <strong>VG</strong> <strong>BBA</strong> 1 - 110711<br />
Assembly page 6/168
�<br />
Fax +32 2 359 95 50<br />
Copies of the I/B. Please reproduce them without any<br />
changes except under special instruction from Team<br />
International BELGIUM. The pages must be reproduced<br />
and folded in order to obtain a booklet A5 (+/- 148.5 mm<br />
width x 210 mm height). When folding, make sure you<br />
keep the good numbering when you turn the pages of<br />
the I/B. Don’t change the page numbering. Keep the<br />
language integrity.<br />
(*) Fachmann: anerkannter Kundendienst des Lieferanten oder des Importeurs, der für<br />
derartige Reparaturen zuständig ist. Für eventuelle Reparaturen wenden Sie sich bitte an<br />
diesen Kundendienst.<br />
BEMERKUNG<br />
Das Gerät hat ein relativ kurzes Kabel damit der Benutzer nicht darüber fallen oder darauf<br />
treten kann. Sie können durchaus eine Verlängerungsschnur benutzen. Achten Sie dennoch<br />
auf folgendes:<br />
• Die Spannung der Verlängerungsschnur sollte mit der Spannung des Gerätes<br />
übereinstimmen oder selbst höher sein.<br />
• Um Unfälle zu vermeiden, darauf achten, dass die Anschlussleitung nicht herunterhängt<br />
und Sie darüber stolpern.<br />
BEVOR DEM ERSTEN GEBRAUCH<br />
Packen Sie das Gerät aus, und entsorgen Sie alle Packungsmaterial. Reinigen Sie den Deckel,<br />
die Backform und andere Zubehörteile mit einem feuchten Tuch, und trocknen Sie alle Teile<br />
sorgfältig ab.<br />
Die Qualität des Brotes, das Sie erhalten kann von vielen Faktoren abhängen. Deshalb ist es<br />
notwendig, die Zutaten und ihre Interaktion zu kennen.<br />
Temperatur<br />
Alle Zutaten, die Sie in den Brotbackautomaten hineingeben sollten Zimmertemperatur haben.<br />
Auch der Raum, in dem Sie das Brot backen, sollte normal (15 – 34°C, und idealerweise 20 –<br />
23°C) temperiert sein.<br />
Dosierung der Zutaten<br />
• Ihr Gerät ist mit einem Messbecher und einer kombinierten Messlöffel (groß und klein)<br />
ausgerüstet. Messen Sie die Zutaten ausschließlich mit diesen Zubehörteilen. Die<br />
Dosierungen in den Rezepten dieser Bedienungsanleitung sind auf diese Zubehörteile<br />
abgestimmt.<br />
• In dieser Bedienungsanleitung wird oft auf "Messbecher" und Teile eines Messbechers<br />
verwiesen. Dies entspricht dem Wort "CUP", das sich auf dem Messbecher (250ml)<br />
befindet.<br />
• Auf dem Messlöffel gibt es folgende Markierungen:<br />
"Tablespoon" bedeutet Esslöffel = 15ml<br />
"Teaspoon" bedeutet Teelöffel = 5ml<br />
• Um die flüssigen Zutaten zu messen, füllen Sie den Messbecher und stellen Sie ihn auf eine<br />
ebene Fläche. Hocken Sie nieder bis Ihre Augen sich am Niveau des Messbechers<br />
befinden. Das Niveau der Flüssigkeit muss der Markierung der gewünschten Menge<br />
entsprechen. Eine annähernde Messung ist nicht ausreichend und könnte das<br />
Gleichgewicht des Rezeptes zerstören.<br />
• Um Mehl zu messen, füllen Sie den Messbecher ein bisschen über dem Rand, und<br />
entfernen Sie den Überrest mit einem flachen Utensil, das Sie über den Rand reiben.<br />
Zerstampfen Sie das Mehl nicht, da Sie dann eine zu große Menge benutzen würden.<br />
Sieben Sie das Mehl nicht. Für kleine Mengen, benutzen Sie den Messlöffel und<br />
vergewissern Sie sich, dass er flach gefüllt ist, nicht rund. Für manche trockne Zutaten wie<br />
Rosinen oder Schokoladenstreusel sollten Sie eine Küchenwaage benutzen.<br />
7 <strong>VG</strong> <strong>BBA</strong> 1 - 110711<br />
Assembly page 7/168
�<br />
Fax +32 2 359 95 50<br />
Geografische Höhe<br />
Copies of the I/B. Please reproduce them without any<br />
changes except under special instruction from Team<br />
International BELGIUM. The pages must be reproduced<br />
and folded in order to obtain a booklet A5 (+/- 148.5 mm<br />
width x 210 mm height). When folding, make sure you<br />
keep the good numbering when you turn the pages of<br />
the I/B. Don’t change the page numbering. Keep the<br />
language integrity.<br />
In Hochlagen (mehr als 914 Meter) verdunstet Wasser schneller und das Brot geht auch<br />
schneller auf. Daher ist es in den Hochlagen notwendig, die Rezepte dementsprechend leicht<br />
zu korrigieren, indem Sie etwas mehr Flüssigkeit oder etwas weniger trockne Zutaten benutzen.<br />
Nachfolgende Tabelle gibt Ihnen die Lösungen, der Höhe entsprechend:<br />
HÖHE<br />
Modifizierung<br />
Reduzieren Sie die<br />
914m 1524m 2133m<br />
Hefemenge: pro Teelöffel<br />
im Rezept, reduzieren Sie<br />
um<br />
Reduzieren Sie die<br />
1/8 Teelöffel 1/8 – 1/4 Teelöffel + 1/4 Teelöffel<br />
Zuckermenge: pro Esslöffel<br />
im Rezept, reduzieren Sie<br />
um<br />
Fügen Sie Flüssigkeit hinzu:<br />
0-1 Teelöffel 0-2 Esslöffel 1-2 Teelöffel<br />
pro Messbecher im<br />
Rezept, fügen Sie<br />
folgende Menge hinzu<br />
1-2 Esslöffel 2-4 Esslöffel 3-4 Esslöffel<br />
Zutaten<br />
Der kritischste Faktor für den Erfolg des Brotbackens ist die Qualität und Frische der Zutaten.<br />
Bitte beachten sie auch, dass die Mengeneinheiten der Zutaten genauestens eingehalten<br />
werden müssen.<br />
Allzweckmehl<br />
Allzweckmehl ist eine Mischung von weichem und hartem Weizen, speziell für Brot und Kuchen<br />
entworfen. Obwohl dieses Mehl zu guten Ergebnissen führt, empfehlen wir Ihnen jedoch<br />
Brotmehl zu benutzen.<br />
Brotmehl<br />
Brotmehl enthält einen hohen Gluten-/Proteingehalt, und wurde mit Backhilfsmitteln, die den<br />
Teig während des Knetprozesses flexibler machen, behandelt. Im Allgemeinen hat dise<br />
Mehlsorte einen höheren Glutengehalt als Allzweckmehl, was von Sorte zu Sorte aber variieren<br />
kann. Wir empfehlen Ihnen Brotmehl zu benutzen, obwohl Allzweckmehl auch zu guten<br />
Ergebnissen führen wird.<br />
Vollkornmehl<br />
Vollkornmehl wird aus vollständigen Weizenkörnern produziert und enthält noch die Kleie und<br />
den Keim, wodurch dieses Mehl dichter und reicher an Nährstoffen als Allzweckmehl ist. Brot,<br />
das mit Vollkornmehl gemacht wurde, ist im Allgemeinen kleiner und schwerer als Weißbrot. Um<br />
dies zu lösen, kann man dieses Mehl mit Allzweckmehl, Brotmehl oder Gluten mischen. Das Brot<br />
wird dann höher und weicher sein.<br />
8 <strong>VG</strong> <strong>BBA</strong> 1 - 110711<br />
Assembly page 8/168
�<br />
Roggenmehl<br />
Fax +32 2 359 95 50<br />
Copies of the I/B. Please reproduce them without any<br />
changes except under special instruction from Team<br />
International BELGIUM. The pages must be reproduced<br />
and folded in order to obtain a booklet A5 (+/- 148.5 mm<br />
width x 210 mm height). When folding, make sure you<br />
keep the good numbering when you turn the pages of<br />
the I/B. Don’t change the page numbering. Keep the<br />
language integrity.<br />
Roggenmehl ist reich an Fasern und kann mit Vollkornmehl verglichen werden. Diese Mehlsorte<br />
muss stets mit Weizenmehl, Allzweckmehl oder Brotmehl gemischt werden, da Roggenmehl<br />
nicht genug Gluten enthält um zu einem guten Ergebnis zu führen.<br />
Gluten<br />
Gluten ist das Protein, das sich in Weizen befindet und den Teig elastisch macht. Gluten findet<br />
man in den meisten Supermärkten und bei den Lebensmittelhändlern. Es wird manchmal in<br />
kleinen Mengen mit dichten Mehlsorten, die wenig Gluten enthalten, gemischt um das<br />
Volumen des Brotes zu vergrößern und die Textur lockerer zu machen.<br />
Kuchenmehl<br />
Kuchenmehl, das wenig Gluten/Protein enthält, wurde speziell für Kuchenrezepte entworfen. Es<br />
ist nicht für Brotrezepte geeignet.<br />
Mehl mit Backpulver<br />
Mehl mit Backpulver enthält unnötige Aufgehmittel die schädlich sind für die Zubereitung von<br />
Brot oder Kuchen. Es ist also nicht für dieses Gerät geeignet.<br />
Kleie<br />
Kleie (nicht behandelt) und der Weizenkeim sind die rohen Hülsen des Weizens oder des<br />
Roggens, die vom Mehl getrennt werden. Diese werden dem Brot in kleinen Mengen<br />
hinzugefügt um es mehr Geschmack zu geben. Sie werden auch benutzt um die Textur des<br />
Brotes zu verbessern.<br />
Maisgrieß und Hafermehl<br />
Maisgrieß und Hafermehl kommen aus fein- oder grobgemahlenem gelbem oder weißem Mais<br />
und aus Haferflocken. Diese werden hauptsächlich benutzt um den Geschmack und die Textur<br />
des Brotes zu verbessern.<br />
Gemahlener Weizen<br />
Gemahlener Weizen hat eine sehr rohe Textur. Er stammt aus zerschmettertem Weizenkorn.<br />
Gemahlener Weizen gibt Vollkornbrot einen Nussgeschmack und eine knusprige Textur.<br />
Siebenkornmehl<br />
Siebenkornmehl ist eine Mischung von gemahlenem Weizen, Hafer, Roggen, gemahlener Kleie,<br />
Maisgrieß, Flachs und Hirse.<br />
Hefe<br />
Während der Fermentierung, produziert die Hefe Kohlendioxyd, das zum Brotbacken<br />
notwendig ist. Um dieses Gas zu produzieren benötigt die Hefe Kohlenhydrat, das man in Mehl<br />
und Zucker findet. In allen Rezepten wo Hefe notwendig ist, wird Trockenhefe mit schneller<br />
Wirkung benutzt. Es gibt eigentlich 4 Hefesorten: frische Hefe, Trockenhefe, Hefe mit schneller<br />
Wirkung, Hefe für Brotbackautomaten. Wir empfehlen Ihnen Trockenhefe zu benutzen, obwohl<br />
9 <strong>VG</strong> <strong>BBA</strong> 1 - 110711<br />
Assembly page 9/168
�<br />
Fax +32 2 359 95 50<br />
Copies of the I/B. Please reproduce them without any<br />
changes except under special instruction from Team<br />
International BELGIUM. The pages must be reproduced<br />
and folded in order to obtain a booklet A5 (+/- 148.5 mm<br />
width x 210 mm height). When folding, make sure you<br />
keep the good numbering when you turn the pages of<br />
the I/B. Don’t change the page numbering. Keep the<br />
language integrity.<br />
Trockenhefe mit schneller Wirkung in kleinen Mengen auch zu guten Ergebnissen führt. Frische<br />
Hefe ergibt keine gute Ergebnisse.<br />
Sie müssen Hefe immer im Kühlschrank aufbewahren damit diese frisch bleibt. Wenn Sie die<br />
Hefe in einem zu heißen Raum aufbewahren, wird sie verderben. Es ist auch sehr wichtig sich zu<br />
vergewissern, dass die Hefe noch frisch ist, indem Sie das Verfalldatum kontrollieren. Sobald die<br />
Verpackung geöffnet ist, ist es wichtig diese gut zu schließen und den Rest in den Kühlschrank<br />
zu stellen für künftigen Gebrauch. Oft ist verdorbene oder alte Hefe die Ursache eines<br />
schlechten Ergebnisses. Sie können einen Test machen, um zu wissen, ob die Hefe noch aktiv<br />
bzw. zu alt ist:<br />
• Gießen Sie ½ Messbecher Leitungswasser in eine Tasse.<br />
• Fügen Sie 1 Teelöffel Zucker hinzu und mischen Sie. Bestreuen Sie mit 2 Teelöffeln Hefe.<br />
• Stellen Sie die Tasse in einen warmen Raum, und warten Sie 10 Minuten.<br />
• Die Mischung sollte schäumen und einen starken Hefegeruch freigeben. Wenn dies<br />
nicht der Fall ist, ist die Hefe zu alt. Sie sollten neue Hefe kaufen.<br />
Zucker<br />
Zucker spielt für die Farbe und den Geschmack des Brotes eine wichtige Rolle. Er hat auch eine<br />
Funktion im Fermentationsvorgang, da er als Nahrung dient für die Hefe. Wenn ein Rezept<br />
Zucker benötigt, sollten Sie Kristallzucker benutzen. Ersetzen Sie diese Zuckersorte nicht durch<br />
Pulverzucker oder braunen Zucker, es sei denn, dass das im Rezept so erwähnt ist. Benutzen Sie<br />
keine chemische Süßstoffe, da die Hefe damit nicht richtig reagiert.<br />
Salz<br />
Salz ist notwendig für das Gleichgewicht und den Geschmack des Brotes und der Kuchen, und<br />
auch für die Krustefarbe. Um Gesundheitsgründen, können Sie Salz weglassen. Das Brot dürfte<br />
aber etwas mehr aufgehen als normales Brot.<br />
Flüssigkeit/Milch<br />
Um Brot zu backen, können Sie auch Flüssigkeiten wie Milch oder eine Kombination von<br />
Milchpulver und Wasser benutzen. Milch gibt dem Brot mehr Geschmack und eine weichere<br />
Textur und Kruste, während nur Wasser die Kruste knuspriger macht. Wenn Sie die Zeitschaltuhr<br />
benutzen, geben Sie bitte nur Milchpulver ins Gerät. Manche Rezepte benötigen Fruchtsaft um<br />
dem Brot mehr Geschmack zu geben.<br />
Eier<br />
Eier geben dem Brotteig und Kuchenteig eine reiche und weiche Textur. Benutzen Sie stets<br />
dicke Eier.<br />
Butter, Öl oder Margarine<br />
Butter, Öl und Margarine geben dem Brot mit Hefe eine weiche Textur. Brot mit Butter können<br />
Sie länger aufbewahren. Wenn Sie Butter oder Margarine, die gerade aus dem Kühlschrank<br />
kommt, müssen Sie diese in kleine Würfel zerschneiden um die Mischung während des<br />
Knetvorganges zu erleichtern.<br />
Backpulver<br />
Backpulver ist ein Aufgehmittel, das für Kuchen und schnell gebackenes Brot benutzt wird.<br />
Dieses Aufgehmittel benötigt keine Aufgehzeit bevor dem Backvorgang, da die chemische<br />
Reaktion auftritt, wenn die flüssigen Zutaten hinzugefügt werden.<br />
10 <strong>VG</strong> <strong>BBA</strong> 1 - 110711<br />
Assembly page 10/168
�<br />
Fax +32 2 359 95 50<br />
Natriumbikarbonat<br />
Copies of the I/B. Please reproduce them without any<br />
changes except under special instruction from Team<br />
International BELGIUM. The pages must be reproduced<br />
and folded in order to obtain a booklet A5 (+/- 148.5 mm<br />
width x 210 mm height). When folding, make sure you<br />
keep the good numbering when you turn the pages of<br />
the I/B. Don’t change the page numbering. Keep the<br />
language integrity.<br />
Natriumbikarbonat ist ein anderes Aufgehmittel, das man nicht mit Backpulver verwirren darf.<br />
Es benötigt auch keine Aufgehzeit bevor dem Backvorgang, da die chemische Reaktion<br />
während des Backvorganges stattfindet.<br />
Spezielle Glasur für Brot:<br />
Wählen Sie eine der nachfolgenden Glasuren um Ihr Brot zu verbessern:<br />
Eierglasur: Klopfen Sie ein Ei und 1 Teelöffel Wasser. Decken Sie den Teig mit der Mischung,<br />
bevor Sie ihn in den Ofen stecken.<br />
Kruste mit geschmolzener Butter: Gießen Sie geschmolzene Butter auf frisch gebackenes Brot<br />
um eine weichere Kruste zu erhalten.<br />
Milchglasur: Decken Sie frisch gebackenes Brot mit Milch oder Sahne um eine weiche und<br />
glänzende Kruste zu bekommen.<br />
Zuckerguss: Mischen Sie 1 Messbecher Pulverzucker mit 1 oder 2 Teelöffeln Milch um eine<br />
reiche Glasur zu machen, und gießen Sie diese auf Süßes Brot.<br />
Mohn-/Sesam-/Kümmelkörner/Maisgrieß/Hafermehl:<br />
Bestreuen Sie ein frisch glasiertes Brot mit den gewünschten Körnern.<br />
INBETRIEBNAHME DER BROTBACKMASCHINE<br />
BEDIENELEMENT<br />
Display:<br />
Zeigt die Nummer des Programms.<br />
Zeigt die übrige Programmdauer, Minute pro Minute.<br />
Zeigt eine Fehlermeldung (Fehlermeldungen "LLL" und "H:HH").<br />
▲ und ▼<br />
Mit diesen Tasten können Sie die Zeitschaltuhr für die Vorprogrammierung einstellen.<br />
Jeden Druck ändert die Zeit jeweils um 10 Minuten.<br />
Wenn Sie diese Taste Knopf länger eindrücken, läuft die Zeit schneller.<br />
MENU-Taste (1-6/7-12):<br />
Mit dieser Taste können Sie ein Programm wählen (von 1 bis 12).<br />
Jeden Druck schaltet auf nächstes Programm um.<br />
START/STOP-Taste (0/1):<br />
Mit dieser Taste starten Sie ein Programm.<br />
Drücken Sie auf diese Taste und halten Sie diese eingedrückt bis Sie ein Tonsignal hören um ein<br />
Programm zu beenden oder die Einstellung der Zeitschaltuhr abzubrechen (Achtung: Drücken<br />
Sie nicht auf die START/STOP-Taste, wenn Sie den Deckel während eines Programms öffnen um<br />
das Brot zu beobachten).<br />
Kruste-Taste (hell/dunkel)<br />
Drücken Sie auf diese Taste um die Krustefarbe zu wählen (manche Programme ermöglichen<br />
diese Funktion nicht). Bei jedem Druck schaltet der Pfeil auf die nächste Farbe um.<br />
11 <strong>VG</strong> <strong>BBA</strong> 1 - 110711<br />
Assembly page 11/168
�<br />
Fax +32 2 359 95 50<br />
Copies of the I/B. Please reproduce them without any<br />
changes except under special instruction from Team<br />
International BELGIUM. The pages must be reproduced<br />
and folded in order to obtain a booklet A5 (+/- 148.5 mm<br />
width x 210 mm height). When folding, make sure you<br />
keep the good numbering when you turn the pages of<br />
the I/B. Don’t change the page numbering. Keep the<br />
language integrity.<br />
Gewicht-Taste (450g/680g/900g)<br />
Ermöglicht Ihnen das Gewicht des Brotes zu wählen (manche Programme ermöglichen diese<br />
Wahl nicht). Bei jedem Druck auf diese Taste schaltet der Pfeil auf das andere Gewicht um.<br />
MÖGLICHE TONSIGNALE<br />
Dieses Gerät erzeugt mehrere Tonsignale:<br />
1 langes Tonsignal: - Das Gerät ist angeschaltet.<br />
- Sie haben eine falsche Taste gedrückt.<br />
1 kurzes Tonsignal: Sie haben eine richtige Programmierungstaste gedrückt.<br />
10 Tonsignale nacheinander: Die Funktion "Zutaten hinzufügen" ist aktiv.<br />
12 kurze Tonsignale: Das Programm ist abgelaufen.<br />
GEBRAUCH<br />
1. Öffnen Sie den Deckel und entfernen Sie die Backform, indem Sie diese anhand des<br />
Griffes hochheben. Gießen Sie niemals Zutaten in die Backform wenn diese sich noch im<br />
Innenraum des Gerätes befindet, damit keine Zutaten im Innenraum geraten. Stellen Sie<br />
die Backform immer auf eine ebene Fläche.<br />
2. Setzen Sie den Knethaken auf die Achse, die sich in der Backform befindet, auf, indem Sie<br />
die flache Seite des Knethakens gegenüber der flachen Seite der Achse stellen.<br />
Vergewissern Sie sich, dass es keine Nahrungsreste auf der Achse gibt, damit der<br />
Knethaken richtig aufgesetzt werden kann. Achtung: Wenn der Knethaken nicht richtig<br />
aufgesetzt ist, könnte er während des Knetvorganges loskommen, was die Mischung<br />
verstören würde. Es wird empfohlen, das Loch des Knethakens mit hitzebeständiger<br />
Margarine aufzufüllen um zu vermeiden, dass der Teig am Knethaken kleben bleibt.<br />
3. Wählen Sie ein Rezept im "Rezepten"-Abschnitt dieser Bedienungsanleitung.<br />
• Messen Sie die Zutaten wie im Abschnitt "Dosierung der Zutaten" beschrieben, gut ab.<br />
• Gießen Sie die Zutaten immer in der Reihenfolge, die im Rezept beschrieben ist, in die<br />
Backform.<br />
• Gießen Sie die Hefe immer an letzter Stelle. Vergewissern Sie sich, dass die Hefe<br />
weder mit den Flüssigen Zutaten, noch mit dem Salz in Kontakt kommt.<br />
4. Stellen Sie die Backform ins Gerät. Senken Sie diese dazu ins Gerät, bis sie festsitzt.<br />
5. Schließen Sie den Deckel und stecken Sie den Stecker in die Steckdose. Sie werden ein<br />
Tonsignal hören, und "2:50" wird im Display erscheinen. Das Programm "1" erscheint<br />
automatisch im Display.<br />
6. Wählen Sie das gewünschte Programm je nach dem gewählten Rezept, indem Sie auf die<br />
MENU-Taste drücken. Die entsprechende Nummer wird im Display erscheinen. Jedesmal<br />
Sie auf diese Taste drücken, wird im Display die Nummer des nächsten Programms<br />
erscheinen.<br />
7. Wählen Sie das Gewicht, indem Sie auf die Gewicht-Taste drücken. Jedesmal Sie auf<br />
diese Taste drücken, schaltet der Pfeil im Display auf das nächste Gewicht um.<br />
8. Wählen Sie den gewünschten Bräunungsgrad für die Kruste, indem Sie auf die Kruste-Taste<br />
drücken. Jedesmal Sie auf die Kruste-Taste drücken, schaltet der Pfeil im Display auf die<br />
nächste Krustefarbe um (dunkel oder hell). Die Anfangseinstellung ist hell.<br />
9. Drücken Sie 3 Sekunden auf die START/STOP-Taste. Die Dauer des Programms in Minuten<br />
und Stunden wird im Display erscheinen und die LCD-Hintergrundbeleuchtung fängt zu<br />
blinken an. Zum Beispiel: Wenn Sie ein Rezept, das das "Basic"-Programm benötigt, für ein<br />
Brot von 680g mit heller Krustefarbe wählen, wird "2:55" im Display erscheinen. Bis zum<br />
12 <strong>VG</strong> <strong>BBA</strong> 1 - 110711<br />
Assembly page 12/168
�<br />
Fax +32 2 359 95 50<br />
Copies of the I/B. Please reproduce them without any<br />
changes except under special instruction from Team<br />
International BELGIUM. The pages must be reproduced<br />
and folded in order to obtain a booklet A5 (+/- 148.5 mm<br />
width x 210 mm height). When folding, make sure you<br />
keep the good numbering when you turn the pages of<br />
the I/B. Don’t change the page numbering. Keep the<br />
language integrity.<br />
Ende des Programms wird im Display die übrige Zeit Minute pro Minute erscheinen. Bei den<br />
Programmen "Basic", "French" (Französisch), "Sweet" (Süß), "Wholewheat" (Vollkorn) und<br />
"Sandwich" ertönen 10 Tonsignale während des Vorganges, um anzudeuten, dass Sie in<br />
dem Moment Zutaten hinfügen dürfen. Öffnen Sie dazu den Deckel und fügen Sie die<br />
gewünschten Zutaten hinzu. Vorsicht! Wenn Sie den Deckel öffnen, könnte heißer Dampf<br />
herauskommen.<br />
Bemerkung: Sobald Sie auf START/STOP gedrückt haben, ist es unmöglich die Einstellungen<br />
mit den anderen Tasten zu ändern.<br />
10. Sobald das Programm zu Ende kommt, hören Sie 12 Tonsignale. Stellen Sie weder die heiße<br />
Backform, noch andere Gegenstände auf die Oberseite des Gerätes um es nicht zu<br />
beschädigen. Wenn Sie die Warmhaltefunktion nicht benutzen möchten, stoppen Sie das<br />
Gerät, indem Sie 3 Sekunden auf die START/STOP-Taste drücken. Ein Tonsignal ertönt und<br />
die Anfangseinstellung erscheint im Display.<br />
11. Wenn Sie nach Ablauf der Backzeit nicht auf die START/STOP-Taste drücken und das Brot<br />
nicht sofort aus dem Gerät entfernen, fängt die Warmhaltefunktion an. Das Brot wird 60<br />
Minuten warmgehalten. Nach Ablauf der 60 Minuten wird die Anfangseinstellung wieder<br />
im Display erscheinen. Sie können die Backform jederzeit während der Warmhaltezeit<br />
entfernen. Um diese Funktion auszuschalten, müssen Sie 3 Sekunden auf die START/STOP-<br />
Taste drücken. Die Anfangseinstellung wird im Display erscheinen. Ziehen Sie den Stecker<br />
aus der Steckdose, wenn Sie das Gerät nicht mehr benutzen. Achtung: Wenn Sie das<br />
Programm 7 (WHISK), 8 (JAM) oder 10 (DOUGH = Teig) benutzen, wird die<br />
Warmhaltefunktion nicht aktiviert. Für Programm 10, der Grund ist: Wenn Sie Teig, der fertig<br />
ist, zu lange im Gerät lassen, könnte er zu viel aufgehen, und zu schlechten Ergebnissen<br />
führen. Um ein gutes Ergebnis zu erhalten, entfernen Sie den Teig sofort aus dem Gerät<br />
und lesen Sie die Anweisungen des Rezeptes bezüglich des Backverfahrens.<br />
12. Das Gerät ist mit einem Sichtfenster ausgerüstet, wodurch Sie den Knetvorgang, die<br />
Mischung und den Backvorgang beobachten können. Von Zeit zu Zeit kann Dampf auf<br />
dem Fenster auftreten. Sie können den Deckel öffnen um den Teig zu beobachten, aber<br />
ÖFFNEN SIE DEN DECKEL AUF KEINEN FALL WÄHREND DES BACKENS (ungefähr die letzte<br />
Stunde des Programms) da das Brot zusammenstürzen könnte.<br />
13. Um das Brot aus der Backform zu entfernen, benutzen Sie Topflappen oder<br />
Ofenhandschuhe und entfernen Sie zuerst die Backform, indem Sie diese anhand des<br />
Griffes hochheben. Drehen Sie die Backform um, schütteln Sie diese, bis das Brot<br />
herauskommt, und stellen Sie es auf einen Gitterrost damit es abkühlen kann. Da die<br />
Backform eine Antihaftbeschichtung besitzt, sollte das Brot leicht herauskommen. Wenn<br />
das nicht der Fall ist, benutzen Sie keine Metallutensilien, sondern benutzen Sie einen Holz-<br />
oder Plastikspatel. Achtung: Wenn Sie das Brot aus der Backform entfernen, kann es sein,<br />
dass der Knethaken sich im Brot befindet. Entfernen Sie den Knethaken dann anhand des<br />
mitgelieferten Hakens oder anhand eines Plastikspatels, bevor Sie das Brot in Scheiben<br />
schneiden. Benutzen Sie kein Messer oder anderes scharfes Metallobjekt um den<br />
Knethaken zu entfernen, da diese die Antihaftbeschichtung des Knethakens beschädigen<br />
könnten. Kontrollieren Sie immer, ob der Knethaken nicht im Brot hintergeblieben ist, wenn<br />
Sie das Brot aus der Backform entfernen. Sonst könnten Sie den Knethaken beschädigen,<br />
wenn Sie das Brot in Scheiben schneiden.<br />
14. Lassen Sie das Brot mindestens 60 Minuten auf dem Gitterrost abkühlen damit der Dampf<br />
entweichen kann, bevor Sie das Brot schneiden. Benutzen Sie zum Schneiden ein<br />
Brotmesser oder ein Elektromesser.<br />
GEBRAUCH DER ZEITSCHALTUHR FÜR DIE VORPROGRAMMIERUNG<br />
Benutzen Sie die Zeitschaltuhr um den Anfang eines Programms zu verschieben. Diese Funktion<br />
ermöglicht Ihnen, das Gerät bis 13 Stunden im Voraus zu programmieren. Zum Beispiel: Sie<br />
können die Zeitschaltuhr um 19 Uhr einstellen, und am nächsten Morgen um 8 Uhr mit dem<br />
Geruch des frischen Brotes aufwachen.<br />
13 <strong>VG</strong> <strong>BBA</strong> 1 - 110711<br />
Assembly page 13/168
�<br />
Fax +32 2 359 95 50<br />
Copies of the I/B. Please reproduce them without any<br />
changes except under special instruction from Team<br />
International BELGIUM. The pages must be reproduced<br />
and folded in order to obtain a booklet A5 (+/- 148.5 mm<br />
width x 210 mm height). When folding, make sure you<br />
keep the good numbering when you turn the pages of<br />
the I/B. Don’t change the page numbering. Keep the<br />
language integrity.<br />
Um die Zeitschaltuhr einzustellen, gehen Sie wie folgt vor:<br />
• Achtung: Benutzen Sie die Zeitschaltuhr nicht für Rezepte, die frische Zutaten wie Eier,<br />
Sahne und Käse enthalten.<br />
• Bestimmen Sie die Zeit, an der das Brot fertig sein muss, und zählen Sie die Anzahl Stunden<br />
bis dann. Zum Beispiel: wenn es 20 Uhr ist wenn Sie die Zutaten in die Backform gießen, und<br />
Sie möchten am nächsten Morgen um 8 Uhr frisch gebackenes Brot erhalten, so braucht<br />
es insgesamt 12 Stunden bis das Brot fertig ist. Sobald Sie das gewünschte Programm, die<br />
gewünschte Krustefarbe usw. eingestellt haben, brauchen Sie nur noch die gesamte<br />
Anzahl Stunden einzustellen – in diesem Fall 12 Stunden.<br />
• Drücken Sie auf ▲ des Bedienelements und "2:50", Zeit für diese Einstellung, wird im<br />
Display erscheinen. Drücken Sie weiter auf ▲ bis 12:00 erscheint. Sie brauchen den<br />
Unterschied zwischen der Einstellzeit (2:50) und der gewünschten Anzahl Stunden (12:00)<br />
nicht zu berechnen. Das Gerät wird sich automatisch anpassen, damit das Brot nach der<br />
gewünschten Zeit fertig ist. Wenn Sie 12:00 überschreiten, drücken Sie auf ▼ um<br />
zurückzukommen. Wenn Sie die Taste eingedrückt halten, läuft die Zeit schneller.<br />
• Sobald die gewünschte Zeit programmiert ist, drücken Sie auf die START/STOP-Taste. Das<br />
Abzählen der Minuten wird jetzt anfangen. Die übrige Zeit bis zum Ende des Programms<br />
wird Minute pro Minute im Display erscheinen. Wenn die Zeitschaltuhr "0:00" erreicht, ist das<br />
Brot fertig, und ertönen 12 Tonsignale.<br />
• Falls bei der Einstellung der Zeitschaltuhr ein Fehler auftritt, drücken Sie auf die STOP-Taste<br />
bis ein Tonsignal ertönt. Die Einstellung wird dann annulliert, und Sie können die<br />
Zeitschaltuhr neu einstellen.<br />
PROBLEME<br />
UND LÖSUNGEN<br />
Problem Lösung<br />
Rauch tritt aus den Belüftungsgittern während<br />
des Backverfahrens.<br />
Das Mehl läuft über die Backform in den<br />
Innenraum des Gerätes.<br />
Dies kann auftreten wenn es Öl auf dem<br />
Heizelement gibt. Ziehen Sie den Stecker aus<br />
der Steckdose, entfernen Sie die Backform<br />
und reinigen Sie das Heizelement mit einem<br />
trocknen Tuch. Vergewissern Sie sich dabei,<br />
dass Sie sich nicht verbrühen.<br />
Ziehen Sie den Stecker und warten Sie, bis das<br />
Gerät abgekühlt ist. Wischen Sie den<br />
Innenraum mit einem sauberen Tuch ab.<br />
Seien Sie vorsichtig wenn Sie in der Nähe des<br />
Heizelementes reinigen.<br />
Die untere Kruste ist zu dick. Dies kann passieren, wenn das Brot nach<br />
Ablauf des Backverfahrens zu lange im Gerät<br />
bleibt. Entfernen Sie das Brot früher.<br />
Das Brot ist nicht gut gebacken. Vergewissern Sie sich, dass der Knethaken<br />
richtig auf der Achse aufgesetzt ist.<br />
Öffnen Sie den Deckel nicht zu oft während<br />
des Backvorganges.<br />
Man hört den Motor, aber die Zutaten<br />
Kontrolllieren Sie ob die Backform und der<br />
werden nicht gemischt.<br />
Knethaken richtig montiert und befestigt sind.<br />
[HOT] erscheint im Display. Wenn „HOT“ im Display erscheint, nachdem<br />
Sie auf die START/STOP-Taste gedrückt haben,<br />
ist die Temperatur im Innenraum zu hoch.<br />
Öffnen Sie den Deckel und lassen Sie den<br />
Innenraum etwa 10 bis 20 Minuten abkühlen.<br />
14 <strong>VG</strong> <strong>BBA</strong> 1 - 110711<br />
Assembly page 14/168
�<br />
Fax +32 2 359 95 50<br />
Copies of the I/B. Please reproduce them without any<br />
changes except under special instruction from Team<br />
International BELGIUM. The pages must be reproduced<br />
and folded in order to obtain a booklet A5 (+/- 148.5 mm<br />
width x 210 mm height). When folding, make sure you<br />
keep the good numbering when you turn the pages of<br />
the I/B. Don’t change the page numbering. Keep the<br />
language integrity.<br />
[H:HH] oder [LLL] erscheint im Display. Wenn H:HH oder LLL im Display erscheint,<br />
nachdem Sie ein Programm gestartet haben,<br />
ist die Temperatur im Innenraum zu hoch.<br />
Öffnen Sie den Deckel und lassen Sie den<br />
Innenraum etwa 10 bis 20 Minuten abkühlen.<br />
Wenn Sie mit dem Ergebnis nicht zufrieden sind, kontrollieren Sie folgende Punkte:<br />
Achtung: versuchen Sie jeweils nur eine Lösung pro Brot!<br />
A) Dosierungsproblem<br />
Brot geht auf, und stürzt zusammen<br />
• Reduzieren Sie die Menge Wasser/Milch um 2 Esslöffel.<br />
• Fügen Sie 1/4 Teelöffel Salz hinzu.<br />
• Reduzieren Sie die Menge Hefe um 1/4 Teelöffel.<br />
Brot geht zu viel auf<br />
• Reduzieren Sie die Menge Mehl um 2 Esslöffel.<br />
• Reduzieren Sie die Menge Wasser/Milch um 2 Esslöffel.<br />
• Fügen Sie 1/4 Teelöffel Salz hinzu.<br />
• Reduzieren Sie die Menge Zucker/Honig um 1 Teelöffel.<br />
• Reduzieren Sie die Menge Hefe um 1/4 Teelöffel.<br />
Brot geht nicht ausreichend auf<br />
• Fügen Sie 2 Esslöffel Wasser/Milch hinzu.<br />
• Reduzieren Sie die Menge Salz um 1/4 Teelöffel.<br />
• Fügen Sie 1 Teelöffel Zucker/Milch hinzu.<br />
• Fügen Sie 1/4 Teelöffel Hefe hinzu.<br />
Die Kruste ist zu dunkel<br />
• Reduzieren Sie die Menge Zucker/Honig um 1 Teelöffel.<br />
Das Brot ist nicht gebacken<br />
• Reduzieren Sie die Menge Wasser/Milch um 2 Esslöffel.<br />
Die Oberseite des Brotes ist nicht gebacken<br />
• Reduzieren Sie die Menge Mehl um 2 Esslöffel.<br />
• Fügen Sie 2 Esslöffel Wasser/Milch hinzu.<br />
Die Textur des Brotes ist zu dicht oder zu schwer<br />
• Reduzieren Sie die Menge Mehl um 2 Esslöffel.<br />
• Fügen Sie 1 Teelöffel Zucker hinzu.<br />
• Fügen Sie 1/4 Teelöffel Hefe hinzu.<br />
B) Probleme der Zutaten<br />
Wenn es sich nicht um ein Dosierungsproblem handelt, kann ein Problem wegen der<br />
gebrauchten Zutaten auftreten.<br />
Brot geht auf, und stürzt zusammen<br />
• Das Mehl ist zu fein.<br />
Brot geht zu viel auf<br />
• Sie haben die falsche Hefesorte benutzt.<br />
• Sie haben das Salz vergessen.<br />
Brot geht nicht ausreichend auf<br />
• Das Mehl ist zu alt.<br />
• Das Mehl enthält zu wenig Gluten.<br />
• Das Mehl ist zu fein.<br />
• Sie haben die falsche Hefesorte benutzt.<br />
15 <strong>VG</strong> <strong>BBA</strong> 1 - 110711<br />
Assembly page 15/168
�<br />
Fax +32 2 359 95 50<br />
• Sie haben zu viel Salz benutzt.<br />
Brot ist flach, geht wenig oder nicht auf<br />
• Die Flüssigkeit ist zu kalt/heiß.<br />
• Das Mehl ist zu alt.<br />
• Das Mehl enthält zu wenig Gluten.<br />
• Das Mehl ist zu fein.<br />
• Sie haben die Hefe vergessen.<br />
• Die Hefe ist verdorben.<br />
• Sie haben die falsche Hefesorte benutzt.<br />
• Sie haben zu viel Salz benutzt.<br />
• Sie haben das Salz vergessen.<br />
Die Zutaten sind nicht gut gemischt worden<br />
• Das Mehl ist zu fein.<br />
Die Textur des Brotes ist zu dicht oder zu schwer<br />
• Sie haben die falsche Hefesorte benutzt.<br />
REINIGUNG UND PFLEGE<br />
Copies of the I/B. Please reproduce them without any<br />
changes except under special instruction from Team<br />
International BELGIUM. The pages must be reproduced<br />
and folded in order to obtain a booklet A5 (+/- 148.5 mm<br />
width x 210 mm height). When folding, make sure you<br />
keep the good numbering when you turn the pages of<br />
the I/B. Don’t change the page numbering. Keep the<br />
language integrity.<br />
Ziehen Sie den Stecker aus der Steckdose, und warten Sie bis das Gerät abgekühlt ist, bevor Sie<br />
es reinigen.<br />
1. Backform<br />
Entfernen Sie die Backform aus dem Gerät wie bereits in dieser Bedienungsanleitung<br />
beschrieben, bevor Sie diese Reinigen. Benutzen Sie ein feuchtes Tuch. Wenn nötig<br />
können Sie etwas Seifenwasser benutzen. Benutzen Sie keine Metallutensilien oder<br />
Scheuermittel, da diese die Antihaftbeschichtung der Backform beschädigen würden.<br />
Eine verkratzte oder beschädigte Backform ist von der Garantie ausgeschlossen. Nach<br />
einer gewissen Zeit wird das Aussehen der Antihaftbeschichtung sich leicht ändern. Dies ist<br />
normal, und hat keinen schlechten Einfluss auf die Qualität und Eigenschaften der<br />
Beschichtung.<br />
2. Knethaken<br />
Reinigen Sie den Knethaken mit einem feuchten Tuch. Wenn Sie den Knethaken nicht<br />
losmachen können, füllen Sie die Backform mit heißem Wasser damit eventuelle<br />
Nahrungsmittel, die sich auf dem Knethaken befinden, weich werden, und so den<br />
Knethaken lockern. Wenn das Loch des Knethakens schmutzig ist, können Sie es mit einem<br />
Zahnstocher reinigen. Vergewissern Sie sich dabei, dass Sie die Antihaftbeschichtung des<br />
Knethakens nicht verkratzen.<br />
3. Deckel mit Sichtfenster<br />
Reinigen Sie ihn mit einem feuchten Tuch. Tauchen Sie ihn niemals in Wasser oder andere<br />
Flüssigkeiten.<br />
4. Innenraum<br />
Wenn nötig können Sie den Innenraum, in dem sich die Backform befindet, reinigen.<br />
Benutzen Sie dazu nur ein feuchtes Tuch. Vergewissern Sie sich, dass das Gerät kalt ist,<br />
bevor Sie mit der Reinigung anfangen, und vergewissern Sie sich, dass der Innenraum<br />
völlig trocken ist, bevor Sie das Gerät erneut anschalten.<br />
5. Gehäuse<br />
Reinigen Sie das Gehäuse mit einem feuchten Tuch. Tauchen Sie das Gerät niemals in<br />
Wasser oder andere Flüssigkeiten.<br />
16 <strong>VG</strong> <strong>BBA</strong> 1 - 110711<br />
Assembly page 16/168
�<br />
Fax +32 2 359 95 50<br />
BESCHREIBUNG DER PROGRAMME UND REZEPTVORSCHLÄGE<br />
SPEICHERFUNKTION<br />
Copies of the I/B. Please reproduce them without any<br />
changes except under special instruction from Team<br />
International BELGIUM. The pages must be reproduced<br />
and folded in order to obtain a booklet A5 (+/- 148.5 mm<br />
width x 210 mm height). When folding, make sure you<br />
keep the good numbering when you turn the pages of<br />
the I/B. Don’t change the page numbering. Keep the<br />
language integrity.<br />
Wenn es einen Stromausfall gibt, wird das Programm automatisch fortgesetzt, wenn die<br />
Stromversorgung innerhalb von 20 Minuten wieder funktioniert, ohne dass Sie auf START/STOP<br />
drücken müssen. Wenn der Stromausfall aber länger als 20 Minuten dauert, wird die<br />
Speicherfunktion nicht funktionieren und werden Sie das Gerät erneut programmieren müssen.<br />
Wenn das laufende Programm den Knetzyklus nicht überschritten hatte, starten Sie das<br />
Programm einfach aufs Neue. Wenn das Programm schon weiter war, aber noch nicht mit<br />
dem Backen angefangen hatte, benutzen Sie das Programm 12 (BAKE) um den Teig 1 Stunde<br />
zu backen. Wenn das Programm vor dem Stromausfall schon mit dem Backen angefangen<br />
hatte, empfehlen wir Ihnen die Zutaten zu entsorgen und ganz erneut anzufangen, da das<br />
Backprogramm zu lange sein könnte.<br />
STANDARD WEIßBROT<br />
Programm: 1 (Basic)– Krustefarbe: hell/dunkel – Gewicht: 450g/680g/900g<br />
Benutzen Sie dieses Programm um Brot mit Weizenmehl zu machen, obwohl dieses Programm<br />
auch für Rezepte mit etwas Vollkornmehl benutzt werden kann. Das Brot wird etwas dichter als<br />
französisches oder süßes Brot sein.<br />
Zutaten:<br />
450g 680g 900g<br />
2/3 Messbecher Wasser<br />
1 Esslöffel Margarine oder<br />
Butter<br />
1 Esslöffel Pflanzenöl<br />
1/3 Teelöffel Salz<br />
1 ½ Esslöffel Milchpulver<br />
2 Esslöffel Zucker<br />
2 Messbecher<br />
Allzweckmehl oder<br />
Brotmehl<br />
1 ¼ Teelöffel Trockenhefe<br />
1 Messbecher Wasser<br />
1 ½ Esslöffel Margarine oder<br />
Butter<br />
1 ½ Esslöffel Pflanzenöl<br />
1 ½ Teelöffel Salz<br />
2 Esslöffel Milchpulver<br />
2 ½ Esslöffel Zucker<br />
2 ¼ Messbecher Allzweckmehl<br />
oder Brotmehl<br />
1 ¼ Teelöffel Trockenhefe<br />
1 1/3 Messbecher Wasser<br />
2 Esslöffel Margarine oder<br />
Butter<br />
2 Esslöffel Pflanzenöl<br />
1 ¾ Teelöffel Salz<br />
3 Esslöffel Milchpulver<br />
3 Esslöffel Zucker<br />
3 ½ Messbecher Allzweckmehl<br />
oder Brotmehl<br />
1 ½ Teelöffel Trockenhefe<br />
1. Messen Sie die Zutaten sorgfältig und gießen Sie diese in die Backform, indem Sie die<br />
obenerwähnte Reihenfolge beachten (flüssige Zutaten an erster Stelle).<br />
2. Stellen Sie die Backform richtig ins Gerät. Schließen Sie den Deckel.<br />
3. Wählen Sie das gewünschte Programm.<br />
4. Wählen Sie die gewünschte Krustefarbe.<br />
5. Wählen Sie das gewünschte Gewicht.<br />
6. Drücken Sie auf START/STOP.<br />
7. Nach Ablauf des Backprogramms, entfernen Sie die Backform anhand eines Topflappens<br />
aus dem Gerät und entfernen Sie das Brot.<br />
8. Lassen Sie das Brot mindestens 1 Stunde auf einem Gitter abkühlen, bevor Sie es<br />
schneiden.<br />
17 <strong>VG</strong> <strong>BBA</strong> 1 - 110711<br />
Assembly page 17/168
�<br />
Fax +32 2 359 95 50<br />
FRANZÖSISCHES BROT<br />
Copies of the I/B. Please reproduce them without any<br />
changes except under special instruction from Team<br />
International BELGIUM. The pages must be reproduced<br />
and folded in order to obtain a booklet A5 (+/- 148.5 mm<br />
width x 210 mm height). When folding, make sure you<br />
keep the good numbering when you turn the pages of<br />
the I/B. Don’t change the page numbering. Keep the<br />
language integrity.<br />
Programm: 2 (French)– Krustefarbe: hell/dunkel – Gewicht: 450g/680g/900g<br />
Französisches Brot hat eine knusprigere Kruste und eine lockere Textur im Vergleich zu Standard<br />
Weißbrot.<br />
Zutaten:<br />
450g 680g 900g<br />
1 Messbecher Wasser<br />
2 Esslöffel Öl<br />
1 Teelöffel Salz<br />
2 Esslöffel Zucker<br />
2 Messbecher<br />
Allzweckmehl oder<br />
Brotmehl<br />
1 Teelöffel Trockenhefe<br />
1 1/4 Messbecher Wasser<br />
2 Esslöffel Öl<br />
1 ½ Teelöffel Salz<br />
2 Esslöffel Zucker<br />
2 ½ Messbecher Allzweckmehl<br />
oder Brotmehl<br />
1 ¼ Teelöffel Trockenhefe<br />
1 ½ Messbecher Wasser<br />
2 Esslöffel Öl<br />
2 Teelöffel Salz<br />
2 ½ Esslöffel Zucker<br />
3 ½ Messbecher Allzweckmehl<br />
oder Brotmehl<br />
1 ½ Teelöffel Trockenhefe<br />
1. Messen Sie die Zutaten sorgfältig und gießen Sie diese in die Backform, indem Sie die<br />
obenerwähnte Reihenfolge beachten (flüssige Zutaten an erster Stelle).<br />
2. Stellen Sie die Backform richtig ins Gerät. Schließen Sie den Deckel.<br />
3. Wählen Sie das gewünschte Programm.<br />
4. Wählen Sie die gewünschte Krustefarbe.<br />
5. Wählen Sie das gewünschte Gewicht.<br />
6. Drücken Sie auf START/STOP.<br />
7. Nach Ablauf des Backprogramms, entfernen Sie die Backform anhand eines Topflappens<br />
aus dem Gerät und entfernen Sie das Brot.<br />
8. Lassen Sie das Brot mindestens 1 Stunde auf einem Gitter abkühlen, bevor Sie es<br />
schneiden.<br />
SÜßES BROT<br />
Programm: 3 (Sweet)– Krustefarbe: hell/dunkel – Gewicht: 450g/680g/900g<br />
Wählen Sie dieses Programm um Rezepte zu machen, die Fruchtsaft, mehr Zucker oder andere<br />
süße Zutaten wie geraspelten Kokosnuss, Korinthen, getrocknete Früchte oder Schokolade<br />
benötigen.<br />
Zutaten:<br />
450g 680g 900g<br />
3/4 Messbecher Milch<br />
1 ½ Esslöffel Butter oder<br />
Margarine<br />
1 Ei<br />
1 Teelöffel Salz<br />
1 ½ Esslöffel Honig<br />
2 Esslöffel Zucker<br />
2 Messbecher Allzweckmehl<br />
oder Brotmehl<br />
1/2 Teelöffel Trockenhefe<br />
1 ¼ Messbecher Milch<br />
1 ½ Esslöffel Butter oder<br />
Margarine<br />
1 Ei<br />
1 Teelöffel Salz<br />
1 ½ Esslöffel Honig<br />
3 Esslöffel Zucker<br />
3 Messbecher Allzweckmehl<br />
oder Brotmehl<br />
1 Teelöffel Trockenhefe<br />
1 ½ Messbecher Milch<br />
2 Esslöffel Butter oder<br />
Margarine<br />
2 Eier<br />
1 Teelöffel Salz<br />
2 Esslöffel Honig<br />
4 Esslöffel Zucker<br />
3 ½ Messbecher Allzweckmehl<br />
oder Brotmehl<br />
1 ¼ Teelöffel Trockenhefe<br />
18 <strong>VG</strong> <strong>BBA</strong> 1 - 110711<br />
Assembly page 18/168
�<br />
Fax +32 2 359 95 50<br />
Copies of the I/B. Please reproduce them without any<br />
changes except under special instruction from Team<br />
International BELGIUM. The pages must be reproduced<br />
and folded in order to obtain a booklet A5 (+/- 148.5 mm<br />
width x 210 mm height). When folding, make sure you<br />
keep the good numbering when you turn the pages of<br />
the I/B. Don’t change the page numbering. Keep the<br />
language integrity.<br />
1. Messen Sie die Zutaten sorgfältig und gießen Sie diese in die Backform, indem Sie die<br />
obenerwähnte Reihenfolge beachten (flüssige Zutaten an erster Stelle).<br />
2. Stellen Sie die Backform richtig ins Gerät. Schließen Sie den Deckel.<br />
3. Wählen Sie das gewünschte Programm.<br />
4. Wählen Sie die gewünschte Krustefarbe.<br />
5. Wählen Sie das gewünschte Gewicht.<br />
6. Drücken Sie auf START/STOP.<br />
7. Nach Ablauf des Backprogramms, entfernen Sie die Backform anhand eines Topflappens<br />
aus dem Gerät und entfernen Sie das Brot.<br />
8. Lassen Sie das Brot mindestens 1 Stunde auf einem Gitter abkühlen, bevor Sie es<br />
schneiden.<br />
KUCHEN<br />
Programm: 4 (Cake)<br />
Wählen Sie diese Kuchenfunktion um Kuchenteig zu machen.<br />
Zutaten:<br />
8 Esslöffel Butter<br />
8 Esslöffel Zucker<br />
5 Eier<br />
1 ½ Messbecher Allzweckmehl<br />
1 ½ Esslöffel Zitronensaft<br />
1 ½ Teelöffel Backpulver<br />
Hinweis: Reiben Sie beim Mischen die Seiten der Backform um eine homogene Mischung zu<br />
erhalten.<br />
1. Messen Sie die Zutaten sorgfältig und gießen Sie diese in die Backform, indem Sie die<br />
obenerwähnte Reihenfolge beachten (flüssige Zutaten an erster Stelle).<br />
2. Stellen Sie die Backform richtig ins Gerät. Schließen Sie den Deckel.<br />
3. Wählen Sie das gewünschte Programm.<br />
4. Drücken Sie auf START/STOP.<br />
5. Nach Ablauf des Backprogramms, entfernen Sie die Backform anhand eines Topflappens<br />
aus dem Gerät und entfernen Sie den Kuchen.<br />
6. Lassen Sie den Kuchen auf einem Gitter abkühlen, bevor Sie ihn schneiden.<br />
VOLLKORNBROT<br />
Programm: 5 (Whole Wheat) – Krustefarbe: hell/dunkel – Gewicht: 450g/680g/900g<br />
Wählen Sie dieses Programm für Rezepte die große Mengen Vollkorn-, Roggen-, oder<br />
Hafermehl enthalten.<br />
19 <strong>VG</strong> <strong>BBA</strong> 1 - 110711<br />
Assembly page 19/168
�<br />
Zutaten:<br />
Fax +32 2 359 95 50<br />
Copies of the I/B. Please reproduce them without any<br />
changes except under special instruction from Team<br />
International BELGIUM. The pages must be reproduced<br />
and folded in order to obtain a booklet A5 (+/- 148.5 mm<br />
width x 210 mm height). When folding, make sure you<br />
keep the good numbering when you turn the pages of<br />
the I/B. Don’t change the page numbering. Keep the<br />
language integrity.<br />
450g 680g 900g<br />
1 Messbecher Wasser<br />
1 Esslöffel Margarine oder<br />
Butter<br />
1 Teelöffel Salz<br />
1 Teelöffel Zucker<br />
1 Messbecher Allzweckmehl<br />
oder Brotmehl<br />
1 1/3 Messbecher<br />
Vollkornmehl<br />
1 Teelöffel Trockenhefe<br />
1 ¼ Messbecher Wasser<br />
1 ½ Esslöffel Margarine oder<br />
Butter<br />
1 Teelöffel Salz<br />
1 Teelöffel Zucker<br />
1 1/3 Messbecher Allzweckmehl<br />
oder Brotmehl<br />
1 1/3 Messbecher Vollkornmehl<br />
1 Teelöffel Trockenhefe<br />
1 1/3 Messbecher Wasser<br />
2 Esslöffel Margarine oder Butter<br />
1 Teelöffel Salz<br />
1 Teelöffel Zucker<br />
1 2/3 Messbecher Allzweckmehl<br />
oder Brotmehl<br />
1 2/3 Messbecher Vollkornmehl<br />
1 ¼ Teelöffel Trockenhefe<br />
Bemerkung: Sie können zu den Zutaten 1 ½ Esslöffel Gluten hinzufügen um die Höhe und die<br />
Textur des Brotes zu verbessern.<br />
1. Messen Sie die Zutaten sorgfältig und gießen Sie diese in die Backform, indem Sie die<br />
obenerwähnte Reihenfolge beachten (flüssige Zutaten an erster Stelle).<br />
2. Stellen Sie die Backform richtig ins Gerät. Schließen Sie den Deckel.<br />
3. Wählen Sie das gewünschte Programm.<br />
4. Wählen Sie die gewünschte Krustefarbe.<br />
5. Wählen Sie das gewünschte Gewicht.<br />
6. Drücken Sie auf START/STOP.<br />
7. Nach Ablauf des Backprogramms, entfernen Sie die Backform anhand eines Topflappens<br />
aus dem Gerät und entfernen Sie das Brot.<br />
8. Lassen Sie das Brot mindestens 1 Stunde auf einem Gitter abkühlen, bevor Sie es<br />
schneiden.<br />
SANDWICH<br />
Programm: 6 – Gewicht: 450g/680g/900g<br />
Zutaten:<br />
450g 680g 900gr<br />
3/4 Messbecher Wasser<br />
1 Esslöffel Butter oder<br />
Margarine<br />
1 Teelöffel Salz<br />
¾ Esslöffel Zucker<br />
2 Messbecher Allzweckmehl<br />
oder Brotmehl<br />
1 Teelöffel Trockenhefe<br />
1 Messbecher Wasser<br />
1 ½ Esslöffel Butter oder<br />
Margarine<br />
1 ½ Teelöffel Salz<br />
1 Esslöffel Zucker<br />
2 ½ Messbecher Allzweckmehl<br />
oder Brotmehl<br />
1 ¼ Teelöffel Trockenhefe<br />
1 1/3 Messbecher Wasser<br />
2 Esslöffel Butter oder Margarine<br />
2 Teelöffel Salz<br />
1 ½ Esslöffel Zucker<br />
3 ¼ Messbecher Allzweckmehl<br />
oder Brotmehl<br />
1 ½ Teelöffel Trockenhefe<br />
1. Messen Sie die Zutaten sorgfältig und gießen Sie diese in die Backform, indem Sie die<br />
obenerwähnte Reihenfolge beachten (flüssige Zutaten an erster Stelle).<br />
2. Stellen Sie die Backform richtig ins Gerät. Schließen Sie den Deckel.<br />
3. Wählen Sie das gewünschte Programm.<br />
4. Wählen Sie das gewünschte Gewicht.<br />
5. Drücken Sie auf START/STOP.<br />
20 <strong>VG</strong> <strong>BBA</strong> 1 - 110711<br />
Assembly page 20/168
�<br />
Fax +32 2 359 95 50<br />
Copies of the I/B. Please reproduce them without any<br />
changes except under special instruction from Team<br />
International BELGIUM. The pages must be reproduced<br />
and folded in order to obtain a booklet A5 (+/- 148.5 mm<br />
width x 210 mm height). When folding, make sure you<br />
keep the good numbering when you turn the pages of<br />
the I/B. Don’t change the page numbering. Keep the<br />
language integrity.<br />
6. Nach Ablauf des Backprogramms, entfernen Sie die Backform anhand eines Topflappens<br />
aus dem Gerät und entfernen Sie das Brot.<br />
7. Lassen Sie das Brot mindestens 1 Stunde auf einem Gitter abkühlen, bevor Sie es<br />
schneiden.<br />
KNETEN<br />
Programm: 7 (Whisk)<br />
Dieses Programm ermöglicht es Ihnen, den Teig zu kneten, den Sie benutzen können um<br />
Teigrollen für Knödel oder Nudeln zu machen. Die Backform wird nicht aufgeheizt und Sie<br />
brauchen keine Krustefarbe oder Gewicht zu wählen.<br />
ERDBEERENMARMELADE<br />
Programm: 8 (Jam)<br />
Mit diesem Programm können Sie sehr einfach Marmelade machen.<br />
Sneiden Sie die Früchte in Würfel von max. 1 cm. Benutzen Sie keinen normalen Zucker sondern<br />
speziellen Zucker für Marmelade.<br />
Das Gerät wird zuerst vorheizen (das Gerät wird also erst nach der Vorheizung aktiv werden).<br />
Zutaten:<br />
900g Erdbeeren in Würfeln von 1 cm.<br />
500g Zucker für Marmelade<br />
1 Esslöffel Zitronensaft<br />
1. Messen Sie die Zutaten sorgfältig und gießen Sie diese in die Backform, indem Sie die<br />
obenerwähnte Reihenfolge beachten.<br />
2. Stellen Sie die Backform richtig ins Gerät. Schließen Sie den Deckel.<br />
3. Wählen Sie das gewünschte Programm.<br />
4. Drücken Sie auf START/STOP.<br />
5. Nach Ablauf des Backprogramms, entfernen Sie die Backform anhand eines Topflappens<br />
aus dem Gerät.<br />
6. Gießen Sie die Marmelade in einen sterilisierten Glasbehälter und schließen Sie den<br />
Behälter mit einem sterilisierten Deckel. Bewahren Sie den Behälter im Kühlschrank.<br />
JOGHURTBROT<br />
Programm: 9 (Yoghourt)<br />
Mit diesem Programm können Sie Brot mit Joghurtgeschmack machen.<br />
21 <strong>VG</strong> <strong>BBA</strong> 1 - 110711<br />
Assembly page 21/168
�<br />
Zutaten:<br />
Fax +32 2 359 95 50<br />
Copies of the I/B. Please reproduce them without any<br />
changes except under special instruction from Team<br />
International BELGIUM. The pages must be reproduced<br />
and folded in order to obtain a booklet A5 (+/- 148.5 mm<br />
width x 210 mm height). When folding, make sure you<br />
keep the good numbering when you turn the pages of<br />
the I/B. Don’t change the page numbering. Keep the<br />
language integrity.<br />
450g 680g 900g<br />
1/3 Messbecher Wasser<br />
100g Joghurt<br />
1 Esslöffel Pflanzenöl<br />
1/3 Teelöffel Salz<br />
1 ½ Esslöffel Zucker<br />
2 Messbecher<br />
Allzweckmehl oder<br />
Brotmehl<br />
1 Teelöffel Trockenhefe<br />
2/3 Messbecher Wasser<br />
150g Joghurt<br />
1 ½ Esslöffel Pflanzenöl<br />
½ Teelöffel Salz<br />
2 Esslöffel Zucker<br />
2 ¼ Messbecher Allzweckmehl<br />
oder Brotmehl<br />
1 ¼ Teelöffel Trockenhefe<br />
1 Messbecher Wasser<br />
200g Joghurt<br />
2 Esslöffel Pflanzenöl<br />
¾ Teelöffel Salz<br />
2 ½ Esslöffel Zucker<br />
3 ½ Messbecher Allzweckmehl<br />
oder Brotmehl<br />
1 ½ Teelöffel Trockenhefe<br />
1. Messen Sie die Zutaten sorgfältig und gießen Sie diese in die Backform, indem Sie die<br />
obenerwähnte Reihenfolge beachten (flüssige Zutaten an erster Stelle).<br />
2. Stellen Sie die Backform richtig ins Gerät. Schließen Sie den Deckel.<br />
3. Wählen Sie das gewünschte Programm.<br />
4. Wählen Sie die gewünschte Krustefarbe.<br />
5. Wählen Sie das gewünschte Gewicht.<br />
6. Drücken Sie auf START/STOP.<br />
7. Nach Ablauf des Backprogramms, entfernen Sie die Backform anhand eines Topflappens<br />
aus dem Gerät und entfernen Sie das Brot.<br />
8. Lassen Sie das Brot mindestens 1 Stunde auf einem Gitter abkühlen, bevor Sie es<br />
schneiden.<br />
PIZZATEIG<br />
Programm: 10 (Dough)<br />
Mit diesem Programm wird Teig zubereitet, aber nicht gebacken. Mit diesem Programm<br />
können Sie jede Teigsorte machen, die Sie bearbeiten können um Pizza, Semmeln, Brezeln oder<br />
Beignets zu machen, die dann im Ofen oder in der Fritteuse gebacken werden müssen.<br />
Zutaten:<br />
1 ¼ Messbecher Wasser<br />
½ Teelöffel Salz<br />
2 Esslöffel Olivenöl<br />
2 ½ Messbecher Allzweckmehl oder Brotmehl<br />
1 ½ Teelöffel Trockenhefe<br />
1. Messen Sie die Zutaten sorgfältig und gießen Sie diese in die Backform, indem Sie die<br />
obenerwähnte Reihenfolge beachten (flüssige Zutaten an erster Stelle).<br />
2. Stellen Sie die Backform richtig ins Gerät. Schließen Sie den Deckel.<br />
3. Wählen Sie das gewünschte Programm. Drücken Sie auf START/STOP.<br />
4. Nach Ablauf des Zyklusses, entfernen Sie den Teig aus der Backform.<br />
5. Lassen Sie den Teig 10 Minuten aufgehen.<br />
6. Gießen Sie Tomatensoße und verspreiden Sie die Zutaten auf der Pizza.<br />
7. Backen Sie die Pizza 15 Minuten in einem normalen Ofen auf 200°C.<br />
22 <strong>VG</strong> <strong>BBA</strong> 1 - 110711<br />
Assembly page 22/168
�<br />
Fax +32 2 359 95 50<br />
SCHNELLPROGRAMM<br />
Programm: 11 (Fast)– Krustefarbe: hell/dunkel<br />
Copies of the I/B. Please reproduce them without any<br />
changes except under special instruction from Team<br />
International BELGIUM. The pages must be reproduced<br />
and folded in order to obtain a booklet A5 (+/- 148.5 mm<br />
width x 210 mm height). When folding, make sure you<br />
keep the good numbering when you turn the pages of<br />
the I/B. Don’t change the page numbering. Keep the<br />
language integrity.<br />
Benutzen Sie diese Funktion um schnell Brot zu backen. Das Brot wird jedoch dichter und<br />
niedriger sein.<br />
Zutaten:<br />
1 Messbecher Wasser<br />
2 Esslöffel Butter oder Margarine<br />
1 ½ Teelöffel Salz<br />
2 Esslöffel Zucker<br />
1 Esslöffel Milchpulver<br />
3 Messbecher Allzweckmehl<br />
2 Teelöffel Trockenhefe<br />
1. Messen Sie die Zutaten sorgfältig und gießen Sie diese in die Backform, indem Sie die<br />
obenerwähnte Reihenfolge beachten (flüssige Zutaten an erster Stelle).<br />
2. Stellen Sie die Backform richtig ins Gerät. Schließen Sie den Deckel.<br />
3. Wählen Sie das gewünschte Programm.<br />
4. Wählen Sie die gewünschte Krustefarbe.<br />
5. Drücken Sie auf START.<br />
6. Nach Ablauf des Backprogramms, entfernen Sie die Backform anhand eines Topflappens<br />
aus dem Gerät und entfernen Sie das Brot.<br />
7. Lassen Sie das Brot mindestens 1 Stunde auf einem Gitter abkühlen, bevor Sie es<br />
schneiden.<br />
BACKEN<br />
Programm: 12 (Bake)<br />
Programmdauer: 1:00<br />
Da dieses Programm einen Backvorgang von einer Stunde ausführt, müssen Sie das Gerät gut<br />
beobachten. Dieses Programm ist nützlich, wenn es einen Stromausfall gibt während des<br />
Aufgehzyklusses, und vor dem Backzyklus eines Programmes.<br />
Lesen Sie den "Speicherfunktion"-Absatz für mehr Auskünfte über Stromausfälle.<br />
UMWELTSCHUTZ – RICHTLINIE 2002/96/EG<br />
Zum Schutz unserer Umwelt und unserer Gesundheit sind Elektro- und Elektronik-Altgeräte nach<br />
bestimmten Regeln zu entsorgen. Dies fordert den Einsatz sowohl des Herstellers bzw.<br />
Lieferanten als auch des Verbrauchers.<br />
Aus diesem Grund darf dieses Gerät, wie das Symbol auf dem Typenschild bzw. auf der<br />
Verpackung zeigt, nicht in den unsortierten Restmüll gegeben werden. Der Verbraucher hat<br />
das Recht, dieses Gerät über kommunale Sammelstellen zu entsorgen; von dort aus wird die<br />
spezifische Behandlung, Verwertung bzw. das Recycling gem. den Erfordernissen der Richtlinie<br />
sichergestellt.<br />
23 <strong>VG</strong> <strong>BBA</strong> 1 - 110711<br />
Assembly page 23/168
�<br />
Fax +32 2 359 95 50<br />
IMPORTANT SAFEGUARDS<br />
Copies of the I/B. Please reproduce them without any<br />
changes except under special instruction from Team<br />
International BELGIUM. The pages must be reproduced<br />
and folded in order to obtain a booklet A5 (+/- 148.5 mm<br />
width x 210 mm height). When folding, make sure you<br />
keep the good numbering when you turn the pages of<br />
the I/B. Don’t change the page numbering. Keep the<br />
language integrity.<br />
Please read these instructions carefully before using the appliance, and always follow the<br />
safety and operating instructions.<br />
Important: People (including children) who are not able to use the appliance in a safe way,<br />
due to their physical, sensorial or mental capacity or their lack of experience or knowledge,<br />
must never use the appliance except if they are supervised by a person responsible for their<br />
safety or if they previously received instructions concerning the safe use of the appliance.<br />
Close supervision is necessary to prevent children from using the appliance as a toy.<br />
� Check that your mains voltage corresponds to that stated on the appliance.<br />
� Never leave the appliance unsupervised when in use.<br />
� From time to time check the appliance and its cord for damages. Never use the<br />
appliance if cord or appliance shows any signs of damage. All repairs should be made by<br />
a competent qualified electrician(*).<br />
� Only use the appliance for domestic purposes and in the way indicated in these<br />
instructions.<br />
� Never immerse the appliance in water or any other liquid for any reason whatsoever.<br />
Never place it into the dishwasher.<br />
� Be very careful right after the baking process, as the appliance is very hot. Let it cool<br />
down completely before storing or cleaning it.<br />
� Never use the appliance near hot surfaces.<br />
� Before cleaning or storing, always unplug the appliance from the power supply.<br />
� Never use the appliance outside and always place it in a dry environment.<br />
� Never use accessories which are not recommended by the producer. They could constitute<br />
a danger to the user and risk to damage the appliance.<br />
� Never move the appliance by pulling the cord. Make sure the cord cannot get caught in<br />
any way. Do not wind the cord around the appliance and do not bend it.<br />
� Stand the appliance on a table or flat surface to prevent it from falling.<br />
� Make sure the cord never comes into contact with the hot parts of the appliance. Never<br />
touch the hot parts of the appliance in order to avoid injuries.<br />
� Make sure the appliance never comes into contact with inflammable materials, such as<br />
curtains, cloth, etc. when it is in use, as a fire might occur.<br />
� The temperature of the accessible surfaces may be very high when the appliance is in<br />
use. Never touch those surfaces during use. Use oven mitts to handle the baking tin after<br />
the baking process in order to avoid injuries. Should the symbol be indicated on a<br />
certain surface, you need to be careful when handling the product. This symbol means:<br />
CAUTION, this surface may get very hot during use.<br />
� Be careful not to scratch the special coating of the baking tin and kneading blade, as this<br />
would damage the non-stick feature.<br />
� Never exceed the amounts of flour and yeast that are recommended in the recipes of this<br />
manual. Otherwise, the dough might flow over the baking tin.<br />
� Never cover the appliance (e.g. with a cloth), as this would hinder the steam outlet.<br />
� Never put any object in the baking tin, as this could cause electric shocks or damage the<br />
non-stick coating of the tin.<br />
� Your appliance must never be switched on through an external timer or any kind of<br />
separate remote control system.<br />
(*) Competent qualified electrician: after-sales department of the producer or importer or any<br />
person who is qualified, approved and competent to perform this kind of repairs in order to<br />
avoid all danger. In case of need you should return the appliance to this electrician.<br />
24 <strong>VG</strong> <strong>BBA</strong> 1 - 110711<br />
Assembly page 24/168
�<br />
Fax +32 2 359 95 50<br />
SHORT CORD INSTRUCTIONS<br />
Copies of the I/B. Please reproduce them without any<br />
changes except under special instruction from Team<br />
International BELGIUM. The pages must be reproduced<br />
and folded in order to obtain a booklet A5 (+/- 148.5 mm<br />
width x 210 mm height). When folding, make sure you<br />
keep the good numbering when you turn the pages of<br />
the I/B. Don’t change the page numbering. Keep the<br />
language integrity.<br />
A relatively short power supply cord is provided to reduce the risk resulting from becoming<br />
entangled in, or tripping over a longer cord. Extension cords may be used if care is exercised in<br />
their use.<br />
• The electrical rating of the extension cord should be at least that of the appliance. If the<br />
electrical rating of the extension cord is too low, it could overheat and burn.<br />
• The longer cord should be arranged so that it will not drape over the counter top or<br />
tabletop where it can be pulled on by children or tripped over.<br />
BEFORE THE FIRST OPERATION<br />
Unpack the appliance and remove all packaging material. Clean the lid, the accessories and<br />
the baking tin with a soft damp cloth and dry these parts thoroughly. The quality of the bread<br />
can depend on many factors. Therefore, it is very important to know all ingredients and their<br />
interaction. This will allow you to obtain satisfactory results.<br />
Temperature<br />
All ingredients that you pour into the bread maker should be at an ambient temperature. The<br />
room where you use the appliance should be at a temperature between 15°C and 34°C, and<br />
ideally between 20 and 23°C.<br />
Measuring the ingredients<br />
• Your appliance is equipped with a combined graduated spoon (small and large).<br />
Measure the ingredients with this spoon only. The recipes of this instruction manual are<br />
based upon the measures of this accessory.<br />
• When talking about "cup" in this instruction manual, it refers to one measuring cup supplied<br />
(250ml).<br />
• On the combined graduated spoon, you'll see the following marks:<br />
Tablespoon (tbs) = 15ml<br />
Teaspoon (tsp) = 5ml<br />
• To measure liquid ingredients, fill the measuring cup and place it on a flat surface. The<br />
liquid level line must be aligned to the mark of measurement. An approximate<br />
measurement is not sufficient and could have a bad influence on the balance of the<br />
recipe.<br />
• To measure the flour, lightly spoon it into the measuring cup and once filled, level off with<br />
a straight-edged utensil. Scooping or tapping a measuring cup will pack the flour and you<br />
will end up with more than is required. This extra amount could affect the balance of the<br />
recipe. Do not sift the flour. To measure small amounts, use the graduated spoon and<br />
make sure it is level, not heaped. For some dry ingredients such as raisins or chocolate<br />
chips, we advise you to use a kitchen scale.<br />
Geographic situation<br />
At an altitude above 3,000 feet, flour tends to be drier and absorbs less liquid. Slightly more<br />
liquid or less flour may be required.<br />
Dough rises faster at higher altitude. Either sugar, yeast or liquid should be adjusted slightly to<br />
prevent over-rising. See table below for guidelines.<br />
25 <strong>VG</strong> <strong>BBA</strong> 1 - 110711<br />
Assembly page 25/168
�<br />
Fax +32 2 359 95 50<br />
Copies of the I/B. Please reproduce them without any<br />
changes except under special instruction from Team<br />
International BELGIUM. The pages must be reproduced<br />
and folded in order to obtain a booklet A5 (+/- 148.5 mm<br />
width x 210 mm height). When folding, make sure you<br />
keep the good numbering when you turn the pages of<br />
the I/B. Don’t change the page numbering. Keep the<br />
language integrity.<br />
ALTITUDE<br />
Adjustment 3,000 ft 5,000 ft 7,000 ft<br />
Reduce yeast: For each<br />
tsp in the recipe, decrease<br />
by<br />
Reduce sugar: For each<br />
tbs in the recipe, decrease<br />
by<br />
Increase liquid: For each<br />
cup in the recipe, add<br />
Ingredients<br />
1/8 tsp 1/8 – 1/4 tsp + 1/4 tsp<br />
0-1 tsp 0-2 tsp 1-2 tsp<br />
1-2 tbs 2-4 tbs 3-4 tbs<br />
One of the most important factors involved when making bread is the quality and freshness of<br />
the ingredients. Moreover, it is absolutely necessary to follow the amounts prescribed<br />
accurately.<br />
All-purpose flour<br />
All-purpose flour is a blend of refined hard and soft wheat flours especially suited for making<br />
breads and cakes. While this type of flour may give acceptable results from your bread maker,<br />
we recommend using bread flour.<br />
Bread flour<br />
Bread flour is high gluten/protein flour that has been treated with conditioners that give dough<br />
a greater tolerance during kneading. Bread flour typically has a higher gluten concentration<br />
than all-purpose flour, however, depending on different milling practices this may vary. Bread<br />
flour is recommended for use with this bread maker, but all-purpose flour will give acceptable<br />
results.<br />
Whole-wheat flour<br />
Whole-wheat flour is milled from the entire wheat kernel, which contains the bran and germ<br />
and makes it heavier and richer in nutrients than all-purpose flour. Bread made with this flour is<br />
usually smaller and heavier than white loaves. To overcome this, whole-wheat flour is usually<br />
mixed with all-purpose flour, bread flour or gluten to produce taller, light-textured bread.<br />
Rye flour<br />
Rye flour is a high fibre flour similar to whole-wheat flour. Rye flour must always be mixed with a<br />
high proportion of all-purpose flour, bread flour or gluten, as it does not contain enough gluten<br />
to develop the structure for a tall, even-grained loaf.<br />
Gluten<br />
Gluten is the protein in the wheat that makes the dough elastic. Gluten is usually available at<br />
most health food and bulk stores and is sometimes used in small portions with dense, low gluten<br />
flours such as a whole-wheat to increase volume and lighten texture.<br />
26 <strong>VG</strong> <strong>BBA</strong> 1 - 110711<br />
Assembly page 26/168
�<br />
Cake flour<br />
Fax +32 2 359 95 50<br />
Copies of the I/B. Please reproduce them without any<br />
changes except under special instruction from Team<br />
International BELGIUM. The pages must be reproduced<br />
and folded in order to obtain a booklet A5 (+/- 148.5 mm<br />
width x 210 mm height). When folding, make sure you<br />
keep the good numbering when you turn the pages of<br />
the I/B. Don’t change the page numbering. Keep the<br />
language integrity.<br />
Cake flour is low gluten/protein flour and is specially designed for use in cake recipes. It is not<br />
recommended for bread recipes.<br />
Self-rising flour<br />
Self-rising flours contain unnecessary leavening ingredients that will interfere with bread and<br />
cake making. It is not recommended for use in your bread maker.<br />
Bran<br />
Bran (unprocessed) and wheat germ are the coarse outer portions of the wheat or rye grains<br />
separated from the flour. They are often added in small quantities to bread for nutritional<br />
enrichment, heartiness and flavour. They are also used to enhance the texture of bread.<br />
Cornmeal and oatmeal<br />
Cornmeal and oatmeal come from the coarsely ground white or yellow corn and from rolled<br />
or steel-cut oats. They are used primarily to enhance the flavour and texture of bread.<br />
Cracked wheat<br />
Cracked wheat is very coarse in texture. It comes from wheat kernels cut into angular<br />
fragments. It gives whole grain bread a nutty flavour and crunchy texture.<br />
Seven-grain cereal blend<br />
Seven-grain cereal blend is a blend of cracked wheat, oats, bran, rye, cornmeal, flax seeds<br />
and hulled millet.<br />
Yeast<br />
Yeast, through a fermentation process, procedures gas (carbon dioxide) necessary to make<br />
bread rise. Yeast must be able to feed on sugar and flour carbohydrates in order to produce<br />
this gas. Active dry granular yeast is used in all recipes that call for yeast. There are basically<br />
four different types of yeast available; fresh, dry, quick-rising and bread machine. It is<br />
recommended that traditional dry yeast be used, however, quick-rising yeast can also be used<br />
in lesser amounts. Fresh or compressed cake yeast is not recommended, as they will produce<br />
poor results.<br />
Yeast must always be stored in a refrigerator to keep it fresh. Too much heat will kill it. Once<br />
your yeast is opened, it is important that the remaining contents be immediately resealed and<br />
refrigerated as soon as possible for future use. Often bread or dough, which fails to rise, is due<br />
to stale yeast being used. The following test can be done to determine whether your yeast is<br />
stale and inactive:<br />
� Place ½ cup of lukewarm water into a small bowl or cup.<br />
� Stir 1 tsp of sugar into the water, then sprinkle 2 tsp of yeast over the surface.<br />
� Place the cup in a warm area and allow sitting for 10 minutes undisturbed.<br />
� The mixture should foam and produce a strong yeast aroma. If this does not occur,<br />
fresh yeast should be purchased.<br />
27 <strong>VG</strong> <strong>BBA</strong> 1 - 110711<br />
Assembly page 27/168
�<br />
Sugar<br />
Fax +32 2 359 95 50<br />
Copies of the I/B. Please reproduce them without any<br />
changes except under special instruction from Team<br />
International BELGIUM. The pages must be reproduced<br />
and folded in order to obtain a booklet A5 (+/- 148.5 mm<br />
width x 210 mm height). When folding, make sure you<br />
keep the good numbering when you turn the pages of<br />
the I/B. Don’t change the page numbering. Keep the<br />
language integrity.<br />
Sugar is important for the colour and flavour of breads. It is also food for yeast as it supports the<br />
fermentation process. Recipes that call for sugar require granulated sugar. Do not substitute<br />
granulated sugar by powdered sugar or brown sugar unless indicated. Artificial sweeteners<br />
cannot be used as a substitute for sugar as yeast will not react properly with them.<br />
Salt<br />
Salt is necessary to balance the flavour of breads and cakes, as well as for the crust colour that<br />
develops during baking. For dietary reasons, it may even be eliminated entirely, however, your<br />
bread may over-proof and rise higher than normal.<br />
Liquids/milk<br />
Liquid such as milk or a combination of powdered milk and water can be used when making<br />
bread. Milk will improve flavour, provide a velvety texture and soften the crust, while water<br />
alone will produce a crispier crust. Use only powdered milk when using the delay timer. Some<br />
recipes call for juice (orange, apple, etc.) to be added as a flavour enhancer.<br />
Eggs<br />
Eggs add richness and velvety texture to bread dough and cakes. Use only large-size eggs in<br />
these recipes.<br />
Butter, oil and margarine<br />
Butter, oil and margarine shorten or tenderise the texture of yeast breads. However, breads<br />
that call for butter stay fresh longer. If butter or margarine is used directly from the refrigerator,<br />
it should be cut into small pieces for easier blending during the kneading cycle.<br />
Baking powder<br />
Baking powder is a leavening agent used in quick breads and cakes. This type of leavening<br />
agent does not require rising time before baking as the chemical reaction works during baking<br />
process.<br />
Baking soda<br />
Baking soda is another leavening agent not to be confused with nor substituted for baking<br />
powder. It also does not require rising time before baking as the chemical reaction works<br />
during baking process.<br />
Special glazes for yeast breads<br />
Select one of the following glazes to enhance your bread:<br />
Egg glaze: Beat 1 large egg and 1 tsp of water together, brush generously. Apply to dough<br />
only, before baking in your regular oven.<br />
Melted butter crust: Brush melted butter over just-baked bread for a softer, tender crust.<br />
Milk glaze: For a softer, shiny crust, brush just-baked bread with milk or cream.<br />
28 <strong>VG</strong> <strong>BBA</strong> 1 - 110711<br />
Assembly page 28/168
�<br />
Fax +32 2 359 95 50<br />
Copies of the I/B. Please reproduce them without any<br />
changes except under special instruction from Team<br />
International BELGIUM. The pages must be reproduced<br />
and folded in order to obtain a booklet A5 (+/- 148.5 mm<br />
width x 210 mm height). When folding, make sure you<br />
keep the good numbering when you turn the pages of<br />
the I/B. Don’t change the page numbering. Keep the<br />
language integrity.<br />
Sweet icing glaze: Mix 1 cup of sifted icing sugar with 1 to 2 tsp of milk to make a consistent<br />
glaze. Drizzle over sweet breads.<br />
Poppy/sesame/caraway seed/cornmeal/oatmeal: Sprinkle your choice of these seeds<br />
generously over just-glazed bread.<br />
OPERATING YOUR BREAD MAKER<br />
CONTROL PANEL<br />
Display window:<br />
Displays the programme number.<br />
Displays a minute-by-minute baking time countdown.<br />
Displays an error (error warning codes "LLL" and "H:HH").<br />
▲ and ▼<br />
Allow setting the timer to delay the baking process.<br />
The arrows allow to set the time up or down in 10-minute increments.<br />
To quickly advance or set the time back, press and hold down the arrows.<br />
MENU key (1-6/7-12):<br />
Press to select a programme of your choice (from 1 to 12).<br />
Each time you press this key, the display switches to the next programme.<br />
START/STOP key (0/1):<br />
Allows starting a programme.<br />
Press and hold until you hear a beep to stop operation or cancel a timer setting. (Note: it is not<br />
necessary to press the stop key when you open the lid to check the progress of your bread.)<br />
Crust key:<br />
Press this key to select the crust colour between light and dark (some programmes do not<br />
allow this choice). Each time you press this key, the arrow on the display will switch to the next<br />
crust colour.<br />
Weight key (450g/680g/900g):<br />
Allows you to choose the loaf size (some programmes do not allow this choice). Each time you<br />
press this key, the arrow on the display switches to the next weight.<br />
BEEP SIGNALS<br />
The appliance emits several beeps:<br />
1 long beep: appliance is turned on<br />
1 short beep: a valid programme key is pressed<br />
10 consecutive beeps: the "add ingredients" function is activated<br />
12 short beeps: the programme is completed<br />
29 <strong>VG</strong> <strong>BBA</strong> 1 - 110711<br />
Assembly page 29/168
�<br />
USE<br />
Fax +32 2 359 95 50<br />
Copies of the I/B. Please reproduce them without any<br />
changes except under special instruction from Team<br />
International BELGIUM. The pages must be reproduced<br />
and folded in order to obtain a booklet A5 (+/- 148.5 mm<br />
width x 210 mm height). When folding, make sure you<br />
keep the good numbering when you turn the pages of<br />
the I/B. Don’t change the page numbering. Keep the<br />
language integrity.<br />
1. Open the lid and remove the baking pan by raising it by its handle. It is important to<br />
remove the baking pan from the unit. Do not add ingredients to the baking pan while it is<br />
in the unit to avoid the risk of spilling ingredients into the inner case.<br />
Place your bread maker where it is level, stable and secure.<br />
2. Attach the kneading blade onto the shaft inside the baking pan by lining up the flat side<br />
of the blade with the flat side of the shaft. Push the blade firmly onto the shaft. Important:<br />
Be sure to set the kneading blade firmly into place, otherwise the blade may come off<br />
during operation. This will affect the kneading or mixing. Be sure the shaft is clean of any<br />
particles to ensure the kneading blade will fully seat into place. It is recommended to fill<br />
the hole of the kneading blade with heat-resistant margarine to prevent the dough from<br />
sticking to the kneading blade.<br />
3. Select a recipe from the "Recipes" section below. When following the recipe:<br />
• Measure the ingredients carefully and accurately. Refer to the section "Measuring the<br />
ingredients".<br />
• Always add ingredients into the baking tin in the order they are listed.<br />
• Yeast is always added last. Be sure that the yeast does not touch the liquid<br />
ingredients.<br />
4. Return the baking tin to the unit until it is locked to the bottom of the cavity.<br />
5. Close the lid and connect the plug to the power outlet. A beep will sound and "2:50" will<br />
appear on the display. Programme 1 will appear as default setting.<br />
6. Select the appropriate programme for your recipe by pressing the MENU button on the<br />
control panel. Each time this button is pressed, the number in the display window will<br />
move to the next setting. Be sure to press the button until you hear a beep.<br />
7. Select the appropriate setting for loaf size by pressing the weight button. Each time this<br />
button is pressed, the display will cycle from one weight to another.<br />
8. Select the appropriate colour setting for your bread crust by pressing the crust button. You<br />
can choose between light and dark. The default setting is light.<br />
9. Press the START/STOP key and hold it for 3 seconds. The baking time in hours and minutes<br />
will appear on the LCD display and the LCD backlight will start flashing. For instance, if you<br />
choose a recipe using the standard bread programme for light crust and 680g size, the<br />
display will show "2:55". It will count down the remaining processing time in one-minute<br />
increments until the bread is done. When using the programmes "Basic", "French", "Sweet",<br />
"Wholewheat" and "Sandwich", 10 beeps will sound during the cycle to indicate that you<br />
can add ingredients. Open the lid and add the desired ingredients. Be careful when<br />
opening the lid because steam might escape.<br />
Note: Once you have pressed the START/STOP key, it is impossible to modify the settings<br />
with the other keys.<br />
10. When the programme is completed, 12 beeps will sound. To avoid damaging the bread<br />
maker surface, do not put any object or the hot baking tin on top of the unit. If you do not<br />
want to use the keep warm function, stop the appliance by pressing the START/STOP<br />
button for 3 seconds. A long beep will sound and the display will go back to the default<br />
setting.<br />
11. If you do not press the START/STOP key and leave the loaf inside the baking tin, the "keep<br />
warm" function begins automatically when the baking time is done. The bread maker will<br />
keep the bread warm for 60 minutes. At the end of the hour, the display will come back to<br />
the default setting. You may remove the baking tin any time during the "keep warm"<br />
cycle. To turn off the "keep warm" feature before the 60 minutes are up, simply press the<br />
START/STOP key and hold it for 3 seconds. Unplug the unit when finished. Caution: when<br />
using the programmes 7 (WHISK), 8 (JAM) and 10 (DOUGH), the keep warm function is not<br />
activated. For programme 10 this is because if you leave finished dough in the unit too<br />
long, it may over-rise and produce poor results. For best results, remove the dough at the<br />
end of the cycle and follow the recipe directions for shaping, resting and baking.<br />
30 <strong>VG</strong> <strong>BBA</strong> 1 - 110711<br />
Assembly page 30/168
�<br />
Fax +32 2 359 95 50<br />
Copies of the I/B. Please reproduce them without any<br />
changes except under special instruction from Team<br />
International BELGIUM. The pages must be reproduced<br />
and folded in order to obtain a booklet A5 (+/- 148.5 mm<br />
width x 210 mm height). When folding, make sure you<br />
keep the good numbering when you turn the pages of<br />
the I/B. Don’t change the page numbering. Keep the<br />
language integrity.<br />
12. This bread maker has a convenient viewing window so that you may watch the progress<br />
of the bread as it is mixed, kneaded and baked. Occasionally, some moisture may form<br />
on the window during processing. You may lift the lid to look inside during the mixing and<br />
kneading stages, however, DO NOT OPEN THE LID DURING THE BAKING CYCLE<br />
(approximately the last hour) as this may cause the bread to collapse.<br />
13. To remove the bread from the baking pan, use potholders or oven mitts and raise it by its<br />
handle. Turn the pan upside down and shake the bread out onto a wire cooling rack. The<br />
baking pan has a non-stick coated finish so that the bread should come out easily. Do not<br />
use metal utensils to remove the bread as they may scratch the non-stick coating. If<br />
needed, slide a flat rubber or plastic spatula along the sides of the pan to loosen the loaf.<br />
If the kneading paddle remains in the bottom of your loaf, use the hook provided or the<br />
end of a plastic spoon or other non-metal utensil to remove it. Do not use a knife or other<br />
sharp metal object, as this will scratch the non-stick coating on the kneading blade.<br />
Always check to see where the kneading blade is when removing a baked loaf of bread.<br />
If it remains stuck to the bread, you may accidentally damage the kneading blade by<br />
cutting into it while slicing.<br />
14. Allow the bread to cool on a rack for at least 60 minutes before slicing, to release steam.<br />
Use a good serrated bread knife or electric knife.<br />
USING THE TIMER FOR DELAYED OPERATION<br />
Use the timer when you wish to delay the completion of your bread. This feature allows you to<br />
delay the baking time for up to 13 hours. For example, you can set the timer at 7 p.m. and<br />
wake up to fresh bread by 8 a.m. the following morning.<br />
To set the timer, follow the instructions below:<br />
• Note: Do not use the timer and delay function with recipes that call for fresh ingredients<br />
that might spoil such as eggs, fresh milk, sour cream or cheese.<br />
• To set the timer, determine when you would like your bread to be ready and count the<br />
number of hours until then. For example, if it is 8 p.m. when you place all your ingredients in<br />
the baking tin and you would like to wake up to the aroma of fresh bread at 8 a.m. the<br />
next morning, you need a total of 12 hours before your bread is complete. Once you have<br />
chosen the appropriate settings for your recipe, simply set the timer for the total number of<br />
hours – in this case, 12 hours.<br />
• Press the ▲ key on the control panel and "2:50" – the time for this setting – will<br />
automatically show in the display window. Continue to press ▲ until the display<br />
indicates 12:00. You do not need to mathematically calculate the difference between<br />
the setting time (2:50) and the total hours you want (12:00). The bread maker will<br />
automatically adjust to include the setting time. Simply set the timer for your total hours<br />
(12). If you pass the 12:00, press the ▼ key to go back. You may press and hold down<br />
either arrow to quickly advance the time on the display.<br />
• Once you have set the time, press START/STOP. The countdown will start. The timer will<br />
count down in one-minute increments. When the display reaches 0:00, your bread is<br />
complete and 12 beeps will sound.<br />
• If you make a mistake while setting the timer, press and hold the START/STOP key until it<br />
beeps. This will clear the display and you can set the timer again.<br />
31 <strong>VG</strong> <strong>BBA</strong> 1 - 110711<br />
Assembly page 31/168
�<br />
Fax +32 2 359 95 50<br />
TROUBLESHOOTING GUIDE – OPERATION PROBLEMS<br />
Problem Solution<br />
Smoke comes out of the air vents during the<br />
baking process<br />
Flour spilled out of the bread tin into the inner<br />
case<br />
Copies of the I/B. Please reproduce them without any<br />
changes except under special instruction from Team<br />
International BELGIUM. The pages must be reproduced<br />
and folded in order to obtain a booklet A5 (+/- 148.5 mm<br />
width x 210 mm height). When folding, make sure you<br />
keep the good numbering when you turn the pages of<br />
the I/B. Don’t change the page numbering. Keep the<br />
language integrity.<br />
This can be due to some oil on the heating<br />
element. Unplug the appliance, remove the<br />
baking tin and clean the heating element<br />
with a dry cloth. Be careful not to get burned.<br />
Unplug the unit and allow to cool, wipe out<br />
inner case with a clean cloth. Take care<br />
when cleaning around the heating element.<br />
The lower crust is too thick This can happen if you leave the bread for a<br />
long time in the baking tin. Try to remove the<br />
loaf earlier.<br />
Bread did not bake properly Ensure the kneading blade is properly seated<br />
on the mounting shaft.<br />
Avoid opening the appliance too frequently<br />
during the programme.<br />
You can hear the motor but the dough is not<br />
being mixed<br />
Check that the baking tin is locked properly<br />
and that the kneading blade is properly<br />
installed.<br />
[HOT] appears in the display window If the display shows “HOT” after you have<br />
pressed START/STOP, the temperature inside is<br />
still too high. Then the programme has to be<br />
stopped. Open the lid and let the machine<br />
cool down for 10 to 20 minutes.<br />
[H:HH] or [LLL] appears in the display window If the display shows “H:HH” or “LLL” after the<br />
programme has been started, the<br />
temperature inside is still too high. Then the<br />
programme has to be stopped. Open the lid<br />
and let the machine cool down for 10 to 20<br />
minutes.<br />
If the result is not satisfactory, please check the following points:<br />
Caution: Try one solution at a time per loaf.<br />
A) Measurement problems<br />
Loaf rises then falls<br />
• Decrease the amount of water/milk by 2 tbs.<br />
• Increase the amount of salt by 1/4 tsp.<br />
• Decrease the amount of yeast by 1/4 tsp.<br />
Loaf rises too much<br />
• Decrease the amount of flour by 2 tbs.<br />
• Decrease the amount of water/milk by 2 tbs.<br />
• Increase the amount of salt by 1/4 tsp.<br />
• Decrease the amount of sugar/honey by 1 tsp.<br />
• Decrease the amount of yeast by 1/4 tsp.<br />
Loaf does not rise enough<br />
• Increase the amount of water/milk by 2 tbs.<br />
• Decrease the amount of salt by/4 tsp.<br />
• Increase the amount of sugar/honey by 1 tsp.<br />
• Increase the amount of yeast by 1/4 tsp.<br />
32 <strong>VG</strong> <strong>BBA</strong> 1 - 110711<br />
Assembly page 32/168
�<br />
Fax +32 2 359 95 50<br />
Crust is too dark<br />
• Decrease the amount of sugar/honey by 1 tsp.<br />
Loaf partially cooked<br />
• Decrease the amount of water/milk by 2 tbs.<br />
Top of the loaf is not smooth<br />
• Decrease the amount of flour by 2 tbs.<br />
• Increase the amount of water/milk by 2 tbs.<br />
Texture of the loaf is heavy or dense<br />
• Decrease the amount of flour by 2 tbs.<br />
• Increase the amount of sugar by 1 tsp.<br />
• Increase the amount of yeast by 1/4 tsp.<br />
B) Ingredient problems<br />
Copies of the I/B. Please reproduce them without any<br />
changes except under special instruction from Team<br />
International BELGIUM. The pages must be reproduced<br />
and folded in order to obtain a booklet A5 (+/- 148.5 mm<br />
width x 210 mm height). When folding, make sure you<br />
keep the good numbering when you turn the pages of<br />
the I/B. Don’t change the page numbering. Keep the<br />
language integrity.<br />
If the poor result is not due to measurement problems, it can also be due to the ingredients<br />
themselves:<br />
Loaf rises then falls<br />
• The flour is too fine.<br />
Loaf rises too much<br />
• You used a wrong type of yeast.<br />
• You forgot to add salt.<br />
Loaf does not rise enough<br />
• The flour is too old.<br />
• The flour does not contain enough gluten.<br />
• The flour is too fine.<br />
• You used a wrong type of yeast.<br />
• You put too much salt.<br />
Flat loaf, little to no rising<br />
• The liquid is too hot/cold.<br />
• The flour is too old.<br />
• The flour does not contain enough gluten.<br />
• The flour is too fine.<br />
• You forgot the yeast.<br />
• The yeast is too old.<br />
• You used a wrong type of yeast.<br />
• You put too much salt.<br />
• You forgot to add salt.<br />
If the ingredients are only partially mixed<br />
• The flour is too fine.<br />
If the loaf texture is heavy or dense<br />
• You used a wrong type of yeast.<br />
CLEANING AND CARE<br />
Unplug the appliance and let it cool down before cleaning.<br />
1. Baking tin<br />
Take the baking tin out of the appliance as explained earlier in this manual before<br />
cleaning. Clean the inside and outside with a damp cloth. If necessary, use soapy water<br />
to clean the inside of the baking tin. Never use scratching or abrasive objects, as they<br />
would damage the non-stick coating of the baking tin. No guarantee claims will be<br />
accepted in case the non-stick coating of the baking tin is scratched or damaged. After<br />
a while, the appearance of the non-stick coating might change because of the steam<br />
and humidity. This is normal and does not affect the features and quality of the coating.<br />
33 <strong>VG</strong> <strong>BBA</strong> 1 - 110711<br />
Assembly page 33/168
�<br />
Fax +32 2 359 95 50<br />
Copies of the I/B. Please reproduce them without any<br />
changes except under special instruction from Team<br />
International BELGIUM. The pages must be reproduced<br />
and folded in order to obtain a booklet A5 (+/- 148.5 mm<br />
width x 210 mm height). When folding, make sure you<br />
keep the good numbering when you turn the pages of<br />
the I/B. Don’t change the page numbering. Keep the<br />
language integrity.<br />
2. Kneading blade<br />
Clean the kneading blade with a damp cloth. If the kneading blade is difficult to detach,<br />
pour some hot water in the baking tin and wait for a few minutes. Hot water will release<br />
the connection of the kneading blade. If the hole of the kneading blade is obstructed,<br />
clean it with a toothpick, making sure not to scratch the blade.<br />
3. Lid with window<br />
Clean it with a damp cloth. Never immerse it in water or any other liquid.<br />
4. Inner case<br />
If necessary, you can also clean the inner case. There too, only use a damp cloth. Make<br />
sure the inner case has totally cooled down before cleaning it. Make sure it is totally dry<br />
before switching on the appliance.<br />
5. Housing<br />
Clean the housing of the appliance with a damp cloth. Never immerse the appliance in<br />
water or any other liquid.<br />
PROGRAMME DESCRIPTION AND RECIPE SUGGESTIONS<br />
MEMORY<br />
If there is a supply interruption during the course of bread making, the process of bread making<br />
will be continued automatically if the supply is restored within 20 minutes, without having to<br />
press the START/STOP key. If the supply interruption time exceeds 20 minutes, the memory<br />
cannot be kept and the bread maker must be restarted. If the programme cycle had not<br />
gone further than the kneading cycle, just restart the programme. If the programme had gone<br />
a bit further than the kneading cycle but had not reached the beginning of the baking cycle,<br />
use the baking programme "BAKE" which will start the baking process. However, if the<br />
programme was in the middle of the baking cycle at the time of the supply interruption, it is<br />
advisable to discard the dough and to start all over again as the baking programme might be<br />
too long and might burn the dough.<br />
STANDARD WHITE BREAD<br />
Programme: 1 (Basic) – Crust colour: light/dark – Weight: 450g/680g/900g<br />
This setting is used for breads which primarily use white flour; though some recipes may include<br />
small amounts of whole wheat flour as well. Loaves will be slightly denser than French or sweet<br />
breads.<br />
Ingredients:<br />
450g 680g 900g<br />
2/3 cup of water<br />
1 tablespoon of butter or<br />
margarine<br />
1 tablespoon of plant oil<br />
1/3 teaspoon of salt<br />
1 ½ tablespoon of<br />
powdered milk<br />
2 tablespoons of sugar<br />
2 cups of all-purpose flour<br />
or bread flour<br />
1 ¼ teaspoon of quick-rise<br />
yeast or dried yeast<br />
1 cup of water<br />
1 ½ tablespoon of butter or<br />
margarine<br />
1 ½ tablespoon of plant oil<br />
½ teaspoon of salt<br />
2 tablespoons of powdered<br />
milk<br />
2 ½ tablespoons of sugar<br />
2 ¼ cups of all-purpose flour or<br />
bread flour<br />
1 ¼ teaspoon of quick-rise<br />
yeast or dried yeast<br />
1 1/3 cup of water<br />
2 tablespoons of margarine or<br />
butter<br />
2 tablespoons of plant oil<br />
1 teaspoon of salt<br />
3 tablespoons of powdered<br />
milk<br />
3 tablespoons of sugar<br />
3 ½ cups of all-purpose flour or<br />
bread flour<br />
1 ½ teaspoon of quick-rise<br />
yeast or dried yeast<br />
34 <strong>VG</strong> <strong>BBA</strong> 1 - 110711<br />
Assembly page 34/168
�<br />
Fax +32 2 359 95 50<br />
Copies of the I/B. Please reproduce them without any<br />
changes except under special instruction from Team<br />
International BELGIUM. The pages must be reproduced<br />
and folded in order to obtain a booklet A5 (+/- 148.5 mm<br />
width x 210 mm height). When folding, make sure you<br />
keep the good numbering when you turn the pages of<br />
the I/B. Don’t change the page numbering. Keep the<br />
language integrity.<br />
1. Measure the ingredients accurately and add to the baking tin in the order listed above<br />
(liquid ingredients first).<br />
2. Insert the baking tin in the bread maker. Close the lid.<br />
3. Select the desired programme.<br />
4. Select the desired crust colour.<br />
5. Select the loaf size.<br />
6. Press the START/STOP key.<br />
7. Using oven mitts, remove the bread after the baking time has elapsed.<br />
8. Let it cool down on a wire rack at least one hour before slicing it.<br />
FRENCH BREAD<br />
Programme: 2 (French) – Crust colour: light/dark – Weight: 450g/680g/900g<br />
Traditionally, French bread has a crispier crust and lighter inside texture than basic breads.<br />
Ingredients:<br />
450g 680g 900g<br />
1 cup of water<br />
2 tablespoons of oil<br />
1 teaspoon of salt<br />
2 tablespoons of sugar<br />
2 cups of all-purpose flour<br />
or bread flour<br />
1 teaspoon of quick-rise<br />
yeast<br />
1 1/4 cup of water<br />
2 tablespoons of oil<br />
1 ½ teaspoon of salt<br />
2 tablespoons of sugar<br />
2 ½ cups of all-purpose flour or<br />
bread flour<br />
1 ¼ teaspoon of quick-rise<br />
yeast<br />
1 ½ cup of water<br />
2 tablespoons of oil<br />
2 teaspoons of salt<br />
2 ½ tablespoons of sugar<br />
3 ½ cups of all-purpose flour or<br />
bread flour<br />
1 ½ teaspoon of quick-rise<br />
yeast<br />
1. Measure the ingredients accurately and add to the baking tin in the order listed above<br />
(liquid ingredients first).<br />
2. Insert the baking tin in the bread maker. Close the lid.<br />
3. Select the desired programme.<br />
4. Select the desired crust colour.<br />
5. Select the loaf size.<br />
6. Press the START/STOP key.<br />
7. Using oven mitts, remove the bread after the baking time has elapsed.<br />
8. Let it cool down on a wire rack at least one hour before slicing it.<br />
SWEET BREAD<br />
Programme: 3 (Sweet)– Crust colour: light/dark – Weight: 450g/680g/900g<br />
Use this setting for recipes that use fruit juice, additional sugar, or sweet ingredients such as<br />
coconut flakes, raisins, dried fruit or chocolate. Baking temperature is reduced to prevent<br />
burning and the extra rise cycle gives the loaves a light, airy texture.<br />
35 <strong>VG</strong> <strong>BBA</strong> 1 - 110711<br />
Assembly page 35/168
�<br />
Ingredients:<br />
Fax +32 2 359 95 50<br />
Copies of the I/B. Please reproduce them without any<br />
changes except under special instruction from Team<br />
International BELGIUM. The pages must be reproduced<br />
and folded in order to obtain a booklet A5 (+/- 148.5 mm<br />
width x 210 mm height). When folding, make sure you<br />
keep the good numbering when you turn the pages of<br />
the I/B. Don’t change the page numbering. Keep the<br />
language integrity.<br />
450g 680g 900g<br />
3/4 cup of milk<br />
1 ½ tablespoon of butter<br />
or margarine<br />
1 egg<br />
1teaspoon of salt<br />
1 ½ tablespoon of honey<br />
2 tablespoons of sugar<br />
2 cups of all-purpose flour<br />
or bread flour<br />
1/2 teaspoon of quick-rise<br />
yeast<br />
1 ¼ cup of milk<br />
1 ½ tablespoon of butter or<br />
margarine<br />
1 egg<br />
1teaspoon of salt<br />
1 ½ tablespoon of honey<br />
3 tablespoons of sugar<br />
3 cups of all-purpose flour or<br />
bread flour<br />
1 teaspoon of quick-rise yeast<br />
1 ½ cup of milk<br />
2 tablespoons of butter or<br />
margarine<br />
2 eggs<br />
1 teaspoon of salt<br />
2 tablespoons of honey<br />
4 tablespoons of sugar<br />
3 ½ cups of all-purpose flour or<br />
bread flour<br />
1 ¼ teaspoon of quick-rise<br />
yeast<br />
1. Measure the ingredients accurately and add to the baking tin in the order listed above<br />
(liquid ingredients first).<br />
2. Insert the baking tin in the bread maker. Close the lid.<br />
3. Select the desired programme.<br />
4. Select the desired crust colour.<br />
5. Select the loaf size.<br />
6. Press the START/STOP key.<br />
7. Using oven mitts, remove the bread after the baking time has elapsed.<br />
8. Let it cool down on a wire rack at least one hour before slicing it.<br />
CAKE<br />
Programme: 4 (Cake)<br />
Use this setting to make cake.<br />
Ingredients:<br />
8 tablespoons of butter<br />
8 tablespoons of sugar<br />
5 eggs<br />
1 ½ cup of all-purpose flour<br />
1 ½ tablespoon of lemon juice<br />
1 ½ teaspoon of baking powder<br />
Hint: Scrape the sides of the pan while mixing to ensure all ingredients are blended.<br />
1. Measure the ingredients accurately and add to the baking tin in the order listed above<br />
(liquid ingredients first).<br />
2. Insert the baking tin in the bread maker. Close the lid.<br />
3. Select the desired programme.<br />
4. Press the START/STOP key.<br />
5. Using oven mitts, remove the cake after the baking time has elapsed.<br />
6. Let it cool down on a wire rack before slicing it.<br />
36 <strong>VG</strong> <strong>BBA</strong> 1 - 110711<br />
Assembly page 36/168
�<br />
Fax +32 2 359 95 50<br />
WHOLE-WHEAT BREAD<br />
Copies of the I/B. Please reproduce them without any<br />
changes except under special instruction from Team<br />
International BELGIUM. The pages must be reproduced<br />
and folded in order to obtain a booklet A5 (+/- 148.5 mm<br />
width x 210 mm height). When folding, make sure you<br />
keep the good numbering when you turn the pages of<br />
the I/B. Don’t change the page numbering. Keep the<br />
language integrity.<br />
Programme: 5 (Whole Wheat) – Crust colour: light/dark – Weight: 450g/680g/900g<br />
This setting is used for recipes with significant amounts of whole-wheat or rye flour, oats, or bran.<br />
Ingredients:<br />
450g 680g 900g<br />
1 cup of water<br />
1 tablespoon of<br />
margarine or butter<br />
1 teaspoon of salt<br />
1 teaspoon of sugar<br />
1 cup of all-purpose flour<br />
or bread flour<br />
1 cup of wholewheat flour<br />
1 teaspoon of quick-rise<br />
yeast<br />
1 ¼ cup of water<br />
1 ½ tablespoon of margarine or<br />
butter<br />
1 teaspoon of salt<br />
1 teaspoon of sugar<br />
1 1/3 cup of all-purpose flour or<br />
bread flour<br />
1 1/3 cup of wholewheat flour<br />
1 teaspoon of quick-rise yeast<br />
1 1/3 cup of water<br />
2 tablespoons of margarine or<br />
butter<br />
1 teaspoon of salt<br />
1 teaspoon of sugar<br />
1 2/3 cup of all-purpose flour or<br />
bread flour<br />
1 2/3 cup of wholewheat flour<br />
1 ¼ teaspoon of quick-rise<br />
yeast<br />
Note: you may add 1 ½ tablespoon of gluten to the ingredients to improve the height and<br />
texture of this bread.<br />
1. Measure the ingredients accurately and add to the baking tin in the order listed above<br />
(liquid ingredients first).<br />
2. Insert the baking tin in the bread maker. Close the lid.<br />
3. Select the desired programme.<br />
4. Select the desired crust colour.<br />
5. Select the loaf size.<br />
6. Press the START/STOP key.<br />
7. Using oven mitts, remove the bread after the baking time has elapsed.<br />
8. Let it cool down on a wire rack at least one hour before slicing it.<br />
SANDWICH<br />
Programme: 6 – Weight: 450g/680g/900g<br />
Ingredients:<br />
450g 680g 900g<br />
3/4 cup of water<br />
1 tablespoon of butter or<br />
margarine<br />
1 teaspoon of salt<br />
¾ tablespoon of sugar<br />
2 cups of all-purpose flour<br />
or bread flour<br />
1 teaspoon of quick-rise<br />
yeast<br />
1 cup of water<br />
1 ½ tablespoon of butter or<br />
margarine<br />
1 ½ teaspoon of salt<br />
1tablespoon of sugar<br />
2 ½ cups of all-purpose flour or<br />
bread flour<br />
1 ¼ teaspoon of quick-rise<br />
yeast<br />
1 1/3 cup of water<br />
2 tablespoons of butter or<br />
margarine<br />
2 teaspoons of salt<br />
1 ½ tablespoon of sugar<br />
3 ¼ cups of all-purpose flour or<br />
bread flour<br />
1 ½ teaspoon of quick-rise<br />
yeast<br />
37 <strong>VG</strong> <strong>BBA</strong> 1 - 110711<br />
Assembly page 37/168
�<br />
Fax +32 2 359 95 50<br />
Copies of the I/B. Please reproduce them without any<br />
changes except under special instruction from Team<br />
International BELGIUM. The pages must be reproduced<br />
and folded in order to obtain a booklet A5 (+/- 148.5 mm<br />
width x 210 mm height). When folding, make sure you<br />
keep the good numbering when you turn the pages of<br />
the I/B. Don’t change the page numbering. Keep the<br />
language integrity.<br />
1. Measure the ingredients accurately and add to the baking tin in the order listed above<br />
(liquid ingredients first).<br />
2. Insert the baking tin in the bread maker. Close the lid.<br />
3. Select the desired programme.<br />
4. Select the desired loaf size.<br />
5. Press the START/STOP key.<br />
6. Using oven mitts, remove the bread after the baking time has elapsed.<br />
7. Let it cool down on a wire rack at least one hour before slicing it.<br />
WHISK<br />
Programme: 7 (Whisk)<br />
This programme allows to knead the dough which is used to make dumplings’ wrappers and<br />
noodles. The baking tin is not heated and no color and weight are to be chosen.<br />
STRAWBERRY JAM<br />
Programme: 8 (Jam)<br />
This programme allows making jam very easily.<br />
Cut the fruits into pieces of max. 1cm. Do not use normal sugar but rather jellifying sugar.<br />
After having pressed the START/STOP key, there is a preheating time (your appliance will thus<br />
be active only after this preheating time).<br />
Ingredients:<br />
900g of fresh strawberries cut into pieces of max. 1cm.<br />
500g of jellifying sugar<br />
1 tablespoon of lemon juice<br />
1. Measure the ingredients accurately and add to the baking tin in the order listed above.<br />
2. Insert the baking tin in the bread maker. Close the lid.<br />
3. Set the desired programme.<br />
4. Press the START/STOP key.<br />
5. Using oven mitts, remove the baking tin after the baking time has elapsed.<br />
6. Pour the jam into a clean, sterilized mason jar and cover with a sterilized mason jar lid.<br />
Store in the refrigerator.<br />
YOGURT BREAD<br />
Programme: 9 (Yoghourt)<br />
This programme allows making bread with yogurt taste.<br />
38 <strong>VG</strong> <strong>BBA</strong> 1 - 110711<br />
Assembly page 38/168
�<br />
Ingredients:<br />
Fax +32 2 359 95 50<br />
Copies of the I/B. Please reproduce them without any<br />
changes except under special instruction from Team<br />
International BELGIUM. The pages must be reproduced<br />
and folded in order to obtain a booklet A5 (+/- 148.5 mm<br />
width x 210 mm height). When folding, make sure you<br />
keep the good numbering when you turn the pages of<br />
the I/B. Don’t change the page numbering. Keep the<br />
language integrity.<br />
450g 680g 900g<br />
1/3 cup of water<br />
100g yogurt<br />
1 tablespoon of plant oil<br />
1/3 teaspoon of salt<br />
1 ½ tablespoons of sugar<br />
2 cups of all-purpose flour<br />
or bread flour<br />
1 teaspoon of quick-rise<br />
yeast or dried yeast<br />
2/3 cup of water<br />
150g yogurt<br />
1 ½ tablespoon of plant oil<br />
½ teaspoon of salt<br />
2 tablespoons of sugar<br />
2 ¼ cups of all-purpose flour or<br />
bread flour<br />
1 ¼ teaspoon of quick-rise<br />
yeast or dried yeast<br />
1 cup of water<br />
200g yogurt<br />
2 tablespoons of plant oil<br />
¾ teaspoon of salt<br />
2 ½ tablespoons of sugar<br />
3 ½ cups of all-purpose flour or<br />
bread flour<br />
1 ½ teaspoon of quick-rise<br />
yeast or dried yeast<br />
1. Measure the ingredients accurately and add to the baking tin in the order listed above<br />
(liquid ingredients first).<br />
2. Insert the baking tin in the bread maker. Close the lid.<br />
3. Select the desired programme.<br />
4. Select the desired crust colour.<br />
5. Select the loaf size.<br />
6. Press the START/STOP key.<br />
7. Using oven mitts, remove the bread after the baking time has elapsed.<br />
8. Let it cool down on a wire rack at least one hour before slicing it.<br />
PIZZA DOUGH<br />
Programme: 10 (Dough)<br />
This setting makes dough only and will not bake the final bread. You may make dough of any<br />
kind using this setting. Dough can then be shaped to make pizza, rolls, pretzels, doughnuts and<br />
round or braided breads that must be baked in an oven or fried in a deep fryer.<br />
Ingredients:<br />
1 ¼ cup of water<br />
½ teaspoon of salt<br />
2 tablespoons of olive oil<br />
2 ½ cups of all-purpose flour or bread flour<br />
1 ½ teaspoon of quick-rise yeast<br />
1. Measure the ingredients accurately and add to the baking tin in the order listed above<br />
(liquid ingredients first).<br />
2. Insert the baking tin in the bread maker. Close the lid.<br />
3. Press the START/STOP key.<br />
4. After the cycle is completed, remove the dough from the baking tin.<br />
5. Let it rise for 10 minutes.<br />
6. Pour tomato sauce on the dough and spread the desired ingredients all over the pizza<br />
dough.<br />
7. Bake it in a traditional oven during 15 minutes at a temperature of 200°C.<br />
39 <strong>VG</strong> <strong>BBA</strong> 1 - 110711<br />
Assembly page 39/168
�<br />
RAPID BREAD<br />
Fax +32 2 359 95 50<br />
Programme: 11 (Fast) – Crust colour: light/dark<br />
Copies of the I/B. Please reproduce them without any<br />
changes except under special instruction from Team<br />
International BELGIUM. The pages must be reproduced<br />
and folded in order to obtain a booklet A5 (+/- 148.5 mm<br />
width x 210 mm height). When folding, make sure you<br />
keep the good numbering when you turn the pages of<br />
the I/B. Don’t change the page numbering. Keep the<br />
language integrity.<br />
Use this setting for quick bread making. However, the bread will be denser and not as tall.<br />
Ingredients:<br />
1 cup of water<br />
2 tablespoons of butter or margarine<br />
1 ½ teaspoon of salt<br />
2 tablespoons of sugar<br />
1 tablespoon of powdered milk<br />
3 cups of all-purpose flour<br />
2 teaspoons of quick-rise yeast<br />
1. Measure the ingredients accurately and add to the baking tin in the order listed above<br />
(liquid ingredients first).<br />
2. Insert the baking tin in the bread maker. Close the lid.<br />
3. Select the desired programme.<br />
4. Select the desired crust colour.<br />
5. Press the START/STOP key.<br />
6. Using oven mitts, remove the bread after the baking time has elapsed.<br />
7. Let it cool down on a wire rack at least one hour before slicing it.<br />
BAKE<br />
Programme: 12 (Bake)<br />
Duration:1:00<br />
Since this programme allows the bread maker to bake for an hour, special attention has to be<br />
paid during this process. This programme helps you when a supply interruption occurs during<br />
the rising process. Read the "MEMORY" section for more information about supply interruptions.<br />
PROTECTION OF THE ENVIRONMENT – DIRECTIVE 2002/96/EC<br />
In order to preserve our environment and protect human health, the waste electrical and<br />
electronic equipment should be disposed of in accordance with specific rules with the<br />
implication of both suppliers and users. For this reason, as indicated by the symbol on the<br />
rating label or on the packaging, your appliance should not be disposed of as unsorted<br />
municipal waste. The user has the right to bring it to a municipal collection point performing<br />
waste recovery by means of reuse, recycling or use for other applications in accordance with<br />
the directive.<br />
40 <strong>VG</strong> <strong>BBA</strong> 1 - 110711<br />
Assembly page 40/168
�<br />
Fax +32 2 359 95 50<br />
POUR VOTRE SECURITE<br />
Copies of the I/B. Please reproduce them without any<br />
changes except under special instruction from Team<br />
International BELGIUM. The pages must be reproduced<br />
and folded in order to obtain a booklet A5 (+/- 148.5 mm<br />
width x 210 mm height). When folding, make sure you<br />
keep the good numbering when you turn the pages of<br />
the I/B. Don’t change the page numbering. Keep the<br />
language integrity.<br />
Lisez attentivement cette notice avant toute utilisation, et respectez bien à la fois les consignes<br />
de sécurité et d'usage.<br />
Important: Votre appareil n’est pas prévu pour être utilisé par des personnes (y compris les<br />
enfants) dont les capacités physiques, sensorielles ou mentales sont réduites, ou des personnes<br />
dénuées d’expérience ou de connaissance, sauf si elles ont pu bénéficier, par l’intermédiaire<br />
d’une personne responsable de leur sécurité, d’une surveillance ou d’instructions préalables<br />
concernant son utilisation en toute sécurité.<br />
Il convient de surveiller les enfants pour s’assurer qu’ils ne jouent pas avec l’appareil.<br />
� Avant d'utiliser l'appareil, vérifiez que la tension du réseau correspond bien à celle de<br />
l'appareil.<br />
� Ne laissez jamais votre appareil sans surveillance lorsque celui-ci est en fonctionnement ou<br />
sous tension.<br />
� Vérifiez régulièrement l’état de votre appareil et s’il est endommagé de quelque façon<br />
que ce soit, faites-le vérifier et réparer par un service qualifié compétent(*). Si le câble est<br />
endommagé, il doit être obligatoirement remplacé par un service qualifié compétent(*).<br />
� Utilisez l'appareil uniquement pour des usages domestiques et de la manière indiquée<br />
dans la notice.<br />
� Ne plongez jamais l'appareil dans l'eau ou dans tout autre liquide ni pour son nettoyage ni<br />
pour toute autre raison. Ne le mettez jamais dans le lave-vaisselle.<br />
� Soyez particulièrement attentif juste après la cuisson. L'appareil est alors très chaud.<br />
Laissez-le refroidir complètement avant de le ranger ou de le nettoyer.<br />
� N'utilisez pas l'appareil près de sources de chaleur.<br />
� La fiche doit être débranchée avant de nettoyer votre appareil et de le ranger.<br />
� Veillez à ne pas utiliser l'appareil à l'extérieur et entreposez-le dans un endroit sec.<br />
� Ne pas utiliser des accessoires non recommandés par le fabricant, cela peut présenter un<br />
danger pour l’utilisateur et risque d’endommager l’appareil.<br />
� Ne déplacez jamais l’appareil en tirant sur le câble. Veillez à ce que le cordon<br />
d’alimentation ne puisse être accidentellement accroché et ce, afin d’éviter toute chute<br />
de l’appareil. Évitez d’enrouler le cordon autour de l’appareil et ne le tordez pas.<br />
� Posez cet appareil sur une table ou un support suffisamment stable pour éviter sa chute.<br />
� Veillez à ce que le cordon n’entre pas en contact avec des surfaces chaudes de<br />
l’appareil. Vous-même, veillez à ne pas toucher les surfaces chaudes de l’appareil.<br />
� Veillez à ce que l’appareil ne rentre pas en contact avec des matériaux facilement<br />
inflammables comme les rideaux, les tissus,... ou ne se trouve à proximité de ces matériaux<br />
lorsqu’il est en fonctionnement car le feu pourrait se déclarer.<br />
� La température des surfaces métalliques peut être élevée lorsque l'appareil fonctionne.<br />
Ne pas toucher ces surfaces chaudes. Certaines de ces surfaces peuvent même devenir<br />
très chaudes pendant l’usage. Utilisez des gants de cuisine lors de la manipulation du<br />
moule après la cuisson afin de ne pas vous brûler. Lorsque le symbole est apposé sur<br />
une surface particulière, il accentue la mise en garde et signifie: ATTENTION, cette surface<br />
peut devenir très chaude pendant l'utilisation.<br />
� Veillez à ne pas griffer le revêtement spécial du moule et de la lame car il perdrait alors<br />
son caractère antiadhésif.<br />
� Ne dépassez jamais les doses de farine et levure indiquées dans les recettes car dans le<br />
cas contraire, la pâte risquerait de déborder du moule.<br />
� Ne pas couvrir l'appareil (par exemple avec un tissus) car cela empêcherait la vapeur de<br />
s'échapper.<br />
� N'introduisez aucun ustensile dans la cuve pour éviter tout choc électrique et<br />
d’endommager son revêtement.<br />
41 <strong>VG</strong> <strong>BBA</strong> 1 - 110711<br />
Assembly page 41/168
�<br />
Fax +32 2 359 95 50<br />
Copies of the I/B. Please reproduce them without any<br />
changes except under special instruction from Team<br />
International BELGIUM. The pages must be reproduced<br />
and folded in order to obtain a booklet A5 (+/- 148.5 mm<br />
width x 210 mm height). When folding, make sure you<br />
keep the good numbering when you turn the pages of<br />
the I/B. Don’t change the page numbering. Keep the<br />
language integrity.<br />
� L’appareil ne doit jamais être mis en fonctionnement par le biais d’une minuterie<br />
extérieure ou d’un autre système de commande à distance séparé.<br />
(*) Service qualifié compétent: service après-vente du fabricant ou de l'importateur ou une<br />
personne qualifiée, reconnue et habilitée à faire ce genre de réparation afin d'éviter tout<br />
danger. Dans tous les cas, veuillez retourner l'appareil auprès de ce service.<br />
REMARQUES<br />
Le cordon d’alimentation de l’appareil est relativement court afin de diminuer les risques<br />
d’accidents (chute si vous accrochez le cordon...). Vous pouvez toutefois utiliser un<br />
prolongateur si nécessaire mais:<br />
• Assurez-vous que l'ampérage du prolongateur soit égal ou supérieur à celui de<br />
l'appareil. Un prolongateur avec un ampérage inférieur à celui de l'appareil risquerait<br />
de surchauffer et de brûler.<br />
• Afin d’éviter tout risque d’accident, assurez-vous que le prolongateur ne pend pas<br />
(d’un coin de table par exemple) ou qu'il ne traîne pas par terre.<br />
AVANT LA PREMIERE CUISSON<br />
Déballez l'appareil et retirez tout matériel d'emballage. Nettoyez le couvercle, la cuve et les<br />
accessoires à l'aide d'un chiffon humide puis séchez toutes les parties soigneusement.<br />
La qualité du pain que vous obtiendrez peut dépendre de nombreux facteurs. C'est pourquoi il<br />
est très important de connaître tous les ingrédients et leur interaction. Cela vous permettra<br />
d'obtenir un résultat satisfaisant à chaque utilisation.<br />
Température<br />
Tous les ingrédients que vous mettez dans la machine à pain doivent être à température<br />
ambiante. De même la pièce dans laquelle vous cuisez le pain doit être tempérée (de 15 à<br />
34°C, et idéalement de 20 à 23°C).<br />
Dosage des ingrédients<br />
• Votre appareil est fourni avec un bol doseur et une cuillère combinée (grande et petite).<br />
Mesurez les ingrédients uniquement avec ces accessoires. Les recettes de ce mode<br />
d'emploi sont basées sur ces dosages.<br />
• L’unité utilisée dans ce mode d’emploi est exprimée en bol doseur et fraction de bol<br />
doseur. Sur le bol vous trouverez une unité exprimée en « cup ». Une « cup » correspond à<br />
un bol doseur entier (250ml).<br />
• Sur la cuillère combinée, vous verrez les marquages suivants:<br />
Table spoon correspond à 1 cuillère à soupe = 15ml<br />
Teaspoon correspond à 1 cuillère à café = 5ml<br />
• Pour mesurer les ingrédients liquides, remplissez le bol doseur et posez celui-ci sur une<br />
surface plane. Abaissez-vous de façon à avoir les yeux au même niveau que le bol. Le<br />
niveau du liquide doit être aligné avec la marque de la mesure désirée. Une mesure<br />
approximative n'est pas suffisante et pourrait compromettre l'équilibre de la recette.<br />
• Pour mesurer la farine, remplissez le bol doseur légèrement au-delà du rebord et enlevez<br />
l'excédent en passant un ustensile droit sur les rebords. Ne tassez pas la farine, car cela<br />
donnerait une quantité supérieure à celle requise. Ne tamisez pas la farine. Pour des<br />
petites quantités, utilisez la cuillère de dosage et assurez-vous qu'elle soit rase et non<br />
42 <strong>VG</strong> <strong>BBA</strong> 1 - 110711<br />
Assembly page 42/168
�<br />
Fax +32 2 359 95 50<br />
Copies of the I/B. Please reproduce them without any<br />
changes except under special instruction from Team<br />
International BELGIUM. The pages must be reproduced<br />
and folded in order to obtain a booklet A5 (+/- 148.5 mm<br />
width x 210 mm height). When folding, make sure you<br />
keep the good numbering when you turn the pages of<br />
the I/B. Don’t change the page numbering. Keep the<br />
language integrity.<br />
comble. Pour certains ingrédients tels que des raisins secs ou des copeaux de chocolat, il<br />
est préférable d'utiliser une balance de cuisine.<br />
Situation géographique<br />
En altitude (plus de 3000 pi = 914 mètres) l'eau s'évapore plus vite et le pain lève plus vite. C'est<br />
pourquoi en altitude il est nécessaire d'adapter les recettes à ces conditions en utilisant un peu<br />
plus de liquide et moins d'ingrédients secs. Le tableau ci-dessous vous donne des conseils en<br />
fonction de l'altitude.<br />
ALTITUDE<br />
Modification 3000 pi (914m) 5000 pi (1524m) 7000 pi (2133m)<br />
Réduire la levure: pour<br />
chaque cuillère à café<br />
dans la recette, réduire de<br />
Réduire le sucre: pour<br />
chaque cuillère à soupe<br />
dans la recette, réduire de<br />
Augmenter le liquide: pour<br />
chaque bol doseur dans la<br />
recette, ajouter:<br />
Ingrédients<br />
1/8 cuillère à café<br />
1/8 – 1/4 cuillère à<br />
café<br />
+ 1/4 cuillère à café<br />
0-1 cuillère à café 0-2 cuillères à café 1-2 cuillères à café<br />
1-2 cuillères à soupe 2-4 cuillères à soupe 3-4 cuillères à soupe<br />
Le facteur délicat pour la réussite du pain est la qualité et la fraîcheur des aliments. Notez aussi<br />
que les quantités des ingrédients doivent être strictement respectées.<br />
Farine tout-usage<br />
La farine tout-usage est un mélange de farines de blé tendre et dur spécialement conçu pour<br />
la préparation de pains et de gâteaux. Bien que ce type de farine offre des résultats<br />
acceptables avec votre appareil, nous vous conseillons d'utiliser de la farine à pain.<br />
Farine à pain<br />
La farine à pain est une farine à haute teneur en gluten/protéine qui a été traitée avec des<br />
améliorants qui rendent la pâte plus tolérante pendant le pétrissage. Habituellement, la farine<br />
à pain a une concentration en gluten plus élevée que la farine tout-usage, ce qui peut<br />
toutefois varier selon les différentes méthodes de mouture. On recommande la farine à pain<br />
pour la cuisson avec cet appareil bien que la farine tout-usage produira des résultats<br />
acceptables.<br />
Farine de blé complet<br />
La farine de blé complet est réalisée à partir de l'amande complète du blé qui contient le son<br />
et le germe, la rendant ainsi plus dense et plus riche en nutriments que la farine tout-usage. Un<br />
pain fait avec cette farine est généralement plus petit et plus lourd que les pains blancs. Pour<br />
pallier cette situation, on mélange souvent la farine de blé complet à de la farine tout-usage,<br />
de la farine à pain ou de gluten pour produire un pain plus haut et plus léger.<br />
43 <strong>VG</strong> <strong>BBA</strong> 1 - 110711<br />
Assembly page 43/168
�<br />
Farine de seigle<br />
Fax +32 2 359 95 50<br />
Copies of the I/B. Please reproduce them without any<br />
changes except under special instruction from Team<br />
International BELGIUM. The pages must be reproduced<br />
and folded in order to obtain a booklet A5 (+/- 148.5 mm<br />
width x 210 mm height). When folding, make sure you<br />
keep the good numbering when you turn the pages of<br />
the I/B. Don’t change the page numbering. Keep the<br />
language integrity.<br />
La farine de seigle est une farine riche en fibres similaires à la farine de blé complet. Il faut<br />
toujours mélanger cette farine à de grandes quantités de farine tout-usage, farine à pain ou<br />
de gluten puisqu'elle ne contient pas suffisamment de gluten pour produire une miche haute<br />
et uniforme.<br />
Gluten<br />
Le gluten est la protéine dans le blé qui rend la pâte élastique. On trouve habituellement du<br />
gluten dans la plupart des magasins d'aliments santé et d'aliments en vrac. On l'utilise parfois<br />
en petites portions, avec des farines denses, à faible teneur en gluten, comme la farine de blé<br />
complet, pour augmenter le volume et alléger la texture.<br />
Farine à gâteau<br />
La farine à gâteau, qui contient peu de gluten/protéine, est spécialement conçue pour les<br />
recettes de gâteaux. Elle n'est pas recommandée pour les recettes de pain.<br />
Farine fermentante<br />
La farine fermentante contient des ingrédients de levage inutiles qui nuisent à la préparation<br />
de pains ou de gâteaux. Elle n'est pas recommandée pour votre appareil.<br />
Son<br />
Le son (non transformé) et le germe de blé constituent les parties extérieures brutes des grains<br />
de blé ou de seigle qu'on a séparé de la farine. On les ajoute souvent au pain en petites<br />
quantités pour l'enrichir, et lui donner du goût et du corps. On les utilise également pour<br />
améliorer la texture du pain.<br />
Semoule de maïs et farine d'avoine<br />
La semoule de maïs et la farine d'avoine proviennent du maïs blanc ou jaune moulu gros et de<br />
l'avoine en flocons ou épointée. On les utilise principalement pour améliorer la saveur et la<br />
texture du pain.<br />
Blé concassé<br />
Le blé concassé a une texture très grossière. Il provient de l'amande du blé coupée en<br />
fragments angulaires. Le blé concassé donne au pain complet une saveur de noisette et une<br />
texture croquante.<br />
Mélange de sept grains<br />
Le mélange de sept grains est un mélange de blé concassé, d'avoine, de son, de seigle, de<br />
semoule de maïs, de lin et de millet.<br />
Levure<br />
Lors de la fermentation, la levure produit du dioxyde de carbone, qui est nécessaire pour faire<br />
du pain. Afin de produire ce gaz, la levure a besoin de glucides qu'on trouve dans le sucre et<br />
la farine. On utilise la levure granulée active dans toutes les recettes qui demandent de la<br />
levure. En fait, il existe encore quatre types de levure: fraîche, sèche, à action rapide et pour<br />
44 <strong>VG</strong> <strong>BBA</strong> 1 - 110711<br />
Assembly page 44/168
�<br />
Fax +32 2 359 95 50<br />
Copies of the I/B. Please reproduce them without any<br />
changes except under special instruction from Team<br />
International BELGIUM. The pages must be reproduced<br />
and folded in order to obtain a booklet A5 (+/- 148.5 mm<br />
width x 210 mm height). When folding, make sure you<br />
keep the good numbering when you turn the pages of<br />
the I/B. Don’t change the page numbering. Keep the<br />
language integrity.<br />
machine à pain. Nous recommandons d'employer la levure sèche traditionnelle bien qu'ion<br />
puisse également utiliser la levure à action rapide en quantités réduites. Les levures fraîches ou<br />
pressées n'offrent pas un bon rendement.<br />
Il faut toujours ranger la levure au réfrigérateur pour conserver sa fraîcheur. Une trop grande<br />
chaleur la rendra inutilisable. Il faut également s'assurer de la fraîcheur de la levure en vérifiant<br />
sa date de péremption. Une fois un emballage ou une boîte de levure ouvert, il est très<br />
important de remballer et de réfrigérer le reste le plus tôt possible pour pouvoir l'utiliser<br />
ultérieurement. Souvent, lorsqu'un pain ou de la pâte ne lève pas, c'est que la levure est vieille.<br />
On peut effectuer le test suivant pour déterminer si une levure est vieille et inactive:<br />
Versez ½ bol doseur d'eau du robinet dans un petit bol ou une tasse.<br />
• Ajoutez et mélangez 1 cuillère à café de sucre, et saupoudrez la surface de 2<br />
cuillères à café de levure.<br />
• Placez le bol ou la tasse dans un endroit chaud et laissez reposer 10 minutes.<br />
• Le mélange devrait mousser et dégager une forte odeur de levure. Si cela ne se<br />
produit pas, il faut se procurer de la levure fraîche.<br />
Sucre<br />
Le sucre joue un rôle important dans la coloration et la saveur du pain. Il intervient aussi dans le<br />
processus de fermentation en servant de nourriture à la levure. Lorsqu'une recette demande<br />
du sucre, il faut comprendre sucre cristallisé. Sauf indication contraire, ne pas substituer par du<br />
sucre en poudre ou de la cassonade. On ne peut pas non plus utiliser des édulcorants artificiels<br />
car la levure ne réagit pas adéquatement avec ceux-ci.<br />
Sel<br />
Le sel est nécessaire à l'équilibre de la saveur des pains et des gâteaux ainsi qu'à la couleur de<br />
la croûte qui se développe pendant la cuisson. Pour des raisons de santé, on peut l'éliminer<br />
complètement. Le pain pourrait toutefois trop gonfler et lever plus haut que la normale.<br />
Liquides/lait<br />
Pour faire du pain, on peut employer des liquides comme le lait ou une combinaison de lait en<br />
poudre et d'eau. Le lait rehausse la saveur, procure une texture veloutée et adoucit la croûte,<br />
alors que l'eau seule donne une croûte plus croustillante. N'employez que du lait en poudre au<br />
moment d'utiliser la minuterie à retardement. Certaines recettes demandent du jus (orange,<br />
pomme, etc.) pour ajouter une saveur au pain.<br />
Œufs<br />
Les œufs donnent une texture riche et veloutée à la pâte à pain et aux gâteaux. N'utilisez que<br />
des œufs de calibre gros.<br />
Beurre, huile et margarine<br />
Le beurre, l'huile et la margarine donnent aux pains à la levure une texture friable ou tendre.<br />
Toutefois, les pains faits avec du beurre conservent leur fraîcheur plus longtemps. Si on emploie<br />
du beurre ou de la margarine directement du réfrigérateur, il faut le couper en petits<br />
morceaux pour faciliter le mélange des ingrédients pendant le pétrissage.<br />
Levure chimique (baking powder)<br />
La levure chimique est un agent de levage utilisé pour les gâteaux et pains rapides. Ce type<br />
d'agent de levage ne nécessite pas de temps de levée avant la cuisson puisque la réaction<br />
chimique s'effectue lorsqu'on ajoute les ingrédients liquides.<br />
45 <strong>VG</strong> <strong>BBA</strong> 1 - 110711<br />
Assembly page 45/168
�<br />
Fax +32 2 359 95 50<br />
Bicarbonate de soude<br />
Copies of the I/B. Please reproduce them without any<br />
changes except under special instruction from Team<br />
International BELGIUM. The pages must be reproduced<br />
and folded in order to obtain a booklet A5 (+/- 148.5 mm<br />
width x 210 mm height). When folding, make sure you<br />
keep the good numbering when you turn the pages of<br />
the I/B. Don’t change the page numbering. Keep the<br />
language integrity.<br />
Le bicarbonate de soude est un autre agent de levage qu'on ne doit pas confondre ni<br />
substituer avec la levure chimique. Il ne nécessite pas non plus de temps de levée avant la<br />
cuisson puisque la réaction chimique s'effectue pendant la cuisson même.<br />
Glaçages spéciaux pour pains à la levure<br />
Choisissez l'un des glaçages suivants pour rehausser votre pain:<br />
Glaçage aux œufs: battre ensemble 1 gros œuf et 1 cuillère à café d'eau. Badigeonner<br />
généreusement la pâte seulement avant de la cuire au four régulier.<br />
Croûte au beurre fondu: Badigeonner de beurre fondu un pain fraîchement cuit pour obtenir<br />
une croûte molle et plus tendre.<br />
Glaçage au lait: badigeonner de lait ou de crème un pain fraîchement cuit pour obtenir une<br />
croûte molle et brillante.<br />
Glaçage sucré: mélanger 1 bol doseur de sucre à glacer tamisé avec 1 ou 2 cuillères à café<br />
de lait pour faire un glaçage consistant, et en arroser les pains briochés.<br />
Graines de pavot/sésame/carvi/semoule de maïs/farine d'avoine:<br />
Saupoudrez généreusement vos graines préférées sur un pain fraîchement glacé.<br />
FONCTIONNEMENT DE VOTRE MACHINE À PAIN<br />
PANNEAU DE COMMANDE<br />
Ecran:<br />
Affiche le numéro du programme.<br />
Affiche le décompte, minute par minute, du temps de cuisson.<br />
Indique une erreur (codes erreurs "LLL" et "H:HH").<br />
▲ et ▼<br />
Servent à régler la minuterie pour une cuisson différée.<br />
Les boutons permettent de faire défiler le temps par tranches de 10 minutes.<br />
Pour faire défiler les minutes plus rapidement, maintenez le bouton enfoncé.<br />
Touche MENU (1-6/7-12):<br />
Sert à choisir un programme (chiffres de 1 à 12).<br />
Chaque appui sur cette touche fait passer l'affichage au programme suivant.<br />
Touche START/STOP (0/1)<br />
Permet de démarrer un programme.<br />
Pour interrompre un programme, pressez et maintenez enfoncé jusqu'à ce que le signal sonore<br />
se fasse entendre pour arrêter le fonctionnement ou annuler un réglage de minuterie.<br />
(Remarque: n'appuyez pas sur START/STOP lorsque vous ouvrez le couvercle pour surveiller la<br />
cuisson du pain.)<br />
46 <strong>VG</strong> <strong>BBA</strong> 1 - 110711<br />
Assembly page 46/168
�<br />
Fax +32 2 359 95 50<br />
Copies of the I/B. Please reproduce them without any<br />
changes except under special instruction from Team<br />
International BELGIUM. The pages must be reproduced<br />
and folded in order to obtain a booklet A5 (+/- 148.5 mm<br />
width x 210 mm height). When folding, make sure you<br />
keep the good numbering when you turn the pages of<br />
the I/B. Don’t change the page numbering. Keep the<br />
language integrity.<br />
Touche "croûte" (clair/foncé)<br />
Pressez cette touche pour choisir la coloration de la croûte (certains programmes ne<br />
permettent pas ce choix). Chaque appui fait passer la flèche sur l'affichage au niveau de<br />
coloration suivant.<br />
Touche "poids" (450g/680g/900g)<br />
Permet de choisir le poids de la miche (certains programmes ne permettent pas ce choix).<br />
Chaque appui fait passer la flèche sur l'affichage au poids suivant.<br />
BIPS SONORES POSSIBLES<br />
L'appareil émet plusieurs sortes de bips sonores.<br />
1 bip long: L'appareil est mis en marche<br />
1 bip court: Une touche de programmation valide est pressée<br />
10 bips consécutifs en cours de fonctionnement: La fonction "ajouter ingrédients" est activée<br />
12 bips courts: le programme est terminé<br />
UTILISATION<br />
1. Ouvrez le couvercle et retirez le moule en le soulevant à l'aide de l'anse. Ne versez jamais<br />
les ingrédients dans le moule lorsque celui-ci se trouve dans l'appareil, afin d'éviter de<br />
renverser des ingrédients sur les parties internes de la cuve de l'appareil. Posez toujours le<br />
moule sur une surface stable.<br />
2. Installez le pétrisseur sur l'axe à l'intérieur du moule en alignant la partie plate de<br />
l'accessoire avec la partie plate de l'axe. Assurez-vous que l'axe soit exempt de tout résidu<br />
de pâte et que le pétrisseur soit bien enfoncé. Attention, si le pétrisseur n'est pas bien<br />
enfoncé, il risque de se détacher pendant le pétrissage, ce qui affecterait le mélange. Il<br />
est recommandé de remplir de matière grasse résistante à la chaleur le trou du pétrisseur<br />
afin d’éviter que la pâte n’adhère au pétrisseur lui-même.<br />
3. Choisissez une recette parmi celles décrites dans le paragraphe "Recettes" de ce mode<br />
d'emploi. En suivant la recette:<br />
• Mesurez les ingrédients comme indiqué dans le paragraphe "Dosage des<br />
ingrédients".<br />
• Versez toujours les ingrédients dans le moule dans l'ordre indiqué dans la recette.<br />
• Incorporez toujours la levure en dernier lieu. Assurez-vous qu'elle n'entre en contact ni<br />
avec les ingrédients liquides, ni avec le sel.<br />
4. Replacez le moule dans l'appareil. Enfoncez-le jusqu'à ce qu'il soit verrouillé dans le fond<br />
de l'appareil.<br />
5. Fermez le couvercle et branchez l'appareil. Un bip se fera entendre et "2:50" s'affichera à<br />
l'écran. Le programme 1 sera affiché par défaut.<br />
6. Choisissez le programme approprié à la recette en appuyant sur le bouton MENU du<br />
panneau de commande. Chaque fois que la touche MENU est pressée, le numéro à<br />
l'écran avance au réglage suivant. Pressez le bouton jusqu'à ce qu'un bip se fasse<br />
entendre.<br />
7. Choisissez le poids approprié de la miche en appuyant sur la touche "poids". Chaque fois<br />
que vous appuyez sur ce bouton, le point sur l'affichage passe d'un cycle à l'autre.<br />
47 <strong>VG</strong> <strong>BBA</strong> 1 - 110711<br />
Assembly page 47/168
�<br />
Fax +32 2 359 95 50<br />
Copies of the I/B. Please reproduce them without any<br />
changes except under special instruction from Team<br />
International BELGIUM. The pages must be reproduced<br />
and folded in order to obtain a booklet A5 (+/- 148.5 mm<br />
width x 210 mm height). When folding, make sure you<br />
keep the good numbering when you turn the pages of<br />
the I/B. Don’t change the page numbering. Keep the<br />
language integrity.<br />
8. Choisissez l'intensité de coloration appropriée pour la croûte du pain en appuyant sur la<br />
touche "croûte". Vous pouvez choisir entre une coloration foncée et claire. Le réglage<br />
"clair" sera affiché par défaut.<br />
9. Appuyez sur la touche "START/STOP" pendant 3 secondes. La durée de cuisson en heures<br />
et en minutes s'affiche à l'écran et le rétro-éclairage LCD clignote. Par exemple, si vous<br />
choisissez une recette demandant le programme "Standard" ("Basic") pour un pain de<br />
680g dont la croûte est de coloration claire, vous verrez "2:55" à l'écran. Jusqu'à ce que le<br />
pain soit prêt, l'écran affichera le temps résiduel, qui décompte minute par minute.<br />
Lorsque vous utilisez les programmes "Basic" ("Standard"), "French" ("Français"), "Sweet"<br />
("Brioché"), "Wholewheat" ("Blé complet") et "Sandwich", 10 bips sonores retentiront<br />
pendant la cuisson pour indiquer que vous pouvez ajouter des ingrédients. Ouvrez le<br />
couvercle et ajoutez les ingrédients. Soyez prudent car de la vapeur pourrait s'échapper<br />
lorsque vous ouvrez le couvercle.<br />
Remarque: Dès que vous avez appuyé sur START/STOP, il est impossible de modifier les<br />
réglages à l'aide des autres boutons.<br />
10. Une fois le cycle terminé, vous entendrez 12 bips. Ne posez pas le moule chaud ou<br />
quelque objet que ce soit sur le dessus de l'appareil pour ne pas endommager sa surface.<br />
Si vous ne désirez pas utiliser la fonction maintien au chaud, arrêtez le programme en<br />
appuyant 3 secondes sur le bouton START/STOP. Un bip sonore retentit et l'affichage<br />
revient aux indications par défaut.<br />
11. Dès que la cuisson est terminée, si vous ne retirez pas le pain immédiatement de son<br />
moule, et que vous n'appuyez pas sur la touche START/STOP l'appareil enclenche la<br />
fonction de maintien au chaud. L’appareil conservera le pain chaud pendant 60 minutes.<br />
A la fin des 60 minutes, l'affichage retournera aux indications par défaut. Vous pouvez<br />
retirer le moule à tout moment pendant le cycle "maintien au chaud". Pour désactiver<br />
cette fonction avant la fin des 60 minutes, il suffit d'appuyer sur le bouton "START/STOP" et<br />
de le maintenir enfoncé pendant 3 secondes. Débranchez l'appareil une fois l'utilisation<br />
terminée. Attention: Lorsque vous utilisez le programme 7 (WHISK), 8 (JAM) ou 10 (DOUGH<br />
= pâte), la fonction de maintien au chaud n’est pas activée. Pour programme 10, il est<br />
fortement déconseillé de laisser la pâte terminée trop longtemps dans l'appareil car elle<br />
pourrait trop lever et produire de mauvais résultats. Pour obtenir de meilleurs résultats,<br />
retirez la pâte à la fin du cycle et suivre les consignes de la recette pour le façonnage, le<br />
repos et la cuisson.<br />
12. L'appareil est muni d'une fenêtre permettant d'observer le pétrissage, le mélange et la<br />
cuisson. De temps à autre, de l'humidité peut se former sur la fenêtre pendant l'opération.<br />
On peut soulever le couvercle pour vérifier le mélange et le pétrissage mais IL EST INTERDIT<br />
D'OUVRIR LE COUVERCLE PENDANT LA CUISSON (plus ou moins la dernière heure du cycle)<br />
car le pain pourrait retomber.<br />
13. Pour retirer le pain du récipient à cuisson, employez des poignées ou des gants de cuisine<br />
et retirez le moule en le soulevant à l'aide de l'anse. Renversez le récipient et secouez-le<br />
pour faire tomber le pain sur une grille de refroidissement. Comme le récipient possède un<br />
revêtement antiadhésif, le pain devrait sortir facilement. Ne pas utiliser d’ustensiles en<br />
métal pour enlever le pain afin de ne pas griffer le revêtement antiadhésif. Si nécessaire,<br />
utilisez une spatule en bois ou en plastique le long des parois du moule pour sortir le pain.<br />
Si le pétrisseur reste coincé au bas du pain, utilisez le crochet fourni ou l’extrémité d’une<br />
cuillère de plastique ou d’un ustensile non métallique pour le retirer. Attention: au moment<br />
où vous retirez le pain du moule, vérifiez toujours où se trouve le pétrisseur. S’il se trouve<br />
dans la miche de pain, retirez-le doucement afin de ne pas l’endommager lorsque vous<br />
coupez le pain.<br />
14. Laissez refroidir le pain sur la grille pendant au moins 60 minutes avant de le trancher pour<br />
laisser échapper la vapeur. Utiliser un bon couteau à pain à lame dentelée ou un<br />
couteau électrique.<br />
48 <strong>VG</strong> <strong>BBA</strong> 1 - 110711<br />
Assembly page 48/168
�<br />
Fax +32 2 359 95 50<br />
UTILISATION DE LA MINUTERIE POUR CUISSON DIFFÉRÉE<br />
Copies of the I/B. Please reproduce them without any<br />
changes except under special instruction from Team<br />
International BELGIUM. The pages must be reproduced<br />
and folded in order to obtain a booklet A5 (+/- 148.5 mm<br />
width x 210 mm height). When folding, make sure you<br />
keep the good numbering when you turn the pages of<br />
the I/B. Don’t change the page numbering. Keep the<br />
language integrity.<br />
Utilisez la minuterie pour retarder la cuisson du pain. Cette fonction vous permet de prérégler<br />
la cuisson du pain jusqu’à 13 heures à l’avance. Par exemple, vous pouvez régler la minuterie<br />
à 19 heures et vous réveiller avec l’odeur du pain frais à 8 heures le matin suivant.<br />
Pour régler la minuterie, suivez les étapes ci-dessous:<br />
• Attention: n’utilisez pas la minuterie pour des recettes qui demandent des ingrédients frais<br />
périssables comme les œufs, le lait frais, la crème sure et le fromage.<br />
• Déterminez l’heure à laquelle le pain doit être prêt et comptez le nombre d’heures<br />
nécessaires. Par exemple, s’il est 20 heures au moment de verser tous les ingrédients dans<br />
le moule et que vous désirez obtenir un pain fraîchement cuit à 8 heures le lendemain<br />
matin, vous comptez un total de 12 heures avant que le pain ne soit prêt. Une fois les<br />
réglages appropriés choisis selon la recette, il suffit de régler la minuterie au nombre<br />
d'heures total – soit, dans ce cas, 12 heures.<br />
• Appuyez sur ▲ du panneau de commande et "2:50", le temps pour ce réglage,<br />
apparaîtra automatiquement à l'écran. Continuez de presser la touche ▲ jusqu'à ce<br />
que l'écran affiche "12:00". Il n'est pas nécessaire de calculer la différence entre le temps<br />
de réglage (2:50) et le total d'heures désiré (12:00). L'appareil s'ajustera automatiquement<br />
pour comprendre le temps de réglage. Il suffit donc de régler la minuterie au nombre<br />
total d'heures (12). Si vous dépassez le "12:00", appuyez sur ▼ pour y revenir. Si vous<br />
maintenez la touche enfoncée, le temps défilera plus rapidement.<br />
• Dès que le temps est réglé, appuyez sur la touche "START/STOP". Le compte à rebours va<br />
commencer. La minuterie affichera le temps résiduel minute par minute. Lorsque la<br />
minuterie arrive à "0:00", le pain est prêt et l'appareil émet 12 bips sonores consécutifs.<br />
• En cas d'erreur dans le réglage de la minuterie, maintenez la touche "START/STOP"<br />
enfoncée jusqu'à ce qu'un bip se fasse entendre. Le réglage sera annulé et on pourra<br />
régler la minuterie à nouveau.<br />
PROBLÈMES ET SOLUTIONS<br />
Problème Solution<br />
De la fumée s'échappe par les grilles de<br />
ventilation pendant la cuisson<br />
La farine a débordé du moule et est tombée<br />
dans le boîtier interne de l'appareil<br />
Cela peut être dû à de l'huile qui aurait coulé<br />
sur l'élément chauffant. Débranchez<br />
l'appareil, retirez le moule et nettoyez<br />
l'élément chauffant avec un chiffon sec en<br />
veillant à ne pas vous brûler.<br />
Débranchez l'appareil et laissez-le refroidir.<br />
Essuyez le boîtier interne avec un chiffon<br />
propre. Soyez prudent lorsque vous nettoyez<br />
autour de l'élément chauffant.<br />
La croûte inférieure est trop épaisse Cela arrive si vous laissez le pain trop<br />
longtemps dans l'appareil après la cuisson.<br />
Retirez le pain plus tôt.<br />
Le pain n'a pas cuit correctement Assurez-vous que le pétrisseur soit<br />
correctement installé sur l'axe.<br />
Evitez d'ouvrir l'appareil trop fréquemment<br />
durant le déroulement du programme.<br />
On entend le moteur de l'appareil, mais la<br />
pâte ne se mélange pas<br />
Vérifiez que le moule soit bien fixé et que le<br />
malaxeur soit bien installé.<br />
49 <strong>VG</strong> <strong>BBA</strong> 1 - 110711<br />
Assembly page 49/168
�<br />
Fax +32 2 359 95 50<br />
Copies of the I/B. Please reproduce them without any<br />
changes except under special instruction from Team<br />
International BELGIUM. The pages must be reproduced<br />
and folded in order to obtain a booklet A5 (+/- 148.5 mm<br />
width x 210 mm height). When folding, make sure you<br />
keep the good numbering when you turn the pages of<br />
the I/B. Don’t change the page numbering. Keep the<br />
language integrity.<br />
HOT apparaît à l'écran Si HOT apparaît à l'écran après que vous ayez<br />
appuyé sur START/STOP, la température à<br />
l'intérieur de l'appareil est trop élevée. Il est<br />
alors nécessaire d'arrêter le programme,<br />
d’ouvrir le couvercle et de laisser l'appareil<br />
refroidir pendant 10 à 20 minutes.<br />
H:HH ou LLL apparaît à l'écran Si H:HH ou LLL apparaît à l'écran après que<br />
vous ayez démarré un programme, la<br />
température à l'intérieur de l'appareil est trop<br />
élevée. Il est alors nécessaire d'arrêter le<br />
programme, d’ouvrir le couvercle et de laisser<br />
l'appareil refroidir pendant 10 à 20 minutes.<br />
Si vous n'obtenez pas le résultat voulu, vérifiez les points suivants:<br />
Attention: essayez une solution à la fois par miche de pain!<br />
A) Problèmes de mesure<br />
Si votre pain lève, puis tombe<br />
• Réduisez la quantité d'eau/lait de 2 cuillères à soupe.<br />
• Augmentez la quantité de sel de 1/4 de cuillère à café.<br />
• Réduisez la quantité de levure de 1/4 de cuillère à café.<br />
Si votre pain lève trop haut<br />
• Réduisez la quantité de farine de 2 cuillères à soupe.<br />
• Réduisez la quantité d'eau/lait de 2 cuillères à soupe.<br />
• Augmentez la quantité de sel de 1/4 de cuillère à café.<br />
• Réduisez la quantité de sucre/miel d'une cuillère à café.<br />
• Réduisez la quantité de levure de 1/4 de cuillère à café.<br />
Si votre pain ne lève pas suffisamment<br />
• Augmentez la quantité d'eau/lait de 2 cuillères à soupe.<br />
• Réduisez la quantité de sel de1/4 de cuillère à café.<br />
• Augmentez la quantité de sucre/miel d'une cuillère à café.<br />
• Augmentez la quantité de levure de 1/4 de cuillère à café.<br />
Si votre croûte est trop foncée<br />
• Réduisez la quantité de sucre/miel d'une cuillère à café.<br />
Si votre pain n'est pas cuit<br />
• Réduisez la quantité d'eau/lait de 2 cuillères à soupe.<br />
Si le dessus du pain n'est pas cuit<br />
• Réduisez la quantité de farine de 2 cuillères à soupe.<br />
• Augmentez la quantité d'eau/lait de 2 cuillères à soupe.<br />
Si la texture du pain est trop lourde ou dense<br />
• Réduisez la quantité de farine de 2 cuillères à soupe.<br />
• Augmentez la quantité de sucre d'une cuillère à café.<br />
• Augmentez la quantité de levure de 1/4 de cuillère à café.<br />
B) Problèmes d'ingrédients<br />
S'il ne s'agit pas d'un problème de mesure, le problème peut également provenir des<br />
ingrédients utilisés.<br />
Si votre pain lève, puis tombe<br />
• La farine est trop fine.<br />
50 <strong>VG</strong> <strong>BBA</strong> 1 - 110711<br />
Assembly page 50/168
�<br />
Fax +32 2 359 95 50<br />
Si votre pain lève trop haut<br />
• Vous avez utilisé un mauvais type de levure.<br />
• Vous avez oublié le sel.<br />
Si votre pain ne lève pas suffisamment<br />
• La farine est trop vieille.<br />
• La farine a une trop faible teneur en gluten.<br />
• La farine est trop fine.<br />
• Vous avez utilisé un mauvais type de levure.<br />
• Vous avez mis trop de sel.<br />
Si votre pain est plat, lève peu ou pas<br />
• Le liquide est trop froid/chaud.<br />
• La farine est trop vieille.<br />
• La farine a une trop faible teneur en gluten.<br />
• La farine est trop fine.<br />
• Vous avez oublié la levure.<br />
• La levure est périmée.<br />
• Vous avez utilisé un mauvais type de levure.<br />
• Vous avez mis trop de sel.<br />
• Vous avez oublié le sel.<br />
Si les ingrédients ne sont pas mélangés<br />
• La farine est trop fine.<br />
Si la texture du pain est trop lourde ou dense<br />
• Vous avez utilisé un mauvais type de levure.<br />
NETTOYAGE ET ENTRETIEN<br />
Copies of the I/B. Please reproduce them without any<br />
changes except under special instruction from Team<br />
International BELGIUM. The pages must be reproduced<br />
and folded in order to obtain a booklet A5 (+/- 148.5 mm<br />
width x 210 mm height). When folding, make sure you<br />
keep the good numbering when you turn the pages of<br />
the I/B. Don’t change the page numbering. Keep the<br />
language integrity.<br />
Veuillez débrancher l'appareil et le laisser refroidir totalement avant de le nettoyer.<br />
1. Moule<br />
Avant de le nettoyer, sortez-le de l'appareil comme décrit plus haut dans ce mode<br />
d'emploi. Nettoyez l'intérieur et l'extérieur avec un chiffon humide. Si nécessaire, utilisez de<br />
l'eau légèrement savonneuse. N'utilisez pas d'objets griffants ou abrasifs car ceux-ci<br />
pourraient endommager le revêtement antiadhésif du moule. Un moule dont le<br />
revêtement serait griffé ou endommagé de cette façon ne pourra être pris en charge<br />
dans la cadre de la garantie. Après un certain temps, l'apparence de la surface<br />
antiadhésive peut changer à cause de l'humidité et de la vapeur. Ceci est normal et n'a<br />
aucune incidence sur ses propriétés et sa qualité.<br />
2. Pétrisseur<br />
Nettoyez le pétrisseur avec un chiffon humide. Si le pétrisseur est difficile à détacher du<br />
moule, versez de l'eau chaude dans le moule et attendez quelques minutes. L'eau<br />
chaude dilatera le point de connexion du pétrisseur et débloquera celui-ci. Si le trou du<br />
pétrisseur est encrassé, nettoyez-le avec un cure-dents en veillant à ne pas griffer le<br />
pétrisseur.<br />
3. Couvercle et regard<br />
Nettoyez-le avec un chiffon humide. Ne l'immergez pas dans l'eau ou dans tout autre<br />
liquide.<br />
4. Intérieur<br />
Si nécessaire vous pouvez aussi nettoyer l'intérieur dans lequel se situe le moule. Là aussi,<br />
veuillez utiliser uniquement un chiffon humide. Assurez-vous que l'intérieur soit totalement<br />
refroidi avant de le nettoyer. Assurez-vous qu'il soit bien sec avant de mettre l'appareil en<br />
marche.<br />
51 <strong>VG</strong> <strong>BBA</strong> 1 - 110711<br />
Assembly page 51/168
�<br />
Fax +32 2 359 95 50<br />
Copies of the I/B. Please reproduce them without any<br />
changes except under special instruction from Team<br />
International BELGIUM. The pages must be reproduced<br />
and folded in order to obtain a booklet A5 (+/- 148.5 mm<br />
width x 210 mm height). When folding, make sure you<br />
keep the good numbering when you turn the pages of<br />
the I/B. Don’t change the page numbering. Keep the<br />
language integrity.<br />
5. Corps de l'appareil<br />
Nettoyez le corps de l'appareil avec un chiffon humide. N'immergez jamais l'appareil dans<br />
l'eau ou tout autre liquide.<br />
DESCRIPTION DES PROGRAMMES ET SUGGESTIONS DE RECETTES<br />
FONCTION MEMOIRE<br />
En cas de coupure de courant, le programme continuera automatiquement si le courant est<br />
rétabli dans les 20 minutes qui suivent la coupure, et ceci sans qu'il soit nécessaire d'appuyer<br />
sur la touche START/STOP. Si le temps de coupure excède les 20 minutes, la mémoire ne<br />
fonctionnera pas et il sera nécessaire de recommencer la programmation. Si le programme<br />
qui était en cours n'a pas dépassé le stade de pétrissage, recommencez simplement le même<br />
programme. Si le programme était déjà à un stade plus avancé mais que la cuisson n'avait<br />
pas encore commencé, utilisez le programme "Cuisson" (BAKE) pour cuire la pâte. Si par contre<br />
la cuisson du pain avait déjà commencé, il est conseillé de recommencer avec de nouveaux<br />
ingrédients car le cycle d'une heure de cuisson proposé par le programme "Cuisson" pourrait<br />
être trop long.<br />
PAIN BLANC STANDARD<br />
Programme: 1 (Basic) – Coloration de la croûte: clair/foncé – Poids: 450g/680g/900g<br />
Utilisez ce réglage pour les pains à base de farine, bien que certaines recettes puissent<br />
également contenir une petite quantité de blé complet. Les miches seront légèrement plus<br />
denses que les pains français ou briochés.<br />
Ingrédients:<br />
450g 680g 900g<br />
2/3 bol doseur d'eau 1 bol doseur d'eau<br />
1 1/3 bol doseur d'eau<br />
1 cuillère à soupe de 1 ½ cuillère à soupe de 2 cuillères à soupe de<br />
margarine ou de beurre margarine ou de beurre margarine ou de beurre<br />
1 cuillère à soupe d’huile 1 ½ cuillère à soupe d’huile 2 cuillères à soupe d’huile<br />
végétale<br />
végétale<br />
végétale<br />
1/3 cuillère à café de sel ½ cuillère à café de sel<br />
1 cuillère à café de sel<br />
1 ½ cuillère à soupe de lait 2 cuillères à soupe de lait en 3 cuillères à soupe de lait en<br />
en poudre<br />
poudre<br />
poudre<br />
2 cuillères à soupe de 2 ½ cuillères à soupe de sucre 3 cuillères à soupe de sucre<br />
sucre<br />
2 ¼ bols doseurs de farine tout- 3 ½ bols doseurs de farine tout-<br />
2 bols doseurs de farine usage ou farine à pain<br />
usage ou farine à pain<br />
tout-usage ou farine à 1 ¼ cuillère à café de levure à 1 ½ cuillère à café de levure à<br />
pain<br />
action rapide<br />
action rapide<br />
1 ¼ cuillère à café de<br />
levure à action rapide<br />
1. Mesurez les ingrédients avec précision et versez dans le moule en respectant l'ordre<br />
donné dans la recette (ingrédients liquides d'abord).<br />
2. Déposez le moule bien en place dans l'appareil. Fermez le couvercle.<br />
3. Choisissez le programme désiré.<br />
4. Choisissez la coloration désirée de la croûte.<br />
5. Choisissez le poids de la miche.<br />
6. Appuyez sur START/STOP.<br />
52 <strong>VG</strong> <strong>BBA</strong> 1 - 110711<br />
Assembly page 52/168
�<br />
Fax +32 2 359 95 50<br />
Copies of the I/B. Please reproduce them without any<br />
changes except under special instruction from Team<br />
International BELGIUM. The pages must be reproduced<br />
and folded in order to obtain a booklet A5 (+/- 148.5 mm<br />
width x 210 mm height). When folding, make sure you<br />
keep the good numbering when you turn the pages of<br />
the I/B. Don’t change the page numbering. Keep the<br />
language integrity.<br />
7. En portant des gants de cuisine, retirez le pain de la machine après la fin de la cuisson.<br />
8. Laissez le pain refroidir sur une grille au moins une heure avant de le couper.<br />
PAIN FRANÇAIS<br />
Programme: 2 (French) – Coloration de la croûte: clair/foncé – Poids: 450g/680g/900g<br />
Traditionnellement, le pain français a une croûte plus croustillante et une texture intérieure plus<br />
claire que celle du pain standard.<br />
Ingrédients:<br />
450g 680g 900g<br />
1 bol doseur d'eau<br />
1 1/4 bol doseur d'eau<br />
1 ½ bol doseur d'eau<br />
2 cuillères à soupe d'huile 2 cuillères à soupe d'huile 2 cuillères à soupe d'huile<br />
1 cuillère à café de sel 1 ½ cuillère à café de sel 2 cuillères à café de sel<br />
2 cuillères à soupe de sucre 2 cuillères à soupe de sucre 2 ½ cuillères à soupe de sucre<br />
2 bols doseurs de farine 2 ½ bols doseurs de farine 3 ½ bols doseurs de farine<br />
tout-usage ou farine à pain tout-usage ou farine à pain tout-usage ou farine à pain<br />
1 cuillère à café de levure 1 ¼ cuillère à café de levure à 1 ½ cuillère à café de levure<br />
à action rapide<br />
action rapide<br />
à action rapide<br />
1. Mesurez les ingrédients avec précision et versez dans le moule en respectant l'ordre<br />
donné dans la recette (ingrédients liquides d'abord).<br />
2. Déposez le moule bien en place dans l'appareil. Fermez le couvercle.<br />
3. Choisissez le programme désiré.<br />
4. Choisissez la coloration désirée de la croûte.<br />
5. Choisissez le poids de la miche.<br />
6. Appuyez sur START/STOP.<br />
7. En portant des gants de cuisine, retirez le pain de la machine après la fin de la cuisson.<br />
8. Laissez le pain refroidir sur une grille au moins une heure avant de le couper.<br />
PAIN BRIOCHÉ<br />
Programme: 3 (Sweet) – Coloration de la croûte: clair/foncé – Poids: 450g/680g/900g<br />
Choisissez ce mode pour faire des recettes contenant du jus de fruit, davantage de sucre ou<br />
des ingrédients sucrés comme de la noix de coco râpée, des raisins, des fruits secs ou du<br />
chocolat.<br />
Ingrédients:<br />
450g 680g 900g<br />
3/4 bol doseur de lait 1 ¼ bol doseur de lait<br />
1 ½ bol doseur de lait<br />
1 ½ cuillère à soupe de 1 ½ cuillère à soupe de beurre 2 cuillères à soupe de beurre<br />
beurre ou margarine ou margarine<br />
ou margarine<br />
1 œuf<br />
1 œuf<br />
2 œufs<br />
1cuillère à café de sel 1cuillère à café de sel<br />
1 cuillère à café de sel<br />
1 ½ cuillère à soupe de 1 ½ cuillère à soupe de miel 2 cuillères à soupe de miel<br />
miel<br />
3 cuillères à soupe de sucre 4 cuillères à soupe de sucre<br />
2 cuillères à soupe de 3 bols doseurs de farine tout- 3 ½ bols doseurs de farine tout-<br />
sucre<br />
usage ou farine à pain<br />
usage ou farine à pain<br />
2 bols doseurs de farine 1 cuillère à café de levure à 1 ¼ cuillère à café de levure à<br />
tout-usage<br />
pain<br />
ou farine à action rapide<br />
action rapide<br />
½ cuillère à café de levure<br />
à action rapide<br />
53 <strong>VG</strong> <strong>BBA</strong> 1 - 110711<br />
Assembly page 53/168
�<br />
Fax +32 2 359 95 50<br />
Copies of the I/B. Please reproduce them without any<br />
changes except under special instruction from Team<br />
International BELGIUM. The pages must be reproduced<br />
and folded in order to obtain a booklet A5 (+/- 148.5 mm<br />
width x 210 mm height). When folding, make sure you<br />
keep the good numbering when you turn the pages of<br />
the I/B. Don’t change the page numbering. Keep the<br />
language integrity.<br />
1. Mesurez les ingrédients avec précision et versez dans le moule en respectant l'ordre<br />
donné dans la recette (ingrédients liquides d'abord).<br />
2. Déposez le moule bien en place dans l'appareil. Fermez le couvercle.<br />
3. Choisissez le programme désiré.<br />
4. Choisissez la coloration désirée de la croûte.<br />
5. Choisissez le poids de la miche.<br />
6. Appuyez sur START/STOP.<br />
7. En portant des gants de cuisine, retirez le pain de la machine après la fin de la cuisson.<br />
8. Laissez le pain refroidir sur une grille au moins une heure avant de le couper.<br />
CAKE<br />
Programme: 4<br />
Choisissez cette fonction pour faire de la pâte à gâteau.<br />
Ingrédients:<br />
8 cuillères à soupe de beurre<br />
8 cuillères à soupe de sucre<br />
5 œufs<br />
1 ½ bol doseur de farine tout-usage<br />
1 ½ cuillère à soupe de jus de citron<br />
1 ½ cuillère à café de levure chimique (baking powder)<br />
Conseil: Pendant le mélange, grattez les parois du récipient pour assurer un mélange<br />
homogène.<br />
1. Mesurez les ingrédients avec précision et versez dans le moule en respectant l'ordre<br />
donné dans la recette (ingrédients liquides d'abord).<br />
2. Déposez le moule bien en place dans l'appareil. Fermez le couvercle.<br />
3. Choisissez le programme désiré.<br />
4. Appuyez sur START/STOP.<br />
5. En portant des gants de cuisine, retirez le gâteau de la machine après la fin de la cuisson.<br />
6. Laissez refroidir le gâteau sur une grille.<br />
PAIN DE BLÉ COMPLET<br />
Programme: 5 (Whole Wheat) – Coloration de la croûte: clair/foncé – Poids: 450g/680g/900g<br />
Choisissez ce réglage pour des recettes comprenant des quantités importantes de farine de<br />
blé complet ou de seigle, d'avoine ou de son.<br />
54 <strong>VG</strong> <strong>BBA</strong> 1 - 110711<br />
Assembly page 54/168
�<br />
Ingrédients:<br />
Fax +32 2 359 95 50<br />
Copies of the I/B. Please reproduce them without any<br />
changes except under special instruction from Team<br />
International BELGIUM. The pages must be reproduced<br />
and folded in order to obtain a booklet A5 (+/- 148.5 mm<br />
width x 210 mm height). When folding, make sure you<br />
keep the good numbering when you turn the pages of<br />
the I/B. Don’t change the page numbering. Keep the<br />
language integrity.<br />
450g 680g 900g<br />
1 bol doseur d'eau<br />
1 cuillère à soupe de<br />
margarine ou de beurre<br />
1 cuillère à café de sel<br />
1 cuillère à café de sucre<br />
1 bol doseur de farine<br />
tout-usage ou farine à<br />
pain<br />
1 bol doseur de farine de<br />
blé complet<br />
1 cuillère à café de levure<br />
à action rapide<br />
1 ¼ bol doseur d'eau<br />
1 ½ cuillère à soupe de<br />
margarine ou de beurre<br />
1 cuillère à café de sel<br />
1 cuillère à café de sucre<br />
1 1/3 bol doseur de farine<br />
tout-usage ou farine à pain<br />
1 1/3 bol doseur de farine de<br />
blé complet<br />
1 cuillère à café de levure à<br />
action rapide<br />
1 1/3 bol doseur d'eau<br />
2 cuillères à soupe de<br />
margarine ou de beurre<br />
1 cuillère à café de sel<br />
1 cuillère à café de sucre<br />
1 2/3 bol doseur de farine toutusage<br />
ou farine à pain<br />
1 2/3 bol doseur de farine de<br />
blé complet<br />
1 ¼ cuillère à café de levure à<br />
action rapide<br />
Remarque: vous pouvez ajouter aux ingrédients 1 ½ cuillère à soupe de gluten pour accroître<br />
la hauteur et améliorer la texture de ce pain.<br />
1. Mesurez les ingrédients avec précision et versez dans le moule en respectant l'ordre<br />
donné dans la recette (ingrédients liquides d'abord).<br />
2. Déposez le moule bien en place dans l'appareil. Fermez le couvercle.<br />
3. Choisissez le programme désiré.<br />
4. Choisissez la coloration désirée de la croûte.<br />
5. Choisissez le poids de la miche.<br />
6. Appuyez sur START/STOP.<br />
7. En portant des gants de cuisine, retirez le pain de la machine après la fin de la cuisson.<br />
8. Laissez le pain refroidir sur une grille au moins une heure avant de le couper.<br />
SANDWICH<br />
Programme: 6 – Poids: 450g/680g/900g<br />
Ingrédients:<br />
450g 680g 900g<br />
¾ bol doseur d'eau<br />
1 ½ cuillère à soupe de<br />
beurre ou de margarine<br />
1 ½ cuillère à café de sel<br />
¾ cuillère à soupe de<br />
sucre<br />
2 bols doseurs de farine<br />
tout-usage ou de farine à<br />
pain<br />
1 cuillère à café de levure<br />
à action rapide<br />
1 bol doseur d'eau<br />
1 ½ cuillère à soupe de beurre<br />
ou de margarine<br />
1 ½ cuillère à café de sel<br />
1cuillère à soupe de sucre<br />
2 ½ bols doseurs de farine<br />
tout-usage ou de farine à pain<br />
1 ¼ cuillère à café de levure à<br />
action rapide<br />
1 1/3 bol doseur d'eau<br />
2 cuillères à soupe de beurre<br />
ou de margarine<br />
2 cuillères à café de sel<br />
1 ½ cuillère à soupe de sucre<br />
3 ¼ bols doseurs de farine toutusage<br />
ou de farine à pain<br />
1 ½ cuillère à café de levure à<br />
action rapide<br />
1. Mesurez les ingrédients avec précision et versez dans le moule en respectant l'ordre<br />
donné dans la recette (ingrédients liquides d'abord).<br />
55 <strong>VG</strong> <strong>BBA</strong> 1 - 110711<br />
Assembly page 55/168
�<br />
Fax +32 2 359 95 50<br />
Copies of the I/B. Please reproduce them without any<br />
changes except under special instruction from Team<br />
International BELGIUM. The pages must be reproduced<br />
and folded in order to obtain a booklet A5 (+/- 148.5 mm<br />
width x 210 mm height). When folding, make sure you<br />
keep the good numbering when you turn the pages of<br />
the I/B. Don’t change the page numbering. Keep the<br />
language integrity.<br />
2. Déposez le moule bien en place dans l'appareil. Fermez le couvercle.<br />
3. Choisissez le programme désiré.<br />
4. Choisissez le poids désiré.<br />
5. Appuyez sur START/STOP.<br />
6. En portant des gants de cuisine, retirez le pain de la machine après la fin de la cuisson.<br />
7. Laissez le pain refroidir sur une grille au moins une heure avant de le couper.<br />
PÉTRIR<br />
Programme: 7 (Whisk)<br />
Ce programme permet de pétrir la pâte qui après peut être utilisée pour faire des boulettes de<br />
pâte et des nouilles. Le moule n’est pas chauffé et il ne faut pas sélectionner la couleur de<br />
croûte ou le poids.<br />
CONFITURE DE FRAISES<br />
Programme: 8 (Jam)<br />
Ce programme permet de faire de la confiture facilement.<br />
Coupez les fruits en morceaux de max. 1 cm. N'utilisez pas de sucre normal mais faites usage<br />
de sucre spécial pour confitures que vous trouverez dans le commerce.<br />
Après l'appui sur START/STOP, il y a un temps de préchauffage (votre appareil ne se mettra en<br />
action qu'après ce temps de préchauffage).<br />
Ingrédients:<br />
900gr de fraises fraîches coupées en morceaux de max. 1 cm.<br />
500gr de sucre spécial pour confitures<br />
1 cuillère à soupe de jus de citron<br />
1. Mesurez les ingrédients avec précision et versez dans le moule.<br />
2. Déposez le moule bien en place dans l'appareil. Fermez le couvercle.<br />
3. Choisissez le programme désiré.<br />
4. Appuyez sur START/STOP.<br />
5. En portant des gants de cuisine, retirez le moule de la machine après la fin de la cuisson.<br />
6. Versez la confiture dans un pot propre et stérilisé et refermez avec un couvercle stérilisé.<br />
Gardez au réfrigérateur.<br />
PAIN YAOURT<br />
Programme: 9 (Yoghourt)<br />
Ce programme permet de faire un pain avec un goût de yaourt.<br />
56 <strong>VG</strong> <strong>BBA</strong> 1 - 110711<br />
Assembly page 56/168
�<br />
Fax +32 2 359 95 50<br />
Copies of the I/B. Please reproduce them without any<br />
changes except under special instruction from Team<br />
International BELGIUM. The pages must be reproduced<br />
and folded in order to obtain a booklet A5 (+/- 148.5 mm<br />
width x 210 mm height). When folding, make sure you<br />
keep the good numbering when you turn the pages of<br />
the I/B. Don’t change the page numbering. Keep the<br />
language integrity.<br />
Ingrédients:<br />
450g 680g 900g<br />
1/3 bol doseur d'eau 2/3 bol doseur d'eau<br />
1 bol doseur d'eau<br />
100g de yaourt<br />
150g de yaourt<br />
200g de yaourt<br />
1 cuillère à soupe d’huile 1 ½ cuillère à soupe d’huile 2 cuillères à soupe d’huile<br />
végétale<br />
végétale<br />
végétale<br />
1/3 cuillère à café de sel ½ cuillère à café de sel<br />
¾ cuillère à café de sel<br />
1 ½ cuillères à soupe de 2 cuillères à soupe de sucre 2 ½ cuillères à soupe de sucre<br />
sucre<br />
2 ¼ bols doseurs de farine tout- 3 ½ bols doseurs de farine tout-<br />
2 bols doseurs de farine usage ou farine à pain<br />
usage ou farine à pain<br />
tout-usage ou farine à 1 ¼ cuillère à café de levure à 1 ½ cuillère à café de levure à<br />
pain<br />
action rapide<br />
action rapide<br />
1 cuillère à café de levure<br />
à action rapide<br />
1. Mesurez les ingrédients avec précision et versez dans le moule en respectant l'ordre<br />
donné dans la recette (ingrédients liquides d'abord).<br />
2. Déposez le moule bien en place dans l'appareil. Fermez le couvercle.<br />
3. Choisissez le programme désiré.<br />
4. Choisissez la coloration désirée de la croûte.<br />
5. Choisissez le poids de la miche.<br />
6. Appuyez sur START/STOP.<br />
7. En portant des gants de cuisine, retirez le pain de la machine après la fin de la cuisson.<br />
8. Laissez le pain refroidir sur une grille au moins une heure avant de le couper.<br />
PATE A PIZZA<br />
Programme: 10 (Dough)<br />
Ce cycle sert à préparer la pâte sans cuire le pain. Avec ce réglage, vous pouvez faire<br />
n'importe quelle sorte de pâte, qui peut être travaillée pour faire de la pizza, des petits pains,<br />
des bretzels, des beignets et des pains ronds ou tressés qui doivent être cuits au four ou frits<br />
dans une friteuse.<br />
Ingrédients:<br />
1 ¼ bol doseur d'eau<br />
½ cuillère à café de sel<br />
2 cuillères à soupe d'huile d'olive<br />
2 ½ bols doseurs de farine tout-usage ou de farine à pain<br />
1 ½ cuillère à café de levure à action rapide<br />
1. Mesurez les ingrédients avec précision et versez dans le moule en respectant l'ordre<br />
donné dans la recette (ingrédients liquides d'abord).<br />
2. Déposez le moule bien en place dans l'appareil. Fermez le couvercle.<br />
3. Choisissez le programme désiré. Appuyez sur START/STOP.<br />
4. Une fois le cycle terminé, retirez la pâte du moule.<br />
5. Etalez la pâte et laissez-la lever pendant 10 minutes.<br />
6. Versez la sauce tomate et répartissez les ingrédients désirés sur la pâte à pizza.<br />
7. Cuisez au four traditionnel pendant environ 15 minutes à 200°C.<br />
57 <strong>VG</strong> <strong>BBA</strong> 1 - 110711<br />
Assembly page 57/168
�<br />
PAIN RAPIDE<br />
Fax +32 2 359 95 50<br />
Programme: 11 (Fast) – Coloration de la croûte: clair/foncé<br />
Copies of the I/B. Please reproduce them without any<br />
changes except under special instruction from Team<br />
International BELGIUM. The pages must be reproduced<br />
and folded in order to obtain a booklet A5 (+/- 148.5 mm<br />
width x 210 mm height). When folding, make sure you<br />
keep the good numbering when you turn the pages of<br />
the I/B. Don’t change the page numbering. Keep the<br />
language integrity.<br />
Utilisez cette fonction pour faire du pain rapidement. Le pain sera toutefois plus dense et moins<br />
haut.<br />
Ingrédients:<br />
1 bol doseur d'eau<br />
2 cuillères à soupe de beurre ou margarine<br />
1 ½ cuillère à café de sel<br />
2 cuillères à soupe de sucre<br />
1 cuillère à soupe de lait en poudre<br />
3 bols doseurs de farine tout-usage<br />
2 cuillères à café de levure à action rapide<br />
1. Mesurez les ingrédients avec précision et versez dans le moule en respectant l'ordre<br />
donné dans la recette (ingrédients liquides d'abord).<br />
2. Déposez le moule bien en place dans l'appareil. Fermez le couvercle.<br />
3. Choisissez le programme désiré.<br />
4. Choisissez la coloration désirée de la croûte.<br />
5. Appuyez sur START/STOP.<br />
6. En portant des gants de cuisine, retirez le pain de la machine après la fin de la cuisson.<br />
7. Laissez le pain refroidir sur une grille au moins une heure avant de le couper.<br />
CUISSON<br />
Programme: 12 (Bake)<br />
Durée: 1:00<br />
Comme ce programme fait fonctionner l'appareil en mode cuisson pendant une heure, il faut<br />
exercer une certaine surveillance pendant ce procédé. Ce programme est utile quand<br />
survient une panne de courant pendant que la pâte lève. Référez-vous au paragraphe<br />
"MEMOIRE" pour plus d'information concernant les pannes de courant.<br />
PROTECTION DE L’ENVIRONNEMENT – DIRECTIVE 2002/96/CE<br />
Afin de préserver notre environnement et notre santé, l’élimination en fin de vie des appareils<br />
électriques et électroniques doit se faire selon des règles bien précises et nécessite<br />
l’implication de chacun, qu’il soit fournisseur ou utilisateur. C’est pour cette raison que votre<br />
appareil, tel que le signale le symbole apposé sur sa plaque signalétique ou sur<br />
l'emballage, ne doit en aucun cas être jeté dans une poubelle publique ou privée destinée<br />
aux ordures ménagères. L'utilisateur a le droit de déposer l'appareil dans des lieux publics de<br />
collecte procédant à un tri sélectif des déchets pour être soit recyclé, soit réutilisé pour<br />
d’autres applications conformément à la directive.<br />
58 <strong>VG</strong> <strong>BBA</strong> 1 - 110711<br />
Assembly page 58/168
�<br />
Fax +32 2 359 95 50<br />
BELANGRIJKE VEILIGHEIDSVOORSCHRIFTEN<br />
Copies of the I/B. Please reproduce them without any<br />
changes except under special instruction from Team<br />
International BELGIUM. The pages must be reproduced<br />
and folded in order to obtain a booklet A5 (+/- 148.5 mm<br />
width x 210 mm height). When folding, make sure you<br />
keep the good numbering when you turn the pages of<br />
the I/B. Don’t change the page numbering. Keep the<br />
language integrity.<br />
Lees de gebruiksaanwijzing aandachtig alvorens u uw toestel gebruikt, en respecteer altijd de<br />
veiligheids- en de gebruiksvoorschriften.<br />
Belangrijk: Personen (kinderen inbegrepen) die wegens hun fysieke, sensoriële of mentale<br />
capaciteiten, of wegens hun gebrek aan ervaring of kennis, het toestel niet veilig kunnen<br />
gebruiken, mogen dit toestel niet zonder toezicht of instructies van een verantwoordelijke<br />
persoon gebruiken. Hou kinderen goed in het oog om te vermijden dat ze met het toestel<br />
spelen.<br />
� Controleer of de netspanning overeenkomt met deze van het toestel vooraleer u het<br />
gebruikt.<br />
� Laat uw toestel tijdens het gebruik nooit zonder toezicht.<br />
� Controleer regelmatig of het snoer niet beschadigd is. Gebruik het toestel niet indien het<br />
snoer en/of het toestel zelf enige beschadiging zouden vertonen. Laat het in dat geval<br />
nakijken en herstellen door een bekwame gekwalificeerde dienst(*).<br />
� Gebruik het toestel enkel voor huishoudelijk gebruik en op de wijze zoals vermeld in de<br />
gebruiksaanwijzing.<br />
� Dompel het toestel nooit onder in water of in enige andere vloeistof, noch om het te<br />
reinigen, noch om welke andere reden ook. Steek het nooit in een afwasmachine.<br />
� Wees juist na het bakproces uiterst voorzichtig, daar het toestel op dat moment zeer<br />
warm is. Wacht totdat het toestel afgekoeld is en trek de stekker uit het stopcontact<br />
vooraleer u het toestel reinigt of opbergt.<br />
� Gebruik het toestel niet in de nabijheid van warmtebronnen.<br />
� Trek de stekker uit het stopcontact vooraleer u het toestel reinigt.<br />
� Gebruik het toestel niet buiten en berg het op in een droge plaats.<br />
� Gebruik geen accessoires die niet door de fabrikant aanbevolen werden. Dit kan<br />
gevaarlijk zijn voor de gebruiker en het toestel beschadigen.<br />
� Trek nooit aan het snoer om het toestel te verplaatsen. Zorg dat het elektriciteitssnoer<br />
nergens kan achterhaken en daardoor de val van het toestel veroorzaken. Draai het<br />
snoer niet rond het toestel en plooi het niet.<br />
� Zet het toestel op een tafel of op een voldoende stabiel oppervlak zodat het niet valt.<br />
� Wacht tot het toestel volledig is afgekoeld alvorens het te reinigen of op te bergen.<br />
� Zorg dat het snoer niet in aanraking komt met de warme onderdelen van het toestel.<br />
� Zorg ervoor dat de warme onderdelen van het toestel tijdens het gebruik niet in aanraking<br />
komen met gemakkelijk ontvlambare materialen, zoals gordijnen, een tafelkleed en<br />
dergelijke vermits deze in brand zouden kunnen vliegen.<br />
� Wanneer het toestel in werking is, kunnen toegankelijke delen ervan een zeer hoge<br />
temperatuur bereiken. Raak deze delen tijdens het gebruik niet aan, maar hanteer enkel<br />
de knoppen. Wanneer het symbool op een bepaald oppervlak gekleefd is, moet u<br />
voorzichtig zijn. Dit symbool betekent het volgende: OPGELET, dit oppervlak kan tijdens het<br />
gebruik heel warm worden.<br />
� Let erop dat u de speciale bekleding van de bakvorm en kneedhaak niet schramt, daar<br />
dit de antiaanbaklaag zou kunnen beschadigen.<br />
� Overschrijd nooit de hoeveelheden bloem en gist die in de recepten aanbevolen zijn.<br />
Indien u dit wel doet, zou het deeg uit de bakvorm kunnen overlopen.<br />
� Dek het toestel nooit af (bijvoorbeeld met een doek) daar dit de dampuitlaat zou<br />
belemmeren.<br />
� Steek nooit voorwerpen in de bakvorm om elektrische schokken en beschadiging van de<br />
bakvorm te vermijden.<br />
� Uw toestel mag nooit worden aangezet door middel van een externe timer of een<br />
separaat systeem met afstandsbediening.<br />
59 <strong>VG</strong> <strong>BBA</strong> 1 - 110711<br />
Assembly page 59/168
�<br />
Fax +32 2 359 95 50<br />
Copies of the I/B. Please reproduce them without any<br />
changes except under special instruction from Team<br />
International BELGIUM. The pages must be reproduced<br />
and folded in order to obtain a booklet A5 (+/- 148.5 mm<br />
width x 210 mm height). When folding, make sure you<br />
keep the good numbering when you turn the pages of<br />
the I/B. Don’t change the page numbering. Keep the<br />
language integrity.<br />
(*) Bekwame gekwalificeerde dienst: klantendienst van de fabrikant of de invoerder, die<br />
erkend en bevoegd is om dergelijke herstellingen te doen zodat elk gevaar vermeden wordt.<br />
Gelieve het toestel bij problemen naar deze dienst terug te brengen.<br />
OPMERKING<br />
Het apparaat wordt met een relatief kort stroomsnoer geleverd, zodat u niet over het snoer<br />
zou struikelen. Indien nodig kan u een verlengsnoer gebruiken.<br />
• Let er echter op dat de spanning van het verlengsnoer minstens even hoog is als de<br />
spanning van het apparaat. Indien dat niet het geval is, loopt u het risico van<br />
oververhitting.<br />
• Let er ook op dat het verlengsnoer geen risico met zich meebrengt. Zorg er dus voor<br />
dat niemand erover kan struikelen...<br />
VÓÓR HET EERSTE GEBRUIK<br />
Haal het toestel uit de verpakking en verwijder alle verpakkingsmateriaal. Reinig het deksel, de<br />
bakvorm en de accessoires met een vochtige doek en droog alle delen goed af.<br />
De kwaliteit van het verkregen brood kan van vele factoren afhangen. Daarom is het heel<br />
belangrijk alle ingrediënten en hun interactie goed te kennen. Dit zal u toestaan een<br />
bevredigend resultaat te verkrijgen.<br />
Temperatuur<br />
Alle ingrediënten die u in de broodbakmachine giet, moeten op kamertemperatuur zijn. Het<br />
toestel zelf moet zich tijdens de werking in een kamer met een temperatuur tussen 15 en 34°C,<br />
en idealiter tussen 20 en 23°C, bevinden.<br />
Dosering van de ingrediënten<br />
• Uw toestel is uitgerust met een maatbeker en een gecombineerde maatlepel (klein en<br />
groot). Meet de ingrediënten enkel met deze accessoires. De doseringen in de recepten<br />
van deze gebruiksaanwijzing zijn op deze accessoires gebaseerd.<br />
• De maateenheid in deze gebruiksaanwijzing verwijst regelmatig naar een "maatbeker" of<br />
fracties van een maatbeker. Deze maateenheid stemt overeen met het woord "cup" dat<br />
op de maatbeker is aangeduid (250ml).<br />
• Op de gecombineerde maatlepel vindt u volgende markeringen:<br />
"Tablespoon" betekent soeplepel = 15ml<br />
"Teaspoon" betekent theelepeltje = 5ml<br />
• Om vloeibare ingrediënten te meten: vul de maatbeker en zet hem op een plat<br />
oppervlak. Buig door de knieën zodat uw ogen zich op hetzelfde niveau als de markering<br />
op de maatbeker bevinden. Het niveau van de vloeistof moet gelijk zijn aan de gewenste<br />
markering. Een benaderende meting is niet voldoende en zou het resultaat schadelijk<br />
kunnen beïnvloeden.<br />
• Om meel te meten: vul de maatbeker lichtjes boven de rand en haal het teveel weg met<br />
een vlak stuk keukengerei. Stamp het meel niet aan want dit zou tot gevolg hebben dat u<br />
een grotere hoeveelheid verkrijgt dan nodig. Zift het meel niet. Voor kleine hoeveelheden<br />
gebruikt u best de maatlepel. Zorg ervoor dat die vlak gevuld is, niet bol. Voor andere<br />
droge ingrediënten zoals rozijnen of chocoladehagelslag is het aan te raden een<br />
keukenweegschaal te gebruiken.<br />
60 <strong>VG</strong> <strong>BBA</strong> 1 - 110711<br />
Assembly page 60/168
�<br />
Fax +32 2 359 95 50<br />
Geografische ligging<br />
Copies of the I/B. Please reproduce them without any<br />
changes except under special instruction from Team<br />
International BELGIUM. The pages must be reproduced<br />
and folded in order to obtain a booklet A5 (+/- 148.5 mm<br />
width x 210 mm height). When folding, make sure you<br />
keep the good numbering when you turn the pages of<br />
the I/B. Don’t change the page numbering. Keep the<br />
language integrity.<br />
Op zekere hoogte (meer dan 914 meter) verdampt water sneller en het brood rijst sneller.<br />
Daarom is het noodzakelijk in geval van hoge geografische ligging de recepten lichtjes aan te<br />
passen aan deze omstandigheden door een beetje meer vloeistof en een beetje minder<br />
droge ingrediënten te gebruiken. Onderstaande tabel biedt de nodige oplossingen<br />
naargelang de ligging:<br />
HOOGTE<br />
Wijziging 914m 1524m 2133m<br />
Hoeveelheid gist<br />
reduceren: voor elk<br />
theelepeltje in het recept,<br />
reduceer met<br />
Hoeveelheid suiker<br />
reduceren: voor elke<br />
soeplepel in het recept,<br />
reduceer met<br />
Vloeistof toevoegen: voor<br />
elke maatbeker in het<br />
recept, voeg de volgende<br />
hoeveelheid toe<br />
Ingrediënten<br />
1/8 theelepeltje 1/8 – 1/4 theelepeltje + 1/4 theelepeltje<br />
0-1 theelepeltje 0-2 theelepeltje(s) 1-2 theelepeltje(s)<br />
1-2 soeplepel(s) 2-4 soeplepels 3-4 soeplepels<br />
Een van de meest delicate factoren om een geslaagd brood te verkrijgen is de kwaliteit en de<br />
versheid van de ingrediënten. Onthoud ook dat de voorgeschreven hoeveelheden<br />
nauwkeurig moeten worden gerespecteerd.<br />
Universele witte bloem<br />
Universele witte bloem is een mengeling van harde en zachte tarwebloem, speciaal<br />
ontworpen voor de toebereiding van brood en gebakken. Hoewel dit soort bloem<br />
bevredigende resultaten biedt, raden wij u aan speciaal meel voor brood te gebruiken.<br />
Meel voor brood<br />
Meel dat speciaal voor brood ontworpen is, bevat een hoog proteïne-/glutengehalte en werd<br />
met verbeterende middelen behandeld die het deeg toleranter maken tijdens het kneden.<br />
Gewoonlijk heeft dit soort meel een hogere concentratie aan gluten dan universele bloem,<br />
wat van soort tot soort wel kan variëren. Wij raden u aan speciaal meel voor brood te<br />
gebruiken, hoewel universele bloem ook degelijke resultaten zal bieden.<br />
Volkorenmeel<br />
Volkorenmeel wordt vanaf de volledige tarwekorrel geproduceerd die nog de zemelen en de<br />
kiem bevat waardoor dit soort meel dichter en rijker aan nutriënten is dan universele bloem.<br />
Brood dat met dit soort meel gemaakt wordt, is in het algemeen kleiner en zwaarder dan wit<br />
brood. Om dit verschijnsel lichtjes af te zwakken, wordt volkorenmeel vaak met universele<br />
bloem, meel voor brood of gluten gemengd om een groter en lichter brood te verkrijgen.<br />
61 <strong>VG</strong> <strong>BBA</strong> 1 - 110711<br />
Assembly page 61/168
�<br />
Roggemeel<br />
Fax +32 2 359 95 50<br />
Copies of the I/B. Please reproduce them without any<br />
changes except under special instruction from Team<br />
International BELGIUM. The pages must be reproduced<br />
and folded in order to obtain a booklet A5 (+/- 148.5 mm<br />
width x 210 mm height). When folding, make sure you<br />
keep the good numbering when you turn the pages of<br />
the I/B. Don’t change the page numbering. Keep the<br />
language integrity.<br />
Roggemeel is rijk aan vezels en is vergelijkbaar met volkorenmeel. Dit soort meel moet steeds<br />
worden gemengd met witte bloem, meel voor brood of gluten aangezien het niet genoeg<br />
gluten bevat om een groot en uniform brood te verkrijgen.<br />
Gluten<br />
Gluten is het eiwit dat zich in tarwe bevindt en het deeg zijn elasticiteit geeft. Gluten kan in de<br />
meeste supermarkten gevonden worden. Het kan in kleine hoeveelheden gebruikt worden<br />
met dichte meelsoorten met een laag glutengehalte zoals volkorenmeel om het volume te<br />
vergroten en de textuur te verlichten.<br />
Bloem voor gebakken<br />
Bloem voor gebakken, die weinig gluten/eiwit bevat, is speciaal gemaakt voor recepten voor<br />
gebakken. Dit is niet aanbevolen voor het maken van brood.<br />
Zelfrijzende bloem<br />
Zelfrijzende bloem bevat onnodige rijsingrediënten die een negatief effect zouden hebben op<br />
het eindresultaat. Dit soort bloem is niet aanbevolen voor dit toestel.<br />
Zemelen<br />
Zemelen (niet verwerkt) en tarwekiem zijn de ruwe omhulsels van tarwe of rogge die van het<br />
meel gescheiden werden. Ze worden vaak in kleine hoeveelheden aan het brood<br />
toegevoegd om het meer smaak te geven. Ze worden ook gebruikt om de textuur van het<br />
brood te verbeteren.<br />
Maïsgries en havermeel<br />
Maïsgries en havermeel komen van gemalen gele of witte maïs en van haver in vlokken. Ze<br />
worden gebruikt om de smaak en de textuur van het brood te verbeteren.<br />
Vermalen tarwe<br />
Vermalen tarwemeel heeft een heel ruwe textuur. Het is afkomstig van een in stukken<br />
gesneden tarwekorrel. Vermalen tarwemeel geeft volkorenbrood een soort notensmaak en<br />
een krokante textuur.<br />
Zevengranenmeel<br />
Het mengsel van zeven granen bestaat uit vermalen tarwe, haver, zemelen, rogge, maïsgries,<br />
vlas en gierst.<br />
Gist<br />
Tijdens de fermentatie produceert gist koolstofdioxide die nodig is om brood te maken. Om dit<br />
gas te produceren, heeft gist koolhydraten nodig die we in bloem en suiker terugvinden. In alle<br />
recepten die gist vergen, worden gedroogde gistkorrels gebruikt. Eigenlijk bestaan er 4 soorten<br />
gist: verse gist, droge gist, gist met snelle werking en gist voor broodbakmachines. Wij raden u<br />
aan gewone droge gist te gebruiken, hoewel gist met snelle werking in kleine hoeveelheden<br />
ook een goed resultaat geeft. Verse gist geeft geen bevredigend resultaat.<br />
62 <strong>VG</strong> <strong>BBA</strong> 1 - 110711<br />
Assembly page 62/168
�<br />
Fax +32 2 359 95 50<br />
Copies of the I/B. Please reproduce them without any<br />
changes except under special instruction from Team<br />
International BELGIUM. The pages must be reproduced<br />
and folded in order to obtain a booklet A5 (+/- 148.5 mm<br />
width x 210 mm height). When folding, make sure you<br />
keep the good numbering when you turn the pages of<br />
the I/B. Don’t change the page numbering. Keep the<br />
language integrity.<br />
Gist moet altijd in de koelkast bewaard worden om de versheid ervan te behouden. Een te<br />
warme omgeving zal de gist onbruikbaar maken. Kijk ook altijd naar de vervaldatum om er<br />
zeker van te zijn dat de gist nog vers is. Eens een verpakking gist geopend is, is het uiterst<br />
belangrijk deze verpakking zo snel mogelijk terug in de koelkast te plaatsen om deze later<br />
opnieuw te kunnen gebruiken. Vaak is het zo dat brood of deeg niet goed rijst ten gevolge<br />
van te oude gist. U kunt de volgende test uitvoeren om te weten of uw gist te oud is en<br />
bijgevolg inactief:<br />
• Giet ½ maatbeker leidingwater in een kleine kom of in een kopje.<br />
• Voeg 1 theelepeltje koffie toe en meng goed. Bestrooi met 2 theelepeltjes gistkorrels.<br />
• Plaats de kom of het kopje op een warme plaats en laat 10 minuten rusten.<br />
• Het mengsel zou moeten schuimen en sterk naar gist ruiken. Indien dit niet het geval<br />
is, moet u verse gist kopen.<br />
Suiker<br />
Suiker speelt een belangrijke rol in de kleur en smaak van het brood. Het speelt ook een rol in<br />
de gisting aangezien het een voedingsmiddel voor gist is. Wanneer een recept suiker vergt,<br />
moet u kristalsuiker gebruiken. Gelieve dit soort suiker niet te vervangen door poedersuiker of<br />
bruine suiker, tenzij dit voorgeschreven is door het recept. Gebruik ook geen kunstmatige<br />
zoetstoffen, daar de gist hiermee niet reageert zoals met suiker.<br />
Zout<br />
Zout is noodzakelijk voor het evenwicht en de smaak van brood en gebakken en ook voor de<br />
kleur van de korst. Om gezondheidsredenen kunt u zout volledig weglaten. Dit zou echter tot<br />
gevolg kunnen hebben dat het brood iets meer rijst dan normaal.<br />
Vloeistoffen/melk<br />
Om brood te maken kunt u vloeistoffen gebruiken zoals melk of een combinatie van<br />
melkpoeder en water. Melk geeft meer smaak, geeft het brood een zachtere textuur en<br />
maakt de korst minder hard terwijl enkel water de korst knapperiger maakt. Wanneer u de<br />
tijdschakelaar gebruikt, gelieve enkel melkpoeder te gebruiken. Sommige recepten vergen<br />
sap (sinaasappel, appel enz.) om het brood een bijkomend aroma te geven.<br />
Eieren<br />
Eieren geven een rijkere textuur aan het deeg en aan de gebakken. Gebruik enkel grote<br />
eieren.<br />
Boter, olie en margarine<br />
Boter en margarine geven het brood een zachtere textuur. Brood met boter of margarine blijft<br />
langer vers. Indien u boter of margarine gebruikt die rechtstreeks uit de koelkast komt, moet u<br />
deze eerst in kleine stukken snijden om het mengen van de ingrediënten tijdens het<br />
kneedproces te vergemakkelijken.<br />
Bakpoeder (baking powder)<br />
Bakpoeder is een rijsmiddel dat gebruikt wordt voor gebakken en snel gebakken brood. Dit<br />
rijsmiddel vergt geen rijstijd vóór het bakken aangezien de chemische reactie plaatsvindt bij<br />
het toevoegen van de vloeibare ingrediënten.<br />
63 <strong>VG</strong> <strong>BBA</strong> 1 - 110711<br />
Assembly page 63/168
�<br />
Fax +32 2 359 95 50<br />
Natriumbicarbonaat<br />
Copies of the I/B. Please reproduce them without any<br />
changes except under special instruction from Team<br />
International BELGIUM. The pages must be reproduced<br />
and folded in order to obtain a booklet A5 (+/- 148.5 mm<br />
width x 210 mm height). When folding, make sure you<br />
keep the good numbering when you turn the pages of<br />
the I/B. Don’t change the page numbering. Keep the<br />
language integrity.<br />
Natriumbicarbonaat is een ander rijsmiddel dat we niet mogen verwarren met bakpoeder. Het<br />
vergt ook geen rijstijd vóór het bakken aangezien de chemische reactie tijdens het bakken<br />
plaatsvindt.<br />
Speciale glazuren voor brood met gist:<br />
Kies een van de volgende glazuren om uw brood te verbeteren:<br />
Eierenglazuur: klop een dik ei met 1 theelepeltje water. Bedek het deeg met een laagje<br />
glazuur vooraleer u het in een traditionele oven bakt.<br />
Gesmolten boterkorst: bedek een pas gebakken brood met een laagje gesmolten boter om<br />
de korst zachter te maken.<br />
Melkglazuur: bedek een pas gebakken brood met melk of room om een malse en glanzende<br />
korst te verkrijgen.<br />
Suikerglazuur: meng een maatbeker gezifte glazuursuiker met 1 à 2 theelepeltjes melk om een<br />
voedzaam glazuur te maken om zoet brood te bedekken.<br />
Papaver-/sesam-/karwijzaad/maïsgries/havermeel:<br />
Bestrooi een net geglazuurd brood met de gewenste zaadjes.<br />
WERKING VAN UW BROODBAKMACHINE<br />
BEDIENINGSPANEEL<br />
Display:<br />
Geeft het nummer van het programma weer.<br />
Geeft het aftellen van de baktijd minuut per minuut weer.<br />
Geeft een foutmelding weer (foutmeldingen "LLL" en "H:HH").<br />
▲ en ▼<br />
Dienen om de tijdschakelaar voor uitgestelde inwerkingstelling in te stellen.<br />
De pijlen doen de tijd telkens met 10 minuten toe- of afnemen.<br />
Indien u de toets ingedrukt houdt, gaat de tijd sneller.<br />
MENU-knop (1-6/7-12):<br />
Dient om een programma te kiezen (cijfers 1 tot 12).<br />
Bij elke druk op de knop schakelt het display over naar het volgende programma.<br />
START/STOP-knop (0/1)<br />
Dient om een programma te starten.<br />
Houd deze knop ingedrukt totdat u een geluidssignaal hoort om een programma stop te<br />
zetten of de instelling van de tijdschakelaar te annuleren. (Opmerking: druk niet op de<br />
START/STOP-knop wanneer u het deksel opent om het bakproces in het oog te houden.)<br />
Korstknop (licht/donker)<br />
Druk op deze knop om de korstkleur te kiezen (sommige programma’s beschikken niet over<br />
deze optie). Bij elke druk op de knop schakelt de pijl over naar de volgende kleur.<br />
64 <strong>VG</strong> <strong>BBA</strong> 1 - 110711<br />
Assembly page 64/168
�<br />
Fax +32 2 359 95 50<br />
Copies of the I/B. Please reproduce them without any<br />
changes except under special instruction from Team<br />
International BELGIUM. The pages must be reproduced<br />
and folded in order to obtain a booklet A5 (+/- 148.5 mm<br />
width x 210 mm height). When folding, make sure you<br />
keep the good numbering when you turn the pages of<br />
the I/B. Don’t change the page numbering. Keep the<br />
language integrity.<br />
Gewichtsknop (450g/680g/900g)<br />
Maakt het mogelijk het gewicht van het brood te kiezen (bepaalde programma’s maken deze<br />
keuze niet mogelijk). Bij elke druk op deze knop schakelt het display over naar het volgende<br />
gewicht.<br />
MOGELIJKE GELUIDSSIGNALEN<br />
Het toestel stuurt verschillende geluidssignalen uit.<br />
1 lange pieptoon: het toestel is aangeschakeld.<br />
1 korte pieptoon: een geldige programmeringstoets is ingedrukt.<br />
10 achtereenvolgende pieptonen tijdens het programma: de functie "ingrediënten<br />
toevoegen" is geactiveerd.<br />
12 korte pieptonen: het programma is afgelopen.<br />
GEBRUIK<br />
1. Open het deksel en neem de bakvorm uit het toestel door het handvat op te heffen. Giet<br />
de ingrediënten nooit in de bakvorm terwijl deze laatste zich noch in het toestel bevindt<br />
om te vermijden dat u ingrediënten in de binnenruimte van het toestel morst. Plaats de<br />
bakvorm altijd op een plat en stabiel oppervlak.<br />
2. Zet de kneedhaak op de as door het platte gedeelte van de kneedhaak te doen<br />
overeenstemmen met het platte gedeelte van de as. Zorg ervoor dat er geen<br />
voedingsrestjes op de as overblijven en dat de kneedhaak goed op de as geplaatst is.<br />
Opgelet: indien de kneedhaak niet goed vastgemaakt is, zou deze tijdens het<br />
kneedproces kunnen loskomen, wat een negatieve invloed zou hebben op het<br />
eindresultaat. Het wordt aangeraden het gat van de kneedhaak te vullen met<br />
hittebestendige margarine om te vermijden dat het deeg aan de kneedhaak zou kleven.<br />
3. Kies een recept in het “Recepten”-hoofdstuk verderop in deze gebruiksaanwijzing.<br />
• Meet de ingrediënten zoals aangeduid in de paragraaf « Dosering van de<br />
ingrediënten ».<br />
• Giet de ingrediënten altijd in de bakvorm in de volgorde die in het recept vermeld is.<br />
• Giet de gist altijd als laatste ingrediënt. Zorg ervoor dat noch de gist noch het zout in<br />
contact komt met de vloeibare ingrediënten.<br />
4. Plaats de bakvorm weer in het toestel tot deze goed aan de bodem van het toestel<br />
vastgehecht is.<br />
5. Sluit het deksel en steek de stekker in het stopcontact. U zult een pieptoon horen en "2:50"<br />
en programma nummer 1 verschijnen als systeemgekozen waarde op het display.<br />
6. Kies het gewenste programma naargelang het recept door op de MENU-knop op het<br />
bedieningspaneel te drukken. Telkens u op deze toets drukt, verschijnt het nummer van<br />
het volgende programma op het display. Druk op de knop tot u een pieptoon hoort.<br />
7. Kies het gewenste gewicht door op de gewichtsknop te drukken. Telkens als u op deze<br />
knop drukt, schakelt het pijltje op het display over naar het volgende gewicht.<br />
8. Kies de gewenste korstkleur door op de korstknop te drukken. Telkens als u op de<br />
korstknop drukt, schakelt het toestel over van licht naar donker.<br />
9. Druk op de START/STOP-knop en houd de toets 3 seconden ingedrukt. De baktijd verschijnt<br />
in uren en minuten op het display en de achtergrondbelichting van het display begint te<br />
flikkeren. Bijvoorbeeld: indien u een recept kiest dat volgens het "Basic"-programma werkt<br />
voor brood van 680g met een lichte korstkleur, dan zal "2:55" op het display verschijnen.<br />
Het display zal tot het einde van de baktijd de resterende tijd minuut per minuut<br />
weergeven. Wanneer u de programma's "Basic" (standaard), "French" (Frans brood),<br />
"Sweet" (zoet), "Wholewheat" (volkorenbrood) en "Sandwich" gebruikt, luiden 10<br />
65 <strong>VG</strong> <strong>BBA</strong> 1 - 110711<br />
Assembly page 65/168
�<br />
Fax +32 2 359 95 50<br />
Copies of the I/B. Please reproduce them without any<br />
changes except under special instruction from Team<br />
International BELGIUM. The pages must be reproduced<br />
and folded in order to obtain a booklet A5 (+/- 148.5 mm<br />
width x 210 mm height). When folding, make sure you<br />
keep the good numbering when you turn the pages of<br />
the I/B. Don’t change the page numbering. Keep the<br />
language integrity.<br />
toonsignalen tijdens het verloop van het programma om aan te duiden dat u op dat<br />
moment ingrediënten mag toevoegen. Open het deksel en voeg de gewenste<br />
ingrediënten toe. Opgelet: wanneer u het deksel opent, zou hete damp kunnen<br />
ontsnappen.<br />
Opmerking: zodra u op de START/STOP-toets heeft gedrukt, is het niet meer mogelijk de<br />
instellingen te wijzigen met de andere knoppen.<br />
10. Wanneer de cyclus afgelopen is, zult u 12 pieptonen horen. Plaats noch de warme<br />
bakvorm, noch enig ander voorwerp op de bovenkant van het toestel om het oppervlak<br />
ervan niet te beschadigen. Indien u de warmhoudfunctie niet wenst te gebruiken, stop<br />
dan het programma door 3 seconden op de START/STOP-toets te drukken. Een pieptoon<br />
luidt en de systeemgekozen waarde verschijnt op het display.<br />
11. Indien u na afloop van de baktijd niet op de START/STOP-toets drukt en het brood niet<br />
onmiddellijk uit de bakvorm haalt, dan zal het toestel zijn warmhoudfunctie activeren. Het<br />
toestel zal het brood 60 minuten warmhouden. Na afloop van die 60 minuten keert het<br />
display terug naar de systeemgekozen waarde. U kunt de warmhoudfunctie op elk<br />
moment uitschakelen door 3 seconden op de START/STOP-toets te drukken. Trek de<br />
stekker uit het stopcontact wanneer het toestel niet meer in gebruik is. Opgelet: wanneer<br />
u programma 7 (WHISK), 8 (JAM) of het deegprogramma (10, DOUGH) gebruikt, wordt de<br />
warmhoudfunctie niet geactiveerd. Voor programma 10 is de reden dat indien u het<br />
deeg na afloop van de cyclus in de bakvorm laat, het te veel zou kunnen rijzen en<br />
daardoor tot een slecht eindresultaat leiden. Om een beter resultaat te verkrijgen haalt u<br />
het deeg meteen na afloop van de cyclus uit de bakvorm en volgt u het recept voor de<br />
vorming, rusttijden en baktijd.<br />
12. Het toestel is met een kijkvenster uitgerust waardoor u het kneden, mengen en bakken in<br />
het oog kunt houden. Tijdens de werking kan het zijn dat er bij momenten damp op het<br />
venster komt. U kunt het deksel openen om het mengsel in het oog te houden, maar HET<br />
IS STRIKT VERBODEN HET DEKSEL TIJDENS DE BAKCYCLUS TE OPENEN (ongeveer het laatste<br />
uur van het programma) aangezien het brood dan in elkaar zou kunnen zakken.<br />
13. Om het brood uit de bakvorm te halen: maak gebruik van pannenlappen of ovenwanten<br />
en hef de bakvorm voorzichtig op met het handvat. Draai de bakvorm om en schud hem<br />
boven een metalen rooster uit om het brood te laten afkoelen. Aangezien de bakvorm<br />
met een antiaanbaklaag uitgerust is, zou het brood er gemakkelijk moeten uitkomen.<br />
Gebruik geen metalen keukengerei om het brood eruit te halen om de antiaanbaklaag<br />
niet te beschadigen. Indien nodig kunt u gebruik maken van een houten of plastic spatel<br />
om het brood uit de bakvorm te halen. Indien de kneedhaak geblokkeerd zit aan de<br />
onderkant van het brood, kunt u de bijgeleverde haak of een plastic lepel gebruiken of<br />
een niet-metalen voorwerp om hem eruit te halen. Opgelet: wanneer u het brood uit de<br />
bakvorm haalt, moet u altijd nakijken waar zich de kneedhaak bevindt. Indien de haak<br />
zich nog in het brood bevindt, haal hem er dan voorzichtig uit vooraleer u het brood<br />
snijdt.<br />
14. Laat het brood minstens 60 minuten op een metalen rooster afkoelen vooraleer u het in<br />
sneden snijdt. Gebruik een goed getand broodmes of een elektrisch mes om het brood te<br />
snijden.<br />
GEBRUIK VAN DE TIJDSCHAKELAAR VOOR EEN UITGESTELDE INWERKINGSTELLING<br />
Gebruik de tijdschakelaar om de inwerkingstelling van het toestel uit te stellen. Deze functie<br />
staat u toe het bakprogramma tot 13 uur op voorhand in te stellen. U kunt de tijdschakelaar<br />
bijvoorbeeld om 19 u instellen en de volgende morgen om 8 uur met de geur van vers brood<br />
wakker worden.<br />
Om de tijdschakelaar in te stellen, gelieve de onderstaande stappen te volgen:<br />
• Opgelet: gebruik de tijdschakelaar niet voor recepten waarin verse ingrediënten<br />
voorkomen die aan bederf onderhevig zijn zoals eieren, verse melk, room of kaas.<br />
• Bepaal het uur waarop het brood klaar moet zijn en tel het aantal uren tot dan.<br />
Bijvoorbeeld: als het 20 u is op het moment dat u de ingrediënten in de bakvorm giet, en u<br />
66 <strong>VG</strong> <strong>BBA</strong> 1 - 110711<br />
Assembly page 66/168
�<br />
Fax +32 2 359 95 50<br />
Copies of the I/B. Please reproduce them without any<br />
changes except under special instruction from Team<br />
International BELGIUM. The pages must be reproduced<br />
and folded in order to obtain a booklet A5 (+/- 148.5 mm<br />
width x 210 mm height). When folding, make sure you<br />
keep the good numbering when you turn the pages of<br />
the I/B. Don’t change the page numbering. Keep the<br />
language integrity.<br />
wenst de volgende morgen om 8 uur vers brood te hebben, dan hebt u een totaal van 12<br />
uur nodig vooraleer het brood klaar is. Eens u het programma, de korstkleur enz. volgens<br />
het recept ingesteld hebt, moet u aan de hand van de tijdschakelaar het aantal uren<br />
instellen – in dit geval 12 uur.<br />
• Druk op ▲ op het bedieningspaneel en "2:50", de tijd voor deze instelling, zal<br />
automatisch op het display verschijnen. Blijf op ▲ drukken totdat "12:00" verschijnt. Het<br />
is dus niet noodzakelijk om het verschil tussen de insteltijd (2:50) en het totaal aantal<br />
gewenste uren (12:00) te berekenen. Het toestel zal automatisch de berekening maken<br />
om zich aan het ingestelde aantal uren (12) aan te passen. Indien u "12:00" overschrijdt,<br />
druk op ▼ om terug te keren. Indien u de toets ingedrukt houdt, loopt de tijd sneller<br />
op het display.<br />
• Zodra de tijd ingesteld is, druk dan op START/STOP. De aftelling van de resterende tijd zal<br />
starten. De overblijvende tijd zal minuut per minuut op het display verschijnen. Wanneer<br />
de tijdschakelaar "0:00" bereikt, is het brood klaar en zal het toestel 12 pieptonen laten<br />
horen.<br />
• Indien een fout is opgetreden bij de instelling van de tijdschakelaar, houd dan de<br />
START/STOP-toets ingedrukt totdat u een pieptoon hoort. De instelling is dan geannuleerd<br />
en u kunt de tijdschakelaar opnieuw instellen.<br />
PROBLEMEN EN OPLOSSINGEN<br />
Probleem Oplossing<br />
Rook komt uit de ventilatieroosters tijdens het<br />
bakken.<br />
Het meel is over de bakvorm gelopen en is in<br />
de interne kuip van het toestel gevloeid.<br />
Dit kan voorkomen wanneer er olie op het<br />
verwarmingselement is. Trek de stekker uit het<br />
stopcontact, neem de bakvorm uit het<br />
toestel en veeg het verwarmingselement<br />
schoon met een droge doek. Let erop dat u<br />
zich niet verbrandt.<br />
Trek de stekker uit het stopcontact en laat het<br />
toestel afkoelen. Veeg de kuip goed af met<br />
een propere doek. Wees voorzichtig wanneer<br />
u rond het verwarmingselement<br />
schoonmaakt.<br />
De onderste korst is te dik. Dit kan gebeuren indien het brood te lang in<br />
het toestel blijft na afloop van het<br />
programma. Haal het brood sneller uit het<br />
toestel.<br />
Het brood bakt niet goed. Zorg ervoor dat de kneedhaak goed<br />
geïnstalleerd is.<br />
Men hoort de motor draaien maar de<br />
Controleer of u de bakvorm en de<br />
ingrediënten worden niet gemengd.<br />
kneedhaak juist geïnstalleerd hebt.<br />
[HOT] verschijnt op het display. Indien “HOT” verschijnt nadat u op de<br />
START/STOP-toets gedrukt hebt, betekent dit<br />
dat de temperatuur in de binnenkuip te hoog<br />
is. Open het deksel en laat het toestel 10 à 20<br />
minuten afkoelen.<br />
[H:HH] of [LLL] verschijnt op het display. Indien H:HH of LLL verschijnt nadat u een<br />
programma geselecteerd hebt, betekent dit<br />
dat de temperatuur in de binnenkuip te hoog<br />
is. Open het deksel en laat het toestel 10 à 20<br />
minuten afkoelen.<br />
67 <strong>VG</strong> <strong>BBA</strong> 1 - 110711<br />
Assembly page 67/168
�<br />
Fax +32 2 359 95 50<br />
Copies of the I/B. Please reproduce them without any<br />
changes except under special instruction from Team<br />
International BELGIUM. The pages must be reproduced<br />
and folded in order to obtain a booklet A5 (+/- 148.5 mm<br />
width x 210 mm height). When folding, make sure you<br />
keep the good numbering when you turn the pages of<br />
the I/B. Don’t change the page numbering. Keep the<br />
language integrity.<br />
Indien u niet tevreden bent met het eindresultaat, ga dan volgende punten na:<br />
Opgelet: probeer telkens slechts één oplossing per brood!<br />
A) Doseringsproblemen<br />
Het brood rijst, en zakt vervolgens in elkaar<br />
• Reduceer de hoeveelheid water/melk met 2 soeplepels.<br />
• Voeg 1/4 theelepeltje zout toe.<br />
• Reduceer de hoeveelheid gist met 1/4 theelepeltje.<br />
Het brood rijst te veel<br />
• Reduceer de hoeveelheid bloem met 2 soeplepels.<br />
• Reduceer de hoeveelheid water/melk met 2 soeplepels.<br />
• Voeg 1/4 theelepeltje zout toe.<br />
• Reduceer de hoeveelheid suiker/honing met 1 theelepeltje.<br />
• Reduceer de hoeveelheid gist met 1/4 theelepeltje.<br />
Het brood rijst onvoldoende<br />
• Voeg 2 soeplepels water/melk toe.<br />
• Reduceer de hoeveelheid zout met 1/4 theelepeltje.<br />
• Voeg een theelepeltje suiker/honing toe.<br />
• Voeg 1/4 theelepeltje gist toe.<br />
De korst is te donker<br />
• Reduceer de hoeveelheid honing/suiker met 1 theelepeltje.<br />
Het brood is onvoldoende gebakken<br />
• Reduceer de hoeveelheid water/melk met 2 soeplepels.<br />
Het oppervlak van het brood is niet gebakken<br />
• Reduceer de hoeveelheid bloem met 2 soeplepels.<br />
• Voeg 2 soeplepels water/melk toe.<br />
De textuur van het brood is te zwaar of te dicht<br />
• Reduceer de hoeveelheid bloem met 2 soeplepels.<br />
• Voeg 1 theelepeltje suiker toe.<br />
• Voeg 1/4 theelepeltje gist toe.<br />
B) Problemen met de ingrediënten<br />
Indien het niet om een doseringsprobleem gaat, zou het probleem ook aan de gebruikte<br />
ingrediënten te wijten kunnen zijn.<br />
Het brood rijst, en zakt vervolgens in elkaar<br />
• Het meel is te dun.<br />
Het brood rijst te veel<br />
• U hebt een verkeerde gistsoort gebruikt.<br />
• U bent het zout vergeten.<br />
Het brood rijst onvoldoende<br />
• Het meel is te oud.<br />
• Het meel bevat te weinig gluten.<br />
• Het meel is te dun.<br />
• U hebt een verkeerde gistsoort gebruikt.<br />
• U hebt te veel zout gebruikt.<br />
Het brood is plat, rijst weinig of niet<br />
• De vloeistof is te koud/warm.<br />
• Het meel is te oud.<br />
• Het meel bevat te weinig gluten.<br />
• Het meel is te dun.<br />
68 <strong>VG</strong> <strong>BBA</strong> 1 - 110711<br />
Assembly page 68/168
�<br />
Fax +32 2 359 95 50<br />
• U bent de gist vergeten.<br />
• De gist is vervallen.<br />
• U hebt een verkeerde gistsoort gebruikt.<br />
• U hebt te veel zout gebruikt.<br />
• U bent het zout vergeten.<br />
De ingrediënten zijn niet goed gemengd<br />
• Het meel is te dun.<br />
De textuur van het brood is te zwaar of te dicht<br />
• U hebt een verkeerde gistsoort gebruikt.<br />
REINIGING EN ONDERHOUD<br />
Copies of the I/B. Please reproduce them without any<br />
changes except under special instruction from Team<br />
International BELGIUM. The pages must be reproduced<br />
and folded in order to obtain a booklet A5 (+/- 148.5 mm<br />
width x 210 mm height). When folding, make sure you<br />
keep the good numbering when you turn the pages of<br />
the I/B. Don’t change the page numbering. Keep the<br />
language integrity.<br />
Trek de stekker uit het stopcontact en laat het toestel afkoelen vooraleer u het reinigt.<br />
1. Bakvorm<br />
Haal de bakvorm uit het toestel vooraleer u deze reinigt. Reinig de binnenkant van de<br />
bakvorm met een vochtige doek. Indien nodig kunt u ook gebruik maken van een lichte<br />
zeepsop om de binnenkant van de bakvorm te reinigen. Gebruik geen krassende<br />
voorwerpen of schuurmiddelen, want deze zouden de antiaanbaklaag van de bakvorm<br />
kunnen beschadigen. Een bakvorm die beschadigd of gekrast is, zal niet door de garantie<br />
worden gedekt. Na verloop van tijd zal het uiterlijk van de antiaanbaklaag lichtjes<br />
veranderen door het vocht en de damp. Dit is normaal en heeft geen enkele negatieve<br />
invloed op de eigenschappen en de kwaliteit van de bakvorm.<br />
2. Kneedhaak<br />
Reinig de kneedhaak met een vochtige doek. Indien de kneedhaak moeilijk loskomt van<br />
de as, giet dan warm water in de bakvorm en wacht enkele minuten. Het warme water<br />
zal het aansluitingspunt vrijmaken en de kneedhaak losmaken. Indien het gaatje van de<br />
kneedhaak vuil is, kunt u het met een tandenstoker reinigen. Wees hierbij voorzichtig<br />
zodat u de antiaanbaklaag van de kneedhaak niet beschadigt.<br />
3. Deksel met kijkvenster<br />
Reinig het met een vochtige doek. Dompel het niet onder in water of enige andere<br />
vloeistof.<br />
4. Binnenkuip<br />
Indien nodig kunt u ook de binnenkuip van het toestel reinigen. Gebruik hiertoe enkel een<br />
vochtige doek. Zorg ervoor dat de binnenkuip volledig afgekoeld is vooraleer u deze<br />
reinigt. Zorg ervoor dat de kuip volledig droog is vooraleer u het toestel weer aanschakelt.<br />
5. Behuizing<br />
Reinig de behuizing van het toestel met een vochtige doek. Dompel het toestel nooit<br />
onder in water of enige andere vloeistof.<br />
BESCHRIJVING VAN DE PROGRAMMA'S EN RECEPTIDEEËN<br />
GEHEUGENFUNCTIE<br />
In geval van een stroomonderbreking zal het programma automatisch voortgezet worden<br />
zonder op de START/STOP-toets te drukken indien de stroomtoevoer binnen de 20 minuten<br />
hersteld wordt. Als de stroomtoevoer pas na meer dan 20 minuten hersteld wordt, werkt de<br />
geheugenfunctie niet en zal u het toestel opnieuw moeten programmeren. Indien het<br />
programma dat in gang was vóór de onderbreking niet verder dan de kneedcyclus geraakt<br />
was, start dan gewoon hetzelfde programma opnieuw. Indien het programma voorbij de<br />
69 <strong>VG</strong> <strong>BBA</strong> 1 - 110711<br />
Assembly page 69/168
�<br />
Fax +32 2 359 95 50<br />
Copies of the I/B. Please reproduce them without any<br />
changes except under special instruction from Team<br />
International BELGIUM. The pages must be reproduced<br />
and folded in order to obtain a booklet A5 (+/- 148.5 mm<br />
width x 210 mm height). When folding, make sure you<br />
keep the good numbering when you turn the pages of<br />
the I/B. Don’t change the page numbering. Keep the<br />
language integrity.<br />
kneedcyclus geraakt was, maar de bakcyclus nog niet had bereikt, kunt u het bakprogramma<br />
(12, BAKE) starten om het brood gedurende 1 uur te bakken. Indien de bakcyclus vóór de<br />
onderbreking al begonnen was, is het aan te raden de ingrediënten weg te gooien en van nul<br />
te herbeginnen omdat het bakprogramma te lang zou kunnen zijn en u dan het risico loopt<br />
dat het brood zal aanbakken.<br />
STANDAARD WIT BROOD<br />
Programma: 1 (Basic) – Kleur van de korst: licht/donker – Gewicht: 450g/680g/900g<br />
Kies dit programma om brood op basis van tarwemeel te maken, hoewel enkele recepten ook<br />
een zekere hoeveelheid volkorenmeel zouden kunnen bevatten. De textuur zal iets dichter zijn<br />
dan bij Frans brood of zoet brood.<br />
Ingrediënten:<br />
450g 680g 900g<br />
2/3 maatbeker water<br />
1 soeplepel margarine of<br />
boter<br />
1 eetlepel plantenolie<br />
1/3 theelepeltje zout<br />
1 ½ soeplepel<br />
melkpoeder<br />
2 soeplepels suiker<br />
2 maatbekers tarwemeel<br />
voor wit brood of<br />
universele witte bloem<br />
1 ¼ theelepeltje instant<br />
gist (gedroogde gist met<br />
snelle werking)<br />
1 maatbeker water<br />
1 ½ soeplepel margarine of<br />
boter<br />
1 ½ soeplepel plantenolie<br />
1 ½ theelepeltje zout<br />
2 soeplepels melkpoeder<br />
2 ½ soeplepels suiker<br />
2 ¼ maatbekers tarwemeel<br />
voor wit brood of universele<br />
witte bloem<br />
1 ¼ theelepeltje instant gist<br />
(gedroogde gist met snelle<br />
werking)<br />
1 1/3 maatbeker water<br />
2 soeplepels margarine of<br />
boter<br />
2 soeplepels plantenolie<br />
1 theelepeltje zout<br />
3 soeplepels melkpoeder<br />
3 soeplepels suiker<br />
3 ½ maatbekers tarwemeel<br />
voor wit brood of universele<br />
witte bloem<br />
1 ½ theelepeltje instant gist<br />
(gedroogde gist met snelle<br />
werking)<br />
1. Meet de ingrediënten nauwkeurig en giet ze in de bakvorm. Respecteer hierbij de<br />
volgorde die hierboven aangeduid is (vloeibare ingrediënten eerst).<br />
2. Plaats de bakvorm goed in het toestel. Sluit het deksel.<br />
3. Kies het gewenste programma.<br />
4. Kies de gewenste kleur van de korst.<br />
5. Kies het gewenste gewicht.<br />
6. Druk op START/STOP.<br />
7. Gebruik pannenlappen of een ovenwant om de bakvorm na afloop van de baktijd uit het<br />
toestel te halen.<br />
8. Laat het brood minstens een uur op een rooster afkoelen vooraleer u het snijdt.<br />
FRANS BROOD<br />
Programma: 2 (French) – Kleur van de korst: licht/donker – Gewicht: 450g/680g/900g<br />
Traditiegetrouw heeft Frans brood een knapperigere korst en een luchtigere textuur in<br />
vergelijking met standaard wit brood.<br />
70 <strong>VG</strong> <strong>BBA</strong> 1 - 110711<br />
Assembly page 70/168
�<br />
Ingrediënten:<br />
Fax +32 2 359 95 50<br />
Copies of the I/B. Please reproduce them without any<br />
changes except under special instruction from Team<br />
International BELGIUM. The pages must be reproduced<br />
and folded in order to obtain a booklet A5 (+/- 148.5 mm<br />
width x 210 mm height). When folding, make sure you<br />
keep the good numbering when you turn the pages of<br />
the I/B. Don’t change the page numbering. Keep the<br />
language integrity.<br />
450g 680g 900g<br />
1 maatbeker water<br />
2 soeplepels olie<br />
1 theelepeltje zout<br />
2 soeplepels suiker<br />
2 maatbekers tarwemeel<br />
voor wit brood of<br />
universele witte bloem<br />
1 theelepeltje instant gist<br />
(gedroogde gist met<br />
snelle werking)<br />
1 1/4 maatbeker water<br />
2 soeplepels olie<br />
1 ½ theelepeltje zout<br />
2 soeplepels suiker<br />
2 ½ maatbekers tarwemeel<br />
voor wit brood of universele<br />
witte bloem<br />
1 ¼ theelepeltje instant gist<br />
(gedroogde gist met snelle<br />
werking)<br />
1 ½ maatbeker water<br />
2 soeplepels olie<br />
2 theelepeltjes zout<br />
2 ½ soeplepels suiker<br />
3 ½ maatbekers tarwemeel<br />
voor wit brood of universele<br />
witte bloem<br />
1 ½ theelepeltje instant gist<br />
(gedroogde gist met snelle<br />
werking)<br />
1. Meet de ingrediënten nauwkeurig en giet ze in de bakvorm. Respecteer hierbij de<br />
volgorde die hierboven aangeduid is (vloeibare ingrediënten eerst).<br />
2. Plaats de bakvorm goed in het toestel. Sluit het deksel.<br />
3. Kies het gewenste programma.<br />
4. Kies de gewenste kleur van de korst.<br />
5. Kies het gewenste gewicht.<br />
6. Druk op START/STOP.<br />
7. Gebruik pannenlappen of een ovenwant om de bakvorm na afloop van de baktijd uit het<br />
toestel te halen.<br />
8. Laat het brood minstens een uur op een rooster afkoelen vooraleer u het snijdt.<br />
ZOET BROOD<br />
Programma: 3 (Sweet) – Kleur van de korst: licht/donker – Gewicht: 450g/680g/900g<br />
Kies dit programma om recepten uit te voeren die fruitsap bevatten, of die meer suiker, zoete<br />
ingrediënten, geraspte kokosnoot, krenten, droge vruchten of chocolade bevatten.<br />
Ingrediënten:<br />
450g 680g 900g<br />
3/4 maatbeker melk<br />
1 ½ soeplepel margarine of<br />
boter<br />
1 ei<br />
1 theelepeltje zout<br />
1 ½ soeplepel honing<br />
2 soeplepels suiker<br />
2 maatbekers tarwemeel<br />
voor wit brood of universele<br />
witte bloem<br />
1/2 theelepeltje instant gist<br />
(gedroogde gist met snelle<br />
werking)<br />
1 ¼ maatbeker melk<br />
1 ½ soeplepel margarine of<br />
boter<br />
1 ei<br />
1theelepeltje zout<br />
1 ½ soeplepel honing<br />
3 soeplepels suiker<br />
3 maatbekers tarwemeel<br />
voor wit brood of universele<br />
witte bloem<br />
1 theelepeltje instant gist<br />
(gedroogde gist met snelle<br />
werking)<br />
1 ½ maatbeker melk<br />
2 soeplepels margarine of boter<br />
2 eieren<br />
1 theelepeltje zout<br />
2 soeplepels honing<br />
4 soeplepels suiker<br />
3 ½ maatbekers tarwemeel voor<br />
wit brood of universele witte<br />
bloem<br />
1 ¼ theelepeltje instant gist<br />
(gedroogde gist met snelle<br />
werking)<br />
1. Meet de ingrediënten nauwkeurig en giet ze in de bakvorm. Respecteer hierbij de<br />
volgorde die hierboven aangeduid is (vloeibare ingrediënten eerst).<br />
2. Plaats de bakvorm goed in het toestel. Sluit het deksel.<br />
71 <strong>VG</strong> <strong>BBA</strong> 1 - 110711<br />
Assembly page 71/168
�<br />
Fax +32 2 359 95 50<br />
Copies of the I/B. Please reproduce them without any<br />
changes except under special instruction from Team<br />
International BELGIUM. The pages must be reproduced<br />
and folded in order to obtain a booklet A5 (+/- 148.5 mm<br />
width x 210 mm height). When folding, make sure you<br />
keep the good numbering when you turn the pages of<br />
the I/B. Don’t change the page numbering. Keep the<br />
language integrity.<br />
3. Kies het gewenste programma.<br />
4. Kies de gewenste kleur van de korst.<br />
5. Kies het gewenste gewicht.<br />
6. Druk op START/STOP.<br />
7. Gebruik pannenlappen of een ovenwant om de bakvorm na afloop van de baktijd uit het<br />
toestel te halen.<br />
8. Laat het brood minstens een uur op een rooster afkoelen vooraleer u het snijdt.<br />
CAKE<br />
Programma: 4 (Cake)<br />
Kies deze functie om taartdeeg te maken.<br />
Ingrediënten:<br />
8 soeplepels boter<br />
8 soeplepels suiker<br />
5 eieren<br />
1 ½ maatbeker universele witte bloem<br />
1 ½ soeplepel citroensap<br />
1 ½ theelepeltje bakpoeder (baking powder)<br />
Raad: Schraap de randen van de bakvorm tijdens het mengen om zeker te zijn dat u een<br />
homogeen mengsel verkrijgt.<br />
1. Meet de ingrediënten nauwkeurig en giet ze in de bakvorm. Respecteer hierbij de<br />
volgorde die hierboven aangeduid is (vloeibare ingrediënten eerst).<br />
2. Plaats de bakvorm goed in het toestel. Sluit het deksel.<br />
3. Kies het gewenste programma.<br />
4. Druk op START/STOP.<br />
5. Gebruik pannenlappen of een ovenwant om de bakvorm na afloop van de baktijd uit het<br />
toestel te halen.<br />
6. Laat de cake op een rooster afkoelen vooraleer u hem snijdt.<br />
VOLKORENBROOD<br />
Programma: 5 (Whole Wheat) – Kleur van de korst: licht/donker – Gewicht: 450g/680g/900g<br />
Kies dit programma voor recepten die een grote hoeveelheid volkorenmeel of rogge, haver of<br />
zemelen bevatten.<br />
72 <strong>VG</strong> <strong>BBA</strong> 1 - 110711<br />
Assembly page 72/168
�<br />
Ingrediënten:<br />
Fax +32 2 359 95 50<br />
Copies of the I/B. Please reproduce them without any<br />
changes except under special instruction from Team<br />
International BELGIUM. The pages must be reproduced<br />
and folded in order to obtain a booklet A5 (+/- 148.5 mm<br />
width x 210 mm height). When folding, make sure you<br />
keep the good numbering when you turn the pages of<br />
the I/B. Don’t change the page numbering. Keep the<br />
language integrity.<br />
450g 680g 900g<br />
1 maatbeker water<br />
1 soeplepel margarine of boter<br />
1 theelepeltje zout<br />
1 theelepeltje suiker<br />
1 maatbeker tarwemeel voor<br />
wit brood of universele witte<br />
bloem<br />
1 maatbeker volkoren bloem<br />
1 theelepeltje instant gist<br />
(gedroogde gist met snelle<br />
werking)<br />
1 ¼ maatbeker water<br />
1 ½ soeplepel margarine of<br />
boter<br />
1 theelepeltje zout<br />
1 theelepeltje suiker<br />
1 1/3 maatbeker tarwemeel<br />
voor wit brood of universele<br />
witte bloem<br />
1 1/3 maatbeker volkoren<br />
bloem<br />
1 theelepeltje instant gist<br />
(gedroogde gist met snelle<br />
werking)<br />
1 1/3 maatbeker water<br />
2 soeplepels margarine of<br />
boter<br />
1 theelepeltje zout<br />
1 theelepeltje suiker<br />
1 2/3 maatbeker tarwemeel<br />
voor wit brood of universele<br />
witte bloem<br />
1 2/3 maatbeker volkoren<br />
bloem<br />
1 ¼ theelepeltje instant gist<br />
(gedroogde gist met snelle<br />
werking)<br />
Opmerking: u kunt anderhalve soeplepel gluten toevoegen om het brood te vergroten en de<br />
textuur van het brood te verbeteren.<br />
1. Meet de ingrediënten nauwkeurig en giet ze in de bakvorm. Respecteer hierbij de<br />
volgorde die hierboven aangeduid is (vloeibare ingrediënten eerst).<br />
2. Plaats de bakvorm goed in het toestel. Sluit het deksel.<br />
3. Kies het gewenste programma.<br />
4. Kies de gewenste kleur van de korst.<br />
5. Kies het gewenste gewicht.<br />
6. Druk op START/STOP.<br />
7. Gebruik pannenlappen of een ovenwant om de bakvorm na afloop van de baktijd uit het<br />
toestel te halen.<br />
8. Laat het brood minstens een uur op een rooster afkoelen vooraleer u het snijdt.<br />
SANDWICH<br />
Programma: 6 – Gewicht: 450g/680g/900g<br />
Ingrediënten:<br />
450g 680g 900g<br />
3/4 maatbeker water<br />
1 soeplepel margarine of boter<br />
1 theelepeltje zout<br />
¾ soeplepel suiker<br />
2 maatbekers tarwemeel voor<br />
wit brood of universele witte<br />
bloem<br />
1 theelepeltje instant gist<br />
(gedroogde gist met snelle<br />
werking)<br />
1 maatbeker water<br />
1 ½ soeplepel margarine of boter<br />
1 ½ theelepeltje zout<br />
1 soeplepel suiker<br />
2 ½ maatbekers tarwemeel voor<br />
wit brood of universele witte<br />
bloem<br />
1 ¼ theelepeltje instant gist<br />
(gedroogde gist met snelle<br />
werking)<br />
1 1/3 maatbeker water<br />
2 soeplepels margarine of<br />
boter<br />
2 theelepeltjes zout<br />
1 ½ soeplepel suiker<br />
3 ¼ maatbekers tarwemeel<br />
voor wit brood of<br />
universele witte bloem<br />
1 ½ theelepeltje instant gist<br />
(gedroogde gist met snelle<br />
werking)<br />
1. Meet de ingrediënten nauwkeurig en giet ze in de bakvorm. Respecteer hierbij de<br />
volgorde die hierboven aangeduid is (vloeibare ingrediënten eerst).<br />
73 <strong>VG</strong> <strong>BBA</strong> 1 - 110711<br />
Assembly page 73/168
�<br />
Fax +32 2 359 95 50<br />
Copies of the I/B. Please reproduce them without any<br />
changes except under special instruction from Team<br />
International BELGIUM. The pages must be reproduced<br />
and folded in order to obtain a booklet A5 (+/- 148.5 mm<br />
width x 210 mm height). When folding, make sure you<br />
keep the good numbering when you turn the pages of<br />
the I/B. Don’t change the page numbering. Keep the<br />
language integrity.<br />
2. Plaats de bakvorm goed in het toestel. Sluit het deksel.<br />
3. Kies het gewenste programma.<br />
4. Kies het gewenste gewicht.<br />
5. Druk op START/STOP.<br />
6. Gebruik pannenlappen of een ovenwant om de bakvorm na afloop van de baktijd uit het<br />
toestel te halen.<br />
7. Laat het brood minstens een uur op een rooster afkoelen vooraleer u het snijdt.<br />
KNEDEN<br />
Programma: 7 (Whisk)<br />
Dit programma maakt het mogelijk om het deeg te kneden dat wordt gebruikt om<br />
deegrolletjes of noedels te maken. De bakvorm wordt niet opgewarmd en er moet geen<br />
korstkleur of gewicht worden gekozen.<br />
AARDBEIENCONFITUUR<br />
Programma: 8 (Jam)<br />
Dit programma staat u toe jam op eenvoudige wijze te maken.<br />
Snijd de aardbeien in stukjes van 1 cm. Gebruik geen normale suiker maar gebruik speciaal<br />
voor jam gemaakte suiker.<br />
Nadat u op de START/STOP-toets gedrukt hebt, zal het toestel eerst opwarmen. Het toestel zal<br />
dus pas na de opwarmtijd actief worden.<br />
Ingrediënten:<br />
900g verse aardbeien in stukjes van max. 1cm<br />
500g speciale suiker voor jam<br />
1 soeplepel citroensap<br />
1. Meet de ingrediënten nauwkeurig en giet ze in de bakvorm. Respecteer hierbij de<br />
volgorde die hierboven aangeduid is.<br />
2. Plaats de bakvorm goed in het toestel. Sluit het deksel.<br />
3. Kies het gewenste programma.<br />
4. Druk op START/STOP.<br />
5. Gebruik pannenlappen of een ovenwant om de bakvorm na afloop van de baktijd uit het<br />
toestel te halen.<br />
6. Giet de jam in een propere en gesteriliseerde pot en sluit de pot af met een gesteriliseerd<br />
deksel. Bewaar in de koelkast.<br />
YOGHURTBROOD<br />
Programma: 9 (Yoghourt)<br />
Met dit programma kunt u een brood met yoghurtsmaak maken.<br />
74 <strong>VG</strong> <strong>BBA</strong> 1 - 110711<br />
Assembly page 74/168
�<br />
Ingrediënten:<br />
Fax +32 2 359 95 50<br />
Copies of the I/B. Please reproduce them without any<br />
changes except under special instruction from Team<br />
International BELGIUM. The pages must be reproduced<br />
and folded in order to obtain a booklet A5 (+/- 148.5 mm<br />
width x 210 mm height). When folding, make sure you<br />
keep the good numbering when you turn the pages of<br />
the I/B. Don’t change the page numbering. Keep the<br />
language integrity.<br />
450g 680g 900g<br />
1/3 maatbeker water<br />
100g yoghurt<br />
1 eetlepel plantenolie<br />
1/3 theelepeltje zout<br />
1 ½ soeplepel suiker<br />
2 maatbekers tarwemeel<br />
voor wit brood of<br />
universele witte bloem<br />
1 theelepeltje instant gist<br />
(gedroogde gist met<br />
snelle werking)<br />
2/3 maatbeker water<br />
150g yoghurt<br />
1 ½ eetlepel plantenolie<br />
½ theelepeltje zout<br />
2 soeplepels suiker<br />
2 ¼ maatbekers tarwemeel<br />
voor wit brood of universele<br />
witte bloem<br />
1 ¼ theelepeltje instant gist<br />
(gedroogde gist met snelle<br />
werking)<br />
1 maatbeker water<br />
200g yoghurt<br />
2 eetlepels plantenolie<br />
¾ theelepeltje zout<br />
2 ½ soeplepels suiker<br />
3 ½ maatbekers tarwemeel<br />
voor wit brood of universele<br />
witte bloem<br />
1 ½ theelepeltje instant gist<br />
(gedroogde gist met snelle<br />
werking)<br />
1. Meet de ingrediënten nauwkeurig en giet ze in de bakvorm. Respecteer hierbij de<br />
volgorde die hierboven aangeduid is (vloeibare ingrediënten eerst).<br />
2. Plaats de bakvorm goed in het toestel. Sluit het deksel.<br />
3. Kies het gewenste programma.<br />
4. Kies de gewenste kleur van de korst.<br />
5. Kies het gewenste gewicht.<br />
6. Druk op START/STOP.<br />
7. Gebruik pannenlappen of een ovenwant om de bakvorm na afloop van de baktijd uit het<br />
toestel te halen.<br />
8. Laat het brood minstens een uur op een rooster afkoelen vooraleer u het snijdt.<br />
PIZZADEEG<br />
Programma: 10 (Dough)<br />
Met dit programma kunt u deeg maken zonder het te bakken. U kunt om het even welk soort<br />
deeg maken, dat u daarna als pizzadeeg, broodjes, krakelingen, beignets of gevlochten<br />
brood kunt bewerken. Deze moeten dan in de oven of in de frituurpan gebakken worden.<br />
Ingrediënten:<br />
1 ¼ maatbeker water<br />
½ theelepeltje zout<br />
2 soeplepels olijfolie<br />
2 ½ maatbekers bloem geschikt voor elk gebruik of bloem voor brood<br />
1 ½ theelepeltje instant gist (gedroogde gist met snelle werking)<br />
1. Meet de ingrediënten nauwkeurig en giet ze in de bakvorm. Respecteer hierbij de<br />
volgorde die hierboven aangeduid is (vloeibare ingrediënten eerst).<br />
2. Plaats de bakvorm goed in het toestel. Sluit het deksel.<br />
3. Kies het gewenste programma. Druk op START.<br />
4. Haal na afloop van de baktijd het deeg uit de bakvorm.<br />
5. Laat het deeg 10 minuten rijzen.<br />
6. Giet tomatensaus op de pizza en verspreid er vervolgens de ingrediënten naar keuze op.<br />
7. Bak de pizza gedurende 15 minuten in een normale oven op 200°C.<br />
75 <strong>VG</strong> <strong>BBA</strong> 1 - 110711<br />
Assembly page 75/168
�<br />
Fax +32 2 359 95 50<br />
SNEL GEBAKKEN BROOD<br />
Programma: 11 (Fast) – Kleur van de korst: licht/donker<br />
Copies of the I/B. Please reproduce them without any<br />
changes except under special instruction from Team<br />
International BELGIUM. The pages must be reproduced<br />
and folded in order to obtain a booklet A5 (+/- 148.5 mm<br />
width x 210 mm height). When folding, make sure you<br />
keep the good numbering when you turn the pages of<br />
the I/B. Don’t change the page numbering. Keep the<br />
language integrity.<br />
Gebruik dit programma om brood snel te bakken. Het brood zal echter dichter zijn en minder<br />
rijzen.<br />
Ingrediënten:<br />
1 maatbeker water<br />
2 soeplepels margarine of boter<br />
1 ½ theelepeltje zout<br />
2 soeplepels suiker<br />
1 soeplepel melkpoeder<br />
3 maatbekers universele witte bloem<br />
2 theelepeltjes instant gist (gedroogde gist met snelle werking)<br />
1. Meet de ingrediënten nauwkeurig en giet ze in de bakvorm. Respecteer hierbij de<br />
volgorde die hierboven aangeduid is (vloeibare ingrediënten eerst).<br />
2. Plaats de bakvorm goed in het toestel. Sluit het deksel.<br />
3. Kies het gewenste programma.<br />
4. Kies de gewenste kleur van de korst.<br />
5. Druk op START/STOP.<br />
6. Gebruik pannenlappen of een ovenwant om de bakvorm na afloop van de baktijd uit het<br />
toestel te halen.<br />
7. Laat het brood minstens een uur op een rooster afkoelen vooraleer u het snijdt.<br />
BAKKEN<br />
Programma: 12 (Bake)<br />
Duur: 1:00<br />
Aangezien het toestel met dit programma een bakcyclus van 1 uur uitvoert, is het raadzaam<br />
het toestel goed in het oog te houden. Dit programma is nuttig wanneer een<br />
stroomonderbreking plaatsvindt terwijl de bakcyclus van het programma nog niet begonnen<br />
was. Voor meer informatie over stroomonderbrekingen, gelieve de paragraaf<br />
"Geheugenfunctie" grondig door te lezen.<br />
MILIEUBESCHERMING – RICHTLIJN 2002/96/EG<br />
Om ons milieu en onze gezondheid te beschermen, moet afgedankte elektrische en<br />
elektronische apparatuur in overeenstemming met welbepaalde regels weggegooid worden.<br />
Dit vergt zowel de inzet van de leveranciers als van de gebruikers. Om deze reden mag uw<br />
apparaat, zoals op het typeplaatje of op de verpakking aangegeven door het symbool ,<br />
niet met het gewone huisvuil weggegooid worden. De gebruiker heeft het recht het toestel<br />
gratis naar een gemeentelijk centrum van gescheiden inzameling te brengen waar het<br />
overeenkomstig de richtlijn hergebruikt, gerecycleerd of voor andere doeleinden gebruikt zal<br />
worden.<br />
76 <strong>VG</strong> <strong>BBA</strong> 1 - 110711<br />
Assembly page 76/168
�<br />
Fax +32 2 359 95 50<br />
CONSEJOS DE SEGURIDAD<br />
Copies of the I/B. Please reproduce them without any<br />
changes except under special instruction from Team<br />
International BELGIUM. The pages must be reproduced<br />
and folded in order to obtain a booklet A5 (+/- 148.5 mm<br />
width x 210 mm height). When folding, make sure you<br />
keep the good numbering when you turn the pages of<br />
the I/B. Don’t change the page numbering. Keep the<br />
language integrity.<br />
Lea detenidamente el modo de empleo antes de utilizar el aparato, y siempre siga las<br />
medidas de seguridad y el modo de funcionamiento.<br />
Importante: Las personas (incluidos niños) con incapacidades físicas, sensoriales o mentales, o<br />
sin experiencia o conocimiento nunca deben utilizar el aparato, salvo si están bajo la<br />
vigilancia de una persona responsable de su seguridad o si recibieron previamente<br />
instrucciones con respecto al uso seguro del aparato.<br />
Es necesario vigilar a los niños para que no jueguen con el aparato.<br />
� Antes de utilizar el aparato, compruebe que el voltaje de la red eléctrica coincide con el<br />
aparato.<br />
� No deje nunca su aparato sin vigilancia cuando esté en marcha.<br />
� Compruebe de vez en cuando que el cable no esté dañado. No utilice su aparato si el<br />
cable o el aparato están dañados por el motivo que sea. Si el cable está dañado, debe<br />
ser reemplazado por un servicio cualificado competente(*). Cualquier reparación debe<br />
ser realizada por un servicio técnico cualificado(*).<br />
� Utilice el aparato solamente para usos domésticos y de la manera indicada en el modo<br />
de empleo.<br />
� No sumerja nunca el aparato en el agua o en cualquier otro líquido ni para su limpieza ni<br />
para cualquier otra razón. No lo meta nunca en el lavavajillas.<br />
� Ten cuidado particularmente después de la cocción. El aparto está muy caliente. Deje<br />
que se enfríe antes de guardarlo o limpiarlo.<br />
� No utilice el aparato cerca de fuentes de calor.<br />
� La clavija eléctrica debe ser desenchufada antes de limpiar el aparato.<br />
� Procure no utilizar el aparato en el exterior y colóquelo en un sitio seco.<br />
� No utilice accesorios no recomendados por el fabricante, eso puede entrañar un riesgo<br />
para el usuario y puede dañar el aparato.<br />
� Nunca mueva el aparato estirando del cable. Procure que el cable no se enganche en<br />
algún saliente, a fin de evitar posibles caídas del mismo. Evite enrollar el cable alrededor<br />
del aparato y no lo tuerza.<br />
� Coloque el aparato sobre una mesa o un soporte lo suficientemente estable para evitar<br />
su caída.<br />
� Procure que el cable no entre en contacto con las partes calientes del aparato. Asimismo<br />
evite Ud. tocarlas.<br />
� Durante el funcionamiento, procure no poner el aparato en contacto con materiales<br />
inflamables como cortinas, tejidos, etc., o cerca de dichos materiales, pues podría<br />
provocar un incendio.<br />
� La temperatura de las superficies metálicas puede ser elevada cuando el aparto<br />
funcione. No toque esas superficies. Utilice guantes de cocina para manipular el molde<br />
después de la cocción para que no se queme. Cuando el símbolo está puesto en<br />
una superficie particular, acentúa la puesta en guardia y significa: CUIDADO, esta<br />
superficie pede volverse muy caliente durante el uso.<br />
� No arañe el revestimiento especial del molde y de la cuchilla, pues perdería su carácter<br />
antiadhesivo.<br />
� No supere nunca las dosis de harina y de levadura indicadas en las recetas, pues en caso<br />
contrario, la pasta podría salir del molde.<br />
� No cubra el aparato (por ejemplo, con un tejido), pues impediría que el vapor se escape.<br />
� No introduzca ningún utensilio en la cubeta a fin de evitar cualquier choque eléctrico y<br />
para no dañar su revestimiento.<br />
77 <strong>VG</strong> <strong>BBA</strong> 1 - 110711<br />
Assembly page 77/168
�<br />
Fax +32 2 359 95 50<br />
Copies of the I/B. Please reproduce them without any<br />
changes except under special instruction from Team<br />
International BELGIUM. The pages must be reproduced<br />
and folded in order to obtain a booklet A5 (+/- 148.5 mm<br />
width x 210 mm height). When folding, make sure you<br />
keep the good numbering when you turn the pages of<br />
the I/B. Don’t change the page numbering. Keep the<br />
language integrity.<br />
� Su aparato nunca debe ser puesto en marcha mediante un minutero externo o un<br />
sistema de mando a distancia separado.<br />
(*) Servicio técnico cualificado: servicio técnico del fabricante o del importador o una<br />
persona cualificada, reconocida y habilitada a fin de evitar cualquier peligro. En cualquier<br />
caso devuelva el aparato al servicio técnico.<br />
NOTAS<br />
El cable de alimentación es un cable bastante corto, a fin de disminuir los riesgos de<br />
accidentes (caída del aparato si se tropeza en el cordón...). Sin embargo, puede utilizar un<br />
alargador si es necesario. Pero:<br />
• Asegúrese de que el amperaje sea igual o superior al del aparato. Un alargador de<br />
amperaje inferior al del aparato podría sobrecalentar y quemar.<br />
• Para evitar cualquier riego de accidentes, asegúrese de que el alargador no<br />
cuelgue (del rincón de una mesa por ejemplo) o que no ande rodeando por el<br />
suelo.<br />
ANTES DE UTILIZARLO POR PRIMERA VEZ<br />
Desembale el aparato y los accesorios. Limpie la tapa, la cubeta y los accesorios con un<br />
paño húmedo y seque todas las partes cuidadosamente.<br />
La calidad del pan depende de muchos elementos. Por tanto, es importante conocer todos<br />
los ingredientes y sus interacciones. Eso le permitirá obtener un resultado satisfactorio cada vez<br />
que utilice el aparato.<br />
Temperatura<br />
Todos los ingredientes que ponga en máquina deben estar a temperatura ambiente. De la<br />
misma manera, la habitación en la que cueza el pan debe ser temperada (entre 15°C y 34°C,<br />
e idealmente entre 20-23°C).<br />
Dosificación de los ingredientes<br />
• Se entrega con el aparato un recipiente de dosificación y una cuchara combinada<br />
(grande y pequeña). Mida los ingredientes sólo con tales accesorios. Las recetas de este<br />
manual de instrucciones se funda en las medidas de esos accesorios.<br />
• La unidad utilizada en este manual está descrita en recipientes de dosificación y<br />
fracciones de ese recipiente. En el recipiente se encuentra una unidad exprimida en<br />
“cup”. Una “cup” corresponde a un recipiente de dosificación (250ml).<br />
• En la cuchara combinada, se pueden encontrar las marcas siguientes:<br />
Table spoon corresponde a 1 cucharada sopera = 15ml<br />
Teaspoon corresponde a 1 cucharadita = 5ml<br />
• Para medir los ingredientes líquidos, llene el recipiente de dosificación y póngalo en una<br />
superficie plana. Inclínese de tal modo que sus ojos se encuentren al mismo nivel que el<br />
recipiente. El nivel del líquido se debe alinear con la marca de medida deseada. Una<br />
medida aproximada no es suficiente y podría perjudicar el equilibrio de la receta.<br />
• Para medir la harina, llene el recipiente apenas sobre el borde y quite el excedente<br />
pasando un utensilio recto en los bordes. No apisone los alimentos, pues podría dar una<br />
cantidad superior a la requerida. No tamice la harina. Para pequeñas cantidades, utilice<br />
la cuchara de dosificación y asegúrese de que esté colmada y no atestada. Para<br />
78 <strong>VG</strong> <strong>BBA</strong> 1 - 110711<br />
Assembly page 78/168
�<br />
Fax +32 2 359 95 50<br />
Copies of the I/B. Please reproduce them without any<br />
changes except under special instruction from Team<br />
International BELGIUM. The pages must be reproduced<br />
and folded in order to obtain a booklet A5 (+/- 148.5 mm<br />
width x 210 mm height). When folding, make sure you<br />
keep the good numbering when you turn the pages of<br />
the I/B. Don’t change the page numbering. Keep the<br />
language integrity.<br />
algunos ingredientes tal como pasas o virutas de chocolate, aconsejamos utilizar una<br />
balanza de cocina.<br />
En altitud (más de 3000 pi = 914 metros), el agua se evapora más rápidamente y el pan sube<br />
más rápidamente. Por tanto, en altitud, es necesario adaptar las recetas ligeramente,<br />
utilizando un poco de líquido y menos ingredientes secos. El cuadro aquí abajo le da consejos<br />
en función de la altitud.<br />
ALTITUD<br />
Modificación 3000 pi (914m) 5000 pi (1524m) 7000 pi (2133m)<br />
Reducir la levadura: por<br />
cada cucharadita en la<br />
receta, reduzca de<br />
Reducir el azúcar: por<br />
cada cucharada sopera<br />
en la receta, reduzca de<br />
Aumentar la cantidad de<br />
líquido por cada<br />
recipiente de dosificación<br />
en la receta, añada<br />
Ingredientes<br />
1/8 cucharadita 1/8 – 1/4 cucharadita + 1/4 cucharadita<br />
0-1 cucharadita 0-2 cucharadita 1-2 cucharadita<br />
1-2 cucharada<br />
sopera<br />
2-4 cucharadas<br />
soperas<br />
3-4 cucharadas<br />
soperas<br />
La calidad y la frescura son factores importantes para conseguir un buen pan. Respete<br />
absolutamente las cantidades de los ingredientes.<br />
Harina común<br />
La harina común es una mezcla de harinas de trigo blando y duro concebido para la<br />
preparación de panes y pasteles. Aunque este tipo de harina ofrece resultados aceptables<br />
con su aparato, le aconsejamos que utilice la harina para pan.<br />
Harina para pan<br />
La harina para pan es una harina en la que hay mucho gluten (proteínas) que ha sido tratada<br />
con productos que la mejoren y que vuelven la pasta más flexible durante el amasamiento.<br />
Por lo general, la harina para pan tiene más gluten de que la harina común, pero eso puede<br />
variar según los varios métodos de molturación. Se aconseja utilizar la harina para pan para la<br />
cocción con este aparato aunque la harina común le dará resultados aceptables.<br />
Harina de trigo entero<br />
Se fabrica la harina de trigo entero con el grano del trigo completo, que contiene el salvado y<br />
el germen, volviéndola más densa y más rica en nutrimientos que la harina común. Un pan<br />
hecho con esta harina es generalmente menor y más pesado que los panes blancos. Para<br />
paliar esta situación, se mezcla muchas veces la harina de trigo entero con harina común,<br />
para pan o gluten, para producir un pan más alto y ligero.<br />
79 <strong>VG</strong> <strong>BBA</strong> 1 - 110711<br />
Assembly page 79/168
�<br />
Fax +32 2 359 95 50<br />
Harina de centeno<br />
Copies of the I/B. Please reproduce them without any<br />
changes except under special instruction from Team<br />
International BELGIUM. The pages must be reproduced<br />
and folded in order to obtain a booklet A5 (+/- 148.5 mm<br />
width x 210 mm height). When folding, make sure you<br />
keep the good numbering when you turn the pages of<br />
the I/B. Don’t change the page numbering. Keep the<br />
language integrity.<br />
La harina de centeno es rica en fibras similar a la harina de trigo entero. Hay que mezclar<br />
siempre esta harina con grandes cantidades de harina común, para pan o gluten ya que no<br />
contiene gluten en cantidad suficiente para producir una hogaza de pan alta y uniforme.<br />
Gluten<br />
El gluten es la proteína del trigo que vuelve la pasta más elástica. Se encuentra generalmente<br />
gluten en la mayor parte de los negocios de alimentación para la salud o a granel. Se utiliza a<br />
veces en pequeñas porciones, con harinas más densas en gluten, como la harina de trigo<br />
entero, para aumentar el volumen y aliviar la textura.<br />
Harina de pastel<br />
La harina de pastel, que contiene poco gluten / proteína, es especialmente concebida para<br />
las recetas de pasteles. No la aconsejamos para las recetas de pan.<br />
Harina fermentante<br />
La harina fermentante contiene ingredientes de subida inútiles que perjudican la preparación<br />
de panes o de pasteles. No la recomendamos para su aparato.<br />
Salvado<br />
El salvado (no transformado) y el germen de trigo constituyen las partes externas brutas de<br />
granos de trigo o de centeno que se haya separado de la harina. Se les añade generalmente<br />
al pan en pequeñas cantidades para enriquecerlo y darle más gusto y cuerpo. Se les utiliza<br />
también para mejorar la textura del pan.<br />
Sémola de maíz y harina de avena<br />
La sémola de maíz y la harina de avena provienen del maíz blanco o amarillo molido grueso o<br />
de la avena en copos y despuntada. Se les utiliza para mejorar el sabor y la textura del pan.<br />
Trigo machacado<br />
El trigo machacado tiene una textura grosera. Proviene del grano del trigo cortado en<br />
fragmentos angulares. El trigo machacado le da al pan integral un sabor de avellana y una<br />
textura crujiente.<br />
Siete granos<br />
Los siete granos son una mezcla de trigo machacado, de avena, de salvado, de sémola de<br />
maíz, de lino y de mijo.<br />
Levadura<br />
Durante la fermentación, la levadura produce dióxido de carbono, que es necesario para<br />
hacer pan. A fin de producir este gas, a la levadura le hace falta glúcidos que se encuentren<br />
en el azúcar y la harina. Se utiliza la levadura granulada para todas las recetas que requieren<br />
levadura. De hecho, existen 4 tipos de levadura más: fresca, seca, rápida y para máquina de<br />
hacer pan. Le recomendamos que utilice levadura seca común aunque se puede también<br />
80 <strong>VG</strong> <strong>BBA</strong> 1 - 110711<br />
Assembly page 80/168
�<br />
Fax +32 2 359 95 50<br />
Copies of the I/B. Please reproduce them without any<br />
changes except under special instruction from Team<br />
International BELGIUM. The pages must be reproduced<br />
and folded in order to obtain a booklet A5 (+/- 148.5 mm<br />
width x 210 mm height). When folding, make sure you<br />
keep the good numbering when you turn the pages of<br />
the I/B. Don’t change the page numbering. Keep the<br />
language integrity.<br />
utilizar la levadura rápida en cantidad reducida. Las levaduras frescas o apretadas no son<br />
eficaces.<br />
Hay que guardar la levadur a en la nevera para conservar la frescura. Un calor demasiado<br />
elevado la volvería inutilizable. Compruebe la frescura de la levadura verificando la fecha de<br />
caducidad. Después de abrir un embalaje o una caja de levadura, es importante cerrarlos y<br />
refrigerar el resto para un uso ulterior. Muchas veces, cuando el pan o la pasta no suba,<br />
significa que la levadura es vieja. Se puede someterla a la prueba siguiente para comprobar si<br />
es vieja o inactiva:<br />
Vierte ½ recipiente de dosificación de agua del grifo en una pequeña escudilla o una taza.<br />
• Añada o mezcle 1 cucharadita de azúcar, y espolvoree la superficie con 2<br />
cucharaditas de levadura.<br />
• Coloque la escudilla o la taza en un sitio caliente y deje que descanse unos 10<br />
minutos.<br />
• La mezcla debería espumar y emanar un fuerte olor de levadura. Si eso no se<br />
produce, hay que procurarse levadura fresca.<br />
Azúcar<br />
El azúcar desempeña un papel importante en la coloración y el sabor del pan. Interviene<br />
también en la fermentación sirviendo de comida a la levadura. Cuando una receta requiere<br />
azúcar, hay que entender azúcar cristalizada. Salvo indicación contraria, no la reemplace por<br />
azúcar en polvo o terciado. Ya no se pueden utilizar edulcorantes artificiales pues la levadura<br />
no reacciona rápidamente con ellos.<br />
Sal<br />
La sal es necesaria para el equilibrio del sabor de los panes y de los pasteles, así como al color<br />
de la corteza que se desarrolla durante la cocción. Por razones de salud, se puede eliminarlo<br />
completamente. Pero el pan podría hinchar demasiado y subir más que lo normal.<br />
Líquidos/leche<br />
Para hacer pan, se pueden utilizar líquidos como la leche o combinar leche en polvo y agua.<br />
La leche aumenta el sabor, da una textura untuosa y suaviza la corteza, mientras que el agua<br />
solo da una corteza más crujiente. No utilice leche el polvo cuando utilice el minutero de<br />
retardo. Algunas recetas necesitan zumo (naranja, manzana, etc.) para añadir un sabor al<br />
pan.<br />
Huevos<br />
Los huevos dan una textura rica y untuosa a la pasta de los panes y pasteles. No utilice huevos<br />
demasiado gruesos.<br />
Mantequilla, aceite y margarina<br />
La mantequilla, el aceite y la margarina dan a los panes con levadura una textura friable o<br />
tierna. Sin embargo, los panes hechos con mantequilla conservan su frescura más tiempo. Si<br />
se emplea mantequilla o margarina proveniente directamente de la nevera, hace falta<br />
cortarla en trozos pequeños para facilitar la mezcla de ingredientes durante el amasamiento.<br />
Levadura química (baking powder)<br />
La levadura química es un agente de levantamiento utilizado para los pasteles y panes<br />
rápidos. Este tipo de agente de levantamiento no necesita un tiempo de levantamiento antes<br />
81 <strong>VG</strong> <strong>BBA</strong> 1 - 110711<br />
Assembly page 81/168
�<br />
Fax +32 2 359 95 50<br />
Copies of the I/B. Please reproduce them without any<br />
changes except under special instruction from Team<br />
International BELGIUM. The pages must be reproduced<br />
and folded in order to obtain a booklet A5 (+/- 148.5 mm<br />
width x 210 mm height). When folding, make sure you<br />
keep the good numbering when you turn the pages of<br />
the I/B. Don’t change the page numbering. Keep the<br />
language integrity.<br />
de la cocción ya que la reacción química se efectúa cuando se añadan los ingredientes<br />
líquidos.<br />
Bicarbonato sódico<br />
El bicarbonato sódico es otro agente de levantamiento que no haya que confundir ni sustituir<br />
con la levadura química. Tampoco necesita un tiempo de levantamiento antes de la cocción<br />
ya que la reacción química se efectúe durante la misma cocción.<br />
Glaseados especiales para panes con levadura<br />
Escoja uno de los siguientes glaseados para realzar su pan:<br />
Glaseado con huevos: bata juntos 1 grueso huevo y 1 cucharadita de agua. Enjalbegue con<br />
generosidad la pasta sólo antes de cocerla en el horno.<br />
Corteza con mantequilla fundida: enjalbegue con mantequilla fundida un pan recién cocido<br />
para obtener una corteza molde y más tierna.<br />
Glaseado de leche: enjalbegue de leche o de nata un pan recién cocido para obtener una<br />
corteza molde y brillante.<br />
Glaseado de azúcar: mezcla 1 recipiente de dosificación de azúcar para escarchar tamizado<br />
con 1 o 2 cucharaditas de leche para hacer un glaseado consistente, y rociar los panes de<br />
brioche.<br />
Adormidera/sésamo/carvi/sémola de maíz/harina de avena:<br />
Espolvoree con generosidad sus granos preferidos en un pan recién glaseado.<br />
FUNCIONAMIENTO DE LA MÁQUINA DE HACER PAN<br />
PANEL DE MANDOS<br />
Pantalla:<br />
Anuncia el número del programa.<br />
Anuncia el descuento, minuto por minuto, del tiempo de cocción.<br />
Indica un error (código errores "LLL" y "H:HH").<br />
▲ y ▼<br />
Sirven para regular el minutero de cocción retrazada.<br />
Los botones le permiten avanzar el tiempo de10 minutos en 10 minutos.<br />
Para hacer desfilar los minutos más deprisa, mantenga presionado el botón.<br />
Botón MENÚ (1-6/7-12):<br />
Para escoger un programa (cifras de 1 a 12).<br />
Cada vez que pulse este botón hace pasar la visualización al programa siguiente.<br />
Botón START/STOP (0/1)<br />
Para empezar un programa.<br />
Para parar un programa, pulse este botón hasta que la señal acústica le indique que se va<br />
parar el funcionamiento o anular un reglaje del minutero. (Nota: no pulse el botón START/STOP<br />
cuando abra la tapa para vigilar la cocción del pan.)<br />
82 <strong>VG</strong> <strong>BBA</strong> 1 - 110711<br />
Assembly page 82/168
�<br />
Fax +32 2 359 95 50<br />
Copies of the I/B. Please reproduce them without any<br />
changes except under special instruction from Team<br />
International BELGIUM. The pages must be reproduced<br />
and folded in order to obtain a booklet A5 (+/- 148.5 mm<br />
width x 210 mm height). When folding, make sure you<br />
keep the good numbering when you turn the pages of<br />
the I/B. Don’t change the page numbering. Keep the<br />
language integrity.<br />
Botón "corteza" (clara/oscura)<br />
Para escoger la coloración de la corteza (algunos programas no permiten esta elección).<br />
Cada vez que pulse este botón hace pasar la flecha en la pantalla al nivel de coloración<br />
siguiente.<br />
Botón "peso" (450g/680g/900g)<br />
Para escoger el peso de la hogaza (algunos programas no permiten esta elección). Cada vez<br />
que pulse este botón, hace pasar la flecha en la pantalla en el nivel de peso siguiente.<br />
SEÑALES ACÚSTICAS POSIBLES<br />
El aparato emite varias señales.<br />
1 señal larga: el aparato está en funcionamiento.<br />
1 señal corta: se ha pulsado un botón de programación válido.<br />
10 señales cortas durante el funcionamiento: la función "añadir ingredientes" está activada.<br />
12 señales cortas: el programa está terminado.<br />
UTILIZACIÓN<br />
1. Abra la tapa y quite el molde e tirelo del asa ligeramente hacia usted. No vierte nunca<br />
los ingredientes en el molde cuando este se encuentre en el aparato, para no derramar<br />
ingredientes en las partes internas de la cubeta del aparato. Coloque siempre el molde<br />
en una superficie estable.<br />
2. Coloque la amasadora en el eje, en el molde, alineando la parte plana del accesorio<br />
con la parte plana del eje. Asegúrese de que el eje esté exento de residuos de masa y<br />
que la amasadora esté bien colocada. Atención: si la amasadora no está bien<br />
encajada, puede destacarse durante el amasamiento, lo que no sería bueno para la<br />
mezcla. Se recomienda llenar el agujero de la amasadora con margarina resistente al<br />
calor para impedir que la masa adhiera a la amasadora.<br />
3. Escoja una receta entre las descritas en el párrafo “Recetas” de este manual. Siguiendo<br />
las instrucciones:<br />
o Mida los ingredientes como indicado en el párrafo “Dosificación de los<br />
ingredientes”.<br />
o Meta siempre los ingredientes en el molde en el orden indicado en la receta.<br />
o Mezcla siempre la levadura por último. Asegúrese de que no entre en contacto ni<br />
con los ingredientes líquidos, ni con la sal.<br />
4. Vuelva a poner el molde en el aparato. Empujelo hasta engancharlo en el fondo del<br />
aparato.<br />
5. Cierre la tapa y enchufe el aparato. Oirá una señal y “2:50” aparecerá en la pantalla. El<br />
programa inicial (1) aparecerá en la pantalla.<br />
6. Escoja el programa adecuado para la receta pulsando en botón MENÚ del panel de<br />
mandos. Cada vez que se pulse el botón MENÚ, el número de la pantalla se va a la<br />
selección siguiente. Pulse el botón hasta que se oiga una señal.<br />
7. Escoja el peso adecuado de la hogaza pulsando el botón “peso”. Cada vez que pulse<br />
este botón, el punto de visualización pasa de un ciclo a otro.<br />
8. Escoja la intensidad de coloración adecuada para la corteza del pan, pulsando el botón<br />
“corteza”. Cada vez que pulsa en el botón “corteza”, la flecha de vizualisación pasa de<br />
“Claro” a “Oscuro”.<br />
9. Pulse el botón "START/STOP" y mantengalo pulsado durante 3 segundos. La duración de<br />
cocción en horas y en minutos aparece en la pantalla y las luces de la pantalla<br />
83 <strong>VG</strong> <strong>BBA</strong> 1 - 110711<br />
Assembly page 83/168
�<br />
Fax +32 2 359 95 50<br />
Copies of the I/B. Please reproduce them without any<br />
changes except under special instruction from Team<br />
International BELGIUM. The pages must be reproduced<br />
and folded in order to obtain a booklet A5 (+/- 148.5 mm<br />
width x 210 mm height). When folding, make sure you<br />
keep the good numbering when you turn the pages of<br />
the I/B. Don’t change the page numbering. Keep the<br />
language integrity.<br />
empezarán a parpadear. Por ejemplo, si escoja una receta que requiere un programa<br />
“Estándar” (“Basic”) para un pan de 680 gr cuya corteza es de coloración suave, verá<br />
“2:55” en la pantalla. Cuando utiliza los programas “estándar” (“Basic”), “barra”<br />
(“French”), “brioche” (“Sweet”), “trigo entero” (“Wholewheat”) e “sándwich”, se oirán 10<br />
señales durante la cocción para indiquar que puede añadir ingredientes. Abra la tapa y<br />
añada los ingredientes. Cuidado: vapor podria salir cuando abre la tapa.<br />
Nota: Una vez que el botón “start/stop” está presionado, no se puede modificar los<br />
reglajes con los otros botones.<br />
10. Cuando el ciclo haya terminado, se oirán 12 señales. No ponga el molde caliente ni<br />
cualquier objeto sobre el aparato para no dañar la superficie. Si no quiere utilizar la<br />
función para mantener la preparación caliente, pare el programa presionando el botón<br />
“START/STOP” durante 3 secondos. Oirá una señal acústica e la pantalla volverá a indicar<br />
las informaciones iniciales.<br />
11. En cuanto la cocción haya terminado, si no quita el pan inmediatamente de su molde, el<br />
aparato activa la función para mantener la preparación caliente. El aparato mantendrá<br />
el pan caliente durante 60 minutos. Después de 60 minutos, la pantalla indiquerá las<br />
informaciones iniciales. Puede quitar el molde en cualquier momento durante el ciclo de<br />
conservación caliente. Para desactivar esa función antes de los 60 minutos basta con<br />
pulsar el botón “START/STOP” durante 3 secondos. Desenchufe el aparato cuando no lo<br />
use más. Cuidado: con el programa 7 (WHISK), 8 (JAM) y 10 (DOUGH = Pasta), la función<br />
para mantener la preparación caliente no está activada. Para programar 10:<br />
aconsejamos no dejar una pasta terminada por demasiado tiempo en el aparato, ello<br />
puede entrañar malos resultados. Para mejores resultados, quite la pasta después del fin<br />
del ciclo y confórmese a las instrucciones de la receta para la hechura, el descanso y la<br />
cocción.<br />
12. En el aparato se encuentra una ventana que le permite observar el amasamiento, la<br />
mezcla y la cocción. De vez en cuando, puede haber humedad en la ventana durante<br />
la operación. Se puede levantar la tapa para observar la mezcla y el amasamiento pero<br />
NO ABRA LA TAPA DURANTE LA COCCIÓN (más o menos la última hora de ciclo) pues el<br />
pan podría recaer.<br />
13. Para quitar el pan del recipiente de cocción, emplee guantes de cocina y quite el molde<br />
levántelo con el asa. Vierte el recipiente y sacuda para hacer caer el pan en una rejilla<br />
de enfriamiento. Visto que el recipiente tiene un revestimiento antiadherente, el pan<br />
debería salir fácilmente. No utilice utensilios metálicos para sacar el pan, para que no<br />
arañe el revestimiento antiadherente. Si es necesario, utilice una espátula de madera o<br />
de plástico a lo largo de las paredes de molde. Si la espátula se queda encajada debajo<br />
del pan, utilice el gancho suministrado o la extremidad de una cuchara de plástico o de<br />
un utensilio no metálico para quitarla. Cuidado: cuando quite el pan del molde, verifique<br />
siempre dónde se encuentre la amasadora. Si se encuentra en la hogaza de pan, quítela<br />
sin forzar para no dañarla cuando corte el pan.<br />
14. Deje que el pan se enfríe en la rejilla durante al menos 60 minutos antes de cortarlo para<br />
que el vapor se escape. Utilice un buen cuchillo para cortar pan con una hoja dentada o<br />
un cuchillo eléctrico.<br />
UTILIZACIÓN DEL MINUTERO PARA UNA COCCIÓN DIFERIDA<br />
Utilice el minutero para retardar la cocción del pan. Esta función le permite programar la<br />
cocción del pan hasta 13 horas antes. Por ejemplo, puede regular el minutero a las siete de la<br />
tarde y despertarse con el olor del pan a las ocho de la mañana siguiente.<br />
Para regular el minutero, confórmese a las etapas siguientes:<br />
• Cuidado: no utilice el minutero para recetas que requieran ingredientes frescos<br />
perecederos tales como huevo, leche fresca, nata agridulce y queso.<br />
• Determine la hora en la que el pan debe estar pronto y cuente el número de horas<br />
necesarias. Por ejemplo, si son las 8 de la tarde cuando vierte todos los ingredientes en el<br />
molde y que desea obtener un pan recién cocido a las ocho de la mañana, cuente un<br />
84 <strong>VG</strong> <strong>BBA</strong> 1 - 110711<br />
Assembly page 84/168
�<br />
Fax +32 2 359 95 50<br />
Copies of the I/B. Please reproduce them without any<br />
changes except under special instruction from Team<br />
International BELGIUM. The pages must be reproduced<br />
and folded in order to obtain a booklet A5 (+/- 148.5 mm<br />
width x 210 mm height). When folding, make sure you<br />
keep the good numbering when you turn the pages of<br />
the I/B. Don’t change the page numbering. Keep the<br />
language integrity.<br />
total de 12 horas antes que el pan esté pronto. Después de escoger los reglajes en<br />
función de la receta, basta con regular el minutero según el número total de horas – es<br />
decir, en este caso, 12 horas.<br />
• Pulse ▲del panel de mandos y "2:50", el tiempo para este reglaje, aparecerá en la<br />
pantalla. Siga presionando en el botón ▲hasta que aparezca "12:00" en la pantalla.<br />
No es necesario calcular la diferencia entre el tiempo del reglaje (2:50) y el total de horas<br />
deseadas (12:00). El aparato se ajustará automáticamente para incluir el tiempo de<br />
reglaje. Basta con regular el minutero según el número total de horas (12). Si supere las<br />
“12:00”, pulse ▼ para volver. Si sigue pulsando el botón, el tiempo pasará más<br />
rápidamente.<br />
• Cuando haya regulado el tiempo, pulse el botón “START/STOP”. La cuenta atrás va<br />
empezar. En el minutero aparece el tiempo residual minuto por minuto. Cuando el<br />
minutero alcance “0:00”, el pan está pronto y el aparato emite 12 señales acústicas<br />
consecutivas.<br />
• En caso de error de reglaje del minutero, sigue pulsando el botón “START/STOP” hasta que<br />
oiga una señal. El reglaje será anulado y se podrá volver a regular el minutero.<br />
PROBLEMAS<br />
Y SOLUCIONES<br />
Problema Solución<br />
Humo sale de la rejillas de ventilación durante<br />
la cocción.<br />
La harina desborde del molde y cae en la<br />
caja interna del aparato.<br />
Aceite se salío en el elemento calentador.<br />
Desenchufe el aparato, quite el molde y<br />
limpie el elemento calentador con un paño<br />
seco. Cuidado: no se queime.<br />
Desenchufe el aparato y deje que se enfríe.<br />
Seque la caja interna con un paño limpio.<br />
Cuidado cuando limpie los alrededores del<br />
elemento calentador.<br />
La corteza inferior está demasiado espesa. Eso acontece cuando deja el pan<br />
demasiado tiempo en el aparato después de<br />
la cocción. Quite el pan más temprano.<br />
El pan no está cocido correctamente. Asegúrese de que la amasadora esté<br />
correctamente colocada en su eje.<br />
Evite abrir el aparato demasiado a menudo<br />
durante el programa.<br />
Se siente el motor del aparato pero la masa Compruebe que el molde está bien fijado y<br />
no se mezcla.<br />
que la amasadora está correctamente<br />
colocada.<br />
[HOT] aparece en la pantalla. Si aparece después del inicio de un<br />
programa, significa que la temperatura es<br />
demasiado elevada en la caja. Pare el<br />
programa, abra la tapa y deja enfriar unos<br />
10-20 minutos.<br />
[H:HH] o [LLL] aparece en la pantalla. Si aparece después del inicio de un<br />
programa, significa que la temperatura es<br />
demasiado elevada en la caja. Pare el<br />
programa, abra la tapa y deja enfriar unos<br />
10-20 minutos.<br />
Si<br />
no obtiene el resultado deseado, verifique los puntos siguientes:<br />
Atención:<br />
intente una solución a la vez por hogaza de pan.<br />
85 <strong>VG</strong> <strong>BBA</strong> 1 - 110711<br />
Assembly page 85/168
�<br />
Fax +32 2 359 95 50<br />
A) Problemas de medida<br />
Copies of the I/B. Please reproduce them without any<br />
changes except under special instruction from Team<br />
International BELGIUM. The pages must be reproduced<br />
and folded in order to obtain a booklet A5 (+/- 148.5 mm<br />
width x 210 mm height). When folding, make sure you<br />
keep the good numbering when you turn the pages of<br />
the I/B. Don’t change the page numbering. Keep the<br />
language integrity.<br />
Si el pan sube, y luego cae<br />
• Reduzca la cantidad de agua/leche de 2 cucharadas<br />
soperas.<br />
• Aumente la cantidad de sal de 1/4 de cucharadita.<br />
• Reduzca la cantidad<br />
de levadura de 1/4 de cucharadita.<br />
Si el pan sube demasiado<br />
• Reduzca la cantidad de harina de 2 cucharadas soperas.<br />
• Reduzca la cantidad de agua/leche de 2 cucharadas<br />
soperas.<br />
• Aumente la cantidad de sal de 1/4 de cucharadita.<br />
• Reduzca la cantidad de azúcar/miel de 1 cucharadita.<br />
• Reduzca la cantidad<br />
de levadura de 1/4 de cucharadita.<br />
Si el pan no sube bastante<br />
• Aumente la cantidad de agua/leche de 2 cucharadas<br />
soperas.<br />
• Reduzca la cantidad de sal de1/4 de cucharaditas.<br />
• Aumente la cantidad de azúcar/miel de una cucharadita.<br />
• Aumente la cantidad de levadura<br />
de 1/4 de cucharadita.<br />
Si la corteza es demasiado oscura<br />
• Reduzca la cantidad<br />
de azúcar/miel de una cucharadita.<br />
Si el pan no está cocido<br />
• Reduzca la cantidad de agua/leche<br />
de 2 cucharadas soperas.<br />
Si la parte superior del pan no está cocida<br />
• Reduzca la cantidad de harina de 2 cucharadas soperas.<br />
• Aumente la cantidad de agua/leche de 2 cucharadas soperas.<br />
Si la textura<br />
del pan es demasiado pesada o densa<br />
• Reduzca la cantidad de harina de 2 cucharadas soperas.<br />
• Aumente la cantidad de azúcar de una cucharadita.<br />
• Aumente la cantidad de levadura de 1/4 de cucharadita.<br />
B)<br />
Problemas de ingredientes<br />
Si no se trata de un problema<br />
de medida, el problema puede también proceder de los<br />
ingredientes<br />
utilizados.<br />
Si el pan sube, y luego cae<br />
• La harina es demasiado<br />
fina.<br />
Si el pan sube demasiado<br />
• Ha utilizado un tipo de levadura errado.<br />
• Ha olvidado la sal.<br />
Si el pan no sube bastante<br />
• La harina es demasiado vieja.<br />
• La harina no tiene bastante gluten.<br />
• La harina es demasiado fina.<br />
• Ha utilizado un tipo de levadura<br />
errado.<br />
• Ha puesto demasiada sal.<br />
Si el pan es plano, sube poco o no sube<br />
• El líquido es demasiado frío/caliente.<br />
• La harina es demasiado vieja.<br />
• La harina no tiene bastante gluten.<br />
• La harina es demasiado fina.<br />
• Ha olvidado la levadura.<br />
• La levadura está caducada.<br />
• Ha utilizado un tipo de levadura<br />
errado.<br />
86 <strong>VG</strong> <strong>BBA</strong> 1 - 110711<br />
Assembly page 86/168
�<br />
Fax +32 2 359 95 50<br />
• Ha puesto demasiada sal.<br />
• Ha olvidado la sal.<br />
Si los ingredientes no están mezclados<br />
• La harina es demasiado fina.<br />
Si la textura del pan es demasiado pesada o densa<br />
• Ha utilizado un tipo de levadura errado.<br />
LIMPIEZA<br />
Y MANTENIMIENTO<br />
Copies of the I/B. Please reproduce them without any<br />
changes except under special instruction from Team<br />
International BELGIUM. The pages must be reproduced<br />
and folded in order to obtain a booklet A5 (+/- 148.5 mm<br />
width x 210 mm height). When folding, make sure you<br />
keep the good numbering when you turn the pages of<br />
the I/B. Don’t change the page numbering. Keep the<br />
language integrity.<br />
Dese nchufe el aparato y deje que se enfríe totalmente antes de limpiarlo.<br />
1. Molde<br />
Antes de limpiarlo, quítelo del aparato como anteriormente mencionando. Limpie las<br />
partes interna y externa con un paño húmedo. Si es necesario, utilice agua ligeramente<br />
jabonosa para limpiar la parte interna. No utilice objetos que puedan arañar o abrasivos<br />
pues podrían dañar el revestimiento antiadherente. La sustitución de un molde cuyo<br />
revestimiento sería arañado o dañado en este modo no está incluida en la garantía.<br />
Después de cierto tiempo, la apariencia de la superficie antiadherente puede cambiar<br />
por causa de la humedad y del vapor. Es un fenómeno normal y no tiene ninguna<br />
incidencia en sus propiedades y su calidad.<br />
2.<br />
3.<br />
4.<br />
5.<br />
Amasadora<br />
Límpiela con un paño húmedo. Si la amasadora es difícil de destacar del molde, vierte<br />
agua caliente en el molde y espere algunos minutos. El agua dilatará el punto de<br />
conexión de la amasadora y la desbloqueará.<br />
Si la amasadora está sucia, límpiela con<br />
un mondadientes; no arañe la amasadora.<br />
Tapa con ventana<br />
Limpiela con un paño húmedo. No la sumerja en agua o en cualquier otro líquido.<br />
Parte interna<br />
Si es necesario, puede también limpiar la parte interna en la que se sitúa el molde. Utilice<br />
sólo un paño húmedo. Asegúrese de que la parte interna haya totalmente enfriado antes<br />
de limpiarla, y que esté bien seca antes de volver a poner el aparato en marcha.<br />
Cuerpo del aparato<br />
Limpie el cuerpo del aparato<br />
con un paño húmedo. No lo sumerja nunca en el agua o<br />
en cualquier otro líquido.<br />
DESCRIPCIÓN<br />
DE LOS PROGRAMAS Y IDEAS DE RECETAS<br />
FUNCIÓN<br />
MEMORIA<br />
En caso de corte de electricidad, el programa continuerá automáticamente si la electricidad<br />
vuelve a funcionar dentro de 20 minutos. No es necesario pulsar el botón START/STOP. Si el<br />
corte dura más de 20 minutos, la memoria no funcionerá y será necesario volver a programar.<br />
Si el programa estava en la fase del amasamiento, puede simplemente volver a empezar el<br />
mismo programa. Si el programa estava en una de las fases siguientes pero que la cocción no<br />
habia empezado, utilice el programa “Cocción” (BAKE) para cocer la masa. Pero si la<br />
cocción del pan ya habia empezado, aconsejamos empezar desde el inicio con nuevos<br />
ingredientes<br />
porque el ciclo de una hora con el programa “Cocción” podría ser demasiado<br />
largo.<br />
87 <strong>VG</strong> <strong>BBA</strong> 1 - 110711<br />
Assembly page 87/168
�<br />
Fax +32 2 359 95 50<br />
PAN BLANCO ESTÁNDAR<br />
Copies of the I/B. Please reproduce them without any<br />
changes except under special instruction from Team<br />
International BELGIUM. The pages must be reproduced<br />
and folded in order to obtain a booklet A5 (+/- 148.5 mm<br />
width x 210 mm height). When folding, make sure you<br />
keep the good numbering when you turn the pages of<br />
the I/B. Don’t change the page numbering. Keep the<br />
language integrity.<br />
Programa: 1 (Basic) – Coloración de la corteza: clara/oscura – Peso: 450g/680g/ 900g<br />
Utilice el reglaje para panes con harina, aunque ciertas recetas puedan también contener<br />
una pequeña cantidad de trigo entero. Las hogazas serán ligeramente más densas que las<br />
barras o los panes de brioche.<br />
Ingredientes:<br />
450g 680g 900g<br />
2/3 recipiente de<br />
dosificación de agua<br />
1 cucharada sopera de<br />
mantequilla o margarina<br />
1 cucharada sopera de<br />
aceite vegetal<br />
1/3 cucharadita de sal<br />
1 ½ cucharada sopera<br />
de leche en polvo<br />
2 cucharadas soperas de<br />
azúcar<br />
2 recipientes de<br />
dosificación de harina<br />
común o de harina para<br />
pan<br />
1 ¼ cucharaditas de<br />
levadura rápida<br />
1 recipiente de dosificación de<br />
agua<br />
1 cucharada sopera de<br />
mantequilla o margarina<br />
1 ½ cucharada sopera de<br />
aceite vegetal<br />
½ cucharadita de sal<br />
2 cucharadas soperas de<br />
leche en polvo<br />
2 ½ cucharadas soperas de<br />
azúcar<br />
2 ¼ recipientes de dosificación<br />
de harina común o de harina<br />
para pan<br />
1 ¼ cucharaditas de levadura<br />
rápida<br />
1 1/3 recipiente de<br />
dosificación de agua<br />
2 cucharadas soperas de<br />
mantequilla o margarina<br />
2 cucharadas soperas de<br />
aceite vegetal<br />
1 cucharadita de sal<br />
3 cucharadas soperas de<br />
leche en polvo<br />
3 cucharadas soperas de<br />
azúcar<br />
3 ½ recipientes de dosificación<br />
de harina común o de harina<br />
para pan<br />
1 ½ cucharadita de levadura<br />
rápida<br />
1. Mida los ingredientes con precisión y viértelos en el molde, respetando la orden indicada<br />
en la receta (ingredientes líquidos primero).<br />
2. Coloque el molde correctamente en el aparato. Cierre la tapa.<br />
3. Escoja el programa deseado.<br />
4. Escoja la coloración de la corteza deseada.<br />
5. Escoja el peso de la hogaza.<br />
6. Pulse el botón START/STOP.<br />
7. Con guantes de cocina, quite el pan de la máquina después de la cocción.<br />
8. Deje que el pan se enfríe en una rejilla durante al menos una hora antes de cortarlo.<br />
BARRA<br />
Programa: 2 (French) – Coloración de la corteza: clara/oscura – Peso: 450g/680g/ 900g<br />
Generalmente, la barra de pan tiene una corteza más crujiente y una textura interna más<br />
clara que la del pan estándar.<br />
88 <strong>VG</strong> <strong>BBA</strong> 1 - 110711<br />
Assembly page 88/168
�<br />
Ingredientes:<br />
Fax +32 2 359 95 50<br />
Copies of the I/B. Please reproduce them without any<br />
changes except under special instruction from Team<br />
International BELGIUM. The pages must be reproduced<br />
and folded in order to obtain a booklet A5 (+/- 148.5 mm<br />
width x 210 mm height). When folding, make sure you<br />
keep the good numbering when you turn the pages of<br />
the I/B. Don’t change the page numbering. Keep the<br />
language integrity.<br />
450g 680g 900g<br />
1 recipiente de<br />
dosificación de agua<br />
2 cucharadas soperas de<br />
aceite de oliva<br />
1 cucharadita de sal<br />
2 cucharadas soperas de<br />
azúcar<br />
2 recipientes de<br />
dosificación de harina<br />
común o de harina para<br />
pan<br />
1 cucharada sopera de<br />
levadura rápida<br />
1 ¼ recipiente de dosificación<br />
de agua<br />
2 cucharadas soperas de<br />
aceite de oliva<br />
1 ½ cucharadita de sal<br />
2 cucharadas soperas de<br />
azúcar<br />
2 ½ recipientes de dosificación<br />
de harina común o de harina<br />
para pan<br />
1 ¼ cucharaditas de levadura<br />
rápida<br />
1 ½ recipiente de dosificación<br />
de agua<br />
2 cucharadas soperas de<br />
aceite de oliva<br />
2 cucharadita de sal<br />
2 ½ cucharadas soperas de<br />
azúcar<br />
3 ½ recipientes de dosificación<br />
de harina común o de harina<br />
para pan<br />
1 ½ cucharada sopera de<br />
levadura rápida<br />
1. Mida los ingredientes con precisión y viértelos en el molde, respetando la orden indicada<br />
en la receta (ingredientes líquidos primero).<br />
2. Coloque el molde correctamente en el aparato. Cierre la tapa.<br />
3. Escoja el programa deseado.<br />
4. Escoja la coloración de la corteza deseada.<br />
5. Escoja el peso de la hogaza.<br />
6. Pulse el botón START/STOP.<br />
7. Con guantes de cocina, quite el pan de la máquina después de la cocción.<br />
8. Deje que el pan se enfríe en una rejilla durante al menos una hora antes de cortarlo.<br />
PAN DE BRIOCHE<br />
Programa: 3 (Sweet )– Coloración de la corteza: clara/oscura – Peso: 450g/680g/ 900g<br />
Escoja este reglaje para hacer recetas con zumo de fruta, más azúcar o ingredientes<br />
azucarados como cocos rallados, uvas, frutas secas o chocolate.<br />
Ingredientes:<br />
450g 680g 900g<br />
3/4 recipiente de<br />
dosificación de leche<br />
1 ½ cucharada sopera de<br />
mantequilla o margarina<br />
1 huevo<br />
1 cucharadita de sal<br />
1 ½ cucharada sopera de<br />
miel<br />
2 cucharadas soperas de<br />
azúcar<br />
2 recipientes de dosificación<br />
de harina común o de<br />
harina para pan<br />
1/2 cucharadita de<br />
levadura rápida<br />
1 ¼ recipiente de dosificación<br />
de leche<br />
1 ½ cucharada sopera de<br />
mantequilla o margarina<br />
1 huevo<br />
1 cucharadita de sal<br />
1 ½ cucharada sopera de miel<br />
3 cucharadas soperas de<br />
azúcar<br />
3 recipientes de dosificación<br />
de harina común o de harina<br />
para pan<br />
1 cucharadita de levadura<br />
rápida<br />
1 ½ recipiente de dosificación<br />
de leche<br />
2 cucharadas soperas de<br />
mantequilla o margarina<br />
2 huevos<br />
1 cucharadita de sal<br />
2 cucharadas soperas de miel<br />
4 cucharadas soperas de<br />
azúcar<br />
3 ½ recipientes de dosificación<br />
de harina común o de harina<br />
para pan<br />
1 ¼ cucharadita de levadura<br />
rápida<br />
89 <strong>VG</strong> <strong>BBA</strong> 1 - 110711<br />
Assembly page 89/168
�<br />
Fax +32 2 359 95 50<br />
Copies of the I/B. Please reproduce them without any<br />
changes except under special instruction from Team<br />
International BELGIUM. The pages must be reproduced<br />
and folded in order to obtain a booklet A5 (+/- 148.5 mm<br />
width x 210 mm height). When folding, make sure you<br />
keep the good numbering when you turn the pages of<br />
the I/B. Don’t change the page numbering. Keep the<br />
language integrity.<br />
1. Mida los ingredientes con precisión y viértelos en el molde, respetando la orden indicada<br />
en la receta (ingredientes líquidos primero).<br />
2. Coloque el molde correctamente en el aparato. Cierre la tapa.<br />
3. Escoja el programa deseado.<br />
4. Escoja la coloración de la corteza deseada.<br />
5. Escoja el peso de la hogaza.<br />
6. Pulse el botón START/STOP.<br />
7. Con guantes de cocina, quite el pan de la máquina después de la cocción.<br />
8. Deje que el pan se enfríe en una rejilla durante al menos una hora antes de cortarlo.<br />
BIZCOCHO<br />
Programa: 4 (CAKE)<br />
Escoja esta función para hacer la pasta de pastel.<br />
Ingredientes:<br />
8 cucharadas soperas de mantequilla<br />
8 cucharadas soperas de azúcar<br />
5 huevos<br />
1 ½ recipiente de dosificación harina común<br />
1 ½ cucharada sopera de zumo de limón<br />
1 ½ cucharadita de levadura química (baking powder)<br />
Consejo: durante la mezcla, raspe las paredes del recipiente para asegurarse de que la<br />
mezcla sea homogénea.<br />
1. Mida los ingredientes con precisión y viértelos en el molde, respetando la orden indicada<br />
en la receta (ingredientes líquidos primero).<br />
2. Coloque el molde correctamente en el aparato. Cierre la tapa.<br />
3. Escoja el programa deseado.<br />
4. Pulse el botón START/STOP.<br />
5. Con guantes de cocina, quite el bizcocho de la máquina después de la cocción.<br />
6. Deje que el bizcocho se enfríe en una rejilla.<br />
PAN DE TRIGO ENTERO<br />
Programa: 5 (Whole Wheat)– Coloración de la corteza: clara/oscura – Peso: 450g/680g/ 900g<br />
Escoja este reglaje para recetas que incluyan grandes cantidades de harina de trigo entero o<br />
de centeno, avena o salvado.<br />
90 <strong>VG</strong> <strong>BBA</strong> 1 - 110711<br />
Assembly page 90/168
�<br />
Ingredientes:<br />
Fax +32 2 359 95 50<br />
Copies of the I/B. Please reproduce them without any<br />
changes except under special instruction from Team<br />
International BELGIUM. The pages must be reproduced<br />
and folded in order to obtain a booklet A5 (+/- 148.5 mm<br />
width x 210 mm height). When folding, make sure you<br />
keep the good numbering when you turn the pages of<br />
the I/B. Don’t change the page numbering. Keep the<br />
language integrity.<br />
450g 680g 900g<br />
1 recipiente de dosificación de<br />
agua<br />
1 cucharada sopera de<br />
mantequilla o margarina<br />
1 cucharadita de sal<br />
1 cucharadita de azúcar<br />
1 recipiente de dosificación de<br />
harina común o de harina para<br />
pan<br />
1 recipiente de dosificación de<br />
trigo entero<br />
1 cucharadita de levadura<br />
rápida<br />
1 ¼ recipiente de dosificación<br />
de agua<br />
1 ½ cucharada sopera de<br />
mantequilla o margarina<br />
1 cucharadita de sal<br />
1 cucharadita de azúcar<br />
1 1/3 recipiente de dosificación<br />
de harina común o de harina<br />
para pan<br />
1 1/3 recipiente de dosificación<br />
de trigo entero<br />
1 cucharadita de levadura<br />
rápida<br />
1 1/3 recipiente de<br />
dosificación de agua<br />
2 cucharadas soperas de<br />
mantequilla o margarina<br />
1 cucharadita de sal<br />
1 cucharadita de azúcar<br />
1 2/3 recipiente de<br />
dosificación de harina<br />
común o de harina para<br />
pan<br />
1 2/3 recipiente de<br />
dosificación de trigo<br />
entero<br />
1 ¼ cucharadita de<br />
levadura rápida<br />
Nota: a los ingredientes, puede usted añadir 1 ½ cucharada sopera de gluten para aumentar<br />
la altura y mejorar la textura del pan.<br />
1. Mida los ingredientes con precisión y viértelos en el molde, respetando la orden indicada<br />
en la receta (ingredientes líquidos primero).<br />
2. Coloque el molde correctamente en el aparato. Cierre la tapa.<br />
3. Escoja el programa deseado.<br />
4. Escoja la coloración de la corteza deseada.<br />
5. Escoja el peso de la hogaza.<br />
6. Pulse el botón START/STOP.<br />
7. Con guantes de cocina, quite el pan de la máquina después de la cocción.<br />
8. Deje que el pan se enfríe en una rejilla durante al menos una hora antes de cortarlo.<br />
SANDWICH<br />
Programa: 6 – Peso: 450g/680g/ 900g<br />
Ingredientes:<br />
450g 680g 900g<br />
3/4 recipiente de dosificación<br />
de agua<br />
1 cucharada sopera de<br />
mantequilla o margarina<br />
1 cucharadita de sal<br />
¾ cucharada sopera de<br />
azúcar<br />
2 recipientes de dosificación<br />
de harina común o de harina<br />
para pan<br />
1 cucharadita de levadura<br />
rápida<br />
1 recipiente de dosificación de<br />
agua<br />
1 ½ cucharada sopera de<br />
mantequilla o margarina<br />
1 ½ cucharadita de sal<br />
1 cucharada sopera de azúcar<br />
2 ½ recipientes de dosificación<br />
de harina común o de harina<br />
para pan<br />
1 ¼ cucharaditas de levadura<br />
rápida<br />
1 recipiente de dosificación<br />
de agua<br />
2 cucharadas soperas de<br />
mantequilla o margarina<br />
1 ½ cucharadita de sal<br />
1 ½ cucharada sopera de<br />
azúcar<br />
3 ¼ recipientes de<br />
dosificación de harina<br />
común o de harina para pan<br />
1 ½ cucharadita de levadura<br />
rápida<br />
91 <strong>VG</strong> <strong>BBA</strong> 1 - 110711<br />
Assembly page 91/168
�<br />
Fax +32 2 359 95 50<br />
Copies of the I/B. Please reproduce them without any<br />
changes except under special instruction from Team<br />
International BELGIUM. The pages must be reproduced<br />
and folded in order to obtain a booklet A5 (+/- 148.5 mm<br />
width x 210 mm height). When folding, make sure you<br />
keep the good numbering when you turn the pages of<br />
the I/B. Don’t change the page numbering. Keep the<br />
language integrity.<br />
1. Mida los ingredientes con precisión y viértelos en el molde, respetando la orden indicada<br />
en la receta (ingredientes líquidos primero).<br />
2. Coloque el molde correctamente en el aparato. Cierre la tapa.<br />
3. Escoja el programa deseado.<br />
4. Escoja el peso deseado.<br />
5. Pulse el botón START/STOP.<br />
6. Con guantes de cocina, quite el pan de la máquina después de la cocción.<br />
7. Deje que el pan se enfríe en una rejilla durante al menos una hora antes de cortarlo.<br />
AMASAR<br />
Programa: 7 (Whisk)<br />
Este programa permite amasar la masa que se utiliza para hacer envolturas de albondigas y<br />
fideos. El molde no se calienta y no hay que elegir ni color ni peso.<br />
MERMELADA DE FRESAS<br />
Programa: 8 (Jam)<br />
Este programa le permite hacer mermelada fácilmente.<br />
Corte la fruta en pedazos de 1cm. No utilice azúcar normal pero sí azúcar especial para<br />
mermelada que se encuentra en los comercios.<br />
Después de encender el aparato, hay un período de precalentamiento (es decir que el<br />
aparato se activará al final deste tiempo).<br />
Ingredientes:<br />
900g de fresas frescas cortadas en pedazos de 1cm<br />
500g de azúcar especial<br />
1 cucharada sopera de zumo de limón<br />
1. Mida los ingredientes con precisión y viértelos en el molde.<br />
2. Coloque el molde correctamente en el aparato. Cierre la tapa.<br />
3. Escoja el programa deseado.<br />
4. Pulse el botón START/STOP.<br />
5. Con guantes de cocina, quite el molde de la máquina después de la cocción.<br />
6. Vierte la mermelada en un tarro limpio y esterilizado, y ciérrelo con una tapa esterilizada.<br />
Guárdelo en la nevera.<br />
PAN DE YOGUR<br />
Programa: 9 (Yoghourt)<br />
Este programa le permite hacer pan con sabor a yogur.<br />
92 <strong>VG</strong> <strong>BBA</strong> 1 - 110711<br />
Assembly page 92/168
�<br />
Ingredientes:<br />
Fax +32 2 359 95 50<br />
Copies of the I/B. Please reproduce them without any<br />
changes except under special instruction from Team<br />
International BELGIUM. The pages must be reproduced<br />
and folded in order to obtain a booklet A5 (+/- 148.5 mm<br />
width x 210 mm height). When folding, make sure you<br />
keep the good numbering when you turn the pages of<br />
the I/B. Don’t change the page numbering. Keep the<br />
language integrity.<br />
450g 680g 900g<br />
1/3 recipiente de<br />
dosificación de agua<br />
100g yogur<br />
1 cucharada sopera de<br />
aceite vegetal<br />
1/3 cucharadita de sal<br />
1 ½ cucharada sopera de<br />
azúcar<br />
2 recipientes de<br />
dosificación de harina<br />
común o de harina para<br />
pan<br />
1 cucharadita de<br />
levadura rápida<br />
2/3 recipiente de dosificación<br />
de agua<br />
150g yogur<br />
1 ½ cucharada sopera de<br />
aceite vegetal<br />
½ cucharadita de sal<br />
2 cucharadas soperas de<br />
azúcar<br />
2 ¼ recipientes de dosificación<br />
de harina común o de harina<br />
para pan<br />
1 ¼ cucharadita de levadura<br />
rápida<br />
1 recipiente de dosificación de<br />
agua<br />
200g yogur<br />
2 cucharadas soperas de<br />
aceite vegetal<br />
¾ cucharadita de sal<br />
2 ½ cucharadas soperas de<br />
azúcar<br />
3 ½ recipientes de<br />
dosificación de harina común<br />
o de harina para pan<br />
1 ½ cucharadita de levadura<br />
rápida<br />
1. Mida los ingredientes con precisión y viértelos en el molde, respetando la orden indicada<br />
en la receta (ingredientes líquidos primero).<br />
2. Coloque el molde correctamente en el aparato. Cierre la tapa.<br />
3. Escoja el programa deseado.<br />
4. Escoja la coloración de la corteza deseada.<br />
5. Escoja el peso de la hogaza.<br />
6. Pulse el botón START/STOP.<br />
7. Con guantes de cocina, quite el pan de la máquina después de la cocción.<br />
8. Deje que el pan se enfríe en una rejilla durante al menos una hora antes de cortarlo.<br />
MASA PARA PIZZA<br />
Programa: 10 (Dough)<br />
Este ciclo sirve para preparar la masa sin cocer el pan. Con este reglaje, puede preparar<br />
cualquier tipo de masa, que puede trabajar para hacer pizza, panecillos, bretzel, buñuelos,<br />
panes redondos o trenzados que se deben cocer en un horno o freír en una freidora.<br />
Ingredientes:<br />
1 ¼ recipiente de dosificación de agua<br />
½ cucharadita de sal<br />
2 cucharadas soperas de aceite de oliva<br />
2 ½ recipientes de dosificación de harina común o de harina para pan<br />
1 ½ cucharadita de levadura rápida<br />
1. Mida los ingredientes con precisión y viértelos en el molde, respetando la orden indicada<br />
en la receta (ingredientes líquidos primero).<br />
2. Coloque el molde correctamente en el aparato. Cierre la tapa.<br />
3. Escoja el programa deseado. Pulse el botón START/STOP.<br />
4. Después del ciclo terminado, quite la masa del molde.<br />
5. Extenda la masa y deje que suba durante 10 minutos.<br />
6. Vierte la salsa de tomate e coloque los ingredientes deseados en la masa para pizza.<br />
7. Cocine al horno tradicional durante unos 15 minutos a 200°C.<br />
93 <strong>VG</strong> <strong>BBA</strong> 1 - 110711<br />
Assembly page 93/168
�<br />
PAN RÁPIDO<br />
Fax +32 2 359 95 50<br />
Programa 11 (Fast) – Coloración de la corteza: clara/oscura<br />
Copies of the I/B. Please reproduce them without any<br />
changes except under special instruction from Team<br />
International BELGIUM. The pages must be reproduced<br />
and folded in order to obtain a booklet A5 (+/- 148.5 mm<br />
width x 210 mm height). When folding, make sure you<br />
keep the good numbering when you turn the pages of<br />
the I/B. Don’t change the page numbering. Keep the<br />
language integrity.<br />
Utilice esta función para hacer pan rápidamente. Sin embargo, el pan será más denso y<br />
menos alto.<br />
Ingredientes:<br />
1 recipiente de dosificación de agua<br />
2 cucharadas soperas de mantequilla o margarina<br />
1 ½ cucharadita de sal<br />
2 cucharadas soperas de azúcar<br />
1 cucharada sopera de leche en polvo<br />
3 recipientes de dosificación de harina común o para pan<br />
2 cucharadita de levadura rápida<br />
1. Mida los ingredientes con precisión y viértelos en el molde, respetando la orden indicada<br />
en la receta (ingredientes líquidos primero).<br />
2. Coloque el molde correctamente en el aparato. Cierre la tapa.<br />
3. Escoja el programa deseado.<br />
4. Escoja la coloración de la corteza deseada.<br />
5. Pulse el botón START/STOP.<br />
6. Con guantes de cocina, quite el pan de la máquina después de la cocción.<br />
7. Deje que el pan se enfríe en una rejilla durante al menos una hora antes de cortarlo.<br />
COCCIÓN<br />
Programa: 12 (Bake)<br />
Duración del programa: 1:00<br />
Puesto que este programa hace funcionar el aparato en modo cocción durante una hora,<br />
hay que vigilar el proceso. Este programa se puede utilizar cuando: ocurre un corte de<br />
electricidad cuando la pasta suba. Para más informaciones sobre los cortes de electricidad,<br />
refirase al parágrafo “MEMORIA”.<br />
PROTECCIÓN DEL MEDIO AMBIENTE – DIRECTIVA 2002/96/CE<br />
Para poder preservar nuestro medio ambiente y proteger la salud humana, los residuos<br />
eléctricos y equipos electrónicos deberían ser destruidos de acuerdo con unas normas<br />
especificas con la implicación de ambos proveedores y consumidores. Por esta razón, como<br />
indica el símbolo en la placa de datos técnicos, su aparato no debería ser tirado en un<br />
contenedor municipal sino que debería ser devuelto a la tienda, o dejado en un punto de<br />
recolección para ser reciclado o usado para otras aplicaciones conforme a la directiva.<br />
94 <strong>VG</strong> <strong>BBA</strong> 1 - 110711<br />
Assembly page 94/168
�<br />
Fax +32 2 359 95 50<br />
PARA A SUA SEGURANÇA<br />
Copies of the I/B. Please reproduce them without any<br />
changes except under special instruction from Team<br />
International BELGIUM. The pages must be reproduced<br />
and folded in order to obtain a booklet A5 (+/- 148.5 mm<br />
width x 210 mm height). When folding, make sure you<br />
keep the good numbering when you turn the pages of<br />
the I/B. Don’t change the page numbering. Keep the<br />
language integrity.<br />
Antes de utilizar o aparelho leia com sentido de responsabilidade as instruções de<br />
funcionamento e respeite sempre as orientações de segurança e de utilização dadas no<br />
manual das instruções.<br />
Importante: As pessoas (incluídas as crianças) com incapacidades físicas, sensoriais ou<br />
mentais, ou sem experiência ou conhecimento não devem utilizar o aparelho excepto se<br />
estiverem a ser vigiadas por uma pessoa responsável pela sua segurança ou se receberam<br />
previamente instruções relativas ao uso seguro do aparelho.<br />
Convém vigiar as crianças para que elas não brinquem com o aparelho.<br />
� Antes de ligar a ficha do cabo da alimentação à tomada eléctrica certifique-se que a<br />
corrente eléctrica tem a potência igual à indicada na placa sinalética do aparelho.<br />
� Mantenha o aparelho sob vigilância quando em funcionamento.<br />
� Verifique com regularidade o estado do aparelho e em caso de danos leve-o a um<br />
serviço técnico competente para o analisar e reparar(*). Se o cabo da alimentação<br />
estiver danificado este tem de ser obrigatoriamente substituído pelo que deve levar o<br />
aparelho a um serviço técnico competente(*).<br />
� Utilize o aparelho unicamente para os fins domésticos e de acordo com as instruções de<br />
utilização.<br />
� Nunca mergulhe o aparelho em água ou outros líquidos seja porque razão for. Nunca<br />
meta o aparelho na máquina de lavar louça.<br />
� O aparelho ao ser limpo tem de ter o cabo da alimentação retirado da tomada<br />
eléctrica.<br />
� O aparelho não deve ser utilizado ao ar livre e deve ser guardado em locais secos.<br />
� Use sempre os acessórios recomendados pelo fabricante.<br />
� Não retire o cabo da alimentação da tomada eléctrica puxando pelo mesmo, pois<br />
danifica o aparelho e pode provocar a sua queda.Verifique se o cabo da alimentação<br />
não se encontra preso em alguma coisa. Nunca enrole o cabo da alimentação à volta<br />
do aparelho.<br />
� Coloque o aparelho numa mesa ou superfície plana e segura de forma a não permitir a<br />
queda do aparelho.<br />
� A limpeza e o acto de guardar o aparelho são operações a fazer sempre com o<br />
aparelho frio, desligado e com o cabo da alimentação retirado da tomada eléctrica.<br />
� Não deixe que o cabo da alimentação toque nas partes quentes do aparelho. De igual<br />
modo nunca toque nas partes quentes do aparelho.<br />
� Não ponha o aparelho em contacto com coisas inflamáveis como cortinados, panos, …<br />
podendo ocorrer possibilidades de fogo. Mantenha o aparelho afastado dos cortinados no<br />
mínimo um metro.<br />
� Com o aparelho em funcionamento as superfícies ficam com temperaturas elevadas<br />
pelo que não pode tocar nestas partes. Utilize sempre as pegas e os punhos. Após a<br />
utilização do aparelho deixe-o arrefecer completamente antes de o limpar ou guardar.<br />
Quando o símbolo é afixado numa superfície determinada, realça e adverte o<br />
utilizador para: ATENÇÃO, esta superfície pode tornar-se muito quente durante o uso.<br />
� Nunca arranhe o revestimento anti aderente da forma e da lâmina pois se tal acontecer<br />
danifica a cobertura que não deixa agarrar a massa do pão à paredes da forma ou da<br />
lâmina.<br />
� Respeite sempre as quantidades de farinha e do fermento indicadas nas receitas pois se<br />
o não fizer arrisca-se a que a massa saia da forma.<br />
� Nunca cubra o aparelho (por exemplo com panos) já que impedirá a saída do vapor.<br />
95 <strong>VG</strong> <strong>BBA</strong> 1 - 110711<br />
Assembly page 95/168
�<br />
Fax +32 2 359 95 50<br />
Copies of the I/B. Please reproduce them without any<br />
changes except under special instruction from Team<br />
International BELGIUM. The pages must be reproduced<br />
and folded in order to obtain a booklet A5 (+/- 148.5 mm<br />
width x 210 mm height). When folding, make sure you<br />
keep the good numbering when you turn the pages of<br />
the I/B. Don’t change the page numbering. Keep the<br />
language integrity.<br />
� Nunca introduza nenhum utensílio na cuba do aparelho pois deste modo evita choques<br />
eléctricos ou danificar a cuba.<br />
� O aparelho nunca deve ser ligado mediante um temporizador externo ou outro sistema<br />
de comando a distância separado.<br />
(*) Serviço técnico habilitado: serviço técnico do fabricante ou do importador, ou uma<br />
pessoa qualificada, reconhecida e habilitada para evitar qualquer perigo. Em qualquer caso<br />
devolva o aparelho ao serviço técnico.<br />
NOTAS<br />
O cabo da alimentação é bastante curto para diminuir riscos de acidentes como quedas ao<br />
tropeçar o cabo. Se necessário pode utilizar uma extensão mas:<br />
• Confirme que a amperagem da extensão é igual ou superior à exigida pelo<br />
aparelho. Uma extensão que não obedeça aos requesitos do aparelho pode<br />
provocar sobre aquecimentos e dar origem a danos como riscos de incêndio.<br />
• Evite os acidentes verificando que a extensão eléctrica não se encontra presa por<br />
exemplo à perna da mesa ou não arrasta pelo chão.<br />
ANTES DA PRIMEIRA UTILIZAÇÃO<br />
Desembale o aparelho e liberte-o de todos os materiais que o protegem. Lave a tampa, a<br />
cuba e os acessórios com um esfregão não abrasivo e húmido. Seque cuidadosamente tudo<br />
muito bem.<br />
A qualidade do pão que se obtém pode depender de muitos factores pelo que é importante<br />
conhecer todos os ingredientes e as suas combinações. Isto ajudará a obter em cada<br />
preparação um resultado mais de encontro aos resultados esperados.<br />
Temperatura<br />
Todos os ingredientes a serem utilizados no aparelho de cozimento de pão devem estar à<br />
temperatura ambiente. Também o local do cozimento do pão deve estar à mesma<br />
temperatura (entre 15°C e 34°C, de preferência entre 20ºC e 23°C).<br />
Preparação dos ingredientes<br />
• O aparelho vem com uma taça com sinalização de medidas (taça medidora) e uma<br />
colher mista (grande e pequena). Meça os ingredientes só com estes acessórios. As<br />
receitas que apresentamos são preparadas com os acessórios indicados.<br />
• As unidades utilizadas nas receitas são taça medidora e fração da taça medidora. Na<br />
taça medidora temos a unidade « cup ». A unidade « cup » corresponde à taça<br />
medidora (250ml).<br />
• Na colher combinada temos as seguintes marcações:<br />
Table spoon corresponde a uma colher de sopa = 15ml<br />
Teaspoon corresponde a uma colher de café = 5ml<br />
• Para medir os ingredientes líquidos, encha a taça medidora e coloque-a numa superfície<br />
plana. Abaixe-se de maneira a ter os olhos ao mesmo nível da taça medidora. O nível do<br />
líquido tem de estar nivelado com a marca da medida desejada. Uma medida<br />
aproximada não é suficiente e poderia comprometer o equlíbrio da receita.<br />
• Para medir a farinha, encha a taça medidora ligeiramente acima do rebordo e retire o<br />
excedente passando um utensílio liso pelo rebordo. Não calque os alimentos pois tal<br />
permitirá ter quantidades superiores às necessárias. Não peneire a farinha. Para<br />
96 <strong>VG</strong> <strong>BBA</strong> 1 - 110711<br />
Assembly page 96/168
�<br />
Fax +32 2 359 95 50<br />
Copies of the I/B. Please reproduce them without any<br />
changes except under special instruction from Team<br />
International BELGIUM. The pages must be reproduced<br />
and folded in order to obtain a booklet A5 (+/- 148.5 mm<br />
width x 210 mm height). When folding, make sure you<br />
keep the good numbering when you turn the pages of<br />
the I/B. Don’t change the page numbering. Keep the<br />
language integrity.<br />
pequenas quantidades utilize a colher medidora e certifique-se que ela é rasa e não<br />
cheia com alto. Por alguns ingredientes tais como passas de uva ou aparas de<br />
chocolate, è melhor utilizar uma balança de cozinha.<br />
Posição geográfica<br />
Em altitude (mais de 3000 pi = 914 metros) a água evapora-se mais depressa e o pão tem<br />
uma fermentação mais rápida. Por esta razão em altitude é preciso adaptar ligeiramente as<br />
receitas utilizando um pouco mais de líquidos e menos ingredientes secos. O quadro que<br />
apresentamos dá alguns conselhos em função da altitude.<br />
ALTITUDE<br />
Modificação 3000 pi (914m) 5000 pi (1524m) 7000 pi (2133m)<br />
Redução do fermento:<br />
por cada colher das de<br />
café na receita reduzir em<br />
Redução do açúcar: Por<br />
cada colher das de sopa<br />
na receita reduzir em<br />
Aumentar o liquidido: por<br />
cada taça na receita<br />
aumentar:<br />
Ingredientes<br />
1/8 da colher de<br />
café<br />
0-1 da colher<br />
decafé<br />
1-2 da colher de<br />
sopa<br />
1/8 – 1/4 da colher<br />
de café<br />
0-2 da colher de café<br />
2-4 da colher de<br />
sopa<br />
+ 1/4 da colher de<br />
café<br />
1-2 da colher de<br />
café<br />
3-4 da colher de<br />
sopa<br />
O factor delicado para a obtenção do pão desejado está na qualidade e frescura dos<br />
alimentos. Tenha também em atenção que as quantidades dos ingredientes devem ser<br />
obrigatoriamente respeitados.<br />
Farinha para toda a utilização<br />
A farinha para toda a utilização é uma mistura de farinhas de trigo fina e dura especialmente<br />
concebida para a preparação do pão e bolos. Ainda que esta fainha permita bons<br />
resultados na preparação do pão com o vosso aparelho aconselha-se a utilização da farinha<br />
para pão.<br />
Farinha para pão<br />
A farinha para pão tem um elevado teor de gluten/proteína que foi tratado com<br />
melhoramentos que tornam a massa mais tolerante durante a amassadura. Habitualmente, a<br />
farinha para pão tem uma concentração em gluten mais elevada que a farinha para todas<br />
as utilizações o que pode todavia variar segundo os diferentes métodos de moagem.<br />
Recomenda-se a farinha para pão na utilização deste aparelho ainda que a farinha para<br />
todas as utilizações permita resultados aceitáveis.<br />
Farinha de trigo sem mistura<br />
A farinha de trigo sem mistura é obtida a partir da semente do trigo com o farelo e o miolo<br />
tornando-a mais densa e mais rica em nutrientes que a farinha para todas as utilizações. Um<br />
pão feito com farinha de trigo sem mistura é geralmente mais pequeno e mais pesado que os<br />
pães brancos. Para atenuar esta situação, muitas vezes mistura-se a farinha de trigo sem<br />
mistura com a farinha para todas as utilizações, com a farinha para pão ou de gluten para se<br />
obter um pão mais alto e mais ligeiro.<br />
97 <strong>VG</strong> <strong>BBA</strong> 1 - 110711<br />
Assembly page 97/168
�<br />
Fax +32 2 359 95 50<br />
Farinha de centeio<br />
Copies of the I/B. Please reproduce them without any<br />
changes except under special instruction from Team<br />
International BELGIUM. The pages must be reproduced<br />
and folded in order to obtain a booklet A5 (+/- 148.5 mm<br />
width x 210 mm height). When folding, make sure you<br />
keep the good numbering when you turn the pages of<br />
the I/B. Don’t change the page numbering. Keep the<br />
language integrity.<br />
A farinha de centeio é uma farinha rica em fibras similares à da farinha de trigo sem mistura. É<br />
sempre necessário misturar a farinha de centeio com grandes quantidades de farinha para<br />
todas as utilizações, farinha para pão ou gluten já que não contém gluten suficiente para<br />
obter um pão grande, alto e uniforme.<br />
Gluten<br />
O gluten é a proteína do trigo que dá a elasticidade à massa. Encontramo-lo normalmente<br />
nas lojas de alimentação dirigidos à saúde. Utiliza-se por vezes em pequenas porções, em<br />
farinhas densas, com fraco teor em gluten, como a farinha de trigo sem mistura, para<br />
aumentar o volume e tornar a textura mais leve.<br />
Farinha para bolos<br />
A farinha para bolos, que contem um pouco de gluten/proteína, é especialmente concebida<br />
para receitas para bolos. Esta farinha não é recomendada para receitas para pão.<br />
Farinha com fermentos<br />
A farinha com fermentos contém ingredientes com fermentos inúteis que prejudicam a<br />
preparação do pão e dos bolos. Não a recomendamos para a utilização do aparelho.<br />
Farelo<br />
O farelo (não transformado) e a casca do trigo constituem as partes exteriores dos grãos do<br />
trigo ou do centeio quando se separa a farinha. Por vezes juntamo-las ao pão em pequenas<br />
quantidades para o enriquecer, lhe dar gosto ou volume. Também se utilizam para melhorar a<br />
textura do pão.<br />
Sémola de milho e farinha de aveia<br />
A sémola do milho e a farinha de aveia obtêm-se do milho branco ou amarelo e da aveia em<br />
flocos ou partida. Utiliza-se para melhorar o sabor e a textura do pão.<br />
Trigo partido<br />
O trigo partido tem uma textura grosseira. Ele obtém-se da semente do trigo cortado em<br />
fragmentos angulares. O trigo partido dá ao pão um sabor a avelã e uma textura<br />
quebradiça.<br />
Mistura com sete sementes<br />
A mistura com sete sementes é uma mistura de trigo moído, aveia, farelo, centeio, sémola de<br />
milho e do milho miúdo.<br />
Fermento<br />
No momento da fermentação, o fermento produz dióxido de carbons que é necessário à<br />
preparação do pão. Para que este gaz se produza, o fermento precisa de glícidos que estão<br />
no açúcar e na farinha. Utiliza-se o fermento granulado activo em todas as receitas que<br />
exigem fermento. Contudo existem mais quatro tipos de fermentos: fresco, seco, de acção<br />
rápida e para os aparelhos de preparação de pão. Recomendamos a utilização do fermento<br />
98 <strong>VG</strong> <strong>BBA</strong> 1 - 110711<br />
Assembly page 98/168
�<br />
Fax +32 2 359 95 50<br />
Copies of the I/B. Please reproduce them without any<br />
changes except under special instruction from Team<br />
International BELGIUM. The pages must be reproduced<br />
and folded in order to obtain a booklet A5 (+/- 148.5 mm<br />
width x 210 mm height). When folding, make sure you<br />
keep the good numbering when you turn the pages of<br />
the I/B. Don’t change the page numbering. Keep the<br />
language integrity.<br />
tradicional seco se bem que se possa também utilizar o fermento de acção rápida mas em<br />
quantidades reduzidas.<br />
Os fermentos frescos ou compactos não garantem bons resultados.<br />
É preciso guardar sempre o fermento no frigorífico para o manter fresco. Um grande calor<br />
torna-o inutilizável. A frescura do fermento também tem de ser confirmada pela leitura da<br />
data da validade. Uma vez aberta uma embalagem ou uma caixa com fermento, é<br />
importante voltar a embalá-la e colocá-la de imediato no frigorífico para posterior utilização.<br />
Muitas vezes o pão ou a massa não fermenta porque o fermento tem muito tempo. Pode-se<br />
verificar se o fermento perdeu qualidades fazendo o seguinte teste:<br />
Verta ½ da taça medidora com água da torneira numa pequena taça ou chávena.<br />
• Junte e mexa uma colher de café com açúcar, salpique a superfície com duas<br />
colheres de café com fermento.<br />
• Coloque a taça ou a chávena num local quente e deixe reposar cerca de 10<br />
minutos.<br />
• A mistura deve espumar e libertar um forte cheiro a fermento. Se tal não acontecer<br />
é preciso comprar fermento fresco.<br />
Açúcar<br />
O açúcar desempenha um papel importante na coloração e sabor do pão. Também<br />
intervem no processo da fermentação alimentando-o. Sempre que uma receita exija açúcar,<br />
fala-se do açúcar cristalizado. Salvo indicação contrária, não o substitua por açúcar em pó<br />
ou açúcar mascavado. Nunca se devem utilizar adocicantes artificiais já que o fermento<br />
reage mal a eles.<br />
Sal<br />
O sal é necessário ao equilibrio do sabor dos pães e dos bolos bem como à cor da côdea<br />
que o pão desenvolve na cozedura. Por razões de saúde pode-se eliminar por completo o sal.<br />
O pão poderá todavia aumentar bastante de volume e em altura mais que o normal.<br />
Líquidos/leite<br />
Para fazer o pão pode-se utilizar líquidos como o leite ou juntar leite em pó com água. O leite<br />
acentua o sabor, fornece uma textura aveludada e um polimento à textura enquanto a água<br />
permite uma côdea mais estaladiça. Certas receitas exigem sumos (de laranja, de maçã,<br />
etc.) para dar gosto ao pão.<br />
Ovos<br />
Os ovos dão uma textura rica e aveludada à massa do pão e dos bolos. Não utilize ovos de<br />
grandes dimensões.<br />
Manteiga, óleo e margarina<br />
A manteiga, o óleo e a margarina dão aos pães a levedar uma textura quebradiça ou mole.<br />
Atribui-se a côdea e a textura únicas do pão francês à não utilização da manteiga nas<br />
receitas. Todavia os pães feitos com manteiga conservam a sua frescura por muito mais<br />
tempo. Se utilizarmos a manteiga ou a margarina saída directamente do frigorífico temos de<br />
a cortar em pequenos pedaços para facilitar a mistura dos ingredientes durante a<br />
amasadura.<br />
99 <strong>VG</strong> <strong>BBA</strong> 1 - 110711<br />
Assembly page 99/168
�<br />
Fax +32 2 359 95 50<br />
Fermento químico (baking powder)<br />
Copies of the I/B. Please reproduce them without any<br />
changes except under special instruction from Team<br />
International BELGIUM. The pages must be reproduced<br />
and folded in order to obtain a booklet A5 (+/- 148.5 mm<br />
width x 210 mm height). When folding, make sure you<br />
keep the good numbering when you turn the pages of<br />
the I/B. Don’t change the page numbering. Keep the<br />
language integrity.<br />
A fermento químico é um agente de fermentação utilizado na preparação rápida de bolos e<br />
de pão. Este agente de fermentação não necessita de tempo para fermentar antes da<br />
cozedura já que a reacção química ocorre assim que se adicionam os ingredientes líquidos.<br />
Bicarbonato de sódio<br />
O bicarbonato de sódio é um agente de fermentação que não deve ser confundido nem<br />
substituído pelo fermento químico. Não necessita de tempo para fermentar antes da<br />
cozedura já que a reacção química se faz durante a cozedura.<br />
Coberturas especiais para o pão a fermentar<br />
Escolha uma das coberturas que indicamos para fazer destacar o pão:<br />
Cobertura com ovos: bater ao mesmo tempo um ovo grande com uma colher de café com<br />
água. Pincelar cuidadosamente a massa apenas antes de a colocar a cozer no forno já<br />
preparado para a cozedura.<br />
Crosta com manteiga derretida: pincelar com manteiga derretida o pão acabado de cozer<br />
para obter uma crosta mole e tenra.<br />
Cobertura com leite: pincelar com leite ou creme o pão acabado de cozer para obter uma<br />
crosta mole e brilhante.<br />
Cobertura açucarada: misturar uma taça medidora de açúcar cristalizado com uma ou duas<br />
colheres de café com leite para fazer uma cobertura consistente e coloque-a por cima do<br />
pão.<br />
Sementes de dormideira/sésamo/carvi/sémola de milho/farinha de aveia:<br />
Salpique a gosto, por cima do pão, com as sementes preferidas a cobertura feita sobre um<br />
pão acabado de cozer.<br />
FUNCIONAMENTO DA MÁQUINA PARA COZER PÃO<br />
PAINEL DOS COMANDOS<br />
Ecrã:<br />
Mostra o número do programa.<br />
Mostra o tempo em falta para terminar a cozedura minuto a minuto.<br />
Indica erros (códigos em "LLL" e "H:HH").<br />
▲ e ▼<br />
Servem para regular o temporizador da cozedura diferida.<br />
Os botões permitem diferir o tempo em periodizações de 10 minutos.<br />
Para diferir mais depressa, mantenha o botão comprimido.<br />
Tecla MENU (1-6/7-12):<br />
Permite escolher um dos 12 programas (algarismos de 1 a 12).<br />
Por cada vez que se comprime a tecla passa-se ao programa seguinte.<br />
100 <strong>VG</strong> <strong>BBA</strong> 1 - 110711<br />
Assembly page 100/168
�<br />
Fax +32 2 359 95 50<br />
Copies of the I/B. Please reproduce them without any<br />
changes except under special instruction from Team<br />
International BELGIUM. The pages must be reproduced<br />
and folded in order to obtain a booklet A5 (+/- 148.5 mm<br />
width x 210 mm height). When folding, make sure you<br />
keep the good numbering when you turn the pages of<br />
the I/B. Don’t change the page numbering. Keep the<br />
language integrity.<br />
Tecla START/STOP (0/1)<br />
Permite dar inicio ao funcionamento de um programa.<br />
Para interromper um programa, comprima e mantenha a tecla comprimida até ouvir um som<br />
acústico que assinala que o aparelho desligou ou anulou uma regulação feita no<br />
temporizador. (Atenção: nunca comprima o START/STOP quando abrir a tampa para ver a<br />
cozedura do pão.)<br />
Tecla "coloração" (clara/escura)<br />
Comprima esta tecla para escolher a coloração da côdea (certos programas não permitem<br />
esta escolha). Por cada apoio da tecla, a seta no ecrã passa para a coloração da côdea<br />
seguinte.<br />
Tecla "peso" (450g/680g/900g)<br />
Permite escolher o peso do pão (certos programas não permitem esta escolha ). Por cada<br />
apoio da tecla surge no ecrã o peso seguinte.<br />
POSSÍVEIS BIPS SONOROS<br />
O aparelho emite vários tipos de sinais sonoros.<br />
1 sinal longo: o aparelho está em funcionamento.<br />
1 sinal curto: Foi comprimida uma tecla da programação válida.<br />
10 sinais curtos consecutivos: A função "adicionar ingredientes" está activada.<br />
12 sinais curtos: o programa terminou.<br />
UTILIZAÇÃO<br />
1. Abra a tampa e retire a forma do pão e puxe-o ligeiramente pela asa na vossa direcção.<br />
Nunca verta os ingredientes na forma com esta no aparelho para se evitar derrames<br />
para a cuba do interior do aparelho. Poise sempre a forma do pão sobre uma superfície<br />
plana e estável.<br />
2. Instale o amassador no eixo do interior da forma alinhando a parte plana do acessório<br />
com a parte plana do eixo. Certifique-se que o eixo esteja limpo de qualquer resíduo de<br />
massa e que o amassador esteja bem fixo. Atenção que se o amassador não estiver bem<br />
colocado ele pode-se desencaixar durante a amassadura o que afectaria a mistura.<br />
Recomenda-se o enchimento dos buracos do amassador com margarina consistente<br />
para evitar que a massa se agarre às varas do amassador.<br />
3. Escolha uma receita entre as descritas nos parágrafos “Receitas” do manual das<br />
instruções da utilização do aparelho. Siga a receita:<br />
o Meça os ingredientes como se indicou no parágrafo “Medida dos ingredientes”.<br />
o Verta sempre os ingredientes na forma seguindo a ordem indicada na receita.<br />
o Coloque sempre o fermento em último lugar. Certifique-se que o fermento não entra<br />
em contacto com os ingredientes líquidos.<br />
4. Volte a colocar a forma na cuba do aparelho. Introduza a forma até que fique<br />
encaixada no fondo do aparelho.<br />
5. Feche a tampa e ligue o aparelho. Um sinal sonoro ouvir-se-à e surgirá no ecrã "2:50". O<br />
programa inicial 1 aparecerá no ecrã.<br />
6. Escolha o programa apropriado à receita comprimindo a tecla "MENU" no painel dos<br />
comandos. Por cada vez que a tecla "MENU" for pressionada surge no ecrã o número<br />
seguinte da regulação. Prima o botão até se ouvir um bip.<br />
101 <strong>VG</strong> <strong>BBA</strong> 1 - 110711<br />
Assembly page 101/168
�<br />
Fax +32 2 359 95 50<br />
Copies of the I/B. Please reproduce them without any<br />
changes except under special instruction from Team<br />
International BELGIUM. The pages must be reproduced<br />
and folded in order to obtain a booklet A5 (+/- 148.5 mm<br />
width x 210 mm height). When folding, make sure you<br />
keep the good numbering when you turn the pages of<br />
the I/B. Don’t change the page numbering. Keep the<br />
language integrity.<br />
7. Escolha o peso apropriado do pão comprimindo a tecla "peso". Por cada vez que<br />
comprimir esta tecla surge no ecrã um novo ciclo.<br />
8. Escolha a intensidade da coloração para a côdea do pão comprimindo a tecla<br />
"coloração". Por cada vez que comprimir a tecla "coloração" a seta no ecrã passa de<br />
"Clara" a "Escura".<br />
9. Comprima a tecla "START/STOP" e mantenha durante 3 segundos. A duração da<br />
cozedura do pão, em horas e minutos, aparecem no ecrã e as luzes do LCD começam a<br />
piscar. Por exemplo se escolher uma receita que exija o programa "Standard" ("Basic")<br />
para um pão com 680g cuja côdea seja clara, aparecerá no ecrã "2:55". Até que o pão<br />
esteja cozido, vai aparecendo no ecrã o tempo que falta para terminar a cozedura que<br />
decrece minuto a minuto. Quando utilizar os programas “standard” (“Basic”), “francês”<br />
(“French”), “brioché” (“Sweet”), “de trigo sem mistura” (“Wholewheat”) ou “sandwich”,<br />
ouvir-se-à 10 sinais sonoros durante a cozedura para indicar que se pode adicionar<br />
ingredientes. Abra a tampa e adicione os ingredientes. Atenção: o vapor poderia sair ao<br />
abrir a tampa.<br />
Nota: Uma vez a tecla START/STOP for carregada, è impossível modificar as regulações<br />
com a ajuda das outras teclas.<br />
10. Uma vez terminado o ciclo ouvir-se-à 12 sinais sonoros. Não pouse a forma quente ou<br />
nem outros objectos na parte superior do aparelho para não danificar a superfície. Se<br />
não quiser utilizar a função da manutenção do aquecimento, pare o programa<br />
carregando 3 segundos na tecla START/STOP. Ouvir-se-á um sinal sonoro e no ecrã<br />
aparecem as indicações iniciais.<br />
11. Assim que a cozedura termina, se não retirar de imediato o pão da forma e não<br />
carregua na tecla START/STOP, o aparelho activa a função da manutenção do<br />
aquecimento. O aparelho manterá o pão quente durante 60 minutos. Ao fim dos 60<br />
minutos, no ecrã aparecerão as indicações iniciais. A forma com o pão pode ser retirada<br />
se o quizer a qualquer momento do ciclo da manutenção do “aquecimento”. Para<br />
desactivar esta função antes de terminar os 60 minutos, basta comprimir sobre o botão<br />
"START/STOP" e de a manter pressionada até que um sinal sonoro se oiça como<br />
precedentemente descrito. Retire o cabo da alimentação da tomada eléctrica.<br />
Atenção: com o programa 7 (WHISK), 8 (JAM) ou 10 (DOUGH = "Massa"), a função de<br />
manter aquecido não se activa. Para o programa 10, aconselhamos não deixar a massa<br />
terminada por muito tempo no aparelho porque pode fermentar demasiado e produzir<br />
maus resultados. Para obter melhores resultados retire a massa no fim do ciclo e siga os<br />
conselhos da receita para a fabricação, reposo e cozedura.<br />
12. O aparelho trás uma janela para se poder observar a amassadura, a mistura e a<br />
cozedura. Uma vez por outra pode-se formar humidade na janela. Pode-se levantar a<br />
tampa para verificar a mistura e a amassadura mas É EXPRESSAMENTE PROÍBIDO ABRIR A<br />
TAMPA DURANTE A COZEDURA (mais ou menos na última hora do ciclo) pois o pão<br />
poderia estragar-se.<br />
13. Para retirar o pão da forma utilize os punhos ou as luvas da cozinha e tire a asa da forma<br />
para si. Vire a forma ao contrário e sacuda-o de forma que o pão caia na grelha de<br />
arrefecimento. Como a forma possui um revestimento antiaderente o pão sairá mais<br />
facilmente. Nunca utilize utensílios de metal para retirar o pão de forma a evitar danificar<br />
o revestimento antiaderente. Se necessário, utilize uma espátula de madeira ou de<br />
plástica para retirar o pão das paredes da forma. Se a espátula ficar presa por baixo do<br />
pão, utilize o gancho fornecido com o aparelho ou uma colher de plástico ou um<br />
utensílio não metálico para libertá-la. Atenção: no momento da altura quando se retira o<br />
pão da forma verifique sempre onde está o amassador. Se ele se encontra na massa do<br />
pão retire-o com cuidado sem o danificar quando cortar o pão.<br />
14. Deixe arrefecer o pão na grelha durante 30 a 60 minutos antes de o cortar para deixar<br />
escapar o vapor. Utilize uma boa faca para cortar o pão com lâmina dentada ou faca<br />
eléctrica.<br />
102 <strong>VG</strong> <strong>BBA</strong> 1 - 110711<br />
Assembly page 102/168
�<br />
Fax +32 2 359 95 50<br />
UTILIZAÇÃO DO TEMPORIZADOR PARA A COZEDURA DIFERIDA<br />
Copies of the I/B. Please reproduce them without any<br />
changes except under special instruction from Team<br />
International BELGIUM. The pages must be reproduced<br />
and folded in order to obtain a booklet A5 (+/- 148.5 mm<br />
width x 210 mm height). When folding, make sure you<br />
keep the good numbering when you turn the pages of<br />
the I/B. Don’t change the page numbering. Keep the<br />
language integrity.<br />
Utilise o temporizador para diferir a cozedura do pão. Esta função permite regular a cozedura<br />
do pão até 13 horas de deferimento. Por exemplo, podemos regular o temporizador às 19<br />
horas da noite e acordar no dia seguinte com o cheiro a pão fresco às 8 horas da manhã.<br />
Para regular o temporizador siga os seguintes passos:<br />
• Atenção: não utilize o temporizador para as receitas que exijam ingredientes frescos com<br />
datas de validade como ovos, leite fresco, creme açucarado e queijo.<br />
• Escolha a hora para a qual pretende ter o pão pronto e conte as horas que são<br />
necessárias para a cozedura. Por exemplo, se forem às 20 horas na altura de colocar os<br />
ingredeientes na forma e se pretender ter um pão fresco cozido às 8 horas do dia<br />
seguinte, conte um total de antecipação de 12 horas para obter o pão cozido. Uma vez<br />
selecionada as regulações de acordo com as receitas basta regular o temporizador para<br />
o total das horas – para o nosso exemplo 12 horas.<br />
• Carregue na tecla ▲ do painel dos comandos e "2:50", o tempo para esta regulação<br />
aparecerá no ecrã. Continue a premir a tecla ▲ até que apareça "12:00" no ecrã.<br />
Não é necessário calcular a diferença entre o tempo de regulação (2:50) e o total das<br />
horas desejadas (12:00). O aparelho ajustará automaticamente ao tempo total de<br />
funcionamento o tempo da regulação (2:50 horas). Assim é suficiente regular o<br />
temporizador com 12:00 horas. Caso ultrapasse as "12:00" horas, prima sobre ▼ para<br />
voltar para trás. Se mantiver a tecla comprimida o tempo a selecionar aparecerá mais<br />
rápido.<br />
• A partir do momento em que o tempo esteja regulado no temporizador prima a tecla<br />
"START/STOP". Iniciou a contagem do tempo para que o pão seja cozido. No ecrã irá<br />
aparecendo a indicação do tempo que falta, minuto a minuto, para que o que o pão<br />
fique pronto a ser servido. Assim que o tempo regulado no temporizador chegue ao fim,<br />
surge no ecrã “0:00”, o pão está cozido e o aparelho emite 12 sinais sonoros<br />
consecutivos.<br />
• Em caso de erro na regulação do tempo no temporizador, mantenha a tecla<br />
"START/STOP" comprimida até que um bip se faça ouvir. A regulação será anulada e<br />
poderá voltar a regular o tempo no temporizador.<br />
PROBLEMAS<br />
E SOLUÇÕES<br />
Problema Solução<br />
Fumo sai das grelhas de ventilação durante a<br />
cozedura.<br />
A farinha transbordou do molde e caiu na<br />
cuba do aparelho.<br />
Óleo gotejou no elemento aquecedor.<br />
Desligue o aparelho, retire a forma e limpe o<br />
elemento aquecedor com um pano seco.<br />
Evite queimaduras.<br />
Desligue o aparelho, retire o cabo da<br />
alimentação da tomada eléctrica e deixe<br />
arrefecer muito bem o aparelho. Limpe a<br />
cuba com um esfregão não abrasivo. Seja<br />
prudente quando limpa à volta da<br />
resistência.<br />
A côdea inferior está demasiado espessa. Pode acontecer se deixar o pão demasiado<br />
tempo no aparelho depois da cozedura.<br />
Retire o pão mais cedo.<br />
O pão não cozeu bem. Verifique que o amassador está bem fixo no<br />
eixo. Evite abrir o aparelho demasiado<br />
frequentemente durante o programa.<br />
103 <strong>VG</strong> <strong>BBA</strong> 1 - 110711<br />
Assembly page 103/168
�<br />
Fax +32 2 359 95 50<br />
Copies of the I/B. Please reproduce them without any<br />
changes except under special instruction from Team<br />
International BELGIUM. The pages must be reproduced<br />
and folded in order to obtain a booklet A5 (+/- 148.5 mm<br />
width x 210 mm height). When folding, make sure you<br />
keep the good numbering when you turn the pages of<br />
the I/B. Don’t change the page numbering. Keep the<br />
language integrity.<br />
Ouve-se o motor mas a massa não se mescla. Verifique que a forma está bem fixo<br />
e que o<br />
amasador está bem colocado.<br />
[HOT] surge no ecrã.<br />
Se HOT surgir no ecrã depois de ter<br />
carregado em START/STOP significa que a<br />
temperatura na cuba está demasiado<br />
elevada. Abra a tampa e retire a forma para<br />
deixar arrefecer<br />
o aparelho durante 10-20<br />
minutos.<br />
[H:HH] ou [LLL] surge no ecrã.<br />
Se H:HH ou LLL surgir no ecrã depois do inicio<br />
dum programa significa que a temperatura<br />
na cuba está demasiado elevada. Abra a<br />
tampa e retire a forma para deixar arrefecer<br />
o aparelho durante 10-20 minutos.<br />
Se não obteve o resultado pretendido leia os seguintes pontos.<br />
Atenção:procure<br />
uma solução para cada tipo de pão!<br />
A)<br />
Problemas de medida<br />
Se o pão fermenta e regride<br />
• Reduza a quantidade da água/leite em 2 colheres de sopa.<br />
• Aumente a quantidade de sal em 1/4 colher de café.<br />
• Reduza a quantidade de fermento<br />
em 1/4 colher de café.<br />
Se o pão fermenta demasiado para o alto<br />
• Reduza a quantidade da farinha em 2 colheres da sopa.<br />
• Reduza a quantidade da água/leite em 2 colheres da sopa.<br />
• Aumente a quantidade de sal em 1/4 colher de café.<br />
• Reduza a quantidade de açúcar/mel em uma colher de café.<br />
• Reduza a quantidade de fermento<br />
em 1/4 colher de café.<br />
Se o pão não fermenta o suficiente<br />
• Aumente a quantidade da água/leite em 2 colheres de<br />
sopa.<br />
• Reduza a quantidade de sal em 1/4 colher de café.<br />
• Aumente a quantidade de açúcar/mel em uma colher de café.<br />
• Aumente a quantidade de fermento em 1/4 colher de café.<br />
Se a côdea estiver muito escura<br />
• Reduza a quantidade<br />
de açúcar/mel em uma colher de café.<br />
Se o pão não está cozido<br />
• Reduza a quantidade da água/leite em duas colheres de sopa.<br />
Se a parte de cima do pão não está cozida<br />
• Reduza a quantidade de farinha em 2 colheres de sopa.<br />
• Aumente a quantidade de água/leite em 2 colheres de sopa.<br />
Se a textura do pão é muito pesada oumuito denso<br />
• Reduza a quantidade da farinha em 2 colheres de sopa.<br />
• Aumente a quantidade de açúcar em uma colher de café.<br />
• Aumente a quantidade de fermente em 1/4 colher de café.<br />
104 <strong>VG</strong> <strong>BBA</strong> 1 - 110711<br />
Assembly page 104/168
�<br />
Fax +32 2 359 95 50<br />
B) Problemas de ingredientes<br />
Copies of the I/B. Please reproduce them without any<br />
changes except under special instruction from Team<br />
International BELGIUM. The pages must be reproduced<br />
and folded in order to obtain a booklet A5 (+/- 148.5 mm<br />
width x 210 mm height). When folding, make sure you<br />
keep the good numbering when you turn the pages of<br />
the I/B. Don’t change the page numbering. Keep the<br />
language integrity.<br />
Se não se tratar de um problema de medida, o problema pode igualmente ter origem nos<br />
ingredientes utilizados.<br />
Se o pão fermenta e reca<br />
• A farinha é muito fina.<br />
Se o pão fermenta e fica muito alto<br />
• O fermento não é o mais indicado.<br />
• Falta de sal.<br />
Se o pão não fermenta o suficiente<br />
• A farinha não é fresca (é velha).<br />
• A farinha tem pouco gluten.<br />
• A farinha é muito fina.<br />
• Utilizou-se um mau fermento.<br />
• Falta de sal.<br />
Se o pão fica espalmado, não fermenta ou fermenta pouco<br />
• O líquido está muito frio/quente.<br />
• A farinha é muito velha.<br />
• A farinha é fraca em gluten.<br />
• A farinha é muito fina.<br />
• Falta fermento.<br />
• A levedura está fora do prazo de validade.<br />
• Má qualidade da levedura.<br />
• Colocou muito sal.<br />
• Falta de sal.<br />
Se os ingredientes não estão misturados<br />
• A farinha é muito fina.<br />
Se a textura do pão é muito pesada ou muito densa<br />
• Má qualidade da levedura.<br />
LIMPEZA E MANUTENÇÃO<br />
Antes de qualquer limpeza desligue o aparelho, retire o cabo da alimentação da tomada<br />
eléctrica e deixe arrefecer muito bem o aparelho.<br />
1. Forma<br />
Antes de limpar a forma para o pão retire-a do aparelho como precendentemente<br />
descrito. Não mergulhe a forma em água ou outros líquidos. Lave o interior e o exterior da<br />
forma para o pão com um esfregão húmido e não abrasivo. Se necessário, utilize água<br />
em sabonária para limpar o interior da forma. Nunca utilize objectos que possam riscar ou<br />
abrasivos já que danificarão o revestimento antiaderente da forma para o pão. A<br />
substituição duma forma cujo revestimento seria riscado ou danificado deste modo não<br />
faz parte da garantia. Após alguma utilização a aparência da superfície antiaderente<br />
pode-se alterar em virtude da humidade e do vapor. Este aspecto é normal e não<br />
existem alterações quer das propriedades quer da qualidade do revestimento<br />
antiaderente.<br />
2. Amassador<br />
Lave o amassador com um esfregão húmido e não abrasivo. Caso o amassador esteja<br />
difícil de ser retirado da forma, verta água quente na forma e espere alguns minutos. A<br />
água quente dilatará o ponto de conexão do amassador e permite desbloquear o<br />
amassador. Se o buraco do amassador estiver com massa limpe-o com um palito de<br />
forma a não riscar o amassador.<br />
105 <strong>VG</strong> <strong>BBA</strong> 1 - 110711<br />
Assembly page 105/168
�<br />
Fax +32 2 359 95 50<br />
Copies of the I/B. Please reproduce them without any<br />
changes except under special instruction from Team<br />
International BELGIUM. The pages must be reproduced<br />
and folded in order to obtain a booklet A5 (+/- 148.5 mm<br />
width x 210 mm height). When folding, make sure you<br />
keep the good numbering when you turn the pages of<br />
the I/B. Don’t change the page numbering. Keep the<br />
language integrity.<br />
3. Tampa com janela<br />
Limpe-a com um esfregão húmido não abrasivo. Nunca mergulhe a tampa em água ou<br />
outros líquidos.<br />
4. Interior<br />
Se necessário pode limpar o interior da cuba onde se coloca a forma para o pão. Utilize<br />
também um esfregão húmido não abrasivo. Antes da limpeza tenha o aparelho<br />
desligado e o cabo da alimentação retirado da tomada eléctrica e totalmente frio. O<br />
aparelho antes de voltar a ser posto a funcionar tem de estar completamente seco.<br />
5. Corpo do aparelho<br />
Limpe o corpo do aparelho com um esfregão húmido não abrasivo. Nunca mergulhe o<br />
aparelho em água ou outros líqidos.<br />
DESCRIÇÃO DOS PROGRAMAS E IDEAS DE RECEITAS<br />
FUNÇÃO MEMÓRIA<br />
Em caso de falta de corrente eléctrica, o programa continuerá automaticamente se a<br />
corrente voltar nos 20 minutos a seguir a falta. Para isso, não è necessário carreguar na tecla<br />
START/STOP. Se a falta ultrepassar 20 minutos, a memória não funcionerá e será necessário<br />
fazer uma nova programação. Se o programa em curso ainda estava na fase da<br />
amassadura, recomeçe simplesmente o mesmo programa. Se o programa estava numa das<br />
fases seguintes, utilize o programa “Cocção” (BAKE) para cozer a massa. Pelo contrário se a<br />
cocção do pão estava iniciada, aconselhamos recomeçar com novos ingredientes porque o<br />
ciclo duma hora de cocção do programa “Cocção” poderia ser demasiado comprido.<br />
PÃO BRANCO STANDARD<br />
Programa: 1 (Basic) – Coloração da côdea: clara/escura – Peso: 450g/680g/900g<br />
Utilize esta regulação para os pães feitos com base em farinha ainda que certas receitas<br />
possam conter pequenas quantidades de farinha de trigo sem mistura. Os pães serão<br />
ligeiramente mais densos que os pães franceses ou brioches.<br />
Ingredientes:<br />
450g 680g 900g<br />
2/3 taça medidora com 1 taça medidora com água 1 1/3 taça medidora com<br />
água<br />
1 ½ colher de sopa com água<br />
1 colher de sopa com margarina ou manteiga 2 colheres de sopa com<br />
margarina ou manteiga 1 ½ colher de sopa com óleo margarina ou manteiga<br />
1 colher de sopa com vegetal<br />
2 colheres de sopa com óleo<br />
óleo vegetal<br />
1 ½ colher de café com sal vegetal<br />
1/3 colher de café com 2 colheres de sopa com leite 1 colher de café com sal<br />
sal<br />
em pó<br />
3 colheres de sopa com leite<br />
1 ½ colher de sopa com 2 ½ colheres de sopa com em pó<br />
leite em pó<br />
açúcar<br />
3 colheres de sopa com<br />
2 colheres de sopa com 2 ¼ taças medidoras com açúcar<br />
açúcar<br />
farinha para toda a utilização 3 ½ taças medidoras com<br />
2 taças medidoras com ou com farinha para pão farinha para toda a utilização<br />
farinha para toda a 1 ¼ colher de café com ou com farinha para pão<br />
utilização ou com farinha fermento com acção rápida 1 ½ colher de café com<br />
para pão<br />
1 ¼ colher de café com<br />
fermento com acção<br />
rápida<br />
fermento com acção rápida<br />
106 <strong>VG</strong> <strong>BBA</strong> 1 - 110711<br />
Assembly page 106/168
�<br />
Fax +32 2 359 95 50<br />
Copies of the I/B. Please reproduce them without any<br />
changes except under special instruction from Team<br />
International BELGIUM. The pages must be reproduced<br />
and folded in order to obtain a booklet A5 (+/- 148.5 mm<br />
width x 210 mm height). When folding, make sure you<br />
keep the good numbering when you turn the pages of<br />
the I/B. Don’t change the page numbering. Keep the<br />
language integrity.<br />
1. Meça os ingredientes com muita precisão e verta-os na forma para o pão respeitando a<br />
ordem por que vêm na receita (ingredientes líquidos em primeiro lugar).<br />
2. Coloque a forma correctamente no aparelho para cozer pão. Feche a tampa.<br />
3. Escolha o programa desejado.<br />
4. Escolha a coloração desejada para a côdea.<br />
5. Escolha o peso da massa.<br />
6. Comprima a tecla START/STOP.<br />
7. Com as luvas da cozinha retire o pão da forma após a cozedura.<br />
8. Deixe arrefecer o pão sobre uma grelha durante mais ou menos uma hora antes de o<br />
cortar.<br />
PÃO FRANCÊS<br />
Programa: 2 (French) – Coloração da côdea: clara/escura – Peso: 450g/680g/900g<br />
Tradicionalmente, o pão francês tem uma côdea mais estaladiça e uma textura interior mais<br />
clara que a do pão standard.<br />
Ingredientes:<br />
450g 680g 900g<br />
1 taça medidora com<br />
água<br />
2 colheres de sopa com<br />
azeite<br />
1 colher de café com sal<br />
2 colheres de sopa com<br />
açúcar<br />
2 taças medidoras com<br />
farinha para toda a<br />
utilização ou com farinha<br />
para pão<br />
1 colher de café com<br />
fermento com acção<br />
rápida<br />
1 ¼ taça medidora com água<br />
2 colheres de sopa com azeite<br />
1 ½ colher de café com sal<br />
2 colheres de sopa com<br />
açúcar<br />
2 ½ taças medidoras com<br />
farinha para toda a utilização<br />
ou com farinha para pão<br />
1 ¼ colher de café com<br />
fermento com acção rápida<br />
1 ½ taça medidora com água<br />
2 colheres de sopa com azeite<br />
2 colheres de café com sal<br />
2 ½ colheres de sopa com<br />
açúcar<br />
3 ½ taças medidoras com<br />
farinha para toda a utilização<br />
ou com farinha para pão<br />
1 ½ colher de café com<br />
fermento com acção rápida<br />
1. Meça os ingredientes com muita precisão e verta-os na forma para o pão respeitando a<br />
ordem por que vêm na receita (ingredientes líquidos em primeiro lugar).<br />
2. Coloque a forma correctamente no aparelho para cozer pão. Feche a tampa.<br />
3. Escolha o programa desejado.<br />
4. Escolha a coloração desejada para a côdea.<br />
5. Escolha o peso da massa.<br />
6. Comprima a tecla START/STOP.<br />
7. Com as luvas da cozinha retire o pão da forma após a cozedura.<br />
8. Deixe arrefecer o pão sobre uma grelha durante mais ou menos uma hora antes de o<br />
cortar.<br />
107 <strong>VG</strong> <strong>BBA</strong> 1 - 110711<br />
Assembly page 107/168
�<br />
Fax +32 2 359 95 50<br />
PÃO BRIOCHÉ/PÃO DE MANTEIGA, FARINHA E OVOS<br />
Copies of the I/B. Please reproduce them without any<br />
changes except under special instruction from Team<br />
International BELGIUM. The pages must be reproduced<br />
and folded in order to obtain a booklet A5 (+/- 148.5 mm<br />
width x 210 mm height). When folding, make sure you<br />
keep the good numbering when you turn the pages of<br />
the I/B. Don’t change the page numbering. Keep the<br />
language integrity.<br />
Programa: 3 (Sweet )– Coloração da côdea: clara/escura – Peso: 450g/680g/900g<br />
Escolha o modo para receitas contendo sumos de fruta, com mais açúcar ou ingredientes<br />
açucarados como raspa de noz de coco, passas, frutos secos ou chocolate.<br />
Ingredientes:<br />
450g 680g 900g<br />
3/4 taça medidora com leite<br />
1 ½ colher de sopa com<br />
manteiga ou margarina<br />
1 ovo<br />
1 colher de café com sal<br />
1 ½ colher de sopa com mel<br />
2 colheres de sopa com<br />
açúcar<br />
2 taças medidoras com<br />
farinha para toda a utilização<br />
ou com farinha para pão<br />
1/2 colher de café com<br />
fermento com acção rápida<br />
1 taça medidora com leite<br />
1 ½ colher de sopa com<br />
manteiga ou margarina<br />
1 ovo<br />
1 colher de café com sal<br />
1 ½ colher de sopa com mel<br />
3 colheres de sopa com<br />
açúcar<br />
3 taças medidoras com<br />
farinha para toda a<br />
utilização ou com farinha<br />
para pão<br />
1 colher de café com<br />
fermento com acção rápida<br />
1 ½ taça medidora com leite<br />
2 colheres de sopa com<br />
manteiga ou margarina<br />
2 ovos<br />
1 colher de café com sal<br />
2 colheres de sopa com mel<br />
4 colheres de sopa com<br />
açúcar<br />
3 ½ taças medidoras com<br />
farinha para toda a<br />
utilização ou com farinha<br />
para pão<br />
1 ¼ colher de café com<br />
fermento com acção rápida<br />
1. Meça os ingredientes com muita precisão e verta-os na forma para o pão respeitando a<br />
ordem por que vêm na receita (ingredientes líquidos em primeiro lugar).<br />
2. Coloque a forma correctamente no aparelho para cozer pão. Feche a tampa.<br />
3. Escolha o programa desejado.<br />
4. Escolha a coloração desejada para a côdea.<br />
5. Escolha o peso da massa.<br />
6. Comprima a tecla START/STOP.<br />
7. Com as luvas da cozinha retire o pão da forma após a cozedura.<br />
8. Deixe arrefecer o pão sobre uma grelha durante mais ou menos uma hora antes de o<br />
cortar.<br />
CAKE<br />
Programa: 4<br />
Escolha esta função para a massa de bolos.<br />
Ingredientes:<br />
8 colheres de sopa com manteiga<br />
8 colheres de sopa com açúcar<br />
5 ovos<br />
1 ½ taça medidora com farinha para toda a utilização<br />
1 ½ colher de sopa com sumo de limão<br />
1 ½ colher de café com fermento químico (baking powder)<br />
Conselho: Durante a mistura, raspe as paredes do recipiente para assegurara uma mistura<br />
homogénea.<br />
108 <strong>VG</strong> <strong>BBA</strong> 1 - 110711<br />
Assembly page 108/168
�<br />
Fax +32 2 359 95 50<br />
Copies of the I/B. Please reproduce them without any<br />
changes except under special instruction from Team<br />
International BELGIUM. The pages must be reproduced<br />
and folded in order to obtain a booklet A5 (+/- 148.5 mm<br />
width x 210 mm height). When folding, make sure you<br />
keep the good numbering when you turn the pages of<br />
the I/B. Don’t change the page numbering. Keep the<br />
language integrity.<br />
1. Meça os ingredientes com muita precisão e verta-os na forma para o pão respeitando a<br />
ordem por que vêm na receita (ingredientes líquidos em primeiro lugar).<br />
2. Coloque a forma correctamente no aparelho para cozer pão. Feche a tampa.<br />
3. Escolha o programa desejado.<br />
4. Comprima a tecla START.<br />
5. Com as luvas da cozinha retire o pão da forma após a cozedura.<br />
6. Deixe arrefecer o pão sobre uma grelha durante mais ou menos uma hora antes de o<br />
cortar.<br />
PÃO DE TRIGO SEM MISTURA<br />
Programa: 5 (Whole Wheat) – Coloração da côdea: clara/escura – Peso: 450g/680g/900g<br />
Escolha esta regulação para as receitas que utilizem maiores quantidades de farinha de trigo<br />
sem mistura ou de centeio, de aveia ou de farelo.<br />
Ingredientes:<br />
450g 680g 900g<br />
1 taça medidora com água<br />
1 colher de sopa com<br />
margarina ou manteiga<br />
1 colher de café com sal<br />
1 colher de café com açúcar<br />
1 taça medidora com farinha<br />
para toda a utilização ou com<br />
farinha para pão<br />
1 taça medidora com farinha<br />
de trigo sem mistura<br />
1 colher de café com fermento<br />
com acção rápida<br />
1 ¼ taça medidora com água<br />
2 colheres de sopa com<br />
margarina ou manteiga<br />
1 colher de café com sal<br />
1 colher de café com açúcar<br />
1 1/3 taça medidora com<br />
farinha para toda a utilização<br />
ou com farinha para pão<br />
1 1/3 taça medidora com<br />
farinha de trigo sem mistura<br />
1 colher de café com fermento<br />
com acção rápida<br />
1 1/3 taça medidora com água<br />
2 colheres de sopa com<br />
margarina ou manteiga<br />
1 colher de café com sal<br />
1 colher de café com açúcar<br />
1 2/3 taça medidora com<br />
farinha para toda a utilização<br />
ou com farinha para pão<br />
1 2/3 taça medidora com<br />
farinha de trigo sem mistura<br />
1 ¼ colher de café com<br />
fermento com acção rápida<br />
Nota: pode juntar aos ingredientes 1 ½ colher de sopa com gluten para aumentar a altura e a<br />
textura do pão.<br />
1. Meça os ingredientes com muita precisão e verta-os na forma para o pão respeitando a<br />
ordem por que vêm na receita (ingredientes líquidos em primeiro lugar).<br />
2. Coloque a forma correctamente no aparelho para cozer pão. Feche a tampa.<br />
3. Escolha o programa desejado.<br />
4. Escolha a coloração desejada para a côdea.<br />
5. Escolha o peso da massa.<br />
6. Comprima a tecla START/STOP.<br />
7. Com as luvas da cozinha retire o pão da forma após a cozedura.<br />
8. Deixe arrefecer o pão sobre uma grelha durante mais ou menos uma hora antes de o<br />
cortar.<br />
109 <strong>VG</strong> <strong>BBA</strong> 1 - 110711<br />
Assembly page 109/168
�<br />
SANDWICH<br />
Fax +32 2 359 95 50<br />
Programa: 6 – Peso: 450g/680g/900g<br />
Ingredientes<br />
Copies of the I/B. Please reproduce them without any<br />
changes except under special instruction from Team<br />
International BELGIUM. The pages must be reproduced<br />
and folded in order to obtain a booklet A5 (+/- 148.5 mm<br />
width x 210 mm height). When folding, make sure you<br />
keep the good numbering when you turn the pages of<br />
the I/B. Don’t change the page numbering. Keep the<br />
language integrity.<br />
450g 680g 900g<br />
3/4 taça medidora com água<br />
1 colher de sopa com<br />
manteiga ou margarina<br />
1 colher de café com sal<br />
¾ colher de sopa com açúcar<br />
2 taças medidoras com<br />
farinha para toda a utilização<br />
ou com farinha para pão<br />
1 colher de café com<br />
fermento com acção rápida<br />
1 taça medidora com água<br />
1 ½ colher de sopa com<br />
manteiga ou margarina<br />
1 ½ colher de café com sal<br />
1 colher de sopa com<br />
açúcar<br />
2 ½ taças medidoras com<br />
farinha para toda a<br />
utilização ou com farinha<br />
para pão<br />
1 ¼ colher de café com<br />
fermento com acção rápida<br />
1 1/3 taça medidora com água<br />
2 colheres de sopa com<br />
manteiga ou margarina<br />
2 colheres de café com sal<br />
1 ½ colher de sopa com<br />
açúcar<br />
3 ¼ taças medidoras com<br />
farinha para toda a utilização<br />
ou com farinha para pão<br />
1 ½ colher de café com<br />
fermento com acção rápida<br />
1. Meça os ingredientes com muita precisão e verta-os na forma para o pão respeitando a<br />
ordem por que vêm na receita (ingredientes líquidos em primeiro lugar).<br />
2. Coloque a forma correctamente no aparelho para cozer pão. Feche a tampa.<br />
3. Escolha o programa desejado.<br />
4. Escolha o peso da massa.<br />
5. Comprima a tecla START/STOP.<br />
6. Com as luvas da cozinha retire o pão da forma após a cozedura.<br />
7. Deixe arrefecer o pão sobre uma grelha durante mais ou menos uma hora antes de o<br />
cortar.<br />
BATER<br />
Programa: 7 (Whisk)<br />
Este programa permite amassar a massa para fazer tortas ou macarrão. A fôrma não é<br />
aquecida, a cor e o peso devem ser seleccionados.<br />
COMPOTA DE MORANGOS<br />
Programa: 8 (Jam)<br />
O programa permite fazer compotas facilmente.<br />
Corte as frutas em pedaços de 1cm. Não utilize açúcar normal mas sim açúcar especial para<br />
compotas que se encontra nos comércios.<br />
Depois de carregar no botão START/STOP, o aparelho esquentará (assim o aparelho será<br />
activo depois do tempo de pre-aquecimento).<br />
Ingredientes:<br />
900g com morangos frescos cortados em pedaços de 1cm<br />
500g com açúcar especial para compotas<br />
1 colher de sopa com sumo de limão<br />
110 <strong>VG</strong> <strong>BBA</strong> 1 - 110711<br />
Assembly page 110/168
�<br />
Fax +32 2 359 95 50<br />
Copies of the I/B. Please reproduce them without any<br />
changes except under special instruction from Team<br />
International BELGIUM. The pages must be reproduced<br />
and folded in order to obtain a booklet A5 (+/- 148.5 mm<br />
width x 210 mm height). When folding, make sure you<br />
keep the good numbering when you turn the pages of<br />
the I/B. Don’t change the page numbering. Keep the<br />
language integrity.<br />
1. Meça os ingredientes com muita precisão e verta-os na forma.<br />
2. Coloque a forma correctamente no aparelho. Feche a tampa.<br />
3. Escolha o programa desejado.<br />
4. Prema a tecla START/STOP.<br />
5. Com a ajuda das luvas de cozinha retire a forma do aparelho após a cozedura.<br />
6. Verta a compota num frasco limpo e esterilizado. Feche-o com uma tampa esterilizada.<br />
Guarde a compota no frigorífico.<br />
PÃO DE IOGURTE<br />
Programa: 9 (Yoghourt)<br />
Este programa permite fazer pão com sabor a iogurte.<br />
Ingredientes:<br />
450g 680g 900g<br />
1/3 taça medidora com<br />
água<br />
100g iogurte<br />
1 colher de sopa com óleo<br />
vegetal<br />
1/3 colher de café com sal<br />
1 ½ colheres de sopa com<br />
açúcar<br />
2 taças medidoras com<br />
farinha para toda a<br />
utilização ou com farinha<br />
para pão<br />
1 colher de café com<br />
fermento com acção<br />
rápida<br />
2/3 taça medidora com água<br />
150g iogurte<br />
1 ½ colher de sopa com óleo<br />
vegetal<br />
½ colher de café com sal<br />
2 colheres de sopa com<br />
açúcar<br />
2 ¼ taças medidoras com<br />
farinha para toda a utilização<br />
ou com farinha para pão<br />
1 ¼ colher de café com<br />
fermento com acção rápida<br />
1 taça medidora com água<br />
200g iogurte<br />
2 colheres de sopa com<br />
óleo vegetal<br />
¾ colher de café com sal<br />
2 ½ colheres de sopa com<br />
açúcar<br />
3 ½ taças medidoras com<br />
farinha para toda a<br />
utilização ou com farinha<br />
para pão<br />
1 ½ colher de café com<br />
fermento com acção<br />
rápida<br />
1. Meça os ingredientes com muita precisão e verta-os na forma para o pão respeitando a<br />
ordem por que vêm na receita (ingredientes líquidos em primeiro lugar).<br />
2. Coloque a forma correctamente no aparelho para cozer pão. Feche a tampa.<br />
3. Escolha o programa desejado.<br />
4. Escolha a coloração desejada para a côdea.<br />
5. Escolha o peso da massa.<br />
6. Comprima a tecla START/STOP.<br />
7. Com as luvas da cozinha retire o pão da forma após a cozedura.<br />
8. Deixe arrefecer o pão sobre uma grelha durante mais ou menos uma hora antes de o<br />
cortar.<br />
MASSA DE PIZA<br />
Programa: 10 (Dough)<br />
Este ciclo permite preparar a massa sem cozer o pão. Com esta regulação pode-se fazer<br />
todo o tipo de massas para pizas, pequenos pães, pães compridos, coscorões, pães redondos<br />
ou entrançados que devem ser cozidos no forno ou fritos numa fritadeira.<br />
111 <strong>VG</strong> <strong>BBA</strong> 1 - 110711<br />
Assembly page 111/168
�<br />
Ingredientes:<br />
Fax +32 2 359 95 50<br />
1 ¼ taça medidora com leite<br />
½ colher de café com sal<br />
2 colheres de sopa com azeite<br />
2 ½ taças medidoras com farinha para toda a utilização<br />
1 ½ colher de café com fermento acção rápida<br />
Copies of the I/B. Please reproduce them without any<br />
changes except under special instruction from Team<br />
International BELGIUM. The pages must be reproduced<br />
and folded in order to obtain a booklet A5 (+/- 148.5 mm<br />
width x 210 mm height). When folding, make sure you<br />
keep the good numbering when you turn the pages of<br />
the I/B. Don’t change the page numbering. Keep the<br />
language integrity.<br />
1. Meça os ingredientes com a muita precisão e verta-os na forma seguindo a ordem da<br />
receita (ingredientes líquidos em primeiro lugar).<br />
2. Coloque a forma correctamente no aparelho. Feche a tampa.<br />
3. Escolha o programa desejado. Prema o botão START/STOP.<br />
4. No fim do ciclo retire a massa da forma.<br />
5. Estenda a massa e deixe-a fermentar durante 10 minutos.<br />
6. Verta o molho de tomate e espalhe os ingredientes desejados na massa.<br />
7. Coza no forno tradicional durante 15 minutos a 200°C.<br />
PÃO RÁPIDO<br />
Programa 11 (Fast) – Coloração da côdea: clara/escura<br />
Utilize esta função para fazer pão rápido. O pão será todavia mais denso e menos alto.<br />
Ingredientes:<br />
1 taça medidora com água<br />
2 colheres de sopa de manteiga ou margarina<br />
1 ½ colher de café com sal<br />
2 colheres de sopa com açúcar<br />
1 colher de sopa com leite em pó<br />
3 taças medidoras com farinha para toda a utilização<br />
2 colheres de café com fermento com acção rápida<br />
1. Meça os ingredientes com muita precisão e verta-os na forma para o pão respeitando a<br />
ordem por que vêm na receita (ingredientes líquidos em primeiro lugar).<br />
2. Coloque a forma correctamente no aparelho para cozer pão. Feche a tampa.<br />
3. Escolha o programa desejado.<br />
4. Escolha a coloração desejada para a côdea.<br />
5. Comprima a tecla START/STOP.<br />
6. Com as luvas da cozinha retire o pão da forma após a cozedura.<br />
7. Deixe arrefecer o pão sobre uma grelha durante mais ou menos uma hora antes de o<br />
cortar.<br />
COZEDURA<br />
Programa: 12 (Bake)<br />
Tempo de cozedura: 1:00<br />
Como o programa faz funcionar o aparelho no modo de cozedura durante uma hora, é<br />
preciso vigiar a cozedura durante este tempo. O programa é útil quando:<br />
Ocorre uma falta de corrente eléctrica no momento em que a massa está a fermentar. Refirase<br />
ao parágrafo “MEMÓRIA” para mais informações sobre as faltas de corrente eléctrica.<br />
112 <strong>VG</strong> <strong>BBA</strong> 1 - 110711<br />
Assembly page 112/168
�<br />
Fax +32 2 359 95 50<br />
PROTECÇÃO DO MEIO AMBIENTE – DIRECTIVA 2002/96/CE<br />
Copies of the I/B. Please reproduce them without any<br />
changes except under special instruction from Team<br />
International BELGIUM. The pages must be reproduced<br />
and folded in order to obtain a booklet A5 (+/- 148.5 mm<br />
width x 210 mm height). When folding, make sure you<br />
keep the good numbering when you turn the pages of<br />
the I/B. Don’t change the page numbering. Keep the<br />
language integrity.<br />
Para a preservação do ambiente e da nossa saúde, a eliminação no fim da vida útil dos<br />
aparelhos eléctricos e electrónicos, deve-se efectuar no cumprimento das legislações em<br />
vigor e pela participação de todos quer sejam produtores ou utilizadores. É por esta razão que<br />
o vosso aparelho tem na placa sinalética o simbolo , informando que em caso algum o<br />
aparelho deve ser colocado no caixote do lixo camarário ou privado para que não vá para<br />
as lixeiras comuns mas sim devolvido ao revendedor ou depositado nos locais apropriados e<br />
identificados para a recolha destes aparelhos para que uma vez recolhidos sejam reciclados,<br />
reutilizados ou lhe sejam dados outras aplicações.<br />
113 <strong>VG</strong> <strong>BBA</strong> 1 - 110711<br />
Assembly page 113/168
�<br />
AVVERTENZE<br />
Fax +32 2 359 95 50<br />
Copies of the I/B. Please reproduce them without any<br />
changes except under special instruction from Team<br />
International BELGIUM. The pages must be reproduced<br />
and folded in order to obtain a booklet A5 (+/- 148.5 mm<br />
width x 210 mm height). When folding, make sure you<br />
keep the good numbering when you turn the pages of<br />
the I/B. Don’t change the page numbering. Keep the<br />
language integrity.<br />
Vi invitiamo a leggere attentamente le istruzioni prima di utilizzare l’apparecchio, e vi<br />
preghiamo di seguire sempre attentamente le istruzioni di sicurezza e di utilizzo.<br />
Importante: Le persone (inclusi i bambini) che non sono capaci di utilizzare l’apparecchio, sia<br />
per incapacità fisiche, sensoriali o mentali, sia per mancanza di esperienza o di conoscenze,<br />
non devono per niente utilizzare l’apparecchio tranne se sono sorvegliati da una persona<br />
responsabile per la loro sicurezza o se hanno previamente ricevuto istruzioni relative all’uso<br />
sicuro dell’apparecchio.<br />
Sorvegliare i bambini perché non utilizzino l’apparecchio come un giocattolo.<br />
� Prima di mettere in funzione l’apparecchio, controllare che la tensione della rete elettrica<br />
corrisponda esattamente a quella dell’apparecchio.<br />
� Non lasciare l’apparecchio incustodito durante il funzionamento.<br />
� Verificare regolarmente che il cavo d’alimentazione non sia danneggiato. Non<br />
accendere l’apparecchio qualora il cavo o l’apparecchio stesso dovesse presentare<br />
qualsiasi danneggiamento. Ogni riparazione deve essere fatta da un servizio<br />
qualificato(*). Un cavo danneggiato deve essere rimpiazzato da un servizio qualificato(*).<br />
� Questo apparecchio dovrà essere destinato solo all’uso domestico, secondo le<br />
indicazioni riportate nel presente libretto.<br />
� Non immergere l’apparecchio in acqua o in qualsiasi altro líquido, né per pulirlo né per<br />
qualunque altra ragione; non inserirlo nella lavastoviglie.<br />
� Essere particolarmente attenti dopo la cottura. L’apparecchio, allora, è molto caldo.<br />
Lasciarlo raffreddare completamente prima di riporre o di pulirlo.<br />
� Non usare l’apparecchio in prossimità di sorgenti di calore.<br />
� Staccare la spina dalla presa di corrente prima di riporre o di pulire l’apparecchio.<br />
� Non usare l’apparecchio all'aperto e dopo l’uso riporlo in un luogo asciutto.<br />
� Non utilizzare accessori se non consigliati dal fabbricante, può essere pericoloso per<br />
l’utente e danneggiare l’apparecchio.<br />
� Non tirare il cavo per spostare l’apparecchio e assicurarsi che questo non si possa<br />
impigliare per evitare eventuali cadute dell’apparecchio. Non avvolgere il cavo intorno<br />
all’apparecchio e non torcerlo.<br />
� Posizionare l’apparecchio su un tavolo o un supporto abbastanza stabile perché non<br />
cada.<br />
� Assicurarsi che il cavo non entri in contatto con le superfici calde dell’apparecchio. Non<br />
toccare quelle superfici.<br />
� Vigilare che l’apparecchio non sia in contatto con materiali facilmente infiammabili<br />
come tende, tessuti… o non si trovi vicino a quelli materiali quando sta funzionando,<br />
perché potrebbe provocare incendi.<br />
� La temperatura delle superfici metalliche può essere elevata quando l’apparecchio è in<br />
funzione. Non toccare quelle superfici. Alcune possono addirittura diventare molto calde<br />
durante l’uso. Utilizzare guanti di cucina per manipolare la forma dopo la cottura per non<br />
bruciarsi. Quando il simbolo è posto su una superficie particolare, accentua la messa<br />
in guardia e significa: ATTENZIONE, questa superficie può diventare molto calda durante<br />
l’uso.<br />
� Non graffiare il rivestimento speciale della forma e della lama, perché perderebbe il<br />
proprio carattere antiadhesivo.<br />
� Non superare mai le dosi di farina e di lievito indicate nelle ricette perché, sennò, la pasta<br />
rischierebbe di traboccare dalla forma.<br />
� Non coprire l’apparecchio (per esempio con un tessuto) giacché impedirebbe al vapore<br />
di uscire.<br />
114 <strong>VG</strong> <strong>BBA</strong> 1 - 110711<br />
Assembly page 114/168
�<br />
Fax +32 2 359 95 50<br />
Copies of the I/B. Please reproduce them without any<br />
changes except under special instruction from Team<br />
International BELGIUM. The pages must be reproduced<br />
and folded in order to obtain a booklet A5 (+/- 148.5 mm<br />
width x 210 mm height). When folding, make sure you<br />
keep the good numbering when you turn the pages of<br />
the I/B. Don’t change the page numbering. Keep the<br />
language integrity.<br />
� Non introdurre utensili nella vasca per evitare qualunque scarica elettrica e non<br />
danneggiare il suo rivestimento.<br />
� L’apparecchio non deve mai essere accesso tramite un timer esterno o un altro sistema di<br />
comando a distanza separato.<br />
(*) Servizio qualificato: Servizio Assistenza del fabbricante o dell’importatore o persona<br />
qualificata, riconosciuta ed autorizzata ad effettuare riparazioni. In ogni caso, restituire<br />
l’apparecchio a questo servizio.<br />
NOTE<br />
Il cavo di alimentazione dell’apparecchio è un cavo piuttosto corto, per sminuire i rischi di<br />
incidenti (cadute se si incupisca sul cavo…). Si può comunque utilizzare una prolunga se<br />
necessario ma:<br />
• Assicurarsi che l’amperaggio della prolunga sia uguale o superiore a quello<br />
dell’apparecchio. Una prolunga con amperaggio inferiore rischierebbe di surriscaldare e<br />
di bruciare.<br />
• Per evitare ogni rischio di incidenti, assicurarsi che la prolunga non penda (da un angolo<br />
di tavolo per esempio) o che non si trascini per terra.<br />
PRIMA DELLA PRIMA COTTURA<br />
Sballare l’apparecchio e gli accessori. Pulire il coperchio, la vasca e gli accessori con un<br />
panno umido poi seccare tutte le parti accuratamente. La qualità del pane ottenuto può<br />
dipendere da numerosi fattori, perciò è importantissimo conoscere tutti gli ingredienti e le loro<br />
interrazioni. Ciò le permetterà di ottenere un risultato soddisfacente ad ogni utilizzazione.<br />
Temperatura<br />
Tutti gli ingredienti messi nell’apparecchio devono essere a temperatura ambiente. La stanza<br />
in cui si cuoce il pane deve essere temperata (15-34°C, e idealmente 20-23°C).<br />
Dosaggio degli ingredienti<br />
• L’apparecchio è fornito con una misura e un cucchiaio combinato (grande e piccolo).<br />
Misurare gli ingredienti solo con questi accessori. Le ricette descritte in queste istruzioni si<br />
basano sulle misure di questi accessori.<br />
• L’unità di queste istruzioni si esprime in misure e frazioni di misura. Sulla misura si trova<br />
un’unità espressa in “cup”. Una “cup” corrisponde ad una misura intera (250ml).<br />
• Sul cucchiaio combinato si trovano i segni seguenti:<br />
Table spoon corrisponde a 1 cucchiaio da minestra = 15ml<br />
Teaspoon corrisponde a 1 cucchiaino = 5ml<br />
• Per misurare gli ingredienti liquidi, riempire la misura e porla su una superficie piana.<br />
Mettersi in modo che gli occhi siano allo stesso livello della misura. Il livello di liquido deve<br />
essere in linea con la marca di misura desiderata. Una misura approssimativa non basta e<br />
potrebbe compromettere l’equilibrio della ricetta.<br />
• Per misurare la farina, riempire la misura appena sopra l’orlo e togliere l’eccedente<br />
passando un utensile sul bordo. Non pigiare gli alimenti, perché darebbe una quantità<br />
superiore a quella richiesta. Non setacciare la farina. Per piccola quantità, utilizzare il<br />
cucchiaio di dosaggio e assicurarsi che sia rasa e non colma. Per alcuni ingredienti tali<br />
come uvette o trucioli di cioccolato, è meglio utilizzare una bilancia da cucina.<br />
115 <strong>VG</strong> <strong>BBA</strong> 1 - 110711<br />
Assembly page 115/168
�<br />
Fax +32 2 359 95 50<br />
Situazione geografica<br />
Copies of the I/B. Please reproduce them without any<br />
changes except under special instruction from Team<br />
International BELGIUM. The pages must be reproduced<br />
and folded in order to obtain a booklet A5 (+/- 148.5 mm<br />
width x 210 mm height). When folding, make sure you<br />
keep the good numbering when you turn the pages of<br />
the I/B. Don’t change the page numbering. Keep the<br />
language integrity.<br />
Ad alta quota (sopra i 3000 pi = 914 metri) l'acqua si evapora più velocemente e il pane lievita<br />
più velocemente. Perciò, è necessario adattare le ricette a quelle condizioni, utilizzando più<br />
liquidi e meno ingredienti secchi. Il quadro successivo dà consigli in funzione dell’altitudine.<br />
ALTITUDINE<br />
Modificazione 3000 pi (914m) 5000 pi (1524m) 7000 pi (2133m)<br />
Ridurre il lievito : per ogni<br />
cucchiaino nella ricetta,<br />
togliere<br />
Ridurre lo zucchero: per<br />
ogni cucchiaio nella<br />
ricetta, togliere<br />
Aumentare la quantità di<br />
liquido: per ogni misura<br />
nella ricetta, aggiungere:<br />
Ingredienti<br />
1/8 cucchiaino 1/8 – 1/4 cucchiaino + 1/4 cucchiaino<br />
0-1 cucchiaino 0-2 cucchiaini 1- 2 cucchiaini<br />
1 -2 cucchiai 2-4 cucchiai 3-4 cucchiai<br />
Fattori cruciali per il successo sono la qualità e la freschezza degli alimenti. Rispettare<br />
assolutamente le quantità degli ingredienti.<br />
Farina ogni uso<br />
La farina ogni uso è una miscela di farina di grano tenero e duro specialmente concepita per<br />
preparare pane e dolce. Benché questo tipo di farina dia risultati accettabili con questo<br />
apparecchio, raccomandiamo di usare la farina da pane.<br />
Farina da pane<br />
La farina da pane è una farina con molto glutine/proteina che è stata trattata con prodotti<br />
miglioratori che rendono la pasta più morbida durante l’impastatura. Generalmente, la farina<br />
da pane ha una concentrazione più forte di glutine che la farina ogni uso, il che può variare<br />
secondo i diversi metodi di macinazione. Si raccomanda la farina da pane per la cottura con<br />
questo apparecchio benché la farina ogni uso produsca risultati accettabili.<br />
Farina di grano intero<br />
La farina di grano intero è fabbricata dal chicco completo del grano che contiene crusca e<br />
germogli, rendendola più densa e più ricca in nutrimenti della farina ogni uso. Un pane fatto<br />
con questa farina è generalmente più piccolo e pesante dei pani bianchi. Per ovviare questa<br />
situazione, si mescola spesso la farina di grano intero con la farina ogni uso o glutine per<br />
produrre un pane più alto e leggero.<br />
Farina di segale<br />
La farina di segale è una farina ricca in fibre similare alla farina di grano intero. Occorre<br />
mescolare questa farina a grande quantità di farina ogni uso, da pane o glutine poiché non<br />
contiene abbastanza glutine da produrre una pagnotta di pane alto e uniforme.<br />
116 <strong>VG</strong> <strong>BBA</strong> 1 - 110711<br />
Assembly page 116/168
�<br />
Glutine<br />
Fax +32 2 359 95 50<br />
Copies of the I/B. Please reproduce them without any<br />
changes except under special instruction from Team<br />
International BELGIUM. The pages must be reproduced<br />
and folded in order to obtain a booklet A5 (+/- 148.5 mm<br />
width x 210 mm height). When folding, make sure you<br />
keep the good numbering when you turn the pages of<br />
the I/B. Don’t change the page numbering. Keep the<br />
language integrity.<br />
Il glutine è la proteina del grano che rende la pasta elastica. Si trova in generale il glutine nella<br />
maggior parte dei negozi di salute ed alimentazione alla rinfusa. Viene a volte utilizzato in<br />
piccole dosi, con farine dense, con poco glutine, come la farina di grano intero, per<br />
aumentare il volume e alleviare la tessitura.<br />
Farina per dolci<br />
La farina per dolci contiene poco glutine/proteina, è specialmente concepita per le ricette di<br />
dolci. Non la raccomandiamo per ricette di pane.<br />
Farina fermentante<br />
La farina fermentante contiene ingredienti di lievitazione inutili che nuocciono alla<br />
preparazione di pani e dolci. Non usarla con questo apparecchio.<br />
Crusca<br />
La crusca (non trasformata) e il germoglio di grano costituiscono le parti esterne gregge dei<br />
chicchi di grano e di segale separati dalla farina. Si aggiungono spesso al pane in piccole<br />
quantità per arricchirlo, e dargli gusto e corpo. Sono pure utilizzati per migliorare la tessitura del<br />
pane.<br />
Semola di mais e farina di avena<br />
La semola di mais e la farina di avena provengono dal mais bianco o giallo macinato grosso e<br />
dall’avena in fiocchi o spuntata. Sono usati generalmente per migliorare il sapore e la tessitura<br />
del pane.<br />
Grano macinato<br />
Il grano macinato ha una tessitura grossolana. Proviene dal chicco del grano tagliato in<br />
frammenti angolari. Il grano macinato da al pane integrale un sapore di nocciola e una<br />
tessitura croccante.<br />
Sette cereali<br />
Il “sette cereali” è una miscela di grano macinato, avena, crusca, segale, semola di mais, lino<br />
e miglio.<br />
Lievito<br />
Durante la fermentazione, il lievito produce del biossido di carbonio, necessario per fare pane.<br />
Per produrre quel gas, il lievito ha bisogno dei carboidrati che si trovano nello zucchero e nella<br />
farina. Si utilizza il lievito granulato attivo in tutte le ricette che richiedono lievito. In effetti,<br />
esistono quattro altri tipi di lievito: fresco, secco, rapido e per macchina da pane. Consigliamo<br />
di utilizzare il lievito secco tradizionale benché si possa anche utilizzare il lievito rapido in<br />
quantità ridotte. I lieviti freschi o pressati non offrono buoni risultati.<br />
Sempre riporre il lievito nel frigorifero per conservare la freschezza. Troppo calore lo<br />
renderebbe inutilizzabile. Occorre pure verificare la freschezza, guardando la data di<br />
scadenza. Dopo aver aperto un imballaggio o una scatola, riporre e refrigerare al più presto<br />
per utilizzarla più tardi. Spesso, quando il pane o la pasta non lievita, significa che il lievito è<br />
troppo vecchio. Si può effettuare il seguente test per verificare se il lievito è vecchio e inattivo.<br />
117 <strong>VG</strong> <strong>BBA</strong> 1 - 110711<br />
Assembly page 117/168
�<br />
Fax +32 2 359 95 50<br />
Copies of the I/B. Please reproduce them without any<br />
changes except under special instruction from Team<br />
International BELGIUM. The pages must be reproduced<br />
and folded in order to obtain a booklet A5 (+/- 148.5 mm<br />
width x 210 mm height). When folding, make sure you<br />
keep the good numbering when you turn the pages of<br />
the I/B. Don’t change the page numbering. Keep the<br />
language integrity.<br />
Versare ½ misura d’acqua del rubinetto in un piccolo recipiente o una tazza.<br />
• Aggiungere e mescolare 1 cucchiaino di zucchero e cospargere la superficie con<br />
due cucchiaini di lievito.<br />
• Sistemare il recipiente o la tazza in un posto caldo e lasciare riposare durante 10<br />
minuti.<br />
• La miscela potrebbe spumare ed emanare un forte odore di lievito. Se non accade,<br />
ci vuole lievito fresco.<br />
Zucchero<br />
Lo zucchero è molto importante per la colorazione e il sapore del pane. Interviene anche nel<br />
processo di fermentazione facendo da cibo per il lievito. Quando la ricetta richiede zucchero,<br />
bisogna capire zucchero cristallizzato. Salvo indicazione contraria, non usare zucchero in<br />
polvere né zucchero grezzo di canna. Non si possono utilizzare edulcoranti artificiali perché il<br />
lievito non reagisce bene con questi.<br />
Sale<br />
Ci vuole sale per l’equilibrio del sapore dei pani e dolci, e per il colore della crosta che si<br />
sviluppa durante la cottura. Per ragioni di salute, si può eliminarlo completamente. Il pane<br />
potrebbe comunque gonfiare troppo e lievitare più del solito.<br />
Liquidi/latte<br />
Per fare pane, si può utilizzare liquidi, tali come latte o una miscela di latte in polvere e di<br />
acqua. Il latte aumenta il sapore, da una tessitura vellutata e addolcisce la crosta, mentre<br />
l’acqua sola dà una crosta più croccante. Non usare latte in polvere al momento di utilizzare il<br />
timer ritardatile. Certe ricette richiedono succo (arancia, mela, ecc.) per aggiungere un<br />
sapore al pane.<br />
Uova<br />
Le uova danno una tessitura ricca e vellutata alla pasta per pane e ai dolci. Non usare uova<br />
troppo grosse.<br />
Burro, olio e margarina<br />
Il burro, l’olio e la margarina danno ai pani al lievito una tessitura friabile e tenera. Però, i pani<br />
fatti con burro conservano la loro freschezza per più tempo. Se si usa burro o margarina presa<br />
direttamente dal frigorifero, bisogna tagliarli a pezzetti per facilitare la miscela di ingredienti<br />
durante l’impastatura.<br />
Lievito artificiale<br />
Il lievito artificiale è un agente di lievitazione utilizzato per i dolci e pani rapidi. Questo tipo di<br />
agenti di lievitazione non necessita lievitazione prima della cottura poiché la reazione chimica<br />
si effettua quando si aggiungono ingredienti liquidi.<br />
Bicarbonato de sodio<br />
Il bicarbonato di sodio è un altro agente di lievitazione da non confondere ne utilizzare al<br />
posto del lievito artificiale. Non ci vuole nemmeno lievitazione prima della cottura giacché la<br />
reazione chimica si effettua durante la cottura stessa.<br />
118 <strong>VG</strong> <strong>BBA</strong> 1 - 110711<br />
Assembly page 118/168
�<br />
Fax +32 2 359 95 50<br />
Glassature speciali per pani con lievito<br />
Scegliere tra le glassature seguenti per migliorare il pane:<br />
Copies of the I/B. Please reproduce them without any<br />
changes except under special instruction from Team<br />
International BELGIUM. The pages must be reproduced<br />
and folded in order to obtain a booklet A5 (+/- 148.5 mm<br />
width x 210 mm height). When folding, make sure you<br />
keep the good numbering when you turn the pages of<br />
the I/B. Don’t change the page numbering. Keep the<br />
language integrity.<br />
Glassatura fatta con uova: battere insieme 1 grosso uovo e 1 cucchiaino d’acqua. Pennellare<br />
con generosità la pasta soltanto prima di cuocerla nel forno normale.<br />
Crosta al burro sciolto: pennellare di burro sciolto un pane cotto di recente per ottenere una<br />
crosta morbida e tenera.<br />
Glassatura al latte: pennellare di latte o di crema un pane cotto di recente per ottenere una<br />
crosta morbida e lucida.<br />
Glassatura di zucchero: mescolare 1 misura di zucchero da glassare setacciata con 1 o 2<br />
cucchiaini di latte per fare una glassatura consistente, e annaffiare le brioche.<br />
Chicchi di papavero/sesamo/semola di mais/farina di avena:<br />
Cospargere con generosità i pani glassati di recente con i chicchi preferiti.<br />
FUNZIONAMENTO DELLA MACCHINA DA PANE<br />
PANNELLO DI CONTROLLO<br />
Schermo:<br />
Indica il numero del programma.<br />
Indica lo sconto, minuto per minuto, della durata di cottura.<br />
Indica un errore (codici errori "LLL" e "H:HH").<br />
▲ e ▼<br />
Servono per regolare il timer per una cottura differita.<br />
I pulsanti permettono di avanzare il tempo di 10 minuti in 10 minuti.<br />
Per far sfilare i minuti più velocemente, mantenere premuto il pulsante.<br />
Pulsante MENU (1-6/7-12):<br />
Per scegliere un programma (cifre da 1 a 12).<br />
Ogni pressione su questo pulsante fa passare la visualizzazione al programma seguente.<br />
Pulsante START/STOP (0/1)<br />
Permette di attivare un programma.<br />
Per interrompere un programma, premere il pulsante fino a sentire il segnale acustico che<br />
indica que si può fermare il funzionamento o annullare una regolazione del timer. (Nota: non<br />
premere START/STOP quando si apre il coperchio per sorvegliare la cottura del pane.)<br />
Pulsante "crosta" (chiara/scura)<br />
Per scegliere la colorazione della crosta (certi programmi non permettono questa scelta). Ogni<br />
pressione fa passare la freccia sullo schermo da un livello al seguente.<br />
Pulsante "peso" (450g/680g/900g)<br />
Permette di scegliere il peso della pagnotta (certi programmi non permettono questa scelta).<br />
Ogni pressione fa passare la freccia sullo schermo al peso seguente.<br />
119 <strong>VG</strong> <strong>BBA</strong> 1 - 110711<br />
Assembly page 119/168
�<br />
Fax +32 2 359 95 50<br />
SEGNALI SONORI POSSIBILI<br />
L'apparecchio emette vari segnali sonori.<br />
1 segnale lungo: l'apparecchio è messo in funzionamento.<br />
Copies of the I/B. Please reproduce them without any<br />
changes except under special instruction from Team<br />
International BELGIUM. The pages must be reproduced<br />
and folded in order to obtain a booklet A5 (+/- 148.5 mm<br />
width x 210 mm height). When folding, make sure you<br />
keep the good numbering when you turn the pages of<br />
the I/B. Don’t change the page numbering. Keep the<br />
language integrity.<br />
1 segnale corto: un pulsante di programmazione valida è stato premuto.<br />
10 segnali successivi durante il funzionamento: la funzione "aggiungere ingredienti" è stata<br />
attivata.<br />
12 segnali corti: il programma è terminato.<br />
UTILIZZAZIONE<br />
1. Aprire il coperchio e togliere la forma e tirare la maniglia verso sé. Non versare mai<br />
ingredienti nella forma quando si trova nell’apparecchio, per evitare di far cadere<br />
ingredienti nelle parti interne della vasca. Sempre sistemare la forma su una superficie<br />
stabile.<br />
2. Sistemare l’impastatrice sull’asse, all’interno della forma, allineando la parte piatta<br />
dell’accessorio con la parte piatta dell’asse. Assicurarsi che l’asse sia esente di ogni<br />
residuo di pasta e che l’impastatrice sia ben sistemata. Attenzione: se l’impastatrice non è<br />
sistemata bene, può staccare durante l’impastatura, il che danneggerebbe la miscela. Si<br />
consiglia di spalmare un piccola quantità di margarina sul foro della lama per impastareIt<br />
affinchè non si attacchi l’impasto in cottura.<br />
3. Scegliere una ricetta tra quelle descritte nel paragrafo “Ricette”. Seguendo le istruzioni:<br />
o Misurare gli ingredienti come indicato nel paragrafo “Dosaggio degli ingredienti”.<br />
o Versare sempre gli ingredienti nella forma nell’ordine indicato nella ricetta.<br />
o Aggiungere sempre il lievito per ultimo. Assicurarsi che non entri in contatto ne con gli<br />
ingredienti liquidi, ne con il sale.<br />
4. Rimettere la forma nell’apparecchio. Inserirla fino ad agganciarla nel fondo<br />
dell’apparecchio.<br />
5. Chiudere il coperchio e collegare l’apparecchio. Un segnale si farà sentire e “2:50”<br />
apparirà sullo schermo. Il programma iniziale “1” apparirà sullo schermo.<br />
6. Scegliere il programma adeguato alla ricetta premendo sul pulsante “MENU” del<br />
pannello di controllo. Ogni pressione su quel pulsante fa passare il numero dello schermo<br />
alla regolazione successiva. Premere il pulsante fino al segnale sonoro.<br />
7. Scegliere il peso adeguato della pagnotta premendo il pulsante “peso”. Ogni volta che si<br />
preme su quel pulsante, il punto sulla visualizzazione passa da un ciclo all’altro.<br />
8. Scegliere l’intensità di colorazione adeguata per la crosta del pane premendo sul<br />
pulsante “crosta”. Ogni pressione sul quel pulsante fa passare la freccia sullo schermo da<br />
“Chiaro” a “Scuro”.<br />
9. Premere il pulsante START/STOP e tenerlo premuto per 3 secondi. La durata di cottura in<br />
ore e minuti appare sullo schermo e la retroilluminazione dello schermo LCD inizierà a<br />
lampeggiare. Per esempio, se si sceglie una ricetta che richiede il programma "Standard"<br />
("Basic") per un pane di 680gr in cui la crosta ha una colorazione chiara, si vedrà “2:55”<br />
sullo schermo. Finché il pane sarà pronto, sullo schermo apparirà il tempo residuale, che<br />
diminuirà minuto per minuto. Quando si utilizzano i programmi “standard” (“Basic”),<br />
“sfilatino” (“French”), “brioche” (“Sweet”), “grano intero” (“Wholewheat”) o “sandwich”, si<br />
sentiranno 10 beepi che indica che si possono aggiungere gli ingredienti. Aprire il<br />
coperchio e aggiungere gli ingredienti. Attenzione: potrebbe fuoriuscire del vapore<br />
quando si apre il coperchio.<br />
Nota: Una volta he il pulsante START/STOP è stato premuto, è impossibile modificare le<br />
regolazioni con gli altri pulsanti.<br />
120 <strong>VG</strong> <strong>BBA</strong> 1 - 110711<br />
Assembly page 120/168
�<br />
Fax +32 2 359 95 50<br />
Copies of the I/B. Please reproduce them without any<br />
changes except under special instruction from Team<br />
International BELGIUM. The pages must be reproduced<br />
and folded in order to obtain a booklet A5 (+/- 148.5 mm<br />
width x 210 mm height). When folding, make sure you<br />
keep the good numbering when you turn the pages of<br />
the I/B. Don’t change the page numbering. Keep the<br />
language integrity.<br />
10. Quando il ciclo è terminato, si sentiranno 12 beep. Non porre la forma calda né<br />
qualunque oggetto sulla parte sopra l’apparecchio per non danneggiare la superficie. Se<br />
non si vuole utilizzare la funzione di riscaldamento, fermare il programma premendo<br />
durante 3 secondi sul pulsante START/STOP. Si sentirà un segnale e sullo schermo<br />
appariranno le indicazioni iniziali.<br />
11. Quando la cottura è terminata, se non si toglie immediatamente il pane dalla forma e se<br />
non si preme il pulsante START/STOP, l’apparecchio attiva la funzione di riscaldamento.<br />
L’apparecchio manterrà il pane caldo durante 60 minuti. Alla fine dei 60 minuti,<br />
appariranno sullo schermo le indicazioni iniziali. Si può togliere la forma ad ogni momento<br />
durante il ciclo di “riscaldamento”. Per disattivare questa funzione, prima dei 60 minuti,<br />
basta premere il pulsante “START/STOP” e mantenerlo durante 3 secondi. Staccare la<br />
spina dell’apparecchio dalla presa di corrente dopo l’uso. Attenzione: quando si utilizza il<br />
programma 7 (WHISK), 8 (JAM) e 10 (DOUGH = Pasta), la funzione “tenere in caldo” non è<br />
attivata. Per il programma 10, si sconsiglia di non lasciare la pasta troppo a lungo dentro<br />
dell’apparecchio, perché potrebbe lievitare troppo e non dareun buon risultato. Per<br />
ottenere risultati migliori, togliere la pasta dopo il ciclo e seguire le indicazioni della ricetta<br />
per la lavorazione, il riposo e la cottura.<br />
12. Sopra l’apparecchio c’è una finestra che permette di osservare l’impasto, la miscelazione<br />
e la cottura. Ogni tanto, può esserci umidità sulla finestra durante l’operazione. Si può<br />
sollevare il coperchio per verificare la miscelazione e l’impastatura ma NON APRIRE IL<br />
COPERCHIO DURANTE LA COTTURA (circa l’ultima ora del ciclo) perché il pane potrebbe<br />
perdere la lievitazione.<br />
13. Per togliere il pane dal recipiente di cottura, utilizzare le maniglie o guanti da cucina e<br />
tirare la maniglia della forma leggermente verso di sé e ritirare la forma. Rovesciare il<br />
recipiente e scuoterlo per far cadere il pane su una griglia di raffreddamento. Siccome il<br />
recipiente possiede un rivestimento antiaderente, il pane dovrebbe uscire facilmente.<br />
Non utilizzare utensili di metallo per togliere il pane, per non graffiare il rivestimento. Se<br />
necessario, utilizzare una spatola di legno o di plastica lungo le pareti della forma per far<br />
uscire il pane. Se la spatola rimane bloccata sotto il pane, utilizzare il gancio fornito o<br />
l’estremità di un cucchiaio di plastica o di un utensile non metallico per toglierla.<br />
Attenzione: al momento in cui si toglie il pane, verificare sempre dove si trovi<br />
l’impastatrice. Se si trova nella pagnotta di pane, toglierla per non danneggiarla quando<br />
si taglia il pane.<br />
14. Lasciar raffreddare il pane sulla griglia per almeno 60 minuti prima di tagliare per lasciar<br />
scappare il vapore. Utilizzare un buon coltello a lama dentellata o un coltello elettrico.<br />
UTILIZZAZIONE DEL TIMER PER COTTURA DIFFERITA<br />
Utilizzare il tilmer per ritardare la cottura del pane. Questa funzione consente di programmare<br />
la cottura del pane fino a 13 ore prima. Per esempio, si può regolare il timer alle 19 e svegliarsi<br />
con l’odore del pane fresco alle 8 della mattina seguente.<br />
Per regolare il timer, fare come indicato qui sotto:<br />
• Attenzione: non utilizzare il timer per ricette che richiedono ingredienti freschi deperibili<br />
come uova, latte fresco, la panna acerba e il formaggio.<br />
• Determinare l’ora cui il pane dovrà essere pronto e calcolare il numero di ore necessarie.<br />
Per esempio, se sono le 20 al momento di versare tutti gli ingredienti nella forma e che si<br />
desidera ottenere un pane cotto alle 8 della mattina seguente, si deve calcolare un<br />
totale di 12 ore prima che il pane sia pronto. Dopo, basta regolare il timer al numero<br />
totale di ore – cioè, in questo caso, 12 ore.<br />
• Premere su ▲ del panello di controllo e "2:50", il tempo per questo regolazione,<br />
comparirà automaticamente sullo schermo. Continuare di premere il pulsante ▲ fino<br />
a vedere "12:00" sullo schermo. Non è necessario calcolare la differenza tra il tempo di<br />
regolazione (2:50) e il totale di ore desiderate (12:00). L’apparecchio si regolerà<br />
121 <strong>VG</strong> <strong>BBA</strong> 1 - 110711<br />
Assembly page 121/168
�<br />
Fax +32 2 359 95 50<br />
Copies of the I/B. Please reproduce them without any<br />
changes except under special instruction from Team<br />
International BELGIUM. The pages must be reproduced<br />
and folded in order to obtain a booklet A5 (+/- 148.5 mm<br />
width x 210 mm height). When folding, make sure you<br />
keep the good numbering when you turn the pages of<br />
the I/B. Don’t change the page numbering. Keep the<br />
language integrity.<br />
automaticamente per includere il tempo di regolazione. Basta quindi regolare il timer al<br />
numero totale di ore (12). Se di supera le“12:00”, premere ▼ per tornarci. Se si<br />
mantiene il pulsante, il tempo scorrerà più velocemente.<br />
• Quando il tempo è regolato, premere il pulsante “START/STOP”. Il conto alla rovescia sta<br />
per cominciare. Sullo schermo apparirà il tempo residuale minuto per minuto. Quando il<br />
timer giungerà a “0:00”, il pane sarà pronto e l’apparecchio emetterà 12 segnali sonori<br />
successivi.<br />
• In caso di errore di regolazione del timer, mantenere il pulsante “START/STOP” finché un<br />
segnale sonoro si faccia sentire. La regolazione sarà annullata e si potrà riprogrammare il<br />
timer.<br />
PROBLEMI E SOLUZIONI<br />
Problema Soluzione<br />
Fuoriesce fumo dalle griglie di ventilazione<br />
durante la cottura.<br />
La farina ha traboccato ed è caduta nella<br />
scatola interna dell’apparecchio.<br />
Olio potrebbe aver scorso sull’elemento<br />
riscaldante. Staccare la spina dalla presa di<br />
corrente, ritirare la forma e pulire l’elemento<br />
riscaldante con un pano umido. Evitare le<br />
bruciature.<br />
Staccare la spina dell’apparecchio dalla<br />
presa di corrente e lasciarlo raffreddare.<br />
Asciugare la scatola interna con un panno<br />
pulito. Stare molto attenti quando si pulisce<br />
attorno all’elemento scaldante.<br />
La crosta inferiore è troppo spessa. Succede se il pane è rimasto troppo a lungo<br />
nell’apparechio dopo la cottura. Ritirare il<br />
pane prima.<br />
Il pane non è cotto correttamente. Assicurarsi che l’impastatrice sia<br />
correttamente sistemata sull’asse.<br />
Evitare di aprire il coperchio troppo spesso<br />
durante lo svolgimento del programma.<br />
Si sente il motore dell’apparecchio, ma la Controllare che la forma sia fissata bene e<br />
pasta non si mescola.<br />
l’impastatrice correttamente sistemata.<br />
HOT appare sullo schermo. Se HOT appare sullo schermo, dopo di aver<br />
premuto il pulsante START/STOP significa che<br />
la temperatura è troppo elevata all’interno<br />
della scatola. È quindi necessario fermare il<br />
programma, aprire il coperchio e lasciar<br />
raffreddare l’apparecchio per 10-20 minuti.<br />
H:HH o LLL appare sullo schermo. Se H:HH o LLL appare sullo schermo dopo<br />
l’inizio di un programma significa che la<br />
temperatura è troppo elevata all’interno<br />
della scatola. È quindi necessario fermare il<br />
programma, aprire il coperchio e lasciar<br />
raffreddare l’apparecchio per 10-20 minuti.<br />
Se non si ottiene il risultato desiderato, verificare i punti seguenti:<br />
Attenzione:provare una soluzione alla volta per pagnotta di pane!<br />
122 <strong>VG</strong> <strong>BBA</strong> 1 - 110711<br />
Assembly page 122/168
�<br />
Fax +32 2 359 95 50<br />
A) Problemi di misura<br />
Copies of the I/B. Please reproduce them without any<br />
changes except under special instruction from Team<br />
International BELGIUM. The pages must be reproduced<br />
and folded in order to obtain a booklet A5 (+/- 148.5 mm<br />
width x 210 mm height). When folding, make sure you<br />
keep the good numbering when you turn the pages of<br />
the I/B. Don’t change the page numbering. Keep the<br />
language integrity.<br />
Se il pane lievita, poi si sgonfia<br />
• Ridurre la quantità d’acqua/latte di 2 cucchiai.<br />
• Aumentare la quantità di sale di ¼ di cucchiaino.<br />
• Ridurre la quantità di lievito di ¼ di cucchiaino.<br />
Se il pane lievita troppo<br />
• Ridurre la quantità di farina di 2 cucchiai.<br />
• Ridurre la quantità d’acqua/latte di 2 cucchiai.<br />
• Aumentare la quantità del sale di ¼ di cucchiaino.<br />
• Ridurre la quantità di zucchero/miele di un cucchiaino.<br />
• Ridurre la quantità di lievito di ¼ di cucchiaino.<br />
Se il pane non lievita abbastanza<br />
• Aumentare la quantità d’acqua/latte di 2 cucchiai.<br />
• Ridurre la quantità di sale di ¼ di cucchiaino.<br />
• Aumentare la quantità di zucchero/miele di un cucchiaino.<br />
• Aumentare la quantità di lievito di un cucchiaino.<br />
Se la crosta è troppo scura<br />
• Ridurre la quantità di zucchero/miele di un cucchiaino.<br />
Se il pane non è cotto<br />
• Ridurre la quantità d’acqua/latte di 2 cucchiai.<br />
Se la parte superiore del pane non è cotta<br />
• Ridurre la quantità di farina di 2 cucchiai.<br />
• Aumentare la quantità d’acqua/latte di 2 cucchiai.<br />
Se la tessitura del pane è troppo pesante o densa.<br />
• Ridurre la quantità di farina di 2 cucchiai.<br />
• Aumentare la quantità di zucchero di cucchiai.<br />
• Aumentare la quantità di lievito di ¼ di cucchiaino.<br />
B) Problemi di ingredienti<br />
Se non si tratta di un problema di misura, il problema può anche provenire dagli ingredienti<br />
utilizzati.<br />
Se il pane lievita, poi si sgonfia<br />
• La farina è troppo fina.<br />
Se il pane lievita troppo<br />
• Se si utilizza un brutto tipo di lievito.<br />
• Si è dimenticato il sale.<br />
Se il pane non lievita abbastanza<br />
• La farina è troppo vecchia.<br />
• La farina ha troppo poco glutine.<br />
• La farina è troppo fine.<br />
• Si è utilizzato un tipo sbagliato di lievito.<br />
• Si è messo troppo sale.<br />
Se il pane è piatto, lievita poco o non lievita.<br />
• Il liquido è troppo freddo/caldo.<br />
• La farina è troppo vecchia.<br />
• La farina ha troppo poco glutine.<br />
• La farina è troppo fine.<br />
• Si è dimenticato il lievito.<br />
• Il lievito non è più buono.<br />
• Si è utilizzato un tipo di lievito sbagliato.<br />
• Si è messo troppo sale.<br />
123 <strong>VG</strong> <strong>BBA</strong> 1 - 110711<br />
Assembly page 123/168
�<br />
Fax +32 2 359 95 50<br />
• Si è dimenticato il sale.<br />
Se gli ingredienti non sono mescolati<br />
• La farina è troppo fine.<br />
Se la tessitura del pane è troppo pesante o densa<br />
• Si è utilizzato un tipo di lievito sbagliato.<br />
PULIZIA E MANUTENZIONE<br />
Copies of the I/B. Please reproduce them without any<br />
changes except under special instruction from Team<br />
International BELGIUM. The pages must be reproduced<br />
and folded in order to obtain a booklet A5 (+/- 148.5 mm<br />
width x 210 mm height). When folding, make sure you<br />
keep the good numbering when you turn the pages of<br />
the I/B. Don’t change the page numbering. Keep the<br />
language integrity.<br />
Staccare la spina dalla presa di corrente e lasciar raffreddare totalmente l’apparecchio prima<br />
di pulirlo.<br />
1. Forma<br />
Prima di pulirla, toglierla dall’apparecchio. Non immergere la forma nell’acqua né in<br />
qualunque liquido. Pulire la parte interna ed esterna con un panno umido. Se necessario,<br />
utilizzare acqua leggermente saponosa per pulire la parte interna. Non utilizzare oggetti<br />
graffianti o abrasivi perché potrebbero danneggiare il rivestimento antiaderente. La<br />
sostituzione di una forma graffiata o danneggiata in questo modo non è compresa nella<br />
garanzia. Dopo certo tempo, l’apparenza della superficie antiaderente può cambiare a<br />
causa dell’umidità e del vapore. È un fenomeno normale che non incide sulle proprietà e<br />
la quantità.<br />
2. Impastatrice<br />
Pulirla con un panno umido. Se l’impastatrice è difficile da staccare dalla forma, versare<br />
acqua calda nella forma e aspettare qualche minuto. L’acqua calda dilaterà il punto di<br />
connessione e lo sbloccherà. Se il buco dell’impastatrice è sporco, pulirlo con uno<br />
stecchino senza graffiare l’impastatrice.<br />
3. Coperchio con finestra<br />
Pulirlo con un panno umido. Non immergerlo nell’acqua né in qualunque liquido.<br />
4. Parte interna<br />
Se necessario, si può anche pulire la parte interna in cui si trova la forma. Utilizzare soltanto<br />
un panno umido. Assicurarsi che la parte interna sia totalmente fredda prima di pulirla.<br />
Assicurarsi che sia ben secca prima di mettere l’apparecchio in funzione.<br />
5. Corpo dell’apparecchio<br />
Pulire il corpo dell’apparecchio con un panno umido. Non immergerlo mai nell’acqua né<br />
in qualunque liquido.<br />
DESCRIZIONE DEI PROGRAMMI E RICETTE<br />
FUNZIONE MEMORIA<br />
In caso di interruzione della corrente, il programma continuerà automaticamente se la<br />
corrente ricomincia a funzionare entro 20 minuti, e ciò senza dover premere il pulsante<br />
START/STOP. Se l’interruzione dura più di 20 minuti, la memoria non funzionerà e sarà necessario<br />
ricominciare la programmazione. Se il programma in corso non aveva ancora raggiunto la<br />
fase di impastamento, basta ricominciare lo stesso programma. Se il programma si trovava già<br />
in una fase succesiva, ma che la cottura non aveva cominciato, utilizzare il programma<br />
“Cottura” (BAKE) per cuocere la pasta. Se invece la cottura del pane era già cominciata, si<br />
consiglia di ricominciare con nuovi ingredienti perché il ciclo di cottura di un’ora del<br />
programma “Cottura” potrebbe essere troppo lungo.<br />
124 <strong>VG</strong> <strong>BBA</strong> 1 - 110711<br />
Assembly page 124/168
�<br />
Fax +32 2 359 95 50<br />
PANE BIANCO STANDARD<br />
Copies of the I/B. Please reproduce them without any<br />
changes except under special instruction from Team<br />
International BELGIUM. The pages must be reproduced<br />
and folded in order to obtain a booklet A5 (+/- 148.5 mm<br />
width x 210 mm height). When folding, make sure you<br />
keep the good numbering when you turn the pages of<br />
the I/B. Don’t change the page numbering. Keep the<br />
language integrity.<br />
Programma: 1 (Basic) – Colorazione della crosta: chiara/scura – Peso: 450g/680g/900g<br />
Per i pani a base di farina, benché certe ricette possano pure contenere una piccola quantità<br />
di grano intero. Le pagnotte saranno leggermente più densi dei sfilatini di pane o brioche.<br />
Ingredienti:<br />
450g 680g 900g<br />
2/3 misurino d’acqua 1 misurino d’acqua<br />
1 1/3 misurino d’acqua<br />
1 cucchiaio di margarina 1 ½ cucchiaio di margarina o 2 cucchiai di margarina o di<br />
o di burro<br />
di burro<br />
burro<br />
1 cucchiaio di olio<br />
1 ½ cucchiaio di olio vegetale 2 cucchiai di olio vegetale<br />
vegetale<br />
1 ½ cucchiaino di sale<br />
1 cucchiaino di sale<br />
1/3 cucchiaino di sale 2 cucchiai di latte in polvere 3 cucchiai di latte in polvere<br />
1 ½ cucchiaio di latte in 2 ½ cucchiai di zucchero 3 cucchiai di zucchero<br />
polvere<br />
2 ¼ misure di farina ogni uso o 3 ½ misure di farina ogni uso o<br />
2 cucchiai di zucchero farina da pane<br />
farina da pane<br />
2 misure di farina ogni uso<br />
o farina da pane<br />
1 ¼ cucchiaino di lievito<br />
rapido<br />
1 ¼ cucchiaino di lievito rapido 1 ½ cucchiaino di lievito rapido<br />
1. Misurare gli ingredienti con precisione e versare nella forma rispettando l’ordine dato nella<br />
ricetta (ingredienti liquidi prima).<br />
2. Sistemare correttamente la forma nell’apparecchio. Chiudere il coperchio.<br />
3. Scegliere il programma desiderato.<br />
4. Scegliere la colorazione desiderata della crosta.<br />
5. Scegliere il peso della pagnotta.<br />
6. Premere START/STOP.<br />
7. Con guanti di protezione, togliere il pane dalla macchina dopo la fine della cottura.<br />
8. Lasciar raffreddare il pane su una griglia per almeno un’ora prima di tagliarlo.<br />
SFILATINO DI PANE<br />
Programma: 2 (French)– Colorazione della crosta: chiara/scura – Peso: 450g/680g/900g<br />
Generalmente, lo sfilatino ha una crosta più croccante e una tessitura più chiara di quella del<br />
pane standard.<br />
Ingredienti:<br />
450g 680g 900g<br />
1 misurino d’acqua 1 ¼ misurino d’acqua<br />
1 ½ misurino d’acqua<br />
2 cucchiai d’olio d’oliva 2 cucchiai d’olio d’oliva 2 cucchiai d’olio d’oliva<br />
1 cucchiaino di sale 1 ½ cucchiaino di sale<br />
2 cucchiaini di sale<br />
2 cucchiai di zucchero 2 cucchiai di zucchero<br />
2 ½ cucchiai di zucchero<br />
2 misure di farina ogni uso 2 ½ misure di farina ogni uso o 3 ½ misure di farina ogni uso o<br />
o farina da pane<br />
farina da pane<br />
farina da pane 1 ½ cucchiaino<br />
1 cucchiaino di lievito 1 ¼ cucchiaino di lievito rapido di lievito rapido<br />
rapido<br />
125 <strong>VG</strong> <strong>BBA</strong> 1 - 110711<br />
Assembly page 125/168
�<br />
Fax +32 2 359 95 50<br />
Copies of the I/B. Please reproduce them without any<br />
changes except under special instruction from Team<br />
International BELGIUM. The pages must be reproduced<br />
and folded in order to obtain a booklet A5 (+/- 148.5 mm<br />
width x 210 mm height). When folding, make sure you<br />
keep the good numbering when you turn the pages of<br />
the I/B. Don’t change the page numbering. Keep the<br />
language integrity.<br />
1. Misurare gli ingredienti con precisione e versare nella forma rispettando l’ordine dato nella<br />
ricetta (ingredienti liquidi prima).<br />
2. Sistemare correttamente la forma nell’apparecchio. Chiudere il coperchio.<br />
3. Scegliere il programma desiderato.<br />
4. Scegliere la colorazione desiderata della crosta.<br />
5. Scegliere il peso della pagnotta<br />
6. Premere START/STOP.<br />
7. Con guanti di protezione, togliere il pane dalla macchina dopo la fine della cottura.<br />
8. Lasciar raffreddare il pane su una griglia per almeno un’ora prima di tagliarlo.<br />
BRIOCHE<br />
Programma: 3 (Sweet )– Colorazione della crosta: chiara/scura – Peso: 450g/680g/900g<br />
Per fare ricette con succhi di frutta, più zucchero o ingredienti dolci come noce di cocco<br />
grattugiato, uva, frutta secca o cioccolato.<br />
Ingredienti:<br />
450g 680g 900g<br />
3/4 misurino di latte<br />
1 ½ cucchiaio di margarina o<br />
di burro<br />
1 uovo<br />
1 cucchiaino di sale<br />
1 ½ cucchiaio di miele<br />
2 cucchiai di zucchero<br />
2 misure di farina ogni uso o<br />
farina da pane<br />
1/2 cucchiaino di lievito rapido<br />
1 ¼ misurino di latte<br />
1 ½ cucchiaio di margarina o<br />
di burro<br />
1 uovo<br />
1 cucchiaino di sale<br />
1 ½ cucchiaio di miele<br />
3 cucchiai di zucchero<br />
3 misure di farina ogni uso o<br />
farina da pane<br />
1 cucchiaino di lievito rapido<br />
1 ½ misurino di latte<br />
2 cucchiai di margarina o<br />
di burro<br />
2 uova<br />
1 cucchiaino di sale<br />
2 cucchiai di miele<br />
4 cucchiai di zucchero<br />
3 ½ misure di farina ogni<br />
uso o farina da pane<br />
1 ¼ cucchiaino di lievito<br />
rapido<br />
1. Misurare gli ingredienti con precisione e versare nella forma rispettando l’ordine dato nella<br />
ricetta (ingredienti liquidi prima).<br />
2. Sistemare correttamente la forma nell’apparecchio. Chiudere il coperchio.<br />
3. Scegliere il programma desiderato.<br />
4. Scegliere la colorazione desiderata della crosta.<br />
5. Scegliere il peso della pagnotta.<br />
6. Premere START/STOP.<br />
7. Con guanti di protezione, togliere il pane dalla macchina dopo la fine della cottura.<br />
8. Lasciar raffreddare il pane su una griglia per almeno un’ora prima di tagliarlo.<br />
PLUM CAKE<br />
Programma: 4<br />
Ingredienti:<br />
8 cucchiai di burro<br />
8 cucchiai di zucchero<br />
5 uova<br />
1 ½ misurino di farina ogni uso<br />
1 ½ cucchiaio di succo di limone<br />
126 <strong>VG</strong> <strong>BBA</strong> 1 - 110711<br />
Assembly page 126/168
�<br />
Fax +32 2 359 95 50<br />
1 ½ cucchiaino di lievito artificiale<br />
Copies of the I/B. Please reproduce them without any<br />
changes except under special instruction from Team<br />
International BELGIUM. The pages must be reproduced<br />
and folded in order to obtain a booklet A5 (+/- 148.5 mm<br />
width x 210 mm height). When folding, make sure you<br />
keep the good numbering when you turn the pages of<br />
the I/B. Don’t change the page numbering. Keep the<br />
language integrity.<br />
Consiglio: durante la miscela, grattare le pareti del recipiente per assicurarsi una miscela<br />
omogenea.<br />
1. Misurare gli ingredienti con precisione e versare nella forma rispettando l’ordine dato nella<br />
ricetta (ingredienti liquidi prima).<br />
2. Sistemare correttamente la forma nell’apparecchio. Chiudere il coperchio.<br />
3. Scegliere il programma desiderato.<br />
4. Premere START/STOP.<br />
5. Con guanti di protezione, togliere il dolce dalla macchina dopo la fine della cottura.<br />
6. Lasciar raffreddare il dolce su una griglia.<br />
PANE DI GRANO INTERO<br />
Programma: 5 (Whole Wheat) – Colorazione della crosta: chiara/scura – Peso:<br />
450g/680g/900g<br />
Per ricette includendo quantità importanti di farina di grano intero o di segale, avena o<br />
crusca.<br />
Ingredienti:<br />
450g 680g 900g<br />
1 misurino d’acqua<br />
1 cucchiai d’olio d’oliva<br />
1 cucchiaino di sale<br />
1 cucchiai di zucchero<br />
1 misure di farina ogni uso o<br />
farina da pane<br />
1 misurino di farina integrale<br />
1 cucchiaino di lievito<br />
rapido<br />
1 ¼ misurino d’acqua<br />
2 cucchiai d’olio d’oliva<br />
1 ½ cucchiaino di sale<br />
2 cucchiai di zucchero<br />
2 ½ misurini di farina ogni<br />
uso o farina da pane<br />
1 ¼ cucchiaino di lievito<br />
rapido<br />
1 ½ misurino d’acqua<br />
2 cucchiai d’olio d’oliva<br />
2 cucchiaini di sale<br />
2 ½ cucchiai di zucchero<br />
3 ½ misurini di farina ogni uso o<br />
farina da pane<br />
1 ½ cucchiaino di lievito rapido<br />
Nota: si possono aggiungere agli ingredienti 1 ½ cucchiaio di glutine per aumentare l’altezza e<br />
migliorare la tessitura del pane.<br />
1. Misurare gli ingredienti con precisione e versare nella forma rispettando l’ordine dato nella<br />
ricetta (ingredienti liquidi prima).<br />
2. Sistemare correttamente la forma nell’apparecchio. Chiudere il coperchio.<br />
3. Scegliere il programma desiderato.<br />
4. Scegliere la colorazione desiderata della crosta.<br />
5. Scegliere il peso della pagnotta.<br />
6. Premere START/STOP.<br />
7. Con guanti di protezione, togliere il pane dalla macchina dopo la fine della cottura.<br />
8. Lasciar raffreddare il pane su una griglia per almeno un’ora prima di tagliarlo.<br />
127 <strong>VG</strong> <strong>BBA</strong> 1 - 110711<br />
Assembly page 127/168
�<br />
SANDWICH<br />
Fax +32 2 359 95 50<br />
Programma: 6 – Peso: 450g/680g/900g<br />
Ingredienti:<br />
Copies of the I/B. Please reproduce them without any<br />
changes except under special instruction from Team<br />
International BELGIUM. The pages must be reproduced<br />
and folded in order to obtain a booklet A5 (+/- 148.5 mm<br />
width x 210 mm height). When folding, make sure you<br />
keep the good numbering when you turn the pages of<br />
the I/B. Don’t change the page numbering. Keep the<br />
language integrity.<br />
450g 680g 900g<br />
3/4 misurino d’acqua<br />
1 cucchiaio di burro o di<br />
margarina<br />
1 cucchiaino di sale<br />
¾ cucchiaio di zucchero<br />
2 misurini di farina ogni uso<br />
o farina da pane<br />
1 cucchiaino di lievito<br />
rapido<br />
1 ½ misurino d’acqua<br />
1 ½ cucchiaio di burro o di<br />
margarina<br />
1 ½ cucchiaino di sale<br />
1 cucchiaio di zucchero<br />
2 ½ misurini di farina ogni<br />
uso o farina da pane<br />
1 ¼ cucchiaino di lievito<br />
rapido<br />
1 1/3 misurino d’acqua<br />
2 cucchiai di burro o di<br />
margarina<br />
2 cucchiaini di sale<br />
1 ½ cucchiaio di zucchero<br />
3 ¼ misurini di farina ogni<br />
uso o farina da pane<br />
1 ½ cucchiaino di lievito<br />
rapido<br />
1. Unire gli ingredienti con precisione e versare nella forma rispettando l’ordine dato nella<br />
ricetta (ingredienti liquidi prima).<br />
2. Sistemare correttamente la forma nell’apparecchio. Chiudere il coperchio.<br />
3. Scegliere il programma desiderato.<br />
4. Scegliere il peso della pagnotta.<br />
5. Premere START/STOP.<br />
6. Con guanti di protezione, togliere il pane dalla macchina dopo la fine della cottura.<br />
7. Lasciar raffreddare il pane su una griglia per almeno un’ora prima di tagliarlo.<br />
FRUSTA<br />
Programma: 7 (Whisk)<br />
Questo programma permette di impastare il composto che viene usato per fare marmellate e<br />
noddles. La teglia non è riscaldata e nessun colore e peso sono da scegliere.<br />
MARMELLATA DI FRAGOLE<br />
Programma: 8 (Jam)<br />
Per preparare facilmente la marmellata .<br />
Tagliare la frutta a pezzi di 1cm. Invece di utilizzare zucchero normale, prendere zucchero<br />
speciale per marmellata che si trova nel commercio.<br />
Dopo aver premuto START/STOP, c’è un periodo di preriscaldamento (l'apparecchio sarà attivo<br />
soltanto alla fine di questo periodo).<br />
Ingredienti:<br />
900g di fragole fresche tagliate a pezzi di 1cm<br />
500g di zucchero speciale<br />
1 cucchiaio di succo di limone<br />
1. Misurare gli ingredienti con precisione e versare nella forma.<br />
2. Sistemare correttamente la forma nell’apparecchio. Chiudere il coperchio.<br />
3. Scegliere il programma desiderato.<br />
4. Premere START/STOP.<br />
128 <strong>VG</strong> <strong>BBA</strong> 1 - 110711<br />
Assembly page 128/168
�<br />
Fax +32 2 359 95 50<br />
Copies of the I/B. Please reproduce them without any<br />
changes except under special instruction from Team<br />
International BELGIUM. The pages must be reproduced<br />
and folded in order to obtain a booklet A5 (+/- 148.5 mm<br />
width x 210 mm height). When folding, make sure you<br />
keep the good numbering when you turn the pages of<br />
the I/B. Don’t change the page numbering. Keep the<br />
language integrity.<br />
5. Con guanti di protezione, togliere il dolce dalla macchina dopo la fine della cottura.<br />
6. Versare la marmellata in un vaso pulito e sterilizzato e chiudere con un coperchio<br />
sterilizzato. Conservare nel frigorifero.<br />
TORTA ALLO YOGHOURT<br />
Programma: 9 (Yoghourt)<br />
Questo programma ti consente di preparare una deliziosa tora allo yoghourt.<br />
Ingredienti:<br />
450g 680g 900g<br />
1/3 misurino d’acqua<br />
100g yogurt<br />
1 cucchiaio di olio<br />
vegetale<br />
1/3 cucchiaino di sale<br />
1 ½ cucchiaio di<br />
zucchero<br />
2 misurini di farina ogni<br />
uso o farina da pane<br />
1 cucchiaino di lievito<br />
rapido<br />
2/3 misurino d’acqua<br />
150g yogurt<br />
1 ½ cucchiaio di olio vegetale<br />
½ cucchiaino di sale<br />
2 cucchiai di zucchero<br />
2 ¼ misurini di farina ogni uso o<br />
farina da pane<br />
1 ¼ cucchiaino di lievito rapido<br />
1 misurino d’acqua<br />
200g yogurt<br />
2 cucchiai di olio vegetale<br />
¾ cucchiaino di sale<br />
2 ½ cucchiai di zucchero<br />
3 ½ misurini di farina ogni uso o<br />
farina da pane<br />
1 ½ cucchiaino di lievito<br />
rapido<br />
1. Misurare gli ingredienti con precisione e versare nella forma rispettando l’ordine dato nella<br />
ricetta (ingredienti liquidi prima).<br />
2. Sistemare correttamente la forma nell’apparecchio. Chiudere il coperchio.<br />
3. Scegliere il programma desiderato.<br />
4. Scegliere la colorazione desiderata della crosta.<br />
5. Scegliere il peso della pagnotta.<br />
6. Premere START/STOP.<br />
7. Con guanti di protezione, togliere il pane dalla macchina dopo la fine della cottura.<br />
8. Lasciar raffreddare il pane su una griglia per almeno un’ora prima di tagliarlo.<br />
PASTA PER LA PIZZA<br />
Programma: 10 (Dough)<br />
Per preparare la pasta senza cuocere il pane. Si può preparare qualsiasi pasta, che può essere<br />
lavorata per fare pizza, piccoli pani, bretzel, frittelle e pani rotondi o intrecciati che devono<br />
essere cotti nel forno o fritti in una friggitrice.<br />
Ingredienti:<br />
1 ¼ misura d’acqua<br />
½ cucchiaino di sale<br />
2 cucchiai d’olio d’oliva<br />
2 ½ misure di farina ogni uso o di farina da pane<br />
1 ½ cucchiaino di lievito rapido<br />
1. Misurare gli ingredienti con precisione e versare nella forma rispettando l’ordine dato nella<br />
ricetta (ingredienti liquidi prima).<br />
129 <strong>VG</strong> <strong>BBA</strong> 1 - 110711<br />
Assembly page 129/168
�<br />
Fax +32 2 359 95 50<br />
Copies of the I/B. Please reproduce them without any<br />
changes except under special instruction from Team<br />
International BELGIUM. The pages must be reproduced<br />
and folded in order to obtain a booklet A5 (+/- 148.5 mm<br />
width x 210 mm height). When folding, make sure you<br />
keep the good numbering when you turn the pages of<br />
the I/B. Don’t change the page numbering. Keep the<br />
language integrity.<br />
2. Sistemare correttamente la forma nell’apparecchio. Chiudere il coperchio.<br />
3. Scegliere il programma desiderato. Premere START/STOP.<br />
4. Quando il ciclo è terminato, togliere la pasta dalla forma.<br />
5. Stendere la pasta e lasciarla lievitare durante 10 minuti.<br />
6. Versare la salsa di pomodori e ripartire gli ingredienti desiderati sulla pasta.<br />
7. Cuocere al forno tradizionale durante 15 minuti circa a 200°C.<br />
PANE RAPIDO<br />
Programma 11 (Fast) – Colorazione della crosta: chiara/scura<br />
Per fare pane in modo veloce. Il pane sarà comunque più denso e meno alto.<br />
Ingredienti:<br />
1 misura d’acqua<br />
2 cucchiai di burro o di margarina<br />
1 ½ cucchiaino di sale<br />
2 cucchiai di zucchero<br />
1 cucchiaio di latte in polvere<br />
3 misure di farina ogni uso<br />
2 cucchiaini di lievito rapido<br />
1. Misurare gli ingredienti con precisione e versare nella forma rispettando l’ordine dato nella<br />
ricetta (ingredienti liquidi prima).<br />
2. Sistemare correttamente la forma nell’apparecchio. Chiudere il coperchio.<br />
3. Scegliere il programma desiderato.<br />
4. Scegliere la colorazione desiderata della crosta.<br />
5. Premere START/STOP.<br />
6. Con guanti di protezione, togliere il pane dalla macchina dopo la fine della cottura.<br />
7. Lasciar raffreddare il pane su una griglia per almeno un’ora prima di tagliarlo.<br />
COTTURA<br />
Programma: 12 (Bake)<br />
Durata del programma: 1:00<br />
Siccome questo programma fa funzionare l’apparecchio in modo cottura durante un’ora,<br />
occorre essere vigilante durante questo processo. Si utilizza questo programma quando<br />
accade un’interruzione di corrente. Per ulteriori informazioni sulle interruzioni di corrente, riferirsi<br />
al paragrafo “MEMORIA”.<br />
DIRETTIVA 2002/96/CE SULLO SMALTIMENTO DI APPARECCHI ELETTRICI ED ELETTRONICI<br />
Per preservare l'ambiente e la nostra salute, l'eliminazione dei vecchi apparecchi elettrici ed<br />
elettronici non più utilizzati, va fatta secondo la direttiva sopra citata che impone l'obbligo al<br />
costruttore, al commerciante e all’utilizzatore di consegnare gli apparecchi ai centri di<br />
raccolta specializzati, i quali saranno in grado di smaltire e riciclare i vecchi prodotti come la<br />
legge prescrive.<br />
Per questa ragione troverete apposto sull’etichetta segnaletica il simbolo che indica di<br />
non gettare il vecchio apparecchio non più utilizzato, in pattumiera o nel cassonetto delle<br />
immondizie.<br />
130 <strong>VG</strong> <strong>BBA</strong> 1 - 110711<br />
Assembly page 130/168
�<br />
Fax +32 2 359 95 50<br />
Copies of the I/B. Please reproduce them without any<br />
changes except under special instruction from Team<br />
International BELGIUM. The pages must be reproduced<br />
and folded in order to obtain a booklet A5 (+/- 148.5 mm<br />
width x 210 mm height). When folding, make sure you<br />
keep the good numbering when you turn the pages of<br />
the I/B. Don’t change the page numbering. Keep the<br />
language integrity.<br />
Per eliminare il vecchio apparecchio non più utilizzato, potete consegnarlo al rivenditore il<br />
cambio di quello nuovo acquistato, o direttamente nei centri di raccolta specializzati messi a<br />
disposizione dal vostro comune di residenza.<br />
131 <strong>VG</strong> <strong>BBA</strong> 1 - 110711<br />
Assembly page 131/168
�<br />
Fax +32 2 359 95 50<br />
ZASADY BEZPIECZNEGO UŻYTKOWANIA<br />
Copies of the I/B. Please reproduce them without any<br />
changes except under special instruction from Team<br />
International BELGIUM. The pages must be reproduced<br />
and folded in order to obtain a booklet A5 (+/- 148.5 mm<br />
width x 210 mm height). When folding, make sure you<br />
keep the good numbering when you turn the pages of<br />
the I/B. Don’t change the page numbering. Keep the<br />
language integrity.<br />
Zanim zaczniesz używać urządzenie przeczytaj uważnie instrukcję i postępuj wyłącznie z jej<br />
wskazaniami.<br />
Ważne: Osoby (w tym dzieci), które ze względów zdrowotnych lub innych mających wpływ na<br />
bezpieczne użytkowanie urządzenia, nie mogą należycie obsługiwać urządzenia nie powinny<br />
go użytkować. Użytkowanie urządzenia może stanowić dla nich niebezpieczeństwo<br />
skaleczenia. Szczególnie dotyczy to dzieci, które mogą uznać urządzenie za zabawkę.<br />
� Zanim włączysz urządzenie sprawdź, czy napięcie sieciowe zgadza się z parametrami<br />
podanymi na tabliczce znamionowej urządzenia.<br />
� Podczas użytkowania nie zostawiaj urządzenia bez nadzoru.<br />
� Regularnie sprawdzaj czy kabel zasilający nie jest uszkodzony. Nie używaj urządzenia z<br />
uszkodzonym kablem zasilającym. Jeżeli nie odłączalny przewód zasilający ulegnie<br />
uszkodzeniu, to powinien on być wymieniony u wytwórcy, lub przez specjalistyczny zakład<br />
naprawczy, albo przez osobę wykwalifikowaną, w celu uniknięcia zagrożenia (*).<br />
� Urządzenie służy tylko do użytku domowego i powinno być używane zgodnie ze<br />
wskazaniami niniejszej instrukcji.<br />
� Nie zanurzaj w wodzie ani żadnym innym płynie. Nie czyść w zmywarce do naczyń.<br />
� Zachowaj szczególną ostrożność, zwłaszcza tuż po zakończeniu pieczenia ponieważ<br />
urządzenie jest bardzo gorące. Przed czyszczeniem pozwól na całkowite ostygnięcie<br />
wszystkich jego elementów.<br />
� Nie używaj w pobliżu źródeł ciepła.<br />
� Przed czyszczeniem wyłącz przewód zasilający z gniazda.<br />
� Nie używaj na zewnątrz, zadbaj, aby urządzenie pracowało w suchym otoczeniu.<br />
� Nigdy nie używaj dodatkowych urządzeń ani części nie posiadających rekomendacji<br />
producenta ponieważ może to być niebezpieczne dla użytkownika. Mogą one również<br />
wpłynąć na wadliwe działanie urządzenia lub jego uszkodzenie.<br />
� Nigdy nie ciągnij, nie podnoś itp. urządzenia za kabel ani nie wyłączaj wtyczki z sieci w ten<br />
sposób. Nie owijaj kabla wokół urządzenia, nie zginaj go, nie skręcaj.<br />
� Ustaw urzadzenie na płaskiej stabilnej powierzchnii.<br />
� Upewnij się, że przewód nie dotyka gorących części urządzenia. Nie dotykaj nagrzanych<br />
cześci urządzenia ponieważ możesz sie poparzyć.<br />
� Sprawdzaj regularnie czy urzadzenie nie ma styczności z łatwopalnymi materiałami<br />
(firany, ubrania). Być przyczyną pożaru.<br />
� Temperatura powierzchni urządzenia podczas użytkowania jest bardzo wysoka. Nigdy nie<br />
dotykaj jego powierzchni podczas działania. Zawsze używaj rękawic kuchennych. Jeśli<br />
symbol pojawia się na niektórych powierzchniach kuchenki musisz zachować<br />
szczególną ostrożność przy dotykaniu urządzenia. Symbol ten oznacza: “UWAGA,<br />
powierzchnia może być gorąca w trakcie funkcjonowania urządzenia.”<br />
� Zachowaj szczególną ostrożność, aby nie porysować specjalnej powłoki blachy oraz<br />
ostrzy, ponieważ uszkodzi to ich nieprzywieralną właściwość.<br />
� Nidgy nie używaj większej niż zalecana w instrukcji lub przepisie ilości składników i drożdży.<br />
W przeciwnym razie ciasto może wypłynąć z blachy.<br />
� Urządzenia nie można przykrywać (przykładowo ścierką kuchenną), ponieważ utrudni to<br />
odprowadzenie ciepła i pary.<br />
� Nie kładź żadnych przedmiotów na blasze, gdyż może to spowodować porażenie<br />
prądem oraz zniszczyć nieprzywieralną powierchnię blachy.<br />
� Urządzenie nie może być podłączone do zewnętrznych systemów sterowania.<br />
132 <strong>VG</strong> <strong>BBA</strong> 1 - 110711<br />
Assembly page 132/168
�<br />
Fax +32 2 359 95 50<br />
Copies of the I/B. Please reproduce them without any<br />
changes except under special instruction from Team<br />
International BELGIUM. The pages must be reproduced<br />
and folded in order to obtain a booklet A5 (+/- 148.5 mm<br />
width x 210 mm height). When folding, make sure you<br />
keep the good numbering when you turn the pages of<br />
the I/B. Don’t change the page numbering. Keep the<br />
language integrity.<br />
(*) Uprawniony elektryk: Osoba wskazana przez dział sprzedaży producenta lub importera lub<br />
każda osoba posiadająca niezbędne kwalifikacje umożliwiające dokonywanie tego typu<br />
napraw bez stwarzania zagrożenia. W każdym przypadku urządzenie należy przekazywać tym<br />
osobom.<br />
UWAGI DOTYCZĄCE KRÓTKIEGO KABLA ZASILAJĄCEGO<br />
Urządzenie posiada krótki kabel zasilający, by zminimalizować ryzyko jego zaplątania lub<br />
potknięcia się. Przedłużacze mogą być używane tylko przy zachowaniu szczególnej<br />
ostrożności.<br />
• Wartość znamionowa natężenia prądu przedłużacza nie może być mniejsza niż 16<br />
amperów. W przeciwnym razie przedłużacz może się nadmiernie nagrzać i ulec<br />
uszkodzeniu.<br />
• Dłuższy kabel musi być tak ułożony, by uniemożliwić jego przypadkowe pociągnięcie np.<br />
przez dzieci.<br />
PRZED PIERWSZYM UŻYCIEM<br />
Rozpakuj urządzenie, usuń wszystkie elementy opakowania. Wilgotną szmatką wytrzyj<br />
poszczególne elementy urządzenia, wytrzyj do sucha. Jakość chleba zależy od wielu<br />
czynników. Znajomość składników i ich interakcji pozwoli osiągnąć oczekiwany rezultat.<br />
Temperatura<br />
Wszystkie składniki umieszczane w urządzeniu powinny mieć temperaturę pokojową.<br />
Pomieszczenie, w którym używane jest urządzenie powinno mieć temperaturę pomiędzy 15°C<br />
a 34°C, najoptymalniej 20 - 23°C.<br />
Odmierzanie składników<br />
• Urządzenie wyposażone jest w miarkę- łyżeczkę (małą i dużą), przy pomocy której należy<br />
odmierzać składniki. Przepisy zawarte w instrukcji oparte są na ilościach odmierzanych tą<br />
właśnie miarką.<br />
• W instrukcji pojawia się również informacja o miarce w postaci kubeczka o pojemności<br />
250ml.<br />
• W odniesieniu do miarki łyżkowej pojemności są następujące:<br />
Łyżka stołowa (tbs) = 15ml<br />
Łyżeczka stołowa (tsp) = 5ml<br />
• W celu odmierzenia płynnych składników, wlej je do miarki – kubeczka i postaw na<br />
płaskiej powierzchni. Poziom płynu powinien odpowiadać oznaczeniu na miarce.<br />
Nieprecyzyjnie odmierzona ilość może mieć zły wpływ na finalny efekt wypieku.<br />
• W celu odmierzenia mąki, wsyp ją do miarki łyżeczkowej. Przestrzegaj dokładnej zalecanej<br />
ilości. W przypadku takich składników jak rodzynki lub kawałeczki czekolady zaleca sie<br />
użycie wagi kuchennej.<br />
Warunki gaograficzne<br />
Na wyskości ponad 3000 stóp, mąka pochłania mniej płynów. Oznacza to konieczność<br />
modyfikacji – dodawania jej mniejszej ilości.<br />
Ciasto wyrasta szybciej w wyższej temperaturze. Cukier, drożdże czy płyny należy dodawać w<br />
ilości nieznacznie skorygowanej, aby uniknąć przerostu ciasta. Patrz tabela poniżej:<br />
133 <strong>VG</strong> <strong>BBA</strong> 1 - 110711<br />
Assembly page 133/168
�<br />
Fax +32 2 359 95 50<br />
Copies of the I/B. Please reproduce them without any<br />
changes except under special instruction from Team<br />
International BELGIUM. The pages must be reproduced<br />
and folded in order to obtain a booklet A5 (+/- 148.5 mm<br />
width x 210 mm height). When folding, make sure you<br />
keep the good numbering when you turn the pages of<br />
the I/B. Don’t change the page numbering. Keep the<br />
language integrity.<br />
Modyfikacje ilości<br />
Dostosowywanie 3000 stóp 5000 stóp 7000 stóp<br />
Zmniejszenie ilości drożdży:<br />
każdą łyżkę z przepisu<br />
należy zmniejszyć o<br />
Zmniejszenie ilości mąki:<br />
każdą łyżkę z przepisu<br />
należy zmniejszyć o<br />
Zwiększenie ilości płynów:<br />
Do każdej szklanki z<br />
przepisu należy dodać<br />
Składniki<br />
1/8 łyżki 1/8 – 1/4 łyżk + 1/4 łyżki<br />
0-1 łyżki 0-2 łyżki 1-2 łyżki<br />
1-2 łyżki 2-4 łyżki 3-4 łyżki<br />
Jednym z najważniejszych elementów podczas wypieku chleba jest jakość i świeżość<br />
składników. Ponadto konieczne jest dokładne przestrzeganie ilości poszczególnych składników<br />
podanych w przepisie.<br />
Mąka pszenna<br />
Mąka pszenna jest napowszechniejszym typem mąki, nadającym se idealnie do wypieku<br />
chleba I ciast.<br />
Mąka chlebowa<br />
Mąka chlebowa to typ maki o dużej zawartości glutenu/białka. Nadaje ona ciastu<br />
plastyczność podczas jego wyrabiania. Posiada większą niż inne mąki zawartość glutenu,<br />
jakkolwiek zależne jest to od sposobu przemiału. Zaleca się ją szczególnie przy pieczeniu w<br />
urządzeniach przeznaczonych do wypieku chleba.<br />
Mąka pełnoziarnista<br />
Postaje ze zmielenia całych ziaren pszenicy, zawierających otręby I kiełki. Sprawia to że jest<br />
cięższa I bogatsza w składniki odżywcze niż pozostałe typy mąki. Chleb z mąki pełnoziarnistej<br />
jest zazwyczaj mniejszy i cięższy niż białe bohenki. Aby tego uniknąć miesza się mąkę<br />
pezłnoziarnistą z mąką pszenna, chlebową lub glutenem, sprawiając że bohenek jest większy I<br />
jaśniejszy.<br />
Mąka żytnia<br />
Jest bogata w błonnik, podobna do mąki pszennej. Należy ją mieszać w dużych proporcjach<br />
z maką pszenną, chlebową lub glutenem, ponieważ sama w sobie nie zawiera wystarczająco<br />
dużo glutenu do wypieku drobnoziarnistego chleba.<br />
Gluten<br />
Gluten jest mieszaniną białek, poprawia objętość I elastyczność ciasta. Gluten jest zawarty w<br />
większości produktów spożywczych. Można go dostać w sklepach, miesza się go z<br />
niskoglutenowymi mąkami takimi jak pełnoziarnista w celu zwiększenia objętości I rozjaśnienia<br />
tekstury.<br />
134 <strong>VG</strong> <strong>BBA</strong> 1 - 110711<br />
Assembly page 134/168
�<br />
Mąka tortowa<br />
Fax +32 2 359 95 50<br />
Copies of the I/B. Please reproduce them without any<br />
changes except under special instruction from Team<br />
International BELGIUM. The pages must be reproduced<br />
and folded in order to obtain a booklet A5 (+/- 148.5 mm<br />
width x 210 mm height). When folding, make sure you<br />
keep the good numbering when you turn the pages of<br />
the I/B. Don’t change the page numbering. Keep the<br />
language integrity.<br />
Mąka o niskiej zawartości glutenu, polecana szczególnie do wypieku ciast. Nie zaleca się jej<br />
do wypieku chleba.<br />
Mąka ze środkiem spulchniającym<br />
Zawiera zbędne składniki zaczynowe kolidujące ze składnikami klasycznego przepisu na chleb<br />
lub ciasto. Nie zaleca się jej do używania w urządzeniu do wypieku chleba.<br />
Otręby<br />
Nieprzetworzone otręby oraz kiełki pszenicy stanowią zmielone zewnętrzne części pszenicy i<br />
ziaren żyta oddzielone od mąki. Dodaje się je w niewielkich ilościach dla wzbogacenia<br />
odżywczego, smaku. Używane są także dla poprawy tekstury chleba.<br />
Płatki kukurydziane oraz płatki owsiane<br />
Pochodzą z grubo zmielonych żółtych i białych częsci kukurydzy oraz ziaren owsa. Używane<br />
są także dla poprawy tekstury chleba.<br />
Śruta pszenna<br />
To posiekane w kanciaste kawałki ziarna pszenicy. Nadają orzechowy posmak i chrupkość.<br />
Mieszanka ziaren z siedmiu zbóż<br />
Zmielone ziarna pszenicy, owsa, otrębów, kukurydzy, ziarna lnu oraz strąków prosa.<br />
Drożdże<br />
Drożdże w wyniku procesu fermentacji wydzielają gaz (dwutlenek węgla) niezbędny do<br />
wzrostu pieczywa. Do produkcji gazu wymagają cukru i mąki. W większości przypadków używa<br />
się suchych drożdży granulowanych. Istnieją cztery typy drożdży; świeże, suszone, szybko<br />
rosnące oraz piekarskie. Zaleca sie używanie tradycyjnych suchych drożdży, a także drożdży<br />
szybko rosnących – stymże w mniejszej ilości. Nie zaleca się używania świeżych drożdży, dają<br />
one słabszy efekt.<br />
Drożdże należy przechowywać w lodówce. Zbyt duża temperatura zabija drożdże. Po otwarciu<br />
opakowania należy je szczelne zamknąć i włożyć do lodówki. Problemy z wyrastaniem ciasta i<br />
chleba wynikają najczęściej z użycia starych drożdży.<br />
W celu sprawdzenia świeżości zaleca się przeprowadzenie testu jak poniżej:<br />
� Umieść ½ szklanki ciepłej przegotowanej wody w miseczce.<br />
� Wymieszaj 1 łyżkę cukru z wodą, nastepnie rozsyp 2 łyżki rozdrobnionych drożdży na<br />
powierzchni wody.<br />
� Umieść miskę w ciepłnym miejscu i odstaw na 10 minut.<br />
� Mieszanka powinna się spienić i wywołać silny aromat drożdży. Jeśli tak się nie stanie<br />
drożdże należy wyrzucić i kupić świeże.<br />
135 <strong>VG</strong> <strong>BBA</strong> 1 - 110711<br />
Assembly page 135/168
�<br />
Cukier<br />
Fax +32 2 359 95 50<br />
Copies of the I/B. Please reproduce them without any<br />
changes except under special instruction from Team<br />
International BELGIUM. The pages must be reproduced<br />
and folded in order to obtain a booklet A5 (+/- 148.5 mm<br />
width x 210 mm height). When folding, make sure you<br />
keep the good numbering when you turn the pages of<br />
the I/B. Don’t change the page numbering. Keep the<br />
language integrity.<br />
Cukier jest ważnym składnikiem dla osiągnięcia kolorytu i smaku pieczywa. To także pożywka<br />
dla drożdży, gdyż wspomaga proces fermentacji. Przepisy wymagające cukru najlepiej łączyć<br />
z granulowanymi drożdżami. Nie zastępuj gruboziarnistego cukru – cukrem pudrem lub cukrem<br />
brązowym, o ile nie ma przeciwwskazań. Sztuczne środki słodzące nie są wskazane, gdyż<br />
drożdże mogą z nimi poprawnie nie zadziałać.<br />
Sól<br />
Sól stanowi podstawę dla uzyskania smaku chleba czy ciast, a także jest odpowiedzialna za<br />
koloryt skórki podczas pieczenia. Z powodów żywieniowych możliwa jest całkowita jej<br />
eliminacja, jakkolwiek spowodować to może przerost pieczywa.<br />
Płyny/mleko<br />
Do wypieku chleba używa się dodatku płynów takich jak mleko, czy mieszanka mleka w<br />
proszku z wodą. Dodatek mleka poprawia smak, zapewnia aksamitną teksturę, zmiękcza<br />
skórkę. Woda natomiast spowoduje, że skórka będzie bardziej chrupiąca. Zaleca sie używanie<br />
sproszkowanego mleka przy użyciu wydłużonego czasu pieczenia. Niektóre przepisy wymagają<br />
dodatku soku (pomarańczowego, jabłkowiego itp.).<br />
Jajka<br />
Jajka wzbogacają i zapewniają jednolitą konsystencję chleba lub ciasta. Zaleca się używanie<br />
jajek w dużych rozmiarach.<br />
Masło, olej i margaryna<br />
Masło, olej i margaryna poprawiają konsystencję i chrupkość chleba drożdżowego. Dodatek<br />
tłuszczu wydłuża jego świeżość. Masło lub margaryna wyjęte bezpośrednio z lodówki należy<br />
pokroić w drobne kawałeczki ułatwiając proces wyrabiania ciasta.<br />
Proszek do pieczenia<br />
Proszek do pieczenia jest to sypka mieszanina rozmaitych związków chemicznych, której<br />
podstawowym zadaniem jest spulchnianie produktów piekarniczych. W przeciwieństwie do<br />
drożdży nie wymaga czasu wyrastania.<br />
Soda oczyszczona<br />
Soda jest kolejną mieszanką związków chemicznych, których nie należy mylić lub zastępować<br />
proszkiem do pieczenia. Podobnie jak proszek do pieczenia nie wymaga czasu wyrastania,<br />
ponieważ do reakcji chemicznej dochodzi podczas samego procesu pieczenia.<br />
GLAZURY<br />
Propozycje glazury na chleb:<br />
Glazura z jajek: rozbij 1 duże jajo z 1 łyżeczką wody. Posmaruj ciasto przed włożeniem do<br />
urządzenia.<br />
136 <strong>VG</strong> <strong>BBA</strong> 1 - 110711<br />
Assembly page 136/168
�<br />
Fax +32 2 359 95 50<br />
Copies of the I/B. Please reproduce them without any<br />
changes except under special instruction from Team<br />
International BELGIUM. The pages must be reproduced<br />
and folded in order to obtain a booklet A5 (+/- 148.5 mm<br />
width x 210 mm height). When folding, make sure you<br />
keep the good numbering when you turn the pages of<br />
the I/B. Don’t change the page numbering. Keep the<br />
language integrity.<br />
Glazura z masła: posmaruj świeżo upieczony chleb rozpuszczonym masłem dla uzyskania<br />
efektu chrupkości.<br />
Glazura z mleka: W celu osiąnięcia efektu delikatnej, świecącej i chrupkiej skórki posamruj<br />
świeżo upieczony chleb mlekiem lub śmietaną.<br />
Glazura z lukru: Zmieszaj 1 szklankę przesianego cukru pudru z 2 łyżeczkami mleka do<br />
osiągnięcia jednolitej masy. Rozlej po powierchni słodkiego pieczywa.<br />
Posypka z makiem/sezamem/kminkiem/płatkami kukurydzianymi/płatkami owsianymi: posyp<br />
wybranymi ziarnami świeżo upieczony chleb.<br />
ELEMNTY URZĄDZENIA DO WYPIEKU CHLEBA<br />
PANEL STERUJĄCY<br />
Wyświetlacz:<br />
Wskazuje wybrany program.<br />
Wskazuje odliczany czas pieczenia chleba.<br />
Wyświetla błędy (Ostrzeżenie o błędzie oznaczane jako "LLL" oraz "H:HH").<br />
▲ oraz▼<br />
Ustawienia timera pozwalają na dowolne modyfikacje czasu pieczenia.<br />
Strzałki pozwalają na ustwienie czasu w górę oraz w dół w interwałach10-minutowych.<br />
W celu szybkieo wyboru nalezy przytrzymac dłużej strzałki.<br />
Przycisk MENU (1-6/7-12):<br />
Służy do wyboru programu (od 1 do 12).<br />
Każde przyciśnięcie powoduje przejście do nastepnego programu.<br />
Przycisk START/STOP (0/1):<br />
Służy do wboru programu.<br />
Przyciśnij i przytrzymaj dopóki usłyszysz zatrzymujący działanie synał dźwiękowy lub anulujesz<br />
ustawienia czasowe. (Uwaga: nie jest konieczne przyciśnięcie przycisku anulującego – stop w<br />
celu sprawdzenia postepu pieczenia chleba.)<br />
Przycisk ustawienia chrupkości skórki:<br />
Uzyj przycisku w celu wyboru koloru zarumienienia skórki - opcja ciemne i jasne (opcja ta nie<br />
jest dostępna we wszystkich programach). Każdorazowe przyciśnięcie przycisku, spowoduje<br />
przejście na kolejny poziom zarumienienia.<br />
Przycisk wagi (450g/680g/900g):<br />
Pozwala na wybór wielkości bochenka (opcja ta nie jest dostępna we wszystkich<br />
programach). Każdorazowe przyciśnięcie przycisku, spowoduje przejście na kolejny poziom.<br />
SYGNAŁ DŹWIĘKOWY<br />
Urządzenie posiada nastepujące opcje:<br />
1 długi ciągły sygnał: właczenie urządzenia<br />
1 krótk sygnał: przyciśnięty przycisk wybranego programu<br />
137 <strong>VG</strong> <strong>BBA</strong> 1 - 110711<br />
Assembly page 137/168
�<br />
Fax +32 2 359 95 50<br />
Copies of the I/B. Please reproduce them without any<br />
changes except under special instruction from Team<br />
International BELGIUM. The pages must be reproduced<br />
and folded in order to obtain a booklet A5 (+/- 148.5 mm<br />
width x 210 mm height). When folding, make sure you<br />
keep the good numbering when you turn the pages of<br />
the I/B. Don’t change the page numbering. Keep the<br />
language integrity.<br />
10 nieprzerwanych sygnałów: funkcja “dodawania składników” aktywowana<br />
12 krótkich sygnałów: program zakończony<br />
DZIAŁANIE<br />
1. Otwórz pokrywę i wyjmij misę do pieczenia używając uchwytów. Ważne jest jej wyjęcie na<br />
tym etapie. Nie dodawaj składników do misy, jeśli znajduje się ona w urządzeniu,<br />
ponieważ mogą się one wylać poza misę i dostać do wewnętrznej części urządzenia.<br />
Ustaw urzadzenia na płaskiej, równej i bezpiecznej powierzchni.<br />
2. Nałóż łopatki na trzon wewnątrz, kierując płaską stronę ostrzy na płaską stronę trzonu.<br />
Dociśnij łopatki do trzonu. WAŻNE: upewnij się, że zostały one poprawnie zainstalowane,<br />
ponieważ w przeciwnym razie podczas pracy urządzenia mogą się one ześlizgnąć z<br />
trzonu. Upewnij się, że trzon nie zawiera żadnych części, tak by łopatki mogły być<br />
bezpieczne i w pełni na niego nałożone. Zaleca się wypełnienie otworu łopatek<br />
wyrabiających ciasto tłuszczem odpornym na ciepło, tak by ciasto do nich nie przywarło.<br />
3. Wybierz przepis z działu “Przepisy”. Nastepnie:<br />
• Omierz precyzyjnie składniki. Patrz dział "Odmierzanie składników".<br />
• Zawsze dodawaj składniki do misy w kolejności zawartej w przepisie.<br />
• Drożdże są zawsze dodawane na końcu. Upewnij się, że drożdże nie stykają się z<br />
płynnymi składnikami z przepisu.<br />
4. Włóż misę z powrotem do urządzenia, upewniajac się że jest poprawnie umieszona –<br />
zablokowana w dolnej części komory.<br />
5. Zamknij pokrywę, włącz kabel zasilajacy do gniazdka. Usłyszysz sygnał dźwiękowy,<br />
natomiast na wyświetlaczu pojawi się "2:50". Pokaże się ustawienie domyślne -program 1.<br />
6. Wybierz żądany program poprzez przyciśnięcie przycisku MENU na panelu. Każdorazowe<br />
wciśnięcie przycisku spowoduje przejście do kolejneo ustawienia. Upewnij, się że<br />
przycisnąłeś przycisk do czasu usłyszenia sygnału dźwiękowego.<br />
7. Wybierz ustawienie wielkości bochenka poprzez przyciśniećie przycisku wagi.<br />
Każdorazowe przyciśnięcie oznacza przejście na kolejny cykl.<br />
8. Ustaw wybraną opcję zarumienienia skórki chleba przy pomocy przycisku. Dostępne opcje<br />
to jasna/ciemna. Ustawienie domyślne – to wersja jasna.<br />
9. Przyciśnij przycisk uruchamiający START/STOP i przytrzymaj go przez 3 sekundy. Na<br />
wyświetlaczu pojawi się czas pieczenia w godzinach I minutach, wyświetlacz LCD zacznie<br />
migać. Przykładowo wybierając przepis oparty na standardowym programie wypieku<br />
chleba z jasną skórką o wadze 680g, wyświetlacz pokaże "2:55". Odliczanie z<br />
dokładnością co do minuty będzie trwało aż do momentu gdy chleb będzie gotowy.<br />
Używając programu podstawowego "Basic", pieczywa francuskiego "French", pieczywa<br />
słodkiego "Sweet", pełnoziarnistego "Wholewheat" oraz przygotowania kanapki<br />
"Sandwich", 10 sygnałów dźwiękowych będzie słyszalnych podczas cyklu wskazując<br />
konieczność dodania składników. Otwórz pokrywę, dodaj składniki. Zachowaj ostrożność<br />
podczas otwierania pokrywy, ponieważ z urządzenia będzie wydobywać się para.<br />
Uwaga: Po przyciśnięciu przycisku uruchamiającego START/STOP niemożliwe jest już<br />
zmodyfikowanie ustawień innymi przyciskami.<br />
10. Zakończenie programu zasygnalizuje sygnał dźwiękowy (12 ciąłych dźwięków). W celu<br />
uniknięcia uszkodzenia powierzchni chleba, nie należy kłaść żadnych przedmiotów lub<br />
gorącej misy na górze pieczywa. Jeśli nie chcesz używać funkcji podtrzymywania ciepła,<br />
zatrzymaj urządzenie poprzez wciśnięcie przycisku START/STOP przez 3 sekundy. Długi<br />
sygnał oraz informacja na wyświetlaczu zasygnalizują powrót do ustawień domyślnych<br />
urządzenia.<br />
11. Jeśli przycisk uruchamiajacy START/STOP nie zostanie wciśnięty, a wewnątrz znajduje się<br />
pozostawione pieczywo automatycznie po zakończeniu pieczenia włączy sie opcja<br />
podtrzymywania temperatury "keep warm" przez okres 60 minut. Pod koniec godziny<br />
138 <strong>VG</strong> <strong>BBA</strong> 1 - 110711<br />
Assembly page 138/168
�<br />
Fax +32 2 359 95 50<br />
Copies of the I/B. Please reproduce them without any<br />
changes except under special instruction from Team<br />
International BELGIUM. The pages must be reproduced<br />
and folded in order to obtain a booklet A5 (+/- 148.5 mm<br />
width x 210 mm height). When folding, make sure you<br />
keep the good numbering when you turn the pages of<br />
the I/B. Don’t change the page numbering. Keep the<br />
language integrity.<br />
wyświetlacz wskaże ustawienia domyślne. Możesz wyjąć misę w każdym momencie cyklu<br />
potrzymywania temperatury. Wyłączenie opcji podtrzymywania temperatury przez 60<br />
minutami następuje poprzez wciśnięcie przez 3 sekundy przycisku START/STOP. Urządzenie<br />
po zakończeniu pracy należy wyłączyć. Uwaga: używając programu 7 (wyrabianie<br />
ciasta), 8 (dżem) and 10 (ciasto), funkcja podtrzymywania ciepła nie jest autmatycznie<br />
aktywowana. Dla programu 10 jest ponieważ jeśli pozostawisz wyrobione ciasto zbyt<br />
długo w urządzeniu, może ono przerosnąć i w efekcie zepsuć efekt finalny. W celu<br />
osiągnięcia najlepszego efektu wjmij ciasto pod koniec cyklu i postępuj zgodnie ze<br />
wskazówkami przepisu – formowaniem, restartowaniem czy pieczeniem.<br />
12. Urządzenie do wypieku chleba wyposażone jest w wygodne okienko umożliwiające<br />
podglądanie procesu mieszania składników, wyrabiania ciasta oraz wypiekania. Może<br />
zdarzyć się, że elementy składników znajdą się na okienku. Dozwolone jest otworzenie<br />
pokrywy podczas mieszania i wyabiania ciasta, jakkolwiek NIE WOLNO JEST OTWIERAĆ<br />
POKRYWY PODCZAS CYKLU PIECZENIA (ostatnia godzina) ponieważ przyczyni się to do<br />
jego niewyrośnięcia - zakalca.<br />
13. Do wyjęcia pieczywa z misy uzywać należy rękawic kuchennych oraz uchwytów. Obróć<br />
misę do góry dnem i lekko wstrząśnij, tak aby bochenek wypadł na deskę. Blacha posiada<br />
wykoczenie z powłoki nieprzywierającej, zapewniając łatwe wyjmowanie pieczywa. Nie<br />
należy używać ostrych narzędzi w celu wyjęcia pieczywa, ponieważ mogą one zniszczyć<br />
powłokę. Jeśli jest to konieczne użyj plastikowej lub gumowej szpatułki do odchylenia<br />
pieczywa z boków. Jeśli łopatki wyrabające pozostaną w dolnej części pieczywa, użyj<br />
załaczonego haczyka lub końcówki plastikowej łyżki bądź innego niemetalowego<br />
przyrządu do ich usunięcia. Nie wolno jest używać w tym celu noża czy innych ostrych<br />
przedmiotów, ponieważ może to uszkodzić nieprzywieralną powłokę łopatek. Przy<br />
wyjmowaniu chleba należy zawsze sprawdzić, gdzie znajdują się łopatki wyrabiące. Jeśli<br />
pozostały w pieczywie możesz przypadkowo zniszczyć łopatki podczas krojenia chleba.<br />
14. Pozwól pieczywu ostygnąć na desce lub kratce przez około 60 minut przed pokrojeniem,<br />
uwalniając tym samym parę. Do krojenia zaleca się używanie noża do chleba lub noża<br />
elektrycznego.<br />
UŻYWANIE TIMERA DLA CYKLU OPÓŹNIONEGO PIECZENIA<br />
Ustawienie używane jest w celu opóźnienia ukończenia procesu gotowości chleba. Funkcja<br />
pozwala opóźnić czas rozpoczęcia programu nawet do 13 godzin. Przykładowo ustawiając<br />
czas na 19:00, jeśli świeży chleb ma być gotowy na 8 rano nastepującego dnia.<br />
Aby ustawić funkcję czasową postępuj następująco:<br />
• Uwaga: Nie używaj timera I funkcji opóźnionego przygotowania dla przepisów<br />
wymagających świeżych składników takich jak jajka, świeże mleko, śmietana czy ser.<br />
• W celu ustwienia timera, wyznacz godzinę, na którą chleb powinien być gotowy.<br />
Przyładowo jeśli oczekujesz zakończenia pracy urządzenia na rano 8:00, umieszczasz<br />
wszystkie składniki o 20:00 dnia poprzedniego - należy wówczas ustawić cykl opóźnionego<br />
pieczenia na 12 godzin, wprowadzając w funkcji timer 12 godzin.<br />
• Przyciśnij przycisk ▲ na panelu, automatycznie wyświetli się "2:50". Wsićnięcie<br />
przycisku przez dłuższy czas ▲ wskaże na wyświetlaczu 12:00. Nie ma potrzeby<br />
kalkulacji różnicy pomiędzy ustawieniem<br />
czasu (2:50) i całkowitą godziną (12:00).<br />
Urządzenie automatycznie podniesie<br />
czas, by wliczyć narzucony czas. Ustaw timer (12).<br />
Jeśli miniesz przypadkowo 12 :00, przyciiśnij przycisk zmniejszający ▼. Dłuższe<br />
przytrzymanie strzałki przyspieszy wybór .<br />
• Po ustawieniu czasu przyciśnij przycisk START/STOP. Rozpocznie się odliczanie czasu. Timer<br />
będzie odliczał w odstępach jednominutowych. Kiedy na wyświetlaczu pojawi się 0:00<br />
chleb będzie gotowy, będzie temu towarzyszyć 12 ciągłych sygnałów dźwiękowych.<br />
139 <strong>VG</strong> <strong>BBA</strong> 1 - 110711<br />
Assembly page 139/168
�<br />
Fax +32 2 359 95 50<br />
Copies of the I/B. Please reproduce them without any<br />
changes except under special instruction from Team<br />
International BELGIUM. The pages must be reproduced<br />
and folded in order to obtain a booklet A5 (+/- 148.5 mm<br />
width x 210 mm height). When folding, make sure you<br />
keep the good numbering when you turn the pages of<br />
the I/B. Don’t change the page numbering. Keep the<br />
language integrity.<br />
• Jeśli popełniony zostanie błąd w ustawieniu timera, przyciśnij i przytrzymaj przycisk<br />
START/STOP do czasu usłyszenia sygnału dźwiękowego. W wynku tego wyświetlacz nie<br />
będzie wyświetlał żadnych ustawień. Możesz wówczas na nowo ustawić czas.<br />
WYKRYWANIE USTEREK – PROBLEMY Z DZIAŁANIEM<br />
Problem Rozwiązanie<br />
Dym wydobywa sie z otworów<br />
wentylacyjnych podczas pieczenia<br />
Rozsypana mąka dostała sie do wnetrza<br />
urzadzenia<br />
Przyczyną może być olej który dostał sie na<br />
element grzejny. Wyłacz urządzenie, wyjmij<br />
misę i wyczyśc element grzejny suchą<br />
szmatką. Zachowaj ostrożnośc gdyż możesz<br />
się poparzyć.<br />
Odłacz urządzenie I pozwól mu ostygnąć,<br />
usuń mąkę przy pomocy czystej ściereczki.<br />
Zachowaj ostrożność w okolicy elementu<br />
grzejnego.<br />
Dolna skórka jest za gruba Jest to efekt pozostawienia bochenka zbyt<br />
długo w blaszce. Staraj się wyjmować gotowy<br />
chleb wcześniej.<br />
Chleb nie upiekł sie poprawnie Sprawdź czy łopatki mieszające sa<br />
poprawnie nałozone na trzon. Unikaj zbyt<br />
częstego otwierania urzadzenia podczas jego<br />
pracy.<br />
Słychać pracę silnika, ale ciasto ei jest<br />
Sprawdź czy misa oraz łopatki do wyrabiania<br />
wyrabiane<br />
ciasta są poprawnie włożone.<br />
Ikonka [HOT] pojawia się na wyswietlaczu Jesli wyswietlacz wskazuje “HOT” po<br />
przyciśnięciu przycisku START/STOP, oznacza<br />
to że temperatura wewnątrz jest nadal zbyt<br />
wysoka. Należy zatrzymać program. Otwórz<br />
pokrywę i pozwól maszynie ostygnąć przez 10<br />
do 20 minut.<br />
Ikonka [H:HH] lub [LLL] wyświetla sie na<br />
wyświetlaczu<br />
Jeśli efekt nie jest satysfakcjonujący sprawdź poniższe rozwiązania:<br />
Ostrzeżenie: Należy stosować jedno rozwiązanie na jeden bochenek.<br />
A) Problemy z ilością<br />
Bochenek rośnie, nastepnie opada<br />
• Zmniejsz ilość wody/mleka o 2 łyżeczki.<br />
• Zwiększ ilośc soli o 1/4 łyzeczki.<br />
• Zmniejsz ilość drożdży o 1/4 łyżeczki.<br />
Bochenek wyrasta za bardzo<br />
• Zamniejsz ilosc mąki o 2 łyżeczki.<br />
• Zmniejsz ilość wody/mleka o 2 łyżeczki.<br />
• Zwiększ ilośc soli o 1/4 łyzeczki.<br />
• Zmniejsz ilosc cukru/miodu o 1 łyżeczkę.<br />
Jeśli wyświetlacz wskzauje “H:HH” lub “LLL” po<br />
rozpoczęciu programu, temperature<br />
wewnątrz jest w dalszym ciągu zbyt wysoka.<br />
Należy zatrzymać program. Otwórz pokrywę i<br />
pozwól maszynie ostygnąć przez 10 do 20<br />
minut.<br />
140 <strong>VG</strong> <strong>BBA</strong> 1 - 110711<br />
Assembly page 140/168
�<br />
Fax +32 2 359 95 50<br />
• Zmniejsz ilość drożdży o 1/4 łyżeczki.<br />
Bochenek nie wyrasta wystarczająco<br />
• Zmniejsz ilość wody/mleka o 2 łyżeczki.<br />
• Zmniejsz ilośc soli o 1/4 łyzeczki.<br />
• Zwiększ ilosć cukru/miodu o 1 łyżeczkę.<br />
• Zmniejsz ilość drożdży o 1/4 łyżeczki.<br />
Skórka jest zbyt ciemna<br />
• Zmniejsz ilosc cukru/miodu o 1 łyżeczkę.<br />
Bochenek częsciowo upieczony<br />
• Zmniejsz ilość wody/mleka o 2 łyżeczki.<br />
Górna część chleba nie jest gładka<br />
• Zmniejsz illość mąki o 2 łyżeczki.<br />
• Zmniejsz ilość wody/mleka o 2 łyżeczki.<br />
Tekstura chleba jest zbyt zbita<br />
• Zmniejsz ilość mąki o 2 łyżeczki.<br />
• Zwiększ ilosc cukru o 1 łyżeczkę.<br />
• Zmniejsz ilość drożdży o 1/4 łyżeczki.<br />
B) Problemy ze składnikami<br />
Copies of the I/B. Please reproduce them without any<br />
changes except under special instruction from Team<br />
International BELGIUM. The pages must be reproduced<br />
and folded in order to obtain a booklet A5 (+/- 148.5 mm<br />
width x 210 mm height). When folding, make sure you<br />
keep the good numbering when you turn the pages of<br />
the I/B. Don’t change the page numbering. Keep the<br />
language integrity.<br />
Jeśli niezadawalający efekt nie jest spowodowany kwestiami ilościowymi składników,<br />
przyczyną może być jakość składników:<br />
Bochenk rośnie następnie opada<br />
• Mąka jest zbyt miałka.<br />
Bochenek wyrasta za bardzo<br />
• Dobrany zły typ drożdży.<br />
• Przeoczone dodanie soli.<br />
Bochenek nie rośnie wystarczająco<br />
• Mąka jest stara.<br />
• Mąka nie zawiera wystarczająco glutenu.<br />
• Mąka jest zbyt miałka.<br />
• Dobrany zły typ drożdży.<br />
• Dodana zbyt duża ilość soli.<br />
Bochenek jest płaski, słabo wyrośniety<br />
• Dodatki płynne są zbyt ciepłe/ zimne.<br />
• Mąka jest stara.<br />
• Mąka nie zawiera wystarczająco glutenu.<br />
• Mąka jest zbyt miałka.<br />
• Przeoczenie dodania drożdży.<br />
• Drożdże są stare.<br />
• Dobrany zły typ drożdży.<br />
• Dodane zbyt dużo soli.<br />
• Przeoczone dodanie soli.<br />
Jeśli sładniki są tylko częściowo zmieszane<br />
• Mąka jest zbyt miałka.<br />
Tekstura chleba jest zbyt zbita<br />
• Dobrany zły typ drożdży.<br />
141 <strong>VG</strong> <strong>BBA</strong> 1 - 110711<br />
Assembly page 141/168
�<br />
Fax +32 2 359 95 50<br />
CZYSZCZENIE I KONSERWACJA<br />
Copies of the I/B. Please reproduce them without any<br />
changes except under special instruction from Team<br />
International BELGIUM. The pages must be reproduced<br />
and folded in order to obtain a booklet A5 (+/- 148.5 mm<br />
width x 210 mm height). When folding, make sure you<br />
keep the good numbering when you turn the pages of<br />
the I/B. Don’t change the page numbering. Keep the<br />
language integrity.<br />
Przed czyszczeniem upewnij się że urządzenie jest odłączone od prądu I całkowicie ostygło.<br />
1. Misa do pieczenia<br />
Wyjmij misę z urządzenia zgodnie z wcześniejszymi zaleceniami w niniejszej instrukcji. Wytrzyj<br />
z zewnątrz i wewnątrz wilgotną szmatką. W miarę potrzeby do umycia wewnętrznej części<br />
misy użyj wody z dodatkiem płynu do naczyń. Nigdy nie używaj ostrych, harujących<br />
przedmiotów, ponieważ moga one zniszczyć nieprzywierającą powłokę. Gwarancja nie<br />
będzie uwzględniania jeśli na misie, blasze będą widoczne oznaki zniszczenia czy<br />
podrapania. Po upływie chwili, z powodu pary i wilgoci misa może nieco zmienić kolor.<br />
Jest to zjawisko naturalne i nie wpływa na właściwości ani jakość powłoki misy.<br />
2. Łopatki do wyrabiania ciasta<br />
Wytrzyj łopatki do wyrabiania ciasta wilgotną szmatką. W miarę trudności z<br />
wyczyszczeniem wlej wodę do misy opiekającej I odczekaj kilka minut. Ciepła woda<br />
pomoże odblokować łopatki. Jesli otwór w łopatkach wyrabiajacych ciasto jest<br />
zapchany, wyczyść go wykałaczką, zachwujac ostrożność, by nie pocharować łopatek.<br />
3. Okienko<br />
Przetrzyj okienko przy użyciu wilgotnej szmatki. Nie zanurzaj w wodzie lub innym płynie.<br />
4. Komora wewnętrzna<br />
W miarę potrzeby wewnątrzna część urządzenia może również zostać wyczyszczona. W<br />
tym celu używaj wyłacznie wilgotnej szmatki. Uprzednio sprawdź czy komora w pełni<br />
wystygła. Przed ponownym właczeniem urządzenia upewnij się, że jest całkowicie sucha.<br />
5. Obudowa<br />
Przetrzyj obudowę przy użyciu wilgotnej szmatki. Nie zanurzaj urządzenia w wodzie lub<br />
innym płynie.<br />
CHARAKTERYSTYKA PROGRAMÓW I PRZYKŁADOWE PRZEPISY<br />
PAMIĘĆ<br />
Podczas przerwy w dostawie prądu, krótszej niż 20 minut proces przygotowywania chleba<br />
przywrócony zostanie automatycznie, bez konieczności przyciskania przycisku START/STOP. Jeśli<br />
przerwa przekroczy 20 minut, konieczne będzie zresetowanie urządzenia I nadanie mu nowych<br />
parametrów pieczenia. Jeśli cykl programowy nie przeszedł dalej niż wyrabianie ciasta,<br />
wystarczy jedynie zresetowanie. Jeśli jednak cykl przeszedł na kolejny po wyrabianiu etap, lecz<br />
nie rozpoczął sie program pieczenia, użyj programu „PIECZENIE” („BAKE”), który rozpocznie<br />
proces pieczenia. Jeśli jednak cykl znajdował się w połowie czasu opiekania, a zasilanie<br />
zostało odcięte, zaleca sie wyrzucenie ciasta I rozpoczęcie na nowo programu pieczenia.<br />
KLASYCZNY BIAŁY CHLEB<br />
Program: 1 (Podstawowy) – Kolor zarumienienia: jasny/ciemny – Waga: 450g/680g/900g<br />
Program używany jest do przygotowywania chleba wymagającego białej mąki; aczkolwiek<br />
niektóre przepisy moga zawierać niewielkie ilości mąki pełnoziarnistej. Bochenki będą bardziej<br />
zbite niż pieczywo francuskie czy pieczywo słodkie.<br />
142 <strong>VG</strong> <strong>BBA</strong> 1 - 110711<br />
Assembly page 142/168
�<br />
Składniki:<br />
Fax +32 2 359 95 50<br />
Copies of the I/B. Please reproduce them without any<br />
changes except under special instruction from Team<br />
International BELGIUM. The pages must be reproduced<br />
and folded in order to obtain a booklet A5 (+/- 148.5 mm<br />
width x 210 mm height). When folding, make sure you<br />
keep the good numbering when you turn the pages of<br />
the I/B. Don’t change the page numbering. Keep the<br />
language integrity.<br />
450g 680g 900g<br />
2/3 szklanki wody<br />
1 łyżka stołowa masła lub<br />
margaryny<br />
1 łyżka oleju<br />
1/3 łyżeczki soli<br />
1 ½ łyżki mleka w proszku<br />
2 łyzki cukru<br />
2 szklanki mąki<br />
uniwersalnej lub<br />
chlebowej<br />
1 ¼ łyżeczki szybko<br />
rosnących lub suchych<br />
drożdży<br />
1 szlanka wody<br />
1 ½ łyżki stołowej masła lub<br />
margaryny<br />
1 ½ łyżki oleju<br />
½ łyżeczki soli<br />
2 łyżki mleka w proszku<br />
2 ½ łyżki cukru<br />
2 ¼ szklanki mąki uniwerslanej<br />
lub chlebowej<br />
1 ¼ łyżeczki szybko rosnących<br />
lub suchych drożdży<br />
1 1/3 szklanki wody<br />
2 łyżki stołowe masła lub<br />
margaryny<br />
2 łyżki oleju<br />
1 łyżeczka soli<br />
3 łyżki mleka w proszku<br />
3 łyzki cukru<br />
3 ½ szklanki mąki uniwerslanej<br />
lub chlebowej<br />
1 ½ łyżeczki szybko rosnących<br />
lub suchych drożdży<br />
1. Odmierz precyzyjnie składniki I dodaj je do misy (w pierwszej kolejnosci ciekłe składniki).<br />
2. Włóż misę do urządzenia, zamknij pokrywę.<br />
3. Wybierz żądany program.<br />
4. Wybierz poziom zabrązowienia.<br />
5. Wybierz wielkość bohenka.<br />
6. Wciśnij przycisk START/STOP.<br />
7. Po zakończeniu procesu pieczenia przy uzyciu rękawic kuchennych wyjmij chleb.<br />
8. Pozwól pieczywu ostygnąć, przez około godzinę przed pokrojeniem.<br />
CHLEB FRANCUSKI<br />
Program: 2 (francuski) – Kolor zarumienienia jasny/ciemny – Waga: 450g/680g/900g<br />
Tradycyjny, francuski chleb ma chrupiącą skórkę i jaśniejszą niż tradycyjny wewnętrzną<br />
teksturę.<br />
Składniki:<br />
450g 680g 900g<br />
1 szklanka wody<br />
2 łyżki oleju<br />
1 łyżeczka soli<br />
2 łyżki cukru<br />
2 szklanki mąki<br />
uniwersalnej lub<br />
chlebowej<br />
1 łyżeczka szybko<br />
rosnących drożdży<br />
1 1/4 szklanki wody<br />
2 łyżki oleju<br />
1 ½ łyżeczki soli<br />
2 łyżki cukru<br />
2 ½ szklanki mąki uniwersalnej<br />
lub chlebowej<br />
1 ¼ łyżeczki szybko rosnących<br />
drożdży<br />
1 ½ szklanki wody<br />
2 łyżki oleju<br />
2 łyżeczki soli<br />
2 ½ łyżki cukru<br />
3 ½ szklanki mąki uniwersalnej<br />
lub chlebowej<br />
1 ½ łyżeczki szybko rosnących<br />
drożdży<br />
1. Odmierz precyzyjnie składniki I dodaj je do misy (w pierwszej kolejnosci ciekłe składniki).<br />
2. Włóż misę do urządzenia, zamknij pokrywę.<br />
3. Wybierz żądany program.<br />
4. Wybierz poziom zabrązowienia.<br />
5. Wybierz wielkość bohenka.<br />
6. Wciśnij przycisk START/STOP.<br />
7. Po zakończeniu procesu pieczenia przy użyciu rękawic kuchennych wyjmij chleb.<br />
8. Pozwól pieczywu ostygnąć, przez około godzinę przed pokrojeniem.<br />
143 <strong>VG</strong> <strong>BBA</strong> 1 - 110711<br />
Assembly page 143/168
�<br />
SŁODKI CHLEB<br />
Fax +32 2 359 95 50<br />
Copies of the I/B. Please reproduce them without any<br />
changes except under special instruction from Team<br />
International BELGIUM. The pages must be reproduced<br />
and folded in order to obtain a booklet A5 (+/- 148.5 mm<br />
width x 210 mm height). When folding, make sure you<br />
keep the good numbering when you turn the pages of<br />
the I/B. Don’t change the page numbering. Keep the<br />
language integrity.<br />
Program: 3 (słodki)– kolor zarumienienia jasny/ciemny – Waga: 450g/680g/900g<br />
Proram dostosowany do przepisów zawierających w składzie soki owocowe, dodatkowy cukier<br />
lub słodkie składniki takie jak wiórki kokosowe, rodzynki, suszone owoce lub czekolada. W celu<br />
uniknięcia przypalenia temperatura pieczenia jest zredukowana a dodatkowy cykl wyrastania<br />
nadaje pieczywu lekkość I puszystość.<br />
Składniki:<br />
450g 680g 900g<br />
3/4 szkalnki mleko<br />
1 ½ łyzka masla lub<br />
margaryny<br />
1 jajo<br />
1 łyżeczka soli<br />
1 ½ łyżka miodu<br />
2 łyżki cukru<br />
2 szklanki mąki<br />
uniwersalnej lub<br />
chlebowej<br />
1/2 łyżeczki drożdży<br />
1 ¼ szklanki mleka<br />
1 ½ łyżki masła lub margaryny<br />
1 jajo<br />
1łyżeczka soli<br />
1 ½ łyżki miodu<br />
3 łyżki cukru<br />
3 szklanki mąki uniwersalnej lub<br />
chlebowej<br />
1 łyżeczka drożdży<br />
1 ½ szklanki mleka<br />
2 łyżki masła lub margaryny<br />
2 jaja<br />
1 łyżeczka soli<br />
2 łyżki miodu<br />
4 łyzki cukru<br />
3 ½ szklanki mąki uniwersalnej<br />
lub chlebowej<br />
1 ¼ łyżeczki drożdży<br />
1. Odmierz precyzyjnie składniki i dodaj je do misy (w pierwszej kolejnosci ciekłe składniki).<br />
2. Włóż misę do urządzenia, zamknij pokrywę.<br />
3. Wybierz żądany program.<br />
4. Wybierz poziom zabrązowienia.<br />
5. Wybierz wielkość bohenka.<br />
6. Wciśnij przycisk START/STOP.<br />
7. Po zakończeniu procesu pieczenia przy uzyciu rękawic kuchennych wyjmij chleb.<br />
8. Pozwól pieczywu ostygnąć, przez około godzinę przed pokrojeniem.<br />
CIASTO<br />
Program: 4 (Ciasto)<br />
Program do przygotowywania ciasta<br />
Składniki:<br />
8 łyżek masła<br />
8 łyżek cukru<br />
5 jaj<br />
1 ½ szkalnki mąki<br />
1 ½ łyżki soku z cytryny<br />
1 ½ łyżeczki proszku do pieczenia<br />
Wskazówka: podczas mieszania zaleca się zeskrobanie składników z boków misy, po to by<br />
wszystkie dokładnie się ze sobą połączyły<br />
1. Odmierz precyzyjnie składniki I dodaj je do misy (w pierwszej kolejnosci ciekłe składniki).<br />
2. Włóż misę do urządzenia, zamknij pokrywę.<br />
3. Wybierz żądany program.<br />
144 <strong>VG</strong> <strong>BBA</strong> 1 - 110711<br />
Assembly page 144/168
�<br />
Fax +32 2 359 95 50<br />
Copies of the I/B. Please reproduce them without any<br />
changes except under special instruction from Team<br />
International BELGIUM. The pages must be reproduced<br />
and folded in order to obtain a booklet A5 (+/- 148.5 mm<br />
width x 210 mm height). When folding, make sure you<br />
keep the good numbering when you turn the pages of<br />
the I/B. Don’t change the page numbering. Keep the<br />
language integrity.<br />
4. Przyciśnij przycisk uruchamiający START/STOP.<br />
5. Po zakończeniu procesu pieczenia przy uzyciu rękawic kuchennych wyjmij chleb.<br />
6. Pozwól pieczywu ostygnąć, przez około godzinę przed pokrojeniem.<br />
CHLEB PEŁNOZIARNISTY<br />
Program: 5 (pełne ziarna) – kolor zarumienienia jasny/ciemny – Waga: 450g/680g/900g<br />
Program typowy dla przepisów ze znaczącym udziałem mąki pełnoziarnistej lub żytniej, owsa,<br />
czy otrębów.<br />
Składniki:<br />
450g 680g 900g<br />
1 szklanka wody<br />
1 łyżka masła lub<br />
margaryny<br />
1 łyżeczka soli<br />
1 łyżka cukru<br />
1 szklanka mąki<br />
uniwersalnej lub<br />
chlebowej<br />
1 szklanka mąki<br />
pełnoziarnistej<br />
1 łyżeczka drożdży<br />
1 ¼ szklanki wody<br />
1 ½ łyżki masła lub margaryny<br />
1 łyżeczka soli<br />
1 łyżka cukru<br />
1 1/3 szklanki mąki uniwersalnej<br />
lub chlebowej<br />
1 1/3 szklanka mąki<br />
pełnoziarnistej<br />
1 łyżeczka drożdży<br />
1 1/3 szklanki wody<br />
2 łyżki masła lub margaryny<br />
1 łyżeczka soli<br />
1 łyżka cukru<br />
1 2/3 szklanki mąki uniwersalnej<br />
lub chlebowej<br />
1 2/3 szklanka mąki<br />
pełnoziarnistej<br />
1 ¼ łyżeczki drożdży<br />
Uwaga: możesz dodać 1 ½ łyżki glutenu w celu poprawienia wagi I tekstury chleba.<br />
1. Odmierz precyzyjnie składniki I dodaj je do misy (w pierwszej kolejnosci ciekłe składniki).<br />
2. Włóż misę do urządzenia, zamknij pokrywę.<br />
3. Wybierz żądany program.<br />
4. Wybierz poziom zabrązowienia.<br />
5. Wybierz wielkość bohenka.<br />
6. Wciśnij przycisk START/STOP.<br />
7. Po zakończeniu procesu pieczenia przy uzyciu rękawic kuchennych wyjmij chleb.<br />
8. Pozwól pieczywu ostygnąć, przez około godzinę przed pokrojeniem.<br />
145 <strong>VG</strong> <strong>BBA</strong> 1 - 110711<br />
Assembly page 145/168
�<br />
KANAPKI<br />
Fax +32 2 359 95 50<br />
Program: 6 – Wagat: 450g/680g/900g<br />
Sładniki:<br />
Copies of the I/B. Please reproduce them without any<br />
changes except under special instruction from Team<br />
International BELGIUM. The pages must be reproduced<br />
and folded in order to obtain a booklet A5 (+/- 148.5 mm<br />
width x 210 mm height). When folding, make sure you<br />
keep the good numbering when you turn the pages of<br />
the I/B. Don’t change the page numbering. Keep the<br />
language integrity.<br />
450g 680g 900g<br />
3/4 szlanki wody<br />
1 łyżka masła lub<br />
margaryny<br />
1 łyzeczka soli<br />
¾ łyzki cukru<br />
2 szklanki mąki<br />
uniwerslanej lub<br />
chlebowej<br />
1 łyzeczka szybko<br />
rosnących drożdży<br />
1 szlanka wody<br />
1 ½ łyżki masła lub margaryny<br />
1 ½ teaspoon of salt<br />
1 łyzka cukru<br />
2 ½ szklanki mąki uniwerslanej<br />
lub chlebowej<br />
1 ¼ łyżeczki szybko rosnących<br />
drożdży<br />
1 1/3 szlanki wody<br />
2 łyżki masła lub margaryny<br />
2 łyzeczki soli<br />
1 ½ łyzki cukru<br />
3 ¼ szklanki mąki uniwerslanej<br />
lub chlebowej<br />
1 ½ łyzeczki szybko rosnących<br />
drożdży<br />
1. Odmierz precyzyjnie składniki I dodaj je do misy (w pierwszej kolejnosci ciekłe składniki).<br />
2. Włóż misę do urządzenia, zamknij pokrywę.<br />
3. Wybierz żądany program.<br />
4. Wybierz rozmiar pieczywa.<br />
5. Przyciśnij przycisk uruchamiający START/STOP.<br />
6. Po zakończeniu procesu pieczenia przy uzyciu rękawic kuchennych wyjmij chleb.<br />
7. Pozwól pieczywu ostygnąć, przez około godzinę przed pokrojeniem.<br />
WYRABIANIE CIASTA<br />
Program: 7<br />
Program pozwala na wyrabianie ciasta do przygotowywania pierogów, klusek, makaronów.<br />
Blacha do pieczenia nie powinna być rozgrzana, ponadto nie należy wybierać opcji koloru i<br />
wagi ciasta.<br />
DŻEM TRUSKAWKOWY<br />
Program: 8 (Jam)<br />
Program pozwala na przygotowanie dżemu w prosty I szybki sposób.<br />
Pokrój owoce na małe kawałeczki o wielkości max. 1cm. Nie uzywaj zwykłego cukru lecz<br />
cukru żelującego.<br />
Po wciśnięciu przycisku START/STOP, urządzenie bedzie się rozgrzewało (będzie ono gotowe do<br />
użycia po zakończeniu tego cyklu).<br />
Składniki:<br />
900g świeżych truskawek pokrojonych na małe kawałeczki max. 1cm.<br />
500g cukru żelującego<br />
1 łyżka stołowa soku z cytryny<br />
1. Odmierz precyzyjnie składniki I dodaj je do misy.<br />
2. Włóż blachę do urządzenia. Zamknij pokrywę.<br />
3. Ustaw żądany program.<br />
146 <strong>VG</strong> <strong>BBA</strong> 1 - 110711<br />
Assembly page 146/168
�<br />
Fax +32 2 359 95 50<br />
Copies of the I/B. Please reproduce them without any<br />
changes except under special instruction from Team<br />
International BELGIUM. The pages must be reproduced<br />
and folded in order to obtain a booklet A5 (+/- 148.5 mm<br />
width x 210 mm height). When folding, make sure you<br />
keep the good numbering when you turn the pages of<br />
the I/B. Don’t change the page numbering. Keep the<br />
language integrity.<br />
4. Przyciśnij przycisk uruchamiajcy START/STOP.<br />
5. Po zakończeniu pracy urządzenia przy użyciu rękawic kuchennych wyjmij misę.<br />
6. Wlej dżem do czystych, wysterylizowanych słoików, zakręć dokładnie. Przechowuj w<br />
lodówce.<br />
CHLEB JOGURTOWY<br />
Programe: 9 (Jogurt)<br />
Program umożliwia przygotowanie chleba o smaku jogurtowym.<br />
Składniki:<br />
450g 680g 900g<br />
1/3 szklanki wody<br />
100g jogurtu<br />
1 łyżka oleju<br />
1/3 łyżeczka soli<br />
1 ½ łyżka cukru<br />
2 szklanki maki<br />
uniwerslanej lub<br />
chlebowej<br />
1 łyżeczka szybko<br />
rosnących lub suchych<br />
drożdży<br />
2/3 szklanki wody<br />
150g jogurtu<br />
1 ½ łyżki oleju<br />
½ łyżeczki soli<br />
2 łyżki cukru<br />
2 ¼ szklanki maki uniwerslanej<br />
lub chlebowej<br />
1 ¼ łyżeczki szybko rosnących<br />
lub suchych drożdży<br />
1 szklanka wody<br />
200g jogurtu<br />
2 łyżki oleju<br />
¾ łyżeczki soli<br />
2 ½ łyżka cukru<br />
3 ½ szklanki maki uniwerslanej<br />
lub chlebowej<br />
1 ½ łyżeczki szybko rosnących<br />
lub suchych drożdży<br />
1. Odmierz precyzyjnie składniki I dodaj je do misy (w pierwszej kolejnosci ciekłe składniki).<br />
2. Włóż misę do urządzenia, zamknij pokrywę.<br />
3. Wybierz program.<br />
4. Wybierz poziom chrupkości – zarumienienia skórki.<br />
5. Wybierz welkosc bochenka.<br />
6. Przyciśnij przycisk uruchamiający START/STOP.<br />
7. Wyjmij chleb po zakończeniu czasu pieczenia przy użyciu rękawic kuchennych.<br />
8. Pozwól pieczywu ostygnąć pozostawiajc je na kratce kuchennej przez około godzinę.<br />
CIASTO NA PIZZĘ<br />
Program: 10 (Ciasto)<br />
Ustawienie pozwala na wyrobienie każdego typu ciasta bez jego pieczenia. Ciasto należy<br />
nastepnie uformować bądź w kształt pizzy, precelków, rogalików, bułeczek- które następnie<br />
należy piec w piekarniku lub na głębokim tłuszczu.<br />
Składniki:<br />
1 ¼ szklanki wody<br />
½ łyżeczki soli<br />
2 łyzki oliwy z oliwek<br />
2 ½ szklanki mąki pszennej lub chlebowej<br />
1 ½ łyzeczi szybko rosnących drożdży<br />
1. Odmierz precyzyjnie składniki I dodaj je do misy (w pierwszej kolejnosci ciekłe składniki).<br />
2. Włóż misę do urządzenia, zamknij pokrywę.<br />
147 <strong>VG</strong> <strong>BBA</strong> 1 - 110711<br />
Assembly page 147/168
�<br />
Fax +32 2 359 95 50<br />
Copies of the I/B. Please reproduce them without any<br />
changes except under special instruction from Team<br />
International BELGIUM. The pages must be reproduced<br />
and folded in order to obtain a booklet A5 (+/- 148.5 mm<br />
width x 210 mm height). When folding, make sure you<br />
keep the good numbering when you turn the pages of<br />
the I/B. Don’t change the page numbering. Keep the<br />
language integrity.<br />
3. Przyciśnij przycisk uruchamiający START/STOP.<br />
4. Po zakończeniu cyklu wyjmij ciasto z misy.<br />
5. Odstaw do wyrośnięcia na około 10 minut.<br />
6. Na rozwałkowane ciasto wylej sos pomidorowy, rozłóż pozostałe.<br />
7. Piecz w tradycyjnym piekarniku 15 minut w temperaturze 200°C.<br />
SZYBKI CHLEB<br />
Programm: 11 (Szybki) – Kolor zarumienienia: jasny/ciemny<br />
Użyj ustawienia w celu szybkiego przygotownia chleba. Pieczywo będzie zbite i mniej<br />
wyrośnięte niż zwykle.<br />
Składniki:<br />
1 szklanka wody<br />
2 łyżka masła lub margaryny<br />
1 ½ łyżeczka soli<br />
2 łyżeczka cukru<br />
1 łyzka mleka w proszku<br />
3 szklanki mąki pszennej<br />
2 łyżeczki drożdży szybko rosnących<br />
1. Odmierz precyzyjnie składniki I dodaj je do misy (w pierwszej kolejnosci ciekłe składniki).<br />
2. Włóż misę do urządzenia, zamknij pokrywę.<br />
3. Wybierz żądany program.<br />
4. Wybierz poziom chrupkości – zarumienienia skórki.<br />
5. Przyciśnij przycisk uruchamiający START/STOP.<br />
6. Wyjmij chleb po zakończeniu czasu pieczenia przy użyciu rękawic kuchennych.<br />
7. Pozwól pieczywu ostygnąć pozostawiajc je na desce kuchennej przez około godzinę.<br />
PIECZENIE<br />
Program: 12 (Bake)<br />
Czas trwania:1:00<br />
Program pozwala na pieczenie chleba przez czas 1 godziny, należy jednak pozostać bardzo<br />
czujnym podczas jego wyboru. Program wpomaga przy pojawieniu się przerwy w dostawie<br />
prądu podczas pieczenia. Patrz dział dot. problemów z dostawą pradu zatytułowany<br />
"PAMIĘĆ".<br />
OCHRONA ŚRODOWISKA NATURALNEGO<br />
Symbol na tabliczce znamionowej urządzenia oznacza, że produktu nie wolno wyrzucać<br />
razem z innymi odpadami z gospodarstw domowych. Polskie prawo zabrania pod karą<br />
grzywny łączenia zużytego sprzętu elektrycznego i elektronicznego wraz z innymi odpadami.<br />
Dbając o pozbycie się produktu w należyty sposób, można zapobiec potencjalnym<br />
negatywnym skutkom dla środowiska naturalnego i zdrowia ludzkiego, jakie mogłyby wyniknąć<br />
z niewłaściwego postępowania z odpadami powstałymi ze zużytego sprzętu elektronicznego.<br />
System zbierania zużytego sprzętu jest zgodny z obowiązującymi na terenie Rzeczpospolitej<br />
Polskiej normami prawnymi, (Ustawa z dnia 29 lipca 2005, Dziennik Ustaw Nr 180 poz.1494 i<br />
1495) obowiązki wynikające z ustawy przejęła w imieniu przedsiębiorcy Organizacja Odzysku.<br />
148 <strong>VG</strong> <strong>BBA</strong> 1 - 110711<br />
Assembly page 148/168
�<br />
Fax +32 2 359 95 50<br />
Copies of the I/B. Please reproduce them without any<br />
changes except under special instruction from Team<br />
International BELGIUM. The pages must be reproduced<br />
and folded in order to obtain a booklet A5 (+/- 148.5 mm<br />
width x 210 mm height). When folding, make sure you<br />
keep the good numbering when you turn the pages of<br />
the I/B. Don’t change the page numbering. Keep the<br />
language integrity.<br />
Gospodarstwo domowe pełni istotną rolę w przyczynianiu się do ponownego użycia i odzysku,<br />
w tym recyklingu, zużytego sprzętu elektrycznego. Przestrzeganie zasad selektywnej zbiórki<br />
sprzętu ma zapewnić właściwy poziom ochrony zdrowia ludzkiego i środowiska naturalnego.<br />
Waga netto urządzenia – 3.7 kg<br />
149 <strong>VG</strong> <strong>BBA</strong> 1 - 110711<br />
Assembly page 149/168
�<br />
Fax +32 2 359 95 50<br />
MASURI DE SIGURANTA<br />
Copies of the I/B. Please reproduce them without any<br />
changes except under special instruction from Team<br />
International BELGIUM. The pages must be reproduced<br />
and folded in order to obtain a booklet A5 (+/- 148.5 mm<br />
width x 210 mm height). When folding, make sure you<br />
keep the good numbering when you turn the pages of<br />
the I/B. Don’t change the page numbering. Keep the<br />
language integrity.<br />
Va rugam cititi cu atentie aceste instructiuni inainte de a folosi aparatul si intotdeauna urmati<br />
instructiunile de siguranta si operare.<br />
Important: persoanele (inclusiv copii) care nu sunt capabile sa foloseasca produsul in<br />
siguranta, datorita capacitatii lor fizice, senzoriale sau mentale, sau datorita lipsei de<br />
experienta sau cunostere, nu trebuie niciodata sa foloseasca produsul decat daca sunt<br />
supravegheati de o persoana responsabila cu siguranta lor sau daca ei anterior au primit<br />
instructiuni privind folorirea aparatului.<br />
Supravegherea indeaproape este necesara pentru a impiedica copiii sa foloseasca aparatul<br />
ca pe o jucarie.<br />
� Va rugam cititi cu atentie instructiunile de folosire inainte de a pune in functiune aparatul.<br />
� Verificati daca puterea surselor de alimentare (voltajul) corespunde celei inscrise pe<br />
aparat.<br />
� Nu lasati niciodata aparatul nesupravegheat cand este in fuctiune. Tineti la distanta copii<br />
sau persoanele necalificate pentru a-l utiliza.<br />
� Periodic verificati daca aparatul a fost avariat. Nu folositi niciodata aparatul daca<br />
prezinta semne de avarie. Toate reparatiile trebuiesc efectuate de un electrician calificat<br />
si competent (*).<br />
� Folositi acest aparat numai in scopuri domestice si conform instructiunilor din acest<br />
manual.<br />
� Nu scufundati niciodata aparatul in apa sau alt lichid pentru nici un motiv. Nu il puneti in<br />
masina de spalat vase.<br />
� Mare atentie dupa ce folositi aparatul, caci este foarte fierbinte. Lasati-l sa se raceasca<br />
complet inainte sa il curatati sau sa il depozitati.<br />
� A nu se folosi niciodata langa suprafete fierbinti.<br />
� Inainte de a curata sau depozita aparatul, deconectati de la sursa de curent.<br />
� Nu folositi niciodata aparatul afara si depozitati-l intr-un mediu uscat.<br />
� Nu folositi accesorii care nu sunt recomandate de producator, pentru ca ar putea<br />
reprezenta un risc pentru utilizator si exista riscul de a avaria aparatul.<br />
� Nu trageti aparatul de fir pentru a-l muta. Asigurati-va ca firul nu poate fi blocat in nici un<br />
fel. Nu rulati firul in jurul aparatului si nu il indoiti.<br />
� Asezati aparatul pe o suprafata plana sau pe o masa pentru a preveni caderea acestuia.<br />
� Asigurati-va ca firul nu va intra in contact cu partile fierbinti ale aparatului. Nu atingeti<br />
niciodata partile fierbinti ale aparatului pentru a evita ranirea.<br />
� Asigurati-va ca aparatul nu intra in contact cu materiale inflamabile, cum ar fi perdele,<br />
tesaturi atunci cand este in fuctiune pentru a evita incendiile.<br />
� Temperatura suprafetelor accesibile poate fi foarte ridicata atunci cand aparatul este in<br />
functiune. Nu atingeti niciodata acele suprafete in timpul functionarii. Folositi manusi de<br />
bucatarie pentru a manevra vasul pentru coacere dupa procesul de coacere pentru a<br />
evita ranirea. Daca simbolul apare pe o aumita suprafata, trebuie sa fiti atent in<br />
cazul manevrarii produsului. Acest simbol inseamna ATENTIE,aceasta suprafata se poate<br />
incalzi foarte tare in momentul folosirii.<br />
� Atentie sa nu zgariati invelisul special al bolului pentru coacere si al lamei pentru<br />
framantat, deoarece aceasta ar putea afecta proprietatea acestora de a nu permite<br />
aluatului sa se lipeasca.<br />
� Nu depasiti niciodata cantitatile de faina si drojdie care sunt recomandate in retetele din<br />
acest manual. Altfel, aluatul ar putea depasi capacitatea vasului.<br />
� Nu acoperiti niciodata aparatul (de ex. cu panza) deoarece ar putea impiedica<br />
evacuarea aburului.<br />
150 <strong>VG</strong> <strong>BBA</strong> 1 - 110711<br />
Assembly page 150/168
�<br />
Fax +32 2 359 95 50<br />
Copies of the I/B. Please reproduce them without any<br />
changes except under special instruction from Team<br />
International BELGIUM. The pages must be reproduced<br />
and folded in order to obtain a booklet A5 (+/- 148.5 mm<br />
width x 210 mm height). When folding, make sure you<br />
keep the good numbering when you turn the pages of<br />
the I/B. Don’t change the page numbering. Keep the<br />
language integrity.<br />
� Nu plasati obiecte in bolul pentru coacere, deoarece ar putea cauza socuri electrice sau<br />
pot dauna invelisului ce impiedica lipirea aluatului.<br />
(*) Electrician competent si calificat: departamentul de vanzari al producatorului sau<br />
importatorului sau orice alta persoana care este calificata, aprobata si competenta sa<br />
efectueze acest gen de reparatii astfel incat sa evite orice pericol. In orice caz ar trebui sa<br />
returnati aparatul electricianului.<br />
INSTRUCTIUNI PENTRU FIRUL SCURT<br />
Aparatul este prevazut cu un fir de alimentare relativ scurt pentru a reduce riscul ca cineva sa<br />
se incurce in el sau sa se impiedice de un fir mai lung. Se pot folosi prelungitoare daca se<br />
circula cu atentie atunci cand sunt folosite.<br />
• Puterea electrica a prelungitorului ar trebui sa fie cel putin egala cu cea a aparatului.<br />
Daca prelungitorul are o putere prea mica, se poate supraincalzi si poate lua foc.<br />
• Firul mai lung ar trebui aranjat astfel incat sa nu atarne de pe masa de unde poate fi tras de<br />
copii sau se poate intampla ca cineva sa se impiedice.<br />
INAINTE DE PRIMA OPERATIE<br />
Despachetati aparatul si inlaturati tot ambalajul. Curatati capacul, accesoriile si bolul pentru<br />
coacere cu o bucata de material moale si umeda si uscati cu atentie aceste parti. Calitatea<br />
painii poate depinde de o multitudine de factori. Astfel, este foarte important sa cunoasteti<br />
toate ingredientele si felul in care interactioneaza. Aceasta va va permite sa obtineti rezultate<br />
satisfacatoare.<br />
Temperatura<br />
Toate ingredientele pe care le puneti trebuie sa fie la temperatura camerei. Camera in care<br />
folositi aparatul ar trebui sa aiba o temperatura de 15-34 de grade C, si ideal intre 20-23°C.<br />
Masurarea ingredientelor<br />
• Aparatul dumneavoastra este echipat cu o lingura gradata combinat. Masurati<br />
ingredientele numai cu aceasta lingura. Instructiunile acestui manual sunt bazate pe<br />
masura acestui accesoriu.<br />
• Cand se face referinta la “cana” in acest material, se face referinta de fapt la o cana<br />
masura (250ml).<br />
• Pe lingura gradata combinat, veti vedea urmatoarele semne:<br />
Tbs = Lingura de masa = 15ml<br />
Tsp = Lingurita de ceai = 5ml<br />
• Pentru a masura ingrediente lichide, umpleti cana masura si asezati-o pe o suprafata<br />
plana. Nivelul lichidului trebuie sa fie aliniat cu semnul masuratorii. O masurare<br />
aproximativa nu este suficienta si poate avea o influenta rea asupra echilibrului retetei.<br />
• Pentru a masura faina puneti-o cu lingura in cana masura si dupa ce ati umplut cana,<br />
nivelati cu o ustensila care are marginea dreapta. A bate sau agita cana va duce la<br />
tasarea fainei si in final veti obtine o cantitate mai mare decat necesar. Cantitatea in plus<br />
ar putea afecta echilibrul retetei. Nu cerneti faina. Pentru a masura cantitati mici folositi<br />
lingura gradata si asigurati-va ca este nivelata si nu cu varf. Pentru anumite ingrediente,<br />
cum ar fi stafide sau fulgi de ciocolata, va sfatuim sa folositi un cantar de bucatarie.<br />
151 <strong>VG</strong> <strong>BBA</strong> 1 - 110711<br />
Assembly page 151/168
�<br />
Fax +32 2 359 95 50<br />
Situatie geografica<br />
Copies of the I/B. Please reproduce them without any<br />
changes except under special instruction from Team<br />
International BELGIUM. The pages must be reproduced<br />
and folded in order to obtain a booklet A5 (+/- 148.5 mm<br />
width x 210 mm height). When folding, make sure you<br />
keep the good numbering when you turn the pages of<br />
the I/B. Don’t change the page numbering. Keep the<br />
language integrity.<br />
La o altitudine mai mare de 1000 metri faina tinde sa fie mai uscata si absoarbe mai putin<br />
lichid. Mai mult lichid sau mai putina faina ar putea stabili echilibrul.<br />
Aluatul creste mai mult la altitudini mari. Fie zaharul,drojdia sau lichidul ar trebui usor adjustate<br />
pentru a impiedica aluatul sa creasca prea mult. Vezi tabelul de mai jos pentru indrumari.<br />
ALTITUDINE<br />
Adjustare 1000m 1500m 3000m<br />
Reduceti drojdia: Pt fiecare lingurita<br />
de ceai in reteta scadeti cu:<br />
Reduceti zaharul: Pt fiecare lingurita<br />
de ceai in reteta scadeti cu:<br />
Cresteti cant de lichid: Pt fiecare<br />
cana din reteta, adaugati:<br />
1/8 lingurita<br />
1/8 – 1/4<br />
lingurita<br />
+ 1/4 lingurita<br />
0-1 lingurita 0-2 lingurita 1-2 lingurita<br />
1-2 lingura 2-4 lingura 3-4 lingura<br />
Ingrediente<br />
Unul din cei mai importanti factori implicati in producerea painii este calitatea si prospetimea<br />
ingredientelor. Mai mult este absolut necesar sa respectati cantitatea din reteta intocmai.<br />
Faina buna la toate<br />
Faina buna la toate este un amestec din faina de grau rafinata fina si dura potrivita pentru a<br />
face paine si prajituri. Desi acest tip de faina poate duce la rezultate acceptabile folosind<br />
aparatul, va recomandam sa folositi faina pentru paine.<br />
Faina pentru paine<br />
Faina pentru paine este o faina cu gluten/proteine care a fost tratata cu aditivi care ofera<br />
aluatului o mai mare toleranta in timpul framantarii. Faina pentru paine are de obicei o<br />
concentratie mai mare de gluten decat faina buna la toate, totusi, aceasta poate varia in<br />
functie de diferitele practici de macinare. Este recomandat sa folositi faina pentru paine cu<br />
acest aparat, dar si faina buna la toate va da rezultate acceptabile.<br />
Faina integrala<br />
Faina integrala este macinata din intregul bob de grau, care contine si tarata si germenele<br />
ceea ce o face mai grea si mai bogata in nutrienti in comparatie cu faina buna la toate.<br />
Painea din aceasta faina este de obicei mai mica si mai grea decat painea alba. Pentru a<br />
depasi acest aspect, faina integrala este de obicei amestecata cu faina buna la toate, faina<br />
pentru paine sau gluten pentru a obtine o paine mai inalta si cu o textura mai usoara.<br />
Faina de secara<br />
Faina de secara este o faina cu fibre similara celei integrale. Trebuie intotdeauna amestecata<br />
cu o cantitate mare de faina buna la toate, faina pentru paine sau gluten, deoarece nu<br />
contine suficient gluten pentru a rezulta o structura inalta si neteda a painii.<br />
Gluten<br />
Glutenul este proteina din faina care face aluatul elastic. Poate fi gasit de obicei in<br />
majoritatea magazinelor naturiste si e folosit cateodata in proportii foarte mici in cazul fainilor<br />
cu mult sau putin gluten cum ar fi faina integrala pentru a creste volumul si a usura textura.<br />
152 <strong>VG</strong> <strong>BBA</strong> 1 - 110711<br />
Assembly page 152/168
�<br />
Fax +32 2 359 95 50<br />
Copies of the I/B. Please reproduce them without any<br />
changes except under special instruction from Team<br />
International BELGIUM. The pages must be reproduced<br />
and folded in order to obtain a booklet A5 (+/- 148.5 mm<br />
width x 210 mm height). When folding, make sure you<br />
keep the good numbering when you turn the pages of<br />
the I/B. Don’t change the page numbering. Keep the<br />
language integrity.<br />
Faina pentru prajituri<br />
Faina pentru prajituri este o faina cu putin gluten/proteine si este special facuta pentru a fi<br />
folosita in retetele de prajituri. Nu este recomandata pentru retetele de paine.<br />
Faina care creste singura<br />
Fainile care cresc singure contin ingrediente pentru crestere care nu sunt necesare si care vor<br />
interfera cu coacerea painii sau prajiturilor. Nu este recomandata pentru aparatul de fata.<br />
Taratele<br />
Taratele (neprocesate) si germenii de grau sunt partile exterioare aspre ale graului sau secarei<br />
separate de faina. Sunt deseori adaugate in cantitati mici pentru a imbunatati nutritiv painea<br />
sau a adauga aroma. De asemenea sunt folosite pentru a intensifica textura painii.<br />
Faina de porumb si de ovaz<br />
Fainile de porumb si ovaz se obtin din parte aspra din partea de jos alba sau galbena a<br />
porumbului si din ovazul cosit. Sunt folosite mai ales pentru a imbogati aroma si textura painii.<br />
Faina grunjoasa<br />
Faina grunjoasa are o textura foarte aspra. Se face din boabe de grau taiate in fragmente<br />
unghiulare. Confera painii din faina integrala un gust de nuca si textura grunjoasa.<br />
Amestecul de 7cereale<br />
Amestecul de 7 cereale este un amestec de faina grunjoasa, ovaz, tarate, secara, faina de<br />
porumb, seminte de in si mei.<br />
Drojdia<br />
Drojdia, printr-un proces de fermentatie produce un gaz (dioxid de carbon) care este necesar<br />
pentru ca painea sa creasca. Drojdia trebui sa se poata hrani cu zahar si faina pentru a<br />
produce acest gaz. Drojdia activa uscata din granule este folosita in toate retetele care cer<br />
drojdie. Exista 4 tipuri de baza de drojdie disponibile: proaspata, uscata, care creste rapid si<br />
pentru masina de paine. Este recomandat sa folositi drojdie uscata traditionala, totusi puteti<br />
folosi si drojdie care creste rapid dar in cantitati mai mici. Drojdia proaspata sau concentrata<br />
pentru prajituri nu este recomandata pentru ca nu va avea rezultate.<br />
Drojdia trebuie tinuta intotdeauna in frigider pentru a se mentine proaspata. Prea multa<br />
caldura o va strica. Asigurati-va ca dupa folosire,drojdia sa fie acoperita si pusa la frigider cat<br />
mai repede pentru a o putea folosi in viitor. Urmatorul test poate fi facut pentru a determina<br />
daca drojdia este veche si inactiva:<br />
� Puneti ½ cana de apa calduta intr-un bol mic sau o cana.<br />
� Amestecati 1 lingurita de zahar in apa si apoi presarati 2 lingurite de drojdie pe<br />
deasupra.<br />
� Puneti cana intr-o zona calda si lasati 10 minute fara a o misca.<br />
� Amestecul ar trebui sa faca spuma si sa degaje o aroma puternica de drojdie. Daca<br />
nu se intampla astfel, ar trebui sa cumparati drojdie proaspata.<br />
Zaharul<br />
Zaharul este important pentru culoarea si aroma painii. De asemenea hraneste drojdia si<br />
sustine procesul de fermentatie. Retetele in care se foloseste zahar cer zahar granulat. Nu<br />
inlocuiti cu zahar pudra sau brun decat daca vi se indica astfel. Indulcitorii artificiali nu pot fi<br />
folositi ca un substitut pentru zahar caci drojdia nu va relationa cum trebuie cu ei.<br />
Sarea<br />
Sarea este necesara pentru a echilibra aroma painii si prajiturilor, cat si culoarea crustei din<br />
timpul coacerii. Din motive de dieta, poate fi eliminata de tot, totusi e posibil ca painea sa<br />
creasca mai mult decat normal.<br />
153 <strong>VG</strong> <strong>BBA</strong> 1 - 110711<br />
Assembly page 153/168
�<br />
Fax +32 2 359 95 50<br />
Copies of the I/B. Please reproduce them without any<br />
changes except under special instruction from Team<br />
International BELGIUM. The pages must be reproduced<br />
and folded in order to obtain a booklet A5 (+/- 148.5 mm<br />
width x 210 mm height). When folding, make sure you<br />
keep the good numbering when you turn the pages of<br />
the I/B. Don’t change the page numbering. Keep the<br />
language integrity.<br />
Lichide/lapte<br />
Lichide precum lapte sau o combinatie de lapte praf si apa pot fi folosite cand se face paine.<br />
Laptele va imbunatati aroma,va conferi o textura catifelata si va inmuia crusta, in timp ce apa<br />
va inaspri crusta. Folositi numai lapte praf atunci cand planificati pornirea cu decalaj. Unele<br />
retete au nevoie de suc (portocale, mere) pentru a imbunatati aroma.<br />
Ouale<br />
Ouale adauga o textura catifelata aluatului. Folositi numai oua mari pentru aceste retete.<br />
Untul uleiu si margarina<br />
Untul uleiul si margarina imbunatatesc textura painii cu drojdie. Totusi painea facuta cu unt<br />
ramane proaspata mai mult timp. Daca untul sau margarina sunt folosite direct din frigider, ar<br />
trebui sa fie taiate in bucati mici pentru a fi mai usor amestecate in timpul ciclului de<br />
framantare.<br />
Praful de copt<br />
Praful de copt este un agent afanator folosit pentru painea si prajiturile rapide. Acest gen de<br />
agent nu are nevoie de timp de crestere deoarece reactia chimica are loc in timpul<br />
procesului de coacere.<br />
Bicarbonatul de sodiu<br />
Bicarbonatul de sodium este un alt agent afanator care nu trebuie confundat sau substituit cu<br />
praful de copt. Nici acesta nu are nevoie de timp de crestere.<br />
Glazuri speciale pentru painea cu drojdie<br />
Selectati una din urmatoarele glazuri pentru a imbunatati painea:<br />
Glazura de oua: Bateti un ou mare impreuna cu o lingura de apa si aplicati-l din belsug.<br />
Aplicati-l numai aluatului inainte de a-l coace in cuptorul obisnuit.<br />
Crusta de unt topit: Aplicati unt topit peste painea abia coapta pentru o crusta moale.<br />
Glazura de lapte: Pentru o crusta mai moale si mai lucioasa aplicati pe painea abia coapta<br />
lapte sau frisca.<br />
Glazura dulce: Amestecati o cana de zahar cernut cu 1 sau 2 lingurite de lapte pentru a<br />
obtine o glazura consistenta. Presarati pe painea dulce.<br />
Mac/susan/seminte de chimen/faina de porumb/faina de ovaz:<br />
Presarati la alegere peste painea abia glazurata.<br />
CUM FOLOSITI APARATUL DE FACUT PAINE<br />
PANOUL DE COMANDA<br />
Fereastra de afisaj:<br />
Afiseaza numarul programului.<br />
Afiseaza o numaratoare din minut in minut pentru timpul de coacere.<br />
Afiseaza o eroare (codurile de avertizare sunt "LLL" si "H:HH").<br />
154 <strong>VG</strong> <strong>BBA</strong> 1 - 110711<br />
Assembly page 154/168
�<br />
Fax +32 2 359 95 50<br />
Copies of the I/B. Please reproduce them without any<br />
changes except under special instruction from Team<br />
International BELGIUM. The pages must be reproduced<br />
and folded in order to obtain a booklet A5 (+/- 148.5 mm<br />
width x 210 mm height). When folding, make sure you<br />
keep the good numbering when you turn the pages of<br />
the I/B. Don’t change the page numbering. Keep the<br />
language integrity.<br />
▲ si ▼<br />
Permite setarea cronometrului pentru decalajul procesului de coacere.<br />
Sagetile permit setarea timpului in plus sau in minus in unitati a cate zece minute.<br />
Pentru a mari sau micsora timpul rapid, apasati si mentineti apasate sagetile.<br />
Tasta MENU (1-6/7-12):<br />
Apasati pentru a selecta un program (de la 1 la 12).<br />
De fiecare data cand apasati aceasta tasta, afisajul trece la urmatorul program.<br />
Tasta START/STOP (0/1):<br />
Permite inceperea unui program.<br />
Apasati si mentineti pana auziti un bip pentru a opri operatia sau a anula o setare de timp.<br />
(Nota: nu este necesar sa apasati tasta stop atunci cand deschideti capacul sa verificati<br />
progresul painii.)<br />
Tasta crusta:<br />
Apasati aceasta tasta pentru a selecta culoarea crustei intre deschisa si inchisa (anumite<br />
programe nu permit aceasta alegere). De fiecare data cand apasati aceasta tasta, sageata<br />
de pe afisaj va trece la urmatoarea culoare a crustei.<br />
Tasta pentru greutate (450g/680g/900g):<br />
Permite sa alegeti marimea painii (anumite programe nu permit aceasta alegere). De fiecare<br />
data cand apasati aceasta tasta, sageata de pe afisaj va trece la urmatoarea greutate.<br />
SEMNALELE SONORE (BIPURI)<br />
Aparatul emite cateva bipuri:<br />
1 beep lung: Aparatul este pornit.<br />
1 beep scurt: O tasta pentru un program valid este apasata.<br />
10 bipuri consecutive: Functia “adaugare ingrediente” este activate.<br />
12 bipuri scurte: Programul s-a terminat.<br />
FOLOSIREA<br />
1. Deschideti capacul si indepartati tigaia pentru copt tragand de manerul acesteia. Este<br />
important sa indepartati tigaia din unitate. Nu adaugati ingrediente in tigaie cat timp este<br />
in unitate pentru a evita riscul de a varsa ingrediente in carcasa interioara.<br />
Plasati aparatul pe o suprafata plana, stabile si sigura.<br />
2. Atasati lama pentru framantat pe axul aflat inauntrul tigaii de copt prin alinierea partii<br />
plate a lamei cu partea plata a axului. Impingeti ferm lama in ax. Important: Fiti siguri ca<br />
ati fixat ferm lama pentru framantat, caci altfel aceasta s-ar putea detasa in timpul<br />
operatiilor. Aceasta ar putea afecta framantatul sau amestecarea. Fiti siguri ca axul este<br />
curatat de orice particule pentru a asigura ca lama pentru framantat se va aseza integral<br />
in locul ei. Este recomandat sa umpleti gaura lamelei de framantat cu margarina<br />
rezistenta la caldura pentru a preveni ca aluatul sa se lipeasca de lamela.<br />
3. Selectati o retete din sectiunea “Retete” de mai jos. Cand urmati reteta:<br />
• Masurati ingredientele cu grija si atentie. Vezi sectiunea “Masurarea ingredientelor”.<br />
• Intotdeauna adaugati ingredientele in ordinea in care sunt indicate.<br />
155 <strong>VG</strong> <strong>BBA</strong> 1 - 110711<br />
Assembly page 155/168
�<br />
Fax +32 2 359 95 50<br />
Copies of the I/B. Please reproduce them without any<br />
changes except under special instruction from Team<br />
International BELGIUM. The pages must be reproduced<br />
and folded in order to obtain a booklet A5 (+/- 148.5 mm<br />
width x 210 mm height). When folding, make sure you<br />
keep the good numbering when you turn the pages of<br />
the I/B. Don’t change the page numbering. Keep the<br />
language integrity.<br />
• Drojdia este adaugata intoteauna ultima. Asigurati-va ca drojdia nu atinge<br />
ingredientele lichide.<br />
4. Reasezati tigaia pentru copt in unitate. Pentru a face astfel, introduceti-o pana cand este<br />
incuiata pe fundul cavitatii.<br />
5. Inchideti capacul si conectati firul la sursa de curent. Se va auzi un bip si pe fereastra de<br />
afisaj vor aparea “2:50”. Programul 1 va aparea ca setat de la inceput.<br />
6. Selectati programul potrivit pentru pentru reteta dumneavoastra apasand pe butonul<br />
MENU din panoul de comanda. De fiecare data cand MENU este apasat, numarul de pe<br />
fereastra de afisaj va trece la urmatoarea setare. Asigurati-va ca apasati butonul pana<br />
auziti un bip.<br />
7. Selectati setarea potrivita pentru marimea painii apasand butonul pentru greutate. De<br />
fiecare data cand butonul va fi apasat, afisajul va trece de la o greutate la alta cyclic.<br />
8. Selectati culoarea potrivita pentru crusta apasand butonul pentru crusta. De fiecare data<br />
cand apasati aceasta tasta, sageata trece de la “deschisa” la “inchisa”.<br />
9. Apasati tasta START/STOP si tineti apasat pentru 3 secunde. Timpul de coacere in ore si<br />
minute va aparea pe afisajul LCD si lumina din spatele dispalyului va palpai. De exemplu,<br />
daca alegeti o reteta folosing programul standard de paine pentru crusta moale si 680<br />
grame, afisajul va arata “2:55”. Va numara descrescator timpul ramas in unitati de un<br />
minut pana cand painea va fi gata. Cand folositi programele "Basic" ("Standard"),<br />
"French" (Francez), "Sweet" (dulce), "Wholewheat" (faina integrala) si "Sandwich", se vor<br />
auzi 10 bipuri in timpul ciclului pentru a va indica ca puteti adauga ingrediente.<br />
Deschideti capacul si adaugati ingredientele dorite. Fiti atenti cand deschideti capacul<br />
deoarece s0ar putea sa se ridice aburi.<br />
Nota: Odata ce ati apasat butonul START/STOP este imposibil sa modificati setarile<br />
celorlalte taste.<br />
10. Cand programul este complet se vor auzi 12 bipuri. Pentru a nu dauna suprafetei<br />
aparatului pentru paine, nu puneti nici un obiect sau tigaia pentru coacere fierbinte<br />
deasupra unitatii. Daca nu doriti sa folositi functia de mentinere a caldurii, opriti aparatul<br />
apasand butonul START/STOP pentru 3 secunde. Se va auzi un bip lung si afisajul va reveni<br />
la setarea initiala.<br />
11. Daca nu apasati butonul START/STOP si lasati painea inauntru, functia de mentinere a<br />
caldurii se va declansa automat cand se va termina procesul de coacere. Aparatul de<br />
preparat paine va mentine painea calda pentru maxim 60 de minute. Dupa o ora afisajul<br />
va reveni la setarile initiale. Puteti detasa tigaia de coacere oricand in timpul ciclului de<br />
mentinere a temperaturii. Pentru a opri functia de mentinere a temperaturii inainte de<br />
terminarea celor 60 de minute, apasti pur si simplu tasta START/STOP si mentineti pentru 3<br />
secunde. Deconectati de la sursa de curent cand ati terminat. Atentie: cand folositi<br />
programul 7 (WHISK), 8 (JAM) si 10 (DOUGH=aluat), functia de mentinere a temperaturii nu<br />
este activat. Pentru programul 10 acesta este pentru ca daca lasati aluatul finit prea mult<br />
in unitate va creste prea mult si va da rezultate nesatisfacatoare. Pentru rezultatele cele<br />
mai bune, scoateti aluatul la finalul ciclului si urmati indicatiile retetei pentru a il modela, al<br />
lasa sa creasca si a-l coace.<br />
12. Acest aparat pentru paine are o fereastra prin care se poate urmari progresul painii cand<br />
este amestecata, framantata si coapta. Ocazional pe fereastra poate aparea condens.<br />
Puteti ridica capacul pentru a va uita inauntru in timpul amestecatului si framantatului dar<br />
NU DESCHIDETI CAPACUL IN TIMPUL CICLULUI DE COACERE (aproximativ in ultima ora) caci<br />
poate face ca painea sa nu mai creasca sau sa dea inapoi.<br />
13. Pentru a scoate painea din tigaia de copt folositi sustinatoare sau manusi si ridicati-o de<br />
maner. Intoarceti tigaia cu susul in jos si scuturati painea pe un support. Forma de copt<br />
are un invelis care previne lipirea astfel ca painea sa alunece usor. Nu folositi ustensile din<br />
metal pentru a scoate painea deoarece acestea ar putea zgaria invelisul impotriva lipirii.<br />
Daca este nevoide folositi o spatula plata de cauciuc sau plastic pe margini pentru a<br />
detasa painea. Daca lama pentru framantat ramane lipita de paine, folositi carlgul<br />
prevazut sau un capat al unei linguri de plastic sau alta ustensile din material non-metalic<br />
156 <strong>VG</strong> <strong>BBA</strong> 1 - 110711<br />
Assembly page 156/168
�<br />
Fax +32 2 359 95 50<br />
Copies of the I/B. Please reproduce them without any<br />
changes except under special instruction from Team<br />
International BELGIUM. The pages must be reproduced<br />
and folded in order to obtain a booklet A5 (+/- 148.5 mm<br />
width x 210 mm height). When folding, make sure you<br />
keep the good numbering when you turn the pages of<br />
the I/B. Don’t change the page numbering. Keep the<br />
language integrity.<br />
pentru a o indeparta. Nu folositi cutite sau orice alt obiect ascutit din metal deoarece va<br />
zgaria invelisul anti-lipire de pe lama. Intotdeauna verificati unde este lama pentru<br />
framantat cand ridicati painea coapta. Daca ramane lipite de paine o puteti avaria<br />
accidental cand veti felia painea.<br />
14. Lasati painea sa se raceasca pe un support pentru cel putin 60 de minute inainte de a o<br />
felia, pentru a permite aburului sa se evapore. Folositi un cutit zimtat sau unul electric.<br />
FOLOSIREA CRONOMETRULUI PENTRU DECALAREA OPERATIILOR<br />
Folositi cronometrul cand doriti sa intarziati finalizarea painii. Aceasta trasatura va permite sa<br />
intarziati timpul de coacere cu pana la 13 ore. De exemplu, puteti seta cronometrul la 7 pm sis<br />
a aveti paine proaspata la 8 am dimineata urmatoare.<br />
Pentru a seta cronometrul urmati instructiunile de mai jos:<br />
• Nota: Nu folositi cronometrul si functia de decalaj pentru retete care au in alcatuire<br />
ingrediente perisabile cum ar fi oua, lapte proaspat, frisca sau branza.<br />
• Pentru a seta timerul determinati momentul in care doriti sa fie gata painea si numarati<br />
cate ore sunt pana atunci. De ex., daca este 8 pm cand puneti toate ingredientele in<br />
tava pentru copt si doriti sa va treziti in zroma de paine proaspata la 8 am dimineata<br />
urmatoare, aveti nevoie de 12 ore pana painea va fi gata. Odata ce ati ales setarile<br />
potrivite pentru pentru reteta, pur si simplu setati timerul pentru numarul total de ore – in<br />
acest caz, 12 ore.<br />
• Apasati tasta ▲ de pe panoul de comanda si “2:50” – timpul pentru aceasta setare –<br />
va aparea automat in fereastra de afisaj. Continuati sa apasati ▲ pana cand afisajul<br />
va indica 12:00. Nu trebuie sa calculati mathematic diferenta dintre timpul setat initial<br />
(2:50) si totalul orelor pe care le doriti (12:00). Aparatul de paine se va adjusta automat<br />
pentru a include timpul setat. Pur si simplu setati timerul pentru timpul total (12:00). Daca<br />
treceti de 12, apasati tasta ▼ ca sa va intoarceti. Puteti apasa si mentine oricare<br />
dintre cele 2 sageti pentru a avansa rapid timpul din afisaj.<br />
• Odata ce ati setat timpul, apasati START/STOP. Numaratoarea inverse va incepe. Se va<br />
numara in unitati de un minut. Cand afisajul va ajunge la “0:00”, painea este gata si se vor<br />
auzi 12 bipuri.<br />
• Daca faceti o greseala in timpul setarii timerului, apasati si mentineti tasta START/STOP<br />
pana cand se vor auzi bipuri. Astfel afisajul se va sterge si veti putea seta din nou timerul.<br />
157 <strong>VG</strong> <strong>BBA</strong> 1 - 110711<br />
Assembly page 157/168
�<br />
Fax +32 2 359 95 50<br />
PROBLEME POSIBILE SI SOLUTII<br />
Problema Solutie<br />
Iese fum din ventilatoarele in timpul<br />
procesului de coacere.<br />
Copies of the I/B. Please reproduce them without any<br />
changes except under special instruction from Team<br />
International BELGIUM. The pages must be reproduced<br />
and folded in order to obtain a booklet A5 (+/- 148.5 mm<br />
width x 210 mm height). When folding, make sure you<br />
keep the good numbering when you turn the pages of<br />
the I/B. Don’t change the page numbering. Keep the<br />
language integrity.<br />
Poate exista ulei pe unul din elementele care se<br />
incalzesc. Deconectati de la sursa de curent, scoateti<br />
tava pentru copt si curatati elemental cu o bucata de<br />
material uscata. Atentie sa nu va ardeti.<br />
Faina varsata in carcasa interioara. Deconectati de la sursa de curent si lasati sa se<br />
raceasca, stergeti carcasa interioara cu o bucata de<br />
material curate. Atentie atunci cand stergeti pe langa<br />
elementele care se incalzesc.<br />
Coaja de jos este prea groasa. Se poate intampla doar daca alsati painea prea mult<br />
timp in tava pentru copt. Incercati sa scoateti painea<br />
mai devreme.<br />
Painea nu s-a copt cum trebuie. Asigurati-va ca lama pentru framantat este asezata<br />
cum tebuie pe ax.<br />
Evitati sa deschideti aparatul de prea multe ori in timpul<br />
programului.<br />
Puteti auzi motorul dar aluatul nu Verificati daca vasul pentru copt este asezat potrivit si<br />
este amestecat.<br />
daca lama a fost instalata cum trebuie.<br />
[HOT] apare in fereastra de afisaj. Daca afisajul arata “HOT” dupa ce ati apasat<br />
START/STOP, inseamna ca temperature inauntru este<br />
prea ridicata. Programul trebuie oprit. Deschideti<br />
capacul si lasati sa se raceasca pentru 10-20 de minute.<br />
[H:HH] sau [LLL] apare in fereastra<br />
de afisaj.<br />
Daca afisajul arata “H:HH” sau “LLL” dup ace programul<br />
a inceput, inseamna ca temperature inauntru este prea<br />
ridicata. Programul trebuie oprit. Deschideti capacul si<br />
lasati sa se raceasca pentru 10-20 de minute.<br />
Daca rezultatul nu este satisfacator,va rugam verificati urmatoarele puncte:<br />
Atentie: Incercati o solutie odata pentru o bucata.<br />
A) Probleme de masurare<br />
Painea creste si apoi da inpoi<br />
• Scadeti cantitatea de apa/lapte cu 2 linguri.<br />
• Cresteti cantitatea de sare cu ¼ lingurite.<br />
• Scadeti cantitatea de drojdie cu ¼ lingurite.<br />
Painea creste prea mult<br />
• Scadeti cantitatea de faina cu 2 linguri.<br />
• Scadeti cantitatea de apa/lapte cu 2 linguri.<br />
• Cresteti cantitatea de sare cu ¼ lingurite.<br />
• Scadeti cantitatea de zahar/miere cu 1 lingurita.<br />
• Scadeti cantitatea de drojdie cu ¼ lingurite.<br />
Painea nu creste destul<br />
• Cresteti cantitatea de apa/lapte cu 2 linguri.<br />
• Scadeti cantitatea de sare cu ¼ lingurite.<br />
• Cresteti cantitatea de zahar/miere cu 1 lingurita.<br />
• Cresteti cantitatea de drojdie cu ¼ lingurite.<br />
Crusta este prea inchisa la culoare<br />
• Scadeti cantitatea de zahar/miere cu 1 lingurita.<br />
Paine coapta partial<br />
• Scadeti cantitatea de apa/lapte cu 2 linguri.<br />
158 <strong>VG</strong> <strong>BBA</strong> 1 - 110711<br />
Assembly page 158/168
�<br />
Fax +32 2 359 95 50<br />
Partea de sus a painii nu este neteda<br />
• Scadeti cantitatea de faina cu 2 linguri.<br />
• Cresteti cantitatea de apa/lapte cu 2 linguri.<br />
Textura este grea sau densa<br />
• Scadeti cantitatea de faina cu 2 linguri.<br />
• Cresteti cantitatea de zahar cu 1 lingurita.<br />
• Cresteti cantitatea de drojdie cu ¼ lingurite.<br />
B) Probleme cu ingredientele<br />
Copies of the I/B. Please reproduce them without any<br />
changes except under special instruction from Team<br />
International BELGIUM. The pages must be reproduced<br />
and folded in order to obtain a booklet A5 (+/- 148.5 mm<br />
width x 210 mm height). When folding, make sure you<br />
keep the good numbering when you turn the pages of<br />
the I/B. Don’t change the page numbering. Keep the<br />
language integrity.<br />
Daca rezultatele slabe nu sunt cauzate de problemele de masurare, se poate ca<br />
ingredientele sa fie de vina:<br />
Painea creste si apoi da inapoi<br />
• Faina este prea fina.<br />
Painea creste prea mult<br />
• Ati folosit un tip gresit de drojdie.<br />
• Ati uitat sa adugati sare.<br />
Paine nu creste destul<br />
• Faina este prea veche.<br />
• Faina nu contine suficient gluten.<br />
• Faina este prea fina.<br />
• Ati folosit un tip gresit de drojdie.<br />
• Ati pus prea multa sare.<br />
Paine plata, crescuta foarte putin sau deloc<br />
• Lichidul este prea cald/rece.<br />
• Faina este prea veche.<br />
• Faina nu contine suficient gluten.<br />
• Faina este prea fina.<br />
• Ati uitat drojdia.<br />
• Drojdia este prea veche.<br />
• Ati folosit un tip gresit de drojdie.<br />
• Ati pus prea multa sare.<br />
• Ati uitat sa adugati sare.<br />
Daca ingredientele sunt numai partial amestecate<br />
• Faina este prea fina.<br />
Daca textura este grea sau densa<br />
• Ati folosit un tip gresit de drojdie.<br />
CURATAREA<br />
Detasati cablul de alimentare cu energie si lasati aparatul sa se raceasca inainte de a-l<br />
curata.<br />
1. Tava de copt<br />
Scoateti tava de copt din aparat asa cum s-a explicat in manual inainte sa o curatati.<br />
Curatati interiorul si exteriorul cu o bucata de material umeda. Daca este nevoie folositi<br />
apa cu detergent pentru a curate interiorul. Nu folositi niciodata obiecte abrasive sau<br />
care zgarie, deoarece pot afecta invelisul anti-lipireal tavii. Nu va fi acceptata nici o<br />
plangere daca invelisul este zgariat sau avariat. Dupa o perioada de timp, infatisarea<br />
invelisului anti-lipire se poate schimba datorita aburului si umiditatii. Este normal si nu<br />
afecteaza trasaturile si calitatea invelisului.<br />
2. Lama pentru framantat<br />
Curatati lama cu o bucata umeda de material. Daca este dificil sa o detasati, turnati niste<br />
apa fierbinte in tava de copt si asteptati cateva minute. Apa calda va dizolva substanta.<br />
159 <strong>VG</strong> <strong>BBA</strong> 1 - 110711<br />
Assembly page 159/168
�<br />
Fax +32 2 359 95 50<br />
Copies of the I/B. Please reproduce them without any<br />
changes except under special instruction from Team<br />
International BELGIUM. The pages must be reproduced<br />
and folded in order to obtain a booklet A5 (+/- 148.5 mm<br />
width x 210 mm height). When folding, make sure you<br />
keep the good numbering when you turn the pages of<br />
the I/B. Don’t change the page numbering. Keep the<br />
language integrity.<br />
Daca gaura lamei este infundata, curatati cu o scobitoare, asigurandu-va ca nu zgariati lama.<br />
3. Capacul cu vizor<br />
Curatati cu o bucata umeda de material. Nu scufundati niciodata in apa sau alt lichid.<br />
4. Carcasa interioara<br />
Daca este necesar puteti curate de asemenea si carcasa interioara. Folositi si acolo o<br />
bucata umeda de material. Asigurati-va ca s-a racit inainte de a o curate. Asigurati-va ca<br />
este uscata in totalitate inainte sa porniti aparatul.<br />
5. Carcasa exterioara<br />
Curatati cu o bucata umeda de material. Nu scufundati nicodata aparatul in apa sau alt<br />
lichid.<br />
DESCRIEREA PROGRAMELOR SI SUGESTII DE RETETE<br />
MEMORIA<br />
Daca are loc o pana de curent in timpul functionarii aparatului, procesul va fi continuat<br />
automat fara a apasa tasta START/STOP daca pana se remediaza in 20 minute. Daca pana<br />
dureaza mai mult de 20 minute memoria nu poate fi pastrata si aparatul trebuie repornit. Daca<br />
ciclul programului nu a deposit faza de framantare, doar reporniti programul. Daca programul<br />
a trecut de faza de framantare, dar nu a ajuns la inceputul fazei de coacere, folositi<br />
programul de coacere “BAKE” care va incepe procesul de coacere. Totusi, daca programul<br />
era in mijlocul procesului de coacere, este de dorit sa inlocuiti aluatul si sa incepeti din nou<br />
deoarece programul de coacere ar putea fi prea lung si ar putea arde aluatul.<br />
PAINEA STANDARD ALBA<br />
Program: 1 (Basic) – Culoarea crustei: deschisa/inchisa – Greutate: 450g/680g/900g<br />
Aceasta setare se foloseste pentru paini care folosesc faina alba; desi anumite retete pot<br />
include si cantitati mici de faina integrala. Painea va fi mai densa decat cea frantuzeasca sau<br />
painea dulce.<br />
Ingrediente:<br />
450g 680g 900g<br />
2/3 cana cu apa<br />
1 cana cu apa<br />
1 1/3 cana cu apa<br />
1 lingura cu unt/margarina 1 ½ lingura cu unt/margarina 2 lingura cu<br />
1 lingura ulei vegetal<br />
1 ½ lingura ulei vegetal<br />
unt/margarina<br />
1/3 lingurita de sare<br />
1 ½ lingurita de sare<br />
2 linguri ulei vegetal<br />
1 ½ lingura de lapte praf<br />
2 linguri de lapte praf<br />
1 lingurita de sare<br />
2 linguri de zahar<br />
2 ½ linguri de zahar<br />
3 linguri de lapte praf<br />
2 cani de faina buna la toate 2 ¼ cani de faina buna la toate 3 linguri de zahar<br />
sau pentru paine<br />
sau pentru paine<br />
3 ½ boluri de masura de<br />
1 ¼ lingurite de drojdie cu<br />
1 ¼ lingurite de drojdie cu<br />
faina buna la toate sau<br />
crestere rapida<br />
crestere rapida<br />
pentru paine<br />
1 ½ lingurite de drojdie<br />
cu crestere rapida<br />
1. Masurati ingredientele cu acuratete si adaugati in tava pentru copt in ordinea precizata<br />
in lista de mai sus (ingredientele lichide primele).<br />
2. Puneti tava in aparat. Inchideti capacul.<br />
3. Selectati programul dorit.<br />
4. Selectati culoarea dorita a crustei.<br />
5. Selectati marimea painii.<br />
6. Apasati tasta START/STOP.<br />
7. Folosind manusi de bucatarie, scoateti painea dup ace s-a scurs timpul pentru coacere.<br />
8. Lasati sa se raceasca pe un support cel putin o ora inainte sa o feliati.<br />
160 <strong>VG</strong> <strong>BBA</strong> 1 - 110711<br />
Assembly page 160/168
�<br />
Fax +32 2 359 95 50<br />
Copies of the I/B. Please reproduce them without any<br />
changes except under special instruction from Team<br />
International BELGIUM. The pages must be reproduced<br />
and folded in order to obtain a booklet A5 (+/- 148.5 mm<br />
width x 210 mm height). When folding, make sure you<br />
keep the good numbering when you turn the pages of<br />
the I/B. Don’t change the page numbering. Keep the<br />
language integrity.<br />
PAINE FRANTUZEASCA<br />
Program: 2 (French) – Culoarea crustei: deschisa/inchisa – Greutate: 450g/680g/900g<br />
Traditional, painea frantuzeasca are crusta crocanta si textura ininterior este mai usoara decat<br />
la majoritatea painilor.<br />
Ingrediente:<br />
450g 680g 900g<br />
1 cana cu apa<br />
1 1/4 cana cu apa<br />
1 ½ cana cu apa<br />
2 linguri de ulei<br />
2 linguri de ulei<br />
2 linguri de ulei<br />
1 lingurite de sare<br />
1 ½ lingurite de sare<br />
2 lingurite de sare<br />
2 linguri de zahar<br />
2 linguri de zahar<br />
2 ½ linguri de zahar<br />
2 cani de faina pt toate 2 ½ cani de faina pt toate sau pt 3 ½ cani cu faina pt toate sau<br />
sau pt paine<br />
paine<br />
pt paine<br />
1 lingurite cu drojdie cu 1 ¼ lingurite cu drojdie cu crestere 1 ½ lingurite cu drojdie cu<br />
crestere rapida<br />
rapida<br />
crestere rapida<br />
1. Masurati ingredientele cu acuratete si adaugati in tava pentru copt in ordinea precizata in<br />
lista de mai sus (ingredientele lichide primele).<br />
2. Puneti tava in aparat. Inchideti capacul.<br />
3. Selectati programul dorit.<br />
4. Selectati culoarea dorita a crustei.<br />
5. Selectati marimea painii.<br />
6. Apasati tasta START/STOP.<br />
7. Folosind manusi de bucatarie, scoateti painea dup ace s-a scurs timpul pentru coacere.<br />
8. Lasati sa se raceasca pe un support cel putin o ora inainte sa o feliati.<br />
PAINE DULCE<br />
Program: 3 (Sweet)– Culoarea crustei: deschisa/inchisa – Greutate: 450g/680g/900g<br />
Folositi aceasta setare pentru retete care folosesc suc de fructe, zahar in plus sau ingrediente<br />
dulci cum ar fi fulgi de nuca de cocs, struguri, fructe uscate sau ciocolata. Temperatura pentru<br />
copt este redusa pentru a preveni arsurile si ciclul extra de crestere va conferi painii o textura<br />
usoara si aerata.<br />
Ingrediente:<br />
450g 680g 900g<br />
3/4 cana cu lapte<br />
1 ¼ cana cu lapte<br />
1 ½ cana cu lapte<br />
1 ½ lingura cu unt/margarina 1 ½ lingura cu unt/margarina 2 linguri cu unt/margarina<br />
1 ou<br />
1 ou<br />
2 oua<br />
1 lingurita de sare<br />
1 lingurita de sare<br />
1 lingurita de sare<br />
1 ½ lingura cu miere<br />
1 ½ lingura cu miere<br />
2 linguri cu miere<br />
2 linguri cu zahar<br />
3 linguri cu zahar<br />
4 linguri cu zahar<br />
2 cani cu faina pt toate sau pt 3 cani cu faina pt toate sau pt 3 ½ cani cu faina pt toate<br />
paine<br />
paine<br />
sau pt paine<br />
1/2 lingurita de drojdie cu 1 lingurita de drojdie cu 1 ¼ lingurita cu crestere<br />
crestere rapida<br />
crestere rapida<br />
rapida<br />
1. Masurati ingredientele cu acuratete si adaugati in tava pentru copt in ordinea precizata<br />
in lista de mai sus (ingredientele lichide primele).<br />
2. Puneti tava in aparat. Inchideti capacul.<br />
161 <strong>VG</strong> <strong>BBA</strong> 1 - 110711<br />
Assembly page 161/168
�<br />
Fax +32 2 359 95 50<br />
Copies of the I/B. Please reproduce them without any<br />
changes except under special instruction from Team<br />
International BELGIUM. The pages must be reproduced<br />
and folded in order to obtain a booklet A5 (+/- 148.5 mm<br />
width x 210 mm height). When folding, make sure you<br />
keep the good numbering when you turn the pages of<br />
the I/B. Don’t change the page numbering. Keep the<br />
language integrity.<br />
3. Selectati programul dorit.<br />
4. Selectati culoarea dorita a crustei.<br />
5. Selectati marimea painii.<br />
6. Apasati tasta START/STOP.<br />
7. Folosind manusi de bucatarie, scoateti painea dup ace s-a scurs timpul pentru coacere.<br />
8. Lasati sa se raceasca pe un suport cel putin o ora inainte sa o feliati.<br />
PRAJITURA<br />
Program: 4 (Cake)<br />
Folositi setarea "cake" pentru a face prajituri.<br />
Ingrediente:<br />
8 linguri de unt<br />
8 linguri de zahar<br />
5 oua<br />
1 ½ cana de faina pt toate<br />
1 ½ lingura de suc de lamaie<br />
1 ½ lingurita de praf de copt<br />
Indiciu: Curatati marginile tavii in timpul amestecarii pentru a va asigura ca toate ingredientele<br />
sunt amestecate.<br />
1. Masurati ingredientele cu acuratete si adaugati in tava pentru copt in ordinea precizata<br />
in lista de mai sus (ingredientele lichide primele).<br />
2. Puneti tava in aparat. Inchideti capacul.<br />
3. Selectati programul dorit.<br />
4. Selectati culoarea dorita a crustei.<br />
5. Selectati marimea painii.<br />
6. Apasati tasta START/STOP.<br />
7. Folosind manusi de bucatarie, scoateti painea dup ace s-a scurs timpul pentru coacere.<br />
8. Lasati sa se raceasca pe un support cel putin o ora inainte sa o feliati.<br />
PAINE DIN FAINA INTEGRALA<br />
Program: 5 (Whole Wheat) – Culoarea crustei: deschisa/inchisa – Greutate: 450g/680g/900g<br />
Aceasta setare este folosita pentru retete cu cantitati semnificative de faina integrala sau<br />
faina de secara, ovaz sau tarate.<br />
Ingrediente:<br />
450g 680g 900g<br />
1 cana cu apa<br />
1 ¼ cana cu apa<br />
1 1/3 cana cu apa<br />
1 linguri cu margarina sau unt 1 ½ linguri cu margarina sau 2 linguri cu margarina sau unt<br />
1 lingurita de sare<br />
unt<br />
1 lingurita de sare<br />
1 lingurita de zahar<br />
1 lingurita de sare<br />
1 lingurita de zahar<br />
1 cana cu faina pt toate sau 1 lingurita de zahar<br />
1 2/3 cana cu faina pt toate<br />
pt paine<br />
1 1/3 cana cu faina pt toate sau pt paine<br />
1 cana cu faina integrala sau pt paine<br />
1 2/3 cana cu faina integrala<br />
1 lingurita de drojdie cu 1 1/3 cana cu faina integrala 1 ¼ lingurita cu crestere<br />
crestere rapida<br />
1 lingurita de drojdie cu rapida<br />
crestere rapida<br />
Nota: Puteti adauga 1 ½ linguri de gluten pentru a imbunatati inaltimea si textura painii.<br />
162 <strong>VG</strong> <strong>BBA</strong> 1 - 110711<br />
Assembly page 162/168
�<br />
Fax +32 2 359 95 50<br />
Copies of the I/B. Please reproduce them without any<br />
changes except under special instruction from Team<br />
International BELGIUM. The pages must be reproduced<br />
and folded in order to obtain a booklet A5 (+/- 148.5 mm<br />
width x 210 mm height). When folding, make sure you<br />
keep the good numbering when you turn the pages of<br />
the I/B. Don’t change the page numbering. Keep the<br />
language integrity.<br />
1. Masurati ingredientele cu acuratete si adaugati in tava pentru copt in ordinea precizata<br />
in lista de mai sus (ingredientele lichide primele).<br />
2. Puneti tava in aparat. Inchideti capacul.<br />
3. Selectati programul dorit.<br />
4. Selectati culoarea dorita a crustei.<br />
5. Selectati marimea painii.<br />
6. Apasati tasta START/STOP.<br />
7. Folosind manusi de bucatarie, scoateti painea dup ace s-a scurs timpul pentru coacere.<br />
8. Lasati sa se raceasca pe un support cel putin o ora inainte sa o feliati.<br />
SANDWICH<br />
Program: 6 – Greutate: 450g/680g/900g<br />
Ingrediente:<br />
450g 680g 900g<br />
3/4 cana cu apa<br />
1 cana cu apa<br />
1 1/3 cana cu apa<br />
1 linguri cu unt/margarina 1 ½ linguri cu unt/margarina 2 linguri cu unt/margarina<br />
1 lingurite de sare<br />
1 ½ lingurite de sare<br />
2 lingurite de sare<br />
¾ lingura de zahar<br />
1 lingura de zahar<br />
1 ½ lingura de zahar<br />
2 cani cu faina pt toate sau pt 2 ½ cani cu faina pt toate sau 3 ¼ cani cu faina pt toate<br />
paine<br />
pt paine<br />
sau pt paine<br />
1 lingurite cu drojdie cu 1 ¼ lingurite cu drojdie cu 1 ½ lingurite cu drojdie cu<br />
crestere rapida<br />
crestere rapida<br />
crestere rapida<br />
1. Masurati ingredientele cu acuratete si adaugati in tava pentru copt in ordinea precizata<br />
in lista de mai sus (ingredientele lichide primele).<br />
2. Puneti tava in aparat. Inchideti capacul.<br />
3. Selectati programul dorit.<br />
4. Selectati marimea painii.<br />
5. Apasati tasta START/STOP.<br />
6. Folosind manusi de bucatarie, scoateti painea dup ace s-a scurs timpul pentru coacere.<br />
7. Lasati sa se raceasca pe un support cel putin o ora inainte sa o feliati.<br />
FRAMANTARE<br />
Program: 7 (Whisk)<br />
Acest program este pentru a prepara aluatul pentru taietei, galusti etc. partea de program de<br />
coacere si nu trebuie selectata nici culoare si greutate.<br />
GEM DE CAPSUNI<br />
Program: 8 (Jam)<br />
Acest program se foloseste pentru a face gem.<br />
Taiati fructele in bucati de max. 1 cm. Nu folositi zahar normal ci mai degraba zahar gelatinat.<br />
Dup ace ati apasat tasta START/STOP are loc o perioada de preincalzire (deci aparatul va fi<br />
activ dupa aceasta perioada).<br />
Ingrediente:<br />
900g capsuni proaspete taiate in bucati de max 1 cm<br />
500g zahar gelifiant<br />
1 lingura de suc de lamaie<br />
163 <strong>VG</strong> <strong>BBA</strong> 1 - 110711<br />
Assembly page 163/168
�<br />
Fax +32 2 359 95 50<br />
Copies of the I/B. Please reproduce them without any<br />
changes except under special instruction from Team<br />
International BELGIUM. The pages must be reproduced<br />
and folded in order to obtain a booklet A5 (+/- 148.5 mm<br />
width x 210 mm height). When folding, make sure you<br />
keep the good numbering when you turn the pages of<br />
the I/B. Don’t change the page numbering. Keep the<br />
language integrity.<br />
1. Masurati ingredientele cu acuratete si adaugati in tava pentru copt in ordinea precizata<br />
in lista de mai sus.<br />
2. Puneti tava in aparat. Inchideti capacul.<br />
3. Setati programul dorit.<br />
4. Apasati tasta START/STOP.<br />
5. Folosind manusi scoateti tava dup ace s-a terminat timpul de coacere.<br />
6. Puneti gemul intr-un borcan curat si sterilizat. Depozitati in frigider.<br />
PAINE CU IAURT<br />
Program: 9 (Yoghourt)<br />
Acest program va permite sa faceti paine cu gust de iaurt.<br />
Ingrediente:<br />
450g 680g 900g<br />
1/3 cana cu apa<br />
2/3 cana cu apa<br />
1 cana cu apa<br />
100g iaurt<br />
150g iaurt<br />
200g iaurt<br />
1 lingura ulei vegetal 1 ½ lingura ulei vegetal<br />
2 linguri ulei vegetal<br />
1/3 lingurite de sare ½ lingurite de sare<br />
¾ lingurite de sare<br />
1 ½ lingura de zahar 2 linguri cu zahar<br />
2 ½ linguri cu zahar<br />
2 cani cu faina pt toate 2 ¼ cani cu faina pt toate sau 3 ½ cani cu faina pt toate sau<br />
sau pt paine<br />
pt paine<br />
pt paine<br />
1 lingurite cu drojdie cu 1 ¼ lingurite cu drojdie cu 1 ½ lingurite cu drojdie cu<br />
crestere rapida<br />
crestere rapida<br />
crestere rapida<br />
1. Masurati ingredientele cu acuratete si adaugati in tava pentru copt in ordinea precizata<br />
in lista de mai sus (ingredientele lichide primele).<br />
2. Puneti tava in aparat. Inchideti capacul.<br />
3. Selectati programul dorit.<br />
4. Selectati culoarea dorita a crustei.<br />
5. Selectati marimea painii.<br />
6. Apasati tasta START/STOP.<br />
7. Folosind manusi de bucatarie, scoateti painea dup ace s-a scurs timpul pentru coacere.<br />
8. Lasati sa se raceasca pe un support cel putin o ora inainte sa o feliati.<br />
ALUAT DE PIZZA<br />
Program: 10 (Dough)<br />
Aceasta setare este pentru exclusive pentru aluat si nu va duce la realizarea finala a painii.<br />
Puteti face aluat de orice fel folosind aceasta setare. Aluatul poate fi modelat pentru pizza,<br />
rulade, covrigi, gogosi si paini rotunde sau impletite care trebuiesc coapte in cuptor sau prajite<br />
la prajitor.<br />
Ingrediente:<br />
1 ¼ cana de apa<br />
½ lingurita de sare<br />
2 linguri de ulei de masline<br />
2 ½ cani de faina pt toate sau pt paine<br />
1 ½ lingurite cu drojdie cu crestere rapida<br />
1. Masurati ingredientele cu acuratete si adaugati in tava pentru copt in ordinea precizata<br />
in lista de mai sus (ingredientele lichide primele).<br />
2. Puneti tava in aparat. Inchideti capacul.<br />
164 <strong>VG</strong> <strong>BBA</strong> 1 - 110711<br />
Assembly page 164/168
�<br />
Fax +32 2 359 95 50<br />
Copies of the I/B. Please reproduce them without any<br />
changes except under special instruction from Team<br />
International BELGIUM. The pages must be reproduced<br />
and folded in order to obtain a booklet A5 (+/- 148.5 mm<br />
width x 210 mm height). When folding, make sure you<br />
keep the good numbering when you turn the pages of<br />
the I/B. Don’t change the page numbering. Keep the<br />
language integrity.<br />
3. Setati programul dorit. Apasati tasta START/STOP.<br />
4. Dup ace s-a terminat ciclul, scoateti aluatul din tava.<br />
5. Lasati sa creasca 10 minute.<br />
6. Puneti suc de rosii si presarati ingredientele dorite pe aluatul de pizza.<br />
7. Coaceti intr-un cuptor traditional timp de 15 minute la o temperature de 200°C.<br />
PAINE RAPIDA<br />
Program: 11 (Fast) – Culoarea crustei: deschisa/inchisa<br />
Folositi aceasta setare pentru a face paine rapid. Totusi painea va fi mai densa si nu atat de<br />
inalta.<br />
Ingrediente:<br />
1 cana cu apa<br />
2 linguri cu unt/margarina<br />
1 ½ lingurite de sare<br />
2 linguri de zahar<br />
1 lingura de lapte praf<br />
3 cani cu faina pt toate<br />
2 lingurite cu drojdie cu crestere rapida<br />
1. Masurati ingredientele cu acuratete si adaugati in tava pentru copt in ordinea precizata<br />
in lista de mai sus (ingredientele lichide primele).<br />
2. Puneti tava in aparat. Inchideti capacul.<br />
3. Selectati programul dorit.<br />
4. Selectati culoarea dorita a crustei.<br />
5. Selectati marimea painii.<br />
6. Apasati tasta START/STOP.<br />
7. Folosind manusi de bucatarie, scoateti painea dup ace s-a scurs timpul pentru coacere.<br />
8. Lasati sa se raceasca pe un support cel putin o ora inainte sa o feliati.<br />
COACERE<br />
Program: 12 (Bake)<br />
Durata:1:00<br />
Din moment ce acest program presupune o coacere timp de o ora, trebui foarte multa<br />
atentie alocata acestui proces. Acest program va ajuta in cazul unei pene de current. Cititi<br />
sectiunea “MEMORY” pentru mai multe informatii.<br />
PROTECTIA MEDIULUI - DIRECTIVA 2002/96/EC<br />
Pentru a proteja si preserva sanatatea umana, deseurile electrice si electronice trebuiesc<br />
eliminate conform regulilor cu implicarea atat a producatorilor cat si a consumatorilor. Din<br />
acest motiv, asa cum indica si simbolul de pe eticheta ambalajului, aparatul nu poate fi<br />
incadrat la reziduuri municipale nesortate. Utilizatorul are dreptul de a-l aduce la un punct<br />
municipal de colectare care recicleaza deseuri prin refolosire sau utilizare in alte scopuri in<br />
concordanta cu directiva.<br />
165 <strong>VG</strong> <strong>BBA</strong> 1 - 110711<br />
Assembly page 165/168
�<br />
Fax +32 2 359 95 50<br />
Copies of the I/B. Please reproduce them without any<br />
changes except under special instruction from Team<br />
International BELGIUM. The pages must be reproduced<br />
and folded in order to obtain a booklet A5 (+/- 148.5 mm<br />
width x 210 mm height). When folding, make sure you<br />
keep the good numbering when you turn the pages of<br />
the I/B. Don’t change the page numbering. Keep the<br />
language integrity.<br />
CERTIFICAT DE GARANTIE<br />
TEAM/ROMIX/KALORIK/MAYBAUM/MAGIC/PMD/ECOLINE/ROYAL<br />
Declaratia de Conformitate (se va completa conform tabelelor de catre magazin)<br />
Produsul : ……………………………………………….……………………………………………... …………..<br />
Magazin : ……………………………………………….……………………………………………………………<br />
Marca/Model : ……………………………………………….………………………………………………………<br />
Adresa, Tel : ……………………………………………….…………………………………………..……………<br />
Nr. Serie : ……………………………………………….…………………………………… ………..……………<br />
Data Vanzarii : ……………………………………………….………………………………………...……………<br />
Termen de garantie : ……………………………………………….………………………………………………<br />
Factura/Chitanta :……………………………………………….…………………………………….. ……………<br />
Client:………………………………………………….……………………………………………….. ……………<br />
S-a efectuat proba de functionare, s-au predat instructiunile de utilizare in limba romana, toate<br />
accesorile, s-a prezentat modul de folosire si s-a predat aparatul in perfecta stare de functionare, s-a<br />
completat corect prezentul Certificat de Garantie<br />
Semnatura si stampila Semnatura Semnatura si stampila<br />
vanzatorului cumparator producatorului<br />
CONDITII DE GARANTIE<br />
Asiguram conform OG 21/92 republicata si Legea 449/2003 o perioada de 24 de luni de garantie in<br />
urmatoarele conditii:<br />
1. Instructiunile de utilizare si instalare trebuie citite si respectate obligatoriu inainte de instalarea si<br />
folosirea rodusului<br />
2. Pentru a beneficia de reparatii in garantie, cumparatorul are obligatia sa prezinte Certificatul de<br />
garantie impreuna cu factura/chitanta originala de cumparare a produsului si ambalajul original si<br />
nederiorat<br />
3. Durata termenului de garantie se prelungeste cu termenul scurs de la data reclamatiei pana la data<br />
punerii in functiune<br />
4. Vanzatorul este obligat sa livreze consumatorului produse care sunt conforme cu contractul de<br />
vanzare cumparare<br />
5. Se considera ca produsele sunt conforme daca:<br />
a) Corespund descrierii facute de vanzator si au aceleasi calitati ca si produsele pe care vanzatorul<br />
le-a prezentat cumparatorului ca mostra sau model;<br />
b) Corespund oricarui scop specific solicitat de catre consumator, scop facut cunoscut vanzatorului si<br />
acceptat de acesta la incheierea contractului de vanzare cumparare;<br />
c) Corespund scopurilor pentru care sunt utilizate in mod normal produsele de acelasi tip;<br />
6. Pana la proba contrarie lipsa de conformitate aparuta in termen de 6 luni de la livrarea produsului se<br />
prezuma ca a existat la momentul livrarii acestuia cu exceptia cazurilor in care prezumtia este<br />
incompatibila cu natura produsului sau lipsei de conformitate;<br />
7. Nu se considera a fi lipsa de conformitate daca in momentul incheierii contractului de vanzare<br />
cumparare consumatorul a cunoscut sau nu putea, in mod rezonabil, sa nu cunoasca aceasta lipsa<br />
de conformitate ori daca lipsa de conformitate isi are originea in materialele furnizate de consumator;<br />
166 <strong>VG</strong> <strong>BBA</strong> 1 - 110711<br />
Assembly page 166/168
�<br />
Fax +32 2 359 95 50<br />
Copies of the I/B. Please reproduce them without any<br />
changes except under special instruction from Team<br />
International BELGIUM. The pages must be reproduced<br />
and folded in order to obtain a booklet A5 (+/- 148.5 mm<br />
width x 210 mm height). When folding, make sure you<br />
keep the good numbering when you turn the pages of<br />
the I/B. Don’t change the page numbering. Keep the<br />
language integrity.<br />
8. Orice reparatie sau inlocuire a produselor va fi facuta intr-o perioada rezonabila de timp, stabilita de<br />
comun acord intre vanzator si consumator. In cazul in care vanzatorul dupa toate eforturile si<br />
incercarile constata ca produsul respectiv nu se poate repara si nici inlocui, atunci se obliga sa<br />
restituie cumparatorului contravaloarea produsului in RON (aceeasi de pe factura sau chitanta);<br />
Pentru a beneficia de reparatie gratuita in garantie sau service autorizat, clientul se va adresa<br />
magazinului de unde a achizitionat produsul respectiv;<br />
NU SE ACORDA service gratuit si nu se inlocuiesc produsele defectate in perioada de garantie, in<br />
urmatoarele conditii:<br />
a) Deteriorari si defectiuni datorate transportului necorespunzator efectuat de cumparator;<br />
b) Nerespectarea de catre cumparator a conditiilor de manipulare, instalare, utilizare si intretinere<br />
precizate in instructiunile de folosire;<br />
c) Interventii efectuate in perioada de garantie de catre persoane neautorizate;<br />
d) Utilizarea produsului pentru alte activitati si in alte conditii decat cele pentru care sunt utilizate in<br />
mod normal produsele de acest fel;<br />
Utilizarea in scop industrial a produselor achizitionate care nu fac parte din gama produselor industriale,<br />
determina pierderea garantiei. Perioada de garantie a produselor din gama produselor industriale este<br />
de 12 luni. In sensul prevederilor legale, respectarea drepturilor fundamentale ale consumatorilor devine<br />
obligatory.<br />
a) protectia impotriva riscului de a achizitiona un produs sau de a li se presta un serviciu care ar<br />
putea sa le prejudicieze viata, sanatatea sau securitatea ori sa le afecteze drepturile si interesele<br />
legitime;<br />
b) informarea completa, corecta si precisa asupra caracteristicilor esentiale ale produselor si<br />
serviciilor, astfel incat decizia pe care o adopta in legatura cu acestea sa corespunda cat mai bine<br />
nevoilor lui, precum si de a fi educati in calitatea lor de consumatori;<br />
c) accesul la piete care le asigura o gama variata de produse si servicii de calitate;<br />
d) despagubirea pentru prejudiciile generate de calitatea necorespunzatoare a produselor si<br />
serviciilor, folosind in acest scop mijloacele prevazute de lege;<br />
e) exonerarea de plata produselor si serviciilor care nu au fost solicitate si acceptate;<br />
f) despagubirea pentru daunele provocate de produsele si serviciile care nu corespund clauzelor<br />
contractuale;<br />
g) asigurarea service-ului necesar si pieselor de schimb pe durata medie de utilizare a produsului,<br />
stabilita in documentele tehnice normative sau declarata de catre producator ori convenita de parti;<br />
h) plata, pentru produsele sau serviciile de care beneficiaza, a unor sume stabilite cu exactitate, in<br />
prealabil; majorarea pretului stabilit initial este posibila numai cu acordul consumatorului.<br />
9. Durata medie de utilizare: 2 ani. Perioada maxima de reparare/inlocuire este de 15 zile<br />
calendaristice. Drepturile consumatorului sunt in conformitate cu Legea 449/2003, Legea 269/2004 si<br />
HG 448/2005.<br />
Data sesizarii Data reparatiei Data prelungirii Magazin Semnatura<br />
Pentru lista actualizata de Service-uri autorizate va rugam sunati la tel:+40 (21) 319 83 26 sau verificati<br />
pe site la adresa: www.team-int.ro<br />
Team International Romania Srl;<br />
Str.Industriilor 56A, sector 3, Bucuresti CUI 16991287; R.C. J40/19685/29.11.2004<br />
167 <strong>VG</strong> <strong>BBA</strong> 1 - 110711<br />
Assembly page 167/168
�<br />
Fax +32 2 359 95 50<br />
Copies of the I/B. Please reproduce them without any<br />
changes except under special instruction from Team<br />
International BELGIUM. The pages must be reproduced<br />
and folded in order to obtain a booklet A5 (+/- 148.5 mm<br />
width x 210 mm height). When folding, make sure you<br />
keep the good numbering when you turn the pages of<br />
the I/B. Don’t change the page numbering. Keep the<br />
language integrity.<br />
<strong>VG</strong> <strong>BBA</strong> 1<br />
�<br />
Deutsch 6<br />
English 24<br />
Français 41<br />
Nederlands 59<br />
Español 77<br />
Português 95<br />
Italiano 114<br />
Polska 132<br />
Română 150<br />
�<br />
Back cover page (last page)<br />
Assembly page 168/168