Toon Boom Solo V3.5 Tutorial - Toon Boom Animation
Toon Boom Solo V3.5 Tutorial - Toon Boom Animation
Toon Boom Solo V3.5 Tutorial - Toon Boom Animation

Create successful ePaper yourself
Turn your PDF publications into a flip-book with our unique Google optimized e-Paper software.
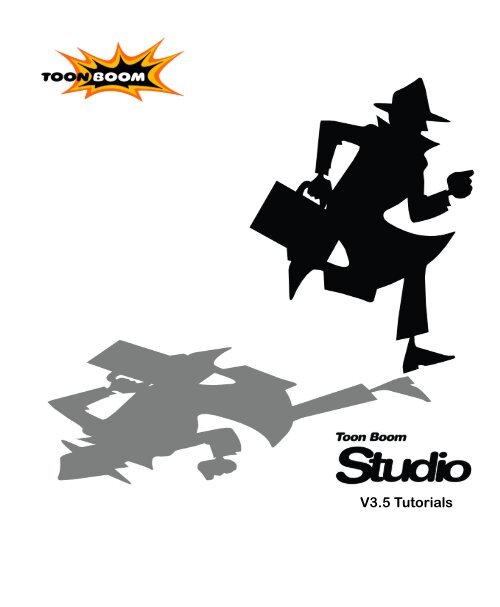
<strong>V3.5</strong> <strong>Tutorial</strong>s
Legal Notices<br />
Corporate Headquarters<br />
7 Laurier Avenue East<br />
Montreal, Quebec<br />
Canada H2T 1E4<br />
Tel: (514) 278-8666<br />
Fax: (514) 278-2666<br />
www.toonboom.com<br />
Disclaimer<br />
Adobe ® , Acrobat ® , Flash ® , Illustrator ® and Photoshop ® are either registered trademarks or<br />
trademarks of Adobe Systems Incorporated in the United States and/or other countries.<br />
The content of this manual is the property of <strong>Toon</strong> <strong>Boom</strong> <strong>Animation</strong> Inc. and is copyrighted. Any<br />
reproduction in whole or in part is strictly prohibited.<br />
For additional copies of this manual, please contact <strong>Toon</strong> <strong>Boom</strong> <strong>Animation</strong> Inc. at the Corporate<br />
Headquarters address.<br />
Copyright © 2006 by <strong>Toon</strong> <strong>Boom</strong> <strong>Animation</strong> Inc. All rights reserved.<br />
Trademarks<br />
<strong>Toon</strong> <strong>Boom</strong> Studio is a trademark owned by <strong>Toon</strong> <strong>Boom</strong> <strong>Animation</strong> Inc. All other trademarks<br />
are the property of their respective owners.<br />
Credits<br />
Documentation Development: Peter Cawthorne, Tamu Townsend<br />
Content Development and Art: Tania Gray<br />
Publication Date<br />
September 2006
Contents<br />
<strong>Tutorial</strong>s ............................................................................................. 3<br />
Lesson 1: Drawing 4<br />
Step 1: Draw Mike Ant’s Body 5<br />
Step 2: Reshape Mike Ant’s Body 8<br />
Step 3: Draw Mike Ant with the Brush Tool 9<br />
Step 4: Preview the Mike Ant Cycle 12<br />
Lesson 2: Painting 13<br />
Step 1: Add a Color Swatch 14<br />
Step 2: Create a Gradient “Flame” Swatch 15<br />
Step 3: Paint the Flame on Mike Ant’s Back 17<br />
Step 4: Edit the Direction of the Flame 19<br />
Step 5: Paint Mike Ant 21<br />
Step 6: Export 23<br />
Lesson 3: Lip Syncing 24<br />
Step 1: Import Deb Ant’s Voice Track 25<br />
Step 2: Generate a Lip Chart for Deb Ant 25<br />
Step 3: Draw Deb Ant’s Missing Lips 27<br />
Step 4: Auto-Map Deb Ant’s Lips to Her Voice Track 29<br />
Step 5: Export 31<br />
Lesson 4: Building a Multiplane Scene 32<br />
Step 1: Attach the Camera to the Peg 33<br />
Step 2: Add Mike Ant Template to the Scene 34<br />
Step 3: Add a Peg and Attach Mike Ant to It 36<br />
Step 4: Create Motion Path for Mike Ant 37<br />
Step 5: Export 41<br />
Lesson 5: Creating Cross-Dissolves with Color Transform Elements 43<br />
Step 1: Add the First Color Transform Element 44<br />
Step 2: Add Keyframes and Set their Values 46<br />
Step 3: Create the Next Color Transform Effect 48<br />
Step 4: Clone the Color Transform Effect 49<br />
Step 5: Create the Last Color Transform 50<br />
Step 6: Export 51<br />
Lesson 6: Creating Clipping Mask Effects 53<br />
Step 1: Drawing the Mask 54<br />
Step 2: Building the Clipping Element 55<br />
Step 3: Export 56<br />
Lesson 7: Retouching Drawings in Sceneplanning 58<br />
Step 1: Play Back the Scene 59<br />
Step 2: Retouch the Elbow Joint 60<br />
Step 3: Create the Shoulder Joint 63<br />
Step 4: Retouch the Shoulder 66<br />
1
<strong>Toon</strong> <strong>Boom</strong> Studio <strong>V3.5</strong> User Guide<br />
Step 5: Export 67<br />
2
<strong>Tutorial</strong>s<br />
The lessons in this tutorial give you the chance to learn <strong>Toon</strong> <strong>Boom</strong> Studio<br />
using realistic examples.<br />
You can do these lessons in any order. Each are self-contained so that you can<br />
learn about the features that interest you most.<br />
The material for these lessons is included in the <strong>Tutorial</strong>s folder in the <strong>Toon</strong><br />
<strong>Boom</strong> Studio application folder on your computer.<br />
This chapter includes the following lessons:<br />
• Lesson 1: Drawing on page 4<br />
• Lesson 2: Painting on page 13<br />
• Lesson 3: Lip Syncing on page 24<br />
• Lesson 4: Building a Multiplane Scene on page 32<br />
• Lesson 5: Creating Cross-Dissolves with Color Transform Elements on<br />
page 43<br />
• Lesson 6: Creating Clipping Mask Effects on page 53<br />
• Lesson 7: Retouching Drawings in Sceneplanning on page 58
<strong>Toon</strong> <strong>Boom</strong> Studio <strong>V3.5</strong> User Guide<br />
Lesson 1: Drawing<br />
In this lesson, you will work with <strong>Toon</strong> <strong>Boom</strong> Studio drawing tools to create frame-byframe<br />
animation.<br />
There are two animation projects for this lesson:<br />
• Drawing_Rough<br />
• Drawing_Final<br />
You’ll use the Drawing_Rough animation project to complete a walk cycle. You’ll use<br />
the onion skin, rotary light table, and the <strong>Toon</strong> <strong>Boom</strong> Studio centerline drawing tools<br />
and pressure-sensitive Brush tool to draw Mike Ant.<br />
You’ll draw this ant so it fits<br />
between the previous and<br />
next frames.<br />
Current frame.<br />
Previous frame.<br />
Next frame.<br />
To start the Drawing Mike Ant lesson:<br />
1. Download the Quick Start <strong>Tutorial</strong> files from the <strong>Toon</strong> <strong>Boom</strong> <strong>Animation</strong> website.<br />
You can click the Quick Start <strong>Tutorial</strong> link on the Welcome Screen to open the<br />
appropriate Web page.<br />
2. Open the Drawing_Rough animation project in the Lesson1_Drawing folder.<br />
3. Save the animation in a location of your choice using File > Save As. Saving this<br />
animation project to a new location will ensure that you always have the original<br />
to return to and use should you want to.<br />
4
Step 1: Draw Mike Ant’s Body<br />
Chapter 2: <strong>Tutorial</strong>s<br />
In this step, you will draw the body of Mike Ant using the Ellipse tool. Because this<br />
drawing must fit with the other drawings in the element to create a complete cycle, you<br />
will use the onion skin to show previous and next drawings of an element as a<br />
reference while you draw.<br />
To draw Mike Ant’s body:<br />
1. In the Exposure Sheet window, click the first cell in the rough-mike element and<br />
press the down arrow key on your keyboard. As you cycle through all of the<br />
drawings in the rough-mike element, you’ll notice that there is no drawing in the<br />
rough-mike-2 cell. That’s because you are going to draw it!<br />
2. Click the Drawing View window and set it up so that you have a clear view of<br />
Mike Ant.<br />
• To turn on and off the grid, press [G], the default keyboard shortcut.<br />
• To zoom in, press [X], and to zoom out press [Z].<br />
• To pan the Drawing View window, press and hold [Spacebar] and use the<br />
Grabber tool to change the part of the window you are seeing.<br />
3. Select the rough-mike-2 cell.<br />
5
<strong>Toon</strong> <strong>Boom</strong> Studio <strong>V3.5</strong> User Guide<br />
4. In the toolbar, click the Onion Skin button to turn on the onion skin feature.<br />
When the onion skin is active, the button looks like it is pressed in.<br />
5. Click the Show Previous button and select Previous Drawing and click the<br />
Show Next button and select Next Drawing.<br />
In the Drawing View window, the previous and next drawings in the onion skin<br />
appear in a different color to distinguish them from the drawing you are working<br />
on.<br />
6. Select the Ellipse tool from the Drawing Tools toolbar.<br />
7. If the Properties window is not open, select Window > Properties. The<br />
Properties window appears.<br />
8. In the Pen tab, type 20 for the Maximum Size value. When you draw with the<br />
centerline tools (including the Pencil, Rectangle, Ellipse, Polyline and Line) <strong>Toon</strong><br />
<strong>Boom</strong> Studio uses the Maximum Size value for the width of the line.<br />
6
Chapter 2: <strong>Tutorial</strong>s<br />
9. In the Drawing View window, draw an ellipse roughly the shape of Mike Ant’s<br />
body. Don’t worry about the actual shape not being the same as the one in the<br />
animation. You will reshape it using the Contour Editor tool.<br />
10. Save your animation using the File > Save command.<br />
7
<strong>Toon</strong> <strong>Boom</strong> Studio <strong>V3.5</strong> User Guide<br />
Step 2: Reshape Mike Ant’s Body<br />
In this step, you will use the Contour Editor tool to move the points that make up the<br />
ellipse you drew in step 1 and reshape Mike Ant’s body.<br />
To reshape Mike Ant’s body:<br />
1. From the Drawing Tools toolbar, select the Contour Editor.<br />
2. Click the ellipse you drew in step 1. You’ll notice that a line appears down the<br />
center of the shape (a centerline) and that there are points on this line.<br />
3. Use the Contour Editor to reshape the ellipse by moving the points and dragging<br />
the Bezier handles. (To get the Bezier handles to appear, click a point on the<br />
centerline.)<br />
The final shape should be approximately the same shape as the ant’s body shown<br />
in the previous drawing.<br />
After you reshape the<br />
ellipse, it should look<br />
something like this<br />
4. Save your work using the save command. Select File > Save.<br />
8
Chapter 2: <strong>Tutorial</strong>s<br />
Step 3: Draw Mike Ant with the Brush Tool<br />
In this step, you use the Brush tool to draw the head and then the rest of Mike Ant.<br />
Unlike the Ellipse tool and other centerline tools (Rectangle, Polyline, Line and Pencil),<br />
the Brush tool creates variable-width strokes that respond to the pressure you apply<br />
with a digital pen and graphic tablet.<br />
When you draw with the Brush tool, <strong>Toon</strong> <strong>Boom</strong> Studio creates shapes that are formed<br />
by points that surround a zone, which is filled with color. We call the shapes created<br />
by the Brush tool “contour shapes”.<br />
Drawing with the Brush tool allows you to create distinctive lines that are more natural<br />
than the mechanical looking centerline shapes. However, brush strokes require more<br />
memory to store because they use more points to create. If you are concerned about the<br />
file size of your animation, consider carefully when choosing your drawing tools.<br />
To draw Mike Ant with the Brush tool:<br />
1. Select the Brush tool from the Drawing Tools toolbar.<br />
2. In the Pen tab, type 5 for the Minimum Size value. When you draw with a graphic<br />
tablet and pen, <strong>Toon</strong> <strong>Boom</strong> Studio uses the Minimum Size and Maximum Size<br />
values to determine the width of the variable-width line.<br />
3. In the Drawing View window, use the Brush tool to draw a circle approximately<br />
the same shape as the Mike Ant’s head as shown in the previous drawing in the<br />
onion skin.<br />
4. Using the Contour Editor tool, [Shift]-click the ant’s head drawing and the ant’s<br />
body. Notice the number of points in Mike Ant’s head, drawn using the Brush<br />
tool, and Mike Ant’s body, drawn using the Ellipse tool.<br />
9
<strong>Toon</strong> <strong>Boom</strong> Studio <strong>V3.5</strong> User Guide<br />
When you have finished comparing the drawings deselect them by clicking anywhere<br />
in the Drawing View window.<br />
A brush stroke is surrounded by a<br />
collection of points. The outline of the<br />
brush stroke or painted fill is called a<br />
Contour.<br />
A line drawn with the<br />
Ellipse tool is defined by a<br />
series of centerline points.<br />
5. Using the Contour Editor tool and the curve handles, reshape the ant’s head you<br />
drew so that it is approximately the same shape as the ant’s head shown in the<br />
previous drawing in the onion skin.<br />
After you reshape the head drawing it<br />
should look something like this.<br />
6. Draw the rest of the ant. The completed drawing must fit in the run cycle, so you<br />
must draw Mike’s legs so that his left leg is touching the ground and his right leg<br />
is bent at the knee. His body should also be slightly elevated, so you might want<br />
to move the body up slightly.<br />
10
When you finish drawing, your ant should look something like this.<br />
Chapter 2: <strong>Tutorial</strong>s<br />
You can look at the final drawing in the Drawing_Final animation project to see how<br />
we did it.<br />
7. To help you with your drawing, you can use the Rotary Light Table so that you<br />
can get a better angle on the part of the drawing you are working on.<br />
• To display the Rotary Light Table, hold down [Ctrl]+[Alt] when using<br />
Windows or [Ctrl]+[Command] when using MacOS, then use your mouse to<br />
freely rotate your drawing space.<br />
• To return your drawing space to the original angle, select View > Reset<br />
Rotation or press [Shift] + [C].<br />
11
<strong>Toon</strong> <strong>Boom</strong> Studio <strong>V3.5</strong> User Guide<br />
Step 4: Preview the Mike Ant Cycle<br />
In this step, you use the Interactive Playback buttons to preview your drawing of Mike<br />
Ant and see how it fits into the run cycle.<br />
To preview the Mike Ant cycle using Interactive Playback:<br />
1. In the Exposure Sheet window, press [Shift] and select drawings 1 through 8.<br />
2. Press Play .<br />
All of the selected content plays in sequential order in the View window.<br />
3. If you want the playback to repeat, select the Loop button before you click the<br />
Play button.<br />
4. Make corrections to your Mike Ant drawing so that the transition between the<br />
drawings in the cycle is logical and smooth.<br />
5. Save your animation project and you are done!<br />
Congratulations on completing the first lesson in this tutorial.<br />
12
Lesson 2: Painting<br />
Chapter 2: <strong>Tutorial</strong>s<br />
In this lesson, you will paint Mike Ant, and give him some color!<br />
There are two animation projects for this lesson:<br />
• Painting_Rough<br />
• Painting_Final<br />
In the Painting_Rough animation project, you’ll build a color palette for Mike Ant and<br />
create a gradient color swatch. Then you’ll paint Mike Ant using <strong>Toon</strong> <strong>Boom</strong> Studio<br />
power-paint features that will speed the painting process.<br />
To start the Painting Mike Ant lesson:<br />
1. Download the Quick Start <strong>Tutorial</strong> files from the <strong>Toon</strong> <strong>Boom</strong> <strong>Animation</strong> website.<br />
You can click the Quick Start <strong>Tutorial</strong> link on the Welcome Screen to open the<br />
appropriate Web page.<br />
2. Open the Painting_Rough animation project in the Lesson2_Painting folder.<br />
3. Save the animation in a location of your choice using File > Save As.<br />
4. Click the Play button and watch Mike Ant run!<br />
You’re going to give Mike some color, as well as give him a real reason to run—<br />
red hot flames licking his back!<br />
13
<strong>Toon</strong> <strong>Boom</strong> Studio <strong>V3.5</strong> User Guide<br />
Step 1: Add a Color Swatch<br />
In this step, you’ll add a color swatch to Mike Ant’s color palette.<br />
To add a color swatch:<br />
1. If the Properties window is not open, select Window > Properties. The<br />
Properties window appears.<br />
2. Click the Color Palette tab. The Color Palette tab appears with the default set of<br />
colors.<br />
3. From the Name drop-list, select mike. This is the Mike Ant color palette, which<br />
you can use to organize all of the color swatches for this buggy character.<br />
4. You can click the Show/Hide Color Name button on the right side of the dialog<br />
box, just above the swatch scroll bar. This changes the display to a list of swatches<br />
and their names.<br />
This color palette<br />
gives you all the color<br />
swatches you need to<br />
paint your ant.<br />
Show Color Names<br />
button, displays the<br />
swatch names.<br />
5. Select the belt color swatch and click the Add a Color button. A copy of the belt<br />
swatch appears in the palette style and it is called New 1 by default. You will edit<br />
the properties of this color swatch in the next step.<br />
14
Chapter 2: <strong>Tutorial</strong>s<br />
Step 2: Create a Gradient “Flame” Swatch<br />
In this step, you will create a gradient for the flame that is licking Mike Ant’s back.<br />
You’ll use the swatch you created in the previous step as the basis for the gradient.<br />
Gradient<br />
To create a gradient:<br />
1. Double-click the color swatch you added in the last step. You’ll use this swatch as<br />
a basis for the gradient because the orange color in the swatch is similar to one of<br />
the gradient colors.<br />
The color picker opens.<br />
15
<strong>Toon</strong> <strong>Boom</strong> Studio <strong>V3.5</strong> User Guide<br />
The look of<br />
your color<br />
picker is<br />
dependent<br />
on your<br />
operating<br />
system.<br />
2. Select the Gradient option.<br />
3. In the Gradient panel, select Radial. The colors in a radial gradient blend in a<br />
circular pattern.<br />
4. Click the first marker below the Gradient bar. A square appears in the marker to<br />
indicate that it is editable.<br />
5. Change the color of the first marker to yellow by dragging your mouse in the<br />
color swatch. We used these R, G, B values: 248, 251, 17. You can use the Color<br />
slider, or enter these values manually, if you want.<br />
6. Click below the Gradient bar to add a gradient marker. The color of the marker is<br />
the same as the marker you had selected. Gradient markers represent the start or<br />
end of a transition between different colors.<br />
7. Do one of the following:<br />
16
• In the Opacity field, type 60 (MacOS).<br />
• In the Alpha field, type 150 (Windows).<br />
Chapter 2: <strong>Tutorial</strong>s<br />
8. Change the value of the last color to red. You can use these specific values: 236, 0,<br />
0.<br />
First color<br />
Last color<br />
Transition color<br />
9. Close the color picker and that’s it! You have created a gradient swatch!<br />
Step 3: Paint the Flame on Mike Ant’s Back<br />
Now that you have created a gradient for the flame, you are ready to paint.<br />
To paint the flame on Mike Ant’s back:<br />
1. In the Exposure Sheet window, select the first drawing in the colorMe element.<br />
Mike Ant appears in the Drawing View window.<br />
2. Set up the Drawing View window so that you have a clear view of Mike Ant.<br />
• To turn off the grid, press [G], the default keyboard shortcut.<br />
• To zoom in, press [X], and to zoom out press [Z].<br />
17
<strong>Toon</strong> <strong>Boom</strong> Studio <strong>V3.5</strong> User Guide<br />
• To pan the Drawing View window, press and hold [Spacebar] and use the<br />
Grabber tool to change the part of the window you are seeing.<br />
3. Select the Paint tool from the Drawing Tools toolbar.<br />
4. From the Color Palette tab, select the gradient swatch you created for the flame.<br />
5. Click the areas of the flame with the Paint tool.<br />
6. Scroll through the Mike Ant drawings and paint all of the flaming areas. Press [S]<br />
to advance to the next frame and press [A] to return to the previous frame.<br />
You’ll notice that after you paint drawing 8, you will come to drawings that have<br />
already been painted. That’s because we repeated drawings 1 through 8 in the<br />
element to create a cycle. Because each cell in the Exposure Sheet window refers<br />
to a drawing in the animation project, when you update a drawing that is<br />
repeated in other frames, <strong>Toon</strong> <strong>Boom</strong> Studio updates all frames that reference that<br />
drawing.<br />
18
Step 4: Edit the Direction of the Flame<br />
Chapter 2: <strong>Tutorial</strong>s<br />
So you’ve painted all the flames that are scorching Mike Ant on his run cycle. But do<br />
they look convincing Do they look natural Not really, if you ask me. Usually a flame<br />
will change color at the edges, not just in a straight line from the source.<br />
In this step, you will use the Edit Texture<br />
the flame gradient.<br />
tool to change the position and length of<br />
To edit the flame in the painted zone:<br />
1. Select the Edit Texture tool from the Drawing Tools toolbar.<br />
2. With the Edit Texture tool, click the flame gradient in one of the Mike Ant<br />
drawings. The gradient editor appears.<br />
3. Grab the handles to rotate the gradient or change its length. You want to create an<br />
effect that looks more natural, so experiment with the Edit Texture tool.<br />
19
<strong>Toon</strong> <strong>Boom</strong> Studio <strong>V3.5</strong> User Guide<br />
Use the handles to reshape<br />
the gradient.<br />
Drag the center of the gradient editor<br />
and you dramatically change the look<br />
of the flame gradient color.<br />
For ideas about how to create a flame effect that changes as Mike runs, check out the<br />
Painting_Final animation project to see how the gradient looks in each frame.<br />
20
Step 5: Paint Mike Ant<br />
Chapter 2: <strong>Tutorial</strong>s<br />
In this step, you are going to get to try out the powerful auto paint features.<br />
With auto paint, you click a zone in one drawing and <strong>Toon</strong> <strong>Boom</strong> Studio automatically<br />
scrolls through the rest of the drawings in the elements to check if there is a closed zone<br />
beneath where you clicked. If there is a closed zone, <strong>Toon</strong> <strong>Boom</strong> Studio paints the zone<br />
with the same color.<br />
Another feature you need to be aware of is auto gap closing. To fill a zone with color,<br />
it has to be completely closed. Sometimes, when you draw with the Brush tool, you<br />
may not always close zones completely. When you are painting, you can set a<br />
threshold for line gaps so that <strong>Toon</strong> <strong>Boom</strong> Studio will paint zones regardless of the size<br />
of the gap that keeps them open.<br />
To paint Mike Ant:<br />
1. From the Tools > Auto Gap menu, select Close Large Gap.<br />
2. In the Exposure Sheet window, select the colorMe-1 drawing.<br />
3. Press [X] to zoom in on the drawing so that you can see the zones clearly.<br />
4. Select the Paint tool from the Drawing Tools toolbar.<br />
5. In the Color Palette tab, click the skin color swatch in the mike color palette.<br />
6. Press [Shift]+[Option] in MacOS, or [Shift]+[Alt] in Windows, and click Mike<br />
Ant’s body. Your pointer changes to indicate that the Paint All tool is active. It<br />
may take a couple of minutes for <strong>Toon</strong> <strong>Boom</strong> Studio to paint all of the zones.<br />
21
<strong>Toon</strong> <strong>Boom</strong> Studio <strong>V3.5</strong> User Guide<br />
After it is done, scroll through the drawings to see that the body on all of the drawings<br />
are painted with the skin color swatch. You may have to manually correct some<br />
drawings because of where you clicked on the drawing (it might overlap other zones,<br />
for example).<br />
Click here with the Paint All tool and it paints the<br />
same spot in all of the drawings in the element.<br />
7. Continue to use the Paint All tool until all the static areas of your drawing are<br />
colored.<br />
8. When you are finished painting the big zones, you are going to have to paint the<br />
smaller zones one at a time. Use the names of the color swatches to identify what<br />
zone they belong to on Mike Ant and just click those zones with the Paint tool.<br />
22
Step 6: Export<br />
Chapter 2: <strong>Tutorial</strong>s<br />
That’s it! You’ve made Mike Ant colorful and given him real inspiration to run, a hot<br />
fire! Now you are ready to export your creation and share it with your friends and<br />
family.<br />
To export your animation:<br />
1. Select File > Export Movie. The Export dialog box opens.<br />
2. From the Export Format menu, select Flash Movie.<br />
3. Select Default from the Settings menu.<br />
4. Type the name of the movie in the File Name field and click the Browse button on<br />
the right if you want to select an alternate location for the final file.<br />
5. Select Full Movie from the Export Type panel.<br />
6. Select the Launch Player After Export option.<br />
7. Click OK to begin the exporting process. A progress bar appears to show you the<br />
progress of the export. If you want to cancel the export, click Cancel.<br />
Your Adobe Flash movie opens automatically in a Flash player when the export<br />
has finished.<br />
23
<strong>Toon</strong> <strong>Boom</strong> Studio <strong>V3.5</strong> User Guide<br />
Lesson 3: Lip Syncing<br />
Lip syncing is typically considered to be the most tedious task in the animation<br />
process. Traditionally, before you can even begin drawing the lip positions, you have<br />
to analyze the voice track to determine what lip position best matches the sound at<br />
each frame.<br />
With <strong>Toon</strong> <strong>Boom</strong> Studio, the easy-to-use lip sync tool analyzes the sounds in a voice<br />
track and generates a lip chart based on the eight animation phonemes. In addition to<br />
that, <strong>Toon</strong> <strong>Boom</strong> Studio has a tool that will automatically map drawings in an element<br />
based on the sounds they match. These two tools together will save you time so that<br />
you can focus on more interesting and creative tasks.<br />
Just look at Deb Ant! So nervous<br />
Looks like she’s got something to say.<br />
There are two animation projects for this lesson:<br />
• Lip_Sync_Rough<br />
• Lip_Sync_Final<br />
To start the Lip Sync lesson:<br />
1. Download the Quick Start <strong>Tutorial</strong> files from the <strong>Toon</strong> <strong>Boom</strong> <strong>Animation</strong> website.<br />
You can click the Quick Start <strong>Tutorial</strong> link on the Welcome Screen to open the<br />
appropriate Web page.<br />
2. Open the Lip_Sync_Rough animation project in the Lesson3_LipSync folder.<br />
3. Save the animation in a location of your choice using File > Save As.<br />
24
Step 1: Import Deb Ant’s Voice Track<br />
Chapter 2: <strong>Tutorial</strong>s<br />
In this step, you will import a speech made by Deb while she’s at the Survivor Ant<br />
tribal counsel meeting.<br />
In <strong>Toon</strong> <strong>Boom</strong> Studio, you must import sounds into Sound elements so you must add<br />
a sound element first.<br />
To import Deb Ant’s voice track:<br />
1. Click the Add Sound Element button at the top of the Exposure Sheet<br />
window. An empty sound element appears in the exposure sheet.<br />
2. Select Element > Rename Element and use the Rename Sound Element dialog<br />
box to name the element debSpeaks.<br />
3. Right-click (Windows) or [Control]-click (MacOS) the first cell in the element and<br />
select Import Sound > From File from the pop-up menu. The Open dialog box<br />
opens.<br />
4. Browse the Lesson3_LipSync folder and select please_dont.MP3 and click Open.<br />
The sound file now appears in the cell you selected.<br />
5. Turn-up your headphones or speakers, [Control]-click (in MacOS) or right-click<br />
(in Windows) the first cell in the debSpeaks element and select Play from the popup<br />
menu. Listen as Deb Ant begs not to be kicked out of the tribe.<br />
Step 2: Generate a Lip Chart for Deb Ant<br />
In this step, you will use <strong>Toon</strong> <strong>Boom</strong> Studio to generate a lip chart that matches Deb<br />
Ant’s speech to a set of animation phonemes. You can use the lip chart as a reference<br />
as you draw the lip sync images for your characters.<br />
To generate a lip chart for a Deb Ant’s voice track:<br />
1. Select the debSpeaks element and select Element > Edit Sound. The Sound<br />
Element Editor appears.<br />
2. In the Sound Element panel, click the wave form of the sound track and click the<br />
Streamed checkbox to set up this sound for streaming.<br />
25
<strong>Toon</strong> <strong>Boom</strong> Studio <strong>V3.5</strong> User Guide<br />
Voice tracks are best set as streamed sounds because they begin playing before<br />
the entire sound is loaded and will better maintain synchronization with images<br />
in Adobe Flash movies.<br />
Here’s the Streamed<br />
checkbox.<br />
3. Select the waveform in the Sound Element panel and click the Lip-Sync button.<br />
A progress bar appears as <strong>Toon</strong> <strong>Boom</strong> Studio analyzes the selected sound clips<br />
and assigns a lip sync letter to each frame.<br />
The lip sync images on the right side of the window become active. Drag the<br />
frame slider in the Sound Element panel to see the lip position for each frame of<br />
sound.<br />
4. Select the Enable Scrubbing option at the bottom of the Sound Element Editor.<br />
Scrubbing allows you to slowly play the sound forward and backward.<br />
5. Drag the frame slider at the top of the Current Sound panel to “scrub” the sound<br />
track and hear for yourself the sound that Deb is making at each frame.<br />
26
Chapter 2: <strong>Tutorial</strong>s<br />
6. Click OK to close the Sound Element Editor and then save your animation<br />
project.<br />
Step 3: Draw Deb Ant’s Missing Lips<br />
In the sample Lip Sync lesson, we drew six out of seven of the lip positions for Deb Ant.<br />
It is up to you to draw Deb’s lip for the “D” position using the lip sync preview images.<br />
To draw Deb Ant’s missing lips:<br />
1. In the Exposure Sheet window, press [Ctrl] (Windows) or [Command] (MacOS)<br />
and drag the debSpeaks element so that it is next to the mouth column. This will<br />
make it easier for you to see the lip chart while you are working on Deb’s lips.<br />
2. Right-click (Windows) or [Control]-click (MacOS) a cell in the debSpeaks element<br />
and select Show Lip-sync from the pop-up menu. <strong>Toon</strong> <strong>Boom</strong> Studio displays the<br />
phoneme assigned to each frame in the sound.<br />
3. Click the Toggle Thumbnails button to show the lip chart.<br />
This is the Toggle Thumbnails button.<br />
Click it and you will see preview<br />
images for the lip chart you computed.<br />
4. Scroll down the Exposure Sheet window. At the frame in the debSpeaks element<br />
that is labelled D, you must double-click the equivalent cell in the mouth element<br />
and rename the drawing D.<br />
27
<strong>Toon</strong> <strong>Boom</strong> Studio <strong>V3.5</strong> User Guide<br />
Cell labels link the contents of the cell<br />
to a file in your animation project.<br />
5. Now, with the lip sync preview image as a reference, draw Deb Ant’s lips in the D<br />
position. After you have finished drawing her lips, paint them using the swatches<br />
in the Deb Ant color palette on the Color Palette tab.<br />
This is how Deb Ant’s lips look in the D position we drew.<br />
Here are some tips that will help you out:<br />
• Use the Stroke tool to create a closed zone without visible line art.<br />
• Use the Close Gap tool to close the zone in the neck so that you can paint it.<br />
• You can copy and paste drawings from previous cells (try the F cell) and<br />
modify them to suit the lip position.<br />
• The lips must fit on Deb Ant’s head.<br />
You can use the onion skin to display the previous and next drawings<br />
and use those drawings as a reference.<br />
You can use the Auto Light Table to display other drawings in the frame,<br />
including Deb. You will need to hide other elements (using the Element<br />
List) to display only selected elements.<br />
You can add a drawing (like the F drawing) to the Static Light Table so<br />
that you can use it as a reference.<br />
• Set up the Drawing View window so that you have a clear view of Deb Ant.<br />
To turn off the grid, press [G], the default keyboard shortcut.<br />
28
Chapter 2: <strong>Tutorial</strong>s<br />
To zoom in, press [X], and to zoom out press [Z].<br />
To pan the Drawing View window, press and hold [Spacebar] and use<br />
the Grabber tool to change the part of the window you are seeing.<br />
Step 4: Auto-Map Deb Ant’s Lips to Her<br />
Voice Track<br />
In the Lip Sync Mapping dialog box, you identify each phoneme drawing for a<br />
character and then <strong>Toon</strong> <strong>Boom</strong> Studio automatically labels all of the cells in the<br />
character’s element with the appropriate label for each phoneme drawing.<br />
To make this feature really work for you, it is best if you name your drawings with the<br />
seven phonemes and the closed mouth position: A, B, C, D, E, F, G, and X.<br />
In the mouth element, we have already named all the elements with the letters of the<br />
seven plus one phonemes. All you have to do is map the drawings to the phonemes in<br />
this element, and <strong>Toon</strong> <strong>Boom</strong> Studio will do the rest of the work for you. For Deb’s lips,<br />
you are going to use the same drawing for the A position and the X position.<br />
To auto-map Deb Ant’s:<br />
1. Select the first drawing in the mouth element and press the arrow keys to scroll<br />
down the drawings in this element. You’ll see that the mouth positions do not<br />
reflect the lip chart that you generated.<br />
2. Right-click (Windows) or [Control]-click (MacOS) the title of the debSpeaks<br />
element and select Modify Lip-Sync Mapping from the pop-up menu. The Lip-<br />
Sync Mapping dialog box opens.<br />
29
<strong>Toon</strong> <strong>Boom</strong> Studio <strong>V3.5</strong> User Guide<br />
3. From the Destination element pull-down list, select mouth. This is the element<br />
that you are going to apply the auto-map to.<br />
4. In the X field, type A. For Deb’s lips, you are going to use the same drawing for<br />
the A position and the X position.<br />
5. Click OK. The dialog box closes.<br />
6. If you scroll through the mouth element now, you’ll see that all of the lip<br />
drawings have been mapped to the phonemes in Deb’s voice track.<br />
30
Step 5: Export<br />
It’s time to export your lip sync scene.<br />
Chapter 2: <strong>Tutorial</strong>s<br />
To export your animation:<br />
1. Select File > Export Movie. The Export dialog box opens.<br />
2. From the Export Format menu, select Flash Movie.<br />
3. Select Default from the Settings menu.<br />
4. Type the name of the movie in the File Name field and click the Browse button if<br />
you want to select an alternate location for the final file.<br />
5. Select Full Movie from the Export type panel.<br />
6. Select the Launch Player After Export option.<br />
7. Click OK to begin the exporting process. A progress bar appears to show you the<br />
progress of the export. If you want to cancel the export, click Cancel.<br />
Your Adobe Flash movie opens automatically in a Flash player when the export<br />
has finished.<br />
31
<strong>Toon</strong> <strong>Boom</strong> Studio <strong>V3.5</strong> User Guide<br />
Lesson 4: Building a Multiplane<br />
Scene<br />
One of the great attributes of <strong>Toon</strong> <strong>Boom</strong> Studio is the 3D scene space and the camera,<br />
which allows you to design multiplane moves and cinematic camera effects.<br />
In this lesson, you’ll create a multiplane camera move that trucks in on the action, as<br />
well as make that hot ant run across the stage. In the process of all this, you will also<br />
get to work a bit with templates.<br />
There are two animation projects for this lesson:<br />
• Sceneplanning_Rough<br />
• Sceneplanning_Final<br />
To start the Building a Multiplane Scene lesson:<br />
1. Download the Quick Start <strong>Tutorial</strong> files from the <strong>Toon</strong> <strong>Boom</strong> <strong>Animation</strong> website.<br />
You can click the Quick Start <strong>Tutorial</strong> link on the Welcome Screen to open the<br />
appropriate Web page.<br />
2. Open the Sceneplanning_Rough animation project in the<br />
Lesson4_Sceneplanning folder.<br />
3. Save the animation in a location of your choice using File > Save As.<br />
32
Chapter 2: <strong>Tutorial</strong>s<br />
4. Play back the rough animation by selecting the Play command from the Play<br />
menu. Not really much to see, eh Nothing moves, nothing happens. Go to Step 1<br />
to create some more interesting visual effects in this scene.<br />
Step 1: Attach the Camera to the Peg<br />
The first step in this lesson is to create a camera move using a peg.<br />
The idea of the <strong>Toon</strong> <strong>Boom</strong> Studio digital peg system was inspired by traditional 2D<br />
cel animation. In traditional animation, cycles of animation are typically drawn inplace.<br />
To make characters move through the cycle, animators would use peg bars,<br />
which would ensure that the drawings changed position gradually and precisely.<br />
In <strong>Toon</strong> <strong>Boom</strong> Studio, you use pegs to create different types of changes over time. In<br />
addition to motion, you can also create scaling and rotation effects using pegs.<br />
<strong>Toon</strong> <strong>Boom</strong> Studio also features “cameras”, which are like traditional cameras that<br />
“film” the action in a scene. In <strong>Toon</strong> <strong>Boom</strong> Studio, you can combine these two features<br />
- cameras and pegs - to create camera moves like trucks and pans.<br />
In <strong>Toon</strong> <strong>Boom</strong> Studio, you use one camera and can add up to two pegs in your scene.<br />
Using <strong>Toon</strong> <strong>Boom</strong> Studio, you can add unlimited cameras and pegs to create even<br />
more sophisticated scenes.<br />
In the View windows, you can see the elements in your scene from the front, side and top:<br />
• Here’s a a motion path we created with a peg<br />
• Here’s the camera<br />
For this step, we’ve already created the motion path that the camera will follow. All<br />
you have to do is attach the camera to the peg.<br />
33
<strong>Toon</strong> <strong>Boom</strong> Studio <strong>V3.5</strong> User Guide<br />
To attach the camera to the peg:<br />
1. In the Timeline window, drag and drop the Camera element on top of the Pegcamera<br />
element.<br />
The Camera element appears indented below the Peg-camera element to indicate<br />
that it is attached.<br />
2. Select Play > Play to play back the scene. Watch the camera as it follows the<br />
motion path of the peg.<br />
Step 2: Add Mike Ant Template to the Scene<br />
Templates are re-usable pieces of animation that you can share within a scene, with<br />
different scenes in the same animation project or with many animation projects.<br />
Templates can help you reduce your workload through re-use, keep the file size of<br />
your animations small, as well as facilitate working in a group on the same project.<br />
For example, you can create a template of a walk cycle and send the template file (with<br />
the extension TBT) to your buddy so that she can incorporate it into her animation.<br />
You can create templates out of anything you draw or import into <strong>Toon</strong> <strong>Boom</strong> Studio<br />
- vector drawings, bitmaps, entire elements, groups of elements, sound or SWF files.<br />
With a template, you have a neat package of all the objects, which makes it easy to<br />
transport and manage. If you create templates from multiple elements, <strong>Toon</strong> <strong>Boom</strong><br />
Studio even maintains timing (exposure) and layout information with the templates.<br />
So why all this talk about templates We created a template of the walk cycle of the<br />
painted ant, Mike. All you have to do is to drag it into the Timeline window and you<br />
will have added it to your scene.<br />
34
Chapter 2: <strong>Tutorial</strong>s<br />
To add the Mike Ant template to the scene:<br />
1. Select Window > Library to open the Library window. The Library window is<br />
your center for <strong>Toon</strong> <strong>Boom</strong> Studio content management.<br />
From the Library window, you can use:<br />
• The <strong>Animation</strong> folder to access<br />
all of the vector drawings in your<br />
animation.<br />
• The Local folder to manage all of<br />
the templates in your current<br />
animation project. Local templates<br />
are available to the current<br />
animation project only.<br />
• The Global folder to manage all of<br />
the templates on your system.<br />
Global templates are available to<br />
all animation projects on your<br />
system.<br />
2. Open the Local folder, double-click the mikeAnt.tbt file and press the Play<br />
button in the Library window’s preview panel. Watch as Mike Ant runs in place,<br />
flames scorching his back (poor Mike!). Please note that Mike only appears at<br />
frame 35 in the template.<br />
This is the preview panel of<br />
the Library.<br />
3. Drag the Mike Ant template file, mikeAnt.tbt, from the Library window to the<br />
Timeline window. Drop it just above the first element at the top of the list.<br />
4. Save your animation project and move on to the next step, where you will make<br />
Mike Ant move as he runs.<br />
35
<strong>Toon</strong> <strong>Boom</strong> Studio <strong>V3.5</strong> User Guide<br />
Step 3: Add a Peg and Attach Mike Ant to It<br />
This is the first step to creating a motion path for Mike Ant.<br />
To add a peg and attach Mike Ant to it:<br />
1. In the Timeline window, select the mike-color element.<br />
2. Click the Add Parent Peg button at the top of the Timeline window to add a<br />
Peg element to your animation and attach the mike-color element as its child<br />
element.<br />
3. With the Peg selected, select Element > Rename Peg Element to open the Rename<br />
Element dialog box and change the name of the peg to Peg-mikeant. Click OK to<br />
confirm the name change.<br />
36
Chapter 2: <strong>Tutorial</strong>s<br />
Step 4: Create Motion Path for Mike Ant<br />
This is the biggest step in this lesson. In this step you will get to do something a bit<br />
more challenging - you’re going to make a motion path with the peg you just added.<br />
This motion path will move Mike Ant from the east to the west side of the stage as he<br />
moves from back to front.<br />
You will use three Sceneplanning view windows to design and play back your motion<br />
effect.<br />
To create a motion path:<br />
1. Advance the red frame slider at the top of the Timeline window to frame 35,<br />
where the Mike Ant peg will start.<br />
2. In the Timeline window, select the Peg element you just added and the Show/<br />
Hide button at the top of the window so that no elements are showing. Then<br />
click the checkboxes next to the Peg-mikeant and Camera elements so that only<br />
they are displayed.<br />
At this point, your peg is just a red circle at the center of the Top View and Side<br />
View windows.<br />
37
<strong>Toon</strong> <strong>Boom</strong> Studio <strong>V3.5</strong> User Guide<br />
Use the Show/Hide<br />
checkboxes to<br />
display the elements<br />
Your Top and Side View windows will look something like these.<br />
You may have to zoom and<br />
pan your windows to get the<br />
same views of these windows.<br />
• To pan a window, press<br />
[Spacebar] and use the<br />
Grabber tool to move<br />
your view of the<br />
window.<br />
• To zoom in, press [X].<br />
• To zoom out, press [Z].<br />
• To reset the view, press<br />
[Shift]+[V].<br />
3. With the Select tool, drag the center of the peg’s red circle to move the peg in<br />
the Top View and Side View windows.<br />
• In the Side View window, move the peg so that it is just above the line that<br />
marks the division between north/south and place it further back in the<br />
scene.<br />
• In the Top View window, place the peg against the east side of the camera<br />
angle.<br />
38
Chapter 2: <strong>Tutorial</strong>s<br />
4. Make sure you have the Peg element selected in the Timeline window and select<br />
Tools > Sceneplanning Tools > Motion to activate the Motion tool.<br />
When you activate the Motion tool, two<br />
keyframes appear on the peg.<br />
• The first keyframe is on the left.<br />
• The last keyframe is on the right.<br />
5. With the Motion tool in the Top View window, drag the last keyframe on the<br />
motion (which is on the right) path towards the west side of the camera frame and<br />
towards the front.<br />
39
<strong>Toon</strong> <strong>Boom</strong> Studio <strong>V3.5</strong> User Guide<br />
This is the last keyframe (frame 58).<br />
You can enter the values for the first keyframe (frame 35) and the last keyframe (58)<br />
directly into the Properties window. Copy these values directly into the Offset fields<br />
in the Motion Point tab.<br />
• Frame 35: 3.70 N, 41.79 E, 49.1 B<br />
• Frame 58: 2.66 N, 25.68 W, 40.32 B<br />
The Frame field identifies the frame<br />
number of the selected motion point.<br />
In the Offset fields, you can type the<br />
value for the selected motion point.<br />
To advance to the next motion point,<br />
you can click this button.<br />
40
Chapter 2: <strong>Tutorial</strong>s<br />
6. Click the Show/Hide button to show all elements in your animation and then<br />
select Play > Quick Preview. This command renders your final animation so that<br />
you can play it back in real-time.<br />
7. Use Playback window to watch your ant run across the stage. Be sure to turn up<br />
the volume on your headphones so that you can hear the sound track that plays.<br />
Step 5: Export<br />
Well, you have successfully created a multiplane camera move and motion path. Now<br />
it’s time to package your creation so that you can share it with friends and family!<br />
To export your animation:<br />
1. Select File > Export Movie. The Export dialog box opens.<br />
2. From the Export Format menu, select Flash Movie.<br />
3. Select Default from the Settings menu.<br />
4. Type the name of the movie in the File Name field and click the Browse button if<br />
you want to select an alternate location for the final file.<br />
5. Select Full Movie from the Export Type panel.<br />
41
<strong>Toon</strong> <strong>Boom</strong> Studio <strong>V3.5</strong> User Guide<br />
6. Select the Launch Player After Export option.<br />
7. Click OK to begin the exporting process. A progress bar appears to show you the<br />
progress of the export. If you want to cancel the export, click Cancel.<br />
If you had any trouble with this lesson, check out the Sceneplanning_Final animation<br />
project to see how we did it.<br />
42
Chapter 2: <strong>Tutorial</strong>s<br />
Lesson 5: Creating Cross-Dissolves<br />
with Color Transform Elements<br />
<strong>Toon</strong> <strong>Boom</strong> Studio includes a Color Transform element, which you can use to change<br />
the color properties of an element over time.<br />
In the lesson scene, a skater does some fancy tricks on a half-pipe. To accentuate his<br />
daring boardwork, you will use a Color Transform element to create a series of crossdissolves<br />
that change the transparency of the skater at different frames.<br />
There are two animation projects for this lesson:<br />
• ColorFX_Rough<br />
• ColorFX_Final<br />
You will use the ColorFX_Rough animation project to follow the steps in the lesson.<br />
When you have questions that you are not sure about, you can refer to ColorFX_Final<br />
to see how we did it.<br />
You will work mostly in the Timeline window to<br />
add and modify Color Transform elements to<br />
create cross-dissolves.<br />
43
<strong>Toon</strong> <strong>Boom</strong> Studio <strong>V3.5</strong> User Guide<br />
To start the Creating Color Effects lesson:<br />
1. Download the Quick Start <strong>Tutorial</strong> files from the <strong>Toon</strong> <strong>Boom</strong> <strong>Animation</strong> website.<br />
You can click the Quick Start <strong>Tutorial</strong> link on the Welcome Screen to open the<br />
appropriate Web page.<br />
2. Open the ColorFX_Rough animation project in the Lesson5_ColorFX folder.<br />
3. Save the animation in a location of your choice using File > Save As. Saving this<br />
animation project to a new location will ensure that you always have the original<br />
to return to and use should you want to.<br />
4. Select Play > Play to play back the rough animation.<br />
Notice how two images of the skater appear to overlap for several frames Well,<br />
in this lesson, you are going to make the overlapping images fade-in/out to create<br />
a series of cross-dissolves (chain mix).<br />
Step 1: Add the First Color Transform<br />
Element<br />
To change the color of a drawing or image element over time, you attach it to a Color<br />
Transform element and then use this element to specify how the colors in the elements<br />
attached to it will change.<br />
During the cross-dissolve you will create, two drawings will appear at the same time,<br />
one fades in while the other fades out. To achieve this effect, we placed each drawing<br />
in a separate element layer so that you can control them independently. You’ll see as<br />
we progress through the lesson how this enables you to create cross-dissolves.<br />
We have put the<br />
drawings for the<br />
skater in different<br />
elements so that<br />
we can create the<br />
cross-dissolve<br />
effect.<br />
44
To add the first color transform element:<br />
Chapter 2: <strong>Tutorial</strong>s<br />
1. Click the Add button at the top of the Timeline window. The New Elements<br />
dialog box opens.<br />
2. Enter information about the element in the New Elements dialog box:<br />
• From the Type menu, select Color Transform Effect.<br />
• In the Name field, type skateColor and click OK. A new element layer appears<br />
in the Timeline window.<br />
3. In the element list on the left-side of the Timeline window, attach the Color<br />
Transform-skateColor element to the SkatePeg2 element by dragging and<br />
dropping it just below the peg.<br />
4. Attach the sk_2 element to the Transform-skateColor element by dragging and<br />
dropping it on top of the effects element.<br />
45
<strong>Toon</strong> <strong>Boom</strong> Studio <strong>V3.5</strong> User Guide<br />
5. Change the start and duration of the Transform-skateColor element so that it<br />
matches the start and duration of the sk_2 element.<br />
• Double-click the trackbar of the Transform-skateColor element to select it<br />
and drag it to frame 12.<br />
• Drag the end of the trackbar so that it ends on the same frame as the sk_2<br />
element (frame 20).<br />
6. Select File > Save to save your animation project.<br />
Step 2: Add Keyframes and Set their Values<br />
In the first Color Transform effect, the drawing should fade out from frame 16 to frame<br />
20.<br />
To achieve this, you must add a keyframe at frame 16. Then, at the keyframe on frame<br />
20, you must make the attached elements completely transparent.<br />
With color transforms, you can chose to do an additive or a multiplicative color<br />
transform.<br />
• In additive color transformations, you select a color value that is added to all<br />
of the color values in an element.<br />
• In multiplicative color transformations, you select a value (usually between 0<br />
and 1) and multiply this value with all of the color values in an element to<br />
arrive at a final value.<br />
46
Chapter 2: <strong>Tutorial</strong>s<br />
Because the effect you want to create in this lesson is an even transformation of the<br />
alpha value (transparency) of element colors, you will create multiplicative color<br />
transformations.<br />
To make an element change from transparent to opaque to transparent, you must<br />
multiply the alpha values by 0, 1, and 0. When you multiply an opaque color (255<br />
alpha) by 0, the result is 0 which makes the color transparent.<br />
To add a keyframe and set its value:<br />
1. Advance the red frame at the top of the Timeline window to frame 16.<br />
2. From the element list on the left-side of the Timeline window, select the<br />
Transform-skateColor element. Notice in the Properties window (Window ><br />
Properties) that the Color Transform tab opens.<br />
3. In the Color Transform tab, click the Add button to add a keyframe to the<br />
selected frame on the Transform-skateColor element.<br />
47
<strong>Toon</strong> <strong>Boom</strong> Studio <strong>V3.5</strong> User Guide<br />
A square appears in the<br />
Timeline to identify the<br />
keyframe on the trackbar.<br />
4. Advance the red frame slider at the top of the Timeline window to frame 20.<br />
5. On the Color Transform tab, drag the Alpha slider in the Multiplicative section<br />
of the tab all the way to the left. The value should appear as 0 in the Alpha field.<br />
6. Drag the red frame slider at the top of the window from frame 11 to 20 and watch<br />
as the element fades-out.<br />
7. Select File > Save to save your animation project.<br />
Step 3: Create the Next Color Transform<br />
Effect<br />
In this step, you are going to create another color transform effect, for the next element<br />
in the series, that will go from transparent to opaque to transparent.<br />
To achieve this effect, you will add a Color Transform element, set three keyframes,<br />
and multiply the alpha value at each keyframe by 0, 1, and 0.<br />
To create the next color transform effect:<br />
1. Add a Color Transform element and name it skateColor2.<br />
2. Drag and drop the Color Transform-skateColor2 element just before the sk_3<br />
element in the element list. This will also attach it to the SkatePeg 2 element.<br />
3. Attach the sk_3 element to the Color Transform-skateColor2 element.<br />
4. Change the start frame of the Color Transform-skateColor2 element so that it<br />
matches the sk_3 element. Start frame: 16; End frame: 24.<br />
48
Chapter 2: <strong>Tutorial</strong>s<br />
5. Add a keyframe to the Color Transform-skateColor2 element at frame 20. Your<br />
Timeline window should now look something like this:<br />
6. In the Color Transform tab, set the keyframes to the following multiplicative<br />
alpha values:<br />
• Frame 16: 0<br />
• Frame 20: 1<br />
• Frame 24: 0<br />
7. Drag the red frame slider from frame 16 to 24 and watch how the first element<br />
fade out as the second one fades in and then out again.<br />
You’ll notice how the drawing in the next element appears for the last five frames.<br />
In the next step you’ll use the exact same color transform element to fix all of the<br />
other elements so that they undergo the same color transform effect.<br />
8. Select File > Save to save your animation project.<br />
Step 4: Clone the Color Transform Effect<br />
All of the remaining elements, except for the last, must undergo the same color<br />
transform effect as you created in Step 3. Rather than duplicating your efforts, you can<br />
just clone the Color Transform element and attach the other elements to it.<br />
When you clone a Color Transform element, all of the information stored in the effect<br />
are duplicated so that you do not have to re-create keyframes or their values. If you<br />
update any one clone with new values, <strong>Toon</strong> <strong>Boom</strong> Studio will update all the other<br />
clones with the new values.<br />
To clone the color transform effect follow these steps:<br />
1. In the Timeline window, select the Color Transform-skateColor2 element.<br />
2. Select Element > Clone Element. <strong>Toon</strong> <strong>Boom</strong> Studio creates a new element and<br />
names it Color Transform-skateColor2(1) and renames the original element<br />
49
<strong>Toon</strong> <strong>Boom</strong> Studio <strong>V3.5</strong> User Guide<br />
Color Transform-skateColor2(0). The new element appears at the top of the<br />
element list in the Timeline window.<br />
3. Attach the new element to the SkatePeg2 element and attach the sk_4 element to<br />
the Color Transform-skateColor2(1) element.<br />
4. Drag the trackbar of the color transform element so its start/end frame matches<br />
the element you want it to transform.<br />
5. Repeat the previous steps for the elements sk_4 to sk_7. Make sure that as you<br />
attach the skater elements to the Color Transform elements that you maintain<br />
their layer order in the element list.<br />
When you are done, your Timeline window should look like this.<br />
6. Select Play > Play to play back the rough animation.<br />
You just have to create the effect for the last element in the series and the effect<br />
will be complete!<br />
7. Select File > Save to save your animation project.<br />
Step 5: Create the Last Color Transform<br />
Now, all that is left is the color transform for the last element that makes up the skater.<br />
For the last color transform effect, the skater will start out transparent, become fully<br />
opaque and remain opaque for the rest of the scene.<br />
To create this effect, you will add one keyframe to a Color Transform element, give the<br />
first keyframe a multiplicative alpha value of 0 and give the second keyframe a<br />
multiplicative alpha value of 1.<br />
50
Chapter 2: <strong>Tutorial</strong>s<br />
This step is basically the reverse of step 2, in which you made the character start<br />
opaque and then end transparent.<br />
To create the last color transform:<br />
1. Add a Color Transform element and name it skateColor3.<br />
2. Attach the Color Transform-skateColor3 element to the SkatePeg2 element and<br />
attach the sk_8 element to the Color Transform-skateColor3 element.<br />
3. Change the duration of the Color Transform-skateColor3 element to 9 frames<br />
and make the element start on frame 36.<br />
4. Add a keyframe to frame 40 of the Color Transform-skateColor3 element.Your<br />
Timeline window will look something like this:<br />
5. In the Color Transform tab, set the keyframes on the color transform element to<br />
the following multiplicative alpha values:<br />
• Frame 36: 0<br />
• Frame 40: 1<br />
6. Select File > Save to save your animation project.<br />
Step 6: Export<br />
That’s it! You’ve created a pretty nifty color transform effect with one of <strong>Toon</strong> <strong>Boom</strong><br />
Studio’s latest effects.<br />
All that is left to do is to export your animation and watch it play!<br />
To export your animation:<br />
1. Select File > Export Movie. The Export dialog box opens.<br />
2. From the Export Format menu, select Flash Movie.<br />
3. Select Default from the Settings menu.<br />
51
<strong>Toon</strong> <strong>Boom</strong> Studio <strong>V3.5</strong> User Guide<br />
4. Type the name of the movie in the File Name field and click Browse button if you<br />
want to select an alternate location for the final file.<br />
5. Select Full Movie from the Export Type panel.<br />
6. Select the Launch Player After Export option.<br />
7. Click OK to begin the exporting process. A progress bar appears to show you the<br />
progress of the export. If you want to cancel the export, click Cancel.<br />
After the animation is rendered, a Playback window will open and play back<br />
your animation.<br />
That’s it! If you had any trouble with this lesson, check out the Color_FX_final<br />
animation project to see how we did it.<br />
52
Chapter 2: <strong>Tutorial</strong>s<br />
Lesson 6: Creating Clipping Mask<br />
Effects<br />
<strong>Toon</strong> <strong>Boom</strong> Studio includes a Clipping Effect element, which you can use to mask out<br />
parts of an image to reveal only those portions you want to.<br />
In the lesson scene, you will merge two extreme sports scenes (mountain bike guy and<br />
surfer guy) using a mask to reveal the second scene. While you work on this effect, we<br />
hope you learn some other things too!<br />
See the wave hot on the trail of<br />
the biker<br />
That is created by a mask<br />
element in the shape of the<br />
wave, which reveals an image<br />
of a wave below it.<br />
There are two animation projects for this lesson:<br />
• MaskFX_Rough<br />
• MaskFX_Final<br />
You will use the MaskFX_Rough animation project to follow the steps in the lesson.<br />
When you have questions that you are not sure about, you can refer to MaskFX_Final<br />
to see how we did it.<br />
To start the Creating Clipping Mask Effects lesson:<br />
1. Download the Quick Start <strong>Tutorial</strong> files from the <strong>Toon</strong> <strong>Boom</strong> <strong>Animation</strong> website.<br />
You can click the Quick Start <strong>Tutorial</strong> link on the Welcome Screen to open the<br />
appropriate Web page.<br />
2. Open the MaskFX_Rough animation project in the Lesson6_MaskFX folder.<br />
3. Save the animation in a location of your choice using File > Save As. Saving this<br />
animation project to a new location will ensure that you always have the original<br />
to return to and use should you want to.<br />
53
<strong>Toon</strong> <strong>Boom</strong> Studio <strong>V3.5</strong> User Guide<br />
4. Select Play > Play to play back the rough animation.<br />
Notice how the two scenes - the one of the biker and the other of the surfer - just<br />
run smack into each other In this lesson, we’ll create a transition between these<br />
two scenes out of a clip in the shape of a wave, which will reveal the surf scene.<br />
Take a look at the final animation project, MaskFX_Final, if you want to see what<br />
you will do.<br />
Step 1: Drawing the Mask<br />
Like the masks worn by partiers at a Halloween ball, a <strong>Toon</strong> <strong>Boom</strong> Studio mask reveals<br />
certain visual elements while hiding others (like a Halloween mask reveals the eyes of<br />
the wearer, while covering most of the face).<br />
For the first step in the creation of the mask effect, you must draw the mask that will<br />
reveal image(s) below it. You can only create masks from vector drawings.<br />
We have already drawn a mask for you. The mask consists of a cycle of vector<br />
drawings of a wave, which will cut out an image of rolling waves beneath it.<br />
Take a look at the mask we drew so that you know what you can do when you create<br />
your next clip effect solo.<br />
With the onion skin on, you can see<br />
the cycle of drawings that fit together<br />
to make the mask.<br />
To review the mask we created:<br />
1. In the wave_mask element column in the Exposure Sheet window, press [Shift]<br />
and select frames 15 through 36.<br />
2. Select Play > Play to play back the selection.<br />
Notice the wave cycle is a collection of painted vector drawings. The painted<br />
areas of these drawings will be like the holes in the Halloween mask that will let<br />
the images below it show through, assuming the shape of the mask drawings.<br />
54
Step 2: Building the Clipping Element<br />
Chapter 2: <strong>Tutorial</strong>s<br />
After you have created the vector drawings that will act as your mask, or in this case,<br />
have seen the vector drawings that will act as the mask, you are ready to add the<br />
Clipping Effect element.<br />
Clipping Effect elements consist of two parts: the clip element and the mask parameter.<br />
• To the clip layer, you attach the elements that you want to show through the<br />
mask.<br />
• To the mask parameter, you attach the vector drawing element that you want<br />
to use as a mask.<br />
You will notice in our setup, that we have attached the wave_mask vector element to<br />
a peg, that moves the wave in the scene.<br />
• Here’s the clip layer.<br />
• Here’s the mask parameter.<br />
• Here’s the vector element that is attached to the<br />
peg.<br />
• Here’s the clip that will “show through” the mask.<br />
To build the mask element:<br />
3. Click the Show/Hide checkbox next to the wave_mask element so that you can<br />
see it.<br />
4. Click the Add button at the top of the Timeline window. The New Elements<br />
dialog box opens.<br />
5. From the Type drop-list, select Clipping Effect, type waveEffect in the name field<br />
and click OK.<br />
55
<strong>Toon</strong> <strong>Boom</strong> Studio <strong>V3.5</strong> User Guide<br />
The Timeline window will look like this:<br />
• Here’s the<br />
Clipping layer.<br />
• Here’s the Mask<br />
parameter.<br />
6. Drag and drop the Peg element on top of the Mask layer. When you drag the Peg<br />
element, the vector element attached to it will move with it as well. You have now<br />
created the mask!<br />
7. Drag the wave.swf Media element on top of the Clipping-waveEffect layer. The<br />
clip layers appear below the mask layers, but are indented out from the mask<br />
layers.<br />
Step 3: Export<br />
Well now that you have created your clip mask effect, you are ready to export and<br />
show the world the fruits of your labor!<br />
To export your animation to SWF:<br />
1. Select File > Export Movie. The Export dialog box opens.<br />
2. From the Export Format menu, select Flash Movie.<br />
3. Select Default from the Settings menu.<br />
56
Chapter 2: <strong>Tutorial</strong>s<br />
4. Type the name of the movie in the File Name field and click the Browse button if<br />
you want to select an alternate location for the final file.<br />
5. Select Full Movie from the Export Type panel.<br />
6. Select the Launch Player After Export option.<br />
7. Click OK to begin the exporting process. A progress bar appears to show you the<br />
progress of the export. If you want to cancel the export, click Cancel.<br />
After the animation is rendered, a Playback window will open and play back<br />
your animation.<br />
There is an element with some text in it, which we imported from an Adobe ® Illustrator<br />
file. To experiment more with the Mask effect, you can replace the existing mask with<br />
this element. Remember you will have to change the start time and exposure of this<br />
drawing so that it matches the duration of the transition.<br />
Enjoy!<br />
57
<strong>Toon</strong> <strong>Boom</strong> Studio <strong>V3.5</strong> User Guide<br />
Lesson 7: Retouching Drawings in<br />
Sceneplanning<br />
In previous versions of <strong>Toon</strong> <strong>Boom</strong> Studio, when you animated drawings with pegs in<br />
Sceneplanning views, you would have to switch to a different state, called Drawing<br />
Mode, to retouch drawings. However, this was difficult to do in Drawing Mode<br />
because you were not able see how drawings would be positioned relative to each<br />
other as a result of Sceneplanning view animations.<br />
<strong>Toon</strong> <strong>Boom</strong> Studio makes it possible to retouch drawings more accurately and easily<br />
because you can see how drawings in different elements work together when<br />
animated.<br />
Over the duration of the sample scene, Tania bends<br />
her arm. The joints at her shoulder and elbow rotate<br />
to create the bending motion.<br />
In this tutorial, you will use “Drawing in<br />
Sceneplanning” to fix gaps that appear at the elbow<br />
and shoulder as a result of the bending action.<br />
There are two animation projects for this lesson:<br />
• DrawingSceneplanning_Rough<br />
• DrawingSceneplanning_Final<br />
You will use the DrawingSceneplanning_Rough animation project to follow the steps<br />
in the lesson. When you have questions that you are not sure about, you can refer to<br />
DrawingSceneplanning_Final to see how we did put the final scene together.<br />
To start the “Drawing in Sceneplanning” lesson:<br />
1. Download the Quick Start <strong>Tutorial</strong> files from the <strong>Toon</strong> <strong>Boom</strong> <strong>Animation</strong> website.<br />
You can click the Quick Start <strong>Tutorial</strong> link on the Welcome Screen to open the<br />
appropriate Web page.<br />
58
Chapter 2: <strong>Tutorial</strong>s<br />
2. Open the Lesson7_DrawingSceneplanning animation project in the<br />
Lesson7_DrawingSceneplanning folder.<br />
3. Save the animation in a location of your choice using File > Save As. Saving this<br />
animation project to a new location will ensure that you always have the original<br />
to return to and use should you want to.<br />
You are now ready to begin working on the sample scene.<br />
Step 1: Play Back the Scene<br />
In this first step, you will play back the rough scene to identify problems that arise from<br />
the rotation of the joints in the shoulder and elbow.<br />
To play back the scene:<br />
4. Click the Loop button in the toolbar, then click Play .<br />
Click the white space to<br />
remove the selection<br />
frame.<br />
5. Pay particular attention to the shoulder and elbow as the animation plays back.<br />
Press [X] to zoom in close to the image. Press [Spacebar] and drag the window to<br />
focus on Tania’s left side.<br />
59
<strong>Toon</strong> <strong>Boom</strong> Studio <strong>V3.5</strong> User Guide<br />
Notice the gap that appears at the shoulder<br />
joint.<br />
Notice also the gap that appears in the line<br />
art at the elbow.<br />
You will fix both of these problems in the<br />
following steps.<br />
6. Click Stop to stop the playback.<br />
Step 2: Retouch the Elbow Joint<br />
In this step, you will use the Brush tool to retouch the line art on the elbow joint.<br />
You must select a drawing element, the frame that contains the drawing you want to<br />
retouch, and a drawing tool. You can draw directly in the Camera View window.<br />
All elements that are shown in the Timeline window will appear in the Camera View<br />
window.<br />
To retouch the elbow joint:<br />
1. In the Timeline window, select the “forearm left” element.<br />
2. Drag the red frame slider to the frame 15 in the scene. At frame 15, the gap<br />
between the upper arm and forearm is the greatest. Correcting the drawing at this<br />
frame should fix the error for the duration of the animation.<br />
60
Chapter 2: <strong>Tutorial</strong>s<br />
3. From the Drawing Tools toolbar, select the Brush tool. To open the Drawing<br />
Tools toolbar, select Window > Drawing Tools.<br />
As soon as you activate one of the drawing tools, you enter in “Edit Drawing”<br />
mode.<br />
4. Set up your drawing space so that you can work on the elbow.<br />
• If the grid is on, you will see it in the Camera View. Press [G] to turn it off.<br />
• To zoom in, press [X].<br />
• To pan the window, press [Spacebar] and drag the window.<br />
61
<strong>Toon</strong> <strong>Boom</strong> Studio <strong>V3.5</strong> User Guide<br />
5. In the Properties window, click the Pen tab, set your Minimum Size to 4 and the<br />
Maximum Size to 6.<br />
6. From the Color Palette tab, select the “line” swatch from the “tania” palette.<br />
62
Chapter 2: <strong>Tutorial</strong>s<br />
7. Use the Brush tool to connect the stroke on the forearm to the stroke on the upper<br />
arm.<br />
8. Click Play and watch the elbow as it bends. If there are any problems in your<br />
retouching, undo what you did and try again. Click Stop to stop the playback<br />
before you try to redo your work.<br />
Step 3: Create the Shoulder Joint<br />
That was a pretty simple retouch example. The next fix is a little bit more sophisticated.<br />
In the shoulder, the gap between the shoulder and the upper arm is large. In this step,<br />
you will practice a technique that will help you animate future jointed characters.<br />
63
<strong>Toon</strong> <strong>Boom</strong> Studio <strong>V3.5</strong> User Guide<br />
To fix the hole between the torso and the upper arm, you will create a perfect circle that<br />
will act as the joint on which your upper arm will rotate. The circle will overlap the<br />
upper arm and torso so that no gaps will appear while the joint rotates. You can try this<br />
technique with other jointed characters you create.<br />
To create the shoulder joint:<br />
1. In the Timeline window, select the upper arm element and move the red frame<br />
slider to frame 1.<br />
2. Zoom and pan the Camera View window so that you have a close-up view of<br />
Tania’s left shoulder.<br />
3. From the Drawing Tools toolbar, select the Ellipse tool.<br />
4. In the Properties window, click the Pen tab and change the Maximum Size value<br />
to 6.<br />
5. Click the Color Palette tab, select a red color swatch from the Default palette.<br />
You will draw the circle with red, and not the color of Tania’s shirt, so that you<br />
can easily see the edges of the circle, which will help you position it. After you<br />
position the circle, you will paint it with the color of Tania’s shirt and delete the<br />
red line art of the circle.<br />
6. In the Camera View window, press [Shift] to draw a perfect circle and then use<br />
the Select tool to position the circle in the gap that is the shoulder.<br />
64
Chapter 2: <strong>Tutorial</strong>s<br />
7. Press [Esc] to release the selected circle.<br />
8. From the Properties window, click the Color Palette tab, select the “shirt” swatch<br />
from the “tania” palette.<br />
9. From the Drawing Tools toolbar, select the Paint tool and click inside the red<br />
circle to fill it with the “shirt” color.<br />
65
<strong>Toon</strong> <strong>Boom</strong> Studio <strong>V3.5</strong> User Guide<br />
10. With the Select tool, select the red line art around the circle and delete it.<br />
11. Click Play and watch the shoulder as it bends. If there are any problems in<br />
your joint, undo what you did and try again. Click Stop to stop the playback<br />
before you try to redo your work.<br />
Step 4: Retouch the Shoulder<br />
After you have created the joint that will fill the gap between the torso and the upper<br />
arm, you have to add the line art that will cover the joint.<br />
To retouch the shoulder:<br />
1. In the Timeline window, select the “upper arm” element.<br />
2. Drag the red frame slider to the first frame in the scene. At frame 1, the gap<br />
between the torso and the upper arm is its greatest. Correcting the drawing at this<br />
frame should fix the error for the duration of the animation.<br />
66
Chapter 2: <strong>Tutorial</strong>s<br />
3. From the Drawing Tools toolbar, select the Brush tool.<br />
4. From the Properties window, click the Color Palette tab, select the “line” swatch<br />
from the “tania” palette.<br />
5. Use the Brush tool to draw the line art over the shoulder.<br />
6. Click Play and watch the shoulder. If there are any problems in your line art,<br />
undo what you did and try again. Click Stop to stop the playback before you<br />
try to redo your work.<br />
Step 5: Export<br />
Export your scene and show others what you can do with the new “Drawing in<br />
Sceneplanning” feature.<br />
To export your animation to SWF:<br />
1. Select File > Export Movie. The Export dialog box opens.<br />
67
<strong>Toon</strong> <strong>Boom</strong> Studio <strong>V3.5</strong> User Guide<br />
2. From the Export Format menu, select Flash Movie.<br />
3. Select Default from the Settings menu.<br />
4. Type the name of the movie in the File Name field and click Browse if you want<br />
to select an alternate location for the final file.<br />
5. Select Full Movie from the Export Type panel.<br />
6. Select the Launch Player After Export option.<br />
7. Click OK to begin the exporting process. A progress bar appears to show you the<br />
progress of the export. If you want to cancel the export, click Cancel.<br />
After the animation is rendered, a Playback window will open and play back<br />
your work. Check it out and enjoy!<br />
68