to download our current GENERAL catalog! (5MB ... - Whitehorse Gear
to download our current GENERAL catalog! (5MB ... - Whitehorse Gear
to download our current GENERAL catalog! (5MB ... - Whitehorse Gear

You also want an ePaper? Increase the reach of your titles
YUMPU automatically turns print PDFs into web optimized ePapers that Google loves.
Powerlet Sockets and Plugs: easy <strong>to</strong> install. Repair, replace, or retrofit<br />
device cords and power outlets.<br />
PART # DESCRIPTION<br />
PRICE<br />
PSO1 Panel-mount Standard Powerlet Socket: includes<br />
$19.95<br />
spring-loaded cover, two 1/4 inch tab connec<strong>to</strong>rs.<br />
Requires 11/16 inch mounting hole or bracket.<br />
PSO3 Panel-mount Military-Style Powerlet Socket: machined $34.95<br />
aluminum housing, two 1/4 inch tab connec<strong>to</strong>rs.<br />
Requires 11/16 inch mounting hole or bracket.<br />
PSO4 Cable-mount Powerlet Socket: use this <strong>to</strong> make cus<strong>to</strong>m $13.95<br />
extension cables or where panel mount is not desired.<br />
Two internal tab connec<strong>to</strong>rs for easy connection.<br />
PSO6 Panel-Top Powerlet Socket: mounts on the <strong>to</strong>p of y<strong>our</strong> $14.95<br />
panel providing low clearance installation.<br />
PSO7 Panel-mount Low-Profile Powerlet Socket: a PSO1 $28.95<br />
with a 9 inch lead ending in a white T-connec<strong>to</strong>r.<br />
Great for limited clearance apps. Requires 11/16 inch<br />
hole and 1 inch clearance behind panel.<br />
PPL1 Basic Powerlet Plug: no strain-relief; no boot. Best for $9.95<br />
workbench use only.<br />
PPL2 Deluxe Powerlet Plug: has strain-relief; no boot. Good $13.95<br />
all-purpose plug.<br />
PPL3 Super-Duper Powerlet Plug: has strain-relief and boot. $16.95<br />
For hard use.<br />
PPL4 Right-Angle Powerlet Plug: for use in tight places. $13.95<br />
Electrify Y<strong>our</strong> Luggage: How about using y<strong>our</strong> tank bag or saddlebag for<br />
an electrical hub <strong>to</strong> power or recharge y<strong>our</strong> phone and other goodies<br />
The bulkhead kits below contain SAE connec<strong>to</strong>rs on both the outside and<br />
inside and an exterior weather cap. These kits require that you make a hole<br />
in the bag you are energizing.<br />
Luggage Electrix Power Kits: easy <strong>to</strong> install, these bulkhead connec<strong>to</strong>rs<br />
permit power <strong>to</strong> be passed through hard or soft luggage wall.<br />
PART #<br />
PTB1<br />
PTB5<br />
PTB6<br />
PTB08<br />
PKT391<br />
PKT392<br />
PAC31<br />
DESCRIPTION<br />
Luggage Bulkhead Kit: contains just the bulkhead and<br />
mounting hardware.<br />
Luggage Kit SAE: contains PTB1, a 3 inch SAE connection<br />
for inside the bag, and an 18 inch SAE-<strong>to</strong>-SAE cable<br />
<strong>to</strong> connect <strong>to</strong> an external SAE power s<strong>our</strong>ce.<br />
Luggage Kit Powerlet: contains PTB1, a 3 inch SAE<br />
connection for inside the bag, and an 18 inch SAE-<strong>to</strong>-<br />
Powerlet plug <strong>to</strong> connect <strong>to</strong> an external Powerlet power<br />
s<strong>our</strong>ce. Great for BMWs.<br />
Luggage Kit <strong>to</strong> Battery: includes a 48 inch fused SAE<br />
battery harness (PKT01), bulkhead kit (PTB1), and a<br />
SAE <strong>to</strong> Powerlet and Cigarette socket (PAC27), for inside<br />
y<strong>our</strong> bag.<br />
Socket Mounting Brackets: quickly mounts y<strong>our</strong> Powerlet or Cigarette<br />
socket without drilling in<strong>to</strong> y<strong>our</strong> bodywork.<br />
PBR01 Single Powerlet Socket Bracket: pre-drilled for a<br />
Powerlet socket with a 6mm hole for mounting,<br />
aluminum. Choose Black or Silver.<br />
PBR03 Dual Powerlet Socket Bracket: pre-drilled for two<br />
Powerlet sockets with an 8mm hole for mounting,<br />
aluminum. Black only.<br />
PBR012 Bar-mount Cigarette Socket Bracket Mount: cigarette<br />
socket (AS02) <strong>to</strong> a 7/8 inch bar or frame tube, aluminum.<br />
Black only.<br />
Miscellaneous Parts and such: cause parts is parts.<br />
Second Powerlet Socket Kit: adds a second Powerlet<br />
socket without adding a second harness. Plugs in<strong>to</strong> any<br />
Powerlet harness with a white T connec<strong>to</strong>r. 12 inches.<br />
Second Powerlet Socket Kit: adds a second Powerlet<br />
socket without adding a second harness. Plugs in<strong>to</strong> any<br />
Powerlet harness with a white T connec<strong>to</strong>r. 24 inches.<br />
Dual Cigarette Socket Surface Mount: 24-inch (relaxed)<br />
coil cord connects a Powerlet plug <strong>to</strong> dual cigarette<br />
sockets, use in a tank bag or mount <strong>to</strong> y<strong>our</strong> bike with<br />
tie-wraps or Velcro.<br />
PRICE<br />
$28.95<br />
$33.95<br />
$44.95<br />
$76.95<br />
$23.95<br />
$26.95<br />
$19.95<br />
$36.95<br />
$36.95<br />
$33.95<br />
Wiring 101<br />
How do you take a good mo<strong>to</strong>rcycle and make it more useful, practical, and<br />
fun A number of answers work but one of the most common and least<br />
expensive ways is <strong>to</strong> add some electrical accessories.<br />
How about a power socket <strong>to</strong> charge y<strong>our</strong> cell phone Or a set of heated<br />
grips or grip covers <strong>to</strong> keep y<strong>our</strong> hands warm on cold rides Perhaps add<br />
some additional lighting for better vision and safety<br />
No matter what, if you choose <strong>to</strong> add additional wiring <strong>to</strong> y<strong>our</strong> bike, just<br />
be sure it’s done right. You don’t have <strong>to</strong> be a rocket scientist <strong>to</strong> do a good<br />
job. First, follow safe workshop practices. Then be certain all wiring is<br />
securely connected and protected from chafing, excessive heat, or damage of<br />
any kind. With a little care and the right supplies, it’s easy <strong>to</strong> do a good job.<br />
Some of <strong>our</strong> favorite electrical workshop essentials are:<br />
Tech Flex Braided Sleeving: Protect wires, hoses, and tubing just like<br />
vehicle fac<strong>to</strong>ries around the world. But don’t use that cheesy corrugated<br />
plastic wire conduit or worse, leave y<strong>our</strong> wiring uncovered. Use genuine<br />
Tech Flex braided sleeving and build y<strong>our</strong> own wire harnesses that are as<br />
good or better than the OEMs. (Page 55)<br />
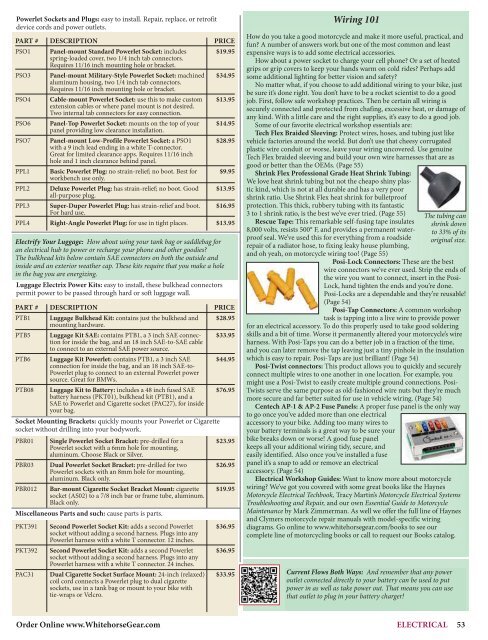
Shrink Flex Professional Grade Heat Shrink Tubing:<br />
We love heat shrink tubing but not the cheapo shiny plastic<br />
kind, which is not at all durable and has a very poor<br />
shrink ratio. Use Shrink Flex heat shrink for bulletproof<br />
protection. This thick, rubbery tubing with its fantastic<br />
3 <strong>to</strong> 1 shrink ratio, is the best we’ve ever tried. (Page 55)<br />
Rescue Tape: This remarkable self-fusing tape insulates<br />
8,000 volts, resists 500° F, and provides a permanent waterproof<br />
seal. We’ve used this for everything from a roadside<br />
repair of a radia<strong>to</strong>r hose, <strong>to</strong> fixing leaky house plumbing,<br />
and oh yeah, on mo<strong>to</strong>rcycle wiring <strong>to</strong>o! (Page 55)<br />
Posi-Lock Connec<strong>to</strong>rs: These are the best<br />
The tubing can<br />
shrink down<br />
<strong>to</strong> 33% of its<br />
original size.<br />
wire connec<strong>to</strong>rs we’ve ever used. Strip the ends of<br />
the wire you want <strong>to</strong> connect, insert in the Posi-<br />
Lock, hand tighten the ends and you’re done.<br />
Posi-Locks are a dependable and they’re reusable!<br />
(Page 54)<br />
Posi-Tap Connec<strong>to</strong>rs: A common workshop<br />
task is tapping in<strong>to</strong> a live wire <strong>to</strong> provide power<br />
for an electrical accessory. To do this properly used <strong>to</strong> take good soldering<br />
skills and a bit of time. Worse it permanently altered y<strong>our</strong> mo<strong>to</strong>rcycle’s wire<br />
harness. With Posi-Taps you can do a better job in a fraction of the time,<br />
and you can later remove the tap leaving just a tiny pinhole in the insulation<br />
which is easy <strong>to</strong> repair. Posi-Taps are just brilliant! (Page 54)<br />
Posi-Twist connec<strong>to</strong>rs: This product allows you <strong>to</strong> quickly and securely<br />
connect multiple wires <strong>to</strong> one another in one location. For example, you<br />
might use a Posi-Twist <strong>to</strong> easily create multiple ground connections. Posi-<br />
Twists serve the same purpose as old-fashioned wire nuts but they’re much<br />
more secure and far better suited for use in vehicle wiring. (Page 54)<br />
Centech AP-1 & AP-2 Fuse Panels: A proper fuse panel is the only way<br />
<strong>to</strong> go once you’ve added more than one electrical<br />
accessory <strong>to</strong> y<strong>our</strong> bike. Adding <strong>to</strong>o many wires <strong>to</strong><br />
y<strong>our</strong> battery terminals is a great way <strong>to</strong> be sure y<strong>our</strong><br />
bike breaks down or worse! A good fuse panel<br />
keeps all y<strong>our</strong> additional wiring tidy, secure, and<br />
easily identified. Also once you’ve installed a fuse<br />
panel it’s a snap <strong>to</strong> add or remove an electrical<br />
accessory. (Page 54)<br />
Electrical Workshop Guides: Want <strong>to</strong> know more about mo<strong>to</strong>rcycle<br />
wiring We’ve got you covered with some great books like the Haynes<br />
Mo<strong>to</strong>rcycle Electrical Techbook, Tracy Martin’s Mo<strong>to</strong>rcycle Electrical Systems<br />
Troubleshooting and Repair, and <strong>our</strong> own Essential Guide <strong>to</strong> Mo<strong>to</strong>rcycle<br />
Maintenance by Mark Zimmerman. As well we offer the full line of Haynes<br />
and Clymers mo<strong>to</strong>rcycle repair manuals with model-specific wiring<br />
diagrams. Go online <strong>to</strong> www.whitehorsegear.com/books <strong>to</strong> see <strong>our</strong><br />
complete line of mo<strong>to</strong>rcycling books or call <strong>to</strong> request <strong>our</strong> Books <strong>catalog</strong>.<br />
Current Flows Both Ways: And remember that any power<br />
outlet connected directly <strong>to</strong> y<strong>our</strong> battery can be used <strong>to</strong> put<br />
power in as well as take power out. That means you can use<br />
that outlet <strong>to</strong> plug in y<strong>our</strong> battery charger!<br />
Order Online www.<strong>Whitehorse</strong><strong>Gear</strong>.com ELECTRICAL 53