Accu-Chek Smart Pix - ACCU-CHEK Insulin Pumps
Accu-Chek Smart Pix - ACCU-CHEK Insulin Pumps
Accu-Chek Smart Pix - ACCU-CHEK Insulin Pumps

Create successful ePaper yourself
Turn your PDF publications into a flip-book with our unique Google optimized e-Paper software.
Chapter 2, Installing the <strong>Accu</strong>-<strong>Chek</strong> <strong>Smart</strong> <strong>Pix</strong> system<br />
2.3 Final preparations<br />
The status indicator of the <strong>Accu</strong>-<strong>Chek</strong> <strong>Smart</strong> <strong>Pix</strong> device<br />
starts flashing as soon as the device is connected to a<br />
computer which is switched on. There are several different<br />
status indicator signals which indicate various operating<br />
states (see page 1-5). After plugging in the <strong>Accu</strong>-<strong>Chek</strong><br />
<strong>Smart</strong> <strong>Pix</strong> device or after switching on the computer the<br />
following occurrences indicate that the device is operating<br />
properly:<br />
• The dots at the top and bottom of the status indicator<br />
flash slowly (about once a second). This indicates that<br />
the device is ready for operation and that it is actively<br />
searching for meters and insulin pumps.<br />
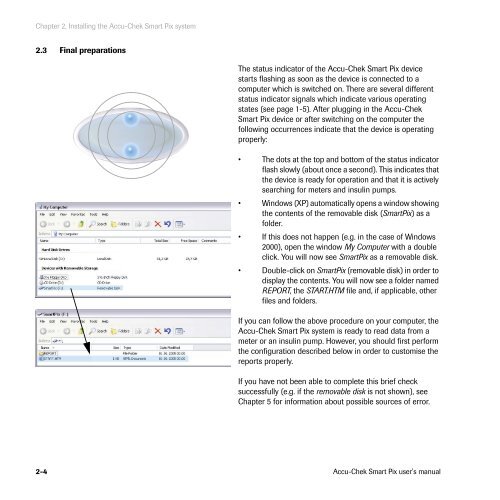
• Windows (XP) automatically opens a window showing<br />
the contents of the removable disk (<strong>Smart</strong><strong>Pix</strong>) as a<br />
folder.<br />
• If this does not happen (e.g. in the case of Windows<br />
2000), open the window My Computer with a double<br />
click. You will now see <strong>Smart</strong><strong>Pix</strong> as a removable disk.<br />
• Double-click on <strong>Smart</strong><strong>Pix</strong> (removable disk) in order to<br />
display the contents. You will now see a folder named<br />
REPORT, the START.HTM file and, if applicable, other<br />
files and folders.<br />
If you can follow the above procedure on your computer, the<br />
<strong>Accu</strong>-<strong>Chek</strong> <strong>Smart</strong> <strong>Pix</strong> system is ready to read data from a<br />
meter or an insulin pump. However, you should first perform<br />
the configuration described below in order to customise the<br />
reports properly.<br />
If you have not been able to complete this brief check<br />
successfully (e.g. if the removable disk is not shown), see<br />
Chapter 5 for information about possible sources of error.<br />
2-4 <strong>Accu</strong>-<strong>Chek</strong> <strong>Smart</strong> <strong>Pix</strong> user's manual