Creating a Template quick start guide - DocuSign
Creating a Template quick start guide - DocuSign
Creating a Template quick start guide - DocuSign
You also want an ePaper? Increase the reach of your titles
YUMPU automatically turns print PDFs into web optimized ePapers that Google loves.
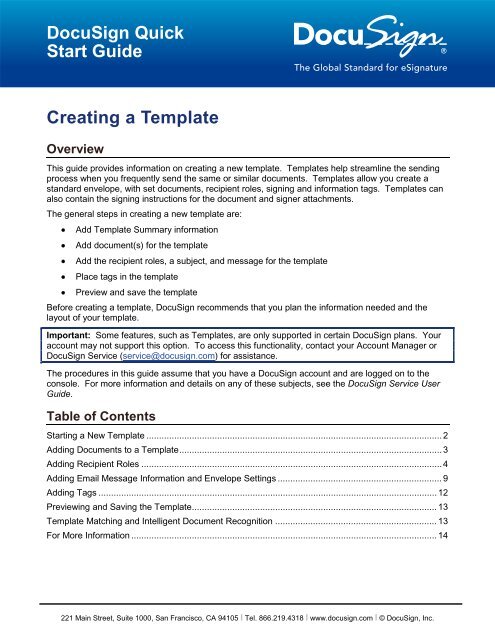
<strong>DocuSign</strong> Quick<br />
Start Guide<br />
<strong>Creating</strong> a <strong>Template</strong><br />
Overview<br />
This <strong>guide</strong> provides information on creating a new template. <strong>Template</strong>s help streamline the sending<br />
process when you frequently send the same or similar documents. <strong>Template</strong>s allow you create a<br />
standard envelope, with set documents, recipient roles, signing and information tags. <strong>Template</strong>s can<br />
also contain the signing instructions for the document and signer attachments.<br />
The general steps in creating a new template are:<br />
• Add <strong>Template</strong> Summary information<br />
• Add document(s) for the template<br />
• Add the recipient roles, a subject, and message for the template<br />
• Place tags in the template<br />
• Preview and save the template<br />
Before creating a template, <strong>DocuSign</strong> recommends that you plan the information needed and the<br />
layout of your template.<br />
Important: Some features, such as <strong>Template</strong>s, are only supported in certain <strong>DocuSign</strong> plans. Your<br />
account may not support this option. To access this functionality, contact your Account Manager or<br />
<strong>DocuSign</strong> Service (service@docusign.com) for assistance.<br />
The procedures in this <strong>guide</strong> assume that you have a <strong>DocuSign</strong> account and are logged on to the<br />
console. For more information and details on any of these subjects, see the <strong>DocuSign</strong> Service User<br />
Guide.<br />
Table of Contents<br />
Starting a New <strong>Template</strong> ..................................................................................................................... 2<br />
Adding Documents to a <strong>Template</strong> ........................................................................................................ 3<br />
Adding Recipient Roles ....................................................................................................................... 4<br />
Adding Email Message Information and Envelope Settings ................................................................. 9<br />
Adding Tags ...................................................................................................................................... 12<br />
Previewing and Saving the <strong>Template</strong> ................................................................................................. 13<br />
<strong>Template</strong> Matching and Intelligent Document Recognition ................................................................ 13<br />
For More Information ......................................................................................................................... 14<br />
221 Main Street, Suite 1000, San Francisco, CA 94105 Ι Tel. 866.219.4318 Ι www.docusign.com Ι © <strong>DocuSign</strong>, Inc.
<strong>Creating</strong> a <strong>Template</strong> Quick Start Guide<br />
2<br />
Starting a New <strong>Template</strong><br />
Note: The options and screens shown in your browser might be different from those shown in this<br />
<strong>guide</strong> depending on your account type and options. If you have questions about the options available<br />
for your account, contact your Account Manager. For more information on different options, refer to<br />
the <strong>DocuSign</strong> Service User Guide or Console online help.<br />
<strong>Creating</strong> a new template is similar to creating a new envelope. The main change is that you can add<br />
recipient roles in addition to actual recipients. A template can contain multiple documents, which can<br />
have multiple pages, and can be sent to several recipients.<br />
IMPORTANT: When creating a template, you need to be aware of the Data Population Scope setting<br />
for your account. If the account setting is Envelope, <strong>DocuSign</strong> tags with the same Label will populate<br />
with the same data when a recipient enters or modifies information in the tag for all documents in the<br />
template. If the account setting is Document, only <strong>DocuSign</strong> tags with the same Label and in the<br />
same document will populate with the same data when a recipient enters or modifies information in<br />
the tag.<br />
1. Click the down arrow on the Create button and select <strong>Template</strong>.<br />
Alternately, you can click Actions and select New <strong>Template</strong>.<br />
The Prepare <strong>Template</strong> page is displayed.<br />
221 Main Street, Suite 1000, San Francisco, CA 94105 Ι Tel. 866.219.4318 Ι www.docusign.com Ι © <strong>DocuSign</strong>, Inc.
<strong>Creating</strong> a <strong>Template</strong> Quick Start Guide<br />
3<br />
2. Type the name for your template in the <strong>Template</strong> Name field.<br />
3. Optionally, type a description of the template in the Description field.<br />
4. Optionally, you can also set password security so that only users that know the password can use<br />
the template.<br />
Select the Password protected check box, the New Password dialog appears. Type the<br />
password in the New Password field, retype the password in the Verify Password, and then click<br />
Save.<br />
5. Optionally, you can share the template with groups or other account members. To share a<br />
template:<br />
• Click the Groups tab. Select the groups that will have access to the template. Click Select<br />
All to select all the groups in the list. All templates are automatically shared with the<br />
Administrators group.<br />
• Click the Members tab. Select the members that will have access to the template. Click<br />
Select All to select all the members in the list.<br />
Note: Due to the way Group and Member template access is tracked, Members that are part<br />
of a selected Group are not shown as selected when viewing the Members tab.<br />
6. Go to the Documents for Signature section to add documents to the template.<br />
Adding Documents to a <strong>Template</strong><br />
In the Documents for Signature section, you add documents from your computer or an online external<br />
document.<br />
1. Select the source of your document:<br />
• To upload documents from your computer: click Browse from my Computer, the File Upload<br />
dialog box is displayed. Locate the file on your computer or network and click Open. The<br />
document is added to the template and a thumbnail image of the document is added to the<br />
section.<br />
221 Main Street, Suite 1000, San Francisco, CA 94105 Ι Tel. 866.219.4318 Ι www.docusign.com Ι © <strong>DocuSign</strong>, Inc.
<strong>Creating</strong> a <strong>Template</strong> Quick Start Guide<br />
4<br />
• To upload an external document: click Choose an Online Document, the Add a Document<br />
dialog box is displayed. Select the location of the online document you want to upload on the<br />
left side of the dialog box. Select the document and then click Add. The document is added<br />
to the template and a thumbnail image of the document is added to the section.<br />
Note: If you want to select a document from an external source, such as Box.Net or<br />
GoogleDocs, you might need to log on to the external document source.<br />
2. Repeat Step 1 to add another document to the template.<br />
3. You can make changes to the documents you’ve uploaded as described below:<br />
• You can view a PDF version of the document by clicking on the document image.<br />
• You can change the name of the uploaded document by clicking in the document name field<br />
and typing a new name.<br />
• Click Other Actions to replace the document.<br />
• If you have multiple documents in the template, you can move a document up or down in the<br />
order of appearance, click on the grip icon ( ) associated with the document and drag the<br />
document to the new location.<br />
• To remove a document, click the remove icon ( ) associated with that document.<br />
4. After all documents are added, go to the Recipients section to add template roles and recipients.<br />
Adding Recipient Roles<br />
In the Recipients and Routing section you add recipient roles and, optionally, set the routing order and<br />
add identification methods.<br />
The routing order sets the order in which recipients receive and can act on documents in the<br />
envelope. Recipients with the same routing order receive and can act on envelopes at the same time<br />
(in parallel), while recipients with different routing orders receive and act on envelopes in sequential<br />
order.<br />
If your account is enabled to send bulk recipient files, you can use bulk recipients in your template.<br />
See the Using the Bulk Recipient Feature <strong>quick</strong> <strong>start</strong> <strong>guide</strong> or <strong>DocuSign</strong> Service User Guide for more<br />
information about adding bulk recipients to a template.<br />
1. Type the Recipient Role. Click Add Signer to add the role to the list with a Sign recipient Action<br />
or click Add CC to add the role to the list with a Receive a copy recipient Action.<br />
221 Main Street, Suite 1000, San Francisco, CA 94105 Ι Tel. 866.219.4318 Ι www.docusign.com Ι © <strong>DocuSign</strong>, Inc.
<strong>Creating</strong> a <strong>Template</strong> Quick Start Guide<br />
5<br />
If you know the information for the recipient role, type the name Email address and Name in the<br />
appropriate fields. As you type, the system will provide suggestions to auto-fill the fields based on<br />
entries in your Address Book.<br />
Note: If your account is enabled to send bulk recipient files, you can use bulk recipients in your<br />
template. See the <strong>Creating</strong> a <strong>Template</strong> with Bulk Recipients <strong>quick</strong> <strong>start</strong> <strong>guide</strong> or <strong>DocuSign</strong><br />
Service User Guide for more information about adding bulk recipients to a template.<br />
2. Recipient Actions: After adding a recipient role, you can select the Action for the recipient, this<br />
sets the actions a recipient can perform. When you add a recipient by clicking Add Signer, the<br />
recipient Action is set to Sign. When you add a recipient by clicking Add CC, the recipient action<br />
is set to Receive a copy. An envelope must have at least one Signer or Acknowledge receipt<br />
recipient. The different recipient actions are described below:<br />
• Sign: Use this action if your recipient must sign, initial, date or add data to form fields on the<br />
documents in the envelope.<br />
• Sign in person: Use this action if the signer is in the same physical location as a <strong>DocuSign</strong><br />
user who will act as a Signing Host for the transaction. The recipient added is the Signing<br />
Host and new separate Signer Name field appears after Sign in person is selected. Type the<br />
name of the signer in the in the Signer Name field. See Sending for In Person Signing in the<br />
<strong>DocuSign</strong> Service User Guide for more information about this recipient action.<br />
• Acknowledge receipt: Use this action if the recipient must receive the completed documents<br />
for the envelope to be completed, but the recipient does not need to sign, initial, date or add<br />
information to any of the documents.<br />
• Receive a copy: Use this action if the recipient should get a copy of the envelope, but the<br />
recipient does not need to sign, initial, date or add information to any of the documents. This<br />
type of recipient can be placed in any order in the recipient list. The recipient receives a copy<br />
of the envelope when the envelope reaches the recipient’s order in the process flow and when<br />
the envelope is completed.<br />
• Address recipients: This recipient can add name and email information for recipients that<br />
appear after the recipient in workflow order. This recipient type is only available if the Send to<br />
Manage feature is enabled for the sender and document visibility is not enabled. See Agent<br />
Managed Envelopes in the <strong>DocuSign</strong> Service User Guide for more information about this<br />
recipient action.<br />
• Manage envelope: This recipient has the same management and access rights for the<br />
envelope as the sender and can make changes to the envelope as if they were using the<br />
Advanced Correct feature. This recipient can add name and email information, add or change<br />
the routing order and set authentication options for the remaining recipients. Additionally, this<br />
recipient can edit signature/initial tabs and data fields for the remaining recipients. This<br />
recipient must have a <strong>DocuSign</strong> account and is only available if the Send to Manage feature is<br />
enabled for the sender. See Agent Managed Envelopes in the <strong>DocuSign</strong> Service User Guide<br />
for more information about this recipient action.<br />
221 Main Street, Suite 1000, San Francisco, CA 94105 Ι Tel. 866.219.4318 Ι www.docusign.com Ι © <strong>DocuSign</strong>, Inc.
<strong>Creating</strong> a <strong>Template</strong> Quick Start Guide<br />
6<br />
3. Identifying Recipients: Optionally, you can select how to Identify a recipient.<br />
Note: In some cases, such as Phone Authentication, a sender might need to enter additional<br />
information for identifying a recipient.<br />
Click on the Identify list to select the authentication options you want to use for the recipient.<br />
By default, Email identification is selected. Other options, Access Code, Phone Authentication, ID<br />
Check, Live ID and Social ID items can be selected for the recipient. The identification options<br />
available depend on your account settings. Each authentication option is described below:<br />
Note: You can add Access Code authentication and one other authentication type for a single<br />
recipient.<br />
• Access Code: The Access Code option requires your recipient to enter an access code<br />
before they can view the envelope.<br />
To enable access code security option, select the Access Code check box and type the<br />
access code into the field. The access code can include upper case or lower case letters,<br />
numbers, and special characters. You must provide this access code to your recipient. It is<br />
recommended that you provide the code over the phone or using some other secure method.<br />
There is no additional fee for using this authentication check.<br />
To require that an Access Code is used for this recipient role, select Access Code Required.<br />
• SMS Authentication: The SMS Authentication option asks the recipient to select a mobile<br />
phone number that a one-time passcode text message can be sent to for authentication.<br />
<strong>DocuSign</strong> sends the passcode to the phone number and the recipient must enter the<br />
passcode to open the envelope.<br />
221 Main Street, Suite 1000, San Francisco, CA 94105 Ι Tel. 866.219.4318 Ι www.docusign.com Ι © <strong>DocuSign</strong>, Inc.
<strong>Creating</strong> a <strong>Template</strong> Quick Start Guide<br />
7<br />
To enable SMS Authentication, select the Identity Check checkbox and then select SMS<br />
Auth from the list. The SMS Authentication information for the recipient appears.<br />
Note: The number used for SMS Authentication must be able to accept an SMS text message.<br />
o<br />
o<br />
Select phone numbers that the recipient can choose from for use during the<br />
authentication phone call. The phone numbers listed here are associated with the<br />
Address Book entry for the recipient. If the recipient does not have any phone<br />
numbers in the Address Book or is not in your Address Book, no numbers are shown.<br />
You can also select to add a phone number for the recipient. Select the Country for<br />
the phone number, type the phone number and, if the number has an extension, type<br />
the extension number.<br />
• Phone Authentication: The Phone Authentication option asks the recipient to select or type<br />
a phone number to use for authentication and then they are presented with a validation code<br />
while the system places a call to the number. After answering the phone, the recipient is<br />
prompted to enter the validation code and speak their name. There is an additional fee for<br />
using this authentication check.<br />
Note: Do not use the Phone Authentication if your recipient cannot connect to the Internet and<br />
use their telephone at the same time.<br />
To enable Phone Authentication, select the - Identity Check - check box and then select<br />
Phone authentication from the list. The Phone Authentication information for the recipient<br />
appears. If the recipient name and email is not specified you can only select the New Number<br />
or Recipient may provide options.<br />
Important: If phone authentication is selected and the system does not have a number to dial<br />
for the recipient (either by allowing the recipient to enter a number, or from the Address Book<br />
or by the entering a number), you cannot complete the sending process.<br />
o<br />
Select phone numbers that the recipient can choose from for use during the<br />
authentication phone call. The phone numbers listed here are associated with the<br />
Address Book entry for the recipient. If the recipient does not have any phone<br />
numbers in the Address Book or is not in your Address Book, no numbers are shown.<br />
221 Main Street, Suite 1000, San Francisco, CA 94105 Ι Tel. 866.219.4318 Ι www.docusign.com Ι © <strong>DocuSign</strong>, Inc.
<strong>Creating</strong> a <strong>Template</strong> Quick Start Guide<br />
8<br />
o<br />
o<br />
You can also select New Number to add a phone number for the recipient. Select the<br />
Country for the phone number, type the phone number and, if the number has an<br />
extension, type the extension number.<br />
Additionally, you can select Recipient may provide to allow the recipient to type their<br />
own phone number.<br />
• ID Check: The ID Check option asks the recipient to provide some initial personal information<br />
(current address is required, but there is other optional information the recipient can enter) and<br />
then answer a set of questions before the recipient can view the envelope. The questions are<br />
based on data available in public records (such as where they have lived).<br />
The ID Check is a knowledge-based authentication provided by RSA. This service is often<br />
used by many banks to validate the ID of recipients.<br />
The ID Check option might not be useful for recipients outside the United States. There is an<br />
additional fee for using this authentication check.<br />
Note: If you select ID Check for a recipient, then the recipient name you supply is the one<br />
used for the ID check.<br />
To enable the ID Check option, select the - Identity Check - check box and then select ID<br />
Check from the list.<br />
• Live ID or Social ID Identity Check: This option requires your recipient to enter their Live ID<br />
or Social ID (Salesforce, LinkedIn, Google, etc.) credentials before they can view the<br />
envelope.<br />
To enable the Live ID or Social ID security option, select the - Identity Check - check box and<br />
then select Live ID or Social ID from the list.<br />
221 Main Street, Suite 1000, San Francisco, CA 94105 Ι Tel. 866.219.4318 Ι www.docusign.com Ι © <strong>DocuSign</strong>, Inc.
<strong>Creating</strong> a <strong>Template</strong> Quick Start Guide<br />
9<br />
4. Set Sender actions: Optionally, you can set the actions the template sender cannot take with the<br />
recipient role.<br />
• Edit recipient: This option locks the recipient information preventing the template sender from<br />
changing the information for this recipient role.<br />
• Delete recipient: This option requires this recipient role to be part of any envelope sent with<br />
this template preventing the template sender from deleting this recipient role.<br />
5. Repeat steps 1 through 4 to add additional recipient roles.<br />
• If you have multiple recipients, you can change the routing order in which the recipients<br />
receive the envelope and perform signing and other activities. To set routing order, type the<br />
Order in which your recipients receive and sign the document.<br />
• Alternately, if you have already set the order for some recipients, you can click on the grip icon<br />
( ) associated with the recipient and drag them to the new order. The Order number for the<br />
recipient is automatically updated.<br />
• You can remove a recipient by clicking the remove icon ( ) associated with that recipient.<br />
6. After all roles and recipients are added, go to the Email Subject section.<br />
Adding Email Message Information and Envelope Settings<br />
In the Email Message section you can customize the email subject and, optionally, the messages for<br />
recipients.<br />
Note: The <strong>DocuSign</strong> service automatically adds a subject based on the documents you have added.<br />
1. Type an Email Subject for the envelope. The subject is limited to 100 characters.<br />
2. Optionally, type an Email Message for all recipients. The message is limited to 2000 characters.<br />
221 Main Street, Suite 1000, San Francisco, CA 94105 Ι Tel. 866.219.4318 Ι www.docusign.com Ι © <strong>DocuSign</strong>, Inc.
<strong>Creating</strong> a <strong>Template</strong> Quick Start Guide<br />
10<br />
3. Optionally, add a note for a recipient:<br />
• Select the recipient for the message from the Add a Note to: list and click Add. The Custom<br />
note dialog box appears.<br />
• Type the message for the recipient. The message is limited to 1000 characters.<br />
• Repeat this step to add a message for a different recipient.<br />
4. Optionally, you can select the email language used for a recipient. This option sets the language<br />
used in the standard email format and initial signing view for the recipient, but it does not translate<br />
the Email Subject, Email Message text or note text. You must type the subject, message or note<br />
in the correct language.<br />
Note: This option might not be enabled for your account. If you have questions about the options<br />
available for your account, contact your Account Manager or <strong>DocuSign</strong> Service<br />
(service@docusign.com) for assistance.<br />
• Click Customize email and signing language for each recipient the Customize Email<br />
Language dialog box appears.<br />
• Select the language for each recipient and click Save. You are returned to the Prepare<br />
Envelope page and separate Email Subject, Email Message and Note fields are provided for<br />
each recipient.<br />
• For each recipient, type an Email Subject for the envelope. Optionally, type an Email<br />
Message and Note for the recipient.<br />
5. Optionally, you can lock the email content (the Subject, Email Message and recipient Notes) of the<br />
template by selecting Sender cannot edit Subject, Message, or Note. This prevents senders<br />
from changing the content when they send an envelope with this template. When a sender uses a<br />
template with locked email content, they see the content, but cannot make any changes or<br />
additions to it.<br />
If the email content is locked and the template Subject is left blank, senders will be able to add a<br />
subject to the envelope.<br />
Locking the email content will also prevent users from making changes to the email content when<br />
correcting envelopes.<br />
6. After the Email Message information is added, scroll down go to the Envelope Settings section.<br />
7. The Envelope Settings section lets you set branding options, recipient options, reminders and<br />
expirations, and sender settings for the template.<br />
Note: The options available in the Envelope Settings depend on your account type and settings.<br />
221 Main Street, Suite 1000, San Francisco, CA 94105 Ι Tel. 866.219.4318 Ι www.docusign.com Ι © <strong>DocuSign</strong>, Inc.
<strong>Creating</strong> a <strong>Template</strong> Quick Start Guide<br />
11<br />
This section provides information about the different options in the Envelope Settings section.<br />
Branding Setting<br />
If your account has Branding enabled and you have access to multiple brand profiles, you can<br />
select the account brand that is seen by recipients during viewing and signing. Additionally, you<br />
can prevent users from changing the brand profile used when sending an envelope with this<br />
template by selecting Don’t allow sender to change selected Brand.<br />
Recipient Information Settings<br />
The following options might be available for your account:<br />
• Allow recipient(s) to sign on paper: Select this option to allow signers to print and sign<br />
the document on paper instead of electronically. See Allowing Your Recipients to Sign On<br />
Paper for more information about this.<br />
• Allow recipient(s) to edit the document(s): Select this option to enable the Document<br />
Markup feature, which allows recipients to access the markup tool. The markup tool is<br />
used to cover up old text, cover text and add new text, or to add new text. Recipients that<br />
signed a document before the markup tool changes are made are given a new opportunity<br />
to review and approve the changes before any document is finalized. See Using the<br />
Document Markup Feature for more information about Document Markup.<br />
• Allow recipient(s) to change signing responsibility: Select this option to allow the<br />
recipient to reassign the envelope to another person.<br />
221 Main Street, Suite 1000, San Francisco, CA 94105 Ι Tel. 866.219.4318 Ι www.docusign.com Ι © <strong>DocuSign</strong>, Inc.
<strong>Creating</strong> a <strong>Template</strong> Quick Start Guide<br />
12<br />
• Turn on auto navigation: Select this option to turn on auto navigation for the envelope. If<br />
this is not selected, there is no auto navigation in the envelope.<br />
• Must be a signer to view signed documents: When this option is selected, recipients will<br />
only be able to see documents that have Signature or Initial tags assigned to them or that<br />
do not have any Signature or Initial tags.<br />
Reminders and Expirations Settings<br />
Optionally, you define rules to remind your recipients of their signing tasks and to expire your<br />
envelope if it is not signed.<br />
Sender Settings<br />
This section lets you select to stamp the envelope ID on the documents in the envelope and has<br />
the active Envelope Custom Fields for your account.<br />
When you are done changing any Envelope Settings, click Next to begin tagging the documents.<br />
Adding Tags<br />
On the Add Tags page, you will add signature, initial and other information tags to help your signers<br />
know precisely what actions you want them to take, where in the document you want them to sign,<br />
initial or add information, and in what order.<br />
1. To assign a signature, initial or other tag to a recipient, click on the recipient’s name on the left<br />
side of the page and the Tag Palette is shown below the recipient’s name.<br />
Click and drag a tag from the palette and drop it on the document. For more information about<br />
tags and how to change tag properties, refer to the <strong>DocuSign</strong> Service User Guide for more<br />
information about <strong>DocuSign</strong> tags.<br />
Note: When adding tags, you can open the properties for the tag and select Required or Locked<br />
to require or lock the tags. Locked tags cannot be removed when a sender opens the template.<br />
221 Main Street, Suite 1000, San Francisco, CA 94105 Ι Tel. 866.219.4318 Ι www.docusign.com Ι © <strong>DocuSign</strong>, Inc.
<strong>Creating</strong> a <strong>Template</strong> Quick Start Guide<br />
13<br />
You can move to different pages in the document by scrolling through the document or by clicking<br />
on the appropriate page in the Page Guide shown on the right side of the console.<br />
Note: If Document Visibility is enabled for your account, you can set the visibility options for the<br />
template. See the Document Visibility <strong>quick</strong> <strong>start</strong> <strong>guide</strong> or <strong>DocuSign</strong> Service User Guide for more<br />
information.<br />
2. Continue placing tags for this recipient until you have added all the needed tags.<br />
3. Repeat steps 1 and 2 for each recipient in the document.<br />
Previewing and Saving the <strong>Template</strong><br />
1. Optionally, you can preview how your recipient will see the tags by clicking Continue.<br />
Select the recipient you want to preview tags for and use the arrowhead icons to advance or move<br />
back. Alternately, you can click Auto-Advance to automatically cycle through the tags.<br />
Click Exit Preview to return to the Add Tags page.<br />
2. When you have added all the needed tags and are done previewing the envelope, click Save.<br />
The template is saved and you are returned to the <strong>DocuSign</strong> console.<br />
<strong>Template</strong> Matching and Intelligent Document Recognition<br />
When a sender <strong>start</strong>s a new envelope and adds a document, template matching, also known as<br />
Intelligent Document Recognition (IDR), reviews the text and information in the document to<br />
determine if the document matches a saved template. If a match is found, the system will ask the<br />
sender if they want to apply the template to the document in the envelope.<br />
IDR looks at the following factors to determine if there is a match between a document and a<br />
template:<br />
• the number of pages in the template is equal to or less than the number of pages in the document,<br />
221 Main Street, Suite 1000, San Francisco, CA 94105 Ι Tel. 866.219.4318 Ι www.docusign.com Ι © <strong>DocuSign</strong>, Inc.
<strong>Creating</strong> a <strong>Template</strong> Quick Start Guide<br />
14<br />
• the first and last 25 words in the document are the same as the template or, if IDR region match<br />
boxes are used in a template, the words in document are the same as those in the IDR regions.<br />
In the case where a template document has similar opening and closing text to many other<br />
documents used by a group, you can add an IDR region match box to the template to narrow down<br />
and improve the IDR selection process.<br />
You can select any region of text within a document for IDR. There is no functional limit to the<br />
maximum or minimum volume of text you can select to define a match. However, the less text you<br />
select the more false positive matches IDR is likely to find and the more text you select, the longer it<br />
will take for the IDR matching process to finish.<br />
Setting Intelligent Document Recognition Regions<br />
1. Before saving a template, on the Tag toolbar click the IDR Regions button.<br />
2. Place your cursor near the text you want to use and then left-click and drag the cursor over the<br />
portion of text to match when <strong>DocuSign</strong> applies IDR. A dashed line appears around the selected<br />
text.<br />
If the area selected is not the area you wanted:<br />
• To adjust the size of the region, place your cursor over the lower right corner of the region (the<br />
cursor turns into a double-headed arrow), click and drag the region to set the correct area.<br />
• To move the region, place your cursor over the region (the cursor turns into a four-headed<br />
arrow), left-click and drag the region to a new area.<br />
• To remove the region, place your cursor over the region (the cursor turns into a four-headed<br />
arrow), left-click and drag the region over the <strong>DocuSign</strong> Tags (the right side of the page) and<br />
release the mouse button.<br />
3. Complete and save the template normally.<br />
For More Information<br />
For more information about additional <strong>DocuSign</strong> features, go to the <strong>DocuSign</strong> Support Site.<br />
221 Main Street, Suite 1000, San Francisco, CA 94105 Ι Tel. 866.219.4318 Ι www.docusign.com Ι © <strong>DocuSign</strong>, Inc.
<strong>Creating</strong> a <strong>Template</strong> Quick Start Guide<br />
15<br />
Copyright, Trademark and Patent Information<br />
Copyright ©2003-2013 <strong>DocuSign</strong>, Inc. All rights reserved.<br />
For information about <strong>DocuSign</strong> trademarks, copyrights and patents refer to the <strong>DocuSign</strong> Intellectual Property page<br />
(https://www.docusign.com/IP) on the <strong>DocuSign</strong> website. All other trademarks and registered trademarks are the property of<br />
their respective holders.<br />
No part of this document may be reproduced or transmitted in any form or by any means, electronic or mechanical, for any<br />
purpose, without the express written permission of <strong>DocuSign</strong>, Inc. Under the law, reproducing includes translating into<br />
another language or format. Every effort has been made to ensure that the information in this manual is accurate. <strong>DocuSign</strong>,<br />
Inc. is not responsible for printing or clerical errors. Information in this document is subject to change without notice.<br />
Version: <strong>DocuSign</strong> Release (December 2013)<br />
If you have any comments or feedback on our documentation, please send them to us at: Documentation@<strong>DocuSign</strong>.com.<br />
Summary of changes for this version:<br />
• Corrected grammar problem in Overview section.<br />
221 Main Street, Suite 1000, San Francisco, CA 94105 Ι Tel. 866.219.4318 Ι www.docusign.com Ι © <strong>DocuSign</strong>, Inc.


