AVerVision SPB350 Manual
AVerVision SPB350 Manual
AVerVision SPB350 Manual

Create successful ePaper yourself
Turn your PDF publications into a flip-book with our unique Google optimized e-Paper software.
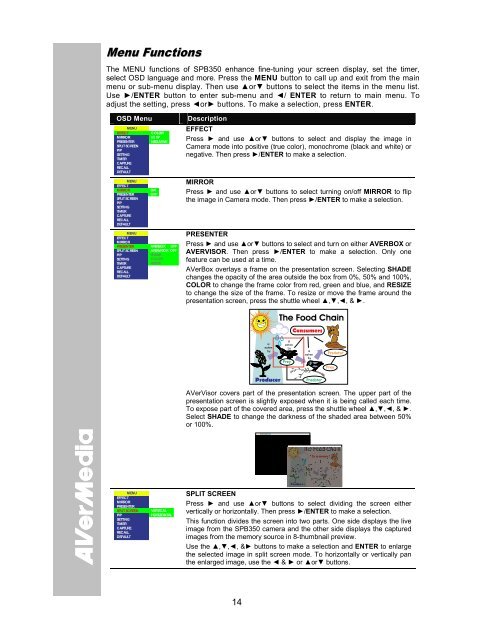
Menu Functions<br />
The MENU functions of <strong>SPB350</strong> enhance fine-tuning your screen display, set the timer,<br />
select OSD language and more. Press the MENU button to call up and exit from the main<br />
menu or sub-menu display. Then use ▲or▼ buttons to select the items in the menu list.<br />
Use ►/ENTER button to enter sub-menu and ◄/ ENTER to return to main menu. To<br />
adjust the setting, press ◄or► buttons. To make a selection, press ENTER.<br />
OSD Menu<br />
MENU<br />
EFFECT<br />
MIRROR<br />
PRESENTER<br />
SPLIT SCREEN<br />
PIP<br />
SETTING<br />
TIMER<br />
CAPTURE<br />
RECALL<br />
DEFAULT<br />
MENU<br />
EFFECT<br />
MIRROR<br />
PRESENTER<br />
SPLIT SCREEN<br />
PIP<br />
SETTING<br />
TIMER<br />
CAPTURE<br />
RECALL<br />
DEFAULT<br />
MENU<br />
EFFECT<br />
MIRROR<br />
PRESENTER<br />
SPLIT SCREEN<br />
PIP<br />
SETTING<br />
TIMER<br />
CAPTURE<br />
RECALL<br />
DEFAULT<br />
COLOR<br />
B / W<br />
NEGATIVE<br />
ON<br />
OFF<br />
AVERBOX OFF<br />
AVERVISOR OFF<br />
SHADE<br />
COLOR<br />
RESIZE<br />
Description<br />
EFFECT<br />
Press ► and use ▲or▼ buttons to select and display the image in<br />
Camera mode into positive (true color), monochrome (black and white) or<br />
negative. Then press ►/ENTER to make a selection.<br />
MIRROR<br />
Press ► and use ▲or▼ buttons to select turning on/off MIRROR to flip<br />
the image in Camera mode. Then press ►/ENTER to make a selection.<br />
PRESENTER<br />
Press ► and use ▲or▼ buttons to select and turn on either AVERBOX or<br />
AVERVISOR. Then press ►/ENTER to make a selection. Only one<br />
feature can be used at a time.<br />
AVerBox overlays a frame on the presentation screen. Selecting SHADE<br />
changes the opacity of the area outside the box from 0%, 50% and 100%,<br />
COLOR to change the frame color from red, green and blue, and RESIZE<br />
to change the size of the frame. To resize or move the frame around the<br />
presentation screen, press the shuttle wheel ▲,▼,◄, & ►.<br />
AVerVisor covers part of the presentation screen. The upper part of the<br />
presentation screen is slightly exposed when it is being called each time.<br />
To expose part of the covered area, press the shuttle wheel ▲,▼,◄, & ►.<br />
Select SHADE to change the darkness of the shaded area between 50%<br />
or 100%.<br />
MENU<br />
EFFECT<br />
MIRROR<br />
PRESENTER<br />
SPLIT SCREEN<br />
PIP<br />
SETTING<br />
TIMER<br />
CAPTURE<br />
RECALL<br />
DEFAULT<br />
VERTICAL<br />
HORIZONTAL<br />
SPLIT SCREEN<br />
Press ► and use ▲or▼ buttons to select dividing the screen either<br />
vertically or horizontally. Then press ►/ENTER to make a selection.<br />
This function divides the screen into two parts. One side displays the live<br />
image from the <strong>SPB350</strong> camera and the other side displays the captured<br />
images from the memory source in 8-thumbnail preview.<br />
Use the ▲,▼,◄, &► buttons to make a selection and ENTER to enlarge<br />
the selected image in split screen mode. To horizontally or vertically pan<br />
the enlarged image, use the ◄ & ► or ▲or▼ buttons.<br />
14