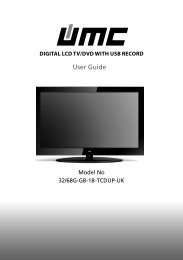
42/63G-GB-3B-F3TCU-UK - Sky Media UK LTD
42/63G-GB-3B-F3TCU-UK - Sky Media UK LTD
42/63G-GB-3B-F3TCU-UK - Sky Media UK LTD

Create successful ePaper yourself
Turn your PDF publications into a flip-book with our unique Google optimized e-Paper software.
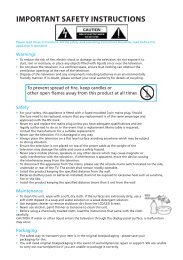
Important safety instructions<br />
CAUTION<br />
RISK OF ELECTRIC SHOCK<br />
DO NOT OPEN<br />
Please, read these safety instructions and<br />
respect the following warnings before the<br />
ap-pliance is operated:<br />
This TV with the weight of more than 20 kg must be lifted<br />
and carried by at least two people.<br />
Be careful! This TV does not contain any parts which could<br />
be repaired by the user. In case of a fault, contact the producer<br />
or the authorized service. The contact with certain parts<br />
inside the appliance might endanger your life. The guarantee<br />
is not provided for the faults caused by non-professional<br />
interactions!<br />
Do not remove the rear part of the appliance.<br />
In order to prevent fire<br />
spread, always keep candles<br />
and other open flames away<br />
from this product.<br />
This appliance is designed for receiving and reproduction of<br />
video and sound signals. Any other use is strictly forbidden.<br />
The ideal distance to watch TV is approximately five times<br />
the diagonal of the screen. The light striking upon the<br />
screen from other light sources can cause reflections and<br />
make the quality of the picture worse.<br />
Please, ensure the sufficient ventilation and appropriate<br />
distance of the appliance from other pieces of furniture.<br />
The TV set is designed exclusively for the operation in a<br />
dry place. When using the appliance outside, please, make<br />
sure it is protected against moisture (rain, splashing water).<br />
Never expose the appliance to moisture.<br />
Do not place any containers with water on the appliance,<br />
such as vases, etc. These containers might get pushed over,<br />
which would endanger electric safety. Place the appliance<br />
exclusively on flat and stable surfaces. Do not place any<br />
objects such as newspaper or blankets, etc. on or under the<br />
appliance.<br />
Make sure the appliance does not stand on any power<br />
cables as they might get damaget. Mobile phones and other<br />
devices such as WLAN adapters, monitoring cameras with<br />
wireless signal transmission, etc. might cause electromagnetic<br />
interference and they should not be placed near the<br />
appliance.<br />
Do not place the appliance near heating elements or in<br />
a place with direct sunshine as it has a negative effect on<br />
cooling of the appliance. Heat storage is dangerous and it<br />
can seriously reduce the lifetime of the appliance. In order<br />
to ensure the safety, ask the qualified person to remove the<br />
dirt from the appliance.<br />
Try to prevent the mains cable or (if it is part of delivery)<br />
mains adapter damage. The appliance can only be connected<br />
with a supplied mains cable/adapter.<br />
Storms are dangerous for all electric appliances. If the mains<br />
or aerial wiring is struck by the lightening, the appliance<br />
might get damaged, even if it is turned off. Thus you should<br />
disconnect all the cables and connectors of the appliance<br />
before the storm.<br />
To clean the screen of the appliance use only a damp and<br />
soft cloth. Use only clean water, never detergents or in no<br />
case dissol-vents.<br />
Warning:<br />
Never connect any external devices to a live appliance.<br />
Switch off not only the TV but also the devices which are<br />
being connected! Plug the appliance plug into the wall<br />
outlet after connecting the external devices and the aerial!<br />
The product construction responds the protection class 1.<br />
Only a properly installed wall outlet with a guard wire (230<br />
V~/50 Hz)of public mains can be used as power source.<br />
Always make sure there is free access to the appliance main<br />
switch and to its mains plug.<br />
The appliance is not designed for a use in a workplace fitted<br />
with monitors.<br />
The systematic use of headphones at high volume might<br />
lead to irreversible hearing damage.<br />
Ensure environmental disposal of this appliance and any<br />
components including batteries. When in doubt, please,<br />
contact your local authority for details of recycling.<br />
While installing the appliance, do not forget that furniture<br />
surfaces are treated with various varnishes, plastics, etc. or<br />
they might be polished. The additions contained in these<br />
products might cause destruction of base material of appliance<br />
stand. This will result in the holdovers of this material<br />
stuck to the furniture surface, which are difficult to remove,<br />
if not even impossible.<br />
The screen of your TV responds to the top quality requirements<br />
and it was checked in details for accidental faulty<br />
pixels several times. Due to the technological properties of<br />
the manufacturing process, it is not possible to eliminate the<br />
existence of a small number of faulty points on the screen<br />
for 100% (even with maximum care while production provided).<br />
These faulty pixels are not considered faults in terms of<br />
guarantee conditions, if their extent is not greater than the<br />
boundaries defined by DIN norm.<br />
4<br />
User Guide - Blaupunkt - <strong>42</strong>-<strong>63G</strong>-<strong>3B</strong>-<strong>F3TCU</strong>-<strong>UK</strong>.indd 4<br />
19-Jun-12 3:43:35 PM
Important safety instructions<br />
Important information regarding use of<br />
video games, computers, captions and<br />
other fixed image displays.<br />
The extended use of fixed image program material can<br />
cause a permanent “shadow image “ on LCD screen (this<br />
is sometimes incorrectly referred to as “burnout to the<br />
screen“ ). This shadow image is then permanently visible<br />
on the screen in the backro-und. It is a partly irreversible<br />
damage. You can avoid such a damage by respecting the<br />
following instructions:<br />
Reduce the brightness/contrast setting to a minimum<br />
viewing level.<br />
Do not display the fixed image for a long period of time.<br />
Avoid displaying of:<br />
» Teletext time and charts,<br />
» TV/DVD menu, e.g. DVD contents,<br />
» In the „Pause“ mode (hold): Do not use this mode for a<br />
long time, e.g. while watching a DVD or a video.<br />
» Turn off the appliance if you are not using it.<br />
Batteries<br />
Observe the correct polarity when inserting<br />
the batteries.<br />
Do not expose batteries to high temperatures<br />
and do not place them on locations<br />
where the temperature might increase<br />
quickly, e.g. near the fire or on the direct<br />
sunshine.<br />
Do not expose batteries to excessive<br />
radiant heat, do not throw them into the<br />
fire, do not disassemble them and do not try ato recharge<br />
unrechargeable batteries. They could leak out or explode.<br />
» Never use different batteries together or mix new and<br />
old ones.<br />
» Dispose of batteries in an environmentally friendly way.<br />
» Most of the EU countries regulate the disposal of batteries<br />
by law.<br />
Product disposal<br />
Waste electrical products should not<br />
be disposed of with household waste.<br />
Separate disposal facilities exist. Check<br />
with your Local Authority or retailer for<br />
recycling advice.<br />
Cd<br />
3D Safety Information<br />
If you watch the 3D imaging too closely or for a long period<br />
of time, it may harm your eyesight.<br />
Watching the TV or playing video games that incorporate<br />
3D imaging with the 3D glasses for a long period of time can<br />
cause drowsiness, headaches or fatigue to you and/or your<br />
eyes. If you have a headache, or otherwise feel fatigued or<br />
drowsy, stopwatching the TV and take a rest.<br />
Pregnant woman, seniors, persons with heart problems or<br />
persons who experience frequent drowsiness should refrain<br />
from watching 3D TV.<br />
Some 3D imaging may cause you to duck or dodge the<br />
image displayed in the video. Therefore, it is best if you do<br />
not watch 3D TV near fragile objects or near any objects that<br />
can be knocked over easily.<br />
Please prevent children under the age of 5 from watching<br />
3D TV as it may affect their vision development.<br />
Warning for photosensitization seizure:<br />
Some viewers may experience a seizure or epilepsy when<br />
exposed to certain factors, including flashing lights or images<br />
in TV or video games. If you or anybody from your family<br />
has a history of epilepsy or seizure, please consult with<br />
your doctor before watching 3D TV. Also certain symptoms<br />
can occur in unspecified conditions without any previous<br />
history. If you experience any of the following symptoms,<br />
immediately stop watching the 3D imaging and consult<br />
a doctor: dizziness or light headedness, visual transition<br />
or altered vision, visual or facial instability, such as eye or<br />
muscle twitching, unconscious action, convulsion, loss of<br />
conscience, confusion or disorientation, loss of directional<br />
sense, cramps, or nausea. Parents should monitor their<br />
children, including teenagers, for these symptoms as they<br />
may be more sensitive to the effects of watching 3D TV.<br />
Risk of photosensitization seizure can be<br />
reduced with the following actions.<br />
Take frequent breaks from watching 3D TV.<br />
For those who have vision that is different in each eye, they<br />
should watch the TV after taking vision correction measures.<br />
Watch the TV so that your eyes are on the same level as the<br />
3D screen and refrain from sitting too closely to the TV.<br />
Do not watch the 3D imaging when tired or sick, and avoid<br />
watching the 3D imaging for a long period of time.<br />
Do not wear the 3D glasses for any other purpose than viewing<br />
3D imaging on a 3D TV.<br />
Some viewers may feel disoriented after watching 3D TV.<br />
Therefore, after you watch 3D TV, take a moment to regain<br />
awareness of your situation before moving.<br />
English<br />
5<br />
User Guide - Blaupunkt - <strong>42</strong>-<strong>63G</strong>-<strong>3B</strong>-<strong>F3TCU</strong>-<strong>UK</strong>.indd 5<br />
19-Jun-12 3:43:37 PM
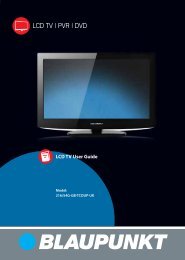
Contents<br />
Important safety instructions ..................................... 4-5<br />
What is included in the box ......................................... 7<br />
Attaching the stand ................................................ 8<br />
Detaching the stand ............................................... 8<br />
Wall mounting the TV .............................................. 8<br />
Getting started - initial set up ....................................... 9<br />
TV buttons & source menu ........................................ 10<br />
Remote control .................................................. 11<br />
Connections ..................................................... 12<br />
TV Menu Operation ............................................... 14<br />
Channel menu .................................................... 14<br />
Picture menu ..................................................... 14<br />
3D settings ....................................................... 15<br />
Sound menu ..................................................... 16<br />
Time menu ....................................................... 16<br />
Feature menu .................................................... 16<br />
Setup menu ...................................................... 17<br />
Using the television as a computer monitor ......................... 18<br />
PC settings ....................................................... 19<br />
7 day TV guide ................................................... 19<br />
USB mode / media player .......................................... 20<br />
Frequently asked questions........................................ 21<br />
Technical specification ............................................ 22<br />
Index ............................................................ 23<br />
6<br />
User Guide - Blaupunkt - <strong>42</strong>-<strong>63G</strong>-<strong>3B</strong>-<strong>F3TCU</strong>-<strong>UK</strong>.indd 6<br />
19-Jun-12 3:43:38 PM
Remote control<br />
buttons<br />
OK<br />
a<br />
b<br />
c<br />
d<br />
e<br />
f<br />
|<br />
STANDBY<br />
TV/RADIO TV GUIDE<br />
ATV USB DVD<br />
REC<br />
REC LIST<br />
SOURCE<br />
AV<br />
MENU<br />
1 2 3 4<br />
5 6 7 8<br />
9<br />
VOL<br />
GOTO<br />
D.DIS<br />
0<br />
OK<br />
SUBTITLE ASPECT<br />
AUDIO<br />
A-B<br />
ZOOM<br />
D.SETUP D.MENU<br />
TEXT<br />
INDEX<br />
PVR/ DVD<br />
SLEEP<br />
ANGLE<br />
SIZE<br />
TITLE<br />
R. VEAL<br />
MUTE<br />
EJECT<br />
INFO<br />
EXIT<br />
FAV<br />
CH<br />
REPEAT<br />
DISPLAY<br />
HOLD<br />
fig. B<br />
Power on/off<br />
1<br />
0<br />
Signal<br />
Booster<br />
fig. A<br />
What is included in the box<br />
Accessories<br />
Supply of this TV includes following parts:<br />
1x TV<br />
1x Stand and stand neck<br />
i<br />
1x Remote control<br />
1x RF cable<br />
2x AAA bateries<br />
1 x TV stand instalation packet<br />
English<br />
1x User guide<br />
WARRANTY<br />
CARD<br />
1x Warranty card<br />
1x Quick Start Guide<br />
4x 3D glasses<br />
Please save your packaging as you will need this in the event of warranty/service repair or support. We are unable to carry out<br />
warranty/service if you are unable to package it correctly. The safest way to package your item in the event of warranty/service<br />
repair is in it’s original box/packaging.<br />
7<br />
User Guide - Blaupunkt - <strong>42</strong>-<strong>63G</strong>-<strong>3B</strong>-<strong>F3TCU</strong>-<strong>UK</strong>.indd 7<br />
19-Jun-12 3:43:38 PM
Attaching / Detaching the Stand<br />
1<br />
2<br />
4 x B<br />
M (4x12)<br />
/(4x14)<br />
2 x A<br />
ST (4x16)<br />
/(4x14)<br />
B<br />
B B<br />
B A<br />
A<br />
6 x ST(4x16)<br />
/(4x14)<br />
/(4x12)<br />
3<br />
1 1/2<br />
4<br />
Attaching the stand<br />
For the assembly you will need a screwdriver. Place TV<br />
body on flat surface with the panel facing downwards<br />
to avoid damage<br />
Wall mounting the TV<br />
This television requires a VESA 400 wall mount,<br />
or equivalent.<br />
TV<br />
VESA Standard<br />
<strong>42</strong>“ TV 400 x 200<br />
1. Remove the four screws highlighted below.<br />
2. The wall mount can now be easily attached to the mounting<br />
holes on the rear of the TV. These<br />
holes are indicated in the picture<br />
below.<br />
For optimum viewing, if wall<br />
mounting the TV higher than<br />
eye level, the TV should be tilted<br />
downwards so that the TV’s<br />
screen is ‘face on’. See fig 1 and 2<br />
fig 1<br />
INCORRECT<br />
TV<br />
fig 2<br />
CORRECT<br />
TV<br />
Viewing angle<br />
Viewing angle<br />
Important - If you mount this television on the wall, use only the screws holes for wall mounting. Using other screws can cause<br />
irreparable damage to internal components.<br />
8<br />
User Guide - Blaupunkt - <strong>42</strong>-<strong>63G</strong>-<strong>3B</strong>-<strong>F3TCU</strong>-<strong>UK</strong>.indd 8<br />
19-Jun-12 3:44:19 PM
Getting started - initial set up<br />
1. Using the RF cable supplied, connect the TV to the TV Aerial<br />
wall socket (Fig A).<br />
2. Connect the power cable to the Electrical outlet (Fig B).<br />
3.<br />
6. You will now be welcomed with the initial set-up screen.<br />
If it does not appear, on the remote control, please press<br />
[MENU] then 8-8-8-8 and the menu will appear. Press OK on<br />
the remote control and tuning will start.<br />
fig. B<br />
fig. A<br />
4. Turn on the device with marked ON/OFF switch<br />
7. After tuning the following screen will appear.<br />
5. Insert the batteries supplied into the Remote control and<br />
press the Standby button to power on the TV.<br />
STANDBY<br />
MUTE<br />
TV/RADIO TV GUIDE<br />
ATV<br />
USB<br />
English<br />
How to connect a signal booster<br />
If you are missing channels, the reason for this is likely to be signal strength, you should consider connecting signal booster and<br />
re-tuning the TV.<br />
As part of our ongoing development to reduce power consumption, we have added an extra function to this Television called<br />
‘Ecohome’ (you will see this during the first time installation set up). Power consumption using the Ecohome function is<br />
approximately 15% lower than some other modes. The picture brightness is reduced using the Ecohome function. If this function is<br />
not suitable for your viewing environment, you can select other modes as necessary. (Please note, ‘Professional’ mode is for optimum<br />
default picture settings, however, power consumption is approximately 15% higher than ‘Ecohome’ mode)<br />
Please refer to the user guide section ‘Picture settings’ in order to change the mode to one that maybe more suitable for your<br />
environment. There is also a shortcut button on the remote control called ‘P-Mode’ should you wish to change to another mode.<br />
9<br />
User Guide - Blaupunkt - <strong>42</strong>-<strong>63G</strong>-<strong>3B</strong>-<strong>F3TCU</strong>-<strong>UK</strong>.indd 9<br />
19-Jun-12 3:44:26 PM
TV buttons & Source menu<br />
1 Volume up and menu right<br />
2 Volume down and menu left<br />
3 Programme/Channel up and menu up<br />
4 Programme/Channel down and menu down<br />
5 Displays Menu/OSD<br />
6 Displays the input source menu<br />
7 Standby Power On/Off<br />
1<br />
2<br />
3<br />
4<br />
5<br />
6<br />
STANDBY<br />
7<br />
Choosing Mode Input/Source<br />
To switch between the different input/connections.<br />
a) Using the buttons on the remote control:<br />
1. Press [SOURCE/ AV] - The source menu will appear.<br />
2. Press [▼] or [▲] to select the input you require.<br />
3. Press [OK].<br />
b) Using the buttons on the Television:<br />
1. Press [SOURCE].<br />
2. Scroll up / down using CH+/ CH- buttons to the input/<br />
source you require.<br />
3. Press Vol+ to change input/source to the one selected.<br />
DVD<br />
HDMI 1<br />
HDMI 2<br />
HDMI 3<br />
10<br />
User Guide - Blaupunkt - <strong>42</strong>-<strong>63G</strong>-<strong>3B</strong>-<strong>F3TCU</strong>-<strong>UK</strong>.indd 10<br />
19-Jun-12 3:44:28 PM
Remote control<br />
TV without DVD<br />
1. STANDBY - Switch on TV when in standby or vice versa<br />
MUTE - Mute the sound or vice versa<br />
TV/RADIO - Switch to Freeview and switch between TV and radio in<br />
Freeview mode<br />
TV GUIDE - Opens the 7 Day TV Guide (Freeview mode)<br />
ATV - Switch to analogue TV source<br />
USB - Switch to USB Source<br />
2. S.MODE - Scrolls through sound mode options<br />
P.MODE - Scrolls through picture mode options<br />
- To restart the current chapter<br />
- To advance forward to the next chapter<br />
- To stop the playback<br />
- To play in fast rewind mode<br />
- To play in fast forward mode<br />
- To play/pause<br />
3. SOURCE/AV – To display the input/source menu.<br />
INFO – Press once for now/next channel information. Press twice for<br />
programme information about current programme.<br />
(▲/▼/◄/►/ OK ) – Allows you to navigate the on-screen menus<br />
and adjust the system settings to your preference.<br />
MENU – To display OSD menu.<br />
EXIT – To exit all menus.<br />
NUMBER BUTTONS – 0 – 9 to select a TV channel directly.<br />
– To return to the previous channel viewed.<br />
FAV – To display favourites menu.<br />
4. VOL ▲/▼ – To increase / decrease the sound level.<br />
SUBTITLE – To switch the dialogue at the bottom of the screen (on/<br />
off).<br />
ASPECT – To switch the screen between the different picture<br />
formats.<br />
AUDIO – To change the audio language (if available).<br />
SLEEP – Press repeatedly to cycle through the sleep options.<br />
CH ▲/▼ – To increase or decrease the channel being watched.<br />
5. TEXT – To enter Teletext.<br />
INDEX – To display the index page.<br />
REVEAL – To reveal or hide the hidden words.<br />
DISPLAY – To switch off the screen when listening to radio.<br />
P.Mode – Navigate between the different picture settings.<br />
SIZE – To change the display size in Teletext mode.<br />
HOLD – Hold current page which is displayed.<br />
3D- Switches between 3D type settings (view page 15)<br />
1<br />
2<br />
3<br />
4<br />
English<br />
5<br />
11<br />
User Guide - Blaupunkt - <strong>42</strong>-<strong>63G</strong>-<strong>3B</strong>-<strong>F3TCU</strong>-<strong>UK</strong>.indd 11<br />
19-Jun-12 3:44:43 PM
W<br />
Connections<br />
Connections<br />
1 USB Port USB 7 COAX Audio Out Digital Coax output<br />
2 x 3 HDMI in HDMI input 8 Video (CVBS) Video input<br />
3 VGA(PC) VGA-PC input 9 Audio L/R<br />
Audio L/R input for component<br />
Composite/CVBS<br />
4 VGA (PC) Audio In 3.5mm PC audio input 10 Component Component input<br />
5 CI Card IN Common Interface Module Input 11 RF In RF / TV Aerial Input<br />
6 SCART SCART input 12 HEADPHONES 3.5mm Headphone output<br />
10<br />
5<br />
G<br />
B<br />
R<br />
CI CARD IN<br />
COMPONENT (HD)<br />
USB<br />
HDMI<br />
HDMI<br />
HDMI<br />
VGA (PC)<br />
VGA (PC)<br />
Audio in<br />
SCART<br />
COAX<br />
Audio Out<br />
Video AV(CVBS)<br />
R L<br />
RF IN<br />
HEADPHONES<br />
Y<br />
R<br />
2<br />
1 3 4<br />
6<br />
7 8 9<br />
11 12<br />
12<br />
User Guide - Blaupunkt - <strong>42</strong>-<strong>63G</strong>-<strong>3B</strong>-<strong>F3TCU</strong>-<strong>UK</strong>.indd 12<br />
19-Jun-12 3:44:43 PM
Connecting a DVD Player/Recorder, Video Recorder or Cable/Satellite Box<br />
TVs Input/Source should be set to SCART.<br />
Connections<br />
SCART<br />
IN<br />
RF OUT<br />
SCART<br />
OUT<br />
RF IN<br />
RF IN<br />
Connecting a Camcorder, Camera or Games Console<br />
TVs Input / Source should be set to Video.<br />
Audio<br />
R / L<br />
Video<br />
(CVBS)<br />
Connecting a High Definition (HD) Device<br />
Option 1 - via HDMI to HDMI cable<br />
A HDMI cable can output both video and audio and enables you to enjoy digital-quality video and audio with minimal loss of<br />
quality.<br />
TVs Input/Source should be set to HDMI.<br />
English<br />
Option 2 - via Component cable.<br />
If you are supplied with a cable from the device which has RED, GREEN, BLUE, RED & WHITE connectors you must use included<br />
YPbPr to MINI YPbPr cable adaptor to connect via Component (for picture) and by phono cable (for sound).<br />
TVs Input / Source should be set to Component.<br />
MINI YPbPr<br />
Y<br />
PB<br />
PR<br />
L<br />
R<br />
L<br />
R<br />
13<br />
User Guide - Blaupunkt - <strong>42</strong>-<strong>63G</strong>-<strong>3B</strong>-<strong>F3TCU</strong>-<strong>UK</strong>.indd 13<br />
19-Jun-12 3:44:45 PM
TV Menu operation<br />
TV Menu Operation | Channel menu | Picture menu | 3D Settings<br />
TV Menu Operation<br />
Picture menu<br />
AV<br />
To access this menu, press [MENU] button on the remote<br />
control. To enter a menu press [OK]<br />
If you wish to make changes to any of the default settings, use<br />
the scroll (▲/▼/◄/►) buttons. To confirm any settings press<br />
[OK] button.<br />
To exit this menu at anytime, press [EXIT] button.<br />
Channel menu<br />
Picture Mode - Choose from the following presets.<br />
Standard Default settings<br />
Dynamic Recommended settings for fast moving pictures<br />
Mild Set to be lighter in colour and less bright<br />
Personal Lets you manually alter all the settings<br />
Ecohome Power saving mode<br />
Contrast - Switch the balance between black and white.<br />
Brightness - Increase or decrease the brightness of the picture.<br />
Colour - Increases the colour from black and white.<br />
Tint - Lets you increase or decrease the level of tint within the<br />
picture.<br />
Sharpness - Increase or decrease the sharpness of the picture.<br />
Colour Temperature - Choose from the following presets.<br />
Auto Tuning - Allows you to retune the television for all digital<br />
channels, digital radio stations and analogue channels.<br />
Digital Manual Tuning- Allows you to manually tune your<br />
digital signal.<br />
Analogue Manual Tuning - Allows you to manually tune your<br />
analogue signal.<br />
Programme Edit - Allows you to delete, skip and add favourite<br />
channels.<br />
Normal Default settings<br />
Warm Increases red within the picture<br />
Cool Increases blue within the picture<br />
Noise Reduction - Choose from the following presets.<br />
Off<br />
Turns noise reduction off<br />
Low Minor system adjustment<br />
Middle Medium system adjustments<br />
High Maximum system adjustments<br />
Default Default settings<br />
Tip: If you do not press<br />
any buttons for 10<br />
seconds, the menu will<br />
automatically exit. You<br />
can change the length<br />
of time before the menu<br />
exits automatically - see<br />
‘Menu Duration’ section.<br />
14<br />
User Guide - Blaupunkt - <strong>42</strong>-<strong>63G</strong>-<strong>3B</strong>-<strong>F3TCU</strong>-<strong>UK</strong>.indd 14<br />
19-Jun-12 3:44:48 PM
TV Menu operation<br />
TV Menu Operation | Channel menu | Picture menu | 3D Settings<br />
3D settings<br />
For the best 3D picture effect, watch your TV from vertical angle +/- 10°.<br />
3D Type- When connecting a 3D product sometimes the picture maybe displayed incorrectly; choose from the following settings to<br />
correct this. You can toggle these settings by pressing the '3D' button on your remote (see page 11).<br />
3D off<br />
Side by Side<br />
Turns 3D off<br />
3D format is commonly used in 3D broadcasting, works by halving the horizontal resolution of videos to<br />
store left and right eye images in each frame. It effectively displays up to 960 x 1,080-pixel pictures to each<br />
eye, enabling TV stations to telecast 3D content at a much lower bandwidth compared with 3D Blu-ray discs.<br />
Typical supported resolutions are limited to 720p and 1080i for 3D TV programs.<br />
Users will need to manually select the correct 3D format to properly display side-by-side<br />
3D content on a 3D TV.<br />
Top Bottom 3D format is alternative for 3D broadcast, which is pretty similar to side-by-side 3D except that it halves the<br />
vertical resolution instead. Available primarily up to 720p resolution, top-and-bottom 3D offers 1,280 pixels<br />
horizontally. The higher pixel count is generally considered more suitable for displaying panning motion in<br />
sports programs.<br />
Frame Packing<br />
Line by Line<br />
As its name suggests, this format stacks the left and right eye images in each frame to retain the content's<br />
original resolution for the best 3D pictures. Most, if not all, 1080p 3D Blu-ray movie discs and 720p PS3 3D<br />
games are produced utilizing this technique. Another key differentiator is that all 3D TVs should be able to<br />
automatically detect frame-packing 3D signals and correctly display the content without user intervention.<br />
The picture signals for left and right eyes are interleaved in alternate lines. The left clip’s resolution is halved<br />
then placed in the odd lines of the video stream. Correspondingly, the right clip’s resolution is halved then<br />
placed in the even lines of the video stream. When combined the video stream totals 1920×1080.<br />
Exchange 3D L/R- change picture sequence for different viewing<br />
2D to 3D- Changes the picture from regular 2 dimensions to 3 (3D). Please note as content is being changed by the TV the effects are limited<br />
English<br />
15<br />
User Guide - Blaupunkt - <strong>42</strong>-<strong>63G</strong>-<strong>3B</strong>-<strong>F3TCU</strong>-<strong>UK</strong>.indd 15<br />
19-Jun-12 3:44:49 PM
TV Menu operation<br />
Sound menu | Time menu | Feature menu<br />
Sound menu<br />
Time menu<br />
Sound Mode - Choose from the following presets:<br />
Standard<br />
Music<br />
Movie<br />
Personal<br />
Sports<br />
Default settings<br />
Emphasises music over voices<br />
Provides live and full sound for movies<br />
Selects your personal sound settings<br />
Emphasises sound for sports<br />
Tip: Treble and bass levels can only be adjusted when the<br />
sound mode ‘Personal’ is selected.<br />
Treble - To adjust the amount of high frequency within the<br />
sound.<br />
Bass - To adjust the amount of low frequency within the sound.<br />
Balance - To switch the sound between the left and right<br />
speakers.<br />
Auto Volume Level (AVL) - When ‘on’ is selected, the volume<br />
will stay at a constant level regardless of input/source.<br />
Digital Output - This is the digital COAX Audio output. Choose<br />
from the following options:<br />
Clock - Set the date and time.<br />
Off Time - Allows you to set a specific time for your TV to turn<br />
off.<br />
On Time - Allows you to set a specific time for your TV to turn<br />
on, the channel it will then display, the source it will be on and<br />
also the volume. This function can then be toggled to repeat<br />
every day or a certain day.<br />
Time Zone - Change your current time zone.<br />
Sleep Timer - Lets you set the sleep timer so the television<br />
automatically switches off after a set amount of time. Off -><br />
10min -> 20min -> 30min -> 60min -> 90min -> 120min -><br />
180min -> 240min.<br />
Auto standby - Toggle the Function on and off.<br />
Feature menu<br />
Off<br />
Auto<br />
PCM<br />
Off<br />
Selects the best settings automatically<br />
Select this option if you are connecting to<br />
a Stereo Hi-fi via coax cable (Pulse-code<br />
modulation (PCM) is a digital representation of<br />
an analogue signal)<br />
AD Volume - Increase or decrease the overall volume.<br />
Schedule List - Lists your programme reminders.<br />
PVR File System - Checks the file system of the connected USB<br />
device and displays the information about the check results.<br />
CI Information - Pay per view services require a “smartcard”<br />
to be inserted into the TV. If you subscribe to a pay per<br />
view service the provider will issue you with a ‘CAM’ and a<br />
“smartcard”. The CAM can then be inserted into the COMMON<br />
INTERFACE PORT (CI Card In).<br />
16<br />
User Guide - Blaupunkt - <strong>42</strong>-<strong>63G</strong>-<strong>3B</strong>-<strong>F3TCU</strong>-<strong>UK</strong>.indd 16<br />
19-Jun-12 3:44:49 PM
TV Menu operation<br />
Setup menu<br />
System Lock - Allows you to lock or unlock the menu. You<br />
will be asked to enter a 4 digit password use the ◄ button<br />
to quit the password input. Use the ► button to clear.<br />
Default password is 0000.<br />
Hearing Impaired - If signal provides support for the<br />
hearing impaired, the subtitles can be displayed by pressing<br />
the “Subtitle”. If you set a Hearing Impaired on and switch to<br />
a channel with support for hearing impaired subtitles will<br />
be activated automatically.<br />
TT Language - Encoding settings for the proper display of<br />
teletext characters.<br />
Setup menu<br />
16:9 - Fills the screen with a regular 16:9 signal and 4:3<br />
picture will be stretched to fill the screen<br />
14:9 - Displays the 14:9 picture in the correct proportion. As<br />
a result side bars are shown on the screen.<br />
Menu language - Allows you to change the language of<br />
the menu.<br />
Aspect Ratio - Within the EU the picture format varies<br />
depending on the channel/broadcast. There are a number<br />
of different options to best meet your needs.<br />
Auto - Automatically displays the best picture format. So<br />
the picture is in the correct position. May have black lines at<br />
the top/bottom and/or sides.<br />
Original - Will display the picture from the broadcaster<br />
without any change.<br />
Zoom - The picture is the correct proportion but zoomed in<br />
to fill the screen.<br />
Blue Screen - Changes the background when there is no<br />
input between clear and a blue background (Only available<br />
on some sources).<br />
Menu Duration - Lets you adjust the amount of time the<br />
On Screen Menu stays on the screen before disappearing.<br />
Reset to default<br />
Reset Menu System - This resets the menus to factory<br />
settings.<br />
Reset TV Channels - This clears all the TV channels from the<br />
television.<br />
English<br />
4:3 - Displays the 4:3 picture in its original size. Side bars are<br />
shown to fill the 16:9 screen.<br />
Software Update (USB) - From time to time we may release<br />
new firmware to improve the operation of the television<br />
(available to download). This menu lets you install the new<br />
software/firmware onto the television. Further details of<br />
how to do this will be issued with the firmware. Contact<br />
the helpline or refer to the ‘product support’ section of the<br />
website.<br />
* after proper software update, remove USB device from TV<br />
and delete software sfrom USB device.<br />
17<br />
User Guide - Blaupunkt - <strong>42</strong>-<strong>63G</strong>-<strong>3B</strong>-<strong>F3TCU</strong>-<strong>UK</strong>.indd 17<br />
19-Jun-12 3:44:50 PM
Using the television as a computer monitor<br />
IMPORTANT – Before connecting the computer to the television you must ensure the computer settings are correct for the<br />
television. You MUST do this using your old monitor.<br />
How to set up for Windows XP, Windows Vista & Windows 7 (connecting via VGA cable to the TV).<br />
1. Switch on your computer.<br />
2. When finished booting up right click your<br />
mouse anywhere on the screen.<br />
3. Left click your mouse on Properties/<br />
Personalise.<br />
4. Left click your mouse on Setting/Display<br />
Settings. Ensure the screen resolution<br />
is set to what is shown in the technical<br />
specifications section toward the rear of this<br />
user guide. To correct the resolution to that<br />
of the television move the slider.<br />
5. Left click your mouse on Advance/Advanced<br />
Settings and left click on Monitor.<br />
6. Left click on the drop down for Screen<br />
refresh rate and select 60 Hertz, if you<br />
experience picture noise or ‘flickering’, select<br />
50 hertz or 70 hertz.<br />
7. Click on Apply, then click Yes and the<br />
settings will be saved.<br />
8. Now switch off your computer and connect<br />
the television (as shown).<br />
9. Switch on the TV, select the input/source to<br />
VGA/PC and re-start your PC.<br />
Windows XP Windows Vista Windows 7<br />
Connecting a Laptop<br />
In addition to the above if you are connecting<br />
a laptop to the television you will also need<br />
to activate the VGA connection on the laptop.<br />
This can vary based on the brand of laptop<br />
you have, on many brands/models, it is as per<br />
below.<br />
1. Connect the laptop to the television.<br />
2. On the Laptop push buttons The screen will<br />
now switch to the television.<br />
VGA<br />
IN<br />
VGA<br />
OUT<br />
AUDIO<br />
IN<br />
AUDIO<br />
OUT<br />
18<br />
User Guide - Blaupunkt - <strong>42</strong>-<strong>63G</strong>-<strong>3B</strong>-<strong>F3TCU</strong>-<strong>UK</strong>.indd 18<br />
19-Jun-12 3:44:52 PM
TV Menu operation<br />
PC Settings | 7 Day TV Guide<br />
PC Settings<br />
Auto Adjust - Lets you automatically configure the television<br />
to be used as a computer monitor.<br />
H Offset - Changes the horizontal position of the picture.<br />
V Offset - Changes the vertical position of the picture.<br />
Size - increase picture size.<br />
Tip: If the computer is left in-active for a period of time,<br />
Phase the television - To adjust will delay switch time into of a phase ‘sleep’ in state order (the to reduce screen the<br />
noise will power of picture off to save power). To switch back on press the<br />
Position standby Reset button. - Changes back to the original settings<br />
7 Day TV Guide<br />
English<br />
TV Guide is available in Digital TV mode. It provides<br />
information about forthcoming programmes (where supported<br />
by the Digital channel). You can view the start and end time of<br />
all programmes and on all channels for the next 7 days and set<br />
reminders.<br />
19<br />
User Guide - Blaupunkt - <strong>42</strong>-<strong>63G</strong>-<strong>3B</strong>-<strong>F3TCU</strong>-<strong>UK</strong>.indd 19<br />
19-Jun-12 3:45:03 PM
TV Menu operation<br />
USB mode / <strong>Media</strong> player<br />
USB mode / <strong>Media</strong> player<br />
USB mode offers playback of various different types of content<br />
that you have saved on your USB Memory Stick.<br />
Please refer to technical specification page for compatible file<br />
types<br />
On switching to USB source the menu screen (right) will<br />
appear. The content will be divided into Photo, Music, Movie<br />
and Text based on file type.<br />
1. You can navigate through the menus using the scroll<br />
▲/▼/◄/►buttons. To confirm the item you wish to play/<br />
view press [OK] button.<br />
2. Select the drive you require. (If your drive only has 1<br />
partition you will only see 1 item).<br />
3. You can now access the item. Press OK to view.<br />
4. While viewing you control the item using or by<br />
pressing ( i ) and using ▲/▼/◄/► and (OK)<br />
20<br />
User Guide - Blaupunkt - <strong>42</strong>-<strong>63G</strong>-<strong>3B</strong>-<strong>F3TCU</strong>-<strong>UK</strong>.indd 20<br />
19-Jun-12 3:45:03 PM
Frequently asked questions<br />
General<br />
I would like to have louder<br />
sound by connecting<br />
additional speakers.<br />
There are 2 options:<br />
1) Use Digital COAX output connected to an external amplifier/surround sound<br />
system.<br />
2) Use the 3.5mm headphone output and a 3.5mm to phono cable (available<br />
separately) to connect to an amplifier/surround sound system.<br />
General<br />
Why are some options in<br />
the menu unavailable and<br />
greyed out.<br />
Some options are only available in certain sources, i.e. HDMI, PC/VGA. They are<br />
unavailable in the other sources where they have no affect.<br />
TV<br />
I have tuned in Digital TV<br />
but I am not receiving any<br />
or all of the channels and/<br />
or the channels I receive are<br />
breaking up.<br />
1) Check you are in an area that can receive Digital TV .<br />
2) Check you are using an aerial that is able to receive a good digital signal. In most<br />
cases, you will need an outdoor digital hi-gain/wideband aerial. In areas that have<br />
excellent digital coverage, you may be able to use a loft type aerial but it is highly<br />
likely that you will also need to connect a booster between the back of the TV and the<br />
TV aerial wall socket. Unfortunately, to receive a good enough digital signal, it is not<br />
possible to use a portable/indoor type aerial.<br />
TV<br />
I have re-tuned my television<br />
but when I switch it off it is<br />
not storing the channels.<br />
Complete a first time installation, please refer to the set-up menu section of the<br />
manual of how to do this.<br />
VCR/DVD<br />
Recorder<br />
I have connected the TV to<br />
my VCR or DVD Recorder via<br />
SCART but it is not recording.<br />
I have connected my PS3 to<br />
the TV via HDMI, but I am<br />
not receiving any pictures or<br />
sound on my Television.<br />
In addition to connecting via SCART, you should connect the aerial cable from the<br />
wall socket to your VCR/DVD Recorder and another aerial cable from the VCR/DVD<br />
Recorder to the TV.<br />
Game Consoles<br />
1) Ensure the TVs source is on HDMI.<br />
2) Check your settings on your PS3 are as per the PS3 instruction manual.<br />
Game Consoles<br />
I have connected my Xbox<br />
360 to the TV via Component<br />
Cables (Red, Green & Blue)<br />
but I am not receiving any<br />
sound.<br />
Component cables only provide HD Pictures. For the sound you will need to connect<br />
the Red & White audio cables on the Xbox to the Red & White phono inputs on the<br />
rear of the TV. Please refer to the ‘Connections’ pages.<br />
USB Mode<br />
I have inserted a USB Memory<br />
Key, but the TV does not<br />
recognise it.<br />
Ensure the USB Memory Key is formatted to type FAT32.<br />
English<br />
USB Mode<br />
Using a USB portable hard<br />
drive.<br />
If you wish to use a portable hard drive larger than 32<strong>GB</strong>, please note that it must<br />
be formatted to the FAT32 file system in order to operate on this TV. Windows XP/<br />
Vista computers are only capable of formatting up to 32<strong>GB</strong>, therefore, you will need a<br />
software programme/utility to format larger hard drives. Please refer to the web site<br />
for more information.<br />
System Lock<br />
I have changed the password<br />
on the television and now<br />
forgotten it.<br />
There is a master password of 4711, to gain access to the TV menu and reset the<br />
normal password.<br />
3D mode<br />
The picture is not displaying<br />
correctly<br />
Press the 3D button to toggle through the different 3D picture formats.<br />
3D mode<br />
I have downloaded a 3D<br />
movie but it will not play<br />
via USB<br />
3D mode is not supported via USB.<br />
21<br />
User Guide - Blaupunkt - <strong>42</strong>-<strong>63G</strong>-<strong>3B</strong>-<strong>F3TCU</strong>-<strong>UK</strong>.indd 21<br />
19-Jun-12 3:45:05 PM
Technical specification<br />
Model<br />
<strong>42</strong>/<strong>63G</strong>-<strong>GB</strong>-<strong>3B</strong>-<strong>F3TCU</strong>-<strong>UK</strong><br />
Screen size (diagonal)<br />
<strong>42</strong>"/107cm<br />
Resolution 1920 x 1080<br />
Contrast Ratio 1000:1<br />
Brightness cd/m2 380<br />
PC R<strong>GB</strong><br />
YES<br />
RF<br />
75 ohm- aerial/PAL-SECAM<br />
Video Inputs<br />
3 x HDMI, 1 x VGA/PC, 1 x SCART,<br />
1 x USB, 1 x Composite/Video, 1 x Component (YPbPr)<br />
Sound Inputs<br />
1 x shared audio for Composite/Video and YPbPR,<br />
1 x 3.5mm jack for PC audio input<br />
Sound Outputs<br />
1 x COAX – audio output, 1 × output for headphones<br />
USB Port 1<br />
Sound power, watts 2 x 9<br />
Voltage and power<br />
consumption<br />
110-240 V 50/60 Hz 85/180W (ecomode/max) - in standby mode less than 0.5 W<br />
Dimensions including stand<br />
(mm)<br />
1016W x 697H x 287D<br />
Net weight (Kgs) 18.6<br />
22<br />
User Guide - Blaupunkt - <strong>42</strong>-<strong>63G</strong>-<strong>3B</strong>-<strong>F3TCU</strong>-<strong>UK</strong>.indd 22<br />
19-Jun-12 3:45:05 PM
Index<br />
3D settings ..............................................15<br />
7 Day TV Guide ..........................................19<br />
Attaching the Stand....................................... 8<br />
Connections ........................................ 12-13<br />
Detaching the Stand .....................................13<br />
Feature menu ...........................................16<br />
Frequently asked questions...............................21<br />
Getting started - initial set up .............................. 9<br />
Channel menu ...........................................14<br />
Important safety instructions ............................4-5<br />
Index ...................................................23<br />
PC Settings ..............................................19<br />
Picture menu ............................................14<br />
Remote control ..................................... 11-12<br />
Setup menu .............................................17<br />
Sound menu ............................................16<br />
Technical specification ...................................22<br />
Time menu ..............................................16<br />
TV buttons & Source menu ...............................10<br />
TV Menu Operation .................................. 15-21<br />
USB mode / <strong>Media</strong> player .................................20<br />
Using the television as a computer monitor ................18<br />
Wall mounting the TV ..................................... 8<br />
What is included in the box ................................ 9<br />
English<br />
23<br />
User Guide - Blaupunkt - <strong>42</strong>-<strong>63G</strong>-<strong>3B</strong>-<strong>F3TCU</strong>-<strong>UK</strong>.indd 23<br />
19-Jun-12 3:45:05 PM
24<br />
User Guide - Blaupunkt - <strong>42</strong>-<strong>63G</strong>-<strong>3B</strong>-<strong>F3TCU</strong>-<strong>UK</strong>.indd 24<br />
19-Jun-12 3:45:05 PM
English<br />
25<br />
User Guide - Blaupunkt - <strong>42</strong>-<strong>63G</strong>-<strong>3B</strong>-<strong>F3TCU</strong>-<strong>UK</strong>.indd 25<br />
19-Jun-12 3:45:05 PM
|<br />
Universal <strong>Media</strong> Corporation /Slovakia/ s.r.o.<br />
Mickiewiczova 7104/14,<br />
811 07 Bratislava 1, Slovakia<br />
Assembled in Europe<br />
BLA/MAN/0045<br />
User Guide - Blaupunkt - <strong>42</strong>-<strong>63G</strong>-<strong>3B</strong>-<strong>F3TCU</strong>-<strong>UK</strong>.indd 26<br />
19-Jun-12 3:45:05 PM