216/54g-gb-tcdup-uk - Sky Media UK LTD
216/54g-gb-tcdup-uk - Sky Media UK LTD
216/54g-gb-tcdup-uk - Sky Media UK LTD

Create successful ePaper yourself
Turn your PDF publications into a flip-book with our unique Google optimized e-Paper software.
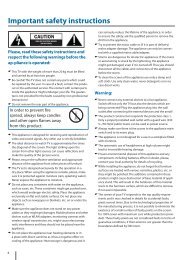
Important safety instructionsCAUTIONRISK OF ELECTRIC SHOCKDO NOT OPENPlease, read these safety instructions andrespect the following warnings before theap-pliance is operated: This TV with the weight of more than 20 kg must be liftedand carried by at least two people. Be careful! This TV does not contain any parts which couldbe repaired by the user. In case of a fault, contact the produceror the authorized service. The contact with certain partsinside the appliance might endanger your life. The guaranteeis not provided for the faults caused by non-professionalinteractions! Do not remove the rear part of the appliance.In order to prevent firespread, always keep candlesand other open flames awayfrom this product. This appliance is designed for receiving and reproduction ofvideo and sound signals. Any other use is strictly forbidden. The ideal distance to watch TV is approximately five timesthe diagonal of the screen. The light striking upon thescreen from other light sources can cause reflections andmake the quality of the picture worse. Please, ensure the sufficient ventilation and appropriatedistance of the appliance from other pieces of furniture. The TV set is designed exclusively for the operation in adry place. When using the appliance outside, please, makesure it is protected against moisture (rain, splashing water).Never expose the appliance to moisture. Do not place any containers with water on the appliance,such as vases, etc. These containers might get pushed over,which would endanger electric safety. Place the applianceexclusively on flat and stable surfaces. Do not place anyobjects such as newspaper or blankets, etc. on or under theappliance. Make sure the appliance does not stand on any powercables as they might get damaget. Mobile phones and otherdevices such as WLAN adapters, monitoring cameras withwireless signal transmission, etc. might cause electromagneticinterference and they should not be placed near theappliance. Do not place the appliance near heating elements or ina place with direct sunshine as it has a negative effect oncooling of the appliance. Heat storage is dangerous and itcan seriously reduce the lifetime of the appliance. In orderto ensure the safety, ask the qualified person to remove thedirt from the appliance. Try to prevent the mains cable or (if it is part of delivery)mains adapter damage. The appliance can only be connectedwith a supplied mains cable/adapter. Storms are dangerous for all electric appliances. If the mainsor aerial wiring is struck by the lightening, the appliancemight get damaged, even if it is turned off. Thus you shoulddisconnect all the cables and connectors of the appliancebefore the storm. To clean the screen of the appliance use only a damp andsoft cloth. Use only clean water, never detergents or in nocase dissol-vents.Warning: Never connect any external devices to a live appliance.Switch off not only the TV but also the devices which arebeing connected! Plug the appliance plug into the walloutlet after connecting the external devices and the aerial! The product construction responds the protection class 1.Only a properly installed wall outlet with a guard wire (230V~/50 Hz)of public mains can be used as power source. Always make sure there is free access to the appliance mainswitch and to its mains plug. The appliance is not designed for a use in a workplace fittedwith monitors. The systematic use of headphones at high volume mightlead to irreversible hearing damage. Ensure environmental disposal of this appliance and anycomponents including batteries. When in doubt, please,contact your local authority for details of recycling. While installing the appliance, do not forget that furnituresurfaces are treated with various varnishes, plastics, etc. orthey might be polished. The additions contained in theseproducts might cause destruction of base material of appliancestand. This will result in the holdovers of this materialstuck to the furniture surface, which are difficult to remove,if not even impossible. The screen of your TV responds to the top quality requirementsand it was checked in details for accidental faultypixels several times. Due to the technological properties ofthe manufacturing process, it is not possible to eliminate theexistence of a small number of faulty points on the screenfor 100% (even with maximum care while production provided).These faulty pixels are not considered faults in terms ofguarantee conditions, if their extent is not greater than theboundaries defined by DIN norm.4
Important safety instructionsImportant information regarding use ofvideo games, computers, captions andother fixed image displays. The extended use of fixed image program material cancause a permanent “shadow image “ on LCD screen (thisis sometimes incorrectly referred to as “burnout to thescreen“ ). This shadow image is then permanently visibleon the screen in the backro-und. It is a partly irreversibledamage. You can avoid such a damage by respecting thefollowing instructions: Reduce the brightness/contrast setting to a minimumviewing level. Do not display the fixed image for a long period of time.Avoid displaying of:» Teletext time and charts,» TV/DVD menu, e.g. DVD contents,» In the „Pause“ mode (hold): Do not use this mode for along time, e.g. while watching a DVD or a video.» Turn off the appliance if you are not using it.Batteries Observe the correct polarity when insertingthe batteries. Do not expose batteries to high temperaturesand do not place them on locationswhere the temperature might increasequickly, e.g. near the fire or on the directsunshine. Do not expose batteries to excessiveradiant heat, do not throw them into thefire, do not disassemble them and do not try ato rechargeunrechargeable batteries. They could leak out or explode.» Never use different batteries together or mix new andold ones.» Dispose of batteries in an environmentally friendly way.» Most of the EU countries regulate the disposal of batteriesby law.Product disposal Waste electrical products should notbe disposed of with household waste.Separate disposal facilities exist. Checkwith your Local Authority or retailer forrecycling advice.CdEnglish5
STANDBYTV/RADIO TV GUIDEATV USB DVDRECREC LISTSOURCEAVMENU1 2 3 45 6 7 89VOLGOTOD.DIS0OKSUBTITLE ASPECTA-BD.SETUP D.MENUTEXTAUDIOZOOMINDEXPVR/ DVDSLEEPANGLESIZETITLER. VEALMUTEEJECTINFOEXITFAVCHREPEATDISPLAYHOLDi
Getting started - initial set up1. Using the RF cable supplied, connect the TV to the TV Aerialwall socket (Fig A).4. You will now be welcomed with the initial set-up screen.If it does not appear, on the remote control, please press[MENU] then 8-8-8-8 and the menu will appear. Press OK onthe remote control and tuning will start.fig. A2. Turn on the device with marked ON/OFF switch5. After tuning the following screen will appear.3. Insert the batteries supplied into the Remote control andpress the Standby button to power on the TV.STANDBYMUTETV/RADIO TV GUIDEATVUSBEnglishHow to connect a signal boosterIf you are missing channels, the reason for this is likely to be signal strength, you should consider connecting signal booster andre-tuning the TV.As part of our ongoing development to reduce power consumption, we have added an extra function to this Television called‘Ecohome’ (you will see this during the first time installation set up). Power consumption using the Ecohome function isapproximately 15% lower than some other modes. The picture brightness is reduced using the Ecohome function. If this function isnot suitable for your viewing environment, you can select other modes as necessary. (Please note, ‘Professional’ mode is for optimumdefault picture settings, however, power consumption is approximately 15% higher than ‘Ecohome’ mode)Please refer to the user guide section ‘Picture settings’ in order to change the mode to one that maybe more suitable for yourenvironment. There is also a shortcut button on the remote control called ‘P-Mode’ should you wish to change to another mode.9
TV buttons & Source menuTV with DVD1 Eject2 Play / Pause3 Volume up and menu right4 Volume down and menu left5 Programme/Channel up and menu up6 Programme/Channel down and menu down7 Displays Menu/OSD8 Displays the input source menu9 Standby Power On/Off12345678STANDBY9Choosing Mode Input/SourceTo switch between the different input/connections.a) Using the buttons on the remote control:1. Press [SOURCE/ AV] - The source menu will appear.2. Press [] or [] to select the input you require.3. Press [OK].b) Using the buttons on the Television:1. Press [SOURCE].2. Scroll up / down using CH+/ CH- buttons to the input/source you require.3. Press Vol+ to change input/source to the one selected.10
11English
Remote controlTV with DVD1. STANDBY – Switch on TV when in standby or vice versa.MUTE – Mute the sound or vice versa.TV/RADIO – Switch to Digital and switch between TV and radio inDigital mode.TV GUIDE – Opens the 7 Day TV Guide (Digital mode).ATV – Switch to analogue TV source.USB – Switch to USB source.2. REC – To record what is currently on television.REC LIST – Opens the list of what you have previously recorded.– To restart the current chapter *.– To advance forward to the next chapter*.– To stop the playback*.– To play in fast rewind mode*.– To play in fast forward mode*.– To play/pause* - Pause live TV when USB Memory Stick is inserted).3. SOURCE/AV – To display the input/source menu.INFO – Press once for now/next channel information. Press twice forprogramme information about current programme.(//// OK ) – Allows you to navigate the on-screen menusand adjust the system settings to your preference.MENU – To display OSD menu.EXIT – To exit all menus.NUMBER BUTTONS – 0 – 9 to select a TV channel directly.– To return to the previous channel viewed.FAV – To display favourites menu.4. VOL / – To increase / decrease the sound level.SUBTITLE – To switch the dialogue at the bottom of the screen (on/off).ASPECT – To switch the screen between the different pictureformats.AUDIO – To change the audio language (if available).SLEEP – Press repeatedly to cycle through the sleep options.CH / – To increase or decrease the channel being watched.5. GOTO – DVD mode - To go to a specifi c chapterA-B – DVD mode - Press once to set point, press a second time toreturn to pointANGLE – DVD mode - Select different angle of DVD (if available)REPEAT – DVD mode - To repeat playbackD.DIS – DVD mode - To display the current disc informationZOOM – DVD mode - To zoom inSIZE – Teletext mode - To change the display size in TeletextmodeDISPLAY – To switch off the screen when listening to radioDVD SETUP/TEXT – DVD mode - To display the DVD setup menuTeletext mode - To enter TeletextD.MENU/INDEX – DVD mode - To display the DVD disc menuTeletext mode – To display the index pageTITLE/REVEAL – DVD mode - To display the DVD title menuTeletext mode – To reveal or hide the hidden words.HOLD - Teletext mode - Hold current page which is displayed12345STANDBYMUTETV/RADIO TV GUIDEEJECTATV USB DVDRECPVR/ DVDREC LISTSOURCEAVOKMENUEXIT1 2 3 45 6 7 89 0INFOFAVSUBTITLE ASPECTVOLGOTOAUDIOA-BSLEEPANGLECHREPEATD.DIS ZOOM SIZE DISPLAYD.SETUP D.MENU TITLEiTEXTINDEXR. VEALHOLD12
ConnectionsConnections1 USB Port USB 7 COAX Audio Out Digital Coax output2 HDMI in HDMI input 8 Video (CVBS) Video input3 VGA(PC) VGA-PC input 9 Component Component input4 VGA (PC) Audio In 3.5mm PC audio input 10 Audio L/RAudio L/R input for component/video5 SCART SCART input 11 RF In RF / TV Aerial Input6 CI Card IN Common Interface Module Input 12 HEADPHONES 3.5mm Headphone output962 1 3 4 5 7810 11 12English13
AudioR / LVideo(CVBS)
TV Menu operationTV Menu Operation | Channel menu | Picture menuTV Menu OperationPicture menuAVTo access this menu, press [MENU] button on the remotecontrol. To enter a menu press [OK]If you wish to make changes to any of the default settings, usethe scroll (///) buttons. To confirm any settings press[OK] button.To exit this menu at anytime, press [EXIT] button.Channel menuPicture Mode - Choose from the following presets.StandardDynamicMildPersonalEcohomeDefault settingsRecommended settings for fast movingpicturesSet to be lighter in colour and less brightLets you manually alter all the settingsPower saving modeContrast - Switch the balance between black and white.Brightness - Increase or decrease the brightness of the picture.Colour - Increases the colour from black and white.Tint - Lets you increase or decrease the level of tint within thepicture.Sharpness - Increase or decrease the sharpness of the picture.Colour Temperature - Choose from the following presets.EnglishAuto Tuning - Allows you to retune the television for all digitalchannels, digital radio stations and analogue channels.Digital Manual Tuning- Allows you to manually tune yourdigital signal.Analogue Manual Tuning - Allows you to manually tune youranalogue signal.Programme Edit - Allows you to delete, skip and add favouritechannels.Normal Default settingsWarm Increases red within the pictureCool Increases blue within the picturewNoise Reduction - Choose from the following presets.Off Turns noise reduction offLow Minor system adjustmentMiddle Medium system adjustmentsHigh Maximum system adjustmentsDefault Default settingsTip: If you do not press any buttons for 10 seconds, the menuwill automatically exit. You can change the length of timebefore the menu exits automatically - see ‘Menu Duration’section.15
TV Menu operationSound menu | Time menu | Feature menuSound menuTime menuSound Mode - Choose from the following presets:StandardMusicMoviePersonalSportsDefault settingsEmphasises music over voicesProvides live and full sound for moviesSelects your personal sound settingsEmphasises sound for sportsTip: Treble and bass levels can only be adjusted when thesound mode ‘Personal’ is selected.Treble - To adjust the amount of high frequency within thesound.Bass - To adjust the amount of low frequency within the sound.Balance - To switch the sound between the left and rightspeakers.Auto Volume Level (AVL) - When ‘on’ is selected, the volumewill stay at a constant level regardless of input/source.Digital Output - This is the digital COAX Audio output. Choosefrom the following options:Clock - Set the date and time.Off Time - Allows you to set a specific time for your TV to turnoff.On Time - Allows you to set a specific time for your TV to turnon, the channel it will then display, the source it will be on andalso the volume. This function can then be toggled to repeatevery day or a certain day.Time Zone - Change your current time zone.Sleep Timer - Lets you set the sleep timer so the televisionautomatically switches off after a set amount of time. Off ->10min -> 20min -> 30min -> 60min -> 90min -> 120min ->180min -> 240min.Auto standby - Toggle the Function on and off.Feature menuOffAutoPCMOffSelects the best settings automaticallySelect this option if you are connecting toa Stereo Hi-fi via coax cable (Pulse-codemodulation (PCM) is a digital representation ofan analogue signal)AD Volume - Increase or decrease the overall volume.Schedule List - Lists your programme reminders.PVR File System - Checks the file system of the connected USBdevice and displays the information about the check results.CI Information - Pay per view services require a “smartcard”to be inserted into the TV. If you subscribe to a pay perview service the provider will issue you with a ‘CAM’ and a“smartcard”. The CAM can then be inserted into the COMMONINTERFACE PORT (CI Card In).16
VGAINVGAOUTAUDIOINAUDIOOUT
TV Menu operationPC Settings | 7 Day TV Guide | USB recordPC SettingsAuto Adjust - Lets you automatically configure the televisionto be used as a computer monitor.H Offset - Changes the horizontal position of the picture.V Offset - Changes the vertical position of the picture.Size - increase picture size.Tip: If the computer is left in-active for a period of time,Phase the television - To adjust will delay switch time into of a phase ‘sleep’ in state order (the to reduce screen thenoise will power of picture off to save power). To switch back on press thePosition standby Reset button. - Changes back to the original settings7 Day TV Guide / USB Record1. Press [TV GUIDE]. The following 7 Day TV Guide will appear.2. Navigate through the menu using ///.You can now:Record a Programme by pressing RED.Set a reminder by pressing GREEN.View a previous day by pressing YELLOW.View the next day by pressing BLUE.3. Press [EXIT] to exit the 7 day TV Guide.Note: This TV is designed to operate with USB memory sticksup to 32GB. It is possible to use either a USB memory stickor a USB portable Hard Drive of a larger capacity, however,it must be formatted to the FAT32 file system in order tooperate correctly. At the time of printing this user guide,Windows XP/Vista computers are only capable of formattingup to 32GB, therefore, you will need a software programme/utility to format larger USB drives/hard drives to FAT32.Additional help and support is available from the web site.USB Record - Digital modeUSB RECORD – DIGITAL/FREEVIEW MODEBuilt into this television is a USB record facility. This function isavailable in Digital mode when.used in conjunction with a compatible USB memory stick orUSB Hard drive. The benefits of this are as follows:• Pause live TV and then playback, fast forward and rewind(up to live TV).• One button record, if you decide you want to record thecurrent programme.• Easy programmable recording from the 7 day TV Guide• Record TV and watch back on your computer/laptop.EnglishDue to the nature of the product, it is necessary to use a highspeed USB memory stick (as the TV reads from and writes tothe memory stick at the same time, some memory sticks maynot be suitable).Minimum Specification - USB Memory StickTV Guide is available in Digital TV mode. It providesinformation about forthcoming programmes (where supportedby the Digital channel). You can view the start and end time ofall programmes and on all channels for the next 7 days and setreminders.Read SpeedWrite Speed20 MB/s (Mega Byte Per Second)6 MB/s (Mega Byte Per Second)If you wish to use a USB portable hard drive larger than32GB, please refer to the FAQ section at the rear of thisuser guide.19
TV Menu operationPause Live TV (Time Shift) | USB mode / <strong>Media</strong> playerPause Live TV (Time Shift)Pausing Live TV is very simple.RECPVRREC LIST- Press the play/pause button and the television will pauseand the live content will be recorded. To resume watchingpress play/pause again.- Press fast forward to go forward in a recording (i.e. to skipadverts).- Press fast rewind to go back in a recording (i.e. if you fastforwarded too far).1. You can navigate through the menus using the scroll///buttons. To confirm the item you wish to play/view press [OK] button.Tip: When you switch the TV to standby or changechannel the Time Shift memory is wiped. To restart timeshift you must press play/pause button.One Button RecordAt any point in time you may decide to record the currentchannel that you are watching. To do this you need to press the[REC] button.2. Select the drive you require. (If your drive only has 1partition you will only see 1 item).Tip: This television contains one TV tuner, therefore it canonly record the channel you are watching or record onechannel while the television is in standby mode.Note: USB record function is only avilable in DigitalTV mode. Due to copyright laws and illegal copying/recording it is not possible to record to/from any otherinput/output source.3. You can now access the item. Press OK to view.USB mode / <strong>Media</strong> playerUSB mode offers playback of various different types of contentthat you have saved on your USB Memory Stick.Please refer to technical specification page for compatible filetypesOn switching to USB source the above menu screen willappear. The content will be divided into Photo, Music, Movieand Text based on file type.4. While viewing you control the item using or bypressing ( i ) and using /// and (OK)20
DVD MenuTo access this menu, press [MENU] button on the remotecontrol. If you wish to make changes to any of the defaultsettings, use the scroll /// buttons. To confirm anysettings press [OK] button.To exit this menu at anytime, press [EXIT] button.TV System - Choose from the following optionsNTSCPALAutoNormally used for discs from North America,Japan etcThe standard for discs from <strong>UK</strong>/Europe, mostof Asia, Australia etcFor both NTSC and PALTV Type - Choose from the following options4:3 PS Traditional picture format, often used onold film4:3 LB Traditional picture which has beenadapted for widescreen16:9 Widescreen picture formatDynamic Range - This is the difference between the quietestand loudest sounds. This setting works only with DVD discsrecorded in Dolby digital.FullSet this to listen with the range recorded onthe disc4/8 Set this to listen with a range equivalent to anormal television2/8 Set this to listen with a smaller differencebetween the maximum and minimumvolumeDual MonoStereoMono LMono RMix MonoOutputs 2 channels of sound both left andrightOutputs left side soundOutputs right side soundOutputs a single channel of sound but mixbetween right and leftEnglishDefault - This option allows you reset all DVD settings tofactory settings.Tone - Choose from the following options+ Increases the treble (high frequency sound)- Increases the bass (low frequency sound)21
Frequently asked questionsGeneralGeneralTVTVVCR/DVDRecorderGame ConsolesGame ConsolesUSB ModeUSB ModeUSB Record / TVUSB Record / TVSystem LockI would like to have loudersound by connectingadditional speakers.Why are some options inthe menu unavailable andgreyed out.I have tuned in Digital TVbut I am not receiving anyor all of the channels and/or the channels I receive arebreaking up.I have re-tuned my televisionbut when I switch it off it isnot storing the channels.I have connected the TV tomy VCR or DVD Recorder viaSCART but it is not recording.I have connected my PS3 tothe TV via HDMI, but I amnot receiving any pictures orsound on my Television.I have connected my Xbox360 to the TV via ComponentCables (Red, Green & Blue)but I am not receiving anysound.I have inserted a USB MemoryKey, but the TV does notrecognise it.Using a USB portable harddrive.I cannot change the channel,access the menu or use thered button.When using the USB to recordthe picture ‘breaks up’ orexperience loss of sound.I have changed the passwordon the television and nowforgotten it.There are 2 options:1) Use Digital COAX output connected to an external amplifier/surround soundsystem.2) Use the 3.5mm headphone output and a 3.5mm to phono cable (availableseparately) to connect to an amplifier/surround sound system.Some options are only available in certain sources, i.e. HDMI, PC/VGA. They areunavailable in the other sources where they have no affect.1) Check you are in an area that can receive Digital TV .2) Check you are using an aerial that is able to receive a good digital signal. In mostcases, you will need an outdoor digital hi-gain/wideband aerial. In areas that haveexcellent digital coverage, you may be able to use a loft type aerial but it is highlylikely that you will also need to connect a booster between the back of the TV and theTV aerial wall socket. Unfortunately, to receive a good enough digital signal, it is notpossible to use a portable/indoor type aerial.Complete a first time installation, please refer to the set-up menu section of themanual of how to do this.In addition to connecting via SCART, you should connect the aerial cable from thewall socket to your VCR/DVD Recorder and another aerial cable from the VCR/DVDRecorder to the TV.1) Ensure the TVs source is on HDMI.2) Check your settings on your PS3 are as per the PS3 instruction manual.Component cables only provide HD Pictures. For the sound you will need to connectthe Red & White audio cables on the Xbox to the Red & White phono inputs on therear of the TV. Please refer to the ‘Connections’ pages.Ensure the USB Memory Key is formatted to type FAT32.If you wish to use a portable hard drive larger than 32GB, please note that it mustbe formatted to the FAT32 file system in order to operate on this TV. Windows XP/Vista computers are only capable of formatting up to 32GB, therefore, you will need asoftware programme/utility to format larger hard drives. Please refer to the web sitefor more information.During Time Shift you cannot change the channel, access the menu or use the redbutton.Check the USB Memory Stick meet the minimum requirements of Read Speed - 20MB/s (Mega Byte Per Second), Write Speed - 6 MB/s (Mega Byte Per Second).There is a master password of 4711, to gain access to the TV menu and reset thenormal password.22
Technical specificationModel<strong>216</strong>/54G-GB-TCDUP-<strong>UK</strong>Screen size (diagonal)21.6"/55cmResolution 1366x 768Contrast Ratio 1000:1Brightness cd/m2 250PC RGBYESRF75 ohm- aerial/PAL-SECAMVideo Inputs1 x SCART, 1 x Video, 1 x Component (YPbPr - 1080p)1 x HDMI (upto 1080p)Sound Inputs1 x 3.5mm jack for PC audio input, 1 x pair RCA shared for Video &YPbPr (component) audio inputSound Outputs1 x COAX – audio output, 1 × output for headphonesUSB Port 1Sound power, watts 2 x 3Voltage and powerconsumptionDimensions including stand(mm)110-240 V 50/60 Hz 41/70W (ecomode/max -in standby mode less than 0,5 W)534W x 404H x 200DNet weight (Kgs) 4.9English23
Index7 Day TV Guide / USB Record .............................19Attaching the Stand....................................... 8Connections ........................................ 13-14Detaching the Stand .....................................13TV menu ................................................15Feature menu ...........................................16Frequently asked questions...............................22Getting started - initial set up .............................. 9Important safety instructions ............................4-5Index ...................................................24PC Settings ..............................................19Picture menu ............................................15Remote control ..................................... 11-12Setup menu .............................................17Sound menu ............................................16Technical specification ...................................23Time menu ..............................................16TV buttons & Source menu ...............................10TV Menu Operation .................................. 15-21USB mode / <strong>Media</strong> player .................................20USB Record - Digital mode ................................19Using the television as a computer monitor ................18Wall mounting the TV ..................................... 8What is included in the box ................................ 924
25English
27English
|Universal <strong>Media</strong> Corporation /Slovakia/ s.r.o.Mickiewiczova 7104/14,811 07 Bratislava 1, SlovakiaAssembled in EuropeBLA/MAN/0047