FH950 User Manual English - Hachflow
FH950 User Manual English - Hachflow
FH950 User Manual English - Hachflow
You also want an ePaper? Increase the reach of your titles
YUMPU automatically turns print PDFs into web optimized ePapers that Google loves.
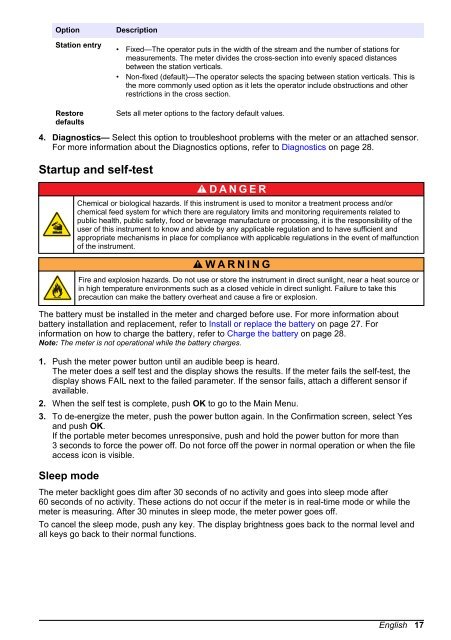
Option<br />
Station entry<br />
Restore<br />
defaults<br />
Description<br />
• Fixed—The operator puts in the width of the stream and the number of stations for<br />
measurements. The meter divides the cross-section into evenly spaced distances<br />
between the station verticals.<br />
• Non-fixed (default)—The operator selects the spacing between station verticals. This is<br />
the more commonly used option as it lets the operator include obstructions and other<br />
restrictions in the cross section.<br />
Sets all meter options to the factory default values.<br />
4. Diagnostics— Select this option to troubleshoot problems with the meter or an attached sensor.<br />
For more information about the Diagnostics options, refer to Diagnostics on page 28.<br />
Startup and self-test<br />
D A N G E R<br />
Chemical or biological hazards. If this instrument is used to monitor a treatment process and/or<br />
chemical feed system for which there are regulatory limits and monitoring requirements related to<br />
public health, public safety, food or beverage manufacture or processing, it is the responsibility of the<br />
user of this instrument to know and abide by any applicable regulation and to have sufficient and<br />
appropriate mechanisms in place for compliance with applicable regulations in the event of malfunction<br />
of the instrument.<br />
W A R N I N G<br />
Fire and explosion hazards. Do not use or store the instrument in direct sunlight, near a heat source or<br />
in high temperature environments such as a closed vehicle in direct sunlight. Failure to take this<br />
precaution can make the battery overheat and cause a fire or explosion.<br />
The battery must be installed in the meter and charged before use. For more information about<br />
battery installation and replacement, refer to Install or replace the battery on page 27. For<br />
information on how to charge the battery, refer to Charge the battery on page 28.<br />
Note: The meter is not operational while the battery charges.<br />
1. Push the meter power button until an audible beep is heard.<br />
The meter does a self test and the display shows the results. If the meter fails the self-test, the<br />
display shows FAIL next to the failed parameter. If the sensor fails, attach a different sensor if<br />
available.<br />
2. When the self test is complete, push OK to go to the Main Menu.<br />
3. To de-energize the meter, push the power button again. In the Confirmation screen, select Yes<br />
and push OK.<br />
If the portable meter becomes unresponsive, push and hold the power button for more than<br />
3 seconds to force the power off. Do not force off the power in normal operation or when the file<br />
access icon is visible.<br />
Sleep mode<br />
The meter backlight goes dim after 30 seconds of no activity and goes into sleep mode after<br />
60 seconds of no activity. These actions do not occur if the meter is in real-time mode or while the<br />
meter is measuring. After 30 minutes in sleep mode, the meter power goes off.<br />
To cancel the sleep mode, push any key. The display brightness goes back to the normal level and<br />
all keys go back to their normal functions.<br />
<strong>English</strong> 17


