Model MR Installation Manual - MTS Sensors
Model MR Installation Manual - MTS Sensors
Model MR Installation Manual - MTS Sensors

Create successful ePaper yourself
Turn your PDF publications into a flip-book with our unique Google optimized e-Paper software.
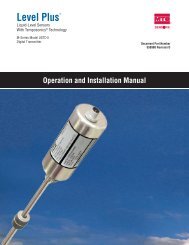
<strong>Model</strong> <strong>MR</strong> Operation and <strong>Installation</strong> <strong>Manual</strong><br />
<strong>Installation</strong>, Mounting and Storage<br />
<strong>Installation</strong> and mounting<br />
This section contains information about storing your transmitter (prior to installation) and detailed procedures for installing and mounting your<br />
transmitter.<br />
Storage<br />
If storage is required prior to installation, store indoors in a dry environment at ambient temperature range not exceeding -40 °C (-40 °F) to<br />
71 °C (160 °F).<br />
Stilling wells and guide poles<br />
Level Plus transmitters can be mounted in slotted or unslotted stilling wells but a slotted stilling well is always preferred. Using a unslotted<br />
stilling well will negatively affect performance of any level device as the level in the stilling well can differ from the level in the tank. The Level<br />
Plus transmitter can also be installed to one side of the stilling well to also allow for sampling and manual gauging from the same opening as<br />
the automatic tank gauging. Contact Technical Support for details.<br />
Level Plus transmitters do not require a stilling well for installation. Our transmitters are installed in numerous tanks without stilling wells with<br />
no loss in performance due to our patented flexible waveguide and hose. A stilling well is highly recommended for agitated, turbulent, and/or<br />
fast filling tanks.<br />
<strong>Installation</strong><br />
The installation procedures below are illustrated using the adjustable NPT fitting for a threaded flange mount. The procedures will have to be<br />
slightly adjusted if using a welded flange or sanitary Tri-Clamp mount.<br />
Rigid probe<br />
Tools Required:<br />
• Channel lock pliers<br />
• Common screwdriver<br />
• 5/32 in. Hex<br />
Caution:<br />
It is recommended that assembly and mounting of this transmitter should not be performed alone. To ensure proper and safe assembly of the M-Series<br />
transmitter, a minimum of two (2) individuals are recommended. Gloves are also recommended. In addition , PPE is required for work areas such as<br />
safety shoes, safety glasses, hard hat, and fire resistant clothing.<br />
Perform the following steps to Install the <strong>Model</strong> <strong>MR</strong> transmitter:<br />
1. Remove the stop collar and E-ring. With assistance, feed the rigid pipe through the hole of the removed tank flange until the flange is<br />
positioned near the top of the transmitter. Insert the threaded portion of the adjustable fitting into the customer supplied flange and<br />
tighten (apply pipe thread sealant if required). Be careful not to drop the flange as it can damage the transmitter.<br />
2. Slide the product float onto the rigid pipe. Slide the interface float (optional) onto the rigid pipe. Install stop collar 2 inches from the<br />
bottom (see ‘Note’ below). Do not drop the float(s) or allow them to free fall along the rigid pipe as damage may result.<br />
<strong>Installation</strong> &<br />
Mounting<br />
Note:<br />
The stop collar can be removed or adjusted based on the float selected for the application. Please consult the factory for more information.<br />
3. Slide float(s) back down to the stop collar to prevent them from free falling during installation into the tank. Insert the rigid pipe<br />
(with floats) through the tank opening and lower the transmitter/float assembly into the tank until it rests on the bottom. DO NOT<br />
DROP OR DAMAGE THE PIPE.<br />
4. Secure the flange onto the tank mount.<br />
5. Pull the transmitter upward so the end plug is just resting on the floor of the tank. Tighten the adjustable fitting to hold the transmitter<br />
in place.<br />
6. Terminate the field wire cables noting proper wire orientation.<br />
Level Plus ® Liquid-Level <strong>Sensors</strong> - M-Series <strong>Model</strong> <strong>MR</strong> Analog Transmitter<br />
Operation and <strong>Installation</strong> <strong>Manual</strong>, Document Number 550720 Revision G, 09/11 EN 10<br />
<strong>MTS</strong> <strong>Sensors</strong>