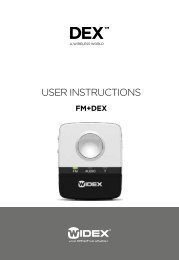
Users instructions SCOLA TEACH - Widex
Users instructions SCOLA TEACH - Widex
Users instructions SCOLA TEACH - Widex

You also want an ePaper? Increase the reach of your titles
YUMPU automatically turns print PDFs into web optimized ePapers that Google loves.
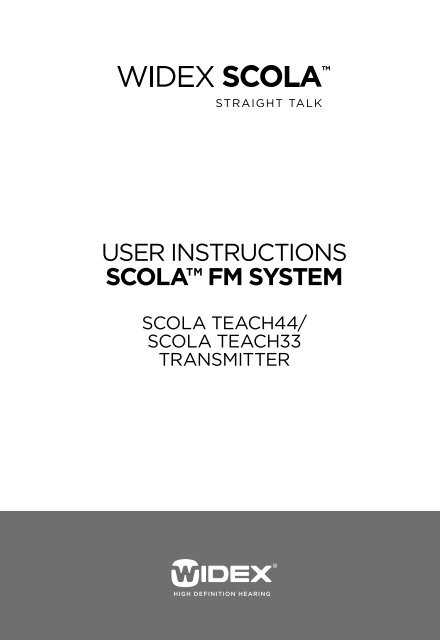
User <strong>instructions</strong><strong>SCOLA</strong> FM system<strong>SCOLA</strong> <strong>TEACH</strong>44/<strong>SCOLA</strong> <strong>TEACH</strong>33transmitter
ContentsSYMBOLS. ............................................. 4INTRODUCTION ........................................ 5THE <strong>SCOLA</strong> FM SYSTEM ................................ 6DESCRIPTION .......................................... 9PREPARING THE <strong>SCOLA</strong> <strong>TEACH</strong>. ......................... 13Inserting the battery ..................................13Charging ............................................13Connecting the microphone ............................14Positioning ...........................................15OPERATING THE <strong>SCOLA</strong> FM SYSTEM ..................... 16On/off . ..............................................16Channel selection .....................................16Synchronising <strong>SCOLA</strong> FLEX or <strong>SCOLA</strong> buddy .............17Microphone on/off ....................................18Keypad lock ..........................................18Connecting audio equipment ...........................18Battery and charging . .................................19Team Teaching function ...............................20Table with <strong>SCOLA</strong> <strong>TEACH</strong> key functions ..................22GOOD ADVICE ........................................ 23CARE AND MAINTENANCE .............................. 25WARNINGS ........................................... 26IN CASE OF MALFUNCTION ............................. 27TERMS AND DEFINITIONS EXPLAINED. ................... 31WARRANTY. .......................................... 42REGULATORY INFORMATION. ........................... 433
SYMBOLSThe following symbols will be used throughout themanual:WARNINGMessages with this heading indicate adverse reactions, potentialsafety hazards or inadequate device performance.CAUTIONMessages with this heading indicate/include informationregarding any special care to be exercised.Not for general waste4
INTRODUCTION<strong>SCOLA</strong> provides hearing aid users with additional opportunitiesin difficult listening situations.The <strong>SCOLA</strong> FM system has been developed specificallyfor children and educational environments. These<strong>instructions</strong> therefore primarily address parents andteachers.The symbol refers to the section ‘Terms and definitionsexplained’, where you will find detailed explanationsof functions and technical terms.WARNINGThis booklet contains important information and <strong>instructions</strong>.Read this booklet carefully before you start using the device.NoteYour <strong>SCOLA</strong> <strong>TEACH</strong> device and accessories may not look exactlyas illustrated in this booklet. We furthermore reserve theright to make any changes considered necessary.5
THE <strong>SCOLA</strong> FM SYSTEMThe <strong>SCOLA</strong> FM system consists of a <strong>SCOLA</strong> <strong>TEACH</strong>transmitter and one or two <strong>SCOLA</strong> receivers. The<strong>SCOLA</strong> <strong>TEACH</strong> transmitter’s primary function is totransmit sound signals from the microphone or audioequipment to the <strong>SCOLA</strong> receiver(s). The operatingrange is up to 20-30 metres, depending on thesurroundings. The transmission power is very low andlimited by national regulations. It has no physiologicalside effects.<strong>SCOLA</strong> <strong>TEACH</strong> is available in two versions:<strong>SCOLA</strong> <strong>TEACH</strong>44 with the Team Teaching function,and <strong>SCOLA</strong> <strong>TEACH</strong>33 without the Team Teaching function. The Team Teaching version can easily be recognisedby its key on the keypad.The <strong>SCOLA</strong> <strong>TEACH</strong> transmitter and <strong>SCOLA</strong> receiver(s)must be on the same channel in order to work together.6
<strong>SCOLA</strong> <strong>TEACH</strong> with standard accessories<strong>SCOLA</strong> <strong>TEACH</strong>(The version shown is theTeam Teaching version)Lapel microphone(omnidirectional) including neck cord andclipsCharger7
Rechargeable battery Audio leadStorage caseUser <strong>instructions</strong>User instrUctions<strong>SCOLA</strong> FM SySteMscoLAteAch44/scoLAteAch33trAnsmitter8
DESCRIPTIONThe top of <strong>SCOLA</strong> <strong>TEACH</strong> has the following functions:Light-emitting diode indicator (LED)On/off button (which also serves to turn themicrophone on or off)Microphone jack (2.5 mm jack)The front of <strong>SCOLA</strong> <strong>TEACH</strong> has the following functions:Display with:Status barBattery indicatorChannel TracerTeam TeachingKeypad lockMicrophone9
H0215Channel informationNOTEThe corresponding channel numberfor MicroLink FM equipment is shownat the bottom of the display10
Multifunctional keypad(this illustration shows theTeam Teaching version)Team Teaching key© C key, which servesas an undo key,amongst otherthings Arrow keysOK keyThe bottom of <strong>SCOLA</strong> <strong>TEACH</strong> has the following functions:Jack (3.5 mm) forconnection of an externalsound sourceor headsetJack for connectionof charger(mini USB jack)11
The back of <strong>SCOLA</strong> <strong>TEACH</strong> has the following functions:Belt clips for fastening the <strong>SCOLA</strong> <strong>TEACH</strong>Battery coverNOTEThe approval label with serial number is located below thebattery. We recommend that you make a note of the serial numberat the back of this booklet.12
PREPARING THE <strong>SCOLA</strong> <strong>TEACH</strong>Inserting the batteryRemove the batterycover and insert thebattery provided .Be sure to insertthe battery correctly,with the positivepole oriented as illustrated.ChargingThe battery includedis not charged. Beforethe battery is used forthe first time, it must becharged for at least 14hours.With the charger pluggedinto the socket,connect the charger tothe <strong>SCOLA</strong> <strong>TEACH</strong> as illustrated.13
During charging the batterysymbol will be shown in thedisplay and the LED will be red.Battery charging!NOTEThe transmitting function is off during charging.Connecting the microphonePlug the microphone lead into the microphone jack.The microphone lead serves as an antenna . For optimumoperating range , make sure that the leadhangs as freely as possible.The standard version of the microphone is omnidirectional,which means that it picks up sound equally fromall directions.14
Positioning<strong>SCOLA</strong> <strong>TEACH</strong> can be placed in a pocket or clippedonto a belt.The microphone can be clipped onto clothes or hungaround the neck on the neck cord. The standard microphonecan also be replaced by one of the other microphones available as optional accessories.15
OPERATING THE <strong>SCOLA</strong> FM SYSTEMOn/offPress and hold down the on/off key on <strong>SCOLA</strong> <strong>TEACH</strong>for one second until the LED is green.The user’s name or ”WIDEX <strong>SCOLA</strong>” will appear onthe display for approx. two seconds. <strong>SCOLA</strong> <strong>TEACH</strong> isturned off by holding the on/off key down for one second.Channel selectionWhen <strong>SCOLA</strong> <strong>TEACH</strong> is turned on, the starting channelwill usually be the channel last used, unless programmeddifferently. To select another channel :Hold down the or key.H0215will appear in front of thechannel number.Press or until the requiredchannel number appears, andpress .Press C if you wish to exit without changes.16
NOTENote that interference may occur if other transmitters are usingthe same channel as you.Synchronising <strong>SCOLA</strong> FLEX or <strong>SCOLA</strong> BUDDYIf the receiving channel differs from the transmittingchannel of <strong>SCOLA</strong> <strong>TEACH</strong>, the former can be synchronisedto the latter.Press briefly. If there are one or more <strong>SCOLA</strong> receiverswithin a range of approx. 80 cm, the receiving channelwill be synchronised to the transmitting channel(standard synchronisation ). When the <strong>SCOLA</strong> receiverpicks up the synchronisation signal, the user willhear a beep, confirming the connection, even if the receivingchannel has not been changed.The option of extended synchronisation (teacher’s synchronisation) is also available.17
Microphone on/offThe microphone can be turned on and off by pressingthe on/off key briefly.A green light will flash in the LED and the followingsymbol will blink in the status bar:Keypad lockThe keypad can be locked and unlocked by holdingdown the right and left arrow keys simultaneously. Anyattempt to activate a locked key will result in the followingmessage:! + Key lock is active.Hold down to unlock.The hearing care professionalcan program the keypadto lock automatically if 1½minutes have elapsed withoutany key press.Connecting audio equipment<strong>SCOLA</strong> <strong>TEACH</strong> can be connected to audio equipment(radio, TV, DVD, PC, etc.) with the audio lead provided.Connect the lead from the audio input jack of<strong>SCOLA</strong> <strong>TEACH</strong> to the headphone jack of the audioequipment. The sound signal volume is usually adjustedusing the volume control of the audio equipment.18
The microphone should also be connected, as its leadserves as an antenna.When the microphone is turned on, it is possible tospeak over the sound from the audio equipment. Whenthe microphone is turned off, only the sound from theaudio equipment will be heard.If the jack does not fit your audio equipment, a leadwith phono plugs and/or a SCART plug can be acquiredas an extra accessory.Battery and chargingOne AA battery is required for <strong>SCOLA</strong> <strong>TEACH</strong>. Arechargeable nickel-metal -hydride (NiMH) battery isincluded as a standard accessory. Ordinary non-rechargeablebatteries can also be used, in which casewe recommend the alkaline type. After its first charge,the battery charge time is ten hours, providing powerfor approximately ten hours of use. Battery status isindicated by the battery symbol in the display.We recommend that you always have a spare batterywith you in case the rechargeable battery becomesdrained.19
H02H01TTeam teaching13TT Ch:55TTeam teaching13TT Ch:30!H06HTeam Teaching functionThe Team Teaching functionis available only in the <strong>SCOLA</strong><strong>TEACH</strong> version provided witha key. The Team Teachingfunction is activated by holdingdown the key. The symbolappears in the display statusbar, and the transmitting channeland Team Teaching channel(TT Ch) are displayed.<strong>SCOLA</strong> <strong>TEACH</strong> automaticallycalculates the risk of interferencebetween the transmittingand receiving channel. If there isa risk of interference, the TeamTeaching channel will be grey,followed by an exclamationmark.The Team Teaching function is deactivated by holdingdown C or .Team Teaching channel selection:The TT channel is changed in the same way as thetransmitting channel.20
Press and hold down the or key. Then press againto go to another TT channel.Pressing will allow you to change the transmittingchannel and still maintain the TT channel.Try to find channels that are not grey.To exit with changes, press .To exit without changes, press C.21
Table with <strong>SCOLA</strong> <strong>TEACH</strong> key functionsHold down (1 second)PressOn/off key On/off Microphone on/off. or or + simultaneously + simultaneously”OK”Ckey *)Enable channel changeEnable TT channelchange with the TTfunction active*)Teacher’ssynchronisationActivate/deactivate TTfunction*)Deactivate TTfunction*)Channel changeSwitch betweentransmitting and TTchannel with the TTfunction active*)Lock / unlock keypadRotate displayExit with changes afterchannel changeChannel synchronisationExit without changes*) Applies only to the <strong>SCOLA</strong> <strong>TEACH</strong> version with Team Teaching function.22
GOOD ADVICE<strong>SCOLA</strong> <strong>TEACH</strong> is primarily intended for educationalenvironments, but can also be used in other situationswhere noise, poor acoustics or the like make listeningdifficult.To benefit fully from the <strong>SCOLA</strong> FM system, it is importantto:• practise using the FM system and test the differentsettings in familiar surroundings• inform other people that you use an FM system withyour hearing aid, so that they can understand whythey should talk into the microphone, and how thesystem works• select the right settings for <strong>SCOLA</strong> <strong>TEACH</strong> and the<strong>SCOLA</strong> receiver(s)23
ListeningsituationIn kindergartens /classroomsLecturesAt homeIn the carUse of <strong>SCOLA</strong> <strong>TEACH</strong> and microphonepositioningAsk the teacher to use <strong>SCOLA</strong> <strong>TEACH</strong> andposition the microphone as described.Microphone types other than omnidirectional areavailable as optional accessories to optimise thespeech signal.For group work, or if several teachers are present,we recommend the use of the Team Teachingfunction. This requires that <strong>SCOLA</strong> <strong>TEACH</strong> isprovided with this function, and that an extra FMmicrophone is available.Check that there is no interference on the channelselected for the system. Find and select a noisefreechannel for the transmitter and receiver.Explain to the lecturer how <strong>SCOLA</strong> <strong>TEACH</strong> works.Ask the lecturer to keep the microphone as closeas possible to his or her mouth.Using the FM system at home is almost the sameas in the classroom. <strong>SCOLA</strong> <strong>TEACH</strong> can beconnected to the TV, PC, etc. via the audio lead.With a Team Teaching version transmitter and anextra FM microphone, e.g. a <strong>SCOLA</strong> TALK, bothparents can communicate with their child via FM.The <strong>SCOLA</strong> FM system is particularly effective in acar.The microphone should be placed as closely aspossible to the person speaking.It is possible to listen to music from an MP3 playeror the like by connecting the audio lead from the<strong>SCOLA</strong> <strong>TEACH</strong> to the headphone jack of the MP3player. Leaving the microphone on allows thechild to hear music as well as any speech into themicrophone.24
CARE AND MAINTENANCEIn general, the <strong>SCOLA</strong> FM system should be cared forin the same way as the hearing aid. It is a good idea toclean and remove dirt and debris from the FM systemon a daily basis. There are also some special precautionswhich should be taken.• Remove any dirt from <strong>SCOLA</strong> <strong>TEACH</strong> with a dry,soft cloth.• Do not disassemble any of the <strong>SCOLA</strong> products orhearing aid, as this will void the guarantee.• Do not use water, alcohol or the like to clean the FMsystem.• Make sure that the microphone, audio and chargercords do not become tangled up.• Do not expose the <strong>SCOLA</strong> FM system to cosmetics,hair spray, water, cleaning solutions or other chemicals.25
WARNINGSWarning• Make sure that the batteries for the hearing aid and for the<strong>SCOLA</strong> <strong>TEACH</strong> are kept out of reach of children, who mightplace them in their mouths.• Discard used batteries carefully.• Do not change batteries in front of children, and do not letthem see where you keep your supply.26
IN CASE OF MALFUNCTIONWith proper use and maintenance, your <strong>SCOLA</strong> FMsystem will give you years of reliable service. The followingpages contain some brief advice to follow if youexperience problems with your <strong>SCOLA</strong> FM system. Beforecontacting the hearing care professional whereyou acquired your <strong>SCOLA</strong> FM system, please follow theadvice below:If there is no sound from the <strong>SCOLA</strong> FM system or theaudio equipment, or the sound is distorted, it couldbe because:• The hearing aid, <strong>SCOLA</strong> <strong>TEACH</strong> or the <strong>SCOLA</strong>receiver(s) are not set correctly.Check to ensure that all the settings are correct forthe desired use, and that both the transmitter andreceiver are turned on.• <strong>SCOLA</strong> <strong>TEACH</strong> and the <strong>SCOLA</strong> receiver(s) are not setto the same channel.Check that the channel number in the display of the<strong>SCOLA</strong> <strong>TEACH</strong> is the same as the receiving channelof the <strong>SCOLA</strong> receiver by performing a channel synchronisation.27
If there is noise in the hearing aid, it could be because:• You are at or beyond the limit of the operating rangeof <strong>SCOLA</strong> <strong>TEACH</strong>.Reduce the distance between the <strong>SCOLA</strong> <strong>TEACH</strong>and <strong>SCOLA</strong> receiver.• Noise and whistling are interfering with reception,possibly because two or more FM transmitters aretransmitting on the same channel as your receivingchannel.To avoid this type of interference, make sure thatonly one FM transmitter is transmitting on the receivingchannel.Try turning off your <strong>SCOLA</strong> <strong>TEACH</strong>. If you hearanother FM signal, this is what is causing the noise.There are several ways of avoiding interference:• Turn on one FM transmitter only.• Find another available channel and select thischannel on both <strong>SCOLA</strong> <strong>TEACH</strong> and the <strong>SCOLA</strong>receiver.• Increase the distance between the interfering FMtransmitter until the interference stops.28
If there is no sound from the audio equipment, but thesound from the <strong>SCOLA</strong> <strong>TEACH</strong> microphone signal isokay, it could be because:• The audio lead is not correctly plugged into the audiojack on the <strong>SCOLA</strong> <strong>TEACH</strong> or audio equipment.Check that it is correctly plugged in.• The signal from the audio equipment is too weak.Turn up the volume of the sound signal on the audioequipment’s volume control, if possible.If the battery is quickly drained of power even aftera full charge cycle, but the display indicates that thebattery is charged, it could be because:• The battery is defective.Contact the hearing care professional where the<strong>SCOLA</strong> FM system was acquired, to have the batterychanged. You can use standard alkaline (nonrechargeable)batteries until this is done.29
If the battery does not charge and the display doesnot indicate that the battery is charging, it could bebecause:• There is no power in the socket.Check that the socket functions.• The charger lead or jack is defective.Consult the hearing care professional where the<strong>SCOLA</strong> FM system was acquired.• The connecting terminals on the battery are dirty ordefective.Consult the hearing care professional where the<strong>SCOLA</strong> FM system was acquired.warningLow battery can cause the sound transmission to suddenlystop.30
TERMS AND DEFINITIONSEXPLAINEDAntennaThe receiver and transmitter are both provided with anantenna.The microphone lead of <strong>SCOLA</strong> <strong>TEACH</strong> also serves asan antenna, and should therefore always be connected,even when only the audio input function is being used.Turn off the microphone if the microphone signal causesdisturbance.Approval and CE marking<strong>SCOLA</strong> <strong>TEACH</strong> and the <strong>SCOLA</strong> receiver have been testedat an EU/FCC accredited test laboratory. The CE/FCC marking and declaration of conformity documentthat the products conform to the directives and technicalrequirements laid down in North America and theEU, as well as in associated countries.The transmitter and receiver are provided with serialnumbers.31
Battery - <strong>SCOLA</strong> <strong>TEACH</strong>One AA battery is required for <strong>SCOLA</strong> <strong>TEACH</strong>. The rechargeablebattery included is a nickel-metal-hydride(NiMH) type battery. It is environmentally friendly anddoes not contain heavy metals. The contact surface atthe negative pole ensures that only this type of batterycan be charged in <strong>SCOLA</strong> <strong>TEACH</strong>.The lifetime of the battery depends on the number oftimes it is charged. If the battery is charged daily, werecommend changing the battery once a year to ensureoptimum operating time.Other battery types can also be used, but cannot berecharged.32
warningIf you use other types of rechargeable batteries in <strong>SCOLA</strong><strong>TEACH</strong> than the original, it must be charged in a separatecharger.If you use a NON-rechargeable battery, then use only high qualitybatteries, e.g. alkaline batteries.Always remove exhausted alkaline batteries from the batterycompartment to limit the risk of leakage.If you try to charge alkaline batteries or other NON-rechargeablebatteries or other rechargeable batteries than the type includedwith <strong>SCOLA</strong> <strong>TEACH</strong>, all that will happen is that the displaywill show: “WARNING, the battery is not rechargeable”.Rechargeable batteries cannot be overcharged in <strong>SCOLA</strong><strong>TEACH</strong>.ALWAYS remember to remove the battery – irrespectiveof type – if the transmitter will not be used againsoon.If you have any questions about the type, acquisition,use or disposal of batteries, please consult the hearingcare professional where you acquired your <strong>SCOLA</strong> FMsystem.CAUTIONBatteries that are no longer usable should be disposed of in accordancewith applicable environmental requirements.33
Battery chargingFully charging a drained battery takes ten hours. Beforethe battery is used for the first time, we recommend thatit is charged for 14 hours. Even when the battery is fullycharged, the battery symbol will continue to indicatethat the battery is charging for as long as the charger isconnected. The battery cannot be overcharged.warningCharger and mini USB connector:This device can be charged by an external charger or USB device.Only connect a charger that is compatible with the <strong>SCOLA</strong><strong>TEACH</strong>.The charger plug and input rating must be compatible with theAC wall outlet in your region.When the <strong>SCOLA</strong> <strong>TEACH</strong> is connected to external mains-operatedequipment like a charger or PC or similar, this equipmentmust comply with IEC 60065, IEC 60950, IEC 60601-1 or equivalentsafety standards.<strong>Widex</strong> strongly recommends that you always use a charger thatis supplied by your <strong>Widex</strong> distributor to ensure safe and efficientuse of your <strong>SCOLA</strong> <strong>TEACH</strong>.Battery statusThe battery power level is shown in the display. Fivebars indicate that the battery is fully charged, threebars that it is half charged, and no bars that it is almostdrained (less than ½ hour of operation remaining).34
When the battery is almost drained, the battery symbolflashes in the display and the LED flashes red. Aftera while, the transmitter will turn off. If the receiver isconnected, this can be clearly heard in the hearing aid.For optimum battery lifetime, we recommend not rechargingthe battery until the battery indication is belowtwo bars.Channels and frequencies<strong>SCOLA</strong> <strong>TEACH</strong> can be set to transmit on different channels.Each channel corresponds to a specific frequency.Only channels/frequencies that are permitted inthe country where the transmitter is employed maybe used. <strong>SCOLA</strong> <strong>TEACH</strong> is pre-programmed with thechannels permitted in the country where it is acquired.The channel numbers are divided into three frequencybands indicated by “H”, “J” or “N” in the lower left-handcorner of the display. The corresponding channel numberfor MicroLink equipment is displayed after thesethree letters. This is an advantage if several FM systemsare used simultaneously.35
<strong>SCOLA</strong> <strong>TEACH</strong> can transmit sound signals on most permittedfrequencies in the frequency ranges 169 MHz–176 MHz (H band), 180 MHz-187 MHz (J band) and 216MHz-217 MHz (N band).note• Do not use two transmitters (e.g. <strong>SCOLA</strong> <strong>TEACH</strong>) on the samechannel/frequency in the same area.• Note that there is a risk of interference from other radio communications,especially when using the system abroad.• Please note that when travelling abroad it may not be permittedto use the same channels as in your own country.Channel synchronisationThe <strong>SCOLA</strong> <strong>TEACH</strong> transmitting channel can be synchronisedwith the <strong>SCOLA</strong> receiver’s receiving channelin two ways.Standard synchronisationPress once. This will change the receiving channelto the same one as the transmitting channel. Forthis type of synchronisation, the distance betweenthe <strong>SCOLA</strong> <strong>TEACH</strong> and <strong>SCOLA</strong> FLEX or <strong>SCOLA</strong> buddyshould be approximately 10-80 cm. The FM user willhear a beep tone when synchronisation is complete.36
Teacher’s settings and Teacher’s synchronisationThe <strong>SCOLA</strong> <strong>TEACH</strong> transmitter can wirelessly synchronise<strong>SCOLA</strong> FLEX with what we call the Teacher’s settings.These Teacher’s settings are temporary, and can onlybe reset by switching the hearing aid off and on.The purpose of this is to prevent small children from operatingthe mode switch and scan button on the <strong>SCOLA</strong>FLEX receiver during classes. These settings can be activatedwithout any risk of altering the settings enteredby the hearing healthcare professional.To set up the Teacher’s settings:Access “Teacher’s menu” by pressing the C key and the key simultaneously.Pressto select “Sync Settings”.With the arrow keys, select switch and scan button settingsand press .Leave “Teacher’s menu” by pressing C.To perform a Teacher’s synchronisation:From the standard “user mode”, hold down for about1 sec. This will synchronise the receiving channel with37
the transmitting channel, mode switch and scan buttonsettings.When a Teacher’s synchronisation is performed withinthe reply range of 10 to 30 cm, the settings of the<strong>SCOLA</strong> FLEX will be shown in the <strong>SCOLA</strong> <strong>TEACH</strong> display.If a Teacher’s synchronisation is performed at a distanceof approximately 30 cm-80 cm, the teacher’s synchronisationwill still take place, and a beep-tone will beheard in the hearing aid. However, the <strong>SCOLA</strong> <strong>TEACH</strong>display will indicate that the receiver is outside its replyrange, and it will not show the detailed settings.noteThe optimal operating range is achieved by holding the <strong>SCOLA</strong><strong>TEACH</strong> vertically – NOT horizontally, as you might with an ordinaryremote control.FM systemAn FM system is a radio communication system inwhich a transmitter sends signals to a receiver via carrierwaves. ”FM” stands for “frequency modulation” andis a technical term for the way in which the radio signalis produced. FM transmission ensures high quality receptionwithout any noise, hum or distortion.38
If you have two hearing aids, they should both have areceiver.noteDo not use <strong>SCOLA</strong> on aircraft or in hospitals without permission.InterferenceInterference occurs when signals from two transmitterson the same frequency are mixed in the same receiver.When the signals are equally strong, the interferencewill be most noticeable. The further away one transmitteris from the receiver compared to the other transmitter,the weaker the disturbing noise will be.Interference can be avoided by selecting another transmittingand receiving channel. Any potential risk of interferencemay be detected if the Channel Tracer functionis active. Channel Tracer is a function in the Teacher’smenu. Consult your hearing care professional forfurther information.39
Microphones for <strong>SCOLA</strong> <strong>TEACH</strong>Omnidirectional lapel microphone: Standard microphoneincluded with <strong>SCOLA</strong> <strong>TEACH</strong>. The microphoneis equally sensitive to sound from all directions.The following microphones are available as optional accessories:Directional lapel microphone: Designed for noisy environments;more sensitive to sounds from one direction.Lavalier microphone: Hangs around the neck along withthe <strong>SCOLA</strong> <strong>TEACH</strong>. The lavalier microphone lead alsoserves as an antenna.When hung around the neck, the <strong>SCOLA</strong> <strong>TEACH</strong> displayis upside down. Press simultaneously to rotatethe display and keys 180 degrees.Headset microphone: Designed for especially noisy environments.It should be placed 2-3 cm from the mouthof the speaker. The advantage of this microphone typeis that its signal remains unchanged even if the personspeaking turns his or her head.All microphones for <strong>SCOLA</strong> <strong>TEACH</strong> are provided witha 2.5 mm jack.40
Operating rangeThe operating range of the FM system is highly dependenton the surroundings, including construction materials.The optimum operating range of 20-30 metres canbe obtained in the open and with the microphone leadhanging freely. Inside buildings with steel and concretewalls and floors, the operating range may be reducedto ten metres. The position of the <strong>SCOLA</strong> receiver willalso affect the range.cautionNote that what is being transmitted from <strong>SCOLA</strong> <strong>TEACH</strong> maypossibly be picked up by another FM system.Phono / SCART plugsIf the 3.5 mm jack of the audio lead does not fit the audioequipment, an additional lead should be acquired.Phono plugs are widely used with CD players, stereosystems, etc., and a SCART plug can be used with televisionsets or video equipment provided with a SCARTconnection. Connect the leads and plugs in the followingway:Audio lead lead with phono/SCART plugs SCART connection.41
WARNINGAudio connector (3.5 mm jack):The safety of the use of <strong>SCOLA</strong> <strong>TEACH</strong> is determined by any externalequipment that is connected to the <strong>SCOLA</strong> <strong>TEACH</strong> viathe audio connector. When <strong>SCOLA</strong> <strong>TEACH</strong> is connected to externalmains-operated equipment via the audio connector, thisequipment must comply with IEC60065, IEC60950, IEC 60601-1 or equivalent safety standards.Team Teaching function (<strong>SCOLA</strong> <strong>TEACH</strong> with TeamTeaching only)When the Team Teaching function is active, the signalfrom the team microphone (an extra FM microphonesuch as <strong>SCOLA</strong> TALK) will be relayed to one or more<strong>SCOLA</strong> receivers along with the microphone signalfrom <strong>SCOLA</strong> <strong>TEACH</strong>. This allows two persons, e.g. twoparents or teachers, to be in contact with one or severalFM users at the same time.With the team microphone’s audio input connectedto a TV or audio equipment, the sound signal is sentwirelessly to the student, who can simultaneously hearwhat the teacher is saying.42
Additional technical information:<strong>SCOLA</strong> <strong>TEACH</strong> has a built-in FM receiver which enablesTeam Teaching. The channel used for the receiver andthe team microphone must be the same. This channelcan be selected in the Team Teaching menu.Reception on the Team Teaching channel is onlypossible if the frequency distance between the<strong>SCOLA</strong> <strong>TEACH</strong> transmitting channel and the TeamTeaching receiving channel is sufficiently large. Thisdistance is calculated by a program integrated in<strong>SCOLA</strong> <strong>TEACH</strong>. If the frequency distance is too small,the Team Teaching channel number will have a greyappearance with an exclamation mark, indicating thatthere is a risk of interference .If the channel for the team microphone cannot bechanged, another transmitting channel can be selecteduntil the warning disappears.43
WARRANTYA warranty of two years is provided. The warranty coversany defects in manufacture or materials. Defectsarising from improper handling or repairs carried outby an unauthorised party are not covered by this warranty.44
REGULATORY INFORMATIONWIDEX A/S • Nymoellevej 6, DK-3540 LyngeDenmark • www.widexusa.comHereby, <strong>Widex</strong> A/S declares that this <strong>SCOLA</strong> <strong>TEACH</strong>44and <strong>SCOLA</strong> <strong>TEACH</strong>33 are in compliance with the essentialrequirements and other relevant provisions ofDirective 1999/5/EC.A copy of the Declaration of Conformity can be foundat http://www.widex.com45
FCC ID: U28AT31IC: 5676B-STEFederal Communications Commission StatementThis device complies with part 15 of the FCC Rules.Operation is subject to the following two conditions:(1) This device may not cause harmful interference, and(2) this device must accept any interference received,including interference that may cause undesiredoperation.NOTE:This equipment has been tested and found to complywith the limits for a Class B digital device, pursuantto part 15 of the FCC Rules. These limits are designedto provide reasonable protection against harmfulinterference in a residential installation. This equipmentgenerates, uses and can radiate radio frequency energyand, if not installed and used in accordance with the<strong>instructions</strong>, may cause harmful interference to radiocommunications. However, there is no guarantee thatinterference will not occur in a particular installation. Ifthis equipment does cause harmful interference to radioor television reception, which can be determined byturning the equipment off and on, the user is encouragedto try to correct the interference by one or more of thefollowing measures:46
— Reorient or relocate the receiving antenna.— Increase the separation between the equipment andreceiver.— Connect the equipment into an outlet on a circuitdifferent from that to which the receiver is connected.— Consult the dealer or an experienced radio/TVtechnician for help.NOTE:This equipment complies with FCC radiation exposurelimits set forth for an uncontrolled environment. Thistransmitter must not be co-located or operating inconjunction with any other antenna or transmitter.Changes or modifications to the equipment not expresslyapproved by <strong>Widex</strong> could void the user’s authority tooperate the equipment.Industry Canada Statement /Déclaration d’industrie CanadaUnder Industry Canada regulations, this radio transmittermay only operate using an antenna of a type andmaximum (or lesser) gain approved for the transmitter byIndustry Canada.To reduce potential radio interference to other users, theantenna type and its gain should be so chosen that theequivalent isotropically radiated power (e.i.r.p.) is notmore than that necessary for successful communication.47
This device complies with Industry Canada licenceexemptRSS standard(s). Operation is subject to thefollowing two conditions:(1) this device may not cause interference, and(2) this device must accept any interference, includinginterference that may cause undesired operation of thedevice.Conformément à la réglementation d’Industrie Canada,le présent émetteur radio peut fonctionner avec uneantenne d’un type et d’un gain maximal (ou inférieur)approuvé pour l’émetteur par Industrie Canada.Dans le but de réduire les risques de brouillageradioélectrique à l’intention des autres utilisateurs, ilfaut choisir le type d’antenne et son gain de sorte quela puissance isotrope rayonnée équivalente (p.i.r.e.) nedépasse pas l’intensité nécessaire à l’établissement d’unecommunication satisfaisante.Le présent appareil est conforme aux CNR d’IndustrieCanada applicables aux appareils radio exempts delicence. L’exploitation est autorisée aux deux conditionssuivantes :(1) l’appareil ne doit pas produire de brouillage, et(2) l’utilisateur de l’appareil doit accepter tout brouillageradioélectrique subi, même si le brouillage estsusceptible d’en compromettre le fonctionnement.48
FM systems and hearing aids, accessoriesand batteries should not be disposed ofwith normal household waste. Please consultyour national <strong>Widex</strong> distributor for adviceon how to dispose of these items.49
SETTINGSSerial number:________________________Gain adjustment:______________________50
MANUFACTURERWIDEX A/S • Nymoellevej 6, DK-3540 LyngeDenmark • www.widex.comPrinted by HTO / 2011-08¡9 514 0197 001T¤ ¡#01v¤9 514 0197 001 #01