airVision User Guide - Ubiquiti Networks
airVision User Guide - Ubiquiti Networks
airVision User Guide - Ubiquiti Networks

Create successful ePaper yourself
Turn your PDF publications into a flip-book with our unique Google optimized e-Paper software.
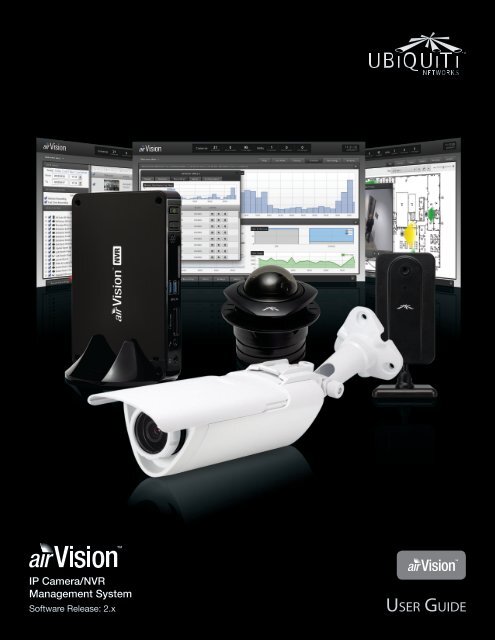
IP Camera/NVRManagement SystemSoftware Release: 2.x
<strong>airVision</strong> <strong>User</strong> <strong>Guide</strong>Table of ContentsTable of ContentsChapter 1: Installation ..............................................1Overview .........................................................................1System Requirements ............................................................1Hardware Installation .............................................................1Software Installation ..............................................................1Chapter 2: Using the <strong>airVision</strong> Software .............................4Interface Tabs ....................................................................4Common Interface Options .......................................................4Chapter 3: Map Tab .................................................9Adding a Map ....................................................................9Chapter 4: Live View Tab ...........................................14Views ...........................................................................14View Playlists ....................................................................16Cameras ........................................................................18Chapter 5: Devices Tab ............................................19Cameras ........................................................................19NVRs ............................................................................21Chapter 6: Statistics Tab ...........................................28Motion Distribution .............................................................28NVR Statistics ....................................................................29Chapter 7: Recordings Tab .........................................30Date Range. . . . . . . . . . . . . . . . . . . . . . . . . . . . . . . . . . . . . . . . . . . . . . . . . . . . . . . . . . . . . . . . . . . . . .30Recording Filters ................................................................30Device Filters ....................................................................30Recordings View ................................................................31Chapter 8: Analytics Tab ...........................................33Creating a New Zone ............................................................33Editing a Zone ...................................................................35Deleting a Zone .................................................................35Appendix A: Mobile Support ......................................36Mobile Site ......................................................................36Appendix B: Contact Information ..................................39<strong>Ubiquiti</strong> <strong>Networks</strong> Support ......................................................39<strong>Ubiquiti</strong> <strong>Networks</strong>, Inc.i
<strong>airVision</strong> <strong>User</strong> <strong>Guide</strong>Chapter 1: InstallationOverview<strong>airVision</strong> is a powerful, flexible, integrated IP videomanagement platform for video surveillance designed towork with <strong>Ubiquiti</strong>’s airCam product line. <strong>airVision</strong> has anintuitive, configurable, and feature-packed user interfacewith advanced features such as motion detection,auto‐discovery, user-level security, storage management,reporting, and mobile device support.<strong>airVision</strong> is pre-installed on the <strong>airVision</strong> NVR. This chapterprovides instructions for users that wish to install the<strong>airVision</strong> software on a computer.System Requirements• Intel Atom D2500 CPU, 2 GB RAM, 100 GB HDD• Microsoft Windows 7+ 64-bit or Ubuntu 12.04+ / Debian6+ 64-bit• Java Runtime Environment 1.6+• FlashPlayer 11• Web Browser: Mozilla Firefox, Google Chrome, AppleSafari, or Microsoft Internet Explorer 10 (or above)Hardware InstallationEnsure your cameras are running the latest version of thecamera firmware. The latest firmware can be found atdownloads.ubnt.com/airvisionFollow the directions in the Quick Start <strong>Guide</strong> thataccompanied your airCam to install your camera.Software InstallationDownload the latest version of the <strong>airVision</strong> software atdownloads.ubnt.com/airvision1. Launch the executable (.exe) file. You may be asked toallow the program to make changes to this computer. Ifso, you will need to click Yes.2. The <strong>airVision</strong> NVR Setup Wizard will start. Click Next.Chapter 1: Installation3. To continue, you must click I agree to accept thelicense agreement.4. The <strong>airVision</strong> Setup Wizard will start. Click Next.5. If your computer doesn’t have Java 1.6 or aboveinstalled, you will be prompted to install it. Click Installto continue. Click Close when it is finished installing.6. Be sure that Start AirVision 2 after installation is selectedand click Finish.7. The <strong>airVision</strong> software will start. Once <strong>airVision</strong> hasstarted, click the <strong>airVision</strong> tray icon and select Open inBrowser.<strong>airVision</strong> tray icon<strong>Ubiquiti</strong> <strong>Networks</strong>, Inc.1
<strong>airVision</strong> <strong>User</strong> <strong>Guide</strong>Launching the <strong>airVision</strong> SoftwareIf you selected Start AirVision after installation when youinstalled the software, <strong>airVision</strong> will launch automatically.When you need to launch the software again or if youdidn’t select the option, you can launch <strong>airVision</strong> via thefollowing methods.1. Launch the <strong>airVision</strong> software using one of thefollowing methods:• Start > ProgramsChapter 1: Installation2. The <strong>airVision</strong> License Agreement will appear. To beginyou must accept the terms and click I accept.• <strong>airVision</strong> desktop icon.3. The <strong>airVision</strong> Setup Wizard will appear:a. Enter a system name for the NVR.b. Select your preferred language.c. Specify your time zone.d. Click Next.2. The <strong>airVision</strong> software will start. Once <strong>airVision</strong> hasstarted, click the <strong>airVision</strong> tray icon and select Open inBrowser.<strong>airVision</strong> tray iconConfiguring the <strong>airVision</strong> Software1. You may receive a security certificate warning, clickProceed anyway.4. Enter an administrator email address, name, andpassword to use when accessing the <strong>airVision</strong>Controller Interface. Confirm your password. Click Next.<strong>Ubiquiti</strong> <strong>Networks</strong>, Inc.2
<strong>airVision</strong> <strong>User</strong> <strong>Guide</strong>Chapter 2: Using the <strong>airVision</strong>SoftwareChapter 2: Using the <strong>airVision</strong> SoftwareCommon Interface OptionsThe common interface options are accessible from all tabsin the <strong>airVision</strong> interface.The <strong>airVision</strong> software has a browser-based interface foreasy configuration and management.To access the interface, perform the following steps:1. Launch the <strong>airVision</strong> application if it hasn’t alreadybeen started. Windows users, go to:Start > All Programs > <strong>Ubiquiti</strong> <strong>airVision</strong>2 > <strong>airVision</strong>22. The <strong>airVision</strong> software will start. Once <strong>airVision</strong> hasstarted, click the <strong>airVision</strong> tray icon and select Open inBrowser.3. The login screen will appear. Enter the email addressand password in the appropriate fields and click Login.Interface TabsThe <strong>airVision</strong> software consists of six primary tabs. This<strong>User</strong> <strong>Guide</strong> covers each tab with a chapter. For details on aspecific tab, refer to the appropriate chapter.• “Map Tab” on page 9• “Live View Tab” on page 14• “Devices Tab” on page 19• “Statistics Tab” on page 28• “Recordings Tab” on page 30• “Analytics Tab” on page 33Cameras• connected Drop-down clickable list of all of thecameras that are online.• disconnected Displays a list of cameras that werepreviously online but are no longer accessible.• unmanaged Drop-down clickable list of all of thecameras that are not yet managed but are available formanagement.NVRs• connected Drop-down clickable list of all of the NVRsthat are online.• disconnected Displays a list of NVRs that werepreviously online but are no longer accessible.• unmanaged Drop-down clickable list of all of theNVRs that are not yet managed but are available formanagement.Time/DateThe current time and date are displayed on the screen.Welcome The welcome on the left has a drop-down menu thatallows you to select or create camera profiles or log out.Camera ProfilesCamera profiles can be created to easily save and selectdifferent camera recording configurations.<strong>Ubiquiti</strong> <strong>Networks</strong>, Inc.4
<strong>airVision</strong> <strong>User</strong> <strong>Guide</strong>Recent Motion RecordingsDisplays a list of recent motion recordings, including thedate and time the recording occurred and camera details.Clear Clears the list of Recent Recordings. This doesn’tdelete the actual recordings; it just removes the entriesfrom this list.Search Allows you to search for specific text. Simplybegin typing; there is no need to press enter. The resultsare filtered in real time as soon as you type two or morecharacters.Time Displays the date and time that the recording tookplace. The year/month/day and hour:minute:seconds aredisplayed.Type The type of recording.Info Displays the zone information.Camera Displays the name of the camera that capturedthe recording. It is a clickable link that will open theCamera Details window. For details on the Camera Detailswindow, refer to “Camera Details Window” on page21.Archived RecordingsChapter 2: Using the <strong>airVision</strong> SoftwareTime Displays the date and time that the recording tookplace. The year/month/day and hour:minute:seconds aredisplayed.Type The type of recording.Info Displays the zone information.Camera Displays the name of the camera that capturedthe event. It is a clickable link that will open the CameraDetails window. For details on the Camera Details window,refer to “Camera Details Window” on page 21.Download Click the Download button to save a .MP4video file of the selected clip to your computer.Archive If you wish to remove a recording from the list ofarchived recordings, simply click the Archive button onthe right and it will be removed from the list. This doesn’tdelete the actual recording.Delete Click Delete to immediately delete a recordingpermanently.AlertsToday/All Pending/Archived Displays a list of Alerts.Toggle between alerts from Today, All Pending, andArchived alerts.Time Occurred Displays the date and time that the eventtook place. The year/month/day and hour:minute:secondsare displayed.Message Details of the alert are listed here. Somemessages contain clickable links, which are underlinedand gray. These links will open the device details window.Admin Displays the name of the associated admin (ifapplicable).Actions Allows you to archive alert messages.Search Allows you to search for specific text. Simplybegin typing; there is no need to press enter. The resultsare filtered in real time as soon as you type two or morecharacters.<strong>Ubiquiti</strong> <strong>Networks</strong>, Inc.5
<strong>airVision</strong> <strong>User</strong> <strong>Guide</strong>SettingsChapter 2: Using the <strong>airVision</strong> Software<strong>User</strong> Accounts (Only visible to admin)My Account Settings<strong>User</strong>sFull Name The full name of the user.Email Address The email address used to log in.Password The password to use for this account.Confirm Password Confirmation of the password.<strong>User</strong> Group Select an existing user group, create a newuser group, or select custom access to assign cameraaccess, API access, and choose whether to allow alertnotifications.GroupCreate groups to give custom access rights tomultiple users.My Account SettingsFull Name The name associated with the currentlylogged in account.Email Address The email address used to log in to thecurrent session.Password Enter the password to use for this account.Confirm Confirm the password.Language Select your language preference.Alert Notification Click to include this account whenemail alert notifications are sent out.API AccessEnable API Access Check to allow access to <strong>airVision</strong>from external applications.Create <strong>User</strong> GroupGroup Name Enter a name for the group.External API Access When this is enabled, users in thisgroup will be allowed to enable or disable external APIaccess.Alert Notification When enabled, users in this grouphave the ability to receive alert notifications via email.Alert notifications still need to be configured. This justgrants them the rights to receive them. Refer to “Alerts”on page 22 for details on configuring alerts.<strong>Ubiquiti</strong> <strong>Networks</strong>, Inc.6
<strong>airVision</strong> <strong>User</strong> <strong>Guide</strong>Camera AccessVisible When this is enabled, the camera itself is visible tothe user group. If only this item is enabled, users cannotconfigure the camera, view the live feed, or view or editrecordings.Configurable When enabled, the camera settings can beconfigured by users in the group.View Feed When enabled, the live feed is accessible byusers in the group.View Recordings Grants access to view recordings. <strong>User</strong>scan play the videos in <strong>airVision</strong> or download MP4 clips.Edit Recordings When enabled, users of this group canedit recordings, allowing archiving and deletion.NVR AccessVisible When this is enabled, the NVR itself is visible tothe user group.Configurable When enabled, the NVR settings can beconfigured by users in the group.System SettingsSystem ConfigurationPublic Host Name / IP Public Host / IP information for the<strong>airVision</strong> system.Public Port Public port for use with the <strong>airVision</strong> system.Time Zone The time zone the <strong>airVision</strong> Controller islocated in.Check for Updates <strong>airVision</strong> automatically checks forsystem updates but doesn’t install them unless requested.If you do not want <strong>airVision</strong> to check for updates, selectthis option.Performance Statistics Gathering <strong>airVision</strong> gathersperformance statistics and provides them to <strong>Ubiquiti</strong>for reference in an effort to continuously improveperformance. If you want to opt out of statistics gathering,click this option.Email Server ConfigurationChapter 2: Using the <strong>airVision</strong> SoftwareAccount Email Address Enter the account informationfor the email address being used to send the alert.Host Name Enter the host information (typically theSMTP settings).Port Enter the port number, which is usually 465.Use SSL If your email provider requires andSSL‐encrypted connection, click this.Use Authentication If your email provider requiresauthentication, click this and enter the username andpassword associated with the account email address.<strong>User</strong>name Enter the username associated with the emailaddress.Password Enter the password associated with the emailaddress.Send Test Email Click send to send a test email once allof your email settings are configured.Alert ConfigurationEnable Connection Alerts Whenever a device isconnected or disconnected, an email alert will be sent outif this is enabled.Enable Motion Alerts When a motion event occurs, anemail will be sent out if this option is enabled.Motion Alert Cool Down Defines the amount of time (inseconds) to wait after a motion event before sending outanother motion event email alert.Auto Management ConfigurationAuto Management When enabled, newly discoveredcameras will automatically be managed by <strong>airVision</strong>.airCam <strong>User</strong>name Enter the airCam username.airCam Password Enter the airCam password.Motion Record When enabled, cameras that areautomatically managed will have motion recordingenabled.Full Time Record When enabled, cameras that areautomatically managed will have full-time recordingenabled.Firmware Updates Check to enable automatic airCamfirmware updates.<strong>Ubiquiti</strong> <strong>Networks</strong>, Inc.7
<strong>airVision</strong> <strong>User</strong> <strong>Guide</strong>Chapter 2: Using the <strong>airVision</strong> SoftwareSystem ProfilesAllows you to define and save camera profiles. You cancreate a new profile by adding cameras manually or selectthe camera information from the current camera profile.LogsAdd New ProfileName Enter a name for the camera profile.Camera Profilesadd camera Select add camera to select which camerasyou want to include in the profile.from current profile This will duplicate all of the currentcamera settings.For each camera you can select motion record, full-timerecord, and a recording schedule. Motion and full-timerecording can both be enabled on one camera as well.Once you’ve finished all of your camera profile settings,click Save.AdminError Log Displays a log of all error messages.Connection Log Displays a log of all connections anddisconnections.Recording Log Displays a log of all recording activity.Purge Log Displays a log of all purge activity.Server InformationVersion The <strong>airVision</strong> software version is displayed here. Ifthere is an update, <strong>airVision</strong> will automatically download itand display it here (unless check for updates is disabled).Support InfoDownload Support Info Select this option to downloada file to your computer with information about yourconfiguration that can be emailed to our support team.<strong>Ubiquiti</strong> <strong>Networks</strong>, Inc.8
<strong>airVision</strong> <strong>User</strong> <strong>Guide</strong>Chapter 3: Map TabChapter 3: Map TabThe <strong>airVision</strong> software allows you to upload map imagesof your location or use Google Maps for a visualrepresentation of your camera layout. When you initiallylaunch <strong>airVision</strong>, a default sample map is displayed.Adding a MapYou can add an image you’ve created as a map imageor use Google Maps to generate an image for use as abackground.Image MapsTo add a custom map, you must first create the imageusing an illustration, image editing, or blueprintapplication that exports .jpg, .gif, or .png file formats.Once you’ve created the map, you can upload it to the<strong>airVision</strong> software by performing the following steps:1. Click the Add button.<strong>Ubiquiti</strong> <strong>Networks</strong>, Inc.9
<strong>airVision</strong> <strong>User</strong> <strong>Guide</strong>2. Enter a map name in the Label field and click Uploadan Image.Chapter 3: Map Tab5. You can adjust the zoom using the slider on the right.3. Select the file to use as a map (valid file formats are.jpg, .gif, and .png). Click Open.6. Drag the Camera icon(s) from the Cameras list onthe left to the appropriate location(s) on the map. Thecamera will appear in the area that you place it.4. Click Add Map.For additional information on the camera icon options,refer to “Camera Icons” on page 12.<strong>Ubiquiti</strong> <strong>Networks</strong>, Inc.10
<strong>airVision</strong> <strong>User</strong> <strong>Guide</strong>Google MapsTo create a custom map using Google Maps, perform thefollowing steps:1. Click the Add button.Chapter 3: Map Tab4. Drag the zoom slider on the left to full magnificationby sliding it all the way up to the plus (+) sign. Click theAdd Map button.2. Enter a map name in the Label field and click UseGoogle Maps. Click Continue.5. You can adjust the zoom using the slider on the right.6. Drag the Camera icon(s) from the Cameras list on theleft to the appropriate location(s) on the map.3. The default Google Map location will appear. Type inthe desired address and click Set Location.<strong>Ubiquiti</strong> <strong>Networks</strong>, Inc.11
<strong>airVision</strong> <strong>User</strong> <strong>Guide</strong>Camera IconsChapter 3: Map TabLive Feed iconConfiguration iconRemove iconairCam airCam Dome airCam MiniCamera Camera icons can be placed on the map toshow the location of the camera. They lock into theposition they are placed. To move the camera positionon the map, click and hold the camera icon until thearrows appear and then drag the camera to anotherlocation on the map.airCam CameraairCam CameraAdjustable Camera Field iconAdjustable Camera Field The field of view for the camerais predefined based on the camera type. Just adjust thedirection and distance. The field of view changes to redwhen motion is detected and transitions in various shadesevery 10 seconds until returning to green after a minute.Click the Camera icon to reveal additional options. Click ablank area of the map to hide the additional options.Motion10Seconds20Seconds30Seconds40SecondsNoMotionairCam Camera<strong>Ubiquiti</strong> <strong>Networks</strong>, Inc.12
<strong>airVision</strong> <strong>User</strong> <strong>Guide</strong>Configuration Brings up the Configurationwindow.There are five main tabs to select from inthe Configuration window: Details, Statistics,Recordings, Alerts, and Configuration. TheConfiguration tab is displayed initially.• Details Displays the IP Address, Model,Firmware, Uptime, Assigned NVR, NVR IP, andMode of NVR operation.• Statistics Displays CPU Utilization, Network,and Disk Usage statistics.• Recordings Displays the most recentrecordings from the selected camera. Theduration, date and time of the recording, andrecording type are displayed.• Alerts Connection and motion alerts canbe enabled from here. A schedule of whenmotion alerts should be sent can also bedefined here.Chapter 3: Map Tab• Configuration Camera configuration settingsare displayed and can be edited from this tab.It includes several sub-tabs:• Basic Configuration Defines the cameraalias and NVR assignment.• Recording Defines whether motion,full‐time, or both recording modes areenabled. Seconds before and after amotion event are defined here too.• Connection Defines the hostname, ports,username, and password.• Source Defines the source video settingsincluding resolution, bit rate, frame rate,refresh rate, and orientation.• Image & Audio Settings Defines imagesettings including gamma, brightness,contrast, hue, saturation, sharpness, anddenoise. Microphone volume levels arealso defined here.• Scheduling Allows you to define camerarecording schedules.• Broadcast Settings for streaming toRTMP (Real Time Messaging Protocol)push capable CDN (Content DeliveryNetwork).• Maintenance Displays current firmwareversion and allows for firmware updates.• Time Stamp Time zone and NTP serversettings are defined here.• Remove Removes the camera from itslocation on the map and places in theUnplaced Cameras list on the left.Live Feed Click this icon to view a live feed ofthe selected camera. You can click on the arrowsin the upper right of the live feed windowto expand the view to full-screen. Press theesc key to return to the minimized view. Clickthe window and a popup allows you to adjustthe resolution and set the view to ContrainProportions or Fill Screen. Click the X in the upperright corner to close the Live Feed window.Remove Remove the camera from the map.Map: If multiple maps have been uploaded, you canselect which map you want to view using this option.Configure Maps Use this option to add maps or edit thecurrent map(s).<strong>Ubiquiti</strong> <strong>Networks</strong>, Inc.13
<strong>airVision</strong> <strong>User</strong> <strong>Guide</strong>Chapter 4: Live View TabChapter 4: Live View TabThe Live View tab provides access to your live camerafeeds. You can view individual cameras or create custommultiple camera views.ViewsCustom views can be created to allow you to monitormultiple cameras from a single view.Create a New ViewTo create a new camera view, perform the following steps:1. Click the Add icon next to Views.Note: Camera streams are viewable withoutassigning the camera to an NVR, but for optimalperformance, cameras should be assigned to amonitor.<strong>Ubiquiti</strong> <strong>Networks</strong>, Inc.14
<strong>airVision</strong> <strong>User</strong> <strong>Guide</strong>2. Click-drag a camera from the list of Cameras to the areaon the right that says “Drag and drop a camera here”.Chapter 4: Live View Tab4. To finalize your camera view, click Save New in thelower right corner.3. Click-drag additional cameras to the desired positionson the screen. A blue position indicator highlightsthe area where the camera will be placed. Release themouse to lock a camera into place. The scale of thecamera is determined by the location it is placed on thescreen and the number of cameras in the view.5. Enter a name for the camera view in the Save As fieldand click Save.Renaming a ViewTo rename a view, perform the following steps:1. Click the Edit icon of the view you want to rename.2. Enter a new name and click Save.<strong>Ubiquiti</strong> <strong>Networks</strong>, Inc.15
<strong>airVision</strong> <strong>User</strong> <strong>Guide</strong>Adding Cameras to an Existing ViewTo add cameras to an existing view, perform the followingsteps:1. Click the view that you want to add cameras to.Deleting a ViewChapter 4: Live View TabTo delete an existing view, perform the following steps:1. Click the Delete icon next to the view that you wantto delete.2. Click-drag additional cameras to the desired positionson the screen. A blue position indicator highlightsthe area where the camera will be placed. Releasethe mouse to lock a camera into place. If you wantto replace an existing camera with another, simplyclick‐drag the new camera from the list and place itover the camera you want to replace in the view.2. Click Confirm.View PlaylistsYou can create playlists to display a rotation of individuallive camera feeds and/or pre-defined multi-camera views.The amount of time that each feed is displayed can be 5,10, 15, 30, or 60 seconds.Create a New PlaylistTo create a new playlist, perform the following steps:1. Click the Add icon next to View Playlists.3. You can save the updated view as a new view orreplace the existing view. Click Save to replace theexisting view. Click Save New if you want to save it as anew view.<strong>Ubiquiti</strong> <strong>Networks</strong>, Inc.16
<strong>airVision</strong> <strong>User</strong> <strong>Guide</strong>2. Click-drag a camera from the list of Cameras or a viewfrom the list of Views to the area on the right that says“Drag and drop a camera here”.Editing a PlaylistChapter 4: Live View TabTo edit a playlist, perform the following steps:1. Click the Edit icon of the playlist you want to edit.3. Add addtional cameras and/or views to the PlaylistEditor until the playlist suits your needs. If you want toremove a camera or view, click the Deleteicon.2. Adjust the time of any camera and/or view in theplaylist by clicking the Time icon.3. Delete any camera and/or view in the playlist byclicking the Delete4. Click Save.Deleting a Playlisticon.To delete an existing playlist, perform the following steps:1. Click the Delete icon of the playlist you want todelete.2. Click Confirm to remove the playlist.4. The playlist plays each selection for 10 seconds bydefault before moving on to the next item in theplaylist. To change the value, click the 10s next to theitem in the playlist and select 5s, 15s, 30s, or 60s. Thiswill determine the number of seconds this camera orview will be displayed during the playlist rotation.5. Enter a name for the playlist in the Name field. Ifyou want the playlist available to all users, click thecheckbox next to available for all users. Click Save.<strong>Ubiquiti</strong> <strong>Networks</strong>, Inc.17
<strong>airVision</strong> <strong>User</strong> <strong>Guide</strong>Chapter 4: Live View TabCamerasDisplays a list of available camera feeds. Click a camera toview a live feed.Display SettingsThe image resolution, display settings, and audio mutingcan be changed by clicking a live camera feed.• 720P 720 pixels of vertical resolution• 480P 480 pixels of vertical resolution• 240P 240 pixels of vertical resolution• Constrain Proportions Fits the image to the displayarea without stretching the image.• Fill Screen Stretches the image to fill the screen.• Mute Audio Mute or unmute the audio feed. Not allcameras support audio.<strong>Ubiquiti</strong> <strong>Networks</strong>, Inc.18
<strong>airVision</strong> <strong>User</strong> <strong>Guide</strong>Chapter 5: Devices TabChapter 5: Devices TabCamerasThe Devices tab displays two separate device lists, one forcameras and one for NVRs.Cameras are displayed with their name, model, firmware,recording mode, image resolution, NVR assignment,hostname/IP address, throughput, last recordingdate/time, camera status, and action buttons to view thelive feed of the camera or configure the camera.Add CameraClick the Add Camera button to manually add a camera.The Add Camera window will appear.<strong>Ubiquiti</strong> <strong>Networks</strong>, Inc.19
<strong>airVision</strong> <strong>User</strong> <strong>Guide</strong>ConnectionAlias This is the user-friendly name of the camera.Hostname/IP Displays the host name or IP address of thecamera.SSH Port The port used for SSH access to the camera. Thestandard default port is 22.RTSP Port The RTSP port is typically port 554.Authorization<strong>User</strong>name The username used to access the camera.Password The password used to access the camera.NVR AssignmentNVR Selectable from the drop-down list or unassigned.Configure SelectedClick the Configure Selected button to configure camerasettings. Multiple cameras can be selected at one time.The Configure Selected Cameras window will appear.Recording SettingsVideo SettingsChapter 5: Devices TabResolution Camera resolution settings can be configuredhere. Higher resolutions provide sharper images butconsume more bandwidth and disk space.Bit Rate Configures the bit rate for the selected camera(s).Higher bit rates provide better quality images butconsume more bandwidth and disk space.Frame Rate Configures the frames per second. Higherframe rates provide less lapse between images butconsume more bandwidth and disk space.Refresh Rate Configures the refresh rate, 50 Hz or 60 Hz.Orientation Allows you to change the camera imageorientation. For examples, see Orientation under“Image & Audio Settings” on page 24.FirmwareNVR Assignment Allows you to change the NVR that thecameras are assigned to. Select from the drop-down list ofavailable NVRs.Enable Full Time Recording Allows you to turn on or offfull-time recording for the selected camera(s).Enable Motion Recording Allows you to turn on or offmotion recording for the selected camera(s).Recording Pre-Padding When motion recording isenabled, this defines the amount of time (in seconds) thatis included in a video clip before the triggering motion.Recording Post Padding When motion recording isenabled, this defines the amount of time (in seconds) thatis included in a video clip after the last triggering motion.<strong>Ubiquiti</strong> <strong>Networks</strong>, Inc.Upload Allows you to upload a firmware file to theselected camera(s).Use Last Uploaded Uses the last firmware file uploadedto the selected camera(s).Use Latest Uses the latest version of the firmwareavailable for the selected camera(s).SearchSearch Allows you to search the tables for specific searchcriteria. Any text that is entered is used as real-time searchcriteria, and anything that doesn’t match the enteredcharacters will be removed from the view. Delete thesearch string to return to an unfiltered view.Managed/Unmanaged/DisconnectedManaged cameras are shown by default. You can selectUnmanaged or Disconnected for a list of cameras that arenot yet managed or are no longer connected.Camera Displays the name of the camera. Click thename to open the Camera Details window for the specificcamera.20
<strong>airVision</strong> <strong>User</strong> <strong>Guide</strong>Model Displays the camera model information.Firmware Displays the version of software used on thecamera.Record Mode Displays the operation mode that thecamera is in.Resolution Displays the current image resolution settingfor the camera.NVR Displays the NVR that is being used for recordingsby the camera. Click the name to open the NVR Detailswindow for the specific NVR.Note: An NVR will also automatically downscaleattached cameras when viewing the live feed.Hostname Displays the hostname of the camera.Click the hostname to access the camera configurationinterface of the selected camera. The login screen for thecamera configuration will appear. Refer to the airCamCamera Configuration Interface <strong>User</strong> <strong>Guide</strong> available onour website at documentation.ubnt.com/airvisionTx Displays the camera throughput.Last Recording Displays the date and time of the lastrecording made by the camera. Click it to view the lastrecording, and the Event Viewer will open and play therecording.Status Displays the connection status information.Actions Select an Action button to perform the desiredaction:Icon Action Descriptionyet managed or are no longer connected.Chapter 5: Devices TabNVR Displays the alias or IP address of the NVR. Click thename to open the NVR Details window of the NVR.Hostname Displays the hostname or IP address of theNVR.Version Displays the version number of the NVRfirmware.CPU Usage Displays the percentage of the CPU beingutilized by the NVR.Disk Usage Displays the amount of disk spacebeing used.Memory Free Displays the amount of memory available.Status Displays the connection status information.Actions Allows you to manage an NVR or edit theconfiguration settings.Clicking a Device LinkThe clickable device and recording links are highlighted inblue. Details vary based on the selection.Camera Details WindowThe Camera Details window has five clickable tabs: Details,Statistics, Recordings, Alerts, and Configuration.DetailsDisplays a preview of the camera feed, map location, anddetails on the selected camera. Click the camera feedpreview to view the live feed, or click the map preview tosee the location of the camera on the map.Live FeedClick to view a live feed of the camera in that row.ConfigureConfigure the camera in that row. Refer to“Configuration” on page 22 for additionaldetails.NVRsSearchManageIf automanagement is not enabled under Settings> System Settings, new cameras will appearunder the Unmanaged tab. Click the Unmanagedtab and click the Manage button to manage anunmanaged camera. You will need to enter theuser name and password for the camera.Search Allows you to search the tables for specific searchcriteria. Any text that is entered is used as real-time searchcriteria and anything that doesn’t match the enteredcharacters will be removed from the view. Delete thesearch string to return to an unfiltered view.Managed/Unmanaged/DisconnectedManaged cameras are shown by default. You can selectUnmanaged or Disconnected for a list of NVRs that are notAssigned NVR Displays the name of the NVR that thecamera has been assigned to.Motion Record Displays whether motion recording is onor off.Full Time Record Displays whether full-time recording ison or off.Hostname/IP Displays the host name or IP address of thecamera.MAC Displays the MAC address of the camera.Model Displays the camera model information.Firmware Displays the version of firmware used on thecamera.Uptime Displays the amount of time the camera has beenrunning without interruption.<strong>Ubiquiti</strong> <strong>Networks</strong>, Inc.21
<strong>airVision</strong> <strong>User</strong> <strong>Guide</strong>Last Recording The date and time of the selectedcamera’s last recording.StatisticsStatistics are shown for CPU Utilization %, Network, andDisk Usage.Icon Action DescriptionDeleteDeletes the selected recording.Chapter 5: Devices TabClicking the bars of the chart will display recordings madeduring the selected time frame.CPU Utilization % Displays the percentage of CPUutilization.Network Displays a chart of transmit and receive datato and from the camera for the last 24 hours. The chartdisplays the information in kbps.Disk Usage Displays a chart of the disk usage for the last24 hours.RecordingsRecordings for the selected camera can be viewed fromthis tab. A chart of recordings made by the selectedcamera in the last 24 hours is also displayed here.PlaylistThe right side of the Playback window displays a playlistof the selected recordings. Thumbnails display a previewof the recording and recording length. The camera name,date, and time of the recording are displayed next to thethumbnail.Playback ControlsPrevious Play the previous recording in theplaylist.Next Play the next recording in the playlist.Duration Displays the time duration of the recording.Time Displays the date and time of the recording.Info Displays the cause of the recording.Actions Action buttons are as follows:Icon Action DescriptionExportArchiveExports an .MP4 of the selected video toyour system default download folder.Select this to archive a recording for quickaccess from the Archived Recordings tab.Config Adjust the camera settings:• Constrain Proportions Fits the image to thedisplay area without stretching the image.• Fill Screen Stretches the image to fill thescreen.• Mute Audio Mute or unmute the audio feed.Not all cameras support audio.• Show Motion When enabled, graphicelements are overlaid during playback toindicate where motion was detected to triggerthe recording.Download Click the Download button todownload an .MP4 video file of the selected clipto your computer.Archive Click to archive a recording. Therecording will be listed under the ArchivedRecordings tab and will not be deleted.<strong>Ubiquiti</strong> <strong>Networks</strong>, Inc.22
<strong>airVision</strong> <strong>User</strong> <strong>Guide</strong>Chapter 5: Devices TabDelete Click to immediately delete a recordingpermanently.AlertsToggle Playlist Click this button to show/hidethe playlist thumbnails in the Playback window.Alias This field defines the name of the camera.NVR Assignment Defines the NVR that the selectedcamera is assigned to.RecordingEnable Connection Alerts Click the checkbox Email mewhen camera goes offline/online. Connection alerts will besent out when the connection status changes.Enable Motion Alerts Click the checkbox Email me whenmotion is detected. Motion alerts will be sent out whenmotion is detected during the times selected in the MotionAlert Schedule.Motion Alert Schedule Select or create a motion alertschedule. Only motion that is detected during the time inthe selected schedule will trigger an email notification.ConfigurationRecord Mode Allows you to define the recordingmode of the camera on the NVR. You can select eitherof the options below or both of them to have full-timerecordings and motion clips:• Motion Record All captured images are analyzed andclips are generated when motion is detected in zonesspecified on the Analytics tab.--Seconds to Record Before Motion Defines theamount of time in the video clip before the triggeringmotion occurs.--Seconds to Record After Motion Defines theamount of time in the video clip after the triggeringmotion occurs.• Full Time Record Continuous clips of a fixed lengthare generated regardless of motion; this is similar to atime‐lapse video recorder. There is no motion detectionused in this mode.ConnectionBasic ConfigurationHostname The hostname or IP address of the camera.SSH Port The port used for SSH access to the camera. Thestandard default port is 22.RTSP Port The RTSP port is typically port 554.<strong>User</strong>name The username used to access the camera.Password The password used to access the camera.Source<strong>Ubiquiti</strong> <strong>Networks</strong>, Inc.23
<strong>airVision</strong> <strong>User</strong> <strong>Guide</strong>Resolution Displays the current resolution setting for thecamera and allows you to change the setting.Note: The selected resolution must be supportedby the camera or the image may not appearcorrectly.Bit Rate The bit rate can be 256, 512, 1024, 2048, or 4096.Typically larger numbers are used for higher quality.Frame Rate Selects the frames per second. Larger framerates capture more images per second but require morebandwidth and storage space.Refresh Rate The refresh rate is 50 Hz or 60 Hz. Typicallythis depends on the region.Orientation Defines the image orientation. Below are theoptions for image orientation.Orientation Description ExampleNormalDisplays the video feed innormal mode.Chapter 5: Devices TabContrast Adjusts the image contrast using theadjustment slider. The value goes from 0 (lowest) to 100(highest).Hue Adjusts the image hue using the adjustment slider.The range is from 0 (lowest) to 100 (highest).Saturation Adjusts the image color saturation using theadjustment slider. The range is from 0 (no color) to 100(maximum color).Sharpness Adjusts the image sharpness using theadjustment slider. The range is from 0 to 100.Denoise Adjusts the denoise image filter using theadjustment slider. The range is 0 to 100.Mic Volume Level This option only appears if audio issupported on the selected camera. The volume levelrange is from 0 to 100.Reset to Default Returns all of the Image & Audio Settingsto their default values.SchedulingFlip HorizontallyFlips the entire imagehorizontally.Flip VerticallyFlips the entire imagevertically.Set Schedule Schedules can be created by clicking theAdd icon. To edit a schedule, click the Edit icon.Select the desired schedule from the drop-down list.Creating a New ScheduleInvertedFlips the entire imagehorizontally and vertically.Image Orientation OptionsImage & Audio SettingsThe image settings can be adjusted using the adjustmentsliders. Click View Feed to view a live feed of the camerato view your settings adjustments as you make them.Gamma Adjusts the gamma correction of the imageusing the adjustment slider. The range is from 0 to 100.Brightness Adjusts the image brightness using theadjustment slider. The range is from 0 (darkest) to 100(brightest).1. Click the Add icon.2. Enter a schedule name in the Schedule Name field.3. Click and drag a timeline on a day of the week andstart time. You can adjust the timeline by clicking andholding at the start or end point of a timeline.Note: You can add specific calendar dates to theschedule by clicking the Add Date button.4. Click the Edit icon, which is visible when you rolloverthe upper right end of a timeline. Select the type ofrecording that you want applied to this timeline. For<strong>Ubiquiti</strong> <strong>Networks</strong>, Inc.24
<strong>airVision</strong> <strong>User</strong> <strong>Guide</strong>Chapter 5: Devices TabCPU Utilization % Displays a chart with the low, average,and high CPU utilization details for the last 24 hours. Youcan place the mouse over areas in the timeline for specificdetails.Network (Peak) Displays a chart of transmit and receivedata to and from the NVR for the last 24 hours. The chartdisplays the information in kbps.Disk Usage Displays a chart of the disk usage for the last24 hours.CamerasEnable Connection Alerts Click Email me when NVRgoes offline/online to receive messages when an NVRoffline/online event occurs. Refer to “Email ServerConfiguration” on page 7 for details on configuringemail.ConfigurationCamera Displays the name of the camera.Mode Displays the camera recording mode.Hostname The hostname or IP address of the camera.Tx Displays the camera transmission rate in kbps.Status Displays the connection status of the camera.ActionsIcon Action DescriptionBasic ConfigurationLive FeedClick to view a live feed of the camera in that row.Configure Configure the camera in that row.AlertsAlias This is the name of the NVR.Hostname The hostname or IP address of the NVR.StorageStorage Path Defines the path to where video clips arestored.<strong>Ubiquiti</strong> <strong>Networks</strong>, Inc.26
<strong>airVision</strong> <strong>User</strong> <strong>Guide</strong>Chapter 6: Statistics TabChapter 6: Statistics TabThe Statistics tab displays the following:• Motion Distribution• By Camera• By Zone• By Time• NVR Statistics• CPU Utilization• Network• Disk & Memory• Disk UsageMotion DistributionThe default statistics displayed show data from all camerasand zones for the last 24 hours.You can modify the time frame, cameras, and zonesincluded by clicking the Edit icon in the upper right.Remove checkmarks from any cameras that you want toexclude from the chart. To deselect zones, click the Plus [+]sign next to the camera to reveal available zones. Removecheckmarks from the zones you want to exclude. ClickUpdate after you’ve removed the checkmarks from thecameras and zones you want to exclude.<strong>Ubiquiti</strong> <strong>Networks</strong>, Inc.28
<strong>airVision</strong> <strong>User</strong> <strong>Guide</strong>Motion Distribution by CameraNVR StatisticsChapter 6: Statistics TabBy default, statistics for all NVRs for the last 24 hours aredisplayed.Displays a pie chart representation of motion distributedby camera that occurred during the specified time frame(24 hours by default). You can place the cursor overareas of the chart to view the total number of recordingsfor each camera during the specified time frame. Thepercentage of activity for each camera is also displayed.Click an area of the chart to see a playlist of recordings forthe selected camera during the specified time frame.Motion Distribution by ZoneYou can modify the time frame and the NVRs selectedby clicking the Edit icon in the upper right of the NVRStatistics area.Displays a pie chart representation of motion distributedby zone that occurred during the specified time frame(24 hours by default). You can place the cursor overareas of the chart to view the total number of recordingsfor each zone during the specified time frame. Thepercentage of activity for each zone is also displayed. Clickan area of the chart to see a playlist of recordings for theselected zone during the specified time frame.Motion Distribution by TimeCPU Utilization %Displays the CPU Utilization of the selected NVR(s). Placethe cursor over the timeline to view detailed statisticsduring the timeline.Network (Peak)Displays a bar chart representation of motion distributedby time that occurred during the specified time frame(24 hours by default). You can place the cursor over areasof the chart to view the total number of recordings foreach time slot during the specified time frame. Click abar of the chart to see a playlist of the recordings createdduring the selected time period.The Network chart details the transmit and receivebandwidth usage from all of the cameras connected to theselected NVR(s). Place the cursor over the timeline to viewdetailed statistics during the timeline.Disk & MemoryA visual representation of the amount of free space andused space is displayed. Place the cursor over the graphsto display detailed disk space statistics.Disk UsageDisplays a chart of disk usage for the specified time frame.Place the cursor over the chart to display details.<strong>Ubiquiti</strong> <strong>Networks</strong>, Inc.29
<strong>airVision</strong> <strong>User</strong> <strong>Guide</strong>Chapter 7: Recordings TabChapter 7: Recordings TabThe Recordings tab allows you to search recordings bydate, recording type, and camera.Date RangeTo Click in the To date field and a calendar will appearthat will allow you to select an end date. Click the timefield and either manually enter a time or use the arrows toselect an hour.Recording FiltersSelect Quick Links display recordings from selected timeframes. Recording and device filters will filter quick linkcontent results.• Today Displays a list of all recordings from today.• Last 7 Days Displays a list of recordings from the last 7days.• Last Month Displays a list of recordings from the lastmonth.From Click in the From date field and a calendar willappear and allow you to select a start date. Click the timefield and either manually enter a time or use the arrows toselect an hour.• Motion Detection Select this if you want your searchresults to include motion detection recordings.• Recording Select this if you want your search to includestandard recordings.Device FiltersDevices allows you to select cameras and zones that youwant included in recording searches. Every camera thathas a checkmark next to it will be included in your search.<strong>Ubiquiti</strong> <strong>Networks</strong>, Inc.30
<strong>airVision</strong> <strong>User</strong> <strong>Guide</strong>Chapter 7: Recordings TabSearching ZonesFor cameras that have multiple zones configured, you canselect individual zones to search.Recordings ViewTo search individual zones, perform the following steps:1. Click the Plus [+]sign to the left of the checkbox andcamera icon.2. Deselect any zones that you do not want to search.3. Select the date range by entering values in the Fromand To fields under Date Range.4. Ensure that Motion Detection is selected underRecording Type.5. Click the Search button and the results will appear inthe Recordings view.Play Place a checkmark next to the videos that you wantto play. If you want to sort them by duration, time, info, orcamera, then click the appropriate title in the Recordingswindow. Once you click the Play button, the selectedrecordings will open in the Playback window according tothe sort selection you have applied.Archive Place a checkmark next to videos that you wantto make accessible via the Archived Recordings tab, andthen click the Archive button. Archived videos are notdeleted.Delete Place a checkmark next to videos that you want topermanently delete and then click the Delete button.Search Allows you to search the results for specific searchcriteria. Any text that is entered is used as real‐time searchcriteria, and anything that doesn’t match the enteredcharacters will be removed from the view. Delete thesearch string to return to an unfiltered view.Select All The Select All button allows you to select allof the recordings in the Playback window. You can play,archive, or delete them.Select All buttonDuration Videos are listed below the Duration headerwith a thumbnail preview and the length of the clip in thelower right corner. The Duration header can be used tosort videos by recording length, either descending fromshortest to longest or from longest to shortest.Time By default the clips are sorted by time and date. Ifyou enter a date range, the first clips to appear are theoldest (closest to the From date and time). If you select aQuick Link, the clips are sorted from newest to oldest. Totoggle the date and time sorting, click the Time header.Type Displays the recording type. Click the header togroup all of the same types of recording.Info Displays the recording zone and camera name. Clickthe header to group all of the same zones.<strong>Ubiquiti</strong> <strong>Networks</strong>, Inc.31
<strong>airVision</strong> <strong>User</strong> <strong>Guide</strong>Camera Displays the name of the camera. Click thename to open the Camera Details window for the specificcamera. Click the header to group the camera recordingsbased on the camera.Actions The actions are as follows:• Download Click the Download button to save a .MP4video file of the selected clip to your computer.• Archive Click to archive a recording. The recording willbe listed under the Archived Recordings tab and will notbe deleted.• Delete Click Delete to immediately delete a recordingpermanently.Playback WindowChapter 7: Recordings TabDownload Click the Download button todownload an .MP4 video file of the selected clipto your computer.Archive Click to archive a recording. Therecording will be listed under the ArchivedRecordings tab and will not be deleted.Delete Click to immediately delete a recordingpermanently.Toggle Playlist Click this button to show/hidethe playlist thumbnails in the Playback window.PlaylistThe right side of the Playback window displays a playlistof the selected recordings. Thumbnails display a previewof the recording and recording length. The camera name,date, and time of the recording are displayed next to thethumbnail.Playback ControlsPrevious Play the previous recording in theplaylist.Next Play the next recording in the playlist.Config Adjust the camera settings:• Constrain Proportions Fits the image to thedisplay area without stretching the image.• Fill Screen Stretches the image to fill thescreen.• Mute Audio Mute or unmute the audio feed.Not all cameras support audio.• Show Motion When enabled, graphicelements are overlaid during playback toindicate where motion was detected to triggerthe recording.<strong>Ubiquiti</strong> <strong>Networks</strong>, Inc.32
<strong>airVision</strong> <strong>User</strong> <strong>Guide</strong>Chapter 8: Analytics TabChapter 8: Analytics TabThe Analytics tab allows you to define zones for motiondetection. You can define multiple zones for each cameraand adjust the sensitivity threshold. This allows yourNVR to record only when motion is detected in areas ofa camera feed that you’ve defined. Setting the sensitivitylevel allows you to define how much motion is required totrigger the motion detection recording.Creating a New Zone1. Click the camera that you want to create a zone for.3. Click the area on the image where you want to start thezone.2. A default zone is created for each camera thatencompasses the entire viewing area. The zone has thesame name as the camera. Click the x next to the zonename to delete the default zone.<strong>Ubiquiti</strong> <strong>Networks</strong>, Inc.33
<strong>airVision</strong> <strong>User</strong> <strong>Guide</strong>4. Click to define as many additional points as you needuntil you close the zone by clicking the starting pointagain.Chapter 8: Analytics Tab7. (Optional) If you want to create additional zones, clickthe desired areas on the feed and follow the samesteps.5. The Zone Settings window will appear. Enter a name forthe zone in the Label field.8. Once you’ve created your zone(s), click Save to add thezone(s) or Discard to discard the zone(s).6. Adjust the sensitivity using the Sensitivity slider. If youwant to test the sensitivity, click the Test button. Asvarious degrees of motion occur, you’ll see differentlevel spikes. Adjust the sensitivity to a level thatbest suits your needs. Motion spikes that exceed thesensitivity threshold you define will be recorded whenmotion detection is enabled. Click Test again to stopthe test.Save button<strong>Ubiquiti</strong> <strong>Networks</strong>, Inc.34
<strong>airVision</strong> <strong>User</strong> <strong>Guide</strong>Appendix A: Mobile SupportYou can access the <strong>airVision</strong> user interface from iOS andAndroid-based smart phones and tablets. <strong>airVision</strong> has amobile site and a desktop site. Smart phones default tothe mobile site and tablets use the desktop site.Mobile Site1. To connect to the web interface, enter the IP address ofthe <strong>airVision</strong> server in your web browser.2. Select <strong>airVision</strong> Controller.airCamsAppendix A: Mobile SupportAfter login, a list of managed airCams is displayed.MenuCamera Detail LinksMenu3. Enter the email address and password used to login toyour <strong>airVision</strong> Controller.<strong>Ubiquiti</strong> <strong>Networks</strong>, Inc.36
<strong>airVision</strong> <strong>User</strong> <strong>Guide</strong>Appendix A: Mobile SupportCamera DetailsDisplays a preview of camera video feed. Click on theimage to view the live feed.SearchState Displays that current state of the camera.Host Displays the host name or IP address of the camera.Motion Record Displays whether motion recording is onor off.Full Time Record Displays whether full time recording ison or off.RecordingsStart Time Touch in the field below Start Time anda calendar will appear that will allow you to select abeginning date and time. Touch Set.SearchRecordingsEnd Time Touch in the field below End Time and acalendar will appear that will allow you to select an endingdate and time. Touch Set.All Cameras Touch to select all available cameras.<strong>Ubiquiti</strong> <strong>Networks</strong>, Inc.37
<strong>airVision</strong> <strong>User</strong> <strong>Guide</strong>Recording DetailsDisplays a preview of the recording. Click on the image toview the recording.Select 720p, 480p, or 240p resolution.Appendix A: Mobile SupportRecorded At Displays the date and time of the recording.Cause Displays what triggered the recording.Camera Displays the name of the camera.Notes Displays the name of the zone (if applicable).SettingsLive Feed Resolution Displays the resolution of the livefeed. Touch it to change the resolution.<strong>Ubiquiti</strong> <strong>Networks</strong>, Inc.38
<strong>airVision</strong> <strong>User</strong> <strong>Guide</strong>Appendix B: Contact InformationAppendix B: ContactInformation<strong>Ubiquiti</strong> <strong>Networks</strong> Support<strong>Ubiquiti</strong> Support Engineers are located around the worldand are dedicated to helping customers resolve software,hardware compatibility, or field issues as quickly aspossible. We strive to respond to support inquiries withina 24-hour period.Online ResourcesSupport: support.ubnt.comCommunity: community.ubnt.comDownloads: downloads.ubnt.com2580 Orchard ParkwaySan Jose, CA 95131www.ubnt.com© 2011-2013 <strong>Ubiquiti</strong> <strong>Networks</strong>, Inc. All rights reserved. <strong>airVision</strong> ,airCam , and <strong>Ubiquiti</strong> <strong>Networks</strong> are trademarks of <strong>Ubiquiti</strong> <strong>Networks</strong>,Inc. Google Maps is a trademark of Google, Inc. WPA and WPA2 aretrademarks of the Wi-Fi Alliance.<strong>Ubiquiti</strong> <strong>Networks</strong>, Inc.39