PNEG-1162CEX - DMC DIII Stir-Ator - David Manufacturing Co.
PNEG-1162CEX - DMC DIII Stir-Ator - David Manufacturing Co.
PNEG-1162CEX - DMC DIII Stir-Ator - David Manufacturing Co.

You also want an ePaper? Increase the reach of your titles
YUMPU automatically turns print PDFs into web optimized ePapers that Google loves.
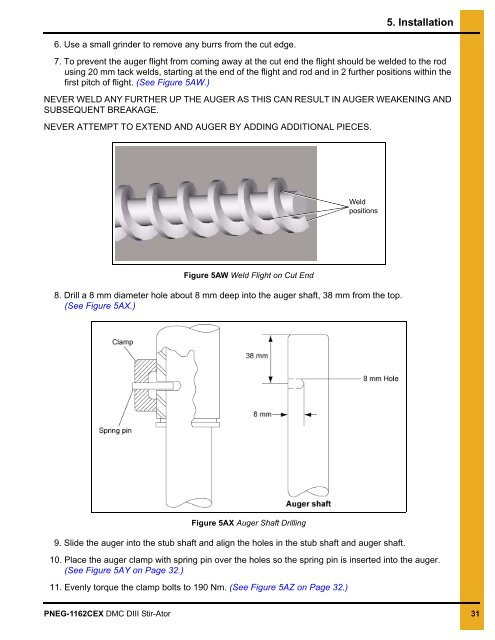
5. Installation6. Use a small grinder to remove any burrs from the cut edge.7. To prevent the auger flight from coming away at the cut end the flight should be welded to the rodusing 20 mm tack welds, starting at the end of the flight and rod and in 2 further positions within thefirst pitch of flight. (See Figure 5AW.)NEVER WELD ANY FURTHER UP THE AUGER AS THIS CAN RESULT IN AUGER WEAKENING ANDSUBSEQUENT BREAKAGE.NEVER ATTEMPT TO EXTEND AND AUGER BY ADDING ADDITIONAL PIECES.WeldpositionsFigure 5AW Weld Flight on Cut End8. Drill a 8 mm diameter hole about 8 mm deep into the auger shaft, 38 mm from the top.(See Figure 5AX.)Figure 5AX Auger Shaft Drilling9. Slide the auger into the stub shaft and align the holes in the stub shaft and auger shaft.10. Place the auger clamp with spring pin over the holes so the spring pin is inserted into the auger.(See Figure 5AY on Page 32.)11. Evenly torque the clamp bolts to 190 Nm. (See Figure 5AZ on Page 32.)<strong>PNEG</strong>-<strong>1162CEX</strong> <strong>DMC</strong> <strong>DIII</strong> <strong>Stir</strong>-<strong>Ator</strong> 31