


You also want an ePaper? Increase the reach of your titles
YUMPU automatically turns print PDFs into web optimized ePapers that Google loves.
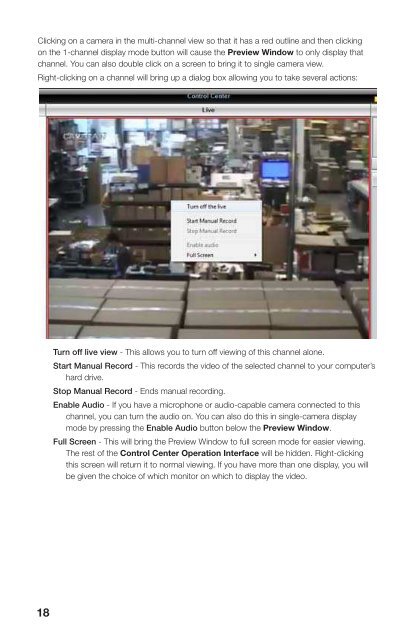
Clicking on a camera in the multi-channel view so that it has a red outline and then clickingon the 1-channel display mode button will cause the Preview Window to only display thatchannel. You can also double click on a screen to bring it to single camera view.Right-clicking on a channel will bring up a dialog box allowing you to take several actions:SNAPSHOTYou can take up to 10 still frames from asingle camera by pressing the Snapshotbutton. Click on any channel in the on-screenPreview Window to chose it. The chosencamera will have a red outline.Once you have selected the camera and pressed the Snapshot button, the Snap Picturewindow will open.Turn off live view - This allows you to turn off viewing of this channel alone.Start <strong>Manual</strong> Record - This records the video of the selected channel to your computer’shard drive.Stop <strong>Manual</strong> Record - Ends manual recording.Enable Audio - If you have a microphone or audio-capable camera connected to thischannel, you can turn the audio on. You can also do this in single-camera displaymode by pressing the Enable Audio button below the Preview Window.Full Screen - This will bring the Preview Window to full screen mode for easier viewing.The rest of the Control Center Operation Interface will be hidden. Right-clickingthis screen will return it to normal viewing. If you have more than one display, you willbe given the choice of which monitor on which to display the video.ChannelFrameSnapTitleTimeExitSave ToBrowseSavePrintFunctionsWhich camera will be used. You can select a camera using the drop down.The number of still images (1-10) that will be taken.This refreshes the images. Use this if you’ve selected a different camera.This will display the camera’s name in the upper left of the image.This will display the time the image was taken.Closes the window without taking pictures.Shows where the files will be saved.Chose a different destination for the files.Saves the imagesYou may print the currently displayed images as you would any otherdocument. You have the option to preview the printed document, changeyour printer settings, and print more than one image to a page.The images will be saved with the file names shown below each picture. The files are savedin the bitmap (BMP) format with the file name format showing the DVR’s name, the camera’sname, the date and the time the image was captured. The first image above would have thefile name: QT4--CAM11.2011.08.30.17.01.14.708.bmp18 19


