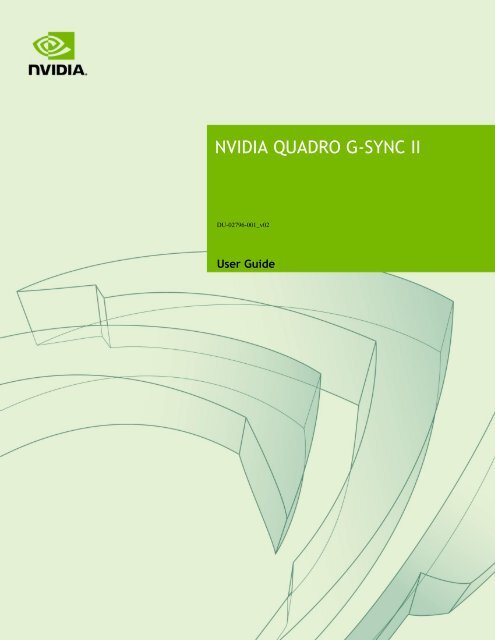
NVIDIA QUADRO G-SYNC II
NVIDIA QUADRO G-SYNC II
NVIDIA QUADRO G-SYNC II

You also want an ePaper? Increase the reach of your titles
YUMPU automatically turns print PDFs into web optimized ePapers that Google loves.
<strong>NVIDIA</strong> <strong>QUADRO</strong> G-<strong>SYNC</strong> <strong>II</strong><br />
DU-02796-001_v02<br />
User Guide
Table of Contents<br />
Introduction 1<br />
About This Guide 1<br />
<strong>NVIDIA</strong> Quadro G-Sync <strong>II</strong> 3<br />
System Requirements 3<br />
Implementing SLI Technology 3<br />
<strong>NVIDIA</strong> Frame Synchronization 4<br />
Unpacking 4<br />
<strong>NVIDIA</strong> Quadro G-Sync <strong>II</strong> Equipment 5<br />
Safety Instructions 6<br />
Installing <strong>NVIDIA</strong> Quadro G-Sync <strong>II</strong> Card 7<br />
<strong>NVIDIA</strong> Frame Synchronization Under Windows 9<br />
How To Set Up Genlock 10<br />
Set Up the Hardware 10<br />
Set Up the Software 12<br />
How To Set Up Frame Lock 16<br />
Set Up the Hardware 17<br />
Set Up the Server Software 18<br />
Changing the Timing Signal Frequency 19<br />
Set Up the Client Software 20<br />
Swap Sync Setup 22<br />
Setting Up Genlock + Frame Lock 23<br />
Checking the Connection Status 24<br />
Swap Sync 25<br />
<strong>NVIDIA</strong> Frame Synchronization Under Linux 27<br />
Using the nvidia-settings Utility 28<br />
How To Set Up Genlock 28<br />
Set Up the Hardware 29<br />
Set Up the Software 30<br />
How to Set Up Frame Lock 34<br />
Set Up the Hardware 34<br />
Set Up the Server Software 35<br />
Test the Connections 37<br />
Swap Sync 38
<strong>NVIDIA</strong> Quadro G-Sync <strong>II</strong> User Guide<br />
Setting Up Genlock + Frame Lock 39<br />
Leveraging Frame Lock/Genlock in OpenGL 40<br />
Frame Lock Restrictions 40<br />
Supported Frame Lock Confi gurations 41<br />
Confi guring Frame Sync Using nvidia-settings Command 42<br />
General Steps 42<br />
Sample Confi gurations 42<br />
Writing a Frame Lock NV-CONTROL Client 49<br />
Writing a Frame Lock Client for NV-CONTROL 1.8 49<br />
Writing a Frame Lock Client for NV-CONTROL 1.9 51<br />
Using the OpenGL Extensions 55<br />
Frame Synchronization Using the OpenGL Extensions 56<br />
About Buffer Swaps 56<br />
Confi guring for Swap Sync 58<br />
OpenGL Extensions 59<br />
References and Resources 63<br />
Getting Driver Updates 63<br />
Registration, Support and Warranty 65<br />
Registering Your Quadro G-Sync <strong>II</strong> 65<br />
Warranty and Support 66<br />
Compliance and Certifi cations 67
Introduction to<br />
<strong>NVIDIA</strong> Quadro G-Sync <strong>II</strong><br />
The <strong>NVIDIA</strong> ® Quadro G-Sync <strong>II</strong> is an option card for the<br />
<strong>NVIDIA</strong> Quadro 6000, 5000, Quadro FX 5800, and FX 4800<br />
graphics boards. Featuring frame lock and genlock functionality,<br />
the Quadro G-Sync <strong>II</strong> delivers unprecedented levels of realism,<br />
visualization and collaborative capabilities by enabling advanced<br />
multi-system and multi-device visualization environments.<br />
Note: It is important to register your <strong>NVIDIA</strong> Quadro G-Sync <strong>II</strong> in order<br />
to receive <strong>NVIDIA</strong> Customer Care online and phone support. You<br />
can register your Quadro G-Sync <strong>II</strong> at www.nvidia.com/register<br />
About This Guide<br />
This User Guide discusses the installation and confi guration<br />
of the <strong>NVIDIA</strong> Quadro G-Sync <strong>II</strong> option card.<br />
1
<strong>NVIDIA</strong> Quadro G-Sync <strong>II</strong> User Guide<br />
2
System Requirements<br />
<strong>NVIDIA</strong> Quadro G-Sync <strong>II</strong><br />
� Operating System (32-bit or 64-bit)<br />
� Microsoft Windows XP<br />
� Microsoft Windows Professional x64 Edition,<br />
Microsoft Windows Vista 32 bit and 64 bit<br />
Microsoft Windows 7 32 bit and 64 bit<br />
� Linux<br />
� Solaris x86<br />
� Processor<br />
� Intel Pentium 4 or Xeon processor or higher<br />
� AMD Opteron processor or higher<br />
� RAM<br />
� 2 GB minimum, 4 GB recommended<br />
� System Interface<br />
� 1 open expansion slot<br />
Implementing SLI Technology<br />
To take advantage of <strong>NVIDIA</strong>’s SLI <br />
technology combined with<br />
Genlock/Frame lock functionality, you must install one <strong>NVIDIA</strong><br />
Quadro G-Sync <strong>II</strong> card in conjunction with two supported <strong>NVIDIA</strong><br />
Quadro graphics boards in a Quadro SLI certifi ed chassis.<br />
3
<strong>NVIDIA</strong> Quadro G-Sync <strong>II</strong> User Guide<br />
See http://www.nvidia.com/object/quadro_sli.html for more information..<br />
<strong>NVIDIA</strong> Frame Synchronization<br />
Visual computing applications that involve multiple displays or<br />
even multiple windows within a display can require special signal<br />
processing and application controls in order to function properly.<br />
For example, in order to produce quality video recording of animated<br />
graphics, the display graphics must be synchronized with the video camera.<br />
As another example, applications presented on multiple displays must be<br />
synchronized in order to complete the illusion of a larger, virtual canvas.<br />
The <strong>NVIDIA</strong> Quadro G-Sync <strong>II</strong> option card and Frame<br />
Synchronization software lets you synchronize windows and<br />
displays for various visual computing applications.<br />
Unpacking<br />
4<br />
Prior to unpacking your new <strong>NVIDIA</strong> Quadro G-Sync <strong>II</strong><br />
option card, it is a good idea to make sure you meet all the<br />
system requirements (page 3) for a smooth installation.<br />
Be sure to inspect each piece of equipment shipped in the packing<br />
box. If anything is missing or damaged, contact your reseller.
<strong>NVIDIA</strong> Quadro G-Sync <strong>II</strong> Equipment<br />
The following equipment is included in the<br />
<strong>NVIDIA</strong> Quadro G-Sync <strong>II</strong> box.<br />
One (1) <strong>NVIDIA</strong> Quadro G-Sync <strong>II</strong> Option Card<br />
Installs into an open expansion slot in your computer.<br />
Two (2) Ribbon Cables<br />
Used to connect the primary G-Sync connector<br />
on the G-Sync <strong>II</strong> option card to the G-Sync<br />
connector on the Quadro FX graphics board.<br />
<strong>NVIDIA</strong> Quadro G-Sync <strong>II</strong><br />
One (1) Quadro G-Sync Cable<br />
Used to connect multiple Quadro G-Sync <strong>II</strong> enabled systems.<br />
5
<strong>NVIDIA</strong> Quadro G-Sync <strong>II</strong> User Guide<br />
Safety Instructions<br />
6<br />
To reduce the risk of fi re, electric shock, and injury<br />
always follow basic safety precautions.<br />
Note: All hardware must be installed prior to installation of the drivers.<br />
� Remove power from your computer by disconnecting the AC<br />
main source before cleaning. Do not use liquid or aerosol cleaners.<br />
Use a soft, damp cloth from cleaning exposed surfaces.<br />
� Do not operate this product near water or<br />
when your hands or body are wet.<br />
� Do not place this product on soft surfaces that could<br />
block the ventilation slots and cause overheating.<br />
� Do not place this product near a heating register or radiator.<br />
� Place this product securely on a stable surface. Serious<br />
damage to this product may result if it falls.<br />
� Do not allow anything to rest on the power cord.<br />
Do not place this product where a person can step<br />
or trip on the power cord or telephone cords.<br />
� Do not disassemble this product. There are<br />
no user-serviceable parts inside.<br />
� Do not put lighted candles, cigarettes, cigars,<br />
and so forth, on this product.<br />
� Do not overload the AC main source and power extension<br />
cords. Doing so increases the risk of fi re and electric shock.
<strong>NVIDIA</strong> Quadro G-Sync <strong>II</strong><br />
Installing <strong>NVIDIA</strong> Quadro G-Sync <strong>II</strong> Card<br />
Before you begin, make sure that the supported Quadro<br />
graphics board and <strong>NVIDIA</strong> drivers are correctly installed.<br />
The following is additional information concerning<br />
installation of the <strong>NVIDIA</strong> Quadro G-Sync <strong>II</strong> card.<br />
Note: The <strong>NVIDIA</strong> Quadro G-Sync <strong>II</strong> option card must be<br />
used only in conjunction with an <strong>NVIDIA</strong> Quadro 6000,<br />
5000, FX 5800, or FX 4800 graphics board.<br />
1. Install the Quadro G-Sync <strong>II</strong> option card into any<br />
available expansion slot within six inches of the G-Sync<br />
connector on the appropriate Quadro graphics board.<br />
2. Use the cable that comes with your Quadro G-Sync <strong>II</strong> option<br />
card to connect the primary G-Sync connector to the Quadro<br />
FX graphics board G-Sync connector shown below.<br />
Quadro graphics board Cable connecting the Quadro G-Sync<br />
card to the Quadro graphics board<br />
Quadro G-Sync <strong>II</strong><br />
7
<strong>NVIDIA</strong> Quadro G-Sync <strong>II</strong> User Guide<br />
8
<strong>NVIDIA</strong> Frame Synchronization<br />
Under Windows<br />
This section describes how to set up frame synchronization<br />
under Windows. It contains the following sections:<br />
� How To Set Up Genlock<br />
� How To Set Up Frame Lock<br />
� Setting Up Genlock + Frame Lock<br />
9
<strong>NVIDIA</strong> Quadro G-Sync <strong>II</strong> User Guide<br />
How To Set Up Genlock<br />
The following are the basic steps to genlocking a system.<br />
Detailed instructions are provided in the related sections:<br />
� Set Up the Hardware<br />
Connect the external sync source to the BNC<br />
connector on the graphics board.<br />
� Set Up the Software<br />
Use the <strong>NVIDIA</strong> Control Panel Workstation->Synchronize<br />
displays page to establish the system as the server, to<br />
choose the sync source, and confi gure the sync pulse.<br />
Set Up the Hardware<br />
10<br />
1. Start the system, then connect the external source signal to the House<br />
Sync connector (BNC) of the Quadro G-Sync <strong>II</strong> option card.<br />
The Quadro G-Sync <strong>II</strong> supports the following<br />
external synchronization signal types:<br />
� TTL (3.3 volt level)<br />
� Composite Bi-level (NTSC or PAL sources<br />
use bi-level composite signals)<br />
� Composite Tri-level (HDTV sources commonly<br />
use tri-level composite signals)
1. Check the LED on the connector panel.<br />
� A green LED means the hardware has detected the<br />
timing signal and you can proceed to the next step.<br />
� An occasional red fl ash is OK.<br />
� A solid red LED means the hardware<br />
can’t detect the timing signal.<br />
� Check the signal source and correct the<br />
problem before proceeding.<br />
Sync Source<br />
<strong>NVIDIA</strong> Frame Synchronization Under Windows<br />
<strong>NVIDIA</strong> Quadro G-Sync <strong>II</strong><br />
Connector Bracket<br />
Server<br />
11
<strong>NVIDIA</strong> Quadro G-Sync <strong>II</strong> User Guide<br />
Set Up the Software<br />
This section provides intructions for using the <strong>NVIDIA</strong><br />
Control Panel to set up the genlock system.<br />
� Basic Genlock Setup<br />
� Detecting the House Sync Signal<br />
� Using the House Sync Signal<br />
� Restoring an Unstable Display<br />
Basic Genlock Setup<br />
12<br />
1. Right-click the desktop and then from the popup<br />
menu click <strong>NVIDIA</strong> Control Panel.<br />
2. From the <strong>NVIDIA</strong> Control Panel Select a Task pane, under the<br />
Workstation heading, click Synchronize displays to open that page.
3. Under The timing server is, click the On this system radio button.<br />
4. Click Apply.<br />
The graphics board should automatically detect the<br />
sync signal and no further action is needed.<br />
The following sections provide information on other tasks such as<br />
how to adjust the synchronization to the external house sync. You can<br />
also consult the online help by pressing F1 to open the Help fi le and<br />
then opening the Workstation->Frame Synchronization contents.<br />
Detecting the House Sync Signal<br />
<strong>NVIDIA</strong> Frame Synchronization Under Windows<br />
Normally, the software automatically detects the signal<br />
type that is being used. If necessary, you can force the<br />
software to detect the signal type as follows:<br />
1. On the system that you have<br />
set up to be the server, rightclick<br />
the desktop and then<br />
from the pop-up menu click<br />
<strong>NVIDIA</strong> Control Panel.<br />
2. From the <strong>NVIDIA</strong> Control<br />
Panel Select a Task pane, under<br />
the Workstation heading,<br />
click Synchronize displays<br />
to open that page, then click<br />
Edit Settings to open the<br />
Server Settings dialog box.<br />
3. Click the Sync<br />
signal detection list arrow and then click the item<br />
corresponding to the house signal source.<br />
4. Click OK to save the settings.<br />
13
<strong>NVIDIA</strong> Quadro G-Sync <strong>II</strong> User Guide<br />
Using the House Sync Signal<br />
14<br />
This section describes how to:<br />
� Select which edge of the house sync signal to use as the trigger<br />
� Double the trigger frequency from the house sync signal<br />
� Properly handle interlaced house sync signals<br />
� Introduce a timing delay to the house sync signal<br />
1. From the <strong>NVIDIA</strong> Control Panel Select a Task pane,<br />
under Workstation, click Synchronize Displays.<br />
2. Make sure that the On this system radio button<br />
under The timing server is selected.<br />
3. Open the Server Settings dialog box using<br />
one of the following methods:<br />
� From the Synchronize Displays page, click Server Settings.<br />
4. Under The synchronization pulses are based on, click the An<br />
external house sync signal radio button.<br />
The Server Settings dialog<br />
box will show the incoming<br />
house sync frequency. A<br />
frequency of 0.00 Hz indicates<br />
that the system has not yet<br />
been set as the server.
5. Confi gure additional synchronization settings as needed:<br />
� Select which edge of the sync signal to use to trigger<br />
the sync pulses - leading or falling edge.<br />
� If necessary, you can double the sync frequency by<br />
clicking the Both edges radio button under Trigger<br />
sync pulses from the frame start signal using.<br />
Note: This control is available only for TTL signals.<br />
House signal<br />
Sync Pulse<br />
� If the external signal is an interlaced signal - such as<br />
is used to drive a 1080i display - then click the The<br />
external signal is an interlaced signal check box.<br />
� This causes the fi rst fi eld of an interlaced signal to<br />
be used to synchronize the display. For example, for<br />
a 60Hz interlaced signal, the effective 120 Hz fi eld<br />
sync is converted to a 60 Hz frame-sync signal.<br />
� To introduce a timing delay to the house sync signal:<br />
In the Sync delay text box enter the delay (in<br />
microseconds) that you want to introduce.<br />
6. Click OK.<br />
A Monitor Settings dialog box appears, asking if<br />
you want to keep the changed settings.<br />
7. Click Yes to keep the new settings, or click No<br />
to revert to the previous settings.<br />
<strong>NVIDIA</strong> Frame Synchronization Under Windows<br />
Outgoing Sync triggered from leading and falling edge<br />
15
<strong>NVIDIA</strong> Quadro G-Sync <strong>II</strong> User Guide<br />
Restoring an Unstable Display<br />
If your display becomes unstable and you want to restore it to<br />
its original confi guration, do one or more of the following:<br />
� Click Restore Defaults and then click Apply.<br />
� Disconnect the external house sync.<br />
Viewing the Connection Status<br />
See the section Checking the Connection Status (page 24).<br />
How To Set Up Frame Lock<br />
16<br />
The following are the basic steps to frame locking several systems. Detailed<br />
instructions are provided in the section Set Up the Hardware (page 17).<br />
� Set Up the Hardware<br />
Connect all the systems together using standard CAT5 patch cabling.<br />
Note: WARNING! The voltage and signal on the frame lock<br />
ports are different from Ethernet signals. Do not connect<br />
a Frame lock port to an Ethernet card or network hub.<br />
Doing so can cause damage to the hardware.<br />
� Set Up the Server Software<br />
Use the <strong>NVIDIA</strong> Control Panel Synchronize Displays<br />
page to establish the system as the server.<br />
� Set Up the Client Software<br />
Use the <strong>NVIDIA</strong> Control Panel Synchronize Displays page<br />
for each client to enable frame lock on that system and to add an<br />
optional delay to the sync pulse before transmitting to other clients.
Set Up the Hardware<br />
<strong>NVIDIA</strong> Frame Synchronization Under Windows<br />
1. Daisy chain the graphics cards together using a standard CAT5<br />
patch cable plugged into the external RJ45 connector.<br />
� You can connect to any of the two RJ45 connectors<br />
located on the G-Sync <strong>II</strong> bracket.<br />
� Each connector automatically confi gures itself as an input or<br />
output after all the connections are made and one system is<br />
confi gured as a synchronization server (see Set Up the Server<br />
Software on page 18). A fl ashing green LED indicates an input<br />
and a fl ashing yellow LED indicates an output.<br />
If there is no server assigned and connected,<br />
then both LEDs are a steady green.<br />
Note: WARNING! The voltage and signal on the frame lock<br />
ports are different from Ethernet signals. Do not connect<br />
a Frame lock port to an Ethernet card or network<br />
hub. Doing so can cause damage to the hardware.<br />
2. Designate one of the cards to be the server device. The remaining<br />
cards are client devices.<br />
The server determines the trigger pulse for the client devices. The<br />
trigger pulse is derived from the v-sync of the server video.<br />
In<br />
Client<br />
Out Out<br />
Out In<br />
Server Client Client<br />
In<br />
17
<strong>NVIDIA</strong> Quadro G-Sync <strong>II</strong> User Guide<br />
Set Up the Server Software<br />
This section provides instructions for using the <strong>NVIDIA</strong><br />
Control Panel to set up the frame lock server.<br />
Basic Server Setup<br />
18<br />
Note: If you are synchronizing stereo displays, make sure stereo<br />
is enabled before synchronizing the displays.<br />
1. On the system that you have designated to be the timing server,<br />
right-click the desktop and then from the pop-up menu, click<br />
<strong>NVIDIA</strong> Control Panel.<br />
2. From the <strong>NVIDIA</strong> Control Panel Select a Task pane, under the<br />
Workstation heading, click Synchronize displays to open that page.<br />
3. Under The timing server is, click the On this system radio<br />
button. If the system has multiple displays, the driver automatically<br />
selects the primary display to be the timing server and all other<br />
displays are the clients. To change the confi guration, click<br />
the icon of the display that you want to be the timing server,
<strong>NVIDIA</strong> Frame Synchronization Under Windows<br />
then under Select displays to be active clients, select the<br />
check boxes for any displays that you want to be clients.<br />
4. Click Apply.The following sections provide information<br />
on other tasks. You can also consult the online help by<br />
pressing F1 to open the Help fi le and then opening the<br />
Workstation->Frame Synchronization contents.<br />
Changing the Timing Signal Frequency<br />
Follow these instructions if you are using the server to generate the<br />
timing signals and you want to change the timing signal frequency.<br />
1. From the <strong>NVIDIA</strong> Control<br />
Panel Select a Task pane, under<br />
the Workstation heading,<br />
click Synchronize displays.<br />
2. Make sure that the On this<br />
system radio button under<br />
The timing server is selected.<br />
3. Click Edit Settings to open<br />
the Server Settings dialog box.<br />
4. Under The synchronization<br />
pulses are based<br />
on, click the Internal<br />
timing signal with<br />
a refresh rate of radio button.<br />
5. Click the list arrow and select a refresh rate, then click OK.<br />
The refresh rate of the server display as well as the frequency<br />
of the timing signal will change based on your selection.<br />
19
<strong>NVIDIA</strong> Quadro G-Sync <strong>II</strong> User Guide<br />
Set Up the Client Software<br />
This section provides instructions for using the <strong>NVIDIA</strong><br />
Control Panel to set up the frame lock client systems.<br />
Basic Client Setup<br />
20<br />
Note: If you are synchronizing stereo displays, make sure stereo<br />
is enabled before synchronizing the displays.<br />
Perform the following steps for each client system:<br />
1. Right-click the desktop and then from the popup<br />
menu click <strong>NVIDIA</strong> Control Panel.<br />
2. Fr From<br />
om the<br />
he NV NVID <strong>NVIDIA</strong> ID IDIA IA Con Control on ontr tr trol ol Pan Panel an anel el Se Sele Select le lect ct a Tas Task as ask pan pane, an ane, e, und under nd nder er the<br />
he<br />
Wo Workstation rk rkst k st stat at atio io ion heading, he ad adin d in ing, cli click li ck k Sy Sync Synchronize nc nchr hr hron on oniz iz ize di disp displays sp spla la lays ys to op open<br />
en tha that ha hat t pa page page. ge ge.<br />
3. 3 3. Un Unde Under der r Th The<br />
e ti ttiming mi ming ng ser server er erve ve v r is, the On ano another nother system<br />
radio button bu b tton on should sho ho h ul uld d already al alre re r ad ady y be selected. sel el elec ec e te ted. d
4. Under Select displays to lock to the server, select the check<br />
boxes for the displays that you want to be clients. You can<br />
select only displays whose refresh rates match that of the<br />
server. Selected displays will be synchronized to the server.<br />
5. Click Apply.<br />
The following sections provide information on other tasks. You can<br />
also consult the online help by pressing F1 to open the Help fi le and<br />
then opening the Workstation->Frame Synchronization contents.<br />
Introducing a Timing Delay at Client Systems<br />
You can introduce a sync offset, or a delay between the source trigger<br />
point coming into the client system and the actual sync pulse. The value<br />
can be in the range of 0 to the time needed to display an entire frame.<br />
House Signal<br />
Sync Pulse<br />
Sync Delay (Skew)<br />
Perform the following steps wherever you want to introduce<br />
a delay in the timing signal transmission chain:<br />
1. From the <strong>NVIDIA</strong> Control<br />
Panel Select a task pane,<br />
under Workstation, click<br />
View System Topology.<br />
2. Right-click the G-Sync image,<br />
then click G-Sync settings<br />
from the pop-up menu to open<br />
the G-Sync Settings dialog box.<br />
<strong>NVIDIA</strong> Frame Synchronization Under Windows<br />
21
<strong>NVIDIA</strong> Quadro G-Sync <strong>II</strong> User Guide<br />
3. In the Sync delay text box, enter the delay (in microseconds)<br />
that you want to introduce to the timing signal, then click OK.<br />
Viewing the Connection Status<br />
See the section Checking the Connection Status (page 24).<br />
Swap Sync Setup<br />
22<br />
The application controls synchronization of buffer swaps (swap sync)<br />
between applications. Proper connection and synchronization of the<br />
timing signal are required for proper synchronization of buffer swaps.<br />
See Using the OpenGL Extensions (page 55) for instructions on how<br />
an application can use the extensions to accomplish swap sync.
Setting Up Genlock + Frame Lock<br />
In<br />
<strong>NVIDIA</strong> Frame Synchronization Under Windows<br />
The procedures in the previous two sections describe the<br />
more common uses of the Quadro G-Sync <strong>II</strong>. A third use<br />
involves a combination of genlock and frame lock.<br />
In this setup, a set of client systems are connected to a system that<br />
is designated as the server, as described in How To Set Up Frame<br />
Lock. The difference is that the server system is genlocked to an<br />
external house sync, as described in How To Set Up Genlock.<br />
Client<br />
Out Out<br />
Out In<br />
Server Client Client<br />
Sync Source<br />
Example of Genlock + Frame Lock Confi guration<br />
In<br />
23
<strong>NVIDIA</strong> Quadro G-Sync <strong>II</strong> User Guide<br />
Checking the Connection Status<br />
24<br />
The View System Topology page provides a graphical view of the<br />
status of your frame-sync environment. It shows all the displays in your<br />
system and provides frame-lock status information for each display<br />
as well as connection status information for the Quadro G-Sync <strong>II</strong><br />
option card. In addition to viewing status information, you can also<br />
change various settings using the View System Topology page.<br />
1. Right-click the desktop and then from the popup<br />
menu click <strong>NVIDIA</strong> Control Panel.<br />
2. From the <strong>NVIDIA</strong> Control Panel Select a Task pane, under<br />
the Workstation heading, click View System Topology to<br />
open that page.The View System Topology page shows the<br />
displays and graphics cards connected within that system.
3. Click any of the display icons to view the status box that appears at the<br />
bottom of the page.<br />
The display status box shows whether the:<br />
Swap Sync<br />
� Display is using internal timing<br />
� Display is locked to a house sync signal<br />
� Display is locked to a frame lock sync pulse<br />
� Display stereo signal is in phase with the server<br />
4. Click the G-Sync <strong>II</strong> card icon to view the status box that appears at<br />
the bottom of the page.<br />
The G-Sync <strong>II</strong> card status box shows:<br />
� Whether or not the frame lock ports are used<br />
� The direction of the timing signal at each<br />
frame lock port - either IN or OUT<br />
<strong>NVIDIA</strong> Frame Synchronization Under Windows<br />
� Whether or not a house sync signal is present<br />
The application controls synchronization of buffer swaps (swap sync)<br />
between applications. Proper connection and synchronization of the<br />
timing signal are required for proper synchronization of buffer swaps.<br />
See Using the OpenGL Extensions (page 55) for instructions on how<br />
an application can use the extensions to accomplish swap sync..<br />
25
<strong>NVIDIA</strong> Quadro G-Sync <strong>II</strong> User Guide<br />
26
<strong>NVIDIA</strong> Frame Synchronization<br />
Under Linux<br />
This section describes how to set up frame synchronization<br />
under Linux. It contains the following sections:<br />
� Using the nvidia-settings Utility<br />
� How To Set Up Genlock<br />
� How To Set Up Frame Lock<br />
� Setting Up Genlock + Frame Lock<br />
� Leveraging Frame Lock/Genlock in OpenGL<br />
� Writing a Frame Lock NV-CONTROL Client<br />
27
<strong>NVIDIA</strong> Quadro G-Sync <strong>II</strong> User Guide<br />
Using the nvidia-settings Utility<br />
Confi gure frame lock and genlock using the nvidia-settings utility. After<br />
booting the system starting X Windows, run nvidia-settings as follows:<br />
% nvidia-settings<br />
From the nvidia-settings frame lock panel, you can add or remove G-<br />
Sync (and display) devices to the frame lock/genlock group, monitor<br />
the status of that group, and enable or disable frame lock and genlock.<br />
For information about the page, click Help at<br />
the lower right corner of the interface.<br />
How To Set Up Genlock<br />
28<br />
The following are the basic steps to genlocking a system.<br />
Detailed instructions are provided in the related sections:<br />
� Set Up the Hardware<br />
Connect the external sync source to the BNC<br />
connector on the graphics boards.<br />
� Set Up the Software<br />
Use the nvidia-settings frame lock panel to establish the system as<br />
the server, to choose the sync source, and confi gure the sync pulse.
Set Up the Hardware<br />
1. Start the system, then connect the external source signal to the House<br />
Sync connector (BNC) of the Quadro G-Sync <strong>II</strong> option card.<br />
The Quadro G-Sync <strong>II</strong> supports the following<br />
external synchronization signal types:<br />
� TTL (3.3 volt level)<br />
� Composite Bi-level (NTSC or PAL sources<br />
use bi-level composite signals)<br />
� Composite Tri-level (HDTV sources commonly<br />
use tri-level composite signals)<br />
2. Check the LED on the connector panel.<br />
� A green LED means the hardware has detected the<br />
timing signal, and you can proceed to the next step<br />
� An occasional red fl ash is OK.<br />
� A red LED means the hardware can’t detect the timing signal.<br />
� Check the signal source and correct the<br />
problem before proceeding.<br />
Sync Source<br />
<strong>NVIDIA</strong> Frame Synchronization Under Linux<br />
<strong>NVIDIA</strong> Quadro G-Sync <strong>II</strong><br />
Connector Bracket<br />
Server<br />
29
<strong>NVIDIA</strong> Quadro G-Sync <strong>II</strong> User Guide<br />
Set Up the Software<br />
Basic Genlock Setup<br />
30<br />
1. Go to the nvidia-settings frame lock panel.<br />
2. Click Add Devices, then add the X Server that contains the display<br />
and G-Sync <strong>II</strong> cards that you want to sync to this external source.<br />
An X Server is typically specifi ed in the format: system:m<br />
For example: mycomputer.domain.com:0 or localhost:0<br />
After adding an X Server, the G-Sync Devices section shows<br />
the X server name, the graphics card attached to the X<br />
server, and the displays attached to the graphics board.<br />
3. Check the Server check box for one of the displays connected to the<br />
system in order to designate the system as the frame lock server.<br />
4. Click the Use House Sync if Present checkbox.<br />
5. Click Enable Frame Lock.<br />
The display device(s) may take a moment to stabilize. If it<br />
does not stabilize, you may have selected a synchronization<br />
signal that the system cannot support–click Disable<br />
Frame Lock and then check the external sync signal.
Note: Any time you modify the genlock settings (for example, by<br />
clicking Use House Sync if Present or Add Devices), you must<br />
fi rst click Disable Frame Lock to disable synchronization.<br />
The G-Sync section shows the status of the sync signals for the X server<br />
� After connecting the house sync, the external sync<br />
signal frequency is displayed in the section Rate.<br />
� The Receiving, Timing, Stereo, and House indicators should be green.<br />
� If the Timing LED is red—indicating the display is not<br />
synchronized to the timing signal—then see Synchronizing<br />
to the External House Signal for further instructions.<br />
� See “Understanding the Status Indicators” for more<br />
information about the status indicators.<br />
Synchronizing to the External House Signal<br />
This section describes other steps you may need to<br />
take after connecting a house sync signal.<br />
<strong>NVIDIA</strong> Frame Synchronization Under Linux<br />
� Adjusting for Interlaced External House Signals<br />
If the external signal is an interlaced signal, then check<br />
the Sync to fi eld 1 check box and click Apply.<br />
� Generating a Sync Frequency Slower than the External House Signal<br />
If the external sync frequency is not support by your display because<br />
it is too high or if you are using an interlaced signal, you can generate<br />
a sync signal of a reduced frequency by entering a number in the Sync<br />
interval box.<br />
This number represents the number of external sync pulses to<br />
receive before generating the synchronization pulse. For example,<br />
if the house sync frequency is 120 Hz, then entering 1 in the<br />
Outgoing sync interval box results in a 60 Hz sync pulse.<br />
31
<strong>NVIDIA</strong> Quadro G-Sync <strong>II</strong> User Guide<br />
32<br />
House Signal<br />
Sync Pulse<br />
This action overrides any refresh rate that you may<br />
have selected from the refresh rate list.<br />
� Generating a Sync Frequency Faster than the External House Signal<br />
You can double the sync frequency by triggering the sync<br />
pulse off both the leading and falling edge of the source<br />
sync signal. This works only with TTL level signals.<br />
Click the Sync Edge list arrow and then select<br />
both leading and falling edges.<br />
House signal<br />
Sync Pulse<br />
� Detecting the Incoming Signal Type<br />
Quadro G-Sync <strong>II</strong> supports the following<br />
external synchronization signal types:<br />
� TTL (3.3 volt level)<br />
Outgoing Sync Interval value of 1<br />
Outgoing Sync triggered from leading and falling edge<br />
� Composite Bi-level (NTSC or PAL sources<br />
use bi-level composite signals)<br />
� Composite Tri-level (HDTV sources commonly<br />
use tri-level composite signals)
Normally, the software automatically detects the signal<br />
type that is being used. If necessary, you can force the<br />
software to detect the signal type as follows:<br />
1. Click Detect to force detection of the signal type.<br />
2. The software tests each signal type and stops when it detects a match.<br />
3. If the signal type cannot be detected, click the Video Mode list box<br />
arrow and then click the item corresponding to the signal source.<br />
4. Click Composite, Auto if you want the frame lock<br />
board to classify the signal as bi-level or tri-level.<br />
Understanding the Status Indicators<br />
<strong>NVIDIA</strong> Frame Synchronization Under Linux<br />
The G-Sync Devices section displays the status of the<br />
sync signals as well as the status of the RJ45 ports. The<br />
two ports are represented by connector icons.<br />
<strong>NVIDIA</strong> Quadro G-Sync <strong>II</strong> Port<br />
33
<strong>NVIDIA</strong> Quadro G-Sync <strong>II</strong> User Guide<br />
Sync and Connection Status for the Genlock Server<br />
� Sync Status<br />
� Receiving - Green indicates that a sync pulse is present.<br />
� House - Green indicates that a signal is<br />
present at the BNC connector<br />
� Timing - Indicates whether the timing is locked to the sync signal<br />
Green: The timing is locked to the house sync.<br />
Grey: The timing is locked to the internal V-Sync.<br />
Red: The display is not synchronized to the timing signal<br />
� Stereo - Always green indicates that it is in sync with a timing signal.<br />
� Port Status<br />
� Out/Out is the normal indicator for the server device.<br />
� In/In indicates that the system is not selected as a<br />
server or client and is not frame-lock enabled.<br />
How To Set Up Frame Lock<br />
Set Up the Hardware<br />
34<br />
1. Daisy chain the graphics cards together using a standard CAT5<br />
patch cable plugged into the external RJ45 connector.<br />
� You can connect to any of the two RJ45 connectors<br />
located on the G-Sync <strong>II</strong> card bracket.<br />
� Each connector automatically confi gures itself as an input or<br />
output after all the connections are made and one system is<br />
confi gured as a synchronization server. A fl ashing green LED<br />
indicates an input and a fl ashing yellow LED indicates an output.<br />
If there is no server assigned and connected,<br />
then both LEDs are a steady green.
Note: WARNING! The voltage and signal on the frame lock ports are different<br />
from Ethernet signals. Do not connect a Frame lock port to an Ethernet<br />
card or network hub. Doing so can cause damage to the hardware.<br />
2. Designate one of the displays to be the server device. The remaining<br />
displays are client devices.<br />
The server determines the trigger pulse for the client devices. The<br />
trigger pulse is derived from the V-Sync signal of the server video.<br />
In<br />
Client<br />
Out Out<br />
Out In<br />
Four frame locked systems<br />
Set Up the Server Software<br />
Frame Lock is supported across an arbitrary<br />
number of Quadro G-Sync <strong>II</strong> systems.<br />
<strong>NVIDIA</strong> Frame Synchronization Under Linux<br />
Server Client Client<br />
Note: All displays connected to the same GPU to be included<br />
in the frame lock group must be confi gured with<br />
identical display-mode timings and refresh rates.<br />
Any X Server can be added to the frame lock group, provided that:<br />
� The system supporting the X Server is confi gured to<br />
support frame lock and is connected via RJ45 cable<br />
to the other systems in the frame lock group.<br />
� The system driving nvidia-settings can communicate with<br />
the X server that is to be included for frame lock. This means<br />
that either the server must be listening over TCP and the<br />
In<br />
35
<strong>NVIDIA</strong> Quadro G-Sync <strong>II</strong> User Guide<br />
36<br />
system’s fi rewall is permissive enough to allow remote X11<br />
display connections, or that you’ve confi gured an alternative<br />
mechanism such as ssh(1) forwarding between the machines.<br />
For the case of listening over TCP, verify that the “-nolisten tcp”<br />
commandline option was not used when starting the X server. You<br />
can fi nd the X server commandline with a command such as<br />
% ps ax | grep X<br />
If “-nolisten tcp” is on the X server commandline, consult your<br />
Linux distribution documentation for details on how to properly<br />
remove this option. For example, distributions confi gured to use<br />
the GDM login manager may need to set “DisallowTCP=false” in<br />
the GDM confi guration fi le (e.g., /etc/gdm/custom.conf, /etc/<br />
X11/gdm/gdm.conf, or /etc/gdb/gdb.conf; the exact confi guration<br />
fi le name and path varies by the distribution). Or, distributions<br />
confi gured to use the KDM login manager may have the line<br />
ServerArgsLocal=-nolisten tcp<br />
in their kdm fi le (e.g., /etc/kde3/kdm/kdmrc). This line<br />
can be commented out by prepending with “#”.<br />
� The system driving nvidia-settings can locate and has display<br />
privileges on the X server that is to be included for frame lock.<br />
A system can gain display privileges on a remote system by executing<br />
% xhost +<br />
on the remote system. See the xhost(1) man page for details.
<strong>NVIDIA</strong> Frame Synchronization Under Linux<br />
Use the following procudure to set-up the server software:<br />
1. Go to the nvidia-settings frame lock panel.<br />
2. Add the X server that contains the display devices that you would like<br />
to include in the frame lock group by clicking Add Devices.<br />
Any X Server can be added to the frame lock group, provided that:<br />
The system supporting the X Server is confi gured to<br />
support frame lock and is connected via RJ45 cable<br />
to the other systems in the frame lock group.<br />
The system driving nvidia-settings can locate and has display<br />
privileges on the X server that is to be included for frame lock.<br />
An X Server is typically specifi ed in the format: system:m<br />
For example: mycomputer.domain.com:0 or localhost:0<br />
Like the genlock status indicators, the Port0 and Port1 columns in<br />
the table on the frame lock panel contain indicators whose states<br />
mirror the states of the physical LEDs on the RJ45 ports. This lets<br />
you monitor the status of the ports from the software interface.<br />
3. Select the Server check box for the display that<br />
you want to use as the frame lock server.<br />
37
4. To gain display privileges on a remote system, execute<br />
% xhost + on the remote system.<br />
See the xhost (1) main page for details. Typically, frame lock<br />
is controlled through one of the systems that will be included<br />
in the frame lock group. While this is not a requirement, note<br />
that nvidia-settings will only display the frame lock panel<br />
when running on an X server that supports frame lock.<br />
5. To enable synchronization on these display devices, click Enable<br />
Frame Lock.<br />
The screens may take a moment to stabilize. If they do not stabilize,<br />
you may have selected mode timings that one or more of the systems<br />
cannot support.<br />
In this case, you should disable synchronization by clicking<br />
Disable Frame Lock, and then fi x the mode timings.<br />
Note: Any time you modify the genlock settings (for example, by<br />
clicking Use House Sync if Present or Add Devices), you must<br />
fi rst click Disable Frame Lock to disable synchronization.<br />
Test the Connections<br />
To test the connections, click Test Link on the<br />
nvidia-settings frame lock panel.<br />
The G-Sync Devices section displays the status of the<br />
sync signals as well as the status of the RJ45 ports. The<br />
two ports are represented by connector icons.<br />
<strong>NVIDIA</strong> Quadro G-Sync <strong>II</strong> Port
<strong>NVIDIA</strong> Quadro G-Sync <strong>II</strong> User Guide<br />
Sync and Connection Status for the Server<br />
� Sync Status<br />
� Receiving - Green indicates that a sync pulse is present.<br />
� Timing - Indicates whether the timing is locked to the sync signal<br />
Grey: The timing is locked to the internal V-Sync.<br />
� Stereo - Always green indicates that it is in sync with a timing signal.<br />
� Port Status<br />
� Out/Out is the normal indicator for the server device.<br />
� In/In indicates that the system is not selected as a<br />
server or client and is not frame-lock enabled.<br />
Sync and Connection Status for the Client<br />
� Sync Status<br />
Swap Sync<br />
39<br />
� Receiving - Green indicates that a sync pulse is present.<br />
� Timing - Indicates whether the timing is locked to the sync signal<br />
Green: The timing is locked to the signal on the frame lock<br />
conector.<br />
Red: Either no signal on the frame lock connector is<br />
detected, or the lock to the signal has been lost<br />
� Stereo - Steady green indicates that the client’s stereo<br />
timing is locked to the server’s stereo signal.<br />
� Port Status<br />
� Out/Out is the normal indicator for the server device.<br />
� In/In indicates that the system is not selected as a<br />
server or client and is not frame-lock enabled.<br />
The application controls synchronization of buffer swaps (swap sync)<br />
between applications. Proper connection and synchronization of the<br />
timing signal are required for proper synchronization of buffer swaps.<br />
See Using the OpenGL Extensions (page 55) for instructions on how<br />
an application can use the extensions to accomplish swap sync.
Setting Up Genlock + Frame Lock<br />
The procedures in the previous two sections describe the more<br />
common uses of the Quadro G-Sync <strong>II</strong> option card. A third<br />
use involves a combination of genlock and frame lock.<br />
In this setup, a set of client systems are connected to a system that<br />
is designated as the server, as described in How To Set Up Frame<br />
Lock. The difference is that the server system is genlocked to an<br />
external house sync, as described in How To Set Up Genlock.<br />
1. Follow the instructions under How To Set Up Frame<br />
Lock and then attach an external sync source to one of<br />
the systems included in the frame lock group.<br />
2. Check the Server check box of the display that<br />
In<br />
Client<br />
Out Out<br />
Out In<br />
<strong>NVIDIA</strong> Frame Synchronization Under Linux<br />
Server Client Client<br />
Sync Source<br />
3.<br />
is connected to that same system.<br />
Check the Use House Sync if Present check box.<br />
4. Enable synchronization by clicking Enable Frame Lock.<br />
As with other frame lock/genlock controls, you must select<br />
the signal server while synchronization is disabled.<br />
In<br />
40
<strong>NVIDIA</strong> Quadro G-Sync <strong>II</strong> User Guide<br />
Leveraging Frame Lock/Genlock in OpenGL<br />
With the GLX_NV_swap_group extension, OpenGL applications can<br />
be implemented to join a group of applications within a system<br />
for local swap sync, and bind the group to a barrier for swap<br />
sync across a frame lock group. A universal frame counter is also<br />
provided to promote synchronization between systems.<br />
Frame Lock Restrictions<br />
41<br />
The following restrictions apply when enabling frame lock:<br />
� All frame lock display devices that are connected to the same<br />
Quadro must have the same display-mode timings.<br />
� All display devices set as the frame lock client must have the same<br />
refresh rate as the frame lock server (master) display device. If a House<br />
Sync signal is used (instead of internal timings), all client display devices<br />
must have the same refresh rate as the incoming house sync signal.<br />
� All X Screens (driving the selected client/server display devices)<br />
must have the same stereo setting. Refer to the Linux README.<br />
TXT fi le for instructions on how to set the stereo X option.<br />
� The frame lock server (master) display device must be on a Quadro<br />
on the primary connector to the Quadro G-Sync <strong>II</strong> option card.<br />
� If connecting a single Quadro to a Quadro G-Sync <strong>II</strong><br />
option card, the primary connector must be used.<br />
� In confi gurations with more than one display device<br />
per Quadro, we recommend enabling frame lock<br />
on all display devices on those Quadros.
Supported Frame Lock Confi gurations<br />
<strong>NVIDIA</strong> Frame Synchronization Under Linux<br />
The following frame lock confi gurations are supported:<br />
� Basic Frame Lock: Single Quadro, Single X Screen, Single Display<br />
Device with or without OpenGL applications that make use of<br />
Quad-Buffered Stereo and/or the GLX_NV_swap_group extension.<br />
� Frame Lock + TwinView: Single Quadro, Single X Screen, Multiple<br />
Display Devices with or without OpenGL applications that make use<br />
of Quad-Buffered Stereo and/or the GLX_NV_swap_group extension.<br />
� Frame Lock + Xinerama: One or more Quadro(s),<br />
Multiple X Screens, Multiple Display Devices with or<br />
without OpenGL applications that make use of Quad-<br />
Buffered Stereo and/or the GLX_NV_swap_group extension.<br />
� Frame Lock + TwinView + Xinerama: One or more<br />
Quadro(s), Multiple X Screens, Multiple Display Devices with<br />
or without OpenGL applications that make use of Quad-<br />
Buffered Stereo and/or the GLX_NV_swap_group extension.<br />
� Frame Lock + SLI SFR, AFR, or SLIAA: Two<br />
Quadros, Single X Screen, Single Display Device with<br />
either OpenGL applications that make use of Quad-<br />
Buffered Stereo or the GLX_NV_swap_group extension.<br />
� For Frame Lock + SLI Frame Rendering, applications<br />
that make use of both Quad-Buffered Stereo and the<br />
GLX_NV_swap_group extension are not supported<br />
� Frame Lock + Mosaic Technologies: One or more Quadro<br />
or Quadro Plex confi gured for Mosaic with or without<br />
OpenGL applications that make use of the Quad-Buffered<br />
Stereo and/or the GLX_NV_swap_group extension.<br />
42
<strong>NVIDIA</strong> Quadro G-Sync <strong>II</strong> User Guide<br />
Confi guring Frame Sync Using the<br />
nvidia-settings Command Line<br />
You can also confi gure frame lock using the nvidiasettings<br />
command line. This method is useful in a scripted<br />
environment for automating the setup process.<br />
General Steps<br />
1. Disable frame lock on all Quadros.<br />
2. Make sure all display devices that are to be framelocked<br />
have the same refresh rate.<br />
3. Confi gure which Quadro/display device is to be the master.<br />
4. Confi gure the house sync (if applicable).<br />
5. Confi gure the slave display devices.<br />
6. Enable frame lock on the master Quadro.<br />
7. Enable frame lock on the slave Quadros.<br />
8. Test the hardware connections using the<br />
test signal on the master Quadro.<br />
Sample Confi gurations<br />
43<br />
Use the examples in this section as a guideline. The exact scripts<br />
that you use will depend on your hardware confi guration.<br />
For a full list of the nvidia-settings frame lock<br />
attributes, see the nvidia-settings (1) main page.
Genlock Example<br />
Hardware Confi guration<br />
System 1<br />
� One Quadro G-Sync <strong>II</strong> Option Card<br />
� One Quadro<br />
� One Display<br />
� Sync Source<br />
� House Sync<br />
Genlock Example Script<br />
<strong>NVIDIA</strong> Frame Synchronization Under Linux<br />
1. Make sure frame lock sync is disabled.<br />
nvidia-settings -a [gpu:0]/FrameLockEnable=0<br />
nvidia-settings -q [gpu:0]/FrameLockEnable<br />
2. Query the enabled displays on the Quadro.<br />
nvidia-settings -q [gpu:0]/EnabledDisplays<br />
3. Check that the refresh rate is the one we want.<br />
nvidia-settings -q [gpu:0]/RefreshRate<br />
4. Set the master display device to CRT-0.<br />
nvidia-settings -a [gpu:0]/FrameLockMaster=0x00000001<br />
nvidia-settings -q [gpu:0]/FrameLockMaster<br />
The desired display device(s) to be set are passed in as a hexadecimal<br />
number in which specifi c bits denote which display devices to set<br />
44
<strong>NVIDIA</strong> Quadro G-Sync <strong>II</strong> User Guide<br />
45<br />
Examples:<br />
0x00000001 - CRT-0<br />
0x00000002 - CRT-1<br />
0x00000003 - CRT-0 and CRT-1<br />
0x00000100 - TV-0<br />
0x00000200 - TV-1<br />
0x00020000 - DFP-1<br />
0x00010101 - CRT-0, TV-0 and DFP-0<br />
0x000000FF - All CRTs<br />
0x0000FF00 - All TVs<br />
0x00FF0000 - All DFPs<br />
Note: You can use the command:<br />
nvidia-settings -q [gpu:0]/EnabledDisplays<br />
to see all the available displays on a given Quadro.<br />
5. Enable use of the house sync signal.<br />
nvidia-settings -a [framelock:0]/<br />
FrameLockUseHouseSync=1<br />
6. Confi gure the house sync signal video mode<br />
nvidia-settings -a [framelock:0]/FrameLockVideoMode=0<br />
7. Set the slave display device to none.<br />
This is to avoid having unwanted display<br />
devices locked to the sync signal.<br />
nvidia-settings -a [gpu:0]/FrameLockSlaves=0x00000000<br />
nvidia-settings -q [gpu:0]/FrameLockSlaves<br />
8. Enable framelocking.<br />
nvidia-settings -a [gpu:0]/FrameLockEnable=1<br />
9. Toggle the test signal.<br />
nvidia-settings -a [gpu:0]/FrameLockTestSignal=1<br />
nvidia-settings -a [gpu:0]/FrameLockTestSignal=0
Frame Lock Example 1<br />
Hardware Confi guration<br />
System 1<br />
� One Quadro G-Sync <strong>II</strong> Option Card<br />
� Two Quadros<br />
� Two Displays (one per Quadro)<br />
System 2<br />
� One Quadro G-Sync <strong>II</strong> Option Card<br />
� Two Quadros<br />
� Two Displays (one per Quadro)<br />
Sync Source<br />
� First display from system 1<br />
Frame Lock Example Scripts<br />
1. Disable frame lock.<br />
<strong>NVIDIA</strong> Frame Synchronization Under Linux<br />
nvidia-settings -a myserver:0[gpu:0]/FrameLockEnable=0<br />
nvidia-settings -a myserver:0[gpu:1]/FrameLockEnable=0<br />
nvidia-settings -a myslave1:0[gpu:0]/FrameLockEnable=0<br />
nvidia-settings -a myslave1:0[gpu:1]/FrameLockEnable=0<br />
46
<strong>NVIDIA</strong> Quadro G-Sync <strong>II</strong> User Guide<br />
47<br />
1. Query the enabled displays on the Quadros.<br />
nvidia-settings -q myserver:0[gpu:0]/EnabledDisplays<br />
nvidia-settings -q myserver:0[gpu:1]/EnabledDisplays<br />
nvidia-settings -q myslave1:0[gpu:0]/EnabledDisplays<br />
nvidia-settings -q myslave1:0[gpu:1]/EnabledDisplays<br />
3. Check the refresh rate is the same for all displays.<br />
nvidia-settings -q myserver:0[gpu:0]/RefreshRate<br />
nvidia-settings -q myserver:0[gpu:1]/RefreshRate<br />
nvidia-settings -q myslave1:0[gpu:0]/RefreshRate<br />
nvidia-settings -q myslave1:0[gpu:1]/RefreshRate<br />
4. Make sure the display device we want as master is masterable<br />
nvidia-settings -q myserver:0[gpu:0]/<br />
FrameLockMasterable<br />
5. Set the master display device (CRT-0).<br />
nvidia-settings -a myserver:0[gpu:0]/<br />
FrameLockMaster=0x00000001<br />
6. Disable the house sync signal on the master device.<br />
nvidia-settings -a myserver:0[framelock:0]/<br />
FrameLockUseHouseSync=0<br />
7. Set the slave display devices.<br />
nvidia-settings -a myserver:0[gpu:1]/<br />
FrameLockSlaves=0x00000001<br />
nvidia-settings -a myslave1:0[gpu:0]/<br />
FrameLockSlaves=0x00000001<br />
nvidia-settings -a myslave1:0[gpu:1]/<br />
FrameLockSlaves=0x00000001<br />
8. Enable frame lock on server.<br />
nvidia-settings -a myserver:0[gpu:0]/FrameLockEnable=1
9. Enable frame lock on slave devices.<br />
nvidia-settings -a myserver:0[gpu:1]/FrameLockEnable=1<br />
nvidia-settings -a myslave1:0[gpu:0]/FrameLockEnable=1<br />
nvidia-settings -a myslave1:0[gpu:1]/FrameLockEnable=1<br />
10. Toggle the test signal.<br />
nvidia-settings -a myserver:0[gpu:0]/<br />
FrameLockTestSignal=1<br />
nvidia-settings -a myserver:0[gpu:0]/<br />
FrameLockTestSignal=0<br />
Frame Lock Example 2<br />
Hardware Confi guration<br />
System 1<br />
� Two Quadro G-Sync <strong>II</strong> Option Cards<br />
� Four Quadros<br />
� Eight Displays (two per Quadro)<br />
� Sync Source<br />
� First display on the fi rst Quadro<br />
Frame Lock Example 2 Scripts<br />
1. Make sure frame lock is disabled for all Quadros.<br />
<strong>NVIDIA</strong> Frame Synchronization Under Linux<br />
nvidia-settings -a [gpu:0]/FrameLockEnable=0<br />
nvidia-settings -a [gpu:1]/FrameLockEnable=0<br />
nvidia-settings -a [gpu:2]/FrameLockEnable=0<br />
nvidia-settings -a [gpu:3]/FrameLockEnable=0<br />
48
<strong>NVIDIA</strong> Quadro G-Sync <strong>II</strong> User Guide<br />
49<br />
2. Query the enabled displays on the Quadros.<br />
nvidia-settings -q [gpu:0]/EnabledDisplays<br />
nvidia-settings -q [gpu:1]/EnabledDisplays<br />
nvidia-settings -q [gpu:2]/EnabledDisplays<br />
nvidia-settings -q [gpu:3]/EnabledDisplays<br />
3. Verify that the refresh rate is the same for all displays.<br />
nvidia-settings -q [gpu:0]/RefreshRate<br />
nvidia-settings -q [gpu:1]/RefreshRate<br />
nvidia-settings -q [gpu:2]/RefreshRate<br />
nvidia-settings -q [gpu:3]/RefreshRate<br />
4. Make sure the display device we want as master is masterable.<br />
nvidia-settings -q myserver:0[gpu:0]/<br />
FrameLockMasterable<br />
5. Set the master display device (CRT-0).<br />
nvidia-settings -a [gpu:0]/FrameLockMaster=0x00000001<br />
6. Disable the house sync signal on the master device.<br />
nvidia-settings -a [framelock:0]/<br />
FrameLockUseHouseSync=1<br />
7. Set the slave display devices.<br />
nvidia-settings -a [gpu:0]/FrameLo<br />
ckSlaves=0x00000002 # CRT-1<br />
nvidia-settings -a [gpu:1]/FrameLockSla<br />
ves=0x00000003 # CRT-0 and CRT-1<br />
nvidia-settings -a [gpu:2]/FrameLockSla<br />
ves=0x00000003 # CRT-0 and CRT-1<br />
nvidia-settings -a [gpu:3]/FrameLockSla<br />
ves=0x00000003 # CRT-0 and CRT-1<br />
8. Enable frame lock on the master Quadro.<br />
nvidia-settings -a [gpu:0]/FrameLockEnable=1
9. Enable frame lock on the slave devices.<br />
nvidia-settings -a [gpu:1]/FrameLockEnable=1<br />
nvidia-settings -a [gpu:2]/FrameLockEnable=1<br />
nvidia-settings -a [gpu:3]/FrameLockEnable=1<br />
10. Toggle the test signal.<br />
nvidia-settings -a [gpu:0]/FrameLockTestSignal=1<br />
nvidia-settings -a [gpu:0]/FrameLockTestSignal=0<br />
Writing a Frame Lock NV-CONTROL Client<br />
The <strong>NVIDIA</strong> X driver exposes the nv-control X extension<br />
that allows the user to confi gure various features–<br />
including frame lock–from an X windows client.<br />
This is a brief summary of some of the requirements for<br />
writing a Frame Lock NV-CONTROL client.<br />
Writing a Frame Lock Client for NV-<br />
CONTROL 1.8 (and earlier)<br />
<strong>NVIDIA</strong> Frame Synchronization Under Linux<br />
See the sample NV-CONTROL clients in the samples directory<br />
for basic examples of how to set integer attributes. See the fi le<br />
ctkframelock.c for a much more involved example of how the<br />
nvidia-settings utility programs the frame lock attributes.<br />
The constants referenced below are defi ned in NVCtrl.<br />
h. See the comments in that fi le for an explanation of each<br />
attribute. It may also be useful to search the ctkframelock.<br />
c fi le using a grep utility to see how each attribute is used.<br />
50
<strong>NVIDIA</strong> Quadro G-Sync <strong>II</strong> User Guide<br />
51<br />
The following are the basic steps:<br />
1. Open a display connection to each X Screen you want to control in<br />
your frame lock cluster.<br />
Make sure you have privileges to establish the X connection.<br />
2. Query the NV_CTRL_FRAMELOCK attribute to determine<br />
if frame lock is supported on each X screen.<br />
3. Set NV_CTRL_FRAMELOCK_MASTER to NV_CTRL_FRAMELOCK_<br />
MASTER_TRUE on one node in the cluster; set it to NV_CTRL_<br />
FRAMELOCK_MASTER_FALSE on every other node in the cluster.<br />
� Set NV_CTRL_FRAMELOCK_POLARITY for each slave node in the<br />
cluster.<br />
Most likely, you want NV_CTRL_FRAMELOCK_<br />
POLARITY_RISING_EDGE.<br />
� Set NV_CTRL_FRAMELOCK_<strong>SYNC</strong>_DELAY as appropriate for each<br />
node.<br />
Most likely, you want 0.<br />
� Set NV_CTRL_FRAMELOCK_<strong>SYNC</strong>_INTERVAL as appropriate if you<br />
are using a house sync.<br />
Most likely, you want 0.<br />
� Set NV_CTRL_FRAMELOCK_<strong>SYNC</strong> to NV_CTRL_FRAMELOCK_<br />
<strong>SYNC</strong>_ENABLE on each X screen to enable frame lock.<br />
� (Optional) Set NV_CTRL_FRAMELOCK_TEST_SIGNAL to NV_CTRL_<br />
FRAMELOCK_TEST_SIGNAL_ENABLE followed immediately by<br />
NV_CTRL_FRAMELOCK_TEST_SIGNAL_DISABLE.<br />
This guarantees accuracy of the Universal Frame Count<br />
(as returned by glXQueryFrameCountNV()).<br />
� When you are done, set NV_CTRL_FRAMELOCK_<br />
<strong>SYNC</strong> to NV_CTRL_FRAMELOCK_<strong>SYNC</strong>_DISABLE<br />
on each X screen to disable frame lock.
During operation, you can also query any of these on each X screen:<br />
� NV _ CTRL _ FRAMELOCK _ PORT0 _ STATUS<br />
� NV _ CTRL _ FRAMELOCK _ PORT1 _ STATUS<br />
� NV _ CTRL _ FRAMELOCK _ HOUSE _ STATUS<br />
� NV _ CTRL _ FRAMELOCK _ <strong>SYNC</strong> _ READY<br />
� NV _ CTRL _ FRAMELOCK _ STEREO _ <strong>SYNC</strong><br />
� NV _ CTRL _ FRAMELOCK _ ETHERNET _ DETECTED<br />
� NV _ CTRL _ FRAMELOCK _ <strong>SYNC</strong> _ RATE<br />
� NV _ CTRL _ FRAMELOCK _ TIMING<br />
nvidia-settings registers a gtk+ timeout function and queries<br />
the state of these on each X screen every few seconds.<br />
Writing a Frame Lock Client for NV-<br />
CONTROL 1.9 (and later)<br />
These are the two major changes to frame lock<br />
confi guration in NV-CONTROL 1.9:<br />
<strong>NVIDIA</strong> Frame Synchronization Under Linux<br />
� Display devices (instead of X Screens) are now selected<br />
as the clients and slaves of a frame lock group.<br />
� Frame lock attributes should now be set/queried on Quadros<br />
(NV _ CTRL _ TARGET _ TYPE _ GPU) and Quadro G-Sync<br />
<strong>II</strong> (frame lock) devices (NV _ CTRL _ TARGET _ TYPE _<br />
FRAMELOCK) using the new NV-CONTROL targeting API.<br />
See the sample NV-CONTROL clients in the samples directory for basic<br />
examples of how to use the new targeting API (nv-control-targets.<br />
c) and a basic frame lock client (nv-control-framelock.c). See the fi le<br />
ctkframelock.c for a much more involved example of how the nvidiasettings<br />
utility programs the frame lock attributes.<br />
The constants referenced below are defi ned in NVCtrl.h.. See the<br />
comments in that fi le for an explanation of each attribute. It may also be<br />
useful to search the ctkframelock.c fi le using a grep utility to see how<br />
each attribute is used.<br />
52
<strong>NVIDIA</strong> Quadro G-Sync <strong>II</strong> User Guide<br />
Querying the Frame Lock Capabilities of a System<br />
1. Query the number of Quadro G-Sync <strong>II</strong> devices on<br />
the system by passing NV_CTRL_TARGET_TYPE_<br />
FRAMELOCK to XNVCTRLQueryTargetCount().<br />
2. Query the Quadros attached to each Quadro G-Sync <strong>II</strong><br />
device by querying the NV_CTRL_GPUS_USING_FRAMELOCK<br />
attribute for each Quadro G-Sync <strong>II</strong> device.<br />
3. Query the enabled (available) displays on each Quadro<br />
using the NV_CTRL_ENABLED_DISPLAYS attribute.<br />
Confi guring the Frame Lock Group<br />
53<br />
This must be done while frame lock is disabled<br />
on the Quadro G-Sync <strong>II</strong> device:<br />
1. Set the frame lock master display on one of the Quadros<br />
using the NV_CTRL_FRAMELOCK_MASTER attribute.<br />
2. Set the rest of the display devices as slaves using the<br />
NV_CTRL_FRAMELOCK_SLAVES attribute.<br />
3. Set NV_CTRL_USE_HOUSE_<strong>SYNC</strong> to NV_CTRL_USE_HOUSE_<strong>SYNC</strong>_<br />
TRUE or NV_CTRL_USE_HOUSE_<strong>SYNC</strong>_FALSE on the master Quadro<br />
G-Sync <strong>II</strong> device, depending on whether or not you will be using a<br />
House Sync signal.<br />
This refers to the G-Sync device that is attached to the Quadro that<br />
contains the display device currently set as the frame lock master.<br />
4. Set NV_CTRL_FRAMELOCK_POLARITY for each slave Quadro G-Sync<br />
<strong>II</strong> device in the cluster.<br />
Most likely, you want NV_CTRL_FRAMELOCK_<br />
POLARITY_RISING_EDGE.<br />
5. Set NV_CTRL_FRAMELOCK_<strong>SYNC</strong>_DELAY as appropriate for each<br />
Quadro G-Sync <strong>II</strong> device.<br />
Most likely, you want 0.
6. Set NV_CTRL_FRAMELOCK_<strong>SYNC</strong>_INTERVAL as appropriate if you are<br />
using a house sync.<br />
Most likely, you want 0.<br />
Enabling/Disabling Frame Lock<br />
1. Enable frame lock on each Quadro by setting NV_CTRL_<br />
FRAMELOCK_<strong>SYNC</strong> to NV_CTRL_FRAMELOCK_<strong>SYNC</strong>_ENABLE.<br />
2. (Optional) Set NV_CTRL_FRAMELOCK_TEST_SIGNAL to NV_CTRL_<br />
FRAMELOCK_TEST_SIGNAL_ENABLE followed immediately by<br />
NV_CTRL_FRAMELOCK_TEST_SIGNAL_DISABLE (on the Quadro that<br />
contains the master frame lock display).<br />
This guarantees accuracy of the Universal Frame Count<br />
(as returned by glXQueryFrameCountNV()).<br />
3. When you are done, set NV_CTRL_FRAMELOCK_<strong>SYNC</strong> to NV_CTRL_<br />
FRAMELOCK_<strong>SYNC</strong>_DISABLE on each Quadro to disable frame lock.<br />
During operation you can also query any of these<br />
on each Quadro or frame lock device:<br />
� NV _ CTRL _ FRAMELOCK _ PORT0 _ STATUS<br />
� NV _ CTRL _ FRAMELOCK _ PORT1 _ STATUS<br />
� NV _ CTRL _ FRAMELOCK _ HOUSE _ STATUS<br />
� NV _ CTRL _ FRAMELOCK _ <strong>SYNC</strong> _ READY<br />
� NV _ CTRL _ FRAMELOCK _ STEREO _ <strong>SYNC</strong><br />
� NV _ CTRL _ FRAMELOCK _ ETHERNET _ DETECTED<br />
� NV _ CTRL _ FRAMELOCK _ <strong>SYNC</strong> _ RATE<br />
� NV _ CTRL _ FRAMELOCK _ TIMING<br />
<strong>NVIDIA</strong> Frame Synchronization Under Linux<br />
54
<strong>NVIDIA</strong> Quadro G-Sync <strong>II</strong> User Guide<br />
55
Using the OpenGL Extensions<br />
This chapter explains how to use the OpenGL extensions supported by the<br />
<strong>NVIDIA</strong> driver for accomplishing frame synchronization of applications.<br />
� Frame Synchronization Using the OpenGL Extensions explains the<br />
principles behind swap groups, and describes the OpenGL<br />
extensions to use to control frame lock and swap sync functions.<br />
� OpenGL Extensions details the API calls for the extensions.<br />
56
<strong>NVIDIA</strong> Quadro G-Sync <strong>II</strong> User Guide<br />
Frame Synchronization Using<br />
the OpenGL Extensions<br />
Swap sync refers to the synchronization of buffer swaps<br />
of multiple application windows. By means of swap sync,<br />
applications running on multiple systems can synchronize<br />
the application buffer swaps between all the systems.<br />
Swap sync requires<br />
� Proper connection and synchronization of the timing signals<br />
� A mechanism for binding several windows together so that<br />
buffer swaps can be synchronized across all windows<br />
About Buffer Swaps<br />
Key Points and Defi nitions<br />
57<br />
Buffer swaps are performed on windows.<br />
� Swap Groups<br />
If buffer swaps must be synchronized across several<br />
windows on a single Quadro, you can defi ne a “group”<br />
that consists of the specifi ed windows.<br />
� Swap Barriers<br />
If buffer swaps must be synchronized across several Quadros, you<br />
can defi ne a “barrier” that consists of the specifi ed Quadros.
Buffer Swap Criteria<br />
The criteria for buffer swaps involves when a window is<br />
ready to swap and when a group is ready to swap.<br />
Window Buffer Swaps<br />
Any rendering surface that is not a window—such as a non-visible<br />
rendering buffer—is always ready, otherwise the following criteria must<br />
be satisfi ed before a buffer swap for a window can be performed:<br />
� The window itself must be ready, meaning:<br />
A buffer swap command has been issued for it.<br />
Its swap interval has elapsed.<br />
� If the window belongs to a group, all the<br />
windows in the group must be ready.<br />
� If the window belongs to a group and that group is bound to<br />
a barrier, all groups bound to that barrier must be ready.<br />
Group and Barrier Buffer Swaps<br />
Using the OpenGL Extensions<br />
� Buffer swaps for all windows in a swap group take place<br />
concurrently and buffer swaps for all groups using a barrier take<br />
place concurrently.For barrier swaps, the vertical retraces of the<br />
screens of all the groups must also be synchronized, otherwise<br />
there is no guarantee of concurrency between groups.<br />
� An implementation may support a limited number of swap groups and<br />
barriers and may have restrictions on where the users of a barrier can<br />
reside.<br />
For example, an implementation may allow the users to reside<br />
on different display devices or even hosts. An implementation<br />
may return zero for any of maxGroups and maxBarriers returned<br />
by QueryMaxSwapGroupsNV if swap groups or barriers are<br />
not available in that implementation or on that host.<br />
58
<strong>NVIDIA</strong> Quadro G-Sync <strong>II</strong> User Guide<br />
Frame Counter<br />
The implementation provides a universal counter, or frame counter, among<br />
all systems that are locked together by swap groups/barriers. It is based<br />
on the internal synchronization signal which triggers the buffer swap.<br />
� To obtain the current frame count, call<br />
wglQueryFrameCountNV(),glxQueryFrameCountNV()().<br />
� To reset the frame count back to zero, call,<br />
wglResetFrameCountNV(),glxResetFrameCountNV()().<br />
In a system that has a Quadro G-Sync <strong>II</strong> device installed<br />
and enabled, ResetFrameCountNV() succeeds only when<br />
the frame lock device is confi gured as a master device.<br />
Confi guring for Swap Sync<br />
Confi guring Swap Groups<br />
59<br />
You can assign an OpenGL window to a swap group. There<br />
is a maximum number of allowable swap groups that can be<br />
created for any particular implementation. With the current<br />
hardware, the maximum number of swap groups is one.<br />
� To determine the maximum swap group number, call<br />
QueryMaxSwapGroupsNV()<br />
� To assign a window to a swap group, call<br />
JoinSwapGroupNV()<br />
and specify the swap group number.<br />
If rendering surface is already a member of a different group, it is<br />
implicitly removed from that group. If the swap group number is zero,<br />
the rendering surface is removed from the current group.<br />
To query the current swap group, call QuerySwapGroupNV().
Confi guring Swap Barriers<br />
You can bind a group to a barrier. There is a maximum<br />
number of barriers that can be created. With the current<br />
hardware, the maximum number of barriers is one.<br />
� To determine the maximum barrier number, call<br />
QueryMaxSwapGroupsNV()<br />
� To bind a group to a barrier, call<br />
BindSwapBarrierNV()<br />
and specify the group and barrier numbers.<br />
If the barrier number is zero, then the group in unbound from the<br />
current barrier.<br />
To query the current barrier, call QuerySwapGroupNV().<br />
OpenGL Extensions<br />
This section describes the relevant OpenGL NV_swap_<br />
group extensions supported by the <strong>NVIDIA</strong> display driver<br />
and shipped with the Quadro G-Sync <strong>II</strong> hardware.<br />
These are exported in the WGL extension string which on<br />
Windows can be queried by wglGetExtensionsStringARB.<br />
This section covers both the WGL_NV_swap_group extensions<br />
(exported on Microsoft WindowsNT/XP systems) and the GLX_<br />
NV_swap_group extensions (exported on Linux systems).<br />
� wglJoinSwapGroupNV(), glxJoinSwapGroupNV()<br />
Using the OpenGL Extensions<br />
� wglBindSwapBarrierNV(), glxBindSwapBarrierNV()<br />
� wglQuerySwapGroupNV(), glxQuerySwapGroupNV()<br />
� wglQueryMaxSwapGroupsNV(), glxQueryMaxSwapGroupsNV()<br />
� wglQueryFrameCountNV(),glxQueryFrameCountNV()<br />
� wglResetFrameCountNV(),glxResetFrameCountNV()<br />
60
<strong>NVIDIA</strong> Quadro G-Sync <strong>II</strong> User Guide<br />
wglJoinSwapGroupNV(), glxJoinSwapGroupNV()<br />
This call adds the OpenGL window with the device context hDC to<br />
the swap group specifi ed by group. If hDC is already a member of<br />
a different group, it is implicitly removed from that group fi rst.<br />
Function B00L JoinSwapGroupNV (HDC hDC, GLuint group);<br />
Parameters In hDC - Device context for the frame lock card, or<br />
a window residing on the frame lock card.<br />
group - Swap group number to which the device context is<br />
to be assigned.<br />
The value must be between 0 and maxGoups<br />
(see wglQueryMzxSwapGroupsNV (),<br />
glxyQueryMaxSwapGroupsNV ()<br />
Parameters Out N/A<br />
Return Values TRUE: Success<br />
FALSE: Failure<br />
wglBindSwapBarrierNV(),<br />
glxBindSwapBarrierNV()<br />
61<br />
This call binds a swap group to a barrier.<br />
Function B00L BindSwapBarrierNV (GLuint<br />
group, GLuint barrier);<br />
Parameters In hDC - Device context for the frame lock card, or<br />
a window residing on the frame lock card.<br />
group - Swap group number that is bound to a barrier.<br />
barrier - Barrier number to which the swap group is to be<br />
bound. Value must be between 0 and maxBarrier<br />
(see wglQueryMzxSwapGroupsNV (),<br />
glxyQueryMaxSwapGroupsNV ()<br />
Parameters Out N/A<br />
Return Values TRUE: Success<br />
FALSE: Failure
wglQuerySwapGroupNV(),<br />
glxQuerySwapGroupNV()<br />
This call returns the swap group number and barrier<br />
number to which the device context is bound.<br />
Function B00L QuerySwapGroupNV (HDC hDC,<br />
GLuint *group, GLuint *barrier);<br />
Parameters In hDC - Device context for the frame lock card, or<br />
a window residing on the frame lock card.<br />
Parameters Out *group - The group number to which the<br />
device context is bound, or assigned.<br />
*barrier - The barrier number to which<br />
the device context is bound.<br />
Return Values TRUE: Success<br />
FALSE: Failure. In this case *group<br />
and *barrier are undefi ned.<br />
wglQueryMaxSwapGroupsNV(),<br />
glxQueryMaxSwapGroupsNV()<br />
This call returns the maximum number of swap groups and<br />
swap barriers that are supported by the implementation.<br />
Function B00L QueryMaxSwapGroupsNV (HDC hDC,<br />
GLuint *maxGroup, GLuint *maxBarrier);<br />
Parameters In hDC - Device context for the frame lock card, or<br />
a window residing on the frame lock card.<br />
Parameters Out *maxGroups - The maximum group number<br />
supported by the implementation.<br />
*maxBarriers - The maximum barrier number<br />
supported by the implementation.<br />
Return Values TRUE: Success<br />
FALSE: Failure. In this case *maxGroups<br />
and *maxBarriers are undefi ned.<br />
Using the OpenGL Extensions<br />
62
<strong>NVIDIA</strong> Quadro G-Sync <strong>II</strong> User Guide<br />
wglQueryFrameCountNV(),glx<br />
QueryFrameCountNV()<br />
QueryFrameCountNV returns in count the<br />
current frame counter for swapGroup.<br />
This call returns the current frame count of the swap group.<br />
Function B00L QueryFrameCountNV (HDC<br />
hDC, GLuint *carrier);<br />
Parameters In hDC - Device context for the frame lock card, or<br />
a window residing on the frame lock card.<br />
Parameters Out *count - The current frame count of the swap group.<br />
Return Values TRUE: Frame count successfully retrieved.<br />
FALSE: Frame count retrieved failed.<br />
wglResetFrameCountNV(),glx<br />
ResetFrameCountNV()<br />
63<br />
This call resets to zero the frame count of the swap group.<br />
The call succeeds only on the master device.<br />
Function B00L ResetFrameCountNV (HDC hDC);<br />
Parameters In hDC - Device context for the frame lock card, or<br />
a window residing on the frame lock card.<br />
Parameters Out N/A<br />
Return Values TRUE: Frame counter successfully reset.<br />
FALSE: Frame counter not successfully reset.
Getting Driver Updates<br />
References and Resources<br />
During <strong>NVIDIA</strong> software installation, the installation wizard<br />
provides an option to check for updated software online.<br />
You can also download software updates by visiting: http://<br />
www.nvidia.com/content/drivers/drivers.asp<br />
64
<strong>NVIDIA</strong> Quadro G-Sync <strong>II</strong> User Guide<br />
65
Registration, Support and Warranty<br />
Registering Your Quadro G-Sync <strong>II</strong><br />
After you register your Quadro G-Sync <strong>II</strong> option card, you have priority<br />
access to <strong>NVIDIA</strong> Customer Care by using your assigned user ID and<br />
password to log on. You can also elect to receive automatic notifi cation<br />
of special promotions and software updates through e-mail to ensure<br />
that your Quadro G-Sync <strong>II</strong> option card continues to operate optimally.<br />
66
<strong>NVIDIA</strong> Quadro G-Sync <strong>II</strong> User Guide<br />
Warranty and Support<br />
67<br />
<strong>NVIDIA</strong> warranty and support (Customer Care) information<br />
is available at:<br />
www.nvidia.com/support<br />
www.nvidia.com/warranty<br />
You may also access these sites from <strong>NVIDIA</strong>’s main Web site at:<br />
www.nvidia.com<br />
Upon registration, you will receive an acknowledgement e-mail<br />
that includes a toll-free phone number, sign-on information<br />
for <strong>NVIDIA</strong> Customer Care, and other information.<br />
The <strong>NVIDIA</strong> support site allows you to search our extensive<br />
knowledge base and communicate with our Customer Care staff.
Compliance and Certifi cations<br />
� Bureau of Standards, Metrology, and Inspection (BSMI)<br />
� C-Tick<br />
� China Compulsory Certifi cation (CCC)<br />
� Conformité Européenne (CE)<br />
� Federal Communications Commission (FCC) - Class B<br />
� Interference-Causing Equipment Standard (ICES)<br />
� Ministry of Information and Communication (MIC)<br />
� Underwriters Laboratories (UL, CUL)<br />
� Voluntary Control Council for Interference (VCCI)<br />
68
<strong>NVIDIA</strong> Quadro G-Sync <strong>II</strong> User Guide<br />
69<br />
Notice<br />
ALL <strong>NVIDIA</strong> DESIGN SPECIFICATIONS, REFERENCE BOARDS, FILES,<br />
DRAWINGS, DIAGNOSTICS, LISTS, AND OTHER DOCUMENTS (TOGETHER<br />
AND SEPARATELY, “MATERIALS”) ARE BEING PROVIDED “AS IS.”<br />
<strong>NVIDIA</strong> MAKES NO WARRANTIES, EXPRESSED, IMPLIED, STATUTORY,<br />
OR OTHERWISE WITH RESPECT TO THE MATERIALS, AND EXPRESSLY<br />
DISCLAIMS ALL IMPLIED WARRANTIES OF NONINFRINGEMENT,<br />
MERCHANTABILITY, AND FITNESS FOR A PARTICULAR PURPOSE.<br />
Information furnished is believed to be accurate and reliable. However, <strong>NVIDIA</strong> Corporation<br />
assumes no responsibility for the consequences of use of such information or for any<br />
infringement of patents or other rights of third parties that may result from its use. No<br />
license is granted by implication or otherwise under any patent or patent rights of <strong>NVIDIA</strong><br />
Corporation. Specifi cations mentioned in this publication are subject to change without<br />
notice. This publication supersedes and replaces all information previously supplied.<br />
<strong>NVIDIA</strong> Corporation products are not authorized for use as critical components in life<br />
support devices or systems without express written approval of <strong>NVIDIA</strong> Corporation.<br />
Product Handling<br />
Do not spill liquid over the circuit board, expose it to fi re, submerse it in<br />
water, or tamper with it. Keep the board out of reach of children. Dispose<br />
this product in accordance with relevant national or local laws.<br />
Trademarks<br />
<strong>NVIDIA</strong>, the <strong>NVIDIA</strong> logo, SLI, G-Sync and <strong>NVIDIA</strong> Quadro are trademarks or<br />
registered trademarks of <strong>NVIDIA</strong> Corporation. Other company and product names<br />
may be trademarks of the respective companies with which they are associated.<br />
Copyright<br />
© 2011 <strong>NVIDIA</strong> Corporation. All rights reserved.<br />
Document Number<br />
DU-02796-001_v02