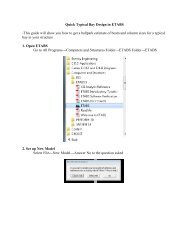
Create successful ePaper yourself
Turn your PDF publications into a flip-book with our unique Google optimized e-Paper software.
Abstract: This step by step guide will help you understand how to render camera views as well as set upyour own screen views straight from the render dialog box.**These steps start after you have a complete model and decide to start render<strong>in</strong>g views.TO LEARN HOW TO SET UP CAMERA VIEWS AND RENDER Step 1: (Scroll to f<strong>in</strong>d screen view <strong>in</strong>structions)To place a camera view <strong>in</strong> your model, select which floor plan your view will be taken from(Level 1, 2, 3 etc.) from the left hand side menu (1). Then click on the View tab (2) on the top menu.Under the View tab click the down arrow under the 3d view Button (3). Select camera (4). Then placeyour camera (5) and select your viewshed by click<strong>in</strong>g one more time (the bigger/longer you make theviewshed the more will show <strong>in</strong> the render<strong>in</strong>g) (6).
Step 2:Once you select your viewshed, the view should appear automatically (1). On the left hand sidemenu under 3D Views (2) , your view will be bolded (3). If you wish to use this view it is best to rename itfor easy referenc<strong>in</strong>g. To rename, right-click the bolded view and select rename (4). This newly renamedview will stay listed under 3D Views.If you wish to change the camera angle, go back to your Floor Plan view (5) the camera wasassigned and edit the viewshed (6).
Step 3:Once your camera view is saved, click on your camera view so it is show<strong>in</strong>g on screen (1). Thenclick the Show <strong>Render<strong>in</strong>g</strong> Dialog button (2). The render<strong>in</strong>g dialog box will appear (3).Step 4:When beg<strong>in</strong>n<strong>in</strong>g your render<strong>in</strong>g process, you’ll want to run a draft render or low quality renderfirst. This will allow you to see what exactly will be show<strong>in</strong>g <strong>in</strong> your render<strong>in</strong>g, <strong>in</strong> case you need to makechanges to the model (hide structure that is show<strong>in</strong>g, etc) or change your camera angle(trees/vegetation block<strong>in</strong>g view?, etc.). To do this click the arrow next to sett<strong>in</strong>g and choose draft (1).Then click the render button (2). <strong>Revit</strong> will render your view as a draft (it will be blurry, but you will beable to see what will show <strong>in</strong> your render<strong>in</strong>g (3).
Step 5:Once you’re happy with what will be show<strong>in</strong>g <strong>in</strong> your render<strong>in</strong>g. You can change the sun andlight<strong>in</strong>g options straight from the <strong>Render<strong>in</strong>g</strong> Dialog box (1). You can also change the exposure of yourrender<strong>in</strong>g by click<strong>in</strong>g on the Adjust Exposure.. button (2). **When adjust<strong>in</strong>g exposure click apply (3) tosee the changes you’ve made without hav<strong>in</strong>g to close the dialog box. When you’re happy with theexposure click ok (4).
Step 6:When ready to render, choose the quality you would like to render with by chang<strong>in</strong>g the sett<strong>in</strong>g(1) (high or best quality is suggested). Then click render (2). Once your image is done render<strong>in</strong>g DO NOTexit from the <strong>Render<strong>in</strong>g</strong> Dialog box. You will want to save the render<strong>in</strong>g to your model, as well as exportthe image as a back-up. To save your image to the model, <strong>in</strong> the <strong>Render<strong>in</strong>g</strong> Dialog box choose Save toProject.. (3). It will ask you to name the rendered view, enter a name when prompted. Then clickExport.. (4) <strong>in</strong> the Render Dialog box to export a jpeg of your image. After you have saved and exportedyour image, it will be safe for you to exit from the dialog box.*your saved image <strong>in</strong> the project will show up under the <strong>Render<strong>in</strong>g</strong>s (5) on the left hand side menu
TO LEARN HOW TO SET UP SCREEN VIEWS AND RENDER Step 1:While <strong>in</strong> 3D views (1) <strong>in</strong> your model, you may choose to take views such as bird’s eye views thatcameras cannot be set up for. In these <strong>in</strong>stances you want to first set up your desired view (2). To savethis view to your model, go to the highlighted view under your 3D Views, right-click and duplicate it(select Duplicate, not Duplicate with Detail<strong>in</strong>g)(3). Rename your view for easy f<strong>in</strong>d<strong>in</strong>g by right-click<strong>in</strong>gand select<strong>in</strong>g rename.*This view will show up under 3D Views (4).Step 2:Once your desired view is saved, open your view (1) and then open the <strong>Render<strong>in</strong>g</strong> Dialog box (2).
Step 3:Once the <strong>Render<strong>in</strong>g</strong> Dialog box is open, place a check mark next to Region (1). This will provideyou with a viewshed <strong>in</strong> your model space (2). *If you do not see the view shed, zoom out and it willappear.
Step 4:Next you will want to select your viewshed for edit<strong>in</strong>g (1). * Putt<strong>in</strong>g the viewshed around onlywhat you want rendered will provide you with a better render<strong>in</strong>g.Step 5:After you have your viewshed focused, you will want to zoom <strong>in</strong> on your viewshed (1) until it fillsthe screen. *This will also produce a better quality render<strong>in</strong>g.
**Now follow steps 4-6 from the camera view portion of this step by step guide for render<strong>in</strong>g and sav<strong>in</strong>gyour view.