
Create successful ePaper yourself
Turn your PDF publications into a flip-book with our unique Google optimized e-Paper software.
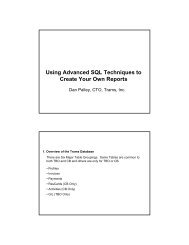
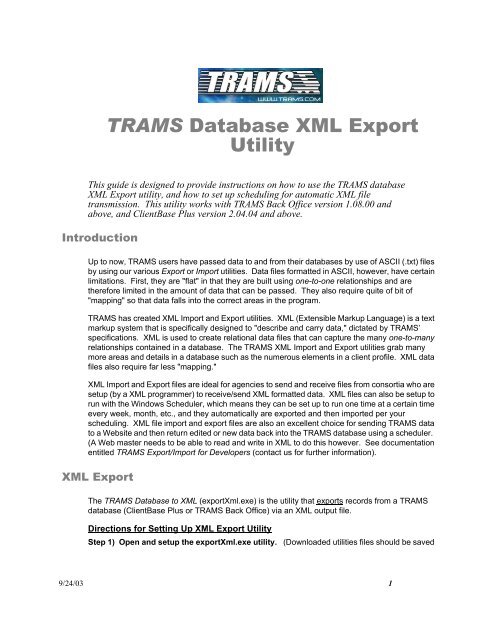
<strong>TRAMS</strong> <strong>Database</strong> <strong>XML</strong> <strong>Export</strong><strong>Utility</strong>This guide is designed to provide instructions on how to use the <strong>TRAMS</strong> database<strong>XML</strong> <strong>Export</strong> utility, and how to set up scheduling for automatic <strong>XML</strong> filetransmission. This utility works with <strong>TRAMS</strong> Back Office version 1.08.00 andabove, and ClientBase Plus version 2.04.04 and above.IntroductionUp to now, <strong>TRAMS</strong> users have passed data to and from their databases by use of ASCII (.txt) filesby using our various <strong>Export</strong> or Import utilities. Data files formatted in ASCII, however, have certainlimitations. First, they are "flat" in that they are built using one-to-one relationships and aretherefore limited in the amount of data that can be passed. They also require quite of bit of"mapping" so that data falls into the correct areas in the program.<strong>TRAMS</strong> has created <strong>XML</strong> Import and <strong>Export</strong> utilities. <strong>XML</strong> (Extensible Markup Language) is a textmarkup system that is specifically designed to "describe and carry data," dictated by <strong>TRAMS</strong>’specifications. <strong>XML</strong> is used to create relational data files that can capture the many one-to-manyrelationships contained in a database. The <strong>TRAMS</strong> <strong>XML</strong> Import and <strong>Export</strong> utilities grab manymore areas and details in a database such as the numerous elements in a client profile. <strong>XML</strong> datafiles also require far less "mapping."<strong>XML</strong> Import and <strong>Export</strong> files are ideal for agencies to send and receive files from consortia who aresetup (by a <strong>XML</strong> programmer) to receive/send <strong>XML</strong> formatted data. <strong>XML</strong> files can also be setup torun with the Windows Scheduler, which means they can be set up to run one time at a certain timeevery week, month, etc., and they automatically are exported and then imported per yourscheduling. <strong>XML</strong> file import and export files are also an excellent choice for sending <strong>TRAMS</strong> datato a Website and then return edited or new data back into the <strong>TRAMS</strong> database using a scheduler.(A Web master needs to be able to read and write in <strong>XML</strong> to do this however. See documentationentitled <strong>TRAMS</strong> <strong>Export</strong>/Import for Developers (contact us for further information).<strong>XML</strong> <strong>Export</strong>The <strong>TRAMS</strong> <strong>Database</strong> to <strong>XML</strong> (exportXml.exe) is the utility that exports records from a <strong>TRAMS</strong>database (ClientBase Plus or <strong>TRAMS</strong> Back Office) via an <strong>XML</strong> output file.Directions for Setting Up <strong>XML</strong> <strong>Export</strong> <strong>Utility</strong>Step 1) Open and setup the exportXml.exe utility. (Downloaded utilities files should be saved9/24/03 1
<strong>TRAMS</strong> <strong>Database</strong> <strong>XML</strong> <strong>Export</strong>in the C:\Program Files|<strong>TRAMS</strong>|Common Files directory, or using the path you created for theCommon Files.)Step 2) Complete the following export fields:<strong>TRAMS</strong> <strong>Database</strong>: Select the database to export from drop-down menu (all <strong>TRAMS</strong> aliases areavailable for selection).Login Name: For security, this defaults to SYSDBA and is inaccessible to other Login Names.Password: Enter the SYSDBA login password used to sign into the <strong>TRAMS</strong> database.<strong>XML</strong> Filename: Create a name and location for the <strong>XML</strong> file by clicking on the drop-down menu.The <strong>XML</strong> export utility automatically completes the file name as follows:(<strong>XML</strong> Filename) + (yyyymmdd) + (hhmmss) + .xml which equals [(<strong>XML</strong> Filename) + (year, year, year,year, month, month, day, day) + (hour, hour, minute, minute, second, second) + .xml file extension.]Log filename (optional): Create a name and location for the <strong>XML</strong> log file by clicking on the dropdownmenu, and typing in a filename with a .txt extension. It is suggested that you do create a log file.E-mail <strong>XML</strong> file as an attachment: Create an e-mail with the <strong>XML</strong> file as an attachment by checkingthis field. (Uses your system default e-mail application which must be MAPI compliant.) Fill in the9/24/03 2
<strong>TRAMS</strong> <strong>Database</strong> <strong>XML</strong> <strong>Export</strong>To, Cc, Bcc, Subject fields and check whether you want to review the message before sending.Separate multiple address with a comma.Load settings: To load previously saved settings, click Load settings or Options|Load settings andfollow these steps:• Locate saved settings .ini file. Highlight file and click Open to continue:• When the .ini file is loaded, it automatically fills in the <strong>XML</strong> <strong>Export</strong> filename and Log filename.Rename/relocate these files if desired. Click Next to continue.Rename/relocate <strong>XML</strong><strong>Export</strong> filename and Logfilename if desired, as theyare picked up from savedsettings.9/24/03 3
<strong>TRAMS</strong> <strong>Database</strong> <strong>XML</strong> <strong>Export</strong>• All settings are checked off from the loaded .ini file. If you would like to modify these settings, doso, or proceed to summary screen and run the export by clicking Run Now or Options|RunNow.Step 3) Click Next to continue with <strong>Export</strong> <strong>Utility</strong>.Step 4) Include the records you want to export.Select ONE only:All Profiles: Click here to select all profiles to include in the <strong>XML</strong> file.Profile Branch: Select the branch from the drop-down menu for which you want to create a <strong>XML</strong> file.Profile Number: Input the profile number for which you want to create a <strong>XML</strong> file.Profile Types: Check the profile type/s (Agent, Corporate, Leisure, Other, and Vendor) for whichyou want to create a <strong>XML</strong> file.Profiles Created: Check here and input the from and to dates to select profiles created within aparticular date range to be included in the <strong>XML</strong> file.Profiles Modified: Check here and input the from and to dates to select profiles modified within aparticular date range to be included in the <strong>XML</strong> file.Profiles created or modified: Check here and input the from and to dates to select profiles createdor modified within a particular date range to be included in the <strong>XML</strong> file.*Profiles with Activities created: Check here and input the from and to dates to select profiles withactivities created within a particular date range to be included in the <strong>XML</strong> file.*Profiles with Invoices issued: Check here and input the from and to dates to select profiles withinvoices issued within a particular date range to be included in the <strong>XML</strong> file.*Profiles with Res Cards created: Check here and input the from and to dates to select profileswith Res Cards created within a particular date range to be included in the <strong>XML</strong> file.Override Profile No with More Field Value: For <strong>TRAMS</strong> ClientBase Plus users, no matter whatoption you select above, if Override Profile No with More Field Value is checked, the profile number9/24/03 4
<strong>TRAMS</strong> <strong>Database</strong> <strong>XML</strong> <strong>Export</strong>in the <strong>XML</strong> file gets the value of the More Field item. (This option is only used by Data Consolidatorswho have stored the original profile number in a More Field category for matching purposes whenthe database is updated. The More Field item must be unique to the database.)Step 5) Click Next to continue.Step 6) Select the Profile Information to <strong>Export</strong>:Choose profileinformation you want toinclude in the export file.A tree outlining profileinformation detailsappears for reference onthe left of the dialog box.Check one or more of the following profile information items to <strong>Export</strong>:General Activities Res Cards CardsMarketing Travel History More Fields GroupsNote: On the left hand side of the dialog box, see an area you can view particulars that arecontained in the profile information items.*Profiles with Activities or Invoices or Rescards Filter selected from previous screen:If the Activities or Invoices or Rescards box is checked for Profile information to <strong>Export</strong>, only theActivity or Invoice or Res Card profile information that falls within the specified date range isincluded in the output <strong>XML</strong> file. For example, an export with a filter of Profile with Activities between1/1/2003 and 12/31/2003 includes all selected profile information, but only activities that werecreated between 1/1/2003 and 12/31/2003.Step 7) Click Next to proceed.Step 8) Review and print selections in the summary screen.Review the summary screen to ensure the selections you have made are correct. Click Print9/24/03 5
<strong>TRAMS</strong> <strong>Database</strong> <strong>XML</strong> <strong>Export</strong>summary to keep for reference.Step 9) Save Settings (optional).To save the settings you have just selected, click Save. Next time you run the <strong>XML</strong> <strong>Export</strong> utility, youcan Load the saved settings (see directions above), so you don't have to set them up all over again.Step 10) Run the <strong>XML</strong> <strong>Export</strong> utility.Click Run now button or Options|Run Now to run the export utility. A dialog box appears asking youif you wish to continue.9/24/03 6
Click Yes if you do. When the export is completed you get this message:<strong>TRAMS</strong> <strong>Database</strong> <strong>XML</strong> <strong>Export</strong>When clicking OK, you receive a summary of the export results (see sample below).----------<strong>TRAMS</strong> <strong>Database</strong> to <strong>XML</strong> result:----------Output file: C:\<strong>XML</strong>\leisure20030428121541.xmlNumber of Profiles Queried: 192Number of Profiles <strong>Export</strong>ed: 192Click Print Summary to print out results. If you created a log (.txt) file, you can open it using Notepador Microsoft Word to see the details, as well.Directions for Setting Up <strong>XML</strong> <strong>Export</strong> or Import with WindowsScheduler within <strong>XML</strong> <strong>Export</strong>/Import <strong>Utility</strong>There are two ways to set up the <strong>XML</strong> <strong>Export</strong> and Import utilities with the Windows Scheduler onetime, so that they run automatically behind the scenes at pre-set times and dates that you set up.The first way is to setup the Windows Scheduler from inside the <strong>XML</strong> <strong>Export</strong> or Import <strong>Utility</strong> byfollowing these directions:Step 1) Open the exportXml.exe or importXml.exe utility and click Options|Task Scheduler.Step 2) Complete the following Task Scheduler fields:Task Name: Assign a name to the export or import task.Application Name: This grayed out area confirms which application you are in (i.e. exportXml.exe9/24/03 7
<strong>TRAMS</strong> <strong>Database</strong> <strong>XML</strong> <strong>Export</strong>or importXml.exe), and its location.Ini File: Type the .ini file location and filename to schedule, or use the drop-down menu to locatethe .ini file.Priority: What priority do you want this task run, in relationship to other tasks you have scheduled?Suggested priority is either Real Time or High. By choosing Normal or Idle, when the processor hasa lull in its activity, this task is started.Click Add to continue.SPECIAL NOTE: When running using Windows Scheduler, ImportXml processes the first file thatmatches "[<strong>XML</strong> filename].<strong>XML</strong>". Processed files are then renamed *.IMP, so that it can pick up thenew <strong>XML</strong> file for the next processing.Step 3) The following fields contained in the Task tab are automatically filled in:Step 4) Click Set password for this computer if applicable. Enter system or domain password,reconfirm it and click OK.Step 5) Check box Enabled (scheduled task run at specified time).Step 6) Click the Schedule tab, and click New to set up scheduled times for task. Completepertinent fields contained in the Schedule tab.Schedule Task: From the drop-down menu, select at what interval you want the job to be run - Daily,9/24/03 8
<strong>TRAMS</strong> <strong>Database</strong> <strong>XML</strong> <strong>Export</strong>Weekly, Monthly, Once, At System Startup, At Logon, or When Idle.Start time: Click on the up or down arrow to choose start time.Advanced: For advanced time settings, click Advanced to fill in pertinent fields:Step 7) Click the Settings tab to add additional pertinent selections:Step 8) Click OK to save settings.9/24/03 9
<strong>TRAMS</strong> <strong>Database</strong> <strong>XML</strong> <strong>Export</strong>Step 9) Make sure your computer is on when the task is supposed to be run!To edit a scheduled task, open the exportXml.exe or importXml.exe utility and click Options|TaskScheduler and click Show Task. On the scheduled task you want to modify, right mouse click to getto the Task, Schedule and Setup Tabs.9/24/03 10
<strong>TRAMS</strong> <strong>Database</strong> <strong>XML</strong> <strong>Export</strong>Using <strong>XML</strong> <strong>Export</strong> or Import with Windows SchedulerYou can also setup the scheduler by going to Start|Programs|Accessories|SystemTools|Scheduler Tasks and follow the scheduler wizard:1) Choose the <strong>XML</strong> <strong>Export</strong> (exportXml) or <strong>XML</strong> Import (importXml) program you want to scheduleby clicking Browse:Important Note: When running using Windows Scheduler, the ImportXml processes the first filethat matches "[<strong>XML</strong> filename].<strong>XML</strong>". Processed files are then renamed *.IMP, so that it can pick upthe new <strong>XML</strong> file for the next processing.2) Name the scheduled task and select how often you want this task performed. Continue to9/24/03 11
<strong>TRAMS</strong> <strong>Database</strong> <strong>XML</strong> <strong>Export</strong>schedule the task by filling in time and day of week:3) Enter and confirm system or domain password for this User Name. Click Next to continue.5) Click Finish to complete the scheduling and check Open advanced properties for this taskwhen I click Finish.6) Another windows appears. Do not delete what is in the Run field, but at the very end of it add:"run" "/ini:full path and filename of your .ini file". The Run box should now read similar to this:9/24/03 12
<strong>TRAMS</strong> <strong>Database</strong> <strong>XML</strong> <strong>Export</strong>"C"\Program Files\Trams\Common Files\exportxml.exe" "/run" "/ini:C:\xml\settings\export.ini".Reminder: Make sure your computer is on when the task is supposed to be run!9/24/03 13
<strong>TRAMS</strong> <strong>Database</strong> <strong>XML</strong> <strong>Export</strong>9/24/03 14