Maintenance & Inspection Guide Edge 400A Series - Johnstech
Maintenance & Inspection Guide Edge 400A Series - Johnstech
Maintenance & Inspection Guide Edge 400A Series - Johnstech
- No tags were found...

You also want an ePaper? Increase the reach of your titles
YUMPU automatically turns print PDFs into web optimized ePapers that Google loves.
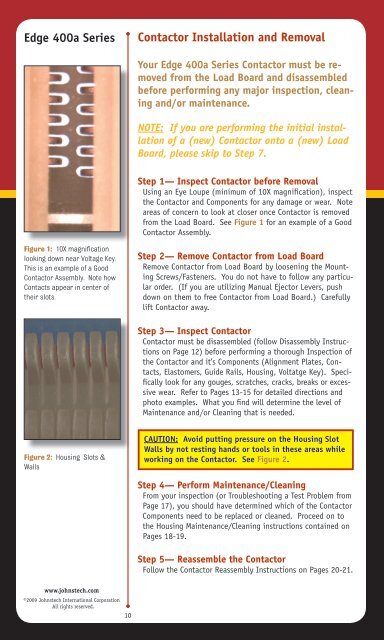
<strong>Edge</strong> 400a <strong>Series</strong>Contactor Installation and RemovalYour <strong>Edge</strong> 400a <strong>Series</strong> Contactor must be removedfrom the Load Board and disassembledbefore performing any major inspection, cleaningand/or maintenance.NOTE: If you are performing the initial installationof a (new) Contactor onto a (new) LoadBoard, please skip to Step 7.Step 1— Inspect Contactor before RemovalUsing an Eye Loupe (minimum of 10X magnification), inspectthe Contactor and Components for any damage or wear. Noteareas of concern to look at closer once Contactor is removedfrom the Load Board. See Figure 1 for an example of a GoodContactor Assembly.Figure 1: 10X magnificationlooking down near Voltage Key.This is an example of a GoodContactor Assembly. Note howContacts appear in center oftheir slots.Step 2— Remove Contactor from Load BoardRemove Contactor from Load Board by loosening the MountingScrews/Fasteners. You do not have to follow any particularorder. (If you are utilizing Manual Ejector Levers, pushdown on them to free Contactor from Load Board.) Carefullylift Contactor away.Step 3— Inspect ContactorContactor must be disassembled (follow Disassembly Instructionson Page 12) before performing a thorough <strong>Inspection</strong> ofthe Contactor and it’s Components (Alignment Plates, Contacts,Elastomers, <strong>Guide</strong> Rails, Housing, Voltatge Key). Specificallylook for any gouges, scratches, cracks, breaks or excessivewear. Refer to Pages 13-15 for detailed directions andphoto examples. What you find will determine the level of<strong>Maintenance</strong> and/or Cleaning that is needed.Figure 2: Housing Slots &WallsCAUTION: Avoid putting pressure on the Housing SlotWalls by not resting hands or tools in these areas whileworking on the Contactor. See Figure 2.Step 4— Perform <strong>Maintenance</strong>/CleaningFrom your inspection (or Troubleshooting a Test Problem fromPage 17), you should have determined which of the ContactorComponents need to be replaced or cleaned. Proceed on tothe Housing <strong>Maintenance</strong>/Cleaning instructions contained onPages 18-19.Step 5— Reassemble the ContactorFollow the Contactor Reassembly Instructions on Pages 20-21.www.johnstech.com©2009 <strong>Johnstech</strong> International CorporationAll rights reserved.10