MODEL V2648XL, V2648 - MinnPar
MODEL V2648XL, V2648 - MinnPar
MODEL V2648XL, V2648 - MinnPar

Create successful ePaper yourself
Turn your PDF publications into a flip-book with our unique Google optimized e-Paper software.
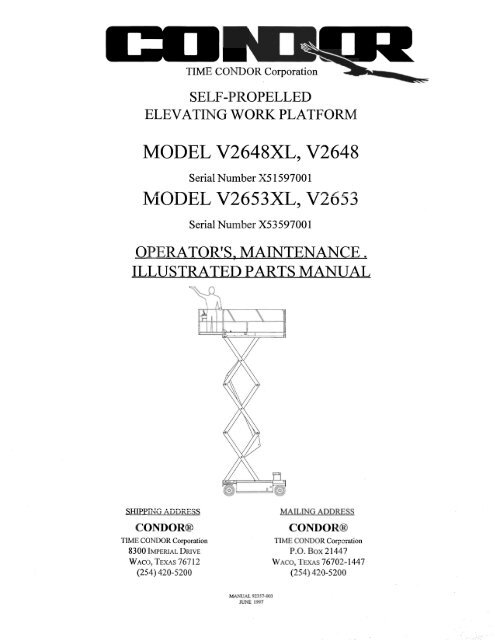
TIME CONDOR CorporationSELF-PROPELLEDELEVATING WORK PLATFORM<strong>MODEL</strong> <strong><strong>V2648</strong>XL</strong>, <strong>V2648</strong>Serial Number X5159700 1<strong>MODEL</strong> V2653XL, V2653Serial Number X53597001OPERATOR'S, MAINTENANCE.ILLUSTRA TED PARTS MANUALSHIPPING ADDRESSCONDOR®TIME CONDOR Corporation8300 IMPERIAL DRIVEVVAco,TEXAS76712(254) 420-5200MAILING ADDRESSCONDOR®TIME CONDOR CorporationP.O. Box 21447VVACO, TEXAS 76702-1447(254) 420-5200MANUAL 92357'()()3JUNE 1997
TIME CONDOR CorporationSELF-PROPELLEDELEVATING WORK PLATFORM<strong>MODEL</strong> <strong><strong>V2648</strong>XL</strong>, <strong>V2648</strong>Serial Number X5159700 1<strong>MODEL</strong> V2653XL, V2653Serial Number X53597001OPERATOR'S MANUALSIDPPING ADDRESSCONDOR®TIME CONDOR Corporation8300 IMPERIAL DRIVEWACO, TEXAS 76712(254) 420-5200MAILING ADDRESSCONDOR®TIME CONDOR CorporationP.O. Box 21447WAco,TEXAS76702-1447(254) 420-5200MANUAL 92357-003JUNE 1997
iINTRODUCTIONThe primary purpose of this manual is to provide the user with a thorough understanding of the properoperating procedures necessary to comply with the intended use of the CONDOR®.THIS MANUAL MUST BE RETAINED ON THE CONDOR® AT ALL TIMES.Do not attempt to operate this CONDOR® until you have read and understoodall information provided in this manual. Familiarizeyourself with the functions and operations of the upper and lower controls.A good understanding of the controls, their limitations, and their capabilitieswill maximize operating efficiency. The various decals attached to thisCONDOR® contain vital information. Read all decals before operating thisCONDOR®.It is YOUR RESPONSIBILITY to follow procedures while operating this CONDOR®. Themanufacturer of this CONDOR® cannot control the wide range of applications that may be used in carryingout a variety of jobs. Therefore, IT IS THE USER'S RESPONSIBILITY to consider all of the personnel whenmaking decisions regarding the intended use of this CONDOR®.It is also YOUR RESPONSIBILITY to understand and obey all federal, state, and local regulationsregarding the operation and use of aerial work platforms. A copy of the ANSIISIA A92.6-l990 Manual ofResponsibilities is attached for your use.TIME CONDOR Corporation reserves the right to modify, improve, add, and/or delete certain designfeatures of its products without any obligation to incorporate new features into products previously sold.Manuals are continually updated to reflect these changes.DO NOT ALTER OR MODIFY THIS CONDOR® WITHOUT PRIOR WRITTENAPPROVAL FROM THE MANAGEMENT OF TIME CONDOR CORPORATION.SERVICE & MAINTENANCEMany of the parts used in the manufacture of this CONDOR® have specific properties, and the manufacturerrecommends that replacement parts be purchased through TIME CONDOR Corporation in order toensure the original integrity ofthe product. Repairs and adjustments should only be made by trained andqualified personnel. Please refer to the maintenance and parts sections of the TIME CONDOR CorporationOperation, Parts & Maintenance Manual for information on service and maintenance of this CONDOR®.MANUAL 92357-001JUNE 1997
iiTIME CONDOR CorporationCONDOR® SERVICE INFORMATION1. If you need assistance or have any service or maintenance questions, TIME CONDORCorporation service and parts personnel are always available by phone or fax. Thetelephone numbers are:(254) 420-5200 Telephone(254) 420-5298 Voice Mail(800) 443-5803 FAX2. There are numerous written Maintenance Procedures available for this CONDOR®.These procedures are available through the TIME CONDOR Corporation ServiceDepartmentto anyone who requests them.3. Service and maintenance are not a substitute fortrained, qualified service technicians.TIME CONDOR Corporation conducts service schools onacontinuing basis. Call anyof our service or sales persons for a schedule. Remember, training of mechanics is theresponsibility of their employer, but TIME CONDOR Corporation Service Schools helpyou provide this training.4. TIME CONDOR Corporation Service School Training Manuals are available forpurchase through the parts department. The part numbers for these manuals are: #92333for self-propelled models; and #92334 for truck -mounted models.8300 OOERIALDIuVE,P.O. Box21447, WACO, TEXAS 76702-1447- 254-420-5200, 254-443-5803 FAXMANUAL 92357-001JUNE 1997
iiiTABLE OF CONTENTSIN'TRODUCTION ••••••••••••••••••••••••••••••.•••••.••••••••••••••••••••••••••••••••••••.••••••.••••••••••.•••••••••••••••.•••••••••••.••••••.•••.•••• ,SERVICE IN'FORMA TION •••••••••••••••••••••••••••••••••••••••••••••••••.•..••••••••••••••••.••••••••••.••.•••.•••••••••••••.•••••••••..••••. iiTABLE OF CONTENTS ._ ...................................................................................................................... iiiI. PREPARATION, INSPECTION, AND MAINTENANCE •••••••••••••••••••••••.••••••.••••••••••••••••••••••.••.••••• 1A. Overall Machine Condition ....................................................................................................... 1B. Lower Control Station ............................................................................................................... 1C. Emergency Lowering ................................................................................................................ 1D. Platform and Upper Control Station .......................................................................................... 2E. Hydraulic System ...................................................................................................................... 2F. Batteries ..................................................................................................................................... 2II. MACmNE OPERATION •••••••••••••••••••••••••••••••••.•••••••••••••.•..••••••.•••••••••••••••••••••••••••••••••••••••••••..•••••••••••• 2A. Rated Work Load ...................................................................................................................... 2B. LowerControls .......................................................................................................................... 2C. Upper Controls .......................................................................................................................... 3D. Emergency Lowering ................................................................................................................ 3E. Lift-up Entry Gate ..................................................................................................................... 3F. Deck Extension ......................................................................................................................... 5G. Removable Upper Control Box ................................................................................................. 5ill. MOVING FR.OM JOB--SITE TO JOB-SITE •••••••••.••••••••••••••••••••••••••.•.••••••.••••••..•..••••.•••.••..•••••.•.••••••• 5A. Loading and Unloading ............................................................................................................. 5B. Ramp Method ............................................................................................................................ 5C. Forklift Loading and Unloading Method .................................................................................. 5D. Transporting ...................................•.......................................................................................... 6E. Freewheel Operation ................................................................................................................. 6IV. STORAGE •••••••••••••••••••.•••••••.•••••.••••.••••••••••••••••••••.•••••••••.•...••• _ •••.•••••••••••••••••••••••••.••••••.••••••••••••.•••••.••.•• 6APPENDIX: DECALS ILLUSTRATION ••••••••••••••••••••••••••••.•..••.••...•••.••••••••••••.•••••••..•••••.••••••••.•...••....••.•. 8ANSI/SIA A92.6 -1990 MANUAL OF RESPONSmILITIESMANUAL 92357-001JUNE 1997
IMPORTANT: A COPY OF THE ANSIISIA A92.6 - 1990 MANUAL OF RESPONSmILITIES ISATTACHED TO THIS OPERATOR'S MANUAL. IT CONTAINS IMPORTANT OPERATINGINFORMATION FOR THIS CONDOR®. READ IT BEFORE OPERATING THIS CONDOR®.48I. PREPARATION. INSPECTION, ANDMAINTENANCEThe condition of this CONDOR® is veryimportant, as it directly affects the operator aswell as others. The operator must perform athorough walk-around inspection each day prior tooperating the CONDOR®. Any damage or faultyoperation should be reported immediately.A DO NOT OPERATE tag outlining theproblem should be attached to the lower controlstation and any discrepancies should be correctedbefore operating this CONDOR®.KNOW THIS CONDOR® AND ITSCAPABILITIES. REPORT ANY UNUSUALOPERATION,SUCHAS ERRATIC SWAY ORMOTION OF THE ARMS OR PLATFORM.Some major areas to check daily are:A.OVERALLMAC~CONDITIONDMISSING, BROKEN, OR DAMAGEDPARTS:Check cylinder mounting pins, pivot pins,pin retainers, bearing pads, bolts, and nuts.DDDSTEERING:Check steering link to knuckleconnections and steering cylinder forproper and secure mounting.BRAKES:Check for abnormal wear betweendeadbolts and hubs, and for loose ormissing bolts, nuts, and pins.DECALS:Check that all decals and warningsigns are in place and are clearlylegible.CAUTIONDefective components, structural damage,missing parts, and equipment malfunctionjeopardize the operator and otherpersonnel and may cause excessivedamage to the unit. A poorly maintainedCONDOR® could become the greatestoperational hazard you may encounter.DDSTRUCTURAL:Check for damaged or cracked weldson structural components-arms, platform,chassis.TIRES AND WHEELS:Check for cracks, tears, cuts, or missing orloose lug nuts (a rust line running down therim from the lug nut indicates a loose lugnut).B. LOWER CONTROLSDCheck that all functions operateproperly, that switches return freelyto neutral position. Do not operatethe CONDOR® with sticking controlsC. EMERGENCY LOWERINGD Check emergency loweringfunction by pulling red T -handle.MANUAL 92357-001JUNE 1997
... D. PLATFORM AND UPPERCONTROL STATIONDDDDCheck that lift-up entry gate is functionaland that chain is secure.Re-check the structural condition of theplatform-pins, railings, and floor.Check for missing bolts & nuts - Replacebefore operating.Check that extension deck is locked inplace.----~~-.-.-.-. ---D Check function of red button. It disconnectspower to the controls and, when pushed,stops all powered functions.Check that drive control lever returns freelyDto neutral. .E. HYDRAULIC SYSTEMD Check the hydraulic tank fluid level withthe platform all the way down. Fluid mustbe visible in sight glass. Add Shell TellusT-32 Hydraulic Fluid if required. Ensurethat the breather cap is clean and in placeon the tank.D Check for hydraulic leaks at all fittingsand valves.D Check all hydraulic hoses and tubes fordamage and kinks.F. BATTERIESCAUTIONKeep flame, sparks and metal awayfrom the batteries.D Check Electrolyte level daily in each cell.If necessary, add clear, odorless, mineralfree water to bring the level to 1/2" abovethe top ofthe separators, or to the LevelIndicator (if equipped), in each cell. Onlyadd water after charging cycle is complete.D Keep battery tops clean and dry.D Keep vent caps tightly in place.D Check that battery cable connections aretight and clean and free of corrosion.D Make sure the battery charger and theindicator lights and meter are not damaged.CAUTIONCONDOR® MUST BE OPERATEDONFIRM, LEVEL GROUND ONLY.A. RATED WORK LOADThe platform will support a combined weight equalto the unit's rated work load-including personnel,tools, and equipment-throughoutthe workingenvelope of the CONDOR®.Rated work load, on extension deck only, is not toexceed 250 Ibs. (113 kg) including one occupant.Total rated work load is not to exceed 1,000 Ibs.(454 kg) including two occupants.B. LOWER CONTROLSCAUTIONARM STAND MUST BE USED WHEMAINTENANCE PERFORMED ONCONDOR® REQUIRES SCISSORARM'S TO BE RAISED.1. To engage arm stand, raise platform,then rotate stand until it hangs vertically.Lower the platform until the arm stand restson the cross tube on the frame. Maintenancecan now begin., yMANUAL 92357-001JUNE 1997
2. To store ann stand, raise platform so thatann stand can be rotated until it rests on thestop provided on the scissor anns.Tum "controls" switch to "lower" position, tooperate from ground.In an emergency, push red button. To operate,button must be pulled out. (Also, if applicable,battery disconnect switch must be "on" tooperate.)Push "raise" or "lower" switches to moveplatform.Tum switch to "upper" position, to operatefrom platform.C. UPPER CONTROLSTum "controls" switch, on lower control panel, to"upper" position to operate from platform.NOTE:Chain should be snapped in place across entry.Gate should be lowered and closed when operatingCONDOR® from upper controls.In an emergency, push red button. To operate fromplatform, both red buttons, on lower and uppercontrols, must be pulled out.To raise and lower platform, push and hold thegreen "power" button, and push the "raise" or"lower" button. Release buttons to stop movement.Select desired drive speed with the "high/low!creep" switch. (A limit switch automatically cutsdrive speed to "creep"as the platform is raised.)To drive forward or reverse, squeeze lever switchon handle, and push or pull handle in the intendeddirection of travel. Release lever switch to stopmovement. Letting go of handle also will stopmovement.Brakes are automatically released whenever thedrive handle is moved. Let go of the handle toautomatically set the brakes.To improve drive traction, depress and hold"positraction" switch. (This will automaticallycut-out high drive speed.)To steer left or right, squeeze lever switch onhandle, and depress rocker switches on top ofhandle in the intended direction of travel. Steeringis not automatically self-centering. Be sure thesteering wheels point in the direction you wantbefore letting go of the steer switch.D. EMERGENCY LOWERiNGFor emergency lowering, grasp theTee-handle located below the rear bumper.Gently pull to lower the platform. Releasehandle to stop lowering.E. LIFT-UP ENTRY GATETo load 4' wide sheets, lift entry gate up untillockpins snap in place. After loading, pull atboth lockpins, to let gate fall into place. Keepgate down, except for loading and unloading.•MANUAL 92357-001JUNE 1997
..LOWERCONTROLSREDEMERGENCY _____ t-____________ ~~~~STOP BUTTONRAISEILOWERBUTTONSOPERATING -------4_--+INSTRUCTIONSCONTROL STATIONSELECTOR SWITCH~~~~---CONTROLCIRCUITBREAKERLEVERSWITCHUPPER CONTROLSRIGHTILEFTSTEERROCKERSWITCHr-------------_ DRIVECONTROLHANDLEREDEMERGENCY ------rSTOP BUTTONRAISEILOWERBUTTONSHIGHILOW/CREEPDRIVE SPEEDSELECTORSWITCHPOWERBUTTONMANUAL 92357-001JUNE 1997
.,F. DECK EXTENSIONLift lockpin, at right side of deck, and push extensiondeck forward (or out). When fully extended,lockpin will automatically lock. To retract, liftlockpin and pull extension deck all the way backuntillockpinautomatically locksextension deck in place.CAUTIONDo not lower extension deck onpeople or any objects!G. 'REMOVABLE' UPPER CONTROLBOXUnsnap overcenter latch at bottom of upper controlbox and pull plug out of receptacle. Bend cable sothat plug faces down. Snap cover onto receptacleat bottom of box. Lift box and store it in a secureplace to prevent unauthorized use of theCONDOR®.III.MOVING FROM JOB-SITE TOJOB-SITEA. LOADING AND UNLOADINGAlthough this CONDOR® is somewhat smallcompared with larger construction equipment, itrequires the same care and attention in loading,transporting, and unloading. At no time should itssize,or weight be under estimated. Beforeloading or unloading, inspect the CONDOR® forany physical damage or defects.The means by which you load or unload theCONDOR® should be of sufficient strength towithstand its weight.<strong>MODEL</strong><strong>V2648</strong><strong><strong>V2648</strong>XL</strong>V2653V2653XLWEIGHT(#)44001bs.45001bs.46001bs.47001bs.WEIGHT(KG)1860kg1905 kg1950 kg1996 kgB. RAMP METHODEnsure that the ramp is sufficiently strong tosupport the weight of the CONDOR®.The ramp should be set, not steeper than thisCONDOR®'s rated gradeability, which for Model<strong>V2648</strong>/531XL is 14 0 or 25%, or a rise ono inchesin a run of 10 feet.Before driving the CONDOR® on a ramp, lowerthe platform completely, test the drive/steercontrols and the brake system.CAUTIONSelect "low" drive speed,not "high" and not "creep".The front of the CONDOR® should be uphill,meaning: Drive forward uphill and reversedown.Keep CONDOR® in alignment with the rampduring loading and unloading procedures.C. FORKLIFT LOADING ANDUNLOADING METHODEnsure that the forklift has sufficient capacity tohandle the weight of this CONDOR®.(SEE III. A. )This CONDOR® can be lifted from the rear,using the forklift pockets provided.NOTE THAT THE CENTER OF GRAVITYIS 50 INCHES FROM THE END OF THECONDOR®.The CONDOR® should only be raised to a heightsufficient to clear any obstructions.Keep forklift travel to a minimum, carryCONDOR® as close as possible to the ground,and set it down gently.MANUtu. 92357-001JUNE 1997
• D.TRANSPORTINGThis CONDOR® can be easily transportedbetween job-sites if the following rules andprocedures are followed:Block all wheels to prevent forward and reversemotion.Tie down the CONDOR® with chains or cables,running them through the tie-down holes only. Donot tie down over the guardrails or entry steps.Always tum the power off at the lower controlstation.E. FREEWHEEL OPERATIONCAUTIONThis CONDOR® must be on firm, levelground when releasing the parking brakes.To put the CONDOR® into freewheel mode,use the brake release handles on the rear axle.One handle is on the front side of the axle andthe other is on the rear side of the axle. Tumeach release handle 90° and at the same time,slightly rotate it. The brakes are now released.(Released brakes will automatically reset thenext time forward or reverse drive is used,then will engage when drive is stopped.)Never exceed 5 mph when moving theCONDOR® in the freewheel mode.IV. STORAGEWhen you get out ofthe platform, leave it all theway down.CAUTIONNever park the CONDOR®with platform raised.MANUAL 92357..001JUNE 1997
NOTES•MANUAL 92357-001JUNE 1997
APPENDIX: DECALS ILLUSTRATION~,..0r">l:8~~'-----l~'--PARTIAL SECTION AAPPLIES TO ALL <strong>MODEL</strong>SMANUAL 92357-001JUNE 1997
APPENDIX: DECALS ILLUSTRA nON•ITEM PARTNUMBER DESCRIPTION QTYRef*1*2*3*4*5*6*7*8*9*10*11*12131415161718192031****55999-005 ..................... Decal Installation <strong>V2648</strong> ................................................................. Ref.55999-006 ..................... Decal Installation <strong><strong>V2648</strong>XL</strong> ............................................................ Ref.55999-007 ..................... Decal Installation V2653 ................................................................. Ref.55999-008 ..................... Decal Installation V2653 XL ............................................................ Ref.55890 ............................ Decal, V Upper Operator's Instructions (<strong>V2648</strong>/53) ............................ 155889 ............................ Decal, V XL Upper Operator's Instructions (<strong>V2648</strong>/53XL) ................ 155894 ............................ Decal, V General Caution ..................................................................... 154652-003 ..................... Decal, GuardraiVChain Caution ............................................................ 155963-1200 ................... Decal, 1200 Rated WorkLoad (<strong>V2648</strong>/53XL) .................................... 255944 ............................ Decal, 250 RWL On Ext. (<strong>V2648</strong>/53XL) ............................................. 155480-001 ..................... Decal, Lower Controls .......................................................................... 155480-002 ..................... Decal, Lower Operator Instructions ...................................................... 154652-002 ..................... Decal, Arm Stand Caution ..................................................................... 154984-005 ..................... Decal, Rear Bumper .............................................................................. 166973 ............................ Decal, Electrocution Hazard .................................................................. 255871-001 ..................... Decal, V XL Upper Electrical Box Top ................................................ 155856-001 ..................... Decal, V Upper Electrical Box Top ...................................................... 155871-002 ..................... Decal, V Upper Electrical Box Front .................................................... 155856-002 ..................... Decal, V XL Upper Electrical Box Front .............................................. 154984-007 ..................... Decal, Hydraulic Fluid .......................................................................... 155940-023 ..................... Decal, CONDOR 3.45 X 23 .................................................................. 256004-006 ..................... Decal, V20481XL .................................................................................. 256004-008 ..................... Decal, V26531XL .................................................................................. 255941-017 ..................... Decal, Condor "Bird" ............................................................................ 253259 ............................ Tape, Non-Skid Jet Black ............................................................ 1.50LF66921 ............................ Coating, Non-Skid Jet Black ......................................................... 25GL55999 ............................ Dwg., Decal Installation ........................................................................ 154984-006 ..................... Decal, 110 Volt Ext. To Platform (<strong>V2648</strong>/53XL) ................................ 1...................................... Nameplate Scissors Indentification .................................................. Ref.55999-101 ..................... Decal Kit, <strong>V2648</strong> Essential .............................................................. Ref.55999-102 ..................... Decal Kit, <strong><strong>V2648</strong>XL</strong> Essential ......................................................... Ref.55999-103 ..................... Decal Kit, V2653 Essential .............................................................. Ref.55999-104 ..................... Decal Kit, V2653XL Essential ......................................................... Ref.- Indicates Items Not Shown*Indicates Included Iu Essential Decals,.·..... " .• " •••••• 0OJ....... • " ••••••....... · 'II • 0 ••••••........ .• ••••• CI 0_o ••••••••2 1/4 MARGINNO NON-SUPCOATINGIPLANVI(W OF<strong>MODEL</strong>S V20/2648/5JMANUAL 92351-001JUNE 1997PARTIAL REAR VIEW OF<strong>MODEL</strong>S 1/20/2648/53
APPENDIX: DECALS ILLUSTRATION1OPERA TING INSTRUCTIONSo TURN SWITCH, ON LOWER CONTROL BOX, TO "UPPER" POSITION, TO OPERATE FROM PLATFORM.o IN AN EMERGENCY, PUSH RED BUTTON. TO OPERATE FROM PLATFORM, BOTH RED BUTTONS,ON LOWER AND ON UPPER CONTROLS, MUST BE PULLED OUT.o TO RAISE AND LOWER PLATFORM, PUT AND KEEP FOOT ON SWITCH, ANDPUSH TOGGLE SWITCH IN "UP" OR "DOWN" DIRECTION.RELEASE SWITCH OR TAKE FOOT OFF SWITCH TO STOP MOVEMENT.o SELECT DRIVE SPEED WITH "FAST/SLOW/CREEP" SWITCH.A LIMIT SWITCH AUTOMA TICALL Y REDUCES DRIVE SPEED AS THE PLATFORM IS RAISED.o TO DRIVE FORWARD OR REVERSE, PUT AND KEEP FOOT ON SWITCH, ANDPUSH OR PULL TOGGLE SWITCH IN INTENDED DIRECTION OF TRAVEL.RELEASE SWITCH, OR TAKE FOOT OFF SWITCH TO STOP MOVEMENT.o BRAKES ARE AUTOMA TICALL Y RELEASED WHENEVER DRIVE MOVES.RELEASE SWITCH OR TAKE FOOT OFF SWITCH TO AUTOMATICALLY SET BRAKES.o TO STEER LEFT OR RIGHT, PUT AND KEEP FOOT ON SWITCH, ANDMOVE "STEERING" SWITCH IN INTENDED DIRECTION OF TRAVEL.STEERING IS NOT AUTOMA TICALL Y SELF-CENTERING. BE SURE STEERING WHEELS POINTIN DIRECTION YOU WANT BEFORE LETTING GO OF SWITCH.OPERA TING INSTRUCTIONSo TURN SWITCH, ON LOWER CONTROL BOX, TO "UPPER" POSITION, TO OPERATE FROM PLATFORM.o IN AN EMERGENCY, PUSH RED BUTTON. TO OPERATE FROM PLATFORM,BOTH RED BUTTONS, ON LOWER AND ON UPPER CONTROLS, MUST BE PULLED OUT.o TO RAISE AND LOWER PLATFORM. PUSH AND HOLD THE GREEN "ENABLE" BUTTON. ANDPUSH THE "UP" OR "DOWN" BUTTON.RELEASE BUTTONS TO STOP MOVEMENT .• SELECT DRIVE SPEED WITH "FAST/SLOW/CREEP" SWITCH.A LIMIT SWITCH AUTOMATICALLY REDUCES DRIVE SPEED AS THE PLATFORM IS RAISED.o TO DRIVE FORWARD OR REVERSE, SQUEEZE GRIP SWITCH ON HANDLE, ANDPUSH OR PULL HANDLE IN INTENDED DIRECTION OF TRAVEL.RELEASE GRIP SWITCH OR LET GO OF HANDLE TO STOP MOVEMENT.o BRAKES ARE AUTOMA TICALL Y RELEASED WHENEVER DRIVE MOVES.RELEASE GRIP SWITCH OR LET GO OF HANDLE TO AUTOMA TICALL Y SET BRAKES .• TO STEER LEFT OR RIGHT, SQUEEZE GRIP SWITCH ON HANDLE, ANDDEPRESS ROCKER SWITCHES ON TOP OF HANDLE IN INTENDED DIRECTION OF TRAVEL.STEERING IS NOT AUTOMA TICALL Y SELF -CENTERING. BE SURE STEERING WHEELS POINTIN DIRECTION YOU WANT BEFORE LETTING GO OF SWITCHES.55889MANUAL 923S7-OO1JUNE 1997
APPENDIX: DECALS ILLUSTRATION2I Lh CAUT~O~ I• DO NOT OPERATE THIS CONDOR'" UNTIL YOU HAVE BEEN PROPERLY TRAINED AND HAVECOMPLETEL Y READ AND UNDERSTOOD THE OPERA TOR'S MANUAL LOCATED ON THIS CONDOR~• THIS CONDOR'" IS NOT ELECTRICALLY INSULATED.SEE OPERATOR'S MANUAL FOR SAFE APPROACH DISTANCES TO ENERGIZED POWER LINES.• PRIOR TO EACH DAY'S USE, CHECK TO MAKE SURE ALL FUNCTIONS ARE OPERA TING PROPERLY.PERFORM ALL INSPECTIONS REQUIRED BY SECTION 6 OF THE ANSI 92.6 STANDARD.• DO NOT USE THE CONDOR'", IF IT IS MALFUNCTIONING OR DAMAGED IN ANY WAY,OR IF THE WIND BLOWS OVER 15 MPH.• RAISE PLATFORM ONLY WHEN CONDOR'"IS ON FIRM, LEVEL GROUND.• DO NOT DRIVE ON A SLOPE UNLESS THE PLATFORM IS FULLY LOWERED.• ALWAYS LOOK IN THE DIRECTION IN WHICH THE PLATFORM IS MOVING.WATCH FOR, AND AVOID, OVERHEAD OBSTRUCTIONS AND ANYTHING ELSE THAT MAY STRIKEPLA TFORM, PERSONNEL, CONTROLS, OR CONDOR'".• FOLLOW INSTRUCTIONS IN OPERA TOR'S MANUAL WHEN SERVICING BATTERIES.EACH REPLACEMENT BATTERY MUST WEIGH AT LEAST AS MUCH AS ORIGINAL EQUIPMENT.• REPLACEMENT TIRES MUS, BE SAME AS ORIGINAL EQUIPMENT.• IN CASE OF EMERGENCY, PUSH RED "EMERGENCY STOP" BUTTON.558943I Lh Cfo\Ur~O[N IGUARDRAILS AND SAFETYCHAINS MUST BE SECUREDAND USED AT ALL TIMES54652-0034RA TED WORK LOAD1000 LBS INCLUDINGTWO OCCUPANTS55963-10005RA TED WORK LOADON DECK EXTENSION250 LBS55944MANUAL 92357-001JUNE 1997
APPENDIX: DECALS ILLUSTRATION6UP$DOWN$PPER+ OFF7OPERATINGINSTRUCTIONS• TO OPERATE FROM GROUND,TURN SWITCH TO "LOWER" POSITION.• IN AN EMERGENCY, PUSH RED BUTTON.TO OPERATE, BUTTON MUST BE PULLED OUT.• PUSH TOGGLE SWITCH TO MOVE PLATFORM.• TURN SWITCH TO "UPPER" POSITION,TO OPERATE FROM PLATFORM.55480-002LOWER8l~cAul~oNlSTAND CLEARUNLESS ARM STANDIS IN PLACE54652-002[9FORKLIFT J EMERGENCY LOWERING BRAKE RELEASEPULL T-HANDLE. TO LOWER PLATFORM.ONLY ON FIRM, LEVEL GROUND.POCKETRELEASE HANDLE TO STOP MOVEMENT.ROTATE BOTH LEVERS TO RELEASE BRAKES.I[ FORKLIFT 1POCKET10ELECTROCUTION HAZARDEATH OR SERIOUS INJURY WILL RESULTFROM CONTACT WITH THIS MACHINE IF ITSHOULD BECOME ELECTRICALLY CHARGED.KEEP C EARMANUAL 92357-OO(JUNE 1997
APPENDIX: DECALS ILLUSTRA nON11-"V"SSI!71-CCtFORWARDEMERGENCY ~OSTOP FAST REVERSESLOWCREEP11-"XL"EMERGENCYSTOPGASTSLOWL@RFORWARDCREEPDRIVE SPEEDREVERSE55856-00112-"V"12-"XL"oUPPLATFORMENABLEoUPDOWN55871-00255856-002DOWN13 HYDRAULICFLUID54984-00MANUAL 92357-001JUNE 1997
--.APPENDIX: DECALS ILLUSTRATION20110 VOLTEXTENSION TOPLATFORM'4QR4-006318300 IMPERIAL DRIVE 0WACO, TEXAS 76712~IM=A=N=U=F=A=C=TU=R=E=D==IN==U=.S=.A=.==~I ~IS=E=R=IA=L=N=O=.============~I CONDOR <strong>MODEL</strong> <strong>V2648</strong> II RATED WORK LOAD 1000 LBS~==============~I PLATFORM HEIGHT 26' .0· II HYD. PRESSURE 2700 PSI~IS=YS=T=EM==V=OL=T=AG=E=2=4=V==D=.C=.==~1 ~I __________________ ~THIS UNIT IS NOT ELECTRICALLY INSULATED.THIS SELF-PROPELLED ELEVATING WORK PLATFORM CONFORMSo TO ALL APPLICABLE REQUIREMENTS OF ANSI A92.6-1990 05134031~IM=A=N=U=F=AC=T=U=R=E=D=I=N=U=.=S.=A=.===;I8300 IMPERIAL DRIVE 0WACO, TEXAS 76712~IS=E=R=IA=L=N=O=.============~I CONDOR <strong>MODEL</strong> <strong><strong>V2648</strong>XL</strong> I I RATED WORK LOAD 1000 LBSI~ P::=:LA=T=F::::OR:::M=HE:=:::IG:=:::H=T===2:::6=' .:,::0=" ==~II HYD. PRESSURE 2700 PSI~IS_Y_ST_E_M_V_0_L_TA_G_E~2~4_V~D~.C=. __ ~1 I~ __________________ ~THIS UNIT IS NOT ELECTRICALLY INSULATED.THIS SELF -PROPELLED ELEVATING WORK PLATFORM CONFORMSo TO ALL APPLICABLE REQUIREMENTS OF ANSI A92.6-1990 051340MANUAL 92357-001JUNE 1997
APPENDIX: DECALS ILLUSTRATION318300 IMPERIAL DRIVE 0WACO, TEXAS 76712I MANUFACTURED IN U.S.A. II SERIAL NO.~==============~~==============~I PLATFORM HEIGHT 26'.0· II HYD. PRESSURE 2700 PSII CONDOR <strong>MODEL</strong> V2653 II RATED WORK LOAD 1000 lBS~IS=Y=ST=E=M=V=O=LT=A=GE=2=4==V=D=.=c=.==~1 ~I __________________ ~THIS UNIT IS NOT ELECTRICALLY INSULA TED.THIS SELF-PROPELLED ELEVATING WORK PLATFORM CONFORMSo TO ALL APPLICABLE REQUIREMENTS OF ANSI A92.6-1990 051.340318300 IMPERIAL DRIVE 0WACO, TEXAS 76712~IM=A=N=U=FA=C=T=U=RE=D~IN~U~.S~.A~·~~I~ls=E=R=IA=L=N=O=.============~I CONDOR <strong>MODEL</strong> V2653Xl II RATED WORK LOAD 1000 lBSI PLATFORM HEIGHT 26'.0· II HYD. PRESSURE 2700 PSI~IS=Y=ST=E=M=V=0=LT=A=GE=2=4==V=D=.=c=.==~1 I~ ________________ ~THIS UNIT IS NOT ELECTRICALLY INSULA TED.THIS SELF-PROPELLED ELEVATING WORK PLATFORM CONFORMSo TO ALL APPLICABLE REQUIREMENTS OF ANSI A92.6-1990 051340MANUAL 92357-001IDNE 1997
TIME CONDOR CorporationSELF-PROPELLEDELEVATING WORK PLATFORM<strong>MODEL</strong> <strong><strong>V2648</strong>XL</strong>, <strong>V2648</strong>Serial Number X5159700 1<strong>MODEL</strong> V2653XL, V2653Serial Number X53597001MAINTENANCE MANUALSHIPPING ADDRESSCONDOR®TIME CONDOR Corporation8300 IMPERIAL DRIVEVVAco,TEXAS76712(254) 420-5200MAILING ADDRESSCONDOR®TIME CONDOR CorporationP.O. Box 21447VVACO, TEXAS 76702-1447(254) 420-5200MANUAL 92357'()(}2JUNE 1997
INTRODUCTIONiThe primary purpose of this manual is to provide the user with a thorough understanding of the properoperating procedures necessary to comply with the intended use of the CONDOR®, and to provide theinformation necessary to maintain and service the CONDOR®.THE OPERATOR'S MANUAL MUST BE RETAINED ON THE CONDOR® AT ALL TIMES.Do not attempt to operate or service the CONDOR® until you have read andunderstood all information provided in this manual. Familiarize yourself withthe functions and operations of the upper and lower controls. A good understandingof the controls, their limitations, and their capabilities will maximizeoperating efficiency. The various decals attached to this CONDOR® alsocontain vital operational instructions. Read the decals before operating thisCONDOR®.It is YOUR RESPONSIBILITY to follow procedures while operating the CONDOR®. The manufacturerof this CONDO R® cannot control the wide range of applications that may be used in carrying outa variety of jobs. Therefore, it is THE USER'S RESPONSIBILITY to consider all personnel whenmaking decisions regarding the CONDOR®'s intended use.It is also YOUR RESPONSIBILITY to understand and obey all federal, state, and local regulationsregarding the operation and use of aerial work platforms. A copy of the ANSIISIA Manual ofResponsibilities is attached for your use: ANSIISIA A92.5-1992 is provided for Boom-SupportedElevating Work Platforms, and ANSIISIA A92.6-1990 is provided for Self-Propelled Elevating WorkPlatforms.TIME CONDOR Corporation reserves the right to modify, improve, add, and/or delete certain designfeatures of its products without any obligation to incorporate new features into products previously sold.Our manuals are continually updated to reflect these changes.DO NOT ALTER OR MODIFY THIS CONDOR® WITHOUT PRIOR WRITTEN APPROVALFROM THE MANAGEMENT OF TIME CONDOR CORPORATIONSERVICE & MAINTENANCEMany of the parts used in the manufacture of the CONDOR® have specific properties, and themanufacturer recommends that replacement parts be purchased through TIME CONDOR Corporationin order to ensure the original integrity of the product. Repairs and adjustments should only be made bytrained and qualified personnel. Please refer to the maintenance and parts sections of the TIMECONDOR Corporation Operation, Maintenance, & Parts Manual for information on service andmaintenance of the CONDOR®.NOTE:Please refer to the TIME CONDOR Corporation section of the Operation, Maintenance, &Parts Manual for information pertaining to your CONDOR®.
iiTIME CONDOR CorporationCONDOR® SERVICE INFORMATION1. If you need assistance or have any service or maintenance questions, TIME CONDORCorporation service and parts personnel are always available by phone or fax. The telephonenumbers are:(254) 420-5200 Telephone(254) 420-5299 Voice Mail(800) 443-5803 FAX2. There are numerous written Maintenance Procedures available for this CONDOR®.These procedures are available through the TIME CONDOR Corporation Service Department to anyone who requests them.3. Service and maintenance are not a substitute for trained, qualified service technicians.TIME CONDOR Corporation conducts service schools on a continuing basis. Call any ofour service or sales persons for a schedule. Remember, training of mechanics is the responsibility of their employer, but TIME CONDOR Corporation Service Schools help you providethis training.4. TIME CONDOR Corporation Service School Training Manuals are available for purchasethrough the parts department. The part numbers for these manuals are: #92333 for selfpropelledmodels; and #92334 for truck-mounted models.TIME CONDOR Corporation8300 IMPERIAL DRIVE, P.O. Box21447, WAco,TEXAS 76702-1447-254-420-5200,254-666-4544 FAX
iiiTIME CONDOR CorporationCondor® Self-Propelled Booms and ScissorsWARRANTYTIME CONDOR Corporation warrants to the purchaser that each new aerial work platform made by TIMECONDOR Corporation is free from defects in material and workmanship arising under normal use andservice-in the case of major weldments, (chassis, turret, and booms), for a period of five (5) years after theoriginal shipment of the aerial work platform fromTiME CONDOR Corporation's plant; and in the case ofall other parts. for a period of one (1) year after the aerial work platform is placed in service or two (2) yearsafter the original shipment of the aerial work platform from TIME CONDOR Corporation's plant, whichevercomes first.The obligation and liability under this Warranty is expressly limited to repairing or, at TIME CONDORCorporation's option. replacing free of charge at its facto!)' in Waco, Texas or at an authorized repair facilitydesignated by TIME CONDOR Corporation, the defective part. In no event shall TIME CONDORCorporation or its suppliers be liable to the purchaser or any other person for transportation charges or forany incidental, collateral, special, or consequential damages, including without limitation damages for lossof profits, loss of customers, loss of goodwill or work stoppage, claims by any party other than the purchaser,or any other similar damage or loss even if TIME CONDOR Corporation, its suppliers, or its representativeshave been advised of the possibility of such damages.Parts claimed to be defective and for which repair or replacement is desired shall be returned transportationprepaid to TIME CONDOR Corporation's facto!), for inspection. This Warranty applies to replacementpartS provided under the terms of this Warranty only for the remainder of the Warranty period applicable tothe original purchase.Any operation of the equipment beyond rated capacity, improper use or application of the equipment,substitution upon it of parts not approved by TIME CONDOR Corporation or alteration or repair of theequipment by any person not authorized by TIME CONDOR Corporation shall, at TIME CONDORCorporation's option. void this Warranty. TIME CONDOR Corporation n shall have no liability orresponsibility for damages resulting from accident or the malfunction of equipment and components notsupplied byTIME CONDOR Corporation.No agent, employee, distributor, dealer, or other representative of TIME CONDOR Corporation isauthorized to modify this Warranty in any way. Accordingly, additional statements or presentations by anysuch representative, whether oral or written, do not constitute warranties by TIME CONDOR Corporationand should not be relied upon as limited warranties of TIME CONDOR Corporation, and no attempt, effort,or promise to repair equipment by TIME CONDOR Corporation or any such representative at any time shallmodify or extend this Warranty in any way. If the purchaser has used its own order form. no additional ordifferent warranty terms contained in the purchaser's form will be honored by TIME CONDOR Corporation.This Warranty covers only new and unused aerial work platforms manufactured by TIME CONDORCorporation. Products or parts manufactured by others are covered only by such warranties as are extendedto the purchaser by TIME CONDOR Corporation's suppliers.This Warranty is in lieu of all other warranties, expressed or implied, including but not limited to warrantiesof merchantibility and fitness for a particular purpose. Any applicable implied warranty shall be limited induration to the warranty period.&300 imperial Drive, P.O. Box 21447, Waco, Texas 76702-1447-254-420-5200,254-666-4544 FAXFonn No.513-3M-392Effective Date 9/1190Printed in U.S.A.
Effectiye January 1, 1993WARRANTy PROGRAMWarranty is a function of a manufacturing company to back up the product it manufactures. It is aguarantee against defects in design and workmanship of components utilized in the product, and is offeredfor a fixed period oftime following the purchase of the product by a customer.TIME CONDOR Corporation Warranty states, in general, that TIME CONDOR Corporation will replacefree of charge any components found to be defective within the time frame of the warranty period. Thereare exceptions to some components which are not the responsibility of TIME CONDOR Corporation.These will be outlined in subsequent paragraphs.A. ~PERIOD1. The Self-Propelled Boom and Scissor Warranty is one (1) year from placing theCONDOR® in service or two (2) years following shipment from TIME CONDORCorporation, whichever comes first. In the case of majorweldments (chassis, turret, andbooms), the Warranty Period is five (5) years following shipment from TIME CONDORCorporation.2. The Truck-Mounted CONDOR® Warranty Period is one (1) year from shipment of theCONDOR® from TIME CONDOR Corporation's plant.3. For parts sold through the Parts Department, the Warranty Period is six (6) months fromutilizing the component or placing it in service, or twelve (12) months followingshipment from TIME CONDOR Corporation, whichever comes first, unless the part isfurnished to correct a defective part on the original shipment still under Warranty.4. Replacement parts provided under the terms of the Warranty are for the Warranty Periodapplicable to the unit in which they were installed as if such parts were originalcomponents ofthe aerial work platform.5. During the Warranty Perio9, in addition to covering the parts replaced under Warranty,TIME CONDOR Corporation will pay a Dealer Warranty Labor Rate which is based ona percentage of your standard shop labor rate.NOTE:The term "IN SERVICE" means that the Warranty starts at the time the CONDOR® isfirst used for any purpose. An example: The dealer may have purchased a CONDOR®to have in stock, but may not use it. After three months, the CONDOR® is sold or thedealer decides to put the CONDOR® into its rental fleet. In this situation, the WarrantyPeriod begins the day the dealer puts the CONDOR® into the fleet or when theCONDOR® is delivered to the end user.The submittal of a warranty claim against a stock machine constitutes it as being "inservice," initiating the warranty period.
B. PRE-DELIVERY INSPECTION SHEET (p.D.I.)1. Each Self-Propelled Boom or Scissor CONDOR® shipped from TIME CONDORCorporation facility will have a Pre-Delivery Inspection (P.D.I.) sheet enclosed in theSafety Manual holder tube.2. It will be the responsibility of the original recipient of the CONDOR® from whether itwill be the dealer or the end user, to complete this form and return it to TIME CONDORCorporation's facility within 45 days from the date of receipt to set up the WarrantyAccount.3. Failure to complete the P .0.1. sheet and return it to TIME CONDOR Corporation withinthe time frame given will result in voiding the Warranty on the CONDOR® .NOTE:The form must be filled out completely, giving the name of the dealer, address, modelnumber, serial number, person inspecting the CONDOR® IS, signature, and date ofinspection. (The date of inspection does not constitute the "In Service" date.)C. ITEMS NOT COVERED UNDER WARRANTYSome components are used on the CONDOR® which are not warranted by TIME CONDORCorporatioin. However, these are warranted by the component manufacturer. Some of these are:1. Tires and Batteries: These are normal wear items and are considered normalmaintenance items. However, if they are found to be defective, contact can be made withthe manufacturer's local dealer.2. Hydraulic Filters and Fluid: These are considered general maintenance and serviceitems, and are not covered by warranty.3. Other components: Products or parts manufactured by others are covered only by suchwarranties as are extended to TIME CONDOR Corporation by its suppliers.4. Freight and Charges: The warranty does not include any transportation, other charges,or the cost of installation or any liability for direct, indirect, or consequential damages ordelay resulting from the defect.5. Travel Time/Mileage: Travel time and the mileage to and from dealer facilities toCONDOR® location are not covered or reimbursable.6. Troubleshooting: Troubleshooting is not covered or reimbursable. However, TIMECONDOR Corporation Warranty will cover reasonable labor charges for the removal andreplacement of defective components.
D. PROCESSING OF WARRANTY CLAIMDuring the Warranty Period, should a component failure be encountered within the guidelines ofthe TIME CONDOR Corporation Warranty Policy, the following procedure is to be followed:1. Upon identifying the defective component, the replacement can be obtained by:a. Issuing an order to our Parts Department through normal channels, whichentails your being invoiced.b. You may have previously purchased the part from TIME CONDOR Corporationfor your stock and will utilize it for this replacement.The above two methods will enable you to indicate on the claim the TIME CONDORCorporation invoice number to substantiate the parts purchase and the amount to becredited.c. Although not recommended, you may purchase the part locally. When this isdone, a copy of the purchase order or receipt MUST accompany the claim. TIMECONDOR Corporation has the option to ship a replacement part at no charge ifthe local cost would be greater, in lieu of is suing credit for locally purchased parts.d. When parts arepuchased from TIME CONDOR Corporation, part numbers withinvoice numbers MUST be referenced in the appropriate section of the claimform.2. Complete the Warranty Claim as noted in the "Warranty Claim Procedure" section.Provide as much information as possible to enable TIME CONDOR Corporation tothoroughly evaluate the claim and process it in the shortest amount of time possible.NOTE:WARRANTY CLAIMS WILL NOT BE ACCEPTED BY TIME CONDOR CORPORATION AFTER 45 DAYS AFTER FAILURE3. Provided no return parts are required and all the information has been verified, the claimwill be processed and credit will be issued against your account.E. RETURNAUTHORIZATIQN1. If a component is found to be defective within the normal guidelines of the Warranty, aWarranty Claim Form must be completed.2. It will be necessary for you to call the TIME CONDOR Corporation Service Departmentand ask to be issued a Return Authorization (R/ A) number. You will be asked for a DealerClaim Number. As noted in Section 2, Item A, of the Warranty Claim Procedure, this isa number assigned by the dealer for the purpose of tracking the claim, as there may bemore than one claim for the same CONDOR®. The R/ A number issued must be loggedin the appropriate section ofthe claim form, and the gold copy (RIA) ofthe form mustbe returned with the parts being returned.
NOTE:DO NOT SHIP ANY RETURN PARTS WITHOUTA RETURN AUTHORIZATION (RIA) NUMBERDoing so may result in parts getting lost in the system and may delay processing the claim,or may cause denial due to the time element of the claim.3. All RIA parts must be received at TIME CONDOR Corporation within 45 days from thedate the RIA number was issued. Failure to do so will cause the claim to be denied.4. All parts claimed under Warranty will be required to be shipped back to TIME CONDORCorporation FREIGHT PREPAID. No freight collect shipments will be accepted.
CONDOR® Model <strong>V2648</strong>/53XL. <strong>V2648</strong>/53MAINTENANCE MANUAL•TABLE OF CONTENTSINTRODUCTION ..................................................................................................................... iCONDOR® SERVICE INFORMATION .............................................................................. iiSELF-PROPELLED WARRANTY ........................................................................................ iiiTable of Contents ...................................................................................................................... 1Specifications ............................................................................................................................ 3Recommended Tool List ........................................................................................................... 4Serial Nwnber Location ............................................................................................................ 5Serial Nwnber To Model Designation ...................................................................................... 6Hydraulic System Description .................................................................................................. 7Pressure Adjustment Procedures ............................................................................................ 11Electrical System Description ................................................................................................. 15Machine Options Description ................................................................................................. 19Assembly Diagrams Section ................................................................................................... 23Battery Service ........................................................................................................................ 45Preventive Maintenance .......................................................................................................... 53Hydraulic Fluid Specifications ............................................................................................... 63Battery Charger Troubleshooting Guide ................................................................................ 65Bolt Torque Chart ................................................................................................................... 75MANUAL 92357-002lUNEl997
• NOTESMANUAL 923S7-OO2JUNE 1997
.,SPECIFICATIONSSPECIFICATIONS<strong>V2648</strong>1XLV26531XLMaximum Working HeightPlatfonnHeightStowedPlatfonnHeightOverall LengthOverall WidthOverall HeightOverall Height With Rails RemovedPlatfonn SizePlatfonn Capacity (Rated WorkLoad)Gross WeightPower SystemBattery CapacityNumber of BatteriesBattery VoltageBattery ChargerWheelBaseTires (non marking) solid ribInside Turning RadiusDrive SpeedGradeabilityLiftlLowerTime32ft.32ft.26ft.26ft.44.5" 46.5"93" 93"48" 53"79" 81"44 1 /2" 46 1 /t92.5"x44" 92.5"x44"10OOlbs.IOOOlbs.4500lbs 47001bs.4400 lbs. (XL) 400 Ibs.(XL)24 volt DC 24 volt DC235 amp hour 235 amp hour4 46 volt 6 volt25 amp 25 amp75" 75"16x5 18x9.5838" 40"611.212.4 mph .7511.5/2.4 mph250/0114° 250/0114°48/40 sec 48/40 secOPTIONS* Battery Condition Indicator* Strobe Light* 250 Amp Hour Deep Cycle Batteries* Hour Meter* TravelAlarm* KeySwitch* MotionIMovementAlarm* DescendAlann* 5° SlopeAlann* Low Volt Warning/InterruptBatteryProtection SystemTheCONDOR® Model <strong>V2648</strong>/531XL is designed and built to confonnto TIME CONDOR Corporationunderstanding and interpretation of all applicable OSHA rules and regulations as well as ANSI standards:ANSI Standard A92.6 - 1990 ................... Self Propelled Elevating Work PlatfonnCAUTIONIt is imperative that all owners and operators of the CONDOR® read, understand and confonn to theseregulations. Ultimate compliance to prevailing OSHA regulations is the RESPONSIBILITY of theemployer utilizing the equipmentMANUAL 92357-002JUNE 1997
• RECOMMENDEDTOOL LISTThe following is a list of tools that you will fmd helpful when performing service, maintenanceor troubleshooting the CONDOR® equipment.leach Volt/Ohm Test Meterleach Hydraulic Flow Meter, 0-10 GPM1 each Hydraulic Flow Meter, 0-50 GPM1 each Hydraulic Quad Meter Pressure Gauge1 each Battery Hydrometer1 each Battery Load Tester1 each 112" Drive Torque Wrench, 0-250 ftIlbs1 each Pry Bar1 each Strap Type Filter Wrench1 each Grease Gun1 each Hammer, 24 oz.1 each Vice Grip Pliers1 each Combination Wrench Set, 1// to 1-1/2"1 each 3/s" Drive Socket Set, 1// to 31/1 each 112" Drive Socket Set, 3/s" to 1-1/2"1 each Hex Key (allen wrench) Set, up to lit1 each Screwdriver Set, Phillips Tip & Slot Tip1 each Punch Set; Drift, Lineup and Straight1 pair Wire Stripping Pliers1 pair Wire Crimping Pliers1 pair Wire Cutting Pliers1 pair Needle Nose Pliers2 pair Jumper Wires with Alligator ClipsNOTE: This list is not intended to be all inclusive of the tools required to perform every maintenancefunction that may be required on this specific CONDOR® model. However, these tools will greatlyassist in troubleshooting problems and conducting routine maintenance on the equipment.MANUAL 92357-002JUNE 1997
Serial Number Location •21The CONDOR® Model <strong>V2648</strong>/531XL Serial Number is stamped in two locations on the machine.1. The first place to find the serial number is on the data plate affixed to thechassis, at the rear between fork lift pockets.2. The second place to fmd the serial number is at the front steering knucklekingpin.MANUAL 92357-002JUNE 1997
..MANUAL 92357-002JUNE 1997
HYDRAULIC SYSTEM DESCRIPTION•The following is a detailed description of the hydraulic system usedon the CONDOR® model <strong>V2648</strong>153IXL scissor, and how it is designed to operate. To assist in understanding the system, this description shouldbe used in conjunction with the hydraulic schematics found atthe end of this section.GENERALThe hydraulic system on the CONDOR® model <strong>V2648</strong>1531XL consists primarily of a sing Ie manifoldassembly, used to control all the hydraulic functions through the use ofhydraulic cylinders and motors. Thesystem is electric over hydraulic, meaning that the hydraulic valve assembly is activated by electrical signalsfrom the function controls. The system is also of the open-centervalve type, meaning that the hydraulic fluidcirculates back to the tank when the pump is running and no functions are being operated. All lift and drivefunctions can be performed from the platform console, while ONLY lift functions are available from the lowercontrol console.HYDRAULIC TANKThe hydraulic tank is an "L" shapedweldment having a fluid capacity of 7 US gallons.The main portion of the tank is locatedbetween the batteries in the belly pan, with thesmaller portion extending outward to the rightside of the unit (See FIG. 1) next to the hydraulicpump. A filler neck and cap, and a sight glass areprovided at the extended section of the tank forchecking and maintaining the fluid level. Filtrationof the hydraulic oil is provided through a 10micron spin-on return filter, and a 100 mesh, 10GPM, tank-mounted strainer. The filter, andstrainer are located at the end of the tank, justbehind the pump. The use of a tank strainer andshut-off valve (ball valve) for the tank has beendiscontinued. Although the tank configurationsdiffer between models, the attaching componentsare identical.BallValveFIG. 1NOTE: Only check the tank fluid level when the unit is in its stowed position to ensure the level willbe at its highest. The hydraulic fluid used is Shell Tellus T -32 and only this fluid, or its equivalent shouldbe used.DO NOT MIX HYDRAULIC FLUIDS.MANUAL 92357-002JUNE 1997
.,PUMPIMOTORThe pump and motor assembly is locatedin the right side of the belly pan, betweenthe tank and the fixed axle (See FIG. 2). A 24volt DC motor drives a tandem pump, whichconsists of two separate pumps driven from thesame shaft. Both sections have a size of .194cubic inch per revolution, which equals to 2.7GPM of hydraulic flow at 3600 rpm. Onesection ofthe pump is only used for drive, whilethe other pump section supplies fluid for steering,lift, or to increase the drive speed whendirected to the drive circuit.HYDRAULIC TANKELECTRIC MOTORPUMP/MOTOR CONTACTORFIG. 2MAIN VALVE ASSEMBLYLocated in the left side of the belly panbetween the batteries and battery charger is themain valve assembly which performs all of thehydraulic functionsofthe machine (See FIG. 3).This assembly includes three directional controlvalves and a variety of cartridge valves to achievethe operation ofthe cylinders and motors for themachine functions. These individual functionsare described in detail below.BatteriesMain ValveAssemblyFIG. 3Ground ControlsBattery ChargerMACHINE FUNCTIONSThe hydraulic functions of the CONDOR® model <strong>V2648</strong>/53IXL includes: forward and reversedrive with three selectable speeds at limited height, spring applied/hydraulically released brake cylinders,left and right steering, and platform raising or lowering. Each of these functions are performed by themain valve assembly via electrical control signals. A detailed description of the electrical controls andtheir circuits can be found in the Electrical System Description of this maintenance section.DRIVE FUNCTIONThe drive function is only available at the platform controls. Movement of the drive controlhandle l3 0 from its center position in either direction will tum the pump motor on and energize therespective forward/reverse electrical circuit. The forward/reverse electrical circuits consist solely ofthe drive controller and the drive directional control valve located on top ofthe main valve assembly (seeFIG. 4).MANUAL 92357-002JUNE 1997
----------------------------------------~~Drive DirectionalControl ValveCreep SpeedSolenoid ValveFlow Divider/CombinerFIG. 4Creep SpeedNeedle ValveDRIVE FUNCTION (cont'd)Pump flow circulates through the main valve assembly and back to tank if no functions areactivated when the pump is running. Once the directional control valve shifts, fluid is directed to oneof the load control valves in its free-flow direction, and then to the normally open positraction valve.Fluid flows through the positraction valve cartridge, then to both drive motors which each have an 11.9cubic inch per revolution displacement and are located on the steer axle. When the positraction buttonis depressed at the upper control box, the 4-way normally open positraction valve closes, blocking theflow of fluid through it, but forcing the fluid through the flow divider/combiner to enhance tire traction.The deceleration valve is utilized to cushion the braking action of the drive circuit. This isaccomplished by letting fluid by-pass between the two drive motors. Since the deceleration valve is a2-way normally open spool valve, it allows fluid to flow through it at all times. When the drive controlhandle is actuated, energizing the drive circuit, the deceleration valve becomes energized and closes,blocking the flow of fluid through it. When the drive handle is released (circuit de-energized), thedeceleration valve opens, and lets the drive pressure by-pass to the opposite drive motor, allowing thetwo drive motors to continue to roll momentarily without creating a hydrostatic lock in the circuit. A0.040 dia. orifice, located under the deceleration valve, is used to control the amount of by-pass thatoccurs which affects the deceleration of the machine.The <strong>V2648</strong>/531XL has a creep speed which is either automatically activated at platform heightsabove seven feet by a limit switch, or is operator selectable at heights below seven feet. Creep speed isa situation in the drive circuit whereas when the creep speed solenoid valve is energized, someofthe driveflow is diverted back to the tank. The speed at which the machine travels when in creep, is controlledby the creep speed needle valve (See FIG. 4). The creep speed is factory set to obtain a travel speed of80-lO0 sec/88 feet, on firm, level ground; (Ref.. 75/.6 mph), (see note #2 on schematic at end of hydraulicsection).MANUAL 92357-002JUNE 1997
•DRIVEFUNCTION (cont'd)When the speed selector switch is in thehigh position, the drive speed increases by theaddition of the P2 pump's fluid displacement(steer/lift pump) being diverted to the drivecircuit. This is accomplished by activation ofthe select directional control valve. The hydraulicpump contains two individual pump sections,one of which is used solely for the drive circuit.The other pump section supplies fluid for theoperation of lift and steer, and will supply fluidto the drive circuit when the machine is in highspeed. A check valve cartridge is used to isolatethe drive-only pump flow for use in the drivecircuit (See FIG. 5).Select DirectionalControl Valve(between drive and steer)Creep ValveFIG.SSteer DirectionalControl ValveCheck ValveCartridgeSTEERING FUNCTIONSteering is accomplished with a cylinder,knuckle, and connecting arm arrangement,which in its configuration provides a tight turningradius. The drive motors are mounted to thesteering knuckles, thus enhancing driveability.The steering cylinder, located just behind thefront bumper plate of the chassis, is controlledby the steer directional control valve on top ofthe manifold assembly (See FIG. 5&6).Steer CylinderLIFT FUNCTIONFIG. 6Lifting of the platform is accomplishedby energizing the select directional control valve.This will direct fluid from the P2 pump to theCylinderbase end ofthe lift cylinder, with the rod end ofManifoldthe lift cylinder being vented back to the tank.CoilLocated on the cylinder body (See FIG. 7), is theholding valve, which consists of a manifoldCablebody, a 2-way normally closed cartridge with amanual override, and an electric coil. Attachedto the cartridge is a cable assembly used forFIG. 7manually lowering the platform via aT-handlelocated at the rear of the machine, under the rearbumper plate. Descent speed is controlled by a flow control valve (See FIG. 3), in which clockwiserotation decreases descent speed, while counterclockwise rotation increases the descent speed.MANUAL 92357-002JUNE 1997
PRESSURE ADJUSTMENT PROCEDURES•NOTES: All pressure adjustments are to be made with the pump motor running, and with the hydraulicfluid at operating temperature. Ensure that the tank is filled to its recommended level, and that thebatteries are fully charged. To simplify the adjustment procedure, install a pressure gauge at the "G 1 "port, and install another pressure gauge at the "G2" port, which are both located at the creep valve endof the main valve assembly. All relief valves adjust in the same manner: clockwise increases pressuresetting, and counterclockwise decreases pressure setting. All flow control cartridges adjust in the samemanner: clockwise decreases flow, and counterclockwise increases flow. Refer to FIG. 8 foradjustments.Drive Pressure Adjustment1. Chock both drive wheels to prevent them from spinning in the forward drive direction.2. With the drive speed selector in the low position, activate forward drive with the drive controller.3. While drive is activated, adjust "RVI" to 2700 psi while observing the gauge reading from the"GI" port.4. After setting, lock the adjustment screw with the jam nut.Higb Drive Pressure Adjustment1. Select high speed at upper control box.2. Observe the pressure reading at the "G 1 " port while climbing a grade, and note pressure readingat which the high drive shifts to low.3. Adjust the "SEQ" valve until the pressure reading is 1100 psi when high drive shifts to low.4. After setting, lock the adjustment screw with the jam nut.NOTE: The load control valves, "CB I " and "CB2", are factory set. If they are not functioning properly,they must be replaced; DO NOT ATTEMPT ADJUSTMENT.Lift PressurelDescent Speed Adjustment1. With pump running, and platform raised completely (cylinder bottomed out), observe thepressure reading on the gauge connected to the "G2" port. Adjust "RV2" to 2700 psi.2. Adjust "FCI" to obtain a 25-35 second descent from a fully raised position.MANUAL 92357-002JUNE 1997
To aid troubleshooting, some of the valves and cartridges are identical to others and can be swapped tohelp determine faulty components:l. "RV3" and "RV4" steer reliefs are identical with same pressure settings.2. "FCI" and "FC2" brake and descend flow control valves are identical while settings may differ.3. "CBI" and "CB2" are identical-- DO NOT ADJUST!4. "RVl" and "RV2" are identical with the same pressure settings.5. "CREEP" and "DECEL" solenoid cartridge valves are identical."G2" Gauge Port-tt-t---- (Reads Steer/Lift!High Drive Pressure)"G1" Gauge Port(Reads Drive OnlyPressure)"FC1" - Controls PlatformDescent Speed"RV2" Relief For Steer/Lift("G2" Gauge Port)"RV5" SecondaryLift ReliefCreep SpeedAdjustment"SEQ" (Sequence) ValveControls High Drive Shifting"RV1" Relief For Drive Only("G1" Gauge Port)"CB1" and "CB2" LoadControl Valves(DO NOT ADJUST)FIG. 8MANUAL 92357-002JUNEJ997
L6613Nflf7:OQ-LS£Z6 'IVilNVW!-"!",..~~,.":;;;0 0 '(J)L'-CCUlUlUln~~",,,,,~£"'O~>","~~aUl"O'"C",'""0"'",00:0 a~b~~CXI .,~~~.. 0'""'o~~VlO• ~N,'" ",'",1;:~}q~~0'"z§l::1"'''' "003~UlM3MlORIVE MOTORS:54644-001REF 11.9 CIPRFOR V2033 :t: V2Q4854644-002REF 14.9 CIPRFOR V26455464-4-004REF 18.7 CIPRFOR V2053 « V2653FD2.50ROO54596-:xn BOOY54635-001 VALVE21 14ca2M249.31 smOKE FOR All <strong>MODEL</strong>S55221 Fe VAL V£ON "Xl" ONLYSEENOTEIFeBORE::to FOR 20'3.5 fOR 26'SOUOL Y M:LO£OSTEEL TUBES- 2ON ~Xl· <strong>MODEL</strong>l ONLY ON ·PLAtN"STEERING CYLINDERS:V2033V"X43/5.355111 555.342.00 OIA 2.5 OIA.625 ROD 1.0 ROD6.81 STROKE 6.0 STROKEpI ITDRIVESELECTTi IPSTEERevgl~I~12.... ! 0 b~ S ~M'3 i
This Page IntentionallyLeft BlankMANUAL 92357-002JUNE 1997
ELECTRICAL SYSTEM DESCRIPTIONThe following is a detailed description of the electrical system used on the CONDOR® model<strong>V2648</strong>/53IXL scissor, and how it designed to operate. To assist in understanding the system, thisdescription should be used in conjunction with the electrical schematics found at the end of this section.GENERALThe CONDOR® model <strong>V2648</strong>/531XL uses a 24 volt direct current (DC) electrical systemconsisting of four, 6 volt DC batteries, an electric motor to drive the hydraulic pump, and variouselectrical controls to operate the system. Included in this system description is a Machine Optionssection, describing options which are available on the model <strong>V2648</strong>/531XL. All of the options containedin this description are electrical only, and do not affect the hydraulic performance of the machine.BATTERIESThe model <strong>V2648</strong>/531XL scissor uses four, 6 volt DC batteries, each having a 235 amp hourcapacity. There are two batteries on each side of the belly pan nearest the steer axle. The four batteriesare connected in series, combining their voltage, to make up the 24 volt DC system. The batteries areof the wet-cell type, and when filled with electrolyte, each battery weighs 661bs. More information onbatteries in general can be found in the Battery Service Section beginning on page 47.BATTERY CHARGERThe battery charger has a 25 amp @ 24volt DC nominal rating, and operates off of aIlSvolt alternating current (AC), 160 Hz, 8 ampinput. The charger features contains an ammeterfor reading the DC amp output, and two LEDstatus indicator lights; a red LED indicates thecharger is on, charging, while a green LED indicatesthe charging is complete. The charger islocated on the left side of the belly pan, betweenthe main valve assembly and the fixed axle (SeeFIG. 9). More detailed information of the chargercan be found in the Battery Charger TroubleshootingGuide beginning on page 67. .Main ManifoldAssemblyGround ControlscmcmT BREAKERIFUSELocated below the control selector switch on the lower control box (see FIG. 11), is a 15 ampfuse. This circuit fuse protects all the machine control circuits.MANUAL 92357-002JUNE 1997
• PUMPMOTORThe CONDOR® model <strong>V2648</strong>/53XLutilizes a pump motor which is a 24 volt DC unit,rated 6 hp @ 3600 rpm. Since the model <strong>V2648</strong>153XL utilizes a gravity lowering system, themotor does not run while the lowering function isactivated.PumplMotorContactorFIG. 10LOWER CONTROL FUNCTIONSLocated above the left rear wheel is thelower control box, which provides a junctionconnection through the use of two terminal strips,for the limit switch cable, the hydraulic valvecable, the pump motor contactor cable, and thecable to the upper controls. At the lower controlsare switches (see FIG. 11), to provide operationof the lift function only; drive is not availablefrom this control box. The lower control boxcontains an emergency stop button which must bepulled out to supply power to both control boxes.The control selector switch is a 3-position maintainedrotary switch that directs power to eithercontrol box for operation of the machine,Emergency Stop ButtonPlatform Lift Control ---";I!+--L....LControl Selector Switch ---jft-+-+-~., J OFF :"""--------':_-l!IH--@ :15 Amp Circuit BreakerlFuse" ,~ ___________ JFIG. 11while the box not selected, will not have power. The platform lift control consists of two pushbuttons,which, through the use of contact blocks, energize the pump motor and selector valve for raising, or theholding valve for lowering. The pump motor does not run during lowering.UPPER CONTROL FUNCTIONSThe upper control box, located at the right hand forward comer of the platform, is a fiberglassenclosure which contains two slip-fit inserts on its underside that allow the box to press onto two pinswhich are part of the platform weldment. The control box is removeable by disconnecting the cableharness plug underneath, and lifting upward on the box assembly. The feature allows for disabling themachine, storage of the box, or ease of repair to the controls. Some of the controls used are identical tothe those found at the lower control box (See FIG. 12), primarily the emergency stop button and the liftcontrols. The platform lift control buttons operate similar to the lower control pushbuttons. However,at this control box, the green "POWER ff pushbutton must be depressed to supply power to either the raiseor lower lift button. To provide electrical power to the upper control box, both emergency stop buttonsmust be in the "out" position, the control selector switch must be in the "UPPER" position.MANUAL 92357-002JUNE 1997
UPPER CONTROL FUNCTIONS (cont'd)•Cut-Away Viewof Slip-Fit InsertLift Controls(-----------------------------,r: ',JDrive Controllerw/SteerRockerSwitchPower Button(green)Cable HarnessPlug/"Hidden View ofSlip-FitInsertFIG. 15Integrated in the forward edge of the drive handle is a grip lever which is a substitute forthe footswitchcommonly used on other machines. The grip lever must be squeezed to perform drive (movement of thehandle), or steer (activation of the rocker switch) functions. This lever, however, does not affect the liftcontrols. Movement of the drive handle 13 0 in either direction will turn the pump motor on, and energize thedrive directional control valve, thus initiating drive motion. Drive speeds are selectable from the drive speedselector switch. Selecting "fast" will energize the select directional control valve and increase drive speed byadding the second pump's flowtothe drive hydraulic circuit. Selecting "low" will de-energizethe select valve,and drive speed will then rely on the single pump output. When in "fast" or "low", the creep valve is alwaysenergized because it is a normally open valve. When "creep" speed is selected, or when the platform is abovesix to seven feet, it is de-energized, thereby letting fluid by-pass to tank through an adjustable needle valve.MANUAL 92357-002JUNE 1997
NOTESMANUAL 92357-002JUNE 1997
MACHINE OPTIONS DESCRIPTIONThe following descriptions are intended to be used with wiring diagrams at the end of thiselectrical section.STROBE LIGHT (OPTION)This option is to indicate that the machine is on or ready to operate. The strobe has: a plug-inflash tube for easy replacement, an energy output of 2 joules, a power output of 3 watts, and a flash rate .of 60 + 10 flashes per minute. The strobe is energized whenever the control selector switch is in theItUPPER It or "LOWER" position and the lower control emergency stop button is pulled out.5°SLOPE ALARM (OPTION)This option sounds an alarm when the <strong>V2648</strong>/53IXL is 50 or more out of level. A 50 omnidirectionalsensor is mounted in the belly pan to sense a 50 out-of-Ievel condition. In this situation, a fastpulse/loud tone alarm at the upper control box (See FIG. 13), is activated until the machine is returnedto a less than 50 condition. This serves as a warning, and does not inhibit any functions. The sensor ismounted on a spring loaded base which is adjustable to allow leveling. Testing of the system isaccomplished by manually tilting the sensor against its spring tension mount, to physically put the sensorin a 50 out-of-Ievel condition, causing the alarm to sound. Power is supplied to the sensor, and the alarm,only when the machine is in the ItUPPER" control position. When the sensor is activated (50 or greater),the sensor's white wire (connected to the alarm), becomes grounded after a few second delay, throughcircuits inside the sensor.BATTERY CONDITION INDICATOR (OPTION)This option is to monitor the batteries'state-of-charge, (See FIG. 13). The indicator iswired directly to the batteries with the 15 ampcircuit breaker, or fuse, included in the circuit.Consisting of an analog 10-LED bar display, theindicator provides a visual reference for readingproperly charged batteries (top LED lit), batteriesat 70% depth-of-discharge (second from bottomLED flashes), and when the batteries have reachedan 80% depth-of-discharge (bottom two LED'sflash alternately).BatteryConditionIndicatorSlope AlarmFIG. 13SIGNAL HORN (OPTION)This option consists of a 133 db automotive type hom mounted in the chassis, and a whitepushbutton on the side of the uppercontrol box (See FIG. 14). The hom is only operable when the controlselector switch is in the ItUPPER" position.MANUAL 92351-002JUNE 1991
•LOWVOLTAGE BATTERYPROTECTION SYSTEM (OPTION)This option prevents operation when thebatteries are in a low voltage condition. It becomesenergized whenever the control selectorswitch is in either "UPPER" or "LOWER" position(lower emergency stop button must be pulledout). While energized, the module monitors thebatteries' voltage level, and will prevent the pumpmotor contactor from being activated once thebattery voltage reaches 12.5% undervoltage, orapproximately 21 volts. This condition must bepresent for 21 seconds to activate the interruptsystem. Terminals 3 & 4 of the module arenormally closed contacts which complete theLow Volt Override Pushbutton(w/Amber Indicator Lamp)SlopeAlarmignal HomPushbutton(white)~~~- Cable Harness PlugFIG. 14pump motor contactor circuit, and it is these contacts which are opened during a low voltage condition.Terminal 7 of the module is the battery input voltage, while terminal 6 is machine ground. Terminals 1& 2 are normally open contacts which close during a low voltage condition and turns on an amberindicator light (pushbutton) at the upper control box. The system can be overridden by pressing thepushbutton on the side ofthe upper control box (See FIG. 14), which energizes terminalS of the module.However, the override will only allow three repeated by-pass cycles of2 minutes 30 seconds each. TheLVI module will reset when the battery voltage reaches approximately 25.5 volts during re-charging.Once the batteries have been properly charged and the L VI module has automatically reset, theCONDOR® can be operated once again.TRAVEL ALARM (OPTION)This option indicates forward or reverse drive (travel) of the machine. The alarm signal isactivated by the deceleration valve circuit since the deceleration valve is always energized during bothforward and reverse drive.DESCEND ALARM (OPTION)This option indicates descent (lowering) of the platform. The alarm signal is activated by theholding valve circuit, which is energized when lowering the platform.MOTION ALARM (OPTION)This option indicates forward or reverse drive, and raising or lowering of the platform. The alarmsignal is activated from two different circuits; one energizes the pump motor contactor, and the otherenergizes the holding valve for platform lowering (pump not running). A diode is used in each circuitto prevent unintended feedback.HOUR METER (OPTION)This option is to record the "run time" of the machine for maintenance scheduling, rental usage,etc.. The meter runs only when the pump motor contactor is energized (pump running); therefore, themeter does not run when the machine is sitting idle, or when the platform is being lowered.MANUAL 92357-002JUNE 1997
L66I3Nill
This Page IntentionallyLeft BlankMANUAL 92357-002JUNE 1997
BATTERY SERVICEBATTERY SERVICING TOOLSUse proper tools when performing battery service to prevent damage to battery, cables, terminalsand hold-downs, and to save time and energy.Suggested battery tools and their use are described below.FILLING DEVICESOne of the most important routine battery service for conventional batteries is to maintain thecorrect electrolyte level. Two devices are available for this purpose, a self-leveling filler which fills thebattery to a predetermined level automatically, and the syringe type. Battery cells should never be filledabove the level indicator. Do not squeeze the syringe so hard that the water splashes acid from thecell opening.SCRAPER AND WIRE BRUSHThe scraper and wire brush can be used for removing dirt, corrosion and rust from various partssuch as the battery posts, battery tray, the hold-down and the hold-down bolts.BATTERY CARRIERA battery carrier should not place any undue strain on the battery terminals or the container. Anexcellent carrier for plastic cased batteries is a clamp ("ice tong") type carrier with rubber pads which gripthe SIDE WALLS of the container just below the lip of the cover. It is used on the side walls rather thanthe end walls, since the side walls have additional strength from the inner cell partitions. Gripping theflexible end walls of plastic containers could cause electrolyte to spew from some of the cells.SERVICE PROCEDURESThe user should realize that the battery is a perishable item and requires periodic attention. With areasonable amount of care, the life of the battery can be appreciably extended. Neglect and abuse willinvariably cause shorter life.CAUTIONLow battery voltage ( discharged) requires higher current draw to dothe samework. This high current draw WILL DAMAGE the electric motor, relaycontacts and the batteries. DO NOT OPERATE the CONDOR® with abattery DISCHARGED or that has a specific gravity of 1.130 or LESS.Routine servicing of the battery should proceed as follows:First, make a visual inspection for defective cables, loose connections, corrosion, cracked casesor covers, loose hold-downs and deformed or loose terminal posts. If any parts such as cables, hold-downsor the battery appear to be unserviceable, it is recommended that they be replaced.When there is corrosion on the terminal posts or hold-down, the tray or hold-down parts are rusty,or the battery is very dirty, it is recommended that time be taken to clean the parts. A wire brush can beused to remove dirt, corrosion or rust from parts. Clean dirt from the battery top with a cloth wetted withammonia or baking soda in water.MANUAL 92357-002JUNE 1997
Next, wipe with a cloth with clear water. After rust is removed from a part with a wire brush,rinse with clear water, dry and paint with an acid-resistant paint.If corrosion is found on the terminal posts, remove the cable terminals from the battery (groundcable first), using the proper end wrench. A wire cleaning brush can be used to clean the posts and themating surfaces of the cable clamps. Connect the cables to the terminal posts (ground cable last). Coatthe terminal connections with a spray corrosion inhibitor or high temperature grease.The second item in routine servicing of conventional batteries is to check the electrolyte level inall cells. Ifnecessary, add clear, odorless, mineral free water to bring the liquid level to the level indicatorin all cells. If the battery does not have a level indicator, bring the level to 1/2" (13mm) above the topsof the separators. Do not overfill any cell. When a cell is overfilled, the excess electrolyte may beforced from the cell by the gas formed in the battery. This will cause excessive corrosion of adjacentmetal parts, reduced performance and shorter life.BATTERY TESTINGBattery testing should be considered an integral part of periodic equipment maintenance and should beperformed whether or not a starting problem has occurred. Servicing the battery in the equipment asdescribed will help prevent premature battery failure from external causes and periodic battery failurefrom both external and internal causes or merely from the battery reaching the end of its useful life.STEP 1 -VISUAL INSPECTIONFor protection, wear a face shield. First, visually inspect the battery. Check for container,cover or terminal damage that might cause leakage of electrolyte or internal damage. If serious damageis found, replace the battery. Check the electrolyte level in each cell. Ifbelow the tops of the plates inany cells, fill all cells with water to just above the tops of the separators and charge for 15 minutes at 15-25 amps to mix the water with the electrolyte. If electrolyte levels are above the tops of the plates,continue to Step 2.STEP 2 -HYDROMETER TESTUsing the hydrometer, measure and record the specific gravity (sp. gr.), corrected to 80 degreesF (26.7 C) of the electrolyte in each cell. If the range (highest-lowest) is 50 points (0.050 sp. gr.) or greaterorthe lowest is less than 1.225 SP'gr" charge the battery at the recommended rate or until all cells are 1.225SP'gr' or greater and the range is less than 50 points. If no amount of charging will achieve theseconditions, replace the battery. If these conditions are achieved, apply a 150 amp load for 15 secondsto remove the surface charge on the battery and continue to Step 3.DANGERLead acid batteries generate highly explosive hydrogen gas especially during thecharging cycle. To AVOID the possibility of an explosion, charge batteries ONLYin a well VENTILATED AREA. Keep fire, sparks, and burning material away fromthe charging area. Do Not smoke near a battery, and always shield the eyes whenworking near a battery.MANUAL 92357-002JUNE 1997
--The average state of charge of the cells in a battery can be determined by measuring the stabilizedvoltage of the battery. The voltage is stabilized ifthe battery has been on open circuit overnight or fora period of several hours. A voltage reading of 12.4 (6.2 on a 6 volt battery) is equivalent to a specificgravity of 1.225. The disadvantage of measuring the open circuit voltage is that a lower voltage cell canbe masked by the remaining cells. If the cell connectors are accessible for voltage measurements, a rangeof 0.05 volts between the highest and lowest cells corresponds to a 50 point variation in specific gravity.A cell voltage of 2.07 is equivalent to a specific gravity of 1.225.STEP 3 -ADJUSTABLE LOAD TESTThe following instructions are intended as guidelines. When available, the instrumentmanufacturer's instructions should be followed. Follow all precautions.A. Disconnect battery cables starting with ground cable.B. Measure temperature of a center cell. If instrument has an integral temperaturecompensator, use attached probe.C. Connect voltmeter and load test leads to appropriate battery terminals, make certainterminals are free of corrosion.D. Connect current transducer (if necessary) to appropriate lead.E. Apply test load equivalent to 50% of Cranking Performance rating of battery for 15seconds. If Cranking Performance is unavailable, use 3 times the 20 ampere-hourcapacity.F. Read the voltage at 15 seconds, then remove the load.G. Determine minimum voltage required at electrolyte test temperature from chart inFigure X.H. If test voltage is above minimum, return battery to service.I. If test voltage is below minimum, replace battery.TESTING WITH FIXED LOAD TESTER AND OPEN CIRCUITFor testing batteries with a fixed load tester and an open circuit voltmeter, referto "Battery Testing Chart"Figure Y.STEP 1 -VISUAL INSPECTIONFirst, visually inspect the battery and check the electrolyte levels as described in Step 1 of "Testingwith Adjustable Load Tester and Hydrometer"; take the same corrective actions. Continue to Step 2.MANUAL 92357-002JUNE 1997
• STEP2-FIXEDLOADTESTSome commercial battery testers do not have an adjustable load but measure the battery voltageunder a heavy fixed load. The tester should include a selector switch or meter scale to choose among avariety of battery sizes. It should include some means of correcting for the battery temperature, eitherin automatic sensing circuit or a manually selectable one.The following instructions are intended as guidelines. When available, the instrument manufacturersinstructions should be followed.A. Disconnect battery cables starting with ground cable.B. Measure temperature of a center cell and set temperature dial on tester or insertautomatic temperature corrector probe in center cell. Cover battery with a damp cloth.C. Set battery size selector to a range or select range on meter which will include 50%of the Cranking Performance rating or 3 times to 20 ampere-hour capacity of the battery.D. Connect voltmeter and load test leads to appropriate battery terminals, make certainterminals are free of corrosion.E. Apply test load for 15 seconds.F. Read battery performance from instrument meter at 15 seconds, then remove the load.G. If the battery passed the load test, return it to service.H. If the battery failed the load test, continue to Step 3.STEP 3 -OPEN CIRCUIT VOLTAGE TESTIf the battery failed the load test, the state of charge must be checked. If a hydrometer is notavailable, the stabilized open circuit voltage can be used to indicate the state of charge. Allow at least10 minutes after the load test for the voltage to stabilize, then measure and record the open circuit voltage.Determine the approximate state of charge from the following chart (Battery temperature 60-1 00 degreesF.)OPEN CIRCUIT VOLTS12.6 or greater12.4 - 12.612.2 - 12.412.0 - 12.211.7 - 12.011.70rlessPERCENT CHARGE100%75-100%50-75%25-50%0-25%0%The change of voltage with state of charge is small and must be measured accurately using adigital meter or an analog meter ",ith an expanded scale. If the state of charge is 75% or greater and thebattery failed the load test, it should be replaced. If the state of charge is less than 75%, the battery shouldbe charged at the recommended rate and time, and the load test repeated. If the battery passes the loadtest, return it to service. If it fails the load test again, replace it and refer to the next chapter to determinethe cause of failure.MANUAL 92357-002JUNE 1997
DETERMINING CAUSES OF BATTERY FAILUREWhether the battery passes or fails either of the above tests, the results must be believed. If the batterypassed the load test only after a recharge, the cause of the discharge condition should be determined.If the battery has been returned previously or is otherwise still questionable, one final test should be made.Fully charge the battery and place it on open circuit stand for three days. If the loss in specific gravityof any cell is greater than 35 points or the open circuit voltage drops by more than 0.20 volts, replace thebattery. If not, return the battery to service and determine the cause for the discharged condition.The following should be checked:1. Corroded Battery Terminals or ConnectorsA corrosion layer between the battery terminals and the cable connectors can prevent goodelectrical contact even when the connectors are tight. The cables should always be removedbefore testing a battery and any corrosion cleaned from the terminals.2. Electrical Circuit LeakageThere may be a fault in the equipment's electrical system that can discharge the battery even whenall the accessories are turned off. To check for such leakage, tum off all accessories in the equipment ..Check for leakage using one of the following methods.A. Ammeter - Cover battery with a damp cloth. Disconnect the ground cable. Using a DCammeter with a resolution of at least 0.1 amp, measure the current between thedisconnected cable and the battery terminal. (DO NOT CONNECT AMMETERACROSS BATTERY TERMINALS!) A leakage current measurement of 0.1 amp ormore indicates the equipment electrical system should be tested and repaired.B. Ohmmeter - Disconnect the positive cable at the battery. Connect an ohmmetertothedisconnected cable end and to the chassis. A resistance measurement of under 100 ohmindicates a load of 0.1 amp or more and indicates the equipment electrical system shouldbe tested and repaired.C. Voltmeter - Disconnect the ground cable (negative) at the battery. Connect a lowresistance voltmeter (l00 ohms - see Note 1) between the disconnected battery postand the chassis. A voltage measurement of 6 volts or more indicates a leak of 0.1 ampor more and the equipment electrical system should be tested and repaired.3. Charging SystemNote 1: The voltmeter test cannot be made with high resistance voltmeters.To complete the determination of the cause for the battery's discharged condition, check theequipment's charging system.MANUAL 92357-002JUNE 1997
ST EP 1I OBVIOUS DAMAGE III REPLACE BATTERY IBELOW TOP OF PLATES IN ONE OR IMORE CELLSADD WATER TO JUST ABOVE SEPA-RATORS. CHARGE FOR 15 MINUTESST EP2AT1~25AMPS.PROCEEDTOSTEP2FIGURE: XBATTERY TESTING CHARTVISUAL INSPECTIONCHECK FOR OBVIOUS DAMAGE SUCH ASCRACKED OR BROKEN CASE THAT SHOWSLOSS OFELECTROL YTE. ALSO CHECK FORTERMINAL DAMAGE.II HYDROMETER TEST II NO OBVIOUS DAMAGE II CHECK ELECTROLYTE LEVEL IELECTROLYTE LEVEL ABOVE TOP OFPLATES IN ALL CELLS - PROCED TOSTEP 2. I ISPECIFIC GRAVITY LESS THAN 1.225SPECIFIC GRAVITY 1.225 OR GREATEROR CELL VARIATION 50 POINTS OR OR CELL VARIATION LESS THAN 50GREATER.POINTS.III RECHARGE,I DISCHARGE AT 150 AMPS FOR 151SECONDSISPECIFIC GRAVITY LESS THAN 1.225 1OR CELL VARIATION 50 POINTS ORI CONTINUE TO STEP 3 IGREATER.STEP 3II REPLACE BATTERY II LOAD TEST II1. PLACE THERMOMETER IN CENTER CELL.COVER BATTERY WITH A DAMP CLOTH.2. CONNECT VOL TMETERAND AMPERE LOADEQUAL TO 112THE COLD CRANKING AMPERESAT OaF (-18°C) RATING OF THE BATTERY FOR15 SECONDS.3. OBSERVE VOLTAGE AT 15 SECONDS WITHLOAD ON.4. REFER TO VOLTAGE CHART BELOW.IIII VOLTAGE EQUAL TO OR ABOVE CHART II VALUE - RETURN TO SERVICEI VOLTAGE BELOW CHART VALUE II REPLACE BATTERY IVOLTAGE CHARTESTIMATED ELECTROLYTE TEMPERATURE70°F (21°C) & ABOVE60°F (16°C)50°F (10°C)40°F (4°C)30°F (-1°C)20°F 1-7°C)10°F (-12°C)oaF (-18°C)MINIMUM REQUIRED VOLTAGE UNDER 15 SEC. LOAD(USE 112 THESE VALVES FOR 6-VOL T BATTERIES)9.69.59.49.39.18.98.78.5MANUAL 92357-002JUNE 1997
FIGURE: YSA TTERY TESTING CHARTSTEP 1STEP 2II OBVIOUS DAMAGE III REPLACE BATTERY IVISUAL INSPECTIONCHECK FOR OBVIOUS DAMAGE SUCH ASCRACKEDORBROKENCASETHATSHOWSLOSS OF ELECTROLYTE. ALSO CHECKFOR TERMINAL DAMAGE.I FIXED LOAD TEST IIIINO OBVIOUS DAMAGE IICHECK ELECTROLYTE LEVEL. ADDWATER IF NECESSARY. PROCEEDTO STEP 2.1. ATTACH TESTER CLAMPS TO BATTERY TERMINALS IN CORRECTPOLAITY - USUALLY RED TO POSITIVE (+) AND BLACK TO NEGATIVE (-).2. SET SELECTOR SWITCH ON LOAD TESTER TO 112 CRANKING AMPERAGERATING OF BATTERY (AT O'F, -1S'C).3. IF TESTER DOES NOT HAVE AN AUTOMATIC BATTERY TEMPERATURECOMPENSATOR, PLACE A THERMOMETER IN CELL, READ AND SET TEMPERATURE DIAL ON TESTER. WITHOUT ANY TEMPERATURE CORRECTION,MAKE LOAD TESTS ONLY ON BATTERIES ABOVE 60"F (16'C).4. APPLY LOAD FOR 15 SECONDS AND READ LOAD TESTER JUST BEFORERELEASING THE LOAD.II BATTERY FAILS LOAD TEST III PROCEED TO STEP 3 IIIIBATTERY PASSES LOAD TEST IRETURN TO SERVICE.ISTEP 3I OPEN CIRCUIT VOLTAGE TEST II1. ALLOW 10 MINUTES FOR BATTERY VOLTAGE TO STABILIZEAFTER LOAD TEXT.2. READ OPEN CIRUITVOLTAGE.IUNDER 12.4 VOLTS-BATTERY SHOULD12.4 VOLTS OR ABOVE -IF BATTERYBE CHARGED AND LOAD TESTED AGAINDID NOT PASS THE LOAD TEST, IT(REPEAT STEP2). IF BATTERY AGAINSHOULD BE REPLACED - THEN PRO-FAILS THE LOAD TEST, REPLACE IT. IF IT CEED TO STEP 4.PASSES, RETURN TO SERVICE AFTERPROCEEDING TO STEP 4.STEP 4CAUSES OF BATTERY FAILURE:1. CORRODED BATTERY POSTS OR CONNECTORS -ALWAYS CLEAN THE BATTERY POSTS ORSIDE TERMINALS AND THE BATTERY CABLE CONNECTIONS WHEN CHARGING OR REPLACINGA BATTERY.2. ELECTRICAL LEAKAGE - CHECK FOR ELECTRICAL LEAKAGE WITH ALL ACCESORIES TURNEDOFF:A) DISCONNECT THE BATTERY GROUND CABLE AND CONNECT A SUITABLE VOLTMETERBETWEEN DISCONNECTED BATTERY POST AND GROUND (A READING OVER 6 VOLTSINDICATES AN EXCESSIVE LEAK).ORB) DISCONNECT THE BATTERY CABLE THAT GOES TO THE STARTER AND CONNECT ANOHMMETER BETWEEN THE CABLE AND THE GOUND (A RESISTANCE OF UNDER 100 OHMSWILL DRAIN THE BATTERY).3. CHARGING SYSTEM SHOULD ALWAYS BE CHECKED AFTER CHARGING OR REPLACING ABATTERY.MANUAL 92357"()()2JUNE 1997
NOTESMANUAL 92357"()02JUNE 1997
PREVENTIVE MAINTENANCEIn conjunction with the pre-operation inspection, a good preventive maintenance program will ensurea properly operating CONDOR®. This section is directed toward those items of maintenance whichthe operator should be aware of, and which may be accomplished prior to the operation ofthe equipment.Refer to the "Preventive Maintenance Daily Inspection" and the "Preventive Maintenance 50Hour Inspection" for detailed inspection procedures. Included in this section are checklists, for theDaily and 50 Hour Inspections, to assist in maintaining the CONDOR®. Please note that on the 50Hour Inspection, some items may be stated as 500 Hours, where applicable.LUBRICATIONNOTE:Recommended lubrication intervals are based on normal use innormal environmental conditions. The operator is cautioned toadjust the lubricating interval accordingly to meet each individualcondition and usage. The recommended lubricants are generallythe best choice. Should these lubricants be unavailable in your area,consult your local supplier for an equivalent.1. Wheel BearingsLubricant:Time Interval:Procedure:Wheel bearing grease.Every 500 hours of operation or yearly, whichever comes first--or upon disassembly.Raise chassis and support. Remove fixed axle wheels. Removeouter dust cap, spindle nut, and washer. Remove outer conebearing, hub, dust seal and inner cone bearing. Clean conebearings and races, and inspect both for physical damage(pitting, etc). Inspect spindle for bending, cracked welds, orother physical damage.IMPORTANT: If damage is evident, remove the CONDOR®from service until the spindle assembly is replaced, and contactthe Condor Div. Service Department to report the damage.Repack cone bearings using fresh wheel bearing grease, installnew dust seal, then reassemble components in reverse order ofdisassembly. Tighten spindle nut until hub will not tum, tumspindle nut counterclockwise one castellation, or until cotterpin will pass through spindle and spindle nut. Secure cotterpin, ensure that hub will rotate. Reinstall wheel assembly;torque wheel nuts to 120 ft lbs.MANUAL 92357-002JUNE 1997
•2.Hydraulic SystemFluid Level:Check level daily. Maintain fluid level so that it is visiblebetween the marks on the sight glass with platform all theway down.Return Filter:Replace filter element after ftrst 50 hours of operation. Thereafter,replace filter element every 500 hours of operation.Tank Breather:Clean every 50 hours of operation. Remove from tank and cleanwith solvent; air blow-dry.Hydraulic Tank:Drain fluid from tank and replace annually. Add hydraulic fluidto required level using only Shell Tellus T-32 or equivalent.Suction Strainer-Drain oil from tank and replace strainer annually. If operatingin dusty or harsh conditions, inspect filter more frequently andreplace if necessary.3. Battery ServicingDO NOT MIX DIFFERENT HYDRAULIC FLUIDSFOR PROTECTION WHEN SERVICING BATTERIES,ALWAYS WEAR A FACE SHIELD AND DO NOT SMOKE!Visual Inspection:Cleaning:Electrolyte Level:Inspect for defective cables, loose connections, corrosion,cracked or swelling cases or covers, loose hold downs, and looseor deformed terminal posts.When needed, a wire brush can be used to remove rust, corrosion, or dirt from terminal ends or posts. The battery top can becleaned with a cloth wetted with ammonia, or baking soda withwater, then wiped with a cloth and clear water.Check electrolyte level daily in each cell. If necessary, add clear,odorless, mineral free water to bring the level to 1/2" above thetop of the separators, or to the level indicator (if equipped), ineach cell. Only add water after the charging cycle is complete.MANUAL 92357-002JUNE 1997
PREVENTIVE MAINTENANCE INSPECTIONThis field inspection list provides for a systematic inspection of the CONDOR®. The items listed to beinspected or checked daily will ensure proper unit performance prior to operation. By following the daily inspectionprocedure on a regular basis, any potential malfunction will be identified before it can become a majorproblem. The 50 Hour Inspection will detect any defective, damaged, or improperly secured part. The 50 hourInspection also includes items requiring attention at 500 hours or yearly which, are indicated where applicable.The time interval of 50 hours applies to normal operation under normal conditions. Should the unit be subjectedto extensive use or abnormal environmental conditions, the inspections should be made more frequently. TIMECONDOR Corporation recommends that a maintenance log be maintained, and that abnormal conditions of anykind be recorded. To help assist in starting a maintenance log, there are inspection checklists included after eachinspection list. These are intended to be used with the field inspection lists to help gain familiarity with therepetitive tasks.A. VISUAL INSPECTIONDAILY INSPECTIONOverall Condition:Tire Condition:Battery CableConnections:Hydraulic FluidLeaks:Inspect platform, armstack, and carriage to make certain that no physicaldamage is evident. Look for missing components and hardware, loosecomponents, etc.Inspect tires for wear, cuts, and abrasions.For protection, wear a faceshield. Inspect for swelling of battery sides,tightness and corrosion of terminals. If corrosion is present, remove cablesfrom the battery (ground cable first). Clean terminals and posts with a wirebrush and reconnect to battery (ground cable last). Coat the terminalconnections with a spray corrosion inhibiter, or high temperature grease.Inspect to ensure that there is no evidence of leaking hoses or fittings.Decals and Placards:Verify that all decals and placards are in place and are legible. It is recommended that any decals or placards which are torn, damaged, missing, orpainted over, be replaced. Essential decals must be legible, or must bereplaced.B. FLUID LEVEL CHECKHydraulic TankLevel:Check level daily. Maintain fluid level so that it is visible between themarks on the sight glass with platform all the way down.Battery ElectrolyteLevel:For protection, wear a faceshield. Check electrolyte level in each cell.If necessary add electrolyte or clear, odorless, mineral free water as requiredto bring the level to 1/2" above the tops of the separators or to the levelindicators (if equipped), in each cell. Add only after the charging cycle iscomplete.MANUAL 92357-002JUNE 1997
•C.OPERATIONAL TESTInstrument CheckHour Meter:Battery Condition Indicator:Ensure that meter is recording properly.Ensure that indicator is monitoring the batteries state-ofchargeproperly.Lower ControlsOperation CheckEmergency Stop Button:Control Selector Switch:Lift Control Buttons:Ensure that machine will not operate with button pushed in.Check that button maintains its in or out position.Ensure that switch controls the selection of "UPPER orLOWER" properly. Make certain that machine will notoperate with switch in its center position.Check that buttons and toggle switch return to their normalposition when released, and that buttons and toggle switchproperly operate the lift function.Upper ControlsOperation CheckEmergency Stop Button:Lift Control Buttons:Drive/Steer Functions:Drive Speed Selector:Positraction Button:Slope Alarm:Ensure that machine will not operate from upper controls withbutton pushed in. Check that button maintains its in or outposition.Check that buttons return to their normal position whenreleased, and that buttons properly operate the lift function.Make certain that lift function does not operate unless greenpower button is depressed.Squeeze handle grip and operate drive and steer functions.Ensure that each speed selection works properly while driving.Ensure that speed shifts to low when button is depressed(platform below seven feet), regardless of speed selectorposition.Tilt sensor more than 5° (located in belly pan), and check foraudible alarm at platform control box. Selector switch must bein "UPPER" position.MANUAL 923S7"()()2JUNE 1997
PREVENTIVENUUNTENANCEDAILY INSPECTIONrzMON/ITEM IHOURSVISUAL INSPECTIONTUBS WEDV /THURS FRI1/ /SAT SUNV !/Overall ConditionTire ConditionBattery Cable ConnectionsHydraulic Fluid LeaksBattery Electrolyte LevelVerify Legibility of Decals & PlacardsOPERATIONAL TESTHour MeterBattery Condition IndicatorLOWER CONTROLSEmergency Stop ButtonControl Selector SwitchLift Control ButtonsUPPER CONTROLSEmergency Stop ButtonLift Control ButtonsDrive/Steer FunctionsDrive Speed Selector SwitchPositraction ButtonSlope AlarmMANUAL 92357-002JUNE 1997
• PREVENTIVEMAINTENANCE INSPECTION50 HOUR INSPECTIONA. CHASSISVisual Inspection:Steering Cylinder:Steering Connecting Arm:Steering Knuckles:Wheels:Drive Motors:Brake Cylinders:Hydraulic Hosesand Fittings:Tires:Belly Pan:Battery Charger:Wiring and ElectricalConnections:Electric Motor and Pump:Inspect for cracks in welds, dents or bends in material.Check cylinder, pins, and cotter pins holding cylinder in placefor proper installation.Check pins and retaining rings for proper installation. Ensurethat arm does not bind or contact chassis throughout range ofsteering travel.Inspect thrust washer for wear, and make certain that both pivotpin retainers are installed properly. Ensure there is no bindingthrough out range of travel.Check for loose or missing lug nuts, loose hub assemblies (fixedaxle), and damaged or cracked rims.Check motor hydraulic lines for leakage. Check wheel hubretaining nut and cotter pin for proper installation.Check hydraulic lines for leakage. Check for proper brakeoperation. Check for proper brake release lever operation.Inspect cylinders and retaining bolts for damage and properinstallation.Inspect for leaks, cuts, and abrasions. Check fittings for tightness.Inspect for excessive or abnormal wear, cuts and abrasions.Check belly pan to chassis weldment bolts for tightness andproper installation. Check for security of components.Inspect for damage. Verify proper charging operation.Inspect for damage, defective cables, fraying or cracked insulation, tightness ofterminal ends, loose connections, corrosion,cracked or swelling cases, or covers, loose hold downs ordeformed terminal posts on batteries.Inpect motor and pump mounting hardware for tightness, cableconnections for tightness, corrosion, fraying, or damage.MANUAL 92357"()()2JUNE 1997
B. ARMSTACKVisual Inspection:Lift Cylinder Hosesand Fittings:Electrical Cable:Lift Cylinder:Lift Cylinder Pins andRetaining Bolts:Limit Switch:UpperlLower ElectricalJunction:Armstack Bearing Pads(chassis):Inspect for cracks in welds, dents or bends in material.Inspect for leaks, cuts, and abrasions. Check for tightness andproper routing.Inspect for fraying or cracked insulation. Check for properslack throughout range of movement.Inspect for damage to chrome on lift cylinder rod, damageto cylinder body, and all welds for cracks. Inspect holdingvalve bolts for tightness.Inspect cylinder pins and retaining bolts for security.Inspect for damage to switch housing, or to arm lever. Inspectfor security of internal wiring, proper strain relief sealing, andsecurity of switch mounting.Remove terminal strip cover and inspect wiring for corrosionand tightness. If rust or corrosion are present, clean with awire brush and coat terminal connections with a spray corrosioninhibiter or high temperature grease.Inspect for binding, cracking, pitting, or abnormal wear. Cleanany dirt or debris from pad slide area. If binding or chatter ispresent during movement, lubricate sliding surfaces with antisiezecompound.C. PLATFORMVisual Inspection:Platform Pivot Shafts andRetaining Bolts:Platform Bearing Pads:Platform Entrance Lift Gateand Latch Assemblies:Inspect for cracks in welds, dents or bends in material.Inspect security of retaining bolts and pin.Inspect for binding, cracking, pitting, or abnormal wear. Cleanany dirt or debris from pad slide area. If binding or chatter ispresent during movement, lubricate sliding surfaces with antisiezecompound.Inspect for damage. Ensure that gate slides (operates) freelyMANUAL 92357-002JUNE 1997
.,C. PLATFORM (cont'd)Extension Deck and LatchAssembly:Electrical Cable:Inspect for damage. Ensure that deck slides freely and latchassembly functions properly.Inspect for damage, fraying or cracked insulation, and properrouting.D. LOWER CONTROL BOXVisual InspectionExternal:Internal:Manual Tube Holder:Inspect for proper mounting, damage to enclosure or controls,Ensure that enclosure lid seals watertight and that controls aresecure.Inspect for tightness of terminal strip mounting, all wire ends,and cable strain reliefs. Ensure that no corrosion is present andthat box drain holes are open.Inspect for damage and security. Ensure that end caps providea watertight seal and that the operator's manual is inside.E. UPPER CONTROL BOXVisual InspectionExternal:Internal:Inspect for proper operation of electrical cable quick disconnectplug. Inspect for damage to enclosure or controls. Ensurethat box fits snugly onto mounting posts and that controls aresecure.Inspect for tightness of wire ends at all locations. Ensure thatenclosure lid seals water tight, and lid hinges are not damaged.MANUAL 92357-002JUNE 1997
PREVENTIVE MAINTENANCE50 HOUR INSPECTION1:2::ITEM I'/HOURSCHASSISVisual InspectionSteering CylinderSteering Connecting ArmSteering KnucklesWheelsDrive MotorsBrake CylindersHydraulic Hoses and FittingsTiresBelly PanBattery ChargerWiring and Electrical ConnectionsElectric Motor and PumpARMSTACKVisual InspectionLift Cylinder Hoses and FittingElectrical CableLift CylinderLift Cylinder Pins and Retaining BoltsLimit SwitchUpperlLower Electrical JunctionArmstack Bearing Pads (chassis)PLATFORMVisual InspectionMON TOES WED THURS FRI SAT SUN1/ 1/ [7 [71/ VMANUAL 92357-002JUNE 1997
•PREVENTIVEMAINTENANCE50 HOUR INSPECTION(cont'd)ITEM IPLATFORM (cont'd)Z / HOURSMON TUES WED THURS FRI/ / / /SAT SUN/ //1Platfonn Pivot ShaftslRetaining BoltsPlatfonn Bearing PadsPlatfonn Entrance Lift GatelLatchesExtension Deck and Latch AssemblyElectrical CableManual Storage ContainerLOWER CONTROL BOXVisual Inspection--ExtemalVisual Inspection--IntemalManual Tube HolderUPPER CONTROL BOXVisual Inspection--ExtemalVisual Inspection--Intemal,MANUAL 92357-002JUNE 1997
HYDRAULIC FLUID SPECIFICATIONSFORCONDOR® AERIAL WORK PLATFORMSShell Tellus - T32 Hydraulic FluidViscositySUS@ 100°F 155SUS@210°F 47Viscosity Index 154Flash Point OF 325 0Pour Point OF -54 0COLD TEMPERATURE OPERATIONFor continuous operation in sub-zero temperatures, a fluid change is required. One of thefollowing should be used:A) Conoco DN-600 Antiwear Hydraulic FluidManufacturer: Continental Oil Co., Houston, TexasB) Sun Low Temperature No.3 Hydraulic FluidManufacturer: Sunoco, Inc., Toronto, Ontario, M5S 2S4, CanadaC) Fluids Conforming to MIL-H-5606C Specifications.Examples: Chevron Aviation Hydraulic Fluid-CShell L.O. Hydraulic #23CAUTIONDO NOT MIX DIFFERENT FLUIDSMANUAL 92357-0021UNE1997
NOTESMANUAL 923S7"()()2JUNE 1997
TROUBLESHOOTING GUIDE115 VAC BATTERY CHARGERTo be able to use the troubleshooting guide effectively, it is important to read this guidecompletely before beginning any tests.II _. REPAIRS BY QUALIFIED CAUTION PERSONNEL ONLY. IINOTE: Modifying this charger for use other than that for which it was intended, repairs by personsnot qualified, or not using original equipment replacement parts will void the warranty and Lesterliability.•CAUTIONDO NOT DISASSEMBLE THE CHARGER. TAKE IT TO AQUALIFIED SERVICEMAN WHEN SERVICE OR REPAIR ISREQUIRED. Incorrect assembly may result in a risk of electric shock or fire.SECTION 1-CHARGER DOES NOT TURN ONIn normal operation the charger DC output must be connected to the batteries in order to tum thecharger on. A time delay of2 to 5 seconds is provided to allow adequate time to make a secure connectionbefore the charger turns on. After this time delay the power relay closes and an audible "click" shouldbe heard. When the relay closes, AC power is supplied to the transformer primary coil. If operatingproperly, the transformer should hum and the ammeter should indicate the charge rate. If the chargerdoes not turn on properly, refer to Part A, B, or C for specific test procedures.WARNINGDo not operate the charger if it is malfunctioning. Personal injury orproperty damage could result.MANUAL 92357-002JUNE 1997
.,PART A- RELAY DOES NOT CLOSE, NO TRANSFORMER HUM AND AMMETERDOES NOT REGISTER.Check to be sure the power supply cord is securely connected to a live outlet. Check theDC output connector and the battery connector for damage, dirt or corrosion that would prevent agood electrical connection.WARNINGIf the plug or receptacle is broken, twisted, bent or loose and does not makegood electrical contact, have it replaced by a qualified serviceman immediately.DO NOT USE THE CHARGER IN THIS CONDITION AS FIRE ORPERSONAL INJURY CAN RESULT.Disconnect the power supply cord from its outlet. With the DC output connector still connectedto the battery connector, measure the voltage at the battery connector using a suitable DC voltmeter. Thevoltage reading should be the same as the battery terminal voltage and must be between 24 and 50 voltsDC in order to close the relay. If the DC voltage is within the above limits, remove the charger cover andverify that the charger is properly wired and you read the same voltage (24 to 50 volts DC) inside thecharger where the white and black wires ofthe DC cord attach. lethe battery DC voltage measured insidethe charger is now below the above limits or not present, the DC plug or cordset has an internal break andmust be replaced. If the charger is wired correctly and a satisfactory battery DC voltage is measured insidethe charger, a malfunction in the Electronic Timer Kit has probably occurred. Due to its complexity, donot attempt to make field repairs to any part of the Electronic Timer Kit. If a malfunction exists, simplyremove the entire Electronic Timer Kit and replace it with a new one. Refer to Part D - "Electronic TimerKit Replacement" - for correct procedure.CAUTIONALWAYS UNPLUG THE ELECTRICAL CORDS FROM THE ACOUTLET AND THE BATTERIES BEFORE ATTEMPTING ANYREPAIRS TO THE CHARGER.The Electronic Timer Kit may be bypassed in order to verify that a malfunction exists. Firstdisconnect the charger power supply cord from its outlet and the DC output from the battery. Place ajumper wire between terminals # 1 and #3 to bypass the Electronic Timer Kit.The power supply cord is now connected directly to the primary transformer coil and thetransformer should hum when the power supply cord is connected to a live outlet. The charger operationmay be checked by first connecting the DC output connector to the battery connector, and then connectingthe power supply cord to an outlet. If normal charging current is indicated on the ammeter the ElectronicTimer Kit is defective and must be replaced.MANUAL 92357'()()2JUNE 1997
CAUTIONDO NOT charge batteries with the Electronic Timer Kit bypassed. The chargerwill remain on as long as the power supply cord is connected to an outlet.Severe overcharging and eventual damage to batteries will result.If the transformer does not hum and the ammeter still does not register with the Electronic TimerKit by-passed, a continuity check of the charger AC circuit is necessary. Disconnect the power supplyfrom its outlet and the DC output connector from the battery connector and, with a suitable continuitytester, check the circuit across the power supply cord prongs. With the Electronic Timer Kit bypassed, theCIRCUIT SHOULD BE COMPLETE. If the circuit is not complete, individually check the continuity ofthe power supply cord, primary transformer coil and all connections.PART B-RELAY CLOSES BUT NO TRANSFORMER HUM AND AMMETER DOES NOTREGISTERCheck to be sure the power supply cord is securely connected to a live AC outlet. When three-prongto two-prong adapters are used, they tend to work loose resulting in a poor connection. Check the AC line fuseor circuit breaker and, if possible, measure the AC line voltage at the outlet to be sure AC power is present.If necessary, connect a functioning charger, utility light or other electrical appliance to the outlet to verify thepresence of AC power.If AC power is present, disconnect the power supply cord from its outlet and the DC output connectorfrom the battery connector. By-pass the Electronic Timer Kit as described in Section 1, Part A, and with asuitable continuity tester check the circuit across the power supply cord prongs. With the Electronic TimerKit bypassed, the CIRCUIT SHOULD BE COMPLETE. If the circuit is complete, refer to the wiring diagramand check the relay wiring and all connections. Ifthe circuit is not complete, check the wiring of the powersupply cord, transformer primary coil leads and the Electronic Timer Kit. If the charger is wired correctly,individually check the continuity ofthe power supply cord, transformer primary coil and relay.PARTC-RELAY CLOSES AND TRANSFORMER HUMS BUT AMMETER DOES NOT REGISTERIf the relay closes and the transformer hums, the charger AC circuit and Electronic Timer Kit arefunctioning properly. If the ammeter does not register, a fault in the charger DC circuit exists and a continuitycheck must be performed. Disconnect the power supply cord from its outlet and the DC output connector fromthe battery connector, and check the charger fuse. If a fuse link is blown, refer to Section 2 - "Charger FuseBlows" for further tests. If the fuse checks good, use a low voltage continuity tester to perform the followingtests:1. Connect the tester leads to the charger DC output connector and note the reading. Reverse the testerleads and check the output connector again. The circuit should be complete in only one direction. If the circuitdoes not conduct in either direction and the fuse is good, individually check the continuity of the DC outputcord, ammeter, diodes and all connections. If the circuit conducts in both directions, a "short" exists in thecharger DC circuit. First check the DC output cord for a "short" between the two wires. It is more likely thatone or both diodes have "shorted." Refer to Section 2 - "Charger Fuse Blows" for continuity test of diodes.MANUAL 92351-002JUNE 1991
•2.If the charger DC circuittest is good, a check ofthe capacitor is necessary. Disconnect the power supplycord from its outlet and the DC output connector from the battery connector. Then disconnectboth transfomter coil leads from the capacitor terminals. Use care when disconnecting the capacitorleads so the wires do not break. Using an ohmmeter, set the scale to R X 10K ohms and test the capacitor asfollows:DANGERmGH VOLTAGE: With the charger operating, the charger capacitor voltage isapproximately 650 volts AC. Use extreme caution when working near the capacitor terminalsGOOD CAPACITOR-When the ohmmeter leads are connected to the capacitor terminals, the meter needlejumps to mid-scale and rapidly moves to high resistance.OPEN CAP ACITOR-When the ohmmeter leads are connected to the capacitor terminals, the meter needledoes not move and stays at high resistance. A bulge in the top of the capacitor may be visible if the capacitorhas failed "Open."SHORTED CAPACITOR - When the ohmmeter leads are connected to the capacitor terminals, themeter needle jumps immediately to zero ohms and remains there.Ifthe capacitor is open or shorted, itmust be replaced.CAUTIONUse only a 6 Mfd, 660 volt AC rated capacitor for replacement (Part No. 02390S).The use of a different value capacitor may result in improper charging, capacitorfailure, transformer burnout and/or battery damage.3. If the charger DC circuit and capacitor check good, a test ofthe transformer is necessary. Refer toSection 7 - "Transformer Short or Burnout" or test procedures.PART D -ELECTRONIC TIMER KIT REPLACEMENTThe Electronic Timer Kit should always be replaced as a complete assembly. The tools requiredare: a Phillips head screwdriver, 3/S" and 11/32" wrenches, and pliers. No soldering is required. To replacethe kit, follow the step-by-step procedures listed below.1. Disconnect the charger power supply cord from its outlet and the DC output connector from thebattery connector and remove the charger cover.2. Disconnect the green, black and red wires ofthe Electronic Timer Kit. Then remove the black andwhite leads of the power supply cord and both primary transformer coil leads from the Electronic TimerKit terminal tabs. The Kit can be removed by removing the three mounting screws on the charger frontpanel. Save all hardware for reassembly.3. Install the replacement Electronic Timer Kit by reversing the disassembly proceduresdescribed in Step 2. When reconnecting the wires to the Electronic Timer Kit terminal tabs, support theterminal board to prevent damage to the electronic circuit board. Connect either transformer primary leadto terminal #2 and the remaining primary I lead to terminal #3.MANUAL 92357'()()2JUNE 1997
Connect the black lead of the power supply cord to terminal # 1 on the Electronic Timer Kitand the white lead ofthe power supply cord to terminal #2.Connect the red wire of the Electronic Timer Kit along with the white lead of the DC cord tothe Heat Sink Assembly. Connect the black wire of the Electronic Timer Kit along with the black lead ofthe DC cord to the ammeter post. Do not allow the ammeter post to turn when tightening the nut. Reconnectthe green wire of the Electronic Timer Kit along with the transformer secondary lead to the diodelead terminal.CAUTIONBe sure all connections are clean and tight. Also check to be sure all wiresand terminals are positioned so they do not short together or to the charger case.4. Replace the charger cover and check the Electronic Timer Kit for proper operation as follows:A. With the DC output connector disconnected from the battery connector, insert the powersupply cord into an outlet. The relay on the Electronic Timer Kit should not close. A DCvoltmeter connected across the DC output connector should indicate zero volts.B. Disconnect the power supply cord from its outlet and connect the DC output connector to thebattery connector. The relay on the Electronic Timer Kit should close with an audible "click"after a two to five second delay.C. If the Electronic Timer Kit does not operate as ( a) and (b) above, refer to the wiring diagramand check to be sure the charger is wired correctly. If the Electronic Timer Kit operatesproperly, the charger is ready for use. Always monitor the first charge cycle to verify thatthe charger is turning off properly.DANGERLead acid batteries generate highly explosive hydrogen gas especiallyduring the charging cycle. To AVOID the possibility of an explosion,charge batteries ONLY in a well VENTILATED AREA. Keep fire, sparksand burning material away from the charging area. Do Not smoke near abattery, and always shield the eyes when working near a battery.SECTION 2 -CHARGER FUSE BLOWSThe charger fuse assembly consists of a dual element fuse link under a transparent cover mountedon the charger front panel. Each fuse element is electrically connected in series with a rectifier diode to. provide protection for the transformer in the event of a diode failure. Visually inspect and electricallytest the fuse to determine if one or both fuse links are blown and refer to Part A or Part B for test procedures.LOCATE AND CORRECT CAUSE OF TROUBLE BEFORE REPLACING BLOWN FUSE. DONOT attempt to repair the fuse link as inadequate protection will result.MANUAL 92357-002JUNE 1997
• PARTA -SINGLE FUSE LINK BLOWSThis condition is normally caused by a short circuit failure of one diode. The fuse link will blowwhen the charger DC output connector is connected to the battery connector, regardless of whether thepower supply cord is connected to an outlet. To check the diodes, disconnect the power supply cord fromits outlet and the DC output connector from the battery connector, and then disconnect one transformersecondary coil lead from the diode terminal. Using a low voltage continuity tester, connect one tester leadto the diode mounting plate and the other tester lead to a diode terminal.Note the reading and then reverse the tester leads and check each diode again. If a diode conductscurrent in both directions, it is "shorted" and the complete Heat Sink Assembly with Diodes (Part No.09653S) must be replaced.On rare occasions a single fuse link may melt due to excessive heat. This can be caused by a looseinternal fuse connection. Check all three fuse connections inside the charger to be sure they are clean andtight. The proper torque on the fuse connector nuts is 20 Inch-Pounds (23 Cm-Kg).PART B -BOTH FUSE LINKS BLOWThis is normally caused by a reverse polarity connection between the charger DC outputconnector and the battery connector. Check the battery pack and battery connector to be sure they arewired in the correct polarity. If possible, check the voltage and polarity at the battery connector with aDC voltmeter. Also, check the charger DC output connector for the correct polarity. The white wireshould be connected to the positive (+) contact, and the black wire to the negative (-) contact. If a reversepolarity connection is made between the charger and batteries, both fuse links will blow, regardless ofwhether the power supply cord is connected to an outlet.Another cause for both fuse links blowing is the short circuit failure of both diodes. Although this is rare,it may occur as the result of a lightning strike at the charging location. Excessive heat due to a looseconnection may also cause both fuse links to melt. Refer to Part A - "Single Fuse Link Blows" fortroubleshooting procedures.MANUAL 92357-002JUNE 1997
SECTION 3 -AMMETER READS 30 AMPS FOR MORE THAN 30 MINUTES•This high output condition is caused by misuse, connecting the charger to an incorrect batterysystem which is lower than 24 volts. A common error is to install one or more ofthe 6 volt batteries ina 24 volt battery pack reverse polarity. Using a suitable DC voltmeter, test to be sure all batteries in abattery pack are correctly wired and also test the battery pack voltage at the charging connector. Aftercharging for 30 minutes at this excessive rate, the measured on charge voltage should rise to 22 to 26 voltsDC for a 24 volt system. Voltage measurements, while charging, lower than this indicate an incorrector failed battery pack that must be corrected before using the charger.CAUTIONDO NOT connect the charger to battery packs which are not 24 voltsystems. This misuse will cause overheating and transformer burnoutwill result.SECTION 4 -CHARGER OUTPUT IS LOWThe most probable cause of low output is a single fuse link blowing as the result of a short circuitfailure of one diode. Refer to Section 2 - "Charger Fuse Blows" for troubleshooting procedures. On rareoccasions a short circuit failure of the transformer coils may cause the output to be low. Refer to section7 - "Transformer Short or Burn Out" for test procedures.CAUTIONDo not use the charger if the output is low. Batteries will not reachfull charge, thereby increasing the possibility of a harmful deepdischarge during their next use.SECTION 5 -CHARGER TURN OFF MALFUNCTIONSThe Electronic Timer Kit turns the charger off as well as on. Proper charge time is determined bymany factors, but the main elements are: (I) battery size, (2) depth of battery discharge and (3) finishcharge rate. Large severely discharged batteries require more time to reach full charge than do smallerlightly discharged batteries.The charge rate, as indicated by current flow in amperes on the panel meter, is controlled by thebatteries' rising voltage during charge. The higher the on charge voltage will rise, the lower the finishcharge will be before the Electronic Timer terminates charging.The following timer malfunctions are occasionally due to factors other than the charger'sperformance. To help isolate the problem, it is often necessary to use the charger on a different set ofbatteries and the original set of batteries on another charger.MANUAL 92357-002JUNE 1997
•PARTA -CHARGER TURNS OFF TOO SOONCheck to be sure the power supply cord is securely connected to a live outlet. If the power supplyoutlet is live, proceed with the next step.To detennine if the charger did shut off too soon, disconnect and reconnect the charger DC outputconnector. This will restart the charger. Observe charger output on the ammeter.1. The ammeter needle jumps smartly to between 20 and 25 amps and then tapers below 14 ampswithin 15 minutes. This indicates that the batteries were truly charged. The apparent short charging timeis in response to the batteries' ability to accept charge and the electronic timer is perfonning properly.2. The ammeter needle jumps smartly to between 20 and 25 amps, but does not taper below 14 ampswithin 15 minutes. If the batteries have been properly maintained and charged regularly, this generallyindicates that the batteries were not fully charged. If possible, use a hydrometer to check the specificgravity of several battery cells. If the specific gravity readings are more than 30 points (.030) lower thannonnal full charge readings, the electronic timer has malfunctioned and the complete Electronic TimerKit must be replaced. Refer to Section 1, Part D - "Electronic Timer Kit Replacement" for correctprocedures.If the batteries have not been used or charged regularly, they may be sulfated and will not producetheir full capacity. Repeated cycles (at least 5) of a light discharge followed by a full charge will generallyresult in the recovery of most of the battery's capacity. Do not interpret this reduced battery capacity asbeing caused by the charger turning off too soon. The charger is working properly if, after several chargecycles, the battery capacity increases to near nonnal. Sulfation occurs most often when the batteries havebeen stored without weekly charging. New batteries may also be sulfated due to extended shipment orstorage time prior to sale.As batteries age, individual cells may weaken, causing a reduction in battery capacity. Thiscondition nonnally results in a finish charge higher than 10 Amps and less time is required to fully chargethe batteries. Do not interput this shorter charging time and reduced battery capacity as being caused bythe charger turning off too soon. The battery is aging naturally and the charger is working properly. Whenthe batteries will no longer perfonn as required, they should be replaced.PART B -CHARGER DOES NOT TURN OFFNew batteries with all good cells should rise to at least 2.5 volts per cell. This will allow the finishcharge rate to taper below 8 amperes. As batteries age, individual cells may weaken and these cells maynot reach 2.5 volts. This will result in finish charge rates greater than 8 amperes, and less time will berequired for the batteries to reach full charge. At a finish charge rate of 8 amperes or less the charge timeshould not exceed 18 hours. At a finish charge rate greater than 8 amperes the charge time should notexceed 14 hours.If the charger remains on longer than the specified maximum time, check to see if the charger turnson immediately when the DC output cord is connected without the nonnal two to five second delay. Ifthe charger turns on instantly without the two to five second delay the Electronic Timer Kit has probablyfailed. This type of malfunction generally results in the charger not turning off and the completeElectronic Timer Kit must be replaced. Refer to Section 1, Part D - "Electronic Timer Kit Replaceme~t"for correct procedures.MANUAL 92357-002JUNE 1997
•If the charger remains on longer than the maximum time specified and the two to five second delayis present, verify thatthe green wire from the Electronic Timer Kit and the secondary transformer coil leadare securely connected to the diode lead as shown. The charger will NOT tum offifthe green wire is looseor disconnected. If the green wire is securely connected, the Electronic Timer has malfunctioned and thecomplete Electronic Timer Kit must be replaced.If a precision digital type DC voltmeter is available, a test to verify that the Electronic Timer hasmalfunctioned can be made. Connect the charger to the batteries and allow to charge normally. Afterthecharge rate has tapered to its lowest point, measure the battery terminal voltage using a DC voltmetercapable of reading in increments of .00 1 volts. Continue charging and check the battery voltage readingevery hour. If the battery voltage increases less than .012 volts, or if the battery voltage decreases betweensuccessive hourly readings, the charger should turn off. If the charger does not tum off, the ElectronicTimer has malfunctioned and the complete Electronic Timer Kit must be replaced.PART C -CHARGER RUNS TOO LONG BUT DOES TURN OFFIn the event of AC power interruption when the charger is on, the charger will automatically restartwhen AC power is restored. This power outage can make the apparent charge time seem longer than theactual charge time. To check for AC power interruptions, plug an electric clock into the same outlet towhich the AC cord is connected. Charge normally and note any time difference between the test clocktime and the actual time.SECTION 6 -AC LINE FUSE OR CIRCUIT BREAKER BLOWSIf this occurs when the charger power supply cord is connected to an outlet, without the DC outputconnector connected to the battery connector, the charger power supply cord may be shorted. Disconnectthe power supply cord from its outlet and the DC output connector from the battery connector, then checkto be sure the Electronic Timer Kit is NOT bypassed. With a suitable continuity tester, check the circuitacross the power supply cord prongs as shown. THE CIRCUIT SHOULD NOT BE COMPLETE. Ifthecircuit is complete, check the relay contacts to be sure they are open and have not welded closed. If therelay contacts are open, the power supply cord is shorted and must be replaced. Ifthe power supply checksgood, the transformer coils may be shorted. Refer to Section 7 - "Transformer Short or Burnout" for testprocedures.SECTION 7 -TRANSFORMER SHORT OR BURNOUTFailure of the transformer can be the result of natural aging, premature shorting of adjacent coilturns or overheating damage. The most common cause of transformer overheating and premature burnoutis the result of misuse, connecting the charger to a battery system of lower voltage than specified on thecharger (See Section 3). Darkening of all the transformer secondary coil windings is an indication ofpossible overheating damage. A low or complete lack of output would be observed on the ammeter,however, the transformer may hum or the AC line fuse or circuit breaker may blow when the charger isturned on. To test the transformer, disconnect the power supply cored from its outlet and the DC outputconnector from the battery connector. Then disconnect the transformer secondary coil leads # 1 and #4from the diode terminals and disconnect the transformer capacitor coil leads from the capacitorterminals.Use care when disconnecting the capacitor lead so the wires do not break.MANUAL 92357-002JUNE 1997
DANGERmGH VOLTAGE: With the charger operating, the charger capacitor voltage isapproximately 650 volts AC. Use extreme caution when working near the capacitorterminals.In order to apply AC power directly to the transformer primary coil, the Electronic Timer Kit mustbe bypassed. Refer to Section I, Part A for by-pass procedures. With the Electronic Timer Kit bypassedtake caution in connecting the power supply cord to an outlet. If the AC line fuse or circuit breaker blows,the transformer is shorted internally and must be replaced. If this does not occur, check the transformersecondary and capacitor coil voltages as shown in Figure 6, using a suitable AC voltmeter. Ifthe measuredvoltages are substantially lower than those shown, the transformer is shorted internally and must bereplaced.If the transformer secondary coil voltage and capacitor coil voltage check good, disconnect thepower supply cord from its outlet. Check the capacitor to be sure its rating is 6 Mfd. 660 volts AC, andthen carefully reconnect the capacitor coil leads to the capacitor terminals. Then, take caution whenreconnecting the power supply cord to an outlet and measure the transformer secondary voltage again.The correct voltage reading is shown in Figure 7. If the transformer secondary voltage reading is the sameas measured with the capacitor disconnected, from Figure 6, the capacitor may be open, the capacitor coilmay be open or the capacitor coil terminals may not be making proper electrical contact. Refer to SectionI, Part C, Item 2 for capacitor test procedures. Ifthe voltage readings are correct, both the transformerand capacitor are good, refer to Section 1, Part C, Item 1 for further tests ofthe DC circuit.If it should become necessary to replace a terminal on one of the transformer leads, the newterminal must be crimped AND soldered. NOTE: Some transformer leads may be aluminum wire anda solder must be used on these wires that is intended for use on aluminum, such as Alcoa #807 solder withAlcoa #69 flux. If these materials are not available locally, contact the Lester factory.MANUAL 92357-002JUNE 1997
APPENDIX ATIME CONDOR CorporationNOMINALTIlREADS4-4U....... Gb-J1.b-4U8-32G-.)OIU-1.4IU-J1.114-1.U114-1.1S'lib-lIS'1Jb-1.4JIIHb3/11-1.41111-147Il6-20ll2,"!3112-209116-12911b-18;)/IS-U:5/8-183/4-lU3f4-1b7/8-97/8-14-IS1-121118-71 1I1S-11.11/4-711/4-121 3/1S-()13/8-121 IIJ.-()1112-12BASIC STRESSBOLT TORQUE CHARTTENSILE STRENGTH (T) MINMAJOR AREA PROOF LOAD (P) SAE GRADE 5 SAE GRADE 8DlA ~.IN SAEGRAJ E(1957)INCH GRADES GRADES CLAMP ASSEMBLY TORQUE CLAMP ASSEMBLYTOROUET P T P LOAD R=.200DRY -. 150 LUB LOAD R~.200DRY =.I50LUBLBS.LBS..1120 .00604 I20KSl 8SKSl ISOKSl I20KSI 380 8LB-1N 6LB-1N S40 12LB-1N 9LB·1N.1120 .00661 120KSI 8SKSI 150KSI 120KSI 420 9LB-1N 7LB-1N 600 13LB-1N 10LB-1N.1380 .00909 120KSI 8SKSI ISOKSI 120KSI 580 16LB-1N 12LB·1N 820 23LB·1N I7LB·1N.1380 .01015 120KSI 8SKSI ISOKSI 120KSl 640 18LB-1N 13LB·1N 920 2SLB·1N 19LB-1N.1640 .01400 120KSI 8SKSI IS0KSI 120KSI 900 3OLB·1N 22LB-1N 1260 41LB·1N 31LB-1N.1640 .01474 I20KSI 8SKSI 1SOKSI 120KSl 940 31LB-1N 23LB·1N 1320 43LB-1N 32LB-1N.1900 .01750 120KSI aSKSI I50KSI 120KSI 1120 43LB-1N 32LB·1N 1580 6OLB·1N 4SLB-1N.1900 .0200 120KSI 8SKSI I50KSI 120KSI 1285 49LB·1N 36LB-1N 1800 68LB·1N SILB-IN.2500 .03180 120KSI 8SKSI I50KSI 120KSI 2020 SLB·FT 7SLB-1N 2860 12LB-FT 9LB-FT.2500 .03640 120KSI 8SKSI IsOKSI 120KSI 2320 IOLB-FT 86LB-1N 3280 14LB-FT 10LB·FT.3125 .05240 120KSI 8SKSI 150KSI 120KSI 3340 17LB-FT 13LB-FT 4720 2SLB-FT 18LB·FT.3125 .05800 120KSI 85KSI I50KSI 120KSI 3700 19LB-FT 14LB-FT 5220 2sLB-FT lOLB·FT.3750 .07750 120KSI 8SKSI ISOKSI 120KSI 4940 lOLB-FT 23LB-FT 7000 45LB-FT 35LB-FT.3750 .08780 I20KSI 8SKSI 150KSI 120KSI 5600 3sLB-FT 2SLB-FT 7900 sOLB-FT 35LB-FT.4375 .10630 120KSI 85KSI 150KSI 120KSI 6800 SOLB-FT 3sLB-FT 9550 7OLB-FT 55LB-FT,4375 .11670 120KSI 8sKSI 150KSI I20KSI 7550 SSLB-FT 4OLB-FT 10700 80LB-FT 6OLB-FT.5000 .14190 12OKS1 8SKSI I50KSI 120KSI 9OSO 75LB-FT SSLB-FT 12750 1I0LB-FT 8OLB-FT.5000 .15990 120KSI 8SKSI 150KSI 120KSI 10700 9OLB-FT 6SLB-FT 14400 120LB-FT 9OLB-FT.5625 .18200 I20KSI 85KSI ISOKSI 120KSI 11600 1I0LB-FT 8OLB-FT 16400 ISOLB-FT 1I0LB-FT.5625 .20300 120KSI 8sKSI IsOKSI 120KSI 12950 120LB-FT 9OLB-FT 18250 17OLB-FT 130LB-FT.6250 .22600 120KSI 85KSI Is0KSI 120KSI 14400 150LB-FT \I0LB-FT 20350 22OLB-FT 17OLB-FT.6250 .25600 120KSI asKSI IsOKSI 120KSI 16950 180LB-FT \30LB-FT 23000 240LB-FT I80LB-FT.7500 .33400 120KSI 8sKSI 1SOKSI 120KSI 21300 260LB-FT 2OOLB-FT 30100 38OLB-FT 28OLB-FT.1500 .37300 120KSI 8SKSI 150KSI 120KSI 23800 300LB-FT 22OLB-FT 33600 420LB-FT 32OLB-FT.8750 .46200 120KSI 8SKSI Is0KSI 120KSI 29500 S20LB-FT 39OLB-FT 41600 600LB-FT 460LB-FT.8150 .S0900 120KSI 8SKSI 150KSI 120KSI 32400 S70LB-FT 43OLB-FT 45800 66OLB-FT 500LB-FT1.000 .60600 120KSI 85KSI 150KSI 120KSI 38600 77OLB-FT 5SOLB-FT S4500 9OOLB-FT 68OLB-FT1.000 .66300 120KSI 85KSI 150KSI 120KSI 42300 850LB-FT 630LB-FT 59700 lOOOLB-FT 74OLB-FT1.1250 .16300 IOSKSI 14KSI 150KSI 120KSI 42300 8OOLB-FT 600LB-FT 68100 128OLB-FT 960LB-FT1.1250 .85600 10sKSI 14KSI 150KSI 120KSI 47500 880LB-FT 66OLB-FT 77000 144OLB-FT 1080LB-FT1.2500 .96900 10SKSI 74KSI I50KSI 120KSI 53800 112OLB-FT 840LB-FT 87200 1820LB-FT 1360LB-FT1.2500 1.0730 10SKSI 74KSI 150KSI 120KSI 59600 1248LB-FT 920LB-FT 96600 2000LB-FT OOLB-FT1.3750 1.1550 105KSI 74KSI lSOKSI 120KSI 64100 1468LB-FT llooLB-FT 104000 23SOLB-FT 80LB-FT1.3750 1.3150 IOSKSI 74KSI ISOKSI 120KSI 13000 1680LB-FT 1260LB-FT 118400 2720LB-FT 2040LB-FT1.5000 1.4050 IOSKSI 74KSI I50KSI 120KSI 78000 194OLB-FT 146OLB-FT 126500 316OLB-FT 2360LB-FT1.5000 1.5800 105KSI 74KSI 150KSI I20KSI 87700 22OOLB-FT I64OLB-FT 142200 3S6OLB-FT 2660LB-FTNOTES:1. THIS CHART SHOWS RECOMMENDED BOLT TORQUES.2. TORQUE = R X D X TR = .150 FOR LUB CONDITIONSR = .200 FOR DRY CONDITIONSTO ASSURE CONSISTENCY IN TORQUE, LUBRICATE FASTENERS WITH ENGINE OIL(MAY BE USED OIL)D = NOMINAL DIAMETER IN INCHEST = DESIRED CLAMP LOAD IN POUNDS = 75% PROOFLOAD X STRESS AREAMANUAL 92357-002JUNE 1997
APPENDIX BTIME CONDOR CoprorationBOLT TORQUE CHARTFOR METRIC HEX HEAD CAP SCREWS- RECOMMENDED ASSEMBLY TORQUES IN FOOT-POUNDS(*V ALUES IN LB-IN, OTHERS ARE LB-FT.)-THE TORQUE VALUES FOR EACH DIAMETER ARE ACCEPTABLEFOR ANY THREAD PITCH IN THAT DIAMETER.DIAMETERM4PROPERTY CLASS 8.8 PROPERTY CLASS 9.8 PROPERTY CLASS 10.9 PROPERTY CLASS 12.9LUBRICATED DRYDRY LUBRICATED DRYtHREADS tHREADS tHREADS27.5* 17* 30*tHREADStHREADS18* 38.5*LUBRICATED DRY LUBRICATEDtHREADS lHREADS tHREADS24* 53* 32.5*M556.5* 33.5* 61*37* 78*47* 107* 65*M695* 57.5* 103*61* 132*79* 180* 109*M819 12 2113 2716 37 22MIO39 23 4225 5332 73 44MI267 40 7344 9255 127 76MI4107 64 11669 14689 203 122MI6167 100 181108 230138 316 190M20325 195 352211 449269 617 370M24562 337 609386 775465 1066 640M301117 670 1210726 1540924 2188 1271MANUAL 92357-002JUNE 1997
MANUAL 92357-002JUNE 1997•
ATTENTIONMANUAL OF RESPONSIBILITIESforDealers, Owners, Users, Operators,Lessors, Lessees and BrokersofANSI/SIA A92.6-2006Self-Propelled Elevating Work PlatformsWARNINGFAILURE TO COMPLY with your REQUIRED 'RESPONSmILITIES in the use and operation of the AerialPlatform could result in DEATH OR SERIOUS INJURY.
IMPORTANTYou are required by ANSIISIA A92.6-2006 to read and understand YOURRESPONSIBILITIES before you use or operate this Aerial Platfonn.This Manual and the manufacturer's operation and safety manuals are considered integral parts ofthe Aerial Platfonn and are VITAL TO COMMUNICATE NECESSARY SAFETYINFORMATION to users and operators. They MUST BE KEPT ON THE AERIAL PLATFORMin the storage compartment.The operation of any aerial platfonn is subject to certain HAZARDS that can be protected againstonly by the exercise of INTELLIGENCE, CARE, AND COMMON SENSE. It is essential tohave COMPETENT, CAREFUL PERSONNEL, TRAINED in the INTENDED USE, SAFEOPERATION, MAINTENANCE AND SERVICE ofthis type of equipment.The USER and OPERA TOR MUST MAKE DECISIONSof the Aerial Platfonn with dueOPERATOR AND OTHERCOMPLY with your REQUIREDPlatfonn could result in DEATH ORRefer to the manufacturer's n",>r.,,",nnplatfonn and)llalnt1enal.llcle, use and operationSAFETY OF THEand operation of the AerialaerialTheDefinitionsResponsibilities of DealersResponsibilities of OwnersResponsibilities of UsersResponsibilitiesSingle copy list price $4.95Self-PropelledManual incorporates "p",,,nnSection 9Section 10Section 11Figure 1Page 2Page 4Page 6Page 10Page 13Page 13Page 13Page 14Published byScaffold Industry Association, Inc.Post Office Box 20574Phoenix, AZ 85036-0574Telephone: (602) 257-1144 / Fax: (602) 257-1166e-mail: sia@scaffold.org / web: www.scaffold.orgCopyright © 2006 by Scaffold Industry Association, Inc.All rights reserved.No part of this publication may be reproduced in any form,in an electronic retrieval system or otherwise, without the prior written permission of the publisher.Printed in the, United States of America
RESPONSIBILITIES MANUAL13. DEFINITIONS IAerial platform. A mobile device that has an adjustable positionplatform, supported from ground level by a structure.Anchorage(s). A secure point of attachment to be used withpersonal fall protection equipment (PFPE).Authorized personnel (authorized person). Personnelapproved or assigned to perform a specific type of duty or dutiesat a specific location or locations at a work site.Base. The relevant contact points of the aerial platform that formthe stability fulcrum (e.g. wheels, casters, outriggers, stabilizers).Broker. An independent business entity or person that arranges alease or transfer of ownership of an aerial platform, but does notown the aerial platform. If the entity or person is an employee ofthe buyer, seller, lessor or lessee of the aerial platform, he shallnot be considered a broker.Chassis. The integral part of the aerial platform that providesmobility and support for the elevating assembly.Configuration. All positions in which an aerial nht-fnll't'ndpart thereof can be placed within its intended operatingCritical component(s). Load supporting elements whichor stabilize the platform or aerial platform.Dealer. A person or entitydistributor and who !o;"'l.''''lC:l.Uplatforms.Delivery. Transfer of care,custody of the aerialplatform from one person or entity to another person or entity.Directional controls. Controls that initiate functions thatmovement of the platform or the aerial platform.Ductile materials. Materials having a mlllll1I\un10% in 2 inches (50.8mm).Elevating assembly.Theplatform relative to the aerialFamiliarization. Providingfunctions and safety devices forthe controlaerial platform(s) to aqualified person or operator who controls the movement of theaerial platform(s) being delivered.Guardrail system. A vertical barrier primarily intended toprotect against personnel falling to lower levels.Hazardous location. Any location that contains, or has thepotential to contain, an explosive or flammable atmosphere asdefined in ANSIINFP A 505 - 1996, Powered Industrial Trucks.Instability. A condition of an aerial platform in which the sumof the moments that tend to overturn the unit exceeds the sum ofthe moments tending to resist overturning.1Reprint from ANSI/SIA A92.6 2006Insulated platform. A platform designed and tested to meet thespecific electrical insulation ratings consistent with themanufacturer's identification plate.Interlock. A control or mechanism that, under specifiedconditions, automatically allows or prevents the operation ofanother control or mechanism.Lessee. A person(s) or entity to whom an aerial platform isprovided by lease, rental, loan, or other arrangement. A lesseemay also be a dealer, owner, user or operator.Lessor. A person(s) or entity who leases, rents, loans, orotherwise provides an aerial platform to another party for thebeneficial use of that party (the user). A lessor may also be adealer, owner, lessee, user, or operator.Maintenance. The act of upkeep such as inspection, lubrication,adjustment and scheduled partes)A document containing the3) and the requirements mandated in thisthe following entities: Dealers (Section 5); Owners6); Users (Section 7); (Section 8); Lessors(Section ll).makes, builds, oraximUlm platform height or theTo make a change(s) to an aerialaffects the operation, stability, safety factors, ratedor safety of the aerial platform in any way.Most adverse stability condition(s). The permittedconfiguration of the aerial platform most likely to causeinstability while maintaining stability. Factors to be consideredshall include:(I) With zero load to maximum test load.(2) Up to arid including maximum platform height.(3) All positions and configurations of the platform(s).(4) All wheel and axle positions.(5) Forward and backward configurations of the elevatingassembly:(6) All other moveable features which affect the stability of theaerial platform.Multiple ratiog(s), multiple rated loads. Two or more differentrated work loads based on alternative configurations of the aerialplatform.Operation. Performance of functions of an aerial platformwithin the scope of its specifications and in accordance with themanufacturer's instructions, the user's work rules, and applicablegovernmental regulations.
RESPONsmILITIES MANUALReprint from ANSIISIA A92.6 2006Operator. A qualified person who controls the movement of anaerial platform.Outriggers. Devices that increase the stability of the aerialplatform and that are capable of lifting and leveling the aerialplatform.Override.To take over aerial platform movement controlfunctions at the upper control station by those at the lower controlstation.Owner.A person or entity who has possession of an aerialplatform by virtue of proof of purchase.Passive. Under specified conditions, automatically performedand not requiring any specific action to accomplish.Platform.The portion of an aerial platform intended to beoccupied by personnel with their necessary tools and materials.Platform height. The vertical distance measured from the floorof the platform to the surface upon which the machine is beingsupported.Powered functions. Those which control motion of the platformor the aerial platform and are caused by eleCtfC)-IIleCinallhydraulic or pneumatic forces.Qualified person. One who, by possession of a recognizedcertificate, or professional standing, or bytraining, and experience, hasability to solve or resolvework, or the project.Rated horizontal force.force at the top rail which can bespecified by the manufacturer.Rated work load. The designed carrying capacity of theplatform as specified by the manufacturer.Rebuild/recondition. Theadjustment of an aerialreplacement parts andbeyond the scope of U"UHO."UUU~standard) in order to restore, toplatform or component tospecifications.manufacturedRemanufacture. The modification of an aerial platform, eitherby the original manufacturer or another qualified entity, so thatthe aerial platform will comply with the ANSI Standard in effecton the date the modification is completed.Repair. The act of restoring to good condition that which hasbeen broken, damaged or worn due to use, abuse orreasons.otherShall. The word "shall" is to be understood as being mandatory.Should. The word "should" indicates that the rule is arecommendation, the advisability of which depends on the factsin each situation.Stability/Stable. A condition of an aerial platform in which thesum of the moments that tend to overturn the unit is less than orequal to the sum of the moments tending to resist overturning.Stabilizers.Devices that increase the stability of the aerialplatform but are not capable of lifting or leveling the aerialplatform.Training. Instruction to enable the trainee to become a qualifiedperson regarding the task to be performed, including knowledgeregarding potential hazards.Unintended motion. Motion of the aerial platform or platformwithout activation of any control.Unrestricted rated workload. The maximum designed carryingcapacity of the aerial platform allowed by the manufacturer in alloperating configurations.User. A or entity who has care, control and custody ofthe aerial This person or entity may also be thea dealer, owner, lessor, lessee, orv1wmtacture:r's operating, maintenance, repair and partsA92.6 2006aerial platformBasic principles. Sound principles of safety, training,inspection, maintenance, application, and operation consistentwith all data available regarding the parameters of intended useand expected environment shall be applied in the training ofoperators, in maintenance, application, safety provisions andoperation of the aerial platform with due consideration of theknowledge that the aerial platform will be carrying personnel.5.2 Manuals.5.2.1 Machine manual(s). Dealers shall keep and maintain acopy(ies) of the :(1 ) Operating manual(2) Maintenance manual(3) Parts manual(4) Repair manualThe operating manual and maintenance manual shall be providedwith each rental, lease or sale delivery and shall be stored in theweather resistant storage compartment on the aerial platform.Manual(s) are considered an integral part of the aerial platformand are vital to communicate necessary safety information to2
RESPONSIBILITIES MANUALReprint from ANSIISIA A92.6 2006owners, users and operators.In addition, repair and partsmanuals should be provided with each sale delivery.5.2.2 Manual of Responsibilities. The current Manual ofResponsibilities for Dealers, Owners, Users, Operators, Lessors,Lessees, and Brokers of Self-Propelled Elevating Work Platfonnsshall be provided and stored in the weather resistant storagecompartment.5.3 Pre-delivery preparation. Aerial platfonns shall beinspected, serviced and adjusted to the manufacturer'srequirements prior to each delivery by sale, lease or rental.5.4 Maintenance, inspection and repair.5.4.1 Maintenance. When a dealer accomplishes preventativemaintenance on the aerial platfonn, it shall be in accordance withthe manufacturer's (remanufacturer's) recommendations, theenvironment, and severity of use.5.4.2 Inspection. When the dealer accomplishes frequent andannual inspections, they shall be accomplished in accordancewith the manufacturer's (remanufacturer's) manuals.5.4.3 Repairs. Repairs accomplished to correct J.ua"LJ.UJ.l~"and problems shall be in accordance with the J.u .. J.J. ... ,,,."l(remanufacturer's) manuals and instructions.5.5 Maintenance safety precautions.repairs are started on an aerialshall be taken as applicable:(1) Power plant stoppedinoperative;(2) All controls in the "Off'secured from inadvertent motion by brakes, blocks, ormeans;(3) Elevating assembly and platfonn lowered tocribbing to prevent(4) Hydraulic oil pressurebefore loosening or rp.n1I"lV"111(2) Safety props or latchesprescribed by the manufacturer.rendered5.6 Replacement parts. When parts or components arereplaced, they shall be identical or equivalent to original aerialplatfonn parts or components.5.7 Training. The dealer shall offer appropriate training tofacilitate owners, users, and operators to comply withrequirements set forth in this standard regarding the inspection,maintenance, use, application, and operation of the aerialplatfonn.5.8 Familiarization on delivery. Upon delivery by sale,lease, rental or any fonn of use, the dealer shall have theresponsibility with the person designated by the receiving entityfor accepting the aerial platfonn to:3(1) identify the weather resistant compartment (for manualstorage).(2) confinn the manuals, as specified by the manufacturer, are onthe aerial platfonn.(3) review control functions(4) review safety devices specific to the model aerial platfonnbeing delivered.5.9 Dealer as user. Whenever a dealer directs personnel tooperate an aerial platfonn (loading, unloading, inspecting, salesdemonstrations, or any fonn of use), the dealer shall assume theresponsibilities of users as specified in Section 7 of this standard.All personnel authorized to operate the aerial platfonn shall havebeen:(1 ) Trained.(2) Familiarized with the aerial platfonn to be operated.(3) of the responsibilities of operators as outlined inStandard.owners and users. If a dealer is unable toor user's question(s} relating to rated capacity,maintenance, repair, inspection, or operation of theplatfonn, the dealer shallyears:the proper infonnationif the manufacturerinfonnation to theaddress of the purchaser of each aerial platfonnRecords of the predelivery preparation perfonned prior toeach delivery.(3) Records of frequent and annual machine inspectionsaccomplished.(4) Records of repairs accomplished to correct malfunctions andproblems.(5) Name of the person(s} trained.(6) Name of the person(s) providing the training.(7) Date of training.(8) Name of person(s) receiving familiarization with the aerialplatfonn upon each delivery unless this individual has beenprovided with familiarization on the same model, or onehaving characteristics consistent with the one beingdelivered, within the prior 90 days.(9) Name of person(s) providing familiarization with the aerialplatfonn upon each delivery.5.11.2 Proof of training. The dealllr should provide traineeswho successfully complete training a means to evidence they aretrained. The dealer shall provide such proof if requested by the
RESPONSIBILITIES MANUALtrainee.The document evidencing training shall include thefollowing information:(1) Name of trainee(2) Name of entity providing training or retraining.(3) Name oftrainer(s).(4) Clear identification that training covered Self-PropelledElevating Work Platforms.(5) Date of training.5.11.3 Record dissemination. Upon request, the dealer shallprovide the following information:(1) To the owner of the aerial platform, a copy of frequent orannual inspections performed.(2) To the owner of the aerial platform, a copy of repairsaccomplished.(3) To a user, proof of training for an operator, including nameof trainer and date of training.(4) To a user, the name of the person(s) receiving familiarizationupon delivery of the aerial platform.5.12 Modifications. Modification, alteration or reIlnaIJlut~lCt\of an aerial platform shall be made only with priorpermission of the manufacturer. Should themanufacturer no longer exist, a qualifiedsuch modifications. All modltllcatlmanufacturer'srequirements(Responsibilities of maillutactur,ers5.13 Manufacturer'sThe dealer shall comply with safetyfrom the manufacturer (remanufacturer).5.14 Responsibilities upon sale. When the aerialsold, the dealer:(1) Shall, upon delivery, ensure themanuals are conveyed to the(2) Shall, upon delivery, provideResponsibilities for Dealers,Lessors, Lessees and BrokersWork Platforms.(3) Should, within 60 days of sale, provide repair and partsmanuals.(4) Shall, within 60 days of the sale, notify the manufacturer(remanufacturer) or its successor (if existing) of the sale,providing the full name and address of the purchaser.(5) Should, if the aerial platform is used, accomplish an annualmachine inspection prior to delivery and provide a copy tothe purchaser within 60 days of the sale.(6) Shall, upon delivery, familiarize the person designated by thereceiving entity with the aerial platform being acquired.4Reprint from ANSIISIA A92.6 200616. RESPONSmILITIES OF OWNERS.6.1 Basic principles. Sound principles of safety, training,inspection, maintenance, application, and operation consistentwith all data available regarding the parameters of intended useand expected environment shall be applied in the performance ofthe responsibilities of owners with due consideration of theknowledge that the aerial platform will be carrying personnel.6.2 Responsibilities upon purchase. Upon purchase of theaerial platform, the buyer:(1) Shall ensure the operating and maintenance manuals havebeen received.(2) Should acquire repair and parts manuals within sixty days(60) of acquisition.(3) Shall within sixty days (60) of acquisition of the aerialplatform provide the manufacturer (remanufacturer), or itsexisting) with the full name and address of thebuyerthe model and serial number of the aerial1'1"'UV'HH is used, ensure that frequent andare current.familiar with and conform with theas set forth in the Manual ofElevating Worka copy(ies) ofwith each rental, lease,they are properly stored in thethat is a part of the aerial platform.COIISl(len:
RESPONSIBILITIES MANUALReprint from ANSIISIA A92.6 20066.4.3 Repairs. When the aerial platform is damaged or in needof repair, all malfunctions and problems identified shall becorrected before the aerial platform is returned to service.6.5 Predelivery preparation. Aerial platforms shall beinspected, serviced, and adjusted in accordance with themanufacturer's (remanufacturer's) requirements prior to eachdelivery by sale, lease or rental.6.6 Frequent inspection. The owner of an aerial platform shallensure that a frequent inspection is performed in accordance withthe manufacture's (remanufacturer's) instructions, for the aerialplatform:(1) That was purchased used. This inspection shall beaccomplished unless it is determined that the frequent andannual inspections are current;(2) That has been in service for three (3) months or 150 hours,whichever comes first;(3) That has been out of service for a period longer than threemonths.The inspection shall be made by a person qualified as a tnP('h!>",('on the specific type of aerial platform or one havingdesign characteristics. The inspection shall be in accordancefrequent inspection and shallfollowing:(1 ) All functions and theirlimits of motion;(2) Lower controls including theupper controls(3) All chain and cable mechanisms for adjustment anddamaged parts;(4)(5) Lubrication of allelement(s), hydraulic oil,by the manufacturer;(6) Visual inspection of structural and other criticalcomponents such as fasteners, pins, shafts and lockingdevices;(7) Placard, warnings and control markings;(8) Additional items specified by the manufacturer.The owner shall not place the aerial platform into service until allmalfunctions and problems have been corrected.6.7 Annual inspection. The owner of an aerial platform shallensure that an annual inspection is performed on the aerialplatform no later than thirteen (13) months from the date of theprior annual inspection. The inspection shall be performed by aperson(s) qualified as a mechanic on the specific make and modelof the aerial platform or one having similar design characteristics.The inspection shall be in accordance with items specified by the5manufacturer (remanufacturer) for an annual inspection. Theowner shall not place the aerial platform into service until allmalfunctions and problems have been corrected.6.8 Maintenance safety precautions. Before adjustments andrepairs are started on an aerial platform, the following precautionsshall be taken as applicable:(1) Power plant stopped and starting means renderedinoperative;(2) All controls in the "off position and all operating systemssecured from inadvertent motion by brakes, blocks, or othermeans;(3) Elevating assembly and platform lowered to the full downposition, if possible, or otherwise secured by blocking orcribbing to prevent dropping;(4) oil pressure relieved from all hydraulic circuitsor removing hydraulic components;or latches installed where applicable asWhen parts or components areshall be identical or equivalent to original aerialnnlOVf~eshall train theirof the6.11 of this standard.Whenever an owner directs orto operate an aerial platform (loading,responsibilities of the user as specified in Section 7 of this(1) Trained.(2) Familiarized with the aerial platform to be operated.(3) Made aware of the responsibilities of operators as outlined inSection 8 of this Standard.6.11.2 Assistance to user. Upon request of the user, when anowner leases, rents or provides an aerial platform for any form ofbeneficial use, the owner at that time shall offer to do training oradvise the user where training may reasonably be secured.6.12 Familiarization upon delivery. Upon delivery for lease,rental or any form of beneficial use, the owner shall have theresponsibility with the person designated by the receiving entityfor accepting the aerial platform to:(1) Identify the weather resistant compartment (for manualstorage).(2) Confirm that the manuals, as specified by the manufacturer,are on the aerial platform.
RESPONSIBILITIES MANUALReprint from ANSIISIA A92.6 2006(3) Review control functions with the operator or person(s)designated by the user.(4) Review safety devices specific to the model aerial platformbeing delivered.6.13 Operation. When an owner operates an aerial platform,the owner shall have the responsibilities of users as specified inSection 7 of this standard and his operating personnel shall haveresponsibilities of operators as specified in Section 8 of thisstandard.6.14 Assistance to users and operators. If an owner is unableto answer a user's or operator's question(s) relating to ratedcapacity, intended use, maintenance, repair, inspection, oroperation of the aerial platform, the owner shall obtain the properinformation from the dealer or manufacturer and provide thatinformation to the user or operator.6.15 Record retention and dissemination.6.15.1 Record retention. The owner shall date and retain thefollowing records for at least 4 years:(1) Name and address of the purchaser of each aerialby serial number and date of delivery.(2) Written records of the frequent and annual inspections(3)repairs performed.found, corrective actionthe person(s) np,'fnrTni"ncr'platform.the repairs.The record shall(4) Pre-delivery preparation performed prior to each(5) Name of the person(s) trained.(6) Name ofperson(s) nrnvitiincr(7) Name of person(s)6.15.3 Record dissemination. Upon request, an owneraccomplishing training and/or familiarization shall provide thefollowing:(1) to a user, proof of training for an operator, including name oftrainer and date of training;(2) to a user, the name of the person(s) receiving familiarizationupon delivery ofthe aerial platform.6.16 Modifications. Modification, alteration or remanufactureof an aerial platform shall be made only with prior writtenpermission of the manufacturer (remanufacturer).Should themanufacturer (remanufacturer) no longer exist, a qualified personmay approve such modifications. All modifications shall meetthe applicable manufacturer's requirements as specified in section4 (Responsibilities of manufacturers) of this Standard.6.17 Safety Bulletins. The owner shallbulletins as received from theor the dealerUpon sale of the aerialupon delivery, ensure the operating and maintenancecurrent Manual ofUsers, Lessors,Elevating Workand parts manuals to the new owner.the request of the new owner, offer to do trainingwhere training may reasonably be obtained.RESPONSIBILITIES OF USERS.on the same model, or onewith the one being delivered,(8) Name ofperson(s) providing familiarization upon delivery.6.15.2 Proof of training. Owners providing training shouldprovide successful trainees a means to evidence their training andshall provide such proof if requested by the trainee.Thedocument evidencing training shall include the followinginformation:(1) Name of trainee(2) Name of entity providing training or retraining.(3) Name oftrainer(s).(4) Clear identification that training covered Self PropelledElevating Work Platforms.(5) Date of training67.1 Basic principles. The information in this standard must besupplemented by good job management, safety control, and theapplication of sound principles of safety, training, inspection,maintenance, application, and operation, consistent with all dataavailable regarding the parameters of intended use and expectedenvironment. Since the user has direct control over theapplication and operation of aerial platforms, conformance withgood safety practices in this area is the responsibility of the userand the operating personnel, including the operator. Decisions onthe use and operation of the aerial platform must always be madewith due consideration for the fact that the aerial platform will becarrying personnel whose safety is dependent on those decisions.7.2 Manuals.7.2.1 Machine manuals. Users shall keep and maintain acopy(ies) of the operating and maintenance manual(s) in the
RESPONSIBILITIES MANUALReprint from ANSIISIA A92.6 2006weather resistant storage compartment provided by themanufacturer. The manual(s) is considered an integral part of theaerial platform and is vital to communicate necessary safetyinformation to users and operators.7.2.2 Manual of Responsibilities. The current Manual ofResponsibilities for Dealers, Owners, Users, Operators, Lessors,Lessees, and Brokers of Self-Propelled Elevating Work Platformsshall be provided and stored in the weather resistant storagecompartment.7.3 Inspection and maintenance. Users shall inspect andmaintain the aerial platform as required to ensure properoperation. The frequency of inspection and maintenance shall bein accordance with the manufacturer's recommendations takinginto account the environment of the work place and the severityof use of the aerial platform. Aerial platforms that are not inproper operating condition shall be immediately removed fromservice until repaired. Repairs shall be made by a qualifiedperson and the repairs shall be in conformance with themanufacturer's recommendations.7.3.1 Frequent inspection. Users of an aerial nl!,tTn1mensure that frequent inspections are conducted asSection 6.6 of this standard.7.3.2 Annual inspection.ensure that annual7.3.3 Prestart inspection.beginning of each shift, the aerial shall be given a visuainspection and functional test including but not limited to thfollowing:(1) Operating and emergency controls.(2) Safety devices.(3)(4) Cables and wiring(5) Loose or missing parts.(6) Tires and wheels.(7) Placards, warnings, control markings, and operatingmanual(s).(8) Outriggers, stabilizers, and other structures.(9) Guardrail system.(10) Items specified by the manufacturer.7.3.4 Maintenance safety precautions. Before adjustmentsand repairs are started on an aerial platform, the followingprecautions shall be taken as applicable:(1) Powerplant stopped and starting means rendered inoperative;(2) All controls in the "Off' position and all operating systemssecured from inadvertent motion by brakes, blocks, or othermeans;7(3) Elevating assembly and platform lowered to the full downposition, if possible, or otherwise secured by blocking orcribbing to prevent dropping;(4) Hydraulic oil pressure relieved from all hydraulic circuitsbefore loosening or removing hydraulic components;(5) Safety props or latches installed where applicable asprescribed by the manufacturer (remanufacturer);(6) Precautions specified by the manufacturer (remanufacturer).7.4 Replacement parts. When parts or components arereplaced, they shall be identical or equivalent to original aerialplatform parts or components.7.5 Maintenance training. The user shall ensure only qualifiedpersonnel inspect and maintain the aerial platform in accordancewith the manufacturer's (remanufacturer's) recommendations and7.4 of this standard.and retraining. Whenever a user directsindividual to operate an aerial platform the userbeing assigned to operate the aerial platform.with the aerial platform to be operated.as outlined inobservation andof the trainee's aerial platformbefore use. The user shall permit onlypersonnel to operate an aerial platform. The userensure that before use the operator is familiar with themodel of the aerial platform to be operated, and specifically:(1) knows where the weather resistant compartment for manualstorage is located.(2) knows the operating and maintenance manuals supplied bythe manufacturer (remanufacturer) are stored in the weatherresistant compartment and is familiar with the operating andsafety manuals.(3) understands all control functions, placards and warnings.(4) is aware of and understands all safety devices specific to themodel aerial platform being used.7.8 Workplace inspection. Before the aerial platform is usedand during use, the user shall check the area in which the aerialplatform is to be used for possible hazards such as, but not limitedto:(1) Drop-offs or holes, including those concealed by water, ice,mud, etc.(2) Slope(s).(3) Bumps and floor obstructions.(4) Debris.
RESPONSIBILITIES MANUALReprint from ANSIISIA A92.6 2006(5) Overhead obstructions and high voltage conductors.(6) Hazardous locations and atmospheres (referenceANSIINFP A 505-1996).(7) Inadequate surface and support to withstand all load forcesimposed by the aerial platform in all operatingconfigurations.(8) Wind and weather conditions.(7) Presence of unauthorized persons.(8) Other possible unsafe conditions.7.9 Determination of hazardous locations. It shall be theresponsibility of the user to determine the hazard classification ofthe intended location of operation. Aerial platforms operated inhazardous locations shall be approved in accordance with, and ofthe type required, by ANSIINFPA 505-1996.7.10 Operator warnings and instructions. The user shalldirect personnel operating the aerial platform to be in compliancewith the provisions set forth in section 8 of this standard. Theuser shall monitor their performance and supervise their work toensure the use, application and operation of the aerial n1l1lttnrmin conformance with the provisions set forth in thiswarn personnel of potential hazards, provide means toagainst identified hazards, and explain theof not following proper operatingguidelines regarding propernecessarily be limited to the(1) Fall protection. The guardrailprovides fall protection. Ifrequired to wear personal fall protection equipment (PFPE),aerial platform manufactureranchorage( s).(2) Slope and grade. Thein any manner on grades,those for which the aerialmanufacturer (remanufacturer).(3) Deployment of stability enhancing means. Outriggers,stabilizers, extendible axles, oscillating axles or otherstability enhancing means shall be deployed and locked intoplace as required by the manufacturer (remanufacturer).(4) Guardrail system. Guardrails shall be installed andpositioned, and access gates or openings shall be closed perthe manufacturer's (remanufacturer's) instructions.(5) Distribution of load. The load and its distribution on theplatform and any platform extension( s) shall be inaccordance with the manufacturer's (remanufacturer's) ratedcapacity for that specific configuration.(6) Maintain overhead clearance. The operator shall beinstructed to ensure that adequate clearance is maintained8from overhead obstructions and energized electricalconductors and parts.(7) Electrocution hazard. All applicable safety related workpractices intended to prevent electric shock covered by theCode of Federal Regulations (CFR) 1910.333 shall bedefined and explained to the operator by a qualified person.In particular, such person shall direct the operator,commensurate with the operator's qualifications, to maintainthe appropriate minimum approach distance (MAD) fromenergized power lines and parts covered by CFR 1910.333(c).(8) Personal protective equipment (PPE). The user shalldirect the operator to ensure all personnel on the platformwear personal protective equipment (PPE) as required.(9)floor while working thereon. Climbing bymidrail or toprail of the aerial platform isof planks, ladders, or any other devicesfor achieving additional height or reach isWhen otherlocal ordinances orthe workplace. Warningsroped off areas, flashingbe used as appropriate.or malfunctions. The user shall directto immediately report to a supervisor anyor malfunction(s) that become evident duringoperation. The user shall ensure all problems andmalfunctions are repaired prior to continued use.(12) Reporting potentially hazardous locations. The user shalldirect the operator to immediately report to a supervisor anypotentially hazardous location(s) that become evident duringoperation.(13) Hazardous location operation. Operation of aerialplatforms not approved and marked for operation in ahazardous location shall be prohibited.(14) Entanglement. Care shall be taken to prevent rope,electric cords, and hoses, etc., from becoming entangled inthe aerial platform.(15) Capacity limitations. Rated capacities shall not beexceeded when loads are transferred to the platform at anyheight.(16) Work area. The user shall direct the operator to ensurethe area surrounding the aerial platform is clear of personneland equipment before lowering the platform.
RESPONSIBILITIES MANUALReprint from ANSIISIA A92.6 2006(17) Fueling. The engine (if applicable) shall be shut downwhile fuel tanks are being filled. Fueling shall be done in awell-ventilated area free of flame, sparks, or other hazardsthat may cause fire or explosion.(18) Battery charging. Batteries shall only be charged in awell-ventilated area free of flame, sparks, or other hazardsthat may cause fire or explosion.(19) Improper platform stabilization. The aerial platformshall not be positioned against another object to steady theplatform or improve stability.(20) Misuse as a crane. The aerial platform shall not be usedas a crane.(21) Unusual operating support conditions. The aerialplatform shall not be operated from a position on trucks,trailers, railway cars, floating vessels, scaffolds, or similarequipment unless the application is approved in writing bythe manufacturer (remanufacturer) or a qualified person.(22) Travel speeds. The user shall direct the operator to limittravel speed according to conditions, including the l'.ntul,t,nnof the support surface, congestion, visibility, slope,of personnel, and other factors leading to hazards whichcause collision(s) or resultpersonnel.(23) Driving requirements.aerial platform, the user shall(a) Maintain a clear view ofof travel.(b) Ensure personnel in the worksite area thataffected are aware of the movement, cornmumc~and maneuvering the aerial platform(c) Maintain a safe distanceoffs, holes, depressions,ensure safe travel.(d) Maintain a safe distanceobstacles andenergized electrical conductors.(24) Stunt driving. The user shall inform the operator that stuntdriving and horseplay are prohibited.(25) Securing the aerial platform. The user shall direct theoperator to implement means provided to protect against useby an unauthorized person(s).(26) Altering safety devices. Interlocks or other safety devicesshall not be altered or disabled.(27) Snagged platform. If the platform/basket or supportingassembly becomes caught, snagged, or otherwise preventedfrom normal motion by adjacent structures or other obstaclessuch that control reversal does not free the platform, allpersonnel shall be removed from the platform/basket beforeattempts are made to free the platform using lower controls.(28) Vacating (or entering) an elevated aerial platform. Ifpermitted by the manufacturer, personnel shall only vacateor enter a raised aerial platform by following the guidelinesand instructions provided by the manufacturer(remanufacturer ).(29) Modifications. Modification or alteration of an aerialplatform or the fabrication and attaching of frameworks, orthe mounting of attachments for holding tools or materialsonto the platform or the guardrail system shall only beaccomplished with the prior written permission of themanufacturer (remanufacturer). Should the manufacturer(remanufacturer) no longer exist, a qualified person maymodifications. All modifications shall meetmanufacturer's requirements as specified inof manufacturers) of thisoperator. If an operator encounters anymalfunction of the aerial platform, or any hazardrequest furtherAny problem(s) oruse of the aerial platform.(larger than the platform.) The userensure that only tools and materials which are evenlydistributed and can be safely handled by a person(s) workingfrom the platform are transported.(33) Rated horizontal force. The user shall direct the operatornot to exceed the manufacturer's (remanufacturer's) ratedhorizontal force.(34) Bridge cranes. When an aerial platform is to operate withinthe area of travel of a bridge crane or similar equipment,steps shall be taken to prevent a collision with the aerialplatform.(35) Adequate support requirements. The user shall insure thesupport surface is adequate for the aerial platform and theload carried.(36) Leveling the aerial platform. Outriggers and levelingdevices supplied by the manufacturer (remanufacturer) shallbe utilized to level the aerial platform when provided.(37) Protecting against unauthorized use. The user shall directthe operator not to use, rent, lease, or provide the aerialplatform for any form of beneficial use unless so authorized.9
RESPONSIBILITIES MANUALReprint from ANSI/SIA A92.6 20067.11 User as Operator. If a user is also the operator of anaerial platform, the user shall have the responsibilities ofoperators specified in Section 8 of this standard as well asresponsibilities of users as specified in Section 7 of this standard.7.12 Shutdown of aerial platform. The user shall authorizeand direct the operating personnel to cease operation of the aerialplatform in case of any suspected malfunctions of the aerialplatform, or any hazard or potentially unsafe condition that maybe encountered, and to request further information as to safeoperation from the owner, dealer, or manufacturer before furtheroperation of the aerial platform.7.13 Record retention and dissemination.7.13.1 Record retention. The user shall retain the followingrecords for at least 4 years:(1) Names of the operator(s) trained and retrained.(2) Names of operator(s) provided familiarization.(3) The owner (or the entity designated by the owner) isresponsible to ensure frequent and annual inspections areconducted and written records are maintained. Theshall include the date of the inspection, anyfound, the corrective action recommended and ,'u '"l1IU'''of the person(s) performing the inspection.(4) When employees of the userplatform, the user shallshall include the dateaccomplished, and ide:ntiticlthe repair.7.13.2 Record dissemination(1 ) When the user directs personnel to accomplish(2)annual inspections, not later than 60inspections. the appropriateowner of the aerial nl
RESPONSIBILITIES MANUAL(9) Outriggers, stabilizers and other structures.(10) Guardrail system.(11)Items specified by the manufacturer (remanufacturer).8.4 Problems or malfunctions. Any problems or malfunctionsthat affect the safety of operations shall be repaired prior to theuse of the aerial platform.8.5 Training, retraining, and familiarization.8.5.1 General training. Only personnel who have receivedgeneral instructions regarding the inspection, application andoperation of aerial platforms, including recognition andavoidance of hazards associated with their operation, shalloperate an aerial platform. Such items covered shall include, butnot necessarily be limited to, the following issues andrequirements:(1) The purpose and use of manuals.(2) That operating manuals are an integral part of the aerialplatform and must be stored properly in the weather resistantcompartment when not in use.(3) A pre-start inspection.(4) Responsibilities associated with problems or malfunctionsaffecting the operation of the aerial platform.(5) Factors affecting stability.(6) The purpose of placards and decals.(7) Workplace inspection.(8) Safety rules and regulations.(9) Authorization to operate.(10) Operator warnings and instructions.(11) Actual operation of the aerial platform.of a qualified person, theplatform for a sufficientproficiency in the actual8.5.2 Retraining. The op~~ratlordirected by the user, basedevaluation of the operator.8.5.3 Familiarization. When an operator is directed toan aerial platform he/she is not familiar with, thereceive instructions regarding the following items:(1) The location of the weather resistantmanual storage).(2) The purpose and function of(3) Safety devices and operatingaerial platform.8.6 Before operation. Before(1) Read and understand the ma:nufacnrrel"S (remanufacturer's)operating instruction(s) and user's safety rules or have themexplained.(2) Understand all labels, warnings and instructions displayed onthe aerial platform or have them explained.(3) Ensure all occupants of the aerial platform wear appropriatepersonal protection equipment (PPE) for the conditions,including the environment in which the aerial platform willbe operated.8.7 Workplace inspection. Before the aerial platform is usedand during use, the operator shall check the area in which theaerial platform is to be used for possible hazards such as, but notlimited to:Reprint from ANSIISIA A92.6 2006(1) Drop-offs or holes, including those concealed by water, ice,mud, etc.(2) Slope(s).(3) Bumps and floor obstructions.(4) Debris.(5) Overhead obstructions and electrical conductors.(6) Hazardous locations and atmospheres (referenceANSIINFP A 505-1995).(7) Inadequate surface and support to withstand all load forcesimposed by the aerial platform in all operatingconfigurations.(8) Wind and weather conditions.(9) Presence of unauthorized persons.(10) Other possible unsafe conditions.8.8 Prior to each elevation. Before each elevation of theplatform, the operator shall ensure:extendible axles, or other stabilityare used as required by the manufacturer.I-ll:>'Ci1U"U and access gates or openings arei1Rl':hlrpr'" (remanufacturer' s) instructions.its distribution on the platform and anyextension(s) are in accordance with the;,rh:1rPl""rated capacity for thatspecific configuration.All personnel on thegear for the workto understand the hazardlocation of operation according towarnings and instructions. The operator shalloperation of the aerial platform is in compliance withFall protection. The guardrail system of the aerial platformprovides fall protection. If occupant(s) of the platform arerequired to wear personal fall protection equipment (PFPE),occupants shall comply with instructions provided by theaerial platform manufacturer (remanufacturer) regardinganchorage( s).(2) Slope and grade. The aerial platform shall not be operatedin any manner on grades, side slopes or ramps exceedingthose for which the aerial platform is rated by themanufacturer (remanufacturer).(3) Deployment of stability enhancing means. Outriggers,stabilizers, extendible axles, oscillating axles or otherstability enhancing means shall be deployed and locked intoplace as required by the manufacturer (remanufacturer).(4) Guardrail system. Guardrails shall be installed andpositioned, and access gates or openings shall be closed perthe manufacturer's (remanufacturer's) instructions.(5) Distribution of load. The load and its distribution on theplatform and any platform extension(s) shall be inaccordance with the manufacturer's rated capacity for thatspecific configuration,(6) Maintaining overhead clearance. The operator shallensure that adequate clearance is maintained from overheadobstructions and energized electrical conductors and parts.11
RESPONSIBILITIES MANUAL(7) Electrocution hazard. The operator shall perfonn only thatwork for which he or she is qualified, in compliance with allapplicable safety related work practices intended to preventelectric shock covered by the Code of Federal Regulations(CFR) 1910.333. The operator's level of competence shallbe established only by persons qualified to do so. Operatorsshall maintain the appropriate minimum approach distance(MAD) from energized power lines and parts covered byCFR 1910.333 (c).(8) Personal protective equipment (PPE). The operator shallensure all occupants of the platfonn wear personal protectiveequipment as required.(9) Personnel footing. Personnel shall maintain finn footing onthe platfonn floor while working thereon. Climbing byoccupants on the midrail or toprail of the aerial platfonn isprohibited. The use of planks, ladders, or any other deviceson the platfonn for achieving additional height or reach isprohibited~(10) Precaution for other moving equipment. When othermoving equipment and vehicles are present, specialprecautions shall be taken to comply with local ordinancessafety standards established for the workplace.such as, but not limited to, flags, roped off areas,lights, and barricades shall be used as appropriate.(11) Reporting problems or malfunctions. The operatorimmediately report to a supervisormalfunction(s) that becomeoperator shall ensureaffect the safety ofuse.(12) Reporting potentiallyshall immediately report tosupervisorhazardous location(s) that become evident during UI.II'''I!''uu(13) Hazardous location operation. Operationmarked forhazardous location shall be(14) Entanglement. Carecords, and hoses, etc.,platfonn.(15) Capacity limitations.exceeded when loads areheight.(16) Work area. The operator shall ensure the area surroundingthe aerial platfonn is clear of personnel and equipmentbefore lowering the platfonn.(17) Fueling. The engine (if applicable) shall be shut down whilefuel tanks are being filled. Fueling shall be done in a wellventilatedarea free of flame, sparks, or other hazards thatmay cause fire or explosion.(18) Battery charging. Batteries shall only be charged in a wellventilatedarea free of flame, sparks, or other hazards thatmay cause fire or explosion.(19) Improper platform stabilization. The aerial platfonn shallnot be positioned against another object to steady theplatfonn or improve stability.(20) Misuse as a crane. The aerial platfonn shall not be used asa crane.12Reprint from ANSIISIA A92.6 2006(21) Unusual operating support conditions. The aerialplatfonn shall not be operated from a position on trucks,trailers, railway cars, floating vessels, scaffolds, or similarequipment unless the application is approved in writing bythe manufacturer (remanufacturer) or a qualified person.(22) Travel speeds. The operator shall limit travel speedaccording to conditions, including the condition of thesupport surface, congestion, visibility, slope, location ofpersonnel, and other factors leading to hazards which maycause collision(s) or result in potential injury(ies) topersonnel.(23) Driving requirements. Before and during driving the aerialplatfonn, the operator shall:(a) Maintain a clear view of the support surface and routeof travel.(b) Ensure personnel in the worksite area that may beaffected are aware of the movement, communicatingand maneuvering the aerial platfonn as required toagainst personal injury.a safe distance from obstacles, debris, dropdepressions,ramps, and other hazards totravel.a safe distance from overhead obstacles andmergl;led electrical conductors.driving. Stunt driving and horseplay are prohibited.Securing the aerialThe operator shallimplement meansagainst use by anunauthorized(26) Alteringshall notor other safety devices(27) ISnal2geam platformibasket or supportingsnagged, or otherwise preventedby adjacent structures or other obstaclescontrol reversal does not free the platfonn, allshall be removed from the platformibasket before"tt,·...,."tQ are made to free the platfonn using lower controls.Vacating (or entering) an elevated aerial platform. Ifpennitted by the manufacturer, personnel shall only vacateor enter a raised aerial platfonn by following the guidelinesand instructions provided by the manufacturer(remanufacturer).(29) Modifications. Modification or alteration of an aerialplatfonn or the fabrication and attaching of frameworks, orthe mounting of attachments for holding tools or materialsonto the platfonn or the guardrail system shall only beaccomplished with the prior written pennission of themanufacturer (remanufacturer). Should the manufacturer(remanufacturer) no longer exist, a qualified person mayapprove such modifications. All modifications shall meetthe applicable manufacturer's requirements as specified insection 4 (Responsibilities of manufacturers) of thisStandard.(30) Assistance to the operator. If an operator encounters anysuspected malfunction of the aerial platfonn, or any hazardor potentially unsafe condition relating to capacity, intendeduse or safe operation of the aerial platfonn, the operator shallcease operation of the aerial platfonn and request furtherinfonnation from the user.
RESPONsmILITIES MANUALReprint from ANSIISIA A92.6 2006(31) Problem(s) or malfunction(s). Any problems ormalfunctions that affect the safety of operations shall berepaired prior to the use of the aerial platform.(32) Carrying materials (larger than the platform.) Theoperator shall ensure only tools and materials which areevenly distributed and can be safely handled by a person(s)working from the platform, shall be transported.(33) Rated horizontal force. The operator shall not permitpersonnel on the platform to exceed the manufacturer's(remanufacturer's) rated horizontal force.(34) Bridge cranes. When an aerial platform is to operate withinthe area of travel of a bridge crane or similar equipment,steps shall be taken to prevent a collision with the aerialplatform.(35) Adequate support requirements. The operator shall ensurethe support surface is adequate for the aerial platform and theload carried.(36) Leveling the aerial platform. Outriggers and levelingdevices supplied by the manufacturer shall be utilized tolevel the aerial platform when provided.(37) Protecting against unauthorized use. The operator shallnot use, rent, lease, or provide the aerial platformform of beneficial use to another entityauthorization of the user.8.11 Record of training. When provided or when obtainedthe operator's request, proof of trainingentity should be retained by thethe following information:(1) Name of trainee.(2) Name of entity providing(3) Name oftrainer(s).(4) Clear identification thatElevating Work Platforms.(5) Date of training.9.4 Lessor as a user. When a lessor is the user of the aerialplatform, the lessor shall have the responsibilities of users asspecified in Section 7 of this standard.9.5 Lessor as an operator. When a lessor is the operator of theaerial platform, the lessor shall have the responsibilities ofoperators as specified in Section 8 of this standard.110. RESPONSIBILITIES OF LESSEES.10.1 Basic principles. Sound principles of safety, training,inspection, maintenance, application, and operation consistentwith all data available regarding the parameters of intended useand expected environment shall be applied in the performance ofof lessees with due consideration of thethe aerial platform will be carrying personnel.a Dealer. When a lessee is also the dealer for theof the aerial platform, the lesseeJll"lUllllU
Figure 1 - Typical Examples of Equipment Covered
TIME CONDOR CorporationSELF-PROPELLEDELEVATING WORK PLATFORM<strong>MODEL</strong> <strong><strong>V2648</strong>XL</strong>, <strong>V2648</strong>Serial Number X51597001<strong>MODEL</strong> V2653XL, V2653Serial Number X53597001ILLUSTRATED PARTS MANUALSHIPPING ADDRESSCONDOR®TIME CONDOR Corporation8300 IMPERIAL DRIVEVVAco,TEXAs76712(254) 420-5200MAILING ADDRESSCONDOR®TIME CONDOR CorporationP.O. Box 21447VVACO, TEXAS 76702-1447(254) 420-5200MANUAL 92357-003JUNE 1997
INTRODUCTIONiThe primary purpose of this manual is to provide the user with a thorough understanding of theproper operating procedures necessary to comply with the intended use of the CONDOR®, and toprovide the information necessary to maintain and service the CONDOR®.THEOPERATOR'SMANUALMUSTBERETAINEDONTHECONDOR®ATALLT1MES.Do not attempt to operate or service the CONDOR® until you have read andunderstood all information provided in this manual. Familiarize yourself withthe functions and operations of the upper and lower controls. A goodunderstanding of the controls, their limitations, and their capabilities willmaximize operating efficiency. The various decals attached to this CONDOR®also contain vital operational instructions. Read the decals before operatingthis CONDOR®.It is YOUR RESPONSIBILITY to follow procedures while operating the CONDOR®.The manufacturer of this CONDOR® cannot control the wide range of applications that may be usedin carrying out a variety of jobs. Therefore, it is THE USER'S RESPONSIBILITY to consider allpersonnel when making decisions regarding the CONDOR®'s intended use.It is also YOUR RESPONSIBILITY to understand and obey all federal, state, and local regulationsregarding the operation and use of aerial work platforms. A copy of the ANSIISIA 92.6-1990 Manualof Responsibilities is attached for your use.TIME CONDOR Corporation reserves the right to modify, improve, add, andlor delete certain designfeatures of its products without any obligation to incorporate new features into products previouslysold. Our manuals are continually updated to reflect these changes.DO NOT ALTER OR MODIFY THIS CONDOR® WITHOUT PRIOR WRITTEN APPROVALFROM THE MANAGEMENT OF T1ME CONDOR CORPORATIONSERVICE & MAINTENANCEMany of the parts used in the manufacture of the CONDOR® have specific properties, and themanufacturer recommends that replacement parts be purchased through TIME CONDOR Corporationin order to ensure the original integrity of the product. Repairs and adjustments should only be madeby trained and qualified personnel. Please refer to the maintenance and parts sections of the TIMECONDOR Corporation Operation, Maintenance, & Parts Manual for information on service andmaintenance of the CONDOR®.NOTE:Please refer to the TIME CONDOR Corporation Parts section of the Operation, Maintenance,& Parts Manual for information pertaining to your machine.MANUAL 92357-003JUNE 1997
iiA div. of TIME Manufacturing CompanyCONDOR® SERVICE INFORMATION1. If you need assistance or have any service or maintenance questions, TIME CONDOR Corporationservice and parts personnel are always available by phone or fax. The telephonenumbers are:(254) 420-5200 Telephone(254) 420-5298 Voice Mail(800) 443-5803 FAX2. There are numerous written Maintenance Procedures available for this CONDOR®.These procedures are available through the TIME CONDOR Corporation Service Departmentto anyone who requests them.3. Service and maintenance are not a substitute fortrained, qualified service technicians.TIME CONDOR Corporation conducts service schools on a continuing basis. Call any ofour service or sales persons for a schedule. Remember, training of mechanics is the responsibility oftheir employer, but TIME CONDOR Corporation Service Schools help you providethis training.pro-4. TIME CONDOR CorporationService School Training Manuals are available for purchasethrough the parts department. The part numbers for these manuals are: #92333 for selfpelledmodelsand #92334 fortruck-mounted models.CONDOR DIVISION8300IMPERIALDRlVE,P.O.Box21447, WACO, TEXAS 76702-1447 254-420-52005,254-443-5803 FAX0
CONDOR® <strong>MODEL</strong> <strong>V2648</strong>/S3 & <strong>V2648</strong>/S3XLILLUSTRATEDPARTS~UALTABLE OF CONTENTS•INTRODUCTION ............................................................................................................. iSERVICE INFORMATION ............................................................................................ iiSERIAL NUMBER TO <strong>MODEL</strong> DESIGNATION •••••••.••.•••.•••••••••••••••••.••••••.•.••.••.••••••• iiiTABLE OF CONTENTS ................................................................................................. 1FIGURE DESCRIPTION PAGEA ............................................... Serial Number Location ............................................... 2B ............................................... Recommended Spare Parts List ................................... 3C ............................................... How to Order Parts .................................................. 4,51 ............................................... Final Installation ........................................................... 62 ...................................... ~ ........ Deca1Installation ......................................................... 83 ............................................... Chassis Assembly ..................... ........ ....... ........ ..... ..... 104 ............................................... -Hose Kit .................................................................. 145 ............................................... -Steer Cylinder .......................................................... 166 ............................................... -Brake Cylinder ......................................................... 177 ............................................... -Hub Motor Assembly................ ..... ...... ...... ........ ...... 188 ............................................... - Rear Hub Assembly ................................................ 199 ............................................... Belly Pan Assembly ................................................... 2010 ............................................... Motor & Pump Assembly .......................................... 22II ............................................... Pump Assembly ......................................................... 2312 ........................................ · ....... Motor24VDCAssembly .......................................... ·2413 ............................................... Valve Installation ....................................................... 2614 ............................................... ChargerI15V/60Hz-25A124VDC ............................ 3015 ............................................... WrringInstallation ...................................................... 3416 ............................................... Lower Control Box Assembly .................................... 3617 ............................................... AnnstackAssembly ................................................... 4418 ............................................... PlatformInstallation ................................................... 5019 ............................................... Upper Control Box Assembly .................................... 5220 ............................................... 110VoitExtensionToPIatform ................................. 5621 ............................................... TraveIAlarm(Option) ............................................... 5722 ............................................... MotionAlarm(Option) .............................................. 5823 ............................................... StrobeLight(Option) ................................................ 5924 ............................................... Descend Alarm (Option) ................................ ; ........... 6025 ............................................... SlopeAlarm(Option) ................................................ 6126 ............................................... Hour Meter (XL-Option) ........................................... 6227 ............................................... Battery Condition Indicator (XL-Option) ................... 6328 ............................................... Low-Voltage Warning Interrupt (XL-Option) ............. 6429 ............................................... Larger Batteries IPOS (XL-Option) ........................... 65MANUAL 92351-003JUNE 1991
• FIGURE A-Serial Number LocationTheCONDOR® Model <strong>V2648</strong>/53 & <strong>V2648</strong>/53XL Serial Number is stamped in two locations on the machine.1. The first place to find the serial number is on the data plate affixed to thechassis, at the rear between fork lift pockets.2. The second place to find the serial number is at the front steering knuckle kingpin.MANUAL 92357-003JUNE 1997
FIGURE B-Recommended Spare Parts List •CONDOR®<strong>MODEL</strong> <strong>V2648</strong>/53 & <strong>V2648</strong>/53 XL (I UNIT-I YEAR OPERATION)PARTNUMBERDESCRIPTION<strong>V2648</strong>/53QTY<strong>V2648</strong>/53XLQTY91029 .................................. NutLug 1/2" ••••••••••••••••••••••••••••••••••••••••••••••••••••••• 5 ......................... 555363-001 ........................... Stud Wheel 112"-20 xl 3/4" ............................. 5 ......................... 5~ 54783-002 ........................... Cable Assembly, Emergency Lowering ............ 1 ......................... 154798 .................................. Coupling Nut, 10-32 UNF ................................. 1 ......................... 154048 .................................. Latch Door ........................................................ 1 ......................... 167408 .................................. Element, Hydraulic Filter PIN 33430 ................ 5 ......................... 536085 .................................. Fitting, Swivel 90° Elbow 6-6 ........................... 2 ......................... 251036 .................................. Switch Limit Body Only ................................... 1 ......................... 151037 .................................. Offset Head Limit Switch ................................. 1 ......................... 151039-002 ........................... Limit Switch, Arm Short ................................... 1 ......................... 167939-015 ........................... Fuse, 15 Amp .................................................... 1 ......................... 167940 .................................. Fuse Holder ....................................................... 5 ......................... 552138 .................................. Solenoid 24V ..................................................... 1 ......................... 1206-00001-00 ...................... Diode ................................................................. 9 ......................... 954438 .................................. Relay, 24V SPDT Bosch ................................... 1 ......................... 134542 .................................. Jumper ............................................................... 4 ......................... 455999-005 ........................... Decal Installation, <strong>V2648</strong> .................................. 1 .......................... .55999-105 ........................... Decals, <strong>V2648</strong> Essentials .................................. 1 .......................... .55999-007 ........................... Decal Installation, V2653 ............................................................... 155999-107 ........................... Decals, V2653 Essentials ............................................................... I55884 .................................. Hose Kit ............................................................ 1 ......................... 167758 .................................. Toggle Switch ............................................... : ... 1 .......................... .50075 .................................. Switch ............................................................... 2 ......................... 251913 .................................. Operator,RedP-Pull ......................................... 1 ......................... 151914 .................................. Base, 1 NC Contact ........................................... 1 ......................... 152671 .................................. Operator, 3 Pos Key .......................................... 1 .......................... .52029 .................................. Base, 2 NO Contacts ......................................... 1 ..................... .... 155333 .................................. Charger .............................................................. 1 ......................... 155471 .................................. Plunger, Hand Retract Spring ........................................................ 355241 .................................. Spring Loaded Pull-Up Latch ........................................................ 354589 .................................. Controller, Drive/Steer ................................................................... 155999-006 ........................... Decal Installation, <strong><strong>V2648</strong>XL</strong> ........................................................ , 155999-106 ........................... Decals, <strong><strong>V2648</strong>XL</strong> Essentials .......................................................... 155999-008 ........................... Decal Installation, V2653XL ......................................................... 155999-108 ........................... Decals, V2653XL Essentials .......................................................... 155243 .................................. Spring-Deck Latch ......................................................................... 154910-102 ........................... Receptacle .................................................................. ........... ...... ... 154910-104 ........................... MountingBase ............................................................................... 152670 .................................. Operator, 3 Pos. Rot ....................................................................... 134464 .................................. Base, NOINC Contacts ................................................................... 152669 .................................. Operator, Black P-Button .............................................•................. 152672 .................................. Base, 1 NO Contact ..................... ................. .............................. .... 169146 .................................. Operator, Green P-Button .............................................................. 154913 .................................. Operator, BlackIBlack Db. P-Button .............................................. 1MANUAL 92357-003JUNE 1997
• FIGURE C-How to Order Parts1. When ordering parts for your CONDOR®, ensure that you are able to give the model and serialnumbers of all units for which parts are needed. The serial number( s) will assist the TIMECONDOR Corporation Parts Department in providing the correct parts for your machine(s).Please refer to FIGURE A for Serial Number Location on this model.2. Ifknown, please specify the TIME CONDOR Corporation part number(s) for the part(s) yourequire, and always provide a complete description of all parts.3. Fax orders are preferable, though parts may also be ordered by mail and telephone. A sampleparts order (with fax number) follows this page.4. Parts needed for a warranty repair must be purchased through the TIME CONDOR CorporationParts Department. Credit will be authorized through the Service Department after a WarrantyClaim has been submitted to TIME CONDOR Corporation A Warranty Claim is to be filed forany part received as "defective". See Maintenance Manual for Warranty Procedures.5. TIME CONDOR Corporation will ship parts as per our customers' request at the time of theorder-i.e., UPS, Federal Express, or preferred truck line. When shipping Federal Express, yourcustomer account must be given at the time of the order.6. TIME CONDOR Corporation classifies its orders in the following ways:Emergency(unit out of service) - Top priority. Shipping deadline for emergencyorders to ship same day is 2.00 p.m. Central Standard Time. Anyemergency order received after 2.00 p.m. will be shipped thefollowing day.Order to be shipped within 1 week.7. Condor Div. has a $25.00 Net Minimum Billing charge per order.8. All price quotations will be valid for 90 days.9. Parts shown as shipped on the TIME CONDOR Corporation packing list and subsequent invoicebut not received by the dealer/customer MUST be reported within 10 days after the date ofshipment. If the parts are still required, a NEW parts order must be submitted. Shortages anddiscrepancies will be reviewed on an individual basis by the Parts staff and adjustments will bemade accordingly.10. Invoice discrepancies regarding incorrect prices or discounts should be reported immediately tothe Parts Department. Report the Sales Order number, Purchase Order number, and Invoicenumber. Your request will be reviewed and adjustments will be made accordingly.MANUAL 92357-003JUNE 1997
TIME CONDOR CORPORATION PARTS DEPARTMENTFAX ORDER FORM FAX NO. 800-443-5803•~COUNT#I PURCHASERINAMEC NU FS 0 ADDRESST R0 MM A CITY STATE ZIPE TR I0PHONEFAXN ( ) ( )CUST. PURCHASE ORDER NO.I ORDERDATEJSHIPPING INSTRUCTIONS~AMESALES ORDER #SH~DRESSTI 0P ~ITY STATE ZIPHONEFAX( ) ( )I RE QUEST DATE SPECIAL MARKS & NUMBERSIPART NUMBERQTY.DESCRIPTIONNOTES-'FOR ORDER STATUS PLEASE CHECKAPPROPRIATE BOX BELOWEMERGENCYSTOCKMANUAL 92357.003JUNE 1997
• FIGURE 1: Final Installation72MANUAL 92357-003JUNE 1997
FIGURE 1: Final InStallation.ITEM PART NUMBER DESCRIPTION QTYRef. 55865 ........................... Final Installation <strong>V2648</strong>1XL ............................................................. Ref.Ref. 55917 ........................... Final Installation V26531XL ............................................................ Ref.1 55623 ........................... Chassis Assembly <strong>V2648</strong>1XL ................................................................ 155834 ........................... Chassis Assembly V26531XL ............................................................... 12 55673 ........................... Bellypan Assembly ................................................................................ 13 55744 ........................... ArmstackInstallation ............................................................................. 14 55663 ........................... Platform Assembly ................................................................................ 15 55869-004 .................... Lower Box Assembly ............................................................................ 1-6 55870 ........................... Wiring Installation ................................................................................. 17 55851 ........................... Upper Electrical Box Assembly ............................................................ 1-8 55884 ........................... Hose Kit ................................................................................................. 1-9 67837-007 .................... Tie, Black Nylon .................................................................................. 10-10 54783-002 .................... Emergency Lowering Cable Assembly ................................................. 1-11 ..................................... Hydraulilc Oil Tellus T32 ............................................................... 8GL-12 55807 ........................... Cover Weldment LH Side ..................................................................... 1-13 55768 ........................... Cover Weldment RH Side .................................................................... 114 54048 ........................... Latch Door ............................................................................................. 215 34354 ........................... Holder, Safety Manual- Blk Caps ......................................................... 1-16 67793 ........................... Clamp Cable .......................................................................................... 2-17 BOW31401 .................. Washer, Flat .25 ID x .63 00 ............................................................... 2-18 BOW36780 .................. Nut, Hex Lock .25-20UNC ................................................................... 2-19 92357-001 .................... Operator's Manual ....................................................................................-20 A630-<strong>V2648</strong>-1 ............. Manual M-2648\53-0 1 OIMIP .................................................................-21 ..................................... Nameplate, Scissor Identification .......................................................... 1-22 55999-006 ........ ~ ........... Decal Installation <strong>V2648</strong> ....................................................................... 155999-008 .................... Decal Installation V2653 ....................................................................... 1-23 55883 ........................... 110V Extension to Platform .................................................................. 1-24 55844 ........................... Schematic, Electrical ............................................................................. 1-25 55309 ........................... Schematic, Hydraulic ............................................................................. 1-26 54701 ........................... Block, ArmstackNylatron ..................................................................... 2-27 55279 ........................... Block, HOPE Slide ................................................................................ 2-28 54616-014 .................... Shaft, Arm Pivot 28.38" LG ................................................................. 1-29 54616-015 .................... Shaft, Arm Pivot 40.62" LG ................................................................. 2-30 BOW30037 .................. Bolt, Hex .31-18UNC x 3.00 ................................................................ 4-31 BOW31432 .................. Washer,Flat .31IDx.680D ...............................................................4-32 BOW36273 .................. Nut, Hex Lock 5/J6"-18UNC .................................................................. 4- Indicates Items Not Shown,MANUAL 9nS7-OO3JUNE 1997
• FIGURE 2: Decal Installationo I:!IIillPA.RTlAL SECTION AAPPLIES TO All <strong>MODEL</strong>SMANUAL 92357-003JUNE 1997
FIGURE 2: Decal Installation.ITEM PARTNUMBER DESCRIPTION QTY55999-005 ..................... Decal Installation <strong>V2648</strong> .... ~ ............................................................ Ref.55999-006 ..................... Decal Installation <strong><strong>V2648</strong>XL</strong> ........................................................... Ref.55999-007 ..................... Decal Installation V2653 ................................................................. Ref.55999-008 ..................... Decal Installation V2653XL ........................................................... Ref.*1 55890 ............................ Decal, V Upper Operator's Instructions (<strong>V2648</strong>/53) ................:........... 1155889 ............................ Decal, V XL Upper Operator's Instructions (<strong>V2648</strong>/53XL) ............... 1*2 55894 ............................ Decal, V General Caution ..................................................................... 1*3 54652-003 ..................... Decal, GuardraiVChain Caution ............................................................ 155944-1000 ................... Decal, 1000 Rated Work Load (<strong>V2648</strong>/53XL) .................................... 2~ 55480-001 ..................... Decal, Lower Controls .......................................................................... 1*6 55480-002 ..................... Decal, Lower Operator Instructions ...................................................... I*7 54652-002 ..................... Decal, Ann Stand Caution ..................................................................... 1*8~ 54984-005 ..................... Decal, Rear Bumper .............................................................................. 1*9 66973 ............................ Decal, Electrocution Hazard .................................................................. 2*10 if 55871-001 ..................... Decal, V XL Upper Electrical Box Top ..,............................................. 1Ref*11Sy~-tJO,*121314151617181955856-001 ..................... Decal, V Upper Electrical ~ox Top ...................................................... 155871-002 ..................... Decal, V Upper Electrical Box Front .................................................... I55856-002 ..................... Decal, V XL Upper Electrical Box Front .............................................. 15~8j4 997 ..................... Decal, Hydraulic Fluid .......................................................................... 1 •55940-023 ..................... Decal, CONDOR 3.45 X 23 .................................................................. 256004-006 ..................... Decal, <strong>V2648</strong> ......................................................................................... 256004-008 ..................... Decal, V26531XL .................................................................................. 255941-017 ..................... Decal, Condor "Bird" ............................................................................ 253259 ..........................•. Tape, Non-Skid Jet Black ......................................................•..... 1.50LF66921 ............................ Coating, Non-Skid Jet Black ........................................................ .25GL55999 ............................ Dwg., Decal Installation ........... ~ ............................................................ 154984-006 ..................... Decal, 110 Volt Ext. To Platfonn (<strong>V2648</strong>/53XL) ................................ 131****...................................... Nameplate Scissors Indentification .................................................. Ref.55999-105 ..................... Decal Kit, <strong>V2648</strong> Essential .............................................................. Ref.55999-106 ..................... Decal Kit, <strong><strong>V2648</strong>XL</strong> Essential ......................................................... Ref.55999-107 ..................... Decal Kit, V2653 Essential .............................................................. Ref.55999-108 ..................... Decal Kit, V2653XL Essential ......................................................... Ref.- Indicates Items Not Shown*Indicates Included In Essential Decals........ 111 .. D .... 0 0 0 .. 111 ........ .. .. .. .. .. .. 0tI .... D ............ .. .. .. .. .. .. .... • .. III .... " ...... .. .. .. .. .. .. .... .. • I) ...................... CI .... (10 .......... .... .. .. .. .. .. .. ..co .... D ..........2 1/4 MARGINNO NON-SUPCOATINGPLANVIEW OF<strong>MODEL</strong>S V20/264B/53PARTIAL REAR VIEW Of<strong>MODEL</strong>S V20/2648/S3MANUAL 92357-003JUNE 1997
• FIGURE 3: Chassis Assembly -<strong>V2648</strong>1XL10 PL 27TOP VIEW OF STEERING COMPONENTSSEE NOTE 32 PLTOP VIEW OF REAR AXLESEE NOTE 12 2 PL2 PLNOTES:1. BRAKE RELEASE HANDLES MUST SWINGFREEL Y. DO NOT TIGHTEN BOLTS AND NUTSANY MORE THAN SNUG FIT (2 PL).2. LOCTITE BDLTS INTO STEER KNUCKLES.3. ITEM 38, SPINDLE ASSY, INCLUDES SPINDLE,WASHER, CASTLE NUT, AND COTTER PIN.SPINDLE ASSY IS PART OF CHASSIS WLDMNT.4. EST WT = 1248.D6 LBTOP VIEW OF RIGHT FRONT CORNEROF CHASSIS WELDMENTMANUAL 92357-003JUNE 1997
FIGURE3: Chassis Assembly -<strong>V2648</strong>1XL.ITEM PART NUMBER DESCRIPTION QTYRef.123456789~ l!.10111213141516171819202122232425262728293031323334353655623 ............................ Chassis Assembly - <strong>V2648</strong>1XL ........................................................ Ref.55712 ............................ Chassis Weldment <strong>V2648</strong>1XL .............................................................. 134145 ............................ Bushing - (R#81368)' ............................................................................. 281368-40-40 ................. Bearing, 2.50 ID x 3.00 OD x 2.50 LG ................................................. 255831-001 ..................... Knuckle Weldment LH Steer <strong>V2648</strong>1XL ............................................ 155831-002 ..................... Knuckle Weldment RH Steer <strong>V2648</strong>1XL ............................................ 154776 ............................ Thrust Washer - Kingpin ....................................................................... 255402 ............................ Retainer - Kingpin ................................................................................. 2BOW30106 ................... Bolt, Hex .50-13UNC x 1.5 GRS ........................................................ 255621 ............................ Link - Steering ....................................................................................... I81368-03-08 ................. Gar-Max 1.00 x 1.25 x .50L ................................................................. 4BOW3870S ................... Washer, Flat .75 ................................................................................... 6BOW38231 ................... Pin, Cotter .12 x 1.50 L ........................................................................ 465057 ............................ Pin, Steer Cylinder 1" Dia .................................................................... 255534 ............................ Steer Cylinder Assembly ....................................................................... 154644 ............................ Motor, Hydraulic Wheel 14.9 V20481XL ........................................... 2BOW30 109 ................... Bolt, Hex .50-13UNC x 2.25 ................................................................ 8BOW36~95 .jt.B.\ .......... Nut - 1 / 2"-13 ........... : ............................................................................... 85):31)2 .... ~U.~ .. ~.\.. ......... Hub Assembly - Dnve w/Studs ............................................................. 202236 ............................ Elbow 90 0 MJ08 FO 1 0 1.00LG ........................................................... 6BOW38232 ................... Pin, Cotter .12 x 1.75L ......................................................................... 254885-001 ..................... Adapter - MOR08 FORI0 1.00LG ........................................................ 154885-002 ..................... Adapter - MOR08 FROIO 1.812LG ..................................................... 154885-003 ..................... Adapter - MOR 08 FORIO 2.625LG ..................................................... 154885-004 ..................... Adapter - MOR08 FORI0 3 .438LG ...................................................... 136085 ............................ Fitting -90 0 Elbow 8-8 Swivel ............................................................... 454929 ............................ Tire & Wheel Assembly ........................................................................ 491029 ............................ Nut, Wheel .50-20UNF (R#30288) ................................................... 1054714 ............................ Cylinder, Brake ..................................................................................... 254796 ............................ Pin - Brake ............................................................................................. 254795 ............................ Handle (Weldment), Brake Release ...................................................... 254779 ............................ Rear Wheel Hub Assembly ................................................................... 254779-DWG ................. DWG - Rear Hub Installation ................................................................ 1BOW36058 ................... Bolt, Hex .38-16UNC x 2.00 GR8 ...................................................... 2BOW36062 ................... Bolt, Hex .38-16UNC x3.00 GR8 ....................................................... 2BOW36703 ................... Washer, Flat .37 ID .81 OD GR8 SAE ............................................... .4BOW34274 ................... Nut, Hex Lock 3/s"-16UNC .................................................................. 4- Indicates Items Not ShownMANUAL 92357-003JUNE 1997
G FIGURE3: Chassis Assembly- V26531XL2 PLTOP VIEW OF STEERING COMPONENTSSEE NOTE 34 PL 26 PL2 PLTOP VIEW OF REAR AXLESEE NOTE 12 PLNOTES:1. BRAKE RELEASE HANDLES MUST SWINGFREELY. DO NOT TIGHTEN BOLTS AND NUTSANY MORE THAN SNUG FIT (2 PL).2. LOCTITE BOLTS INTO STEER KNUCKLES.3. ITEM 38, SPINDLE ASSY, INCLUDES SPINDLE,WASHER, CASTLE NUT, AND COTTER PIN.SPINDLE ASSY IS PART OF CHASSIS WLDMNT.4. EST WT = 1427.28 LBTOP VIEW OF RIGHT FRONT CORNEROF CHASSIS WELPMENTMANUAL 92357-003JUNE 1997
~-------"'-~.......CALAVAR SERVICE..PART NUWBERDESCRIPTION54644 100 SEAL KIT FOR WHEEL II!OTOR54644-101 HOLSING. BEARING54844-102 SHAFT & BEARING KIT (I 1/4 IN TAPERED54644-103 KEY FOR TAPERED SHAFT54644 104 NUT. HEX FOR TAPERED SHAFT)54644-105 PLATE. WEAR54644 108 DRIVE. VALVE54644 109 PLATE. VALVE54644-110 .VALVE54644-111 BALANCE RING54644-112 PIN54644-113 SPRING54644-115 HOUSING. VALVE 7 8-14 STAGGERED PORTS54644-116 PLUG ASSEMBLY ·W6-20UNF54644-114 5,4644 117 54644-120 54644-123 14384 008 14384-010 14384 007 14384-012 BOLT54644-106 54644-118 54644-121 54644 124 21371 005 21371 006 21371 004 21371-007 DRIVE54644-107 54644 119 54644-122 54644-125 21625-005 21625-006 21625-003 21625-007 GEROLER~rlt0"'i/~.!~ /~ I~ ,;~'''I,~!/;~d rid Id ~c1 ~vf .pqf ~II/ ~II{tof..:::, ~.:::. ~ ~ It;"::::.CALAVAR # CHAR-LYNN CIPR REF USED ON54644-001 105-1005 11.9 V2033 I54644-002 105-1006 14.9 VXX4854644-003 105-1003 8.0 V14/1854644-004 105-1007 18.7 VXX53UNL£'S!j 01WEltM$t NOTED:-- - -,._.0 10216 "'-"'-"""'"""C 9921 10/15jS6 RAK .XX $:.03.liO: II: .010 nTU:SlJltFACE FINISI1 1~B 9759 __ " .... @c::JA 8322 8/2/95 RAK "' .......... _~1NCII!S~DlVISIOH OF T1ME WF'G. co.8300 IWPEfUAL DRIVE~:~(111., .. , w.wo. lEICAS 11712MOTOR CHART, HYD WHEELL11l o.t.IiI.NO. .• DAtt"PO. ...... A.HITTLE 'talKB I OR .-,., 54644 IREVo4885 7/13/VO RAK"""""OR-N. NO. _~!-!E: ___ ~ """'OO!D ___ RAI'~_7f13[94 __ SCALE NON~ _ .. _ . iSHE!T _~_9f 1
FIGURE 3: Chassis Assembly - V26531XL •ITEM PART NUMBER DESCRIPTION QTYRef.12345678.910Ii12131415161718192021222324252627282930313233343536373855834 ............................ Chassis Assembly - V26531XL ........................................................ Ref.55802 ............................ Chassis Weldment V26531XL .............................................................. 134145 ............................ Bushing - (R#81368) ............................................................................. 281368-40-40 ................. Bearing, 2.50 ID x 3.00 OD x 2.50 LG ................................................. 255818-001 ..................... Knuckle Weldment LH Steer V26531XL ............................................ 155818-002 ..................... Knuckle Weldment RH Steer V26531XL ............................................ 154776 ............................ Thrust Washer- Kingpin ....................................................................... 255402 ............................ Retainer- Kingpin ................................................................................. 2BOW30106 ................... Bolt, Hex .50-13UNC x 1.5 GRS ........................................................ 255621 ............................ Link - Steering ....................................................................................... 181368-03-08 ................. Gar-Max 1.00 x 1.25 x .50L ................................................................. 4BOW3870S ................... Washer, Flat .75 ................................................................................... 6BOW38231 ................... Pirl, Cotter .12 x 1.50 L ...................................................................... ~.465057 ............................ Pin, Steer Cylinder 1" Dia .................................................................... 255534 ............................ Steer Cylinder Assembly ....................................................................... 154644-004 ..................... Motor, Hydraulic Wheel 18.7 V26531XL ........................................... 2BOW30117 ................... Bolt, Hex .50-13UNC x 4.500 .............................................................. 8BOW36~5 .. 511[ .. · ...... Nut - 1/2"-13 ........... : .......................................... ···········,······:1r················ 8~2 ..... j.c ............... Hub Assembly - Dnve w/Studs ......... ~L.~~.Q{ ................. 202236 ............................ Elbow 90 0 MJ08 FOI0 1.00LG .......................................................... :6BOW38232 ................... Pin, Cotter .12 x 1.75L ......................................................................... 254885-001 ..................... Adapter- MOR08 FORIO 1.00LG ........................................................ 154885-002 ..................... Adapter - MOR08 FRO 1 0 1.812LG ..................................................... 154885-003 ..................... Adapter - MOR 08 FORI0 2.625LG ..................................................... 154885-004 ..................... Adapter _ MOR08 FORIO 3.438LG ...................................................... 136085 ............................ Fitting _90 0 Elbow 8-8 Swivel ............................................................... 465089 ............................ Tire & Wheel Assembly (Foam) .......................................................... 491029 ............................ Nut, Wheel .50-20UNF (R#30288) ................................................... 1054714 ............................ Cylinder, Brake ..................................................................................... 254796 ............................ Pin - Brake ............................................................................................. 254795 ............................ Handle (Weldment), Brake Release ...................................................... 254779 ............................ Rear Wheel Hub Assembly ................................................................... 254779-DWG ................. DWG - Rear Hub Installation .................................................... ; ........... 1BOW36058 ................... Bolt, Hex .38-16UNC x 2.00 GR8 ...................................................... 2BOW36062 ................... Bolt, Hex .38-16UNC x 3.00 GR8 ....................................................... 2BOW36703 ................... Washer, Flat .37 ID .81 OD GR8 SAE ............................................... .4BOW34274 ................... Nut, Hex Lock 3/s"-16UNC .................................................................. 455834-I).WG ................. Dwg., Chassis Assembly ................................................................. Ref.55924 ............................ Spindle Assembly, SA-1750 ........................................................... Ref.- Indicates Items Not ShownMANUAL 92357-003JUNE 1997
• FIGURE 4: Hose KitP2PlHYDRAULIC TANKELECTRIC MOTORLIFT CYLINDER4TOPBELLYPANBACK WALLBOTTOM7RIGHT MOTORLEFT MOTORSTEERMANUAL 92357-003JUNE 1997
FIGURE 4: Hose Kit.ITEM PARTNUMBER DESCRIPTION QTYRef. 55884 ............................ Hose Kit <strong>V2648</strong>/531XL .................................................................... Ref.1 66698-031.00 ................ Hose Assembly, #06 66645 137 ST-ST ................................................. 12 66698-030.00 ................ Hose Assembly, #06 66645 137 ST-ST ................................................. 13 66702-012.00 ................ Hose Assembly, #10 66137 137 ST-ST ................................................. 14 66044-145.00 ................ Hose Assembly, #04 67685 137 ST-ST ................................................. 15 66698-120.00 ................ HoseAssembly, #06 66645 137 ST-ST ................................................. 16 66700-031.00 ................ Hose Assembly, #06 66645137 ST-STJ ............................................... 17 66700-032.00 ................ Hose Assembly, #06 66645 137 ST-STJ ............................................... 18 66043-014.00 ................ HoseAssembly, #0367684137 STJ-STJ ............................................. 19 66043-016.00 ................ Hose Assembly, #0367684137 STJ-STJ ............................................. 110 66700-029.00 ................ Hose Assembly, #06 66645 137 ST-STJ ............................................... 111 66700-031.00 ................ Hose Assembly, #06 66645 137 ST-STJ ............................................... 112 66696-006.00 ................ Hose Assembly, #0466646 137 ST -ST................................................. 113 66696-006.00 ................ Hose Assembly, #04 66646 137 ST-ST ................................................. 114 66696-006.00 ................ Hose Assembly, #04 66646 137 ST-ST ................................................. 115 66696-020.00 ................ Hose Assembly, #04 66646 137 ST-ST ..............•.................................. 1- Indicates Items Not ShownTOPBELLYPANBACK WALLBOTTOMoRIGHTNOTES:1. TAG EACH HOSE ASSEMBLY WITH PART NUMBER.2. THE HOSE KIT IS 55884.3. THE HOSE INST DWG IS 55884-DWG.4. THE DWG IS NOT PART OF THE KIT.MANUAL 92357"()()3JUNE 1997
.FIGURE 5: Steer CylinderITEM PART NUMBER DESCRIPTION QTYRef. 55534 ............................ Steer Cylinder Assembly .................................................................. Ref.55534-100 ..................... Seal Kit .................................................................................................. 11 55534-101 ..................... Locknut ................................................................................................. 12 55534-102 ..................... Glandnut ................................................................................................ 13 BOW32288 ................... Jam Nut, 3/4"-16UNF ............................................................................ 1- Indicates Items Not ShownMANUAL 92357-003JUNE 1997
FIGURE 6: Cylinder, Brake.0-"-
• FIGURE 7: Hub Motor Assembly1109 . 116 141 1 11310 111ITEM PART NUMBER DESCRIPTION QlYRef. 54644-002 ..................... Motor, 14.9 Hydraulic Wheel- <strong>V2648</strong> ............................................. Ref.Ref. 54644-004 ..................... Motor, 18.7 Hydraulic Wheel- V2653 ............................................. Ref.1 54644-100 ..................... Seal Kit For Wheel Motor ..................................................................... 12 54644-101 ..................... Housing, Bearing ................................................................................... 13 54644-102 ..................... Shaft & Bearing Kit (1 1/4 in Tapered) ..................................................44 54644-103 ..................... Key (For Tapered Shaft) ....................................................................... 15 54644-104 ..................... Nut, Hex (For Tapered Shaft) .............................................................. 16 54644-105 ..................... Plate, Wear ............................................................................................ 17 54644-124 ..................... Drive ...................................................................................................... 154644-118 ..................... Drive ...................................................................................................... 18 54644-125 ..................... Geroler- <strong>V2648</strong> ..................................................................................... 154644-119 ..................... Geroler - V2653 ..................................................................................... 19 54644-108 ..................... Drive, Valve ........................................................................................... 110 54644-109 ..................... Plate Drive ............................................................................................ 111 54644-110 ..................... Valve ..................................................................................................... 112 54644-111 ..................... Balance Ring ......................................................................................... 113 54644-112 ..................... Pin .......................................................................................................... 214 54644-113 ..................... Spring ..................................................................................................... 215 54644-123 .........'............ Bolt ........................................................................................................ 454644-117 ..................... Bolt ........................................................................................................ 416 54644-115 ..................... Housing, Valve (1/8-14 Staggered Ports) .............................................. 117 54644-116 ..................... Plug Assembly 7/16-20UNF ................................................................... 1- Indicates Items Not ShownMANUAL 92357..003JUNE 1997
FIGURE 8: Hub Assembly, Rear •Chassis WeldmentRef./J94ITEM PART NUMBER DESCRIPTION10QTYRef. 54779 ............................ Hub Assembly .................................................................................. Ref.1 54779-109 ..................... Hub ........................................................................................................ 12 54779-101 ..................... Inner Cup ............................................................................................... 13 54779-102 ..................... Inner Cone ............................................................................................. 14 54779-106 ..................... Seal ........................................................................................................ 15 54779-103 ..................... 0uterCup .............................................................................................. 16 54779-104 ..................... Outer Cone ............................................................................................ 17 BOW36718-HD ............ Washer ................................................................................................... 18 BOWI802 ..................... S1ottedNut,3/4"-16UNF ........................................................................ 19 BOW38233 ................... CotterPin, .125" x 2.00" ....................................................................... 110 54779-105 ..................... DustCap ................................................................................................ 111 54779-107 ..................... Stud ....................................................................................................... 512 54779-108 ..................... Stud Nut ................................................................................................ 5- Indicates Items Not ShownMANUAL 92357"()()3JUNE 1997
• FIGURE 9: Belley Pan Assembly2 PL4 PL2 PLo."" '" "" .~ IIII2 PL TO MANIFOLD 17TANKTROJAN(J:®~TROJAN~ ~ 1fELLY PAN FRONT WALL125®Bpcs~==~~~~~===-~-~-~ - -1 2 PL,---,,--j,-jMANUAL 92357-003JUNE 1997
FIGURE 9: Belly Pan ASSemblY.ITEM PARTNUMBER DESCRIPTION QTYRef. 55673 ............................ Belly Pan Assembly ......................................................................... Ref.I 55671 ............................ BellyPan Weldment .............................................................................. 12 54989 ............................ MotorlPumpAssembly .......................................................................... 13 55379 ............................ Valve Installation ................................................................................... 14 55297 ............................ Hydraulic Tank Assembly ..................................................................... 15 50316 ............................ BreatherFiller ....................:................................................................... 16 52049 ............................ Gauge - Fluid Level ............................................................................'" 17 04699-08 ....................... Plug - Socket Hex .50 NPT ................................................................. 18 02806 ............................ Straight MJI0MP12 ............................................................................ 19 33430 ............................ Hydraulic Filter Assembly ..................................................................... 1110-2 ............................. --FilterHead - Return Line ................................................................... 1110-1 .............................--Filter Element ...................................................................................... 110 00324 ............................ Elbow 90° MJ-08 MP12 ....................................................................... 111 02430 ............................ Straight MJ04 MB04 ............................................................................ 312 02431 ............................ Fitting - Straight MJ06 MB06 ............................................................... 213 02303 ............................ Elbow 90° MJ06 MB06 ........................................................................ 214 00354 ............................ Tee MJ06 MJ06 MB06 ........................................................................ 115 00334 ............................ Nut - Bulkhead 04 ................................................................................ 516 00336 ............................ Nut - Bulkhead 06 ................................................................................ 517 02662 ............................ Elbow 90° MJ06 M006 ........................................................................ 218 55703 ............................ Cable Kit ............................................................................................... 119 04674 ............................ Elbow 90° MJIO M008 ........................................................................ 120 02407 ............................ Tee MJ()4 MJ04 MP04 ........................................................................ 121 55693 ............................ Charger Mod ............................................,............................................ 122 52138 ............................ Solenoid 24V ........................................................................................ I23 55334 ............................ Jumper Assembly -12 LG Wire ......................................•..................... 124 54627 ............................ Washer, Arm Stand Retainer ................................................................ 425 55505 ............................ Battery Tie Down Angle 22" ................................................................. 226 55506 ............................ J-Bolt - Battery Hold Down .................................................................. 227 BOW30054 ................... Bolt, Hex .38-16UNC x 1.00 GRS ...................................................... 128 BOW30055 ................... Bolt, Hex .38-16UNC x 1.25 ................................................................ 229 BOW30057 ................... Bolt, Hex .38-16UNCx1.75 ................................................................ 230 BOW31433 ................... Washer, Flat .38x.810D GRSSAE ................................................. 531 BOW34274 ................... Nut,HexLock 3/s"-16UNC .................................................................. 532 BOW30037 ................... Bolt, Hex .31-18UNC x 3.00 ............................................................... 233 BOW30029 ................... Bolt, Hex .31-18UNC x 1.00 GR5 ...................................................... 434 BOW31432 ................... Washer, Flat .31 ID x .68 OD ............................................................ 1235 BOW34273 ................... Nut, Hex Lock 5116 -18UNC ............................................................... 436 BOW30003 ................... Bolt, Hex .25-20UNC x .875 LG ......................................................... 437 BOW31401 ................... Washer, Flat .25 ID x .63 OD ............................................................ 1038 BOW36780 ................... Nut, Hex Lock Nylon .25-20UNC ....................................................... 639 55695 ............................ Tube Kit ................................................................................................. 140 04185 ............................ Fitting- Bulkhead Tee ........................................................................... 2- Indicates Items Not ShownMANUAL 92357'()()3JUNE 1997
• FIGURE 10: Motor & Pump Assembly5ITEM PARTNUMBER DESCRIPTION QTYRef. 54989 ............................ MotorlPump Assembly ..................................................................... Ref.1 54761 ............................ Duplex Pump & Parts (See Page 23) .................................................. 154761-101 ..................... Seal Kit (Pump) ..................................................................................... 12 BOW30029 ................... Bolt,Hex.31"-18UNCx 1.00" .............................................................. 43 ...................................... Tag Nails ................................................................................................4 BOW31444 ................... Washer, Flat 5/16" ••••••••••••••••••••••••••••••••••••••••••••••••••••••••••••••••••••••••••••••••••• 45 54759 ............................ 24 Volt Motor (See Page 25) ............................................................... 16 54989-100 ..................... Gasket .................................................................................................... 17 54760 ............................ Replacement Coupling ........................................................................... 18 [Not Used] ..................................:................................................................................................. 1- Indicates Items Not Shown•MANUAL 92357·003JUNE 1997
~,-- I6lLEfTBACKSlOE OP2oP1 SlOEMJ...,? J f/ 7/?f-o$1 ()1'-f-oS2~l111 1M2II?019 II 1II j I II 1,1 IIII 01;V1 II " 1fIIIt yv )'I'0 ~ ---®lBIIII 1II ~TANt< II 1 11 55048 1.00 EA lUBE ASSY, 26JJ CYL \lENT TO TI I - J-I0 9 55694 1.00 EA lUBE ASSY, VXX48/5J 1.110I ~"~--J10 55697 1.00 EA lUBE ASSY, VXX48/5J MJ BlKHDBEU. Y PAN BACK WAIl.8 55696 1.00 EA lUBE ASSY, VXX48/5J T TO FILlER07 55051 1.00 EA lUBE ASSY, 26J3 BRAKES TO T.t:I.OlE;.--1. TAG EACH TUBE ASSY WITH PART NUMBERSHOWN IN THE BILL OF MATERIAL .... __ .- lUBEL1II. o.e.H. NO. DAlE -. 8EASONloaRAI
--. - ~ 2 2PL27/8 ~ m(2.875 REF) [V 3 2 PL_t ________________________________________________________________________ __1.....-6 3/8(6.375 REF)5 1/2(5.500 REF)~------------------------------------------------- 36 3~6 ------------------------------------------------~~(36.188 REF)3 01209 2.00 EA TUBE SLEEVE-#04 (1319)2. 01214 2.00 EA TUBE NUT-#04 (1318)1 RUR00100 3.40 LF 18 HYD .250 00 .035W R04623IlEU PART NUMBER QTY UM DESCRIPll0N_"3:l~..~ WACO, TEXAS"'1ru=----- _~~----~---+--~ ... - .. - ... ~ .. I=~==~---------------------------;t--I-----+----+---I - 011: 171 m -=---=-~ .. -=r TUBE ASSY, 2633 S11 OF 1\R£V.11
,,IIIILEFTSIDErI'"OP2'\ ""'"'0 S 1"-G1C~./-...$2rOLT?BACKOPl SIDE,...11.3....()Ml ()M2"-? r YJ /I //r\III10IIC)IIII8I'"•IIIIII"'"D011BELL Y PAN BACK WALLoNOTE:oIIII1. TAG EACH TUBE ASSY WITH PART NUMBERSHOWN IN THE BILL OF MATERIAl.-ITANK•:..I.•.....II\I11 55048 1.00 EA TUBE ASSY. 2633 CYL VENT TO T10 55697 1.00 EA TUBE ASSY. VXX48/53 M3 BLKHD9 55694 1.00 EA TUBE ASSY, VXX48/53 MlBELL Y PAN FRONT WAll 8 55696 1.00 EA TUBE ASSY, VXX48/53 T TO FILTER7 550516 553245 550724 55050.3 550632 550641 55076ITEM PART NUMBERUNLESS OTHERWISE 'iOlEO:1---+----1-----+---1 TOlERANCES:1-_-1-__ -1-__--\_--1 ~~~~~S; ~(16SURF ACE FINISH1----+--_-1-__ --\_--1 PROJECTION OF VIEWS' @ c:::J12V1.001.001.001.001.001.001.00QTYEA TUBE ASSY. 2633 BRAKES TO TEA TUBE ASSY, MDD2633 BEA TUBE ASSY, 2633 M2EA TUBE ASSY. 2633 M3EA TUBE ASSY, 2633 LEA TUBE ASSY, 2633 Sl';c / "~EA TUBE ASSY. 2633 S2UM DESCRIPTIONDIVISION OF TIME MFG. CO.8300 IMPERIAL DRIVEWACO. TEXAS 76712TUBE KIT, VXX48/53ALL OIMENSIONS ARE IN INCHESLTR. D.C.N. NO. DATE APPR. DRAWN BEASON 02/28/97 SIZE DRAWING NO.~---+~~~4---~~~--~B- 105:5'1 t..lz~jcI7 CHECKED AI,55695LTR. OcR.N. NO. DATE APPR. APPROVE0h1'& SCALE 1: 8 I SHEET 1 OF 1
A14FIGURE 11: Pump ASSembly.SECTION A-A1517A©©12HYDRAULIC SCHEMATICB 24 23 4 11OUTLET PORTS9/16-18 SAE 20ITEM PART NUMBER DESCRIPTION QTYRef.123456789101112131415161718192054761 ....... u ••••••••••••••••••• Duplex Pump & Parts .......................................... : ............................ Ref.54761-100 ..................... Seal Kit .................................................................................................. 154761-103 ..................... Gear Housing ......................................................................................... 154761-108 ..................... DrivePin ............................................................................................... 1........ " .................................................................................................................................................... ....................................... Oil Seal (in seal kit) ............................................................................... 154761-112 ..................... Drive Shaft ............................................................................................ 1...................................... Lee Plug ................................................................................................ 154761-107 ..................... 375 Gear Face ....................................................................................... 1...................................... Gasket (in seal kit) ................................................................................. 154761-102 ..................... Needle Bearing ...................................................................................... 154761-101 ..................... Idler Shaft .............................................................................................. 154761-105 ..................... Stator ..................................................................................................... 154761-106 ..................... Screw ..................................................................................................... 854761-109 ..................... Shear Pin ............................................................................................... 1...................................... Plastic Plug ............................................................................................ 1...................................... Gasket (in seal kit) ....... ~ ......................................................................... 154761-111 ..................... Woodruff Key ....................................................................................... 1...................................... Plastic Plug ............................................................................................ 121 ........................................................................................................................................................22 ........................................................................................................................................................23 54761-110 ..................... CreascentRing ...................................................................................... 124 54761-104 ..................... Gear Housing ......................................................................................... 1- Indicates Items Not ShownMANUAL 92357-003JUNE 1997
• FIGURE 12: Motor 24VDC Assembly-l----l-NAMEPLATE2115MANUAL 92357-003JUNE 1997
FIGURE 12: Motor 24VDC ASSembly.ITEM PARTNUMBER DESCRIPTION QTYRef. 54759 ............................ Motor, 24VDC Assembly ................................................................. Ref.1 ...................................... Complete Stator Assembly .................................................................... 12 NSS ............................... CompleteTerminaIAssembly ............................................................... 23 ...................................... Screw Hex fill Cap 3/8"-16 ................................................................... 24 ...................................... JamNut, Hex 1 /s"-16 ............................................................................. 25 ...................................... JamNut, Hex l /s"-16 ............................................................................. 26 ...................................... Insulator ................................................................................................. 47 ...................................... Insulator ................................................................................................. 28 ...................................... LockWasher,Split 3 / s" .......................................................................... 29 ...................................... LockWasher,Ext. TffI3/S" .................................................................. 410 ...................................... Field Coil Assembly .............................................................................. 1II ...................................... Field Pole .............................................................................................. 412 ...................................... Screw, BTIN fill Socket, 3/8"-16 x S/s" ................................................. 813 ...................................... Field Coil Terminal ............................................................................... 114 ...................................... Loctite,222 ..............................................................................................15 ...................................... Pulley Cover .......................................................................................... 116 ...................................... Screw, Socketfill#10-32xl.00" ......................................................... 417 54759-117 ..................... Complete Armature Assembly .............................................................. 118 54759-118 ..................... Fan ......................................................................................................... 119 54759-119 ..................... Bearing, Pulley ...................................................................................... 120 54759-120 ..................... Bearing,Comm ..................................................................................... 121 ...................................... Complete Comm Cover Assembly ........................................................ 122 54759-122 ..................... Complete Brush Ring Assembly ........................................................... 123 54759-123 ..................... Brush Spring ........................................................................................... 824 54759-124 ..................... BrushAssembly .................................................................................... 225 ...................................... Screw, RH Slotted #10-32 x 3/4" ............................................................ 426 ...................................... Nut, Hex #10-32 .................................................................................... 427 ...................................... Washer Bearing Spring ......................................................................... 128 ...................................... Screw, Hex fill #10-32 x 2.00" ............................................................. 429 54759-129 ..................... Brush Inspection Cover ......................................................................... 130 ...................................... Screw, PH fill #10-32 x 1- 3 / 4" .............................................................. 131 ...................................... Nut, Square #10-32 ............................................................................... 132 ...................................... Insulator ................................................................................................. 133 ...................................... Screw, RH Slotted 1/4"-20 x 3/s" ............................................................. 234 ...................................... Lock Washer, Ext. TffI 1/4" .................................................................. 235 54760 ............................ CouplingAssembly ........................................................................... RefNSS - Not Sold Separately- Indicates Items Not ShownMANUAL 92357-003JUNE 1997
• FIGURE 13: Valve Installation3P2L~~ ~P1~M2REAR VIEWLEFT END VIEWMANUAL 92357-003JUNE 1997
FIGURE 13: Valve Insta1lation •CREEPo.0oRIGHT END VIEWITEM PARTNUMBER DESCRIPTION QTYRef. 55379 ............................ Valve Installation ............................................................................. Ref.1 55296 ............................ Valve Assembly .................................................................................... 12 54892 ............................ Valve, Load Control .............................................................................. 23 02525 ............................ Straight, MJ04 M004 ............................................................................ 34 02448 '" ......................... Straight, MJ06 M006 ............................................................................ 55 00458 ............................ Straight, MJ08 M008 ............................................................................ 16 04579 ............................ Elbow, 90 0 MJ06 M006 LL ................................................................. 17 04682 ............................ Tee, MJ04 M004 MJ04 ........................................................................ 18 04003 ............................ Nut, Cap #04 ......................................................................................... 2- Indicates Items Not ShownMANUAL 92357-003JUNE 1997
• FIGURE 13: Valve AssemblyAI9B~A§]120JBFRONT VIEWRIGHT END VIEW====BACK VIEW B-BLEFT END VIEW A-AMANUAL 92357-003JUNE 1997
FIGURE 13: Valve Assembly •ITEM PART NUMBER DESCRIPTION QIYRef. 55296 ............................ Valve Assembly ............................................................................... Ref.1 55337-001 ..................... Manifold, Valve ..................................................................................... 12 54646-004 ..................... Valve, Drive .......................................................................................... 13 54646-001 ..................... Valve, Steer ........................................................................................... 14 54646-005 ..................... Valve, Select .................................................,....................................... 15 54639 ............................ Cartridge,2WayNOSpooIValve 26 54852-052 ..................... Orfice,0.052 Dia.lIF 1 ° ........................................................................ 17 54641 ............................ Cartridge,4WayNOSpooIValve ......................................................... 28 54634 ............................ Cartridge, Flow Divider Valve ............................................................... 19 54890 ............................ Cartridge, Dir. Act. Relief Valve .......................................................... 110 54640 ............................ Cartridge, Check Valve ......................................................................... 111 54889 ............................ Cartridge, Flow Control Valve ............................................................... 112 54622 ............................ Cartridge, Needle .................................................................................. 113 54638 ............................ Cartridge, Sequence Valve .................................................................... 1- Indicates Items Not ShownMANUAL 92357-003JUNE 1997
.FIGURE 14: Charger 115V/60HZ-25A124VDC(.,"·OLTSDill'-CAlI'"CDtERTZ <strong>MODEL</strong> DCYOlTS[![] 1178701 [E]PMAI£ SERtALNO. KAMPam [KJAMMETER, 0-30 AMPU." PAT.NO.:I.H4 ....U.IR.PAT.NO.1.414.151fA.PAT.NO.t .. oa,1"W.CIR,PAT.NQ."U1.n1JAPANPAT.NO.S31331117'I10IIIII~oIIIIrr.1®IIIII~IIIII.::::::=:::::::.::::::=:::::::.::::::=:::::::.::::::=:::::::.::::::=:::::::.::::::=:::::::.::::::=:::::::.::::::=:::::::.::::::=:::::::.::::::=:::::::.::::::=:::::::.::::::=:::::::®.::::::=::::::: .::::::=:::::::.::::::=::::::: .::::::=:::::::.::::::=::::::: .::::::=:::::::.::::::=::::::: .::::::=:::::::.::::::=::::::: .::::::=:::::::.::::::=::::::: .::::::=:::::::.::::::=::::::: .::::::=:::::::.::::::=::::::: .::::::=:::::::.::::::=::::::: .::::::=:::::::.::::::=::::::: .::::::=:::::::.::::::=::::::: .::::::=:::::::.::::::=::::::: .::::::=:::::::®I~ IDTERMINAL, 3/8 RING2 PLCS.\Blp..~DC CORD:R[D~60 ± 1-----12 PLCS..281 X .625 SLOTMOUNTING HOLES4 PLCS.(IN BASE LEG)#12 AWt;,2 PL\~ VENTILATION LOUVERSON BACK SIDEII\psMANUAL 92357.003JUNE 1997
FIGURE 14: Charger 115V/60HZ-25N24VDC.ELECTRIC TIMERBLACKGREENREDTRANSFORMERFANRED or WHITE+TO SA TTERIES2BLACKBLACKWHITE120 VOGINPUT-GREEN WIRE NOT USEDON SOME <strong>MODEL</strong>S.ITEM PART NUMBER DESCRIPTION QTYRef.54908 ............................ Charger, 115V/60HZ-25N24VDC .................................................. Ref.54908-101 ..................... Transformer Assembly ........................................................................... .54908-102 ..................... Heatsink Assembly, with Diodes ........................................................... .54098-103 ..................... Ammeter ................................................................................................. .54908-104 ..................... Electronic Timer Assembly .................................................................... .54908-105 ..................... Capacitor, 6.0 MFD,660V AC ................................................................ .54908-106 ..................... Fuse Assembly ....................................................................................... .- Indicates Items Not ShownMANUAL 92357-003JUNE 1997
•This Page Intentionally Left BlankMANUAL 92357-003JUNE 1997
FIGURE 14: Charger 115V/25AMOd .•BATTERYCHARGER11------ 23BLKREOIr----____ 36ITEMPART NUMBERDESCRIPTIONQTYRef. 55693 ............................ Charger, 115V/25A Mod .......................................................... Ref.I 54908 ............................ Charger, 115V/60HZ-25A124VDC ............................................... 12 BOW23065 ................... Ring Terminal, 12Ga. 3/8 Stud ..................................................... 2- Indicates Items Not ShownMANUAL 92357-003JUNE 1997
~Irg~-J~S ... ORNS .. WHT2-SlU12=GRN/BlK8D=WHT/BLKPROP DRIVEOPTIONCABLE/HARNESSIS INCLUDED IN LOWER BOX11.)=RED fOR PROPORTIONAL DRIVE OPTIONDRIVE VALVESTEER VAL\/[SELECT VALVEOPTIONOPTIONSTANDARDWlRINC10AI BlK80 I WHT/BLK1111. REO12 GRN/SLK19120)2 PL>-
FIGURE 15: Wiring Installation - <strong>V2648</strong>/53XLGITEM PART NUMBER DESCRIPTION QTYRef. 55870 ............................ Wiring Installation ............................................................................ Ref.1 55331 ............................ Jumper, 3 Lg Wire ................................................................................. 62 55330-001 ..................... Jumper,21 1/2" LgWire ......................................................................... 13 55829 ............................ Harness, Lift Cylinder Valve ................................................................. 14 55330-003 ..................... Jumper, 14 1 //' Lg. Wire ........................................................................ 15 55878 ............................ Switch Assembly, V Chassis Limit ....................................................... 16 55868 ............................ Spacer, .5 OD x #10 ID x.5 L Nylon ................................................... 27 BOW31148 ................... Screw, Slotted Rnd. Head 10-32 x 2.00 ............................................... 28 BOW31233 ................... Nut, Hex Keps #10-32 .......................................................................... 29 67837-006 ..................... Tie, Nylon-6" Black .............................................................................. 110 55222 ............................ Cover, Chassis Electrical Terminal ....................................................... 111 34552-008 ..................... Terminal Strip ......................................,................................................ 112 BOW31130 ................... Screw, Slotted Rnd. Head #8-32 x .50 ...........................:..................... 213 BOW31232 ................... Nut, Hex Keps #8-32UNC ................................................................... 214 54952 ............................ Support (Weldment), Cable ................................................................... 115 BOW34980 .................... Pin,Roll .125 x 1.250 ........................................................................... 116 54926 ............................ Tray, Extension Cable ........................................................................... 117 BOW34575 ................... Bolt, Carriage .25-20UNC x .75" ......................................................... 218 BOW30002 ................... Bolt, Hex .25-20UNC x .75 .................................................................. 219 BOW31444 ................... Washer, Flat .251D x .63 OD ................................................................ 620 BOW34272 ................... Nut, Nylon Lock .25-20UNC ............................................................. 1121 67281-005 ..................... Wrapping, Spiral- 3/4" Black .......................................................... 66LF22 65099-12 ....................... Clamp,Loop .75 Dia ............................................................................ 223 55872-001 ..................... Jumper Assembly - 14 "L Ground Wire ................................................. 158274 ............................--Wire - 12Ga. Green Bulk .......................................................... 1.12LFBOW23 062 ................... --Terminal Ring #67960 12-10 .25 Stud ............................................... 1BOW23068 ................... --Termina18 Stud 16/14Ga. Spade ........................................................ 124 55330-002 ..................... Jumper Assembly - 24 "L Wire .............................................................. 155298 ............................--Wire, 16Ga. Green .................................................................... 1.93LFBOW23 024 ................... --Terminal Ring #67960 16114Ga .. 25 Stud .......................................... 1BOW23087 ................... --Coupler - R#67963 16114 Female ....................................................... 1- Indicates Items Not ShownMANUAL 92357-003JUNE 1997
.FIGURE 16: Box Assembly - Lower ControloOPERATINGINSTRUCTIONSfOOPERA'lEI'ROI.IIGROUND.l'I.IRNSlilTCHTOi.0WER"f"OSI1ION..IJtAAlEIKllGEfrC.... PUSHlilroauTTON.TO CIP£lI:iIo.lE. tuT'fCft IoIUST BE PUU.EI> OUT.-PuSH 'ItlGQ.£ SWITCH 10 UO'o£ PLA1FOfIW.TUaN S.lCH Tn "uPPER" POSItION.TC OP£RAtE FRCt.I PLATFOItt/I.oNOTES:1. DECALS. ON OUTSIDE OF BOX. ARE SHOWN FOR REF ONLY.2. THIS ASSY IS SIMILAR TO 55853.3. FEATURES SHOWN ".**" ARE TO BE PROTO TYPED.EST. WT. = 15 LBSWITH ALL OPTIONSPART NUMBER55869-00155869-00255869-00355869-004DESCRIPTIONBOX ASSY. V2033 LOWER ELECBOX ASSY. V2033XL LOWER ELBOX ASSY. VXX48/53 LOWERBOX ASSY. VXX4S/53XL LWRMANUAL 92357-003JUNE 1997
FIGURE 16: Box Assembly - Lower Control.ITEM PART NUMBER DESCRIPTION QIYRef. 55869-004 ..................... Box Assembly - Lower Control ....................................................... Ref.1 55488 ............................ Box, Mach. Lower Control ................................................................... 12 55893 ............................ Decal, Lower Control Box Electrical Tags ........................................... 13 51913 ............................ Operator, Red P-Pull ............................................................................. 14 51914 ............................ Base + 1 NC Contact ............................................................................ 15 52671 ............................ Operator, 3 Pos. Rot .............................................................................. 1Akk02016 ...................... -Key ..................................................................................................... 16 52029 ............................ Base + 2 NO Contacts .......................................................................... 17 50075 ............................ Switch, (Ref PIN 67760) ....................................................................... 18 54438 ............................ Relay, 24V SPDT Bosch ...................................................................... 19 206-00001-00 ................ Diode ..................................................................................................... 810 67114-013 ..................... Strain Relief 1 NPT .62/.75 ................................................................... 111 67114-008 ..................... Connector, Strain Relief ........................................................................ 112 67114-009 ..................... Strain Relief, 3/4" NPT .62/.75 ............................................................... 213 67124-003 ..................... Locknut, 1" NPT .................................................................................... 114 67124-002 ..................... Locknut, 3/4 NPT Conduit ...................................................................... 315 67123-003 ..................... Seal, Connector Elect 1" ........................................................................ 116 67123-002 ..................... Seal, Connector Elect. 3/4" ••••••••••••••••••••••••••••••••••••••••••••••••••••••••••••••••••••• 317 BOW23022 ................... RingTongue .......................................................................................... 318 67837-006 ..................... Tie, Nylon 6" Black ............................................................................... 819 BOW31430 ................... Washer, Flat #10 ID .............................................................................. 120 BOW31129 ................... Screw, Slot Round Hd 8-32UNC x .375 ............................................... 121 BOW31232 ................... Nut, Hex Keps #8-32UNC ................................................................... 122 BOW31124 ................... Screw, Round Hd #6-32UNF x 1/2"Lg .................................................. 423 BOW31231 ................... Nut, Hex Keps #6-32 ............................................................................ 424 BOW31428 ................... Washer, Flat #6 ..................................................................................... 425 67295-024 ..................... Cable, 8 Condo 16A WG Type SO .............................................. 9 .50LF.26 67295-004 ..................... Cable, 12 Conductor 16Ga ............................................................... 5LF.27 67295-022 ..................... Cable, 12 Gal3C ......................................................................... 6.50LF28 34552-016 ..................... TerminaIStrip ........................................................................................ 229 67940 ............................ Holder, Fuse .......................................................................................... 130 67939-015 ..................... Fuse, 15Ga 1/4" x 1-1/4" .......................................................................... 131 58251 ............................ Wire, 12Ga. White ........................................................................... 4LF.32 58292 ............................ Wire, 16Ga. White ........................................................................... lLF.33 66720-001 ..................... Disconnect, STA-KON Female ............................................................ 634 BOW23087 ................... Terminal, Female Push-On .250W ........................................................ 335 67960-006 ..................... Terminal, Ring 10 16-14A WG ............................................................... 236 BOW23024 ................... Ring, Tongue 16-14 Ga 1/4 Stud ............................................................. 137 BOW23025 ................... Terminal, Ring Tongue 16-14Ga ........................................................... 138 BOW18578 ................... Terminal, Piggyback R 67963 ................................................................ 139 BOW23087-2 ................ Terminal, Female Push-On .250W ........................................................ 240 BOW23028 ................... Terminal, 8 Stud 12/10Ga. Spade .......................................................... 441 67961-006 ..................... Terminal, 8 Stud 121l0Ga. Spade ........................................................ 10MANUAL 92357-003JUNE 1997
il-",:Btl.. ~I,-- - -- -'$0r-=T~~~~p\'~?~r--~SPARE'l===~~T ~~~?' 88~~ 8 r.,..7 IT~ i=== ~~ ~6,)8A'=f ~ I~80~r==:=~r--.TO T8 ONCHASSIS- t-~HYD~- - - - - --41 3 PL~V 3 I3'f=='==10 -~ ----"V-- F== I-~v--; ~ ?l=f2----V~34PLV-, Ff3F=f4 p, po SPARE, F=f5ISOLATEF=r6/"T+=,?Io!==~1l"~~TO ARMS/PLATFORM( ~MOTORVCONTACTORBOTTOMIIIIIT- - - - - -512 GA5 t C\ 0~ ~6rd rl 50'i@1~ 1.--' 12 GA l9 "DOWN" -;-;=;:r:8 "UP"~",41 2 PLttl0~17 3 PL~2 PL3 UPPER 3L~~1Z GAbl~c:a~~5Drl~9~5G 'i@1LOWER3958 V05040 J PLw~II-~I39 I512 GA3438- - JNOTES:1. THIS SHEET SHOWS "STANDARD" WIRING ONLY.FOR A~Y _A"i~ ~~L OPTI0"iS,_~E_E _S~EET_!. _ _-3. LOCATE ITEM 2, "EL TAGS", BETWEEN TERMINAL BOARDS.D, AS MARKED.-'"rj@~.....~~CI.I~-
FIGURE 16: Box Assembly - Lower Control.ITEM PARTNUMBER DESCRIPTION QIYRef. 55869-004 ..................... Box Assembly - Lower Control ....................................................... Ref.1 55488 ............................ Box, Mach. Lower Control ................................................................... 12 55893 ............................ Decal, Lower Control Box Electrical Tags ........................................... 13 51913 ............................ Operator, Red P-Pull ............................................................................. 14 51914 ............................ Base + 1 NC Contact ............................................................................ 15 52671 ............................ Operator, 3 Pos. Rot .............................................................................. 1Akk02016 ...................... -Key ..................................................................................................... 16 52029 ............................ Base + 2 NO Contacts .......................................................................... 17 50075 ............................ Switch, (Ref PIN 67760) ....................................................................... 18 54438 ............................ Relay, 24V SPDT Bosch ...................................................................... 19 206-00001-00 ................ Diode ..................................................................................................... 8. 10 67114-013 ..................... Strain Relief 1 NPT .62/.75 ................................................................... 111 67114-008 ..................... Connector, Strain Relief ........................................................................ 112 67114-009 ..................... Strain Relief, 3/4" NPT .62/.75 ............................................................... 213 67124-003 ..................... Locknut, 1" NPT .................................................................................... 114 67124-002 ..................... Locknut, 3/4 NPT Conduit ...................................................................... 315 67123-003 ..................... Seal, Connector Elect 1 " ........................................................................ 116 67123-002 ..................... Seal, Connector Elect. 3/4" ••••••••••••••••••••••••••••••••••••••••••••••••••••••••••••••••••••• 317 BOW23022 ................... RingTongue .......................................................................................... 318 67837-006 ..................... Tie, Nylon 6" Black ............................................................................... 819 BOW31430 ................... Washer, Flat #10 ID .............................................................................. 120 BOW31129 ................... Screw, Slot Round Hd 8-32UNC x .375 ............................................... 121 BOW31232 ................... Nut, Hex Keps #8-32UNC ................................................................... 122 BOW31124 ................... Screw, Round Hd #6-32UNF x 1/2"Lg .................................................. 423 BOW31231 ................... Nut, Hex Keps #6-32 ............................................................................ 424 BOW31428 ................... Washer, Flat #6 ..................................................................................... 425 67295-024 ..................... Cable, 8 Condo 16A WG Type SO .............................................. 9.50LF.26 67295-004 ..................... Cable, 12 Conductor 16Ga ............................................................... 5LF.27 67295-022 ..................... Cable, 12 Ga/3C ......................................................................... 6.50LF28 34552-016 ..................... TerminaIStrip ........................................................................................ 229 67940 ............................ Holder, Fuse .......................................................................................... 130 67939-015 ..................... Fuse, 15Ga 1/4" x 1-;1/4" .......................................................................... 131 58251 ............................ Wire, 12Ga. White ........................................................................... 4LF.32 58292 ............................ Wire, 16Ga. White ........................................................................... lLF.33 66720-001 ..................... Disconnect, STA-KON Female ............................................................ 634 BOW23087 ................... Terminal, Female Push-On .250W ........................................................ 335 67960-006 ..................... Terminal, Ring 10 16-14A WG ............................................................... 236 BOW23024 ................... Ring, Tongue 16-14 Ga 1/4 Stud ............................................................. 137 BOW23025 ................... Terminal, Ring Tongue 16-14Ga ........................................................... 138 BOW18578 ................... Terminal, Piggyback R 67963 ................................................................ 139 BOW23 087-2 ................ Terminal, Female Push-On .250W ........................................................ 2MANUAL 92357'()()3JUNE 1997
~I:gtl -'"-.~TABLE 1H1,110lOB911- l1Aiii '"COLOR FUNCTIONBLU GROUNDORN STROBE LIGHT OPTIONBLK "FAST" TO LIMIT SWITCHWHT FROM LS TO INHIBIT FASTWHT BLK LOWER PLATFORMGRN "CREEP" TO LIMn 5WITCH-RED FROM LS TO CREEP VALVERED/BLK SEE NOTE 2 ON SHEET 4CABLE FOR "XL" <strong>MODEL</strong>STO HYD VALVE ASSYSEE TABLE 2oo1 :-r," IINSIDEBjOX II IN'~IDEBOX1I I :IIFI::::l, F::::l,ISEETABLE 3TO HYDVALVE ASSYSEE TABLE 2INSIDEBOXooS10 CABLETO MOTORCONTACTORSIGNAL(REF)SIGNALCONTACTOR(REF)GROUNDCONTACTOR(REF)67964-002S' SLOPE SENSOR/WHT(REF)67964-0025' SLOPE SENSOR/RED(REF)67964-002S' SLOPE SENSOR/BlKo":rj......~- R"ttl~~~~-
FIGURE 16: Box Assembly - Lower Control.ITEM PARTNUMBER DESCRIPTION QIYRef. 55869-004 ..................... Box Assembly - Lower Control ....................................................... Ref.1 55488 ............................ Box, Mach. Lower Control ................................................................... 12 55893 ............................ Decal, Lower Control Box Electrical Tags ........................................... 13 51913 ............................ Operator, Red P-Pull ............................................................................. 14 51914 ............................ Base + 1 NC Contact ............................................................................ 15 52671 ............................ Operator, 3 Pos. Rot .............................................................................. 1Akk02016 ...................... -Key ..................................................................................................... 16 52029 ............................ Base + 2 NO Contacts .......................................................................... 17' 50075 ............................ Switch, (Ref PIN 67760) ....................................................................... 18 54438 ............................ Relay, 24V SPDT Bosch ...................................................................... 19 206-00001-00 ................ Diode ..................................................................................................... 810 67114-013 ...................... StrainReliefl NPT .62/.75 ................................................................... 111 67114-008 ..................... Connector, Strain Relief ........................................................................ 112 67114-009 ..................... Strain Relief, 3/4" NPT .62/.75 ............................................................... 213 67124-003 ..................... Locknut, l"NPT .................................................................................... 114 67124-002 ..................... Locknut, 3/4 NPT Conduit ...................................................................... 315 67123-003 ..................... Seal, Connector Elect 1 ,. ........................................................................ 116 67123-002 ..................... Seal, Connector Elect. 3/4" ••••••••••••••••••••••••••••••••••••••••••••••••••••••••••••••••••••• 317 BOW23022 ................... RingTongue .......................................................................................... 318 67837-006 ..................... Tie,Nylon6" Black ............................................................................... 819 BOW31430 ................... Washer,Flat#10ID .............................................................................. 120 BOW31129 ................... Screw, Slot Round Hd 8-32UNC x .375 ............................................... 121 BOW31232 ................... Nut, Hex Keps #8-32UNC ................................................................... 122 BOW31124 ................... Screw, Round Hd #6-32UNF x 1/2"Lg .................................................. 423 BOW31231 ................... Nut, Hex Keps #6-32 ............................................................................ 424 BOW31428 ................... Washer, Flat #6 ..................................................................................... 425 67295-024 ..................... Cable, 8 Condo 16A WG Type SO .............................................. 9.50LF.26 67295-004 ..................... Cable, 12 Conductor 16Ga ............................................................... 5LF.27 67295-022 ..................... Cable, 12 Gal3C ......................................................................... 6.50LF28 34552-016 ..................... Terminal Strip ........................................................................................ 229 67940 ............................ Holder, Fuse .......................................................................................... 130 67939-015 ..................... Fuse, 15Ga 1/4" x 1-1/4" ......•••..............•.......•........•••.••••..•.•....•.•.............. 131 58251 ............................ Wire, 12Ga. White ........................................................................... 4LF.32 58292 ............................ Wire, 16Ga. White ........................................................................... lLF.33 66720-001 ..................... Disconnect, STA-KON Female ............................................................ 634 BOW23087 ................... Terminal, Female Push-On .250W ........................................................ 335 67960-006 ..................... Terminal, Ring 10 16-14AWG ............................................................... 236 BOW23024 ................... Ring, Tongue 16-14 Ga 1/4 Stud ............................................................. 137 BOW23025 ................... Terminal, Ring Tongue 16-14Ga ........................................................... 138 BOWl 8578 ................... Terminal, Piggyback R 67963 ................................................................ 139 BOW23 087-2 ................ Terminal, Female Push-On .250W ........................................................ 240 BOW23028 ................... Terminal, 8 Stud 12/10Ga. Spade .......................................................... 441 67961-006 ..................... Terminal, 8 Stud 121l0Ga. Spade ........................................................ 10MANUAL 92357-003JUNE 1997
• FIGURE 16: Box Assembly - Lower Control~ 8AJE~r~-+--r--+----~1lQi:--... /-.....o HYD ( . 0 ARMS/ifALvES ~-=--r-ooM!2: 12 GA:3~ =~10 I1c5A= ------=;!"r-: ~~ 12r- =IT'14 I15 "UPPER"16=f=,= :.JfiI-fi1 ~ ~'l,: 1 ==::-.(crn~III- I- -~TO ~TACTORAND SLOPE SENSOJ-:lBOTTOM OF BOX ISLOPE-EJ EJ ' :
FIGURE 16: Box Assembly - Lower Control.ITEM PART NUMBER DESCRIPTION QIYRef. 55869-004 ..................... Box Assembly - Lower Control ....................................................... Ref.1 55488 ............................ Box, Mach. Lower Control ................................................................... 12 55893 ............................ Decal, Lower Control Box Electrical Tags ........................................... I3 51913 ............................ Operator, Red P-Pull ............................................................................. 14 51914 ............................ Base + 1 NC Contact ............................................................................ 15 52671 ............................ Operator, 3 Pos. Rot .............................................................................. 1Akk02016 ...................... -Key ..................................................................................................... 16 52029 ............................ Base + 2 NO Contacts .......................................................................... 17 50075 ............................ Switch, (Ref PIN" 67760) ....................................................................... 18 54438 ............................ Relay, 24V SPDT Bosch ...................................................................... 19 206-00001-00 ................ Diode ..................................................................................................... 810 67114-013 ..................... Strain Relief 1 NPT .62/.75 ................................................................... 111 67114-008 ..................... Connector, Strain Relief ........................................................................ 112 67114-009 ..................... Strain Relief, 3// NPT .62/.75 ............................................................... 213 67124-003 ..................... Locknut, 1" NPT .................................................................................... 114 67124-002 ..................... Locknut, 3/4 NPTConduit ...................................................................... 315 67123-003 ..................... Seal, Connector Elect 1" ............;........................................................... 116 67123-002 ..................... Seal, Connector Elect. 3/4" ••....•.•......•.......•.•••..•...••..•..•..............•.••.•..•..•. 317 BOW23022 ................... RingTongue .......................................................................................... 318 67837-006 ..................... Tie, Nylon 6" Black ............................................................................... 819 BOW31430 ................... Washer, Flat #10 ID .............................................................................. 120 BOW31129 ................... Screw, Slot Round Hd 8-32UNC x .375 ............................................... 121 BOW31232 ................... Nut, Hex Keps #8-32UNC ................................................................... 122 BOW31124 ................... Screw, Round Hd #6-32UNF x '/2"Lg .................................................. 423 BOW31231 ................... Nut, Hex Keps #6-32 ............................................................................ 424 BOW31428 ................... Washer, Flat #6 ..................................................................................... 425 67295-024 ..................... Cable, 8 Condo 16AWG Type SO .............................................. 9.50LF.26 67295-004 ..................... Cable, 12 Conductor 16Ga ............................................................... 5LF.27 67295-022 ..................... Cable, 12 Ga/3C ......................................................................... 6.50LF28 34552-016 ..................... Terminal Strip ........................................................................................ 229 67940 ............................ Holder, Fuse .......................................................................................... 130 67939-015 ..................... Fuse, 15Ga 1/4" x 1-1/4" ......•.....••.••.••.••.•....•....•.•.••.•..•••.........•.........•......• 131 58251 ............................ Wire, 12Ga. White ........................................................................... 4LF.32 58292 ............................ Wire, 16Ga. White ........................................................................... lLF.33 66720-001 ..................... Disconnect, STA-KON Female ............................................................ 634 BOW23087 ................... Terminal, Female Push-On .250W ........................................................ 335 67960-006 ..................... Terminal, Ring 10 16-14AWG ............................................................... 236 BOW23024 ................... Ring, Tongue 16-14 Ga 1/4 Stud ............................................................. 137 BOW23025 ................... Terminal, Ring Tongue 16-14Ga ........................................................... 138 BOW18578 ................... Terminal,PiggybackR67963 ................................................................ 139 BOW23087-2 ................ Terminal, Female Push-On .250W ........................................................ 240 BOW23028 ................... Terminal, 8 Stud 12/10Ga. Spade .......................................................... 441 67961-006 ..................... Terminal, 8 Stud 12/10Ga. Spade ........................................................ 10MANUAL 92357-003JUNE 1997
.FIGURE 17: AnnstackAssembly~~------____________ SEE NOTE 1 ;2 _------------------~---- ---- - ---- ----- ----- ------ ------ -- ---- ---- -------- --____ _ b~ - ---- ~..::----~------ -:..>- - ------ --- ---- ---- -- ---- -- ----- -____ - - ---- ______ ---- - - 25 26 ---- - _ ____ - ---- - _____- ---- ---- ------- ---- ------ -- ---- ------ ------ --25 26 - - ---- - - ---- _ ------ - - - --c::.: ----- -- _---- ------ -------- ----..-----Q~--------::--..::-- SEE NOTE 1 \3 ~>-------~-o----_--~2 SEE NOTE 1 ______ - ____ - - - - _____ 0 - ,_----- ------ ____ -- ------ 25 -6 L ------ __"q __ --- __~~-;-::::::= ~ : "", ~ 36 28 - ____: ~ ~~--2 PL22 SEE NOTE 1------ - ) ---=-----=--::- ------39 - ~-_-:::::-- - ---- - _- - ____---=:::: ----:::::-- ----32 33 2 PL ~~_-_ Q22 SEE NOTE 1 ____ - ------- -2 PL ____ - - ----\ - - - ----\\ - ---- --- -* -- ~-- ----\ " ------- - -------~------~ --- ----=---~r.::-~---~~-=;->~-- ~-~--~--~--------~-:;:;~_----------- 25 26 2 PL -------_~ __ ~~1. BOLT IS TO BE ON UPHill SIDE OFROUND TUBE. NUT AND WASHER ARETO BE ON DOWNHill SIDE OF ROUNDTUBE.2. EST WT 1992 lB FOR 55744EST WT 2002 LB FOR 55744XlMANUAL 92357-003JUNE 1997
FIGURE 17: Armstack ASSemblY.~IT~E~M~~P~AR~T~N~U~M~B=E~R~~D~E~S~C~RI~P~T~I~O~N~ ______________________ ~QTYRef.12345678910111213141516171819202122232425262728293031323334353637383940414255744 ............................ ArmstackAssembly ......................................................................... Ref.56135 ............................ Arm Weldment, Lower Outer ................................................................ 156106 ............................ Arm Weldment, Lower Inner ................................................................ 156159 ............................ Arm Weldment, Lower LH ................................................................... 156160 ............................ Arm Weldment, Lower RH ................................................................... 156168 ............................ Arm Weldment, Middle ........................................................................ 156157 ............................ Arm Weldment, UpperLH .................................................................... 156158 ............................ Arm Weldment, Upper RH .................................................................... 156089 ............................ Arm Weldment, Upper Cylinder ........................................................... 155748 ............................ Arm Weldment, Upper Outer ................................................................ 155749 ............................ Arm Weldment, Upper Inner ................................................................. 181368-007 ..................... Bearing, 1.50 ID x 2.50 OL x lIs" W .................................................. 1881368-11-040 ............... Bearing, 2.0 ID x2.50 OL x lIs" W ...................................................... 254616-003 ..................... Pin, Arm Pivot 1.50 Dia 6.38LG .......................................................... 254616-016 ..................... Pin, Arm Pivot 1.50 Dia. 7.88LG ......................................................... 254616-012 ..................... Pin, Arm Pivot 1.50 Dia. 26.25LG ....................................................... 654616-013 ..................... Pin, Arm Pivot 1.50 Dia. 14.25LG ....................................................... 256073-012 ..................... Pin, Arm Pivot 1.50 Dia. 26.25LG 4140 ............................. ~ ............... 156090 ............................ Pin, Arm Pivot 2.00 Dia. 26.50LG 4140 ............................................. 155744-Weldment .......... Armstack Weldment- <strong>V2648</strong>/531XL .................................................... 1167-00002-00 ............... Collar, 2" Shaft ...................................................................................... 266388-001 ..................... Collar, 1 1 / 2" Shaft ................................................................................ 18BOW30037 ................... Bolt, Hex .31-18UNC x 3.00 .............................................................. 11BOW30039 ................... Bolt, Hex .31-18UNC x 3.50 ................................................................. 1BOW30040 ................... Bolt, Hex .31-18UNC x 4.00 ................................................................ 2BOW31432 ................... Washer, Flat .31 ID x .68 OD ............................................................. 13BOW36273 ................... Nut, Lock Hex 5/16"-18UNC ............................................................. 1002236 ............................ Elbow 90° MJ04 MOO4 ....................................................................... 102662 ............................ Elbow 90° MJ06 M006 ....................................................................... 181368-07-16 ................. Bearing, 1.5 ID x 1.0 L X I/s"W ............................................................. 4BOW32606 ................... Clamp, Wire Loom I" ............................................................................ 9BOW9977 ..................... O-Ring .375 x .500 OD ......................................................................... 1BOW30002 ................... Bolt, Hex .25-20UNC x .75 .................................................................. 2BOW31401 ................... Washer, Flat .25 ID x .68 OD ............................................................... 255848-026 ..................... "V" Main Cable Harness ....................................................................... 155849-026 ..................... "V" "XL" Main Cable Harness .............................................................. 1BOW30035 ................... Bolt, Hex .31-18UNC x 2.50 ................................................................ 255083 ............................ Manifold Assembly - Lift Cylinder ....................................................... 155715 ............................ Bracket Weldment, Lower .................................................................... 154798 ............................ Coupling Nut, #10-32UNF .................................................................... 156007 ............................ Cylinder, Lift <strong>V2648</strong>/53 ........ ('1' .•............................•.•....•....•................. 155511 ............................ Cylinder, Lift <strong>V2648</strong>/53XL .. 1.\~ ... \I.~.~ ... 5.5.~?:\ .......................... 167281-005 ..................... Wrapping, Spiral 3/4" ................................................................. .3.75LFBOW34272 ................... Nut, Lock Hex 1/4"-20UNC ................................................................... 967295-017 ..................... Cable, 12Ga.l3C ............................................................................. 47LF- Indicates Items Not ShownMANUAL 92357-003JUNE 1997
.FIGURE 17: ArmstackAssemblyREF-PAD IS IN FINAL ASSYREF-BRG BLOCK IS IN PLTFRM ASSYREF-PIN IS IN FINAL ASSY10E---, 7 PLi4298RIGHT NEARSIDEc5RIGHT NEARSIDE40 4 PLRIGHT SIDE VIEWREF-PAD IS INFINAL ASSY4 PL2 PL1. IF COLLARS HAVE MANUFACTURERSTAMPED ON ONE SIDE, PLACESTAMPED SIDE TOWARD ARMSTACK,2. USE ITEM 17 AT #8 TO #3/4 ARM JOINTS,INSTALL ARMS #3 & #4 WITH BACKUPPLA TE AT JOINT WITH ARM #8.Scale= 1: 3PLMANUAL 92357-003JUNE 1997
FIGURE 17: Armstack ASSembly.~IT~E=M~~P~AR~T~N~UMB~==E~R~~D=E=S=C=RI=P~T=I=O=N~ ______________________ ~QTYRef. 55744 ............................ ArmstackAssembly ......................................................................... Ref.1 56135 ............................ Arm Weldment, LowerOuter ................................................................ 12 56106 ............................ Arm Weldment, Lower Inner ................................................................ 13 56159 ............................ Arm Weldment, Lower LH ................................................................... 14 56160 ............................ Arm Weldment, Lower RH ................................................................... 15 56168 ............................ Arm Weldment, Middle ........................................................................ 16 56157 ............................ Arm Weldment, UpperLH .................................................................... 17 56158 ............................ Arm Weldment, Upper RH .................................................................... 18 56089 ............................ Arm Weldment, Upper Cylinder ........................................................... 19 55748 ............................ Arm Weldment, Upper Outer ................................................................ 110 55749 ............................ Arm Weldment, Upper Inner ................................................................. 111 81368-007 ..................... Bearing, 1.50 ID x 2.50 OL x lIs" W .................................................. 1812 81368-11-040 ............... Bearing, 2.0 ID x 2.50 OL x lIs" W ...................................................... 213 54616-003 ..................... Pin, Arm Pivot 1.50 Dia 6.38LG .......................................................... 214 54616-016 ..................... Pin, Arm Pivot 1.50 Dia. 7.88LG ......................................................... 215 54616-012 ..................... Pin, Arm Pivot 1.50 Dia. 26.25LG ....................................................... 616 54616-013 ..................... Pin, Arm Pivot 1.50 Dia. 14.25LG ....................................................... 217 56073-012 ..................... Pin, Arm Pivot 1.50 Dia. 26.25LG 4140 ............................................. 118 56090 ............................ Pin, Arm Pivot 2.00 Dia. 26.50LG 4140 ............................................. 119 55744-Weldment .......... Armstack Weldment- <strong>V2648</strong>/531XL .................................................... 120 167-00002-00 ............... Collar, 2" Shaft ...................................................................................... 221 66388-001 ..................... Collar, 1 1 / 2" Shaft ................................................................................ 1822 BOW30037 ................... Bolt, Hex .31-18UNC x 3.00 .............................................................. 1123 BOW30039 ................... Bolt, Hex .31-18UNC x 3.50 ................................................................ 124 BOW30040 ................... Bolt, Hex .31-18UNC x 4.00 ................................................................ 225 BOW31432 ................... Washer, Flat .31 ID x .68 OD ..................,,,........................................ 1326 BOW36273 ................... Nut,LockHex 5/16"-18UNC ............................................................. 1027 02236 ............................ Elbow 90° MJ04 M004 ....................................................................... 128 02662 ............................ Elbow 90° MJ06 M006 ....................................................................... 129 81368-07-16 ................. Bearing, 1.5 ID x 1.0 Lx I/s"W ............................................................. 430 BOW32606 ................... Clamp, Wire Loom 1" ........................................................................... 931 BOW9977 ..................... O-Ring .375 x .500 OD ......................................................................... 132 BOW30002 ................... Bolt, Hex .25-20UNC x . 75 .................................................................. 233 BOW31401 ................... Washer, Flat .25IDx.680D............................................................... 234 55848-026 ..................... "V" Main Cable Harness ....................................................................... 155849-026 ..................... "V" ·'XL" Main Cable Harness .............................................................. 135 BOW30035 ................... Bolt, Hex .31-18UNCx2.50................................................................ 236 55083 ............................ Manifold Assembly - Lift Cylinder ....................................................... 137 55715 ............................ Bracket Weldment, Lower .................................................................... 138 54798 ............................ CouplingNut, #10-32UNF .................................................................... 139 56007 ............................ Cylinder, Lift <strong>V2648</strong>/53 ........................................................................ 155511 ............................ Cylinder, Lift <strong>V2648</strong>/53XL .................................................................. 140 67281-005 ..................... Wrapping, Spiral 3/4" ................................................................. .3.75LF41 BOW34272 ................... Nut, Lock Hex 1/4"-20UNC ................................................................... 942 67295-017 ..................... Cable, 12Ga./3C ............................................................................. 47LF- Indicates Items Not ShownMANUAL 92351-003JUNE 1991
• FIGURE 17: Armstack Assembly12 PL6 PL12 PLSEE NOTE 1SECTION E-E 6 PLScole= 1: 318- --------------------------------------------------------------$------------------------------------------------------------ ----2 PL 20SEE NOTE 1SECTION D-DScole= 1: 3BACKUPPLATE REFSEE NOTE 2- -----------------------------------------------------------+-----------------------------------------------------------2 PL 21SEE NOTE 1SECTION C-CScole= 1: 3SEE NOTE 1SECTION 8-8Scole= 1: 32 PL 14 I2 PL 21SEE NOTE 1SECTION A-AScole= 1: 3MANUAL 92357-003JUNE 1997
FIGURE 17: AnnstackAssemblyG~IT~E=M~~P~AR~T~N~U~MB~~E~R~~D~E=S~C~RI=P~T~I~O~N~ ______________________ ~QTYRef. 55744 ............................ AnnstackAssembly ......................................................................... Ref.1 56135 ............................ Ann Weldment, Lower Outer ................................................................ 12 56106 ............................ Ann Weldment, Lower Inner ................................................................ 13 56159 ............................ Ann Weldment, Lower LH ................................................................... 14 56160 ............................ Ann Weldment, Lower RH ................................................................... 15 56168 ............................ Ann Weldment, Middle ........................................................................ 16 56157 ............................ Ann Weldment, UpperLH .................................................................... 17 56158 ............................ Ann Weldment, UpperRH .................................................................... 18 56089 ............................ Ann Weldment, Upper Cylinder ........................................................... 19 55748 ............................ Ann Weldment, Upper Outer ................................................................ 110 55749 ............................ Ann Weldment, Upper Inner ................................................................. 111 81368-007 ..................... Bearing, 1.50 ID x 2.50 OL x lIs" W .................................................. 1812 81368-11-040 ............... Bearing, 2.0 ID x 2.50 OL x I Is" W ...................................................... 213 54616-003 ..................... Pin, Ann Pivot 1.50 Dia 6.38LG .......................................................... 214 54616-016 ..................... Pin, Ann Pivot 1.50 Dia. 7.88LG ......................................................... 215 54616-012 ..................... Pin, Ann Pivot 1.50 Dia. 26.25LG ....................................................... 616 54616-013 ..................... Pin, Ann Pivot 1.50 Dia. 14.25LG ....................................................... 217 56073-012 ..................... Pin, Ann Pivot 1.50 Dia. 26.25LG 4140 ............................................. 118 56090 ............................ Pin, Ann Pivot 2.00 Dia. 26.50LG 4140 ............................................. 119 55744-Weldment .......... Annstack Weldment - <strong>V2648</strong>/531XL .................................................... 120 167-00002-00 ............... Collar, 2" Shaft ...................................................................................... 221 66388-001 ..................... Collar, 1 1 / 2" Shaft ................................................................................ 1822 BOW30037 ................... Bolt,Hex .31-18UNCx3.00 .............................................................. 1123 BOW30039 ................... Bolt, Hex .31-18UNC x 3.50 ................................................................ 124 BOW30040 ................... Bolt,Hex .31-18UNC x 4.00 ................................................................ 225 BOW31432 ................... Washer, Flat .31 ID x .68 OD ............................................................. 1326 BOW36273 ................... Nut, Lock Hex 5/16"-18UNC ............................................................. 1027 02236 ............................ Elbow 90° MJ04 MOO4 ....................................................................... 128 02662 ............................ Elbow 90° MJ06 M006 ....................................................................... 129 81368-07-16 ................. Bearing, 1.5 ID x 1.0 Lx I/s"W .............................._.............................430 BOW32606 ................... Clamp, Wire Loom 1" ........................................................................... 931 BOW9977 ..................... O-Ring .375 x .500 OD ......................................................................... 132 BOW30002 ................... Bolt, Hex .25-20UNCx.75 .................................................................. 233 BOW31401 ................... Washer, Flat .25IDx.680D............................................................... 234 55848-026 ..................... "V" Main Cable Harness ....................................................................... 155849-026 ..................... "V" "XL" Main Cable Harness .............................................................. 135 BOW30035 ................... Bolt, Hex .31-18UNC x 2.50 ................................................................ 236 55083 ............................ Manifold Assembly - Lift Cylinder .............................................. ~ ........ 137 55715 ............................ Bracket Weldment, Lower .................................................................... 138 54798 ............................ CouplingNut, #10-32UNF .................................................................... 139 56007 ............................ Cylinder, Lift <strong>V2648</strong>/53 ........................................................................ 155511 ............................ Cylinder, Lift <strong>V2648</strong>/53XL .................................................................. 140 67281-005 ..................... Wrapping, Spiral 3/4" ................................................................. .3.75LF41 BOW34272 ................... Nut, Lock Hex 1/4"-20UNC ................................................................... 942 67295-017 ..................... Cable, 12Ga./3C ............................................................................. 47LF- Indicates Items Not ShownMANUAL 92357-003JUNE 1997
• FIGURE 18: Platform Installation617ATTACH CHAINON RIGHT SIDE2 PL18~' FAR SIDE4 NEAR SIDE- - - - - - - - - - - - ~iF====~~~I=========I2 PL14MANUAL 92357-003JUNE 1997
FIGURE 18: Platform InstallationGITEM PART NUMBER DESCRIPTION QIYRef. 55663 ............................ Platform Installation <strong>V2648</strong>/53XL ................................................... Ref.1 55572 ............................ Platform Weldment ............................................................................... 12 54582 ............................ Block, ArmIPlatform Bearing ................................................................ 23 55599-001 ..................... Toeboard WeldmentLH ........................................................................ 14 55599-002 ..................... Toeboard Weldment RH ....................................................................... 15 55607 ............................ Handrail Weldment ................................................................................ 26 55612 ............................ Gate Weldment, Lift-Up ........................................................................ 17 54685 ............................ Strap Weldment, Lift-Up Gate .............................................................. 28 164-00013-00 ................ Chain,2/0 ..................................................................................... 2.62LF9 50286 ............................ Chain Snap ............................................................................................ 110 BOW2548 ..................... S-Hook .................................................................................................. 111 54682 ............................ Roller Weldment, Extension Deck Mount ............................................. 412 54689 ............................ Roller, Extension Deck .......................................................................... 413 BOW367U-HD ........... Washer, Flat 3/4" SAE Thick ................................................................. 414 55600 ............................ Deck Weldment, Extension ................................................................... 115 55563 ............................ Bracket Weldment, Lock Mount ........................................................... 116 55241 ............................ Latch Assembly, Deck .62-11UNC Mount.. ........................................ l55245 ............................ -Latch Body, Deck .62-11UNC Mnt. ................................................. 155243 ............................ -Spring, Deck Latch ............................................................................. 155242 ............................ -Plunger, Deck Lazwtch ...................................................................... 155031 ............................ -SlitRing,Zinc-Plated ........................................................................... 117 55567 ............................ Handrail Weldment, Extension .............................................................. 118 55670 ............................ Tube, Lift-Up Guide .............................................................................. 219 55681 ............................ Tube, Extension Deck Rear .................................................................. 220 55929 ............................ Dwg.-Extension Deck Foot ................................................................... 121 55207 ............................ Foot,HandraillEntryGate ...................................................................... 422 BOW30027 ................... Bolt, Hex .31-18UNC x .75 ................................................................ 1623 BOW34602 ................... Bolt, Carr. .31-18UNC x 1.25 ............................................................ 1624 BOW30036 ................... Bolt, Hex .31-18UNC x 2.75 ................................................................ 425 BOW30002 ................... Bolt, Hex .25-20UNC x .75 .................................................................. 626 BOW30008 ................... Bolt, Hex .25-20UNC x 2.00 .............................................................. 1827 BOW34273 ................... Nut, Hex Lock .31-18UNC ................................................................ 3628 BOW36780 ................... Nut, Hex Lock .25-20UNC ................................................................ 2429 BOW31432 ................... Washer, Flat .31 ID x .68 OD ............................................................ 4030 BOW31444 ................... Washer, Flat .25 ID x .63 OD ............................................................ 48- Indicates Items Not ShownMANUAL 92357-003JUNE 1997
• FIGURE 19: Upper Control Box Assembly33 REF17:I!-'"Vl !"'" 0'" mREF 314 3.P37 REFDRIVE SPEEDL@>FORWARDREVERSE19(------------------------------'1D \j1720POWERRAISE10 11LOWERI I' I I :I I' I I rl ___________________________ ll J_~ _____ IIIIIIIIII IMANUAL 92357-003JUNE 1997
FIGURE 19: Upper Control Box ASSembly.ITEM PART NUMBER DESCRIPTION QIYRef.12345678910111213141516171819203132333435363755317 ............................ Upper Control Box Assembly .......................................................... Ref.54587 ............................ Box, Upper Control ............................................................................... 154589 ............................ Contr. BMS4RM9071 WIRG5 + Lever ................................................ 154589-100 ..................... -Boot ...................................................................................................... 151913 ............................ Operator-PushPull ................................................................................ 151914 ............................ Contact Block NC ................................................................................. 152670 ............................ Operator Selector .................................................................................. 134464 ............................ Contact·Block NO-NC .......................................................................... 1[Not Used] .......................................................................................................... : .......................... .[Not Used] ..................................................................................................................................... .69146 ............................ Operator, Green Pushbutton .................................................................. 154913 ............................ Operator - BlackIBlack Dual Switch ..................................................... 152029 ............................ Block Contact 2 NO wlBase ................................................................ 154910-104 ..................... Mounting Base - AG Panel ................................................................... 154910-102 ..................... Recep. Screw Term. #1-16 ................................................................... 167837-006 ..................... Tie, Nylon 6.00" Black ...................................................................... : .... 5BOW31125 ................... Screw, Slotted Pan #06-32UNF x .62" .................................................. 4BOW31231 ................... Nut, Hex Keps #6-32 ............................................................................ 455012 ............................ Insert, Control Box Plastic ..................................................................... 258300 ............................ Wire, 16GaBIack ............................................................................ 8LF.54976-001 ..................... Decal, Upper Control Box ..................................................................... 154976-002 ..................... Decal, Upper Control Box ..................................................................... 1A620-2633 .................... BatleryConditionIndicator(Option) ................................................ Ref.A353-2633 .................... Slope Alarm (Option) .................................................... : .................. Ref.A626-2633 .................... LowVoltAlarmlInterrupt(Option) .................................................. Ref.A304-2633 .................. :.SignaIHorn(Option) ......................................................................... Ref.- Indicates Items Not ShownMANUAL 92357-003JUNE 1997
::::i~_'D~Ij~r----.-... -- _.16SEENOTE 1,-----------------,OPTIONALSLOPEALARMI.. L1.~ ~L1PPED ~~EN)-1---~F! ~'~ - - - --1---- --- --- --- -1------1OPTIONALSA TTERYINDICATOR3A~Q~ I SEE 1 SEE ~~'NOTEI(p1'b\lJ>jA ______ ~~L ______ _OPTIONALLOW VOLTAGEOVERRIDE SWITCHOPTIONALSIGNAL HORNSWITCH16,r----------I----~-------VIEW OF INSIDE OF BOX13i;--~...158:~I~,01~o"'""---IJ~:L _________________ .--J,"r:I-§~-\0~~no-~otc~:>enen80"qNOTES:1. CONNECT CIRCUIT 3 AS REQUIRED BY OPTIONS.2. CIRCUITS 1, 5, 13, 14, 15. & 16 ARE FOR OPTIONS._'M,"'''''_ I~~'!:!~~nlLE~~.~5,au:-a:5"':':1Im~APf'1iI. r DIWM8_ SfFCIK I'/lOII5 CRN< 02/01 SC.tl£ 1:1.5WACO, TEXASBOX ASSY, MDD2633UPPER CNTRL553172 or 2c
FIGURE 19: Upper Control Box ASSembly.ITEM PART NUMBER DESCRIPTION QTYRef. 55317 ............................ Upper Control Box Assembly .......................................................... Ref.1 54587 ............................ Box, Upper Control ............................................................................... 12 54589 ............................ Contr. BMS4RM9071 WIRG5 + Lever ................................................ 154S89-100 ..................... -Boot ...................................................................................................... 13 51913 ............................ Operator-PushPull ................................................................................ 14 SI914 ............................ ContactBlockNC ................................................................................. 15 52670 ............................ Operator Selector ................................................................................... 16 34464 ............................ ContactBlockNO-NC .......................................................................... 17 52669 ............................ Operator Black Pushbutton ................................................................... 1-s-=--52672 ............................ Contact Block 1 NO .............................................................................. 29 69146 ............................ Operator, Green Pushbutton .................................................................. 110 54913 ............................ Operator - BlackIBlack Dual Switch ..................................................... 111 52029 ............................ Block Contact 2 NO wlBase ................................................................. 112 54910-104 ..................... Mounting Base - AG Panel ................................................................... 113 54910-102 ..................... Recep. Screw Term. #1-16 .................................................................... 114 67837-006 ..................... Tie, Nylon 6.00" Black .......................................................................... 5IS BOW31125 ................... Screw, Slotted Pan#06-32UNF x .62" .................................................. 416 BOW31231 ................... Nut, Hex Keps #6-32 ............................................................................. 417 5S012 ............................ Insert, Control Box Plastic .................................................................... 218 58300 ............................ Wire, 16Ga Black ............................................................................ 8LF.19 54976-001 ..................... Decal, Upper Control Box ..................................................................... 120 54976-002 ..................... Decal, Upper Control Box ..................................................................... 131323334353637A620-2633 .................... Battery Condition Indicator (Option) ............................................... Ref.A353-2633 .................... Slope Alarm (Option) ....................................................................... Ref.A626-2633 .................... Low Volt Alarm/Interrupt (Option) .................................................. Ref.A304-2633 .................... Signal Hom (Option) ........................................................................ Ref.- Indicates Items Not ShownMANUAL 92357-003JUNE 1997
• FIGURE 20: 110 Volt Exte~ion To PlatformGREENWHITEOF PLATFORM-NOT ILLUSTRATED00WHITE«'"glOHBLACK23 PL - LOCA TEDUNDERPLATFORMRE~CABLE IS INCLUDEDIN ARMSTACKAT CHASSIS12REF. LEFTGOLD SCREWFRONT OF CHASSISBLACKGREENGREEN SCREWWHITESILVER SCREWITEM PART NUMBER DESCRIPTION QTYRef.1234567891011121354918 ............................ 110 Volt Extension To Platform (Option) ........................................ Ref.66357 ............................ Receptacle, Ground Fault ...................................................................... 155019 ............................ OutletBox, Platform ............................................................................. 166358 ............................ Cover, Weatherproof ............................................................................. 167114-003 ..................... StrainReliefI/ 2"NPT .37/.5 ................................................................... 167124-001 ..................... Locknut, 1f2''NPT Strain Relief.. ............................................................ 167123-001 ..................... Seal, Connector Elect. 1/2" ••••••••••••••••••••••••••••••••••••••••••••••••••••••••••••••••••••• 1BOW31105 ................... 10-32 x .75 Slotted Pan Head, Machine Screw ..................................... 2BOW31233 .................... Nut, Hex Keps #10-32 ........................................................................... 2BOW32603 ................... Clamp, Wire Loom .50 .......................................................................... 452710 ............................ Plug, 110 Volt ....................................................................................... 155036-001 ..................... Grommet, 1/2" ID 114 x 13 / 16" Dia. Grv ................................................... 1BOW34272 ................... Nut, Hex Lock .25"-20UNC .................................................................. 4- Indicates Items Not ShownMANUAL 92357-003JUNE 1997
BILL OF MATERIALS INQUIRY Date: 07/22/99'.1 of Mat'l No: A317-V2033-1Desc: V20/26 PROPORTIONAL DRIVE,.I: ERCN 11009 08/26/1997 Last Activity: 07/20/99"----------------------------------------------------------J---------------------Lne Part No. Description Req I U/M Qty Reqd Lower----------------------------------------------------------T----------------Leve11 55852 BOX ASSY; V14/26 PROP DRV UPR W N EA 1.00 N2 55851 BOX ASSY; V XL UPPER W N EA -1.00 N3 55842-002 VALVE MOD, PROP DR HF V20/26 N EA 1.00 Y4 55379 VALVE INST, V20/26 N EA -1.00 Y5 55845 SCHEMATIC - V PROP DRIVE EL X N EA 1.00 N6 55838 SCHEMATIC - V PROP DRIVE HYD X N EA 1.00 N7 56003 INST DWG; PROPORTIONAL DRIVE X N EA 1.00 N8 66043-031.00 HOSE ASSY #3 67684 J37 STJ-STJ 1 Y EA 1.00 N9 55324 TUBE ASSY; MDD2633 BUY EA -1.00 NCTL III to Restart, CTL IV to END ... Line Number:
FIGURE 21: Travel Alann(Option) •ITEM PART NUMBER DESCRIPTION QTYRef. A301-2633 .................... Travel Alarm .................................................................................... Ref.-1 80188-024 ..................... Wobbulator and Speaker ....................................................................... 1-2 67295-035 ..................... Cable, 16Ga.l2 Conductor SJO ....................................................... 2LF-3 BOW23027 ................... Terminal 6 Stud 16/14Ga. Spade .........................................................4-4 55036-001 ..................... Grommet, !fz"ID 1/4" x 13/16"Dia. Grv .................................................... 1- Indicates Items Not ShownMANUAL 92357-003JUNE 1997
• FIGURE 22: Motion Alarm (Option)ITEM PART NUMBER DESCRIPTION QTYRef. AJ09-2633 .................... Motion Alarm ................................................................................... Ref.-1 80188-024 ..................... Wobbulator and Speaker ....................................................................... 1-2 67295-035 ..................... Cable, 16Ga'/2 Conductor SJO ....................................................... 2LF-3 BOW23 027 ................... Terminal 6 Stud 16/14Ga. Spade ......................................................... 4-4 55036-001 ..................... Grommet, 1/2"ID 1/4" x 13/1/Dia. Grv .................................................... 1-5 206-00001-00 ............... Diode ..................................................................................................... 2- Indicates Items Not ShownMANUAL 92357-003JUNE 1997
FIGURE 23: Strobe Light (Option) •REF. RIGHT SIDE VIEWOF PLATFORM.4ITEM PART NUMBER DESCRIPTIONQTYRef. A310-2633 .................... Strobe Light ...................................................................................... Ref.1 58395 ............................ Light Amber Strobe 12-72 VDC .......................................................... 12 BOW31400 ................... Washer, Flat #10 .................................................................................. 33 BOW31 144 ................... Screw, SlotRnd. #1O-32UNF x .50 ...................................................... 34 55400 ............................ Mount - Strobe Light 14" ..................................................................... 15 BOW3400 1 ................... Bolt, Hex .25-20UNC x 1.00 ................................................................ 26 BOW31432 ................... Washer, Flat .31 IDx.680D ............................................................... 27 BOW36780 ................... Nut, Hex .25-20UNC Nylon Lock ....................................................... 28 67295-035 ..................... Cable, 16Ga'/2 Conductor SJO .................................................... 50LF9 52672 ............................ Base + 1 NO Contact ZB2BZ 101 ......................................................... 210 58259 ............................ Wire, 18Ga. Black-Bulk .................................................................. lLF- Indicates Items Not ShownMANUAL 92357-003JUNE 1997
• FIGURE 24: Descend Alarm (Option)ITEM PART NUMBER DESCRIPTION QTYRef. A312-2633 .................... DescendAlann ................................................................................. Ref.-1 80188-024 ..................... Wobbulator and Speaker 24V ............................................................. 1-2 67295-035 ..................... Cable, 16Ga'/2 Conductor SJO ...................................................... 2LF-3 BOW23 027 ................... Terminal 6 Stud 16114Ga. Spade ........................................................ 4-4 55036-001 ..................... Grommet, 1/2"ID 1/4" x 13/16"Dia ............................................................ 1-5 34542 ............................ Jumper .................................................................................................. 1- Indicates Items Not ShownMANUAL 92357-003JUNE 1997
FIGURE 25: Slope Alarm (Option) •ITEM PART NUMBER DESCRIPTION QTYRef. A353-2633 .................... Slope Alarm ...................................................................................... Ref.-1 32002 ............................ Slope Sensor 2-Axis ............................................................................. 1-2 BOW30002 ................... Bolt, Hex .25-20UNC x . 750 ................................................................ 2-3 BOW31432 ................... Washer, Flat .31 ID x .68 OD ............................................................... 2-4 67295-024 ..................... Cable, 8 Conductor 16A WG Type SO ........................................... 7LF-5 BOW23003 ................... Terminal Ring #6796022-18 #10 Stud ................................................ 2-6 34644 ............................ Alarm ..................................................................................................... 1-7 58259 ............................ Wire, 18Ga. Black-Bulk .................................................................. 2LF- Indicates Items Not ShownMANUAL 92357-003JUNE 1997
• FIGURE 26: Hour Meter (XL-Option)8 2 PL8B=WHT#1 =BLK#1=BLK8B=WHTREFERENCEMOTOR CONTACTORITEM PART NUMBER DESCRIPTIONQTYRef. A619-2633 .................... HourMeter ....................................................................................... Ref.-1 80027 ............................ Meter, Hour 4/40V DC ......................................................................... 1-2 67840-001 ..................... Bracket, Gage Mounting ....................................................................... 1-3 BOW30003 ................... Bolt, Hex .25-20UNC x .875 ................................................................ 2-4 BOW31401 ................... Washer, Flat .25IDx.630D............................................................... 4-5 BOW36780 ................... Nut, Hex .25-20UNC Nylon Lock ....................................................... 2-6 67295-035 ..................... Cable, 16Ga.l2 Conductor SJO ...................................................... 6LF-7 BOW23087 ................... Coupler - R#67963 16-14 Female ......................................................... 2-8 67960-006 ..................... Terminal Ring - 16-14 # 10 Stud ........................................................... 2-9 67837-004 ..................... Tie, Nylon-4" Black .............................................................................. 4- Indicates Items Not ShownMANUAL 92357-003JUNE 1997
FIGURE 27: Battery Condition Indicator (XL-Option) •ITEM PART NUMBER DESCRIPTION QIYRef. A620-2633 .................... Battery Condition Indicator .............................................................. Ref.-1 37716 ............................ Meter, 24V Battery .............................................................................. 1-2 37993 ............................ Meter Guard .......................................................................................... 1-3 58300 ............................ Wire, 16Ga.-Black ........................................................................... 2LF-4 67963-001 ..................... Coupler - 22-18 Male ............................................................................ 2- Indicates Items Not ShownMANUAL 92357-003JUNE 1997
• FIGURE 28: Low-Voltage Warning Interrupt (XL-Option)ITEM PART NUMBER DESCRIPTION QTYRef. A626-2633 .................... Low-Voltage Warning Interrupt ....................................................... Ref.-1 54169 ............................ Low Voltage Interrupt 24V .................................................................. 1-2 54967-104 ..................... Operator, Blue IlIum Pushbutton ........................................................... 1-3 55902 ............................ Base + NO/Ne Contact w/24V Bulb ..................................................... 1-4 58259 ............................ Wire, 18Ga. Black-Bulk .................................................................. 6LF-5 54935 ............................ Decal- Low Volt Warning/Override ..................................................... 1-6 BOW31141 ................... Screw, Slotted Rnd. #10-24 x 2.00 ....................................................... 2-7 BOW31288 ................... Nut, Hex #10-32 ................................................................................... 2-8 BOW31430 ................... Washer, Flat #10ID ............................................................................. 4- Indicates Items Not ShownMANUAL 92357-003JUNE 1997
FIGURE 29: Larger Batteries IPOS (XL-OptiOn).ITEM PART NUMBER DESCRIPTION QTYRef. A629-2633 .................... Larger Batteries IPOS ..................................................................... Ref.-1 50046 ............................ Battery - 6 Volt ...................................................................................... 4-2 52627 ............................ Battery - 6V Trojan T125-WT ............................................................ -4-3 54836 ............................ Angle - Option Battery Tie-Down ......................................................... 2-4 55505 ............................ Angle, E2633 Battery Tie-Down 22" ................................................ -2- Indicates Items Not ShownMANUAL 92357-003JUNE 1997
TIME CONDOR CorporationSELF-PROPELLEDELEVATING WORK PLATFORM<strong>MODEL</strong> <strong><strong>V2648</strong>XL</strong>, <strong>V2648</strong>Serial Number XS15-9700 1<strong>MODEL</strong> V2653XL, V2653Serial Number XS35-97001VENDOR SECTIONSHIPPING ADDRESSCONDOR®TIME CONDOR Corporation8300 IMPERIAL DRIVEVVAco,TEXAS76712(254) 420-5200MAILING ADDRESSCONDOR®TIME CONDOR CorporationP.O. Box 21447VVACO, TEXAS 76702-1447(254) 420-5200MANUAL 92356-004May 1997
CONDOR® <strong>MODEL</strong> <strong>V2648</strong>/53XL, <strong>V2648</strong>/53VENDOR SECTIONTABLE OF CONTENTSCONTROLLER .................................................................................................. OEM CONTROLSCHARGER ................................................................................................ LESTER ELECTRICALOPEN CIRCUIT TRANSFORMER TEST .........................................................................................2000 SERIES MOTOR ............................................................................................... CHAR-LYNN