WSH-XSC 65D-70D-75D-80D-85D-90D-100D-110D - Delta-Temp
WSH-XSC 65D-70D-75D-80D-85D-90D-100D-110D - Delta-Temp
WSH-XSC 65D-70D-75D-80D-85D-90D-100D-110D - Delta-Temp

You also want an ePaper? Increase the reach of your titles
YUMPU automatically turns print PDFs into web optimized ePapers that Google loves.
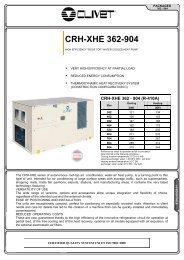
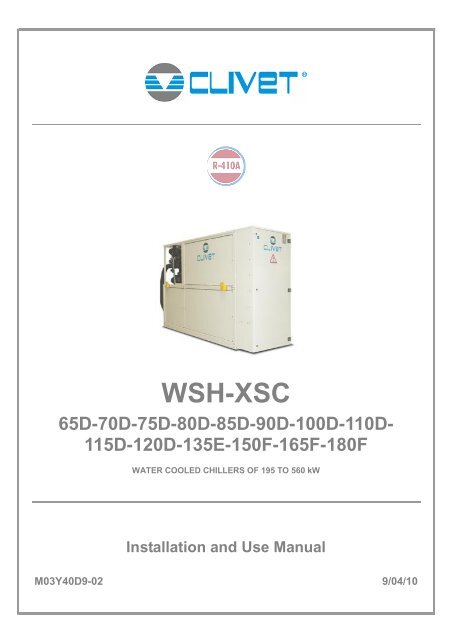
<strong>WSH</strong>-<strong>XSC</strong><strong>65D</strong>-<strong>70D</strong>-<strong>75D</strong>-<strong>80D</strong>-<strong>85D</strong>-<strong>90D</strong>-<strong>100D</strong>-<strong>110D</strong>-115D-120D-135E-150F-165F-180FWATER COOLED CHILLERS OF 195 TO 560 kWInstallation and Use ManualM03Y40D9-02 9/04/10
UNIT IDENTIFICATIONSERIAL NUMBER LABELThe units are identified by the serial number label shown here.The label lists the type of unit (series and size), serial number, yearof manufacture, number of electrical diagram, main technical data,logo and address of the manufacturer.The label is placed on the unit, generally near the electrical paneland also on the external panelling.IT MUST NEVER BE REMOVED.SERIAL NUMBERThis provides unique identification of the machine. It makes itpossible to trace the specific features of the unit and to identify thecomponents installed in it.Without this number, it is not possible to identify with certainty thespare parts that are specific to that unit.When requesting assistance, always provide the type of machineand the serial number.Write them in the space below so that they are readily availablewhen needed.Type of unit : _________________________________FACSIMILESerial number : _________________________________Wiring diagram : __________________________Year of manufacture : ___________________________M03Y40D9-01 09/04/10 page 4
MANUAL PURPOSEThis manual has been designed to enable the unit to beinstalled, started up and maintained correctly.MANUAL INSTRUCTIONSIt is essential to observe these instructions.The manufacturer declines all liability for any damage thatmay be caused whether directly or indirectly to persons orthings if these instructions are not heeded.USER TRAININGThe installer must provide the user with all necessaryinformation to use, maintain and troubleshoot of the unit.MANUAL STORAGEThis manual and the unit’s wiring diagram should becarefully stored so that they are readily available to theoperator when required.EXPERT PERSONALThe unit must be installed, tested and maintained by expertpersonal who meet the relevant legal requirements (Italianlaw No. 46 of 5/3/1990).LOCAL SAFET REGULATION INSTALLATIONThe installation must be performed observing the localsafety regulations.POWER SUPPLYMake sure the power supply conforms to the data on theunit’s rating plate, located inside the door of the mainelectrical panel.PACKAGINGThe packaging material (plastic bags, polystyrene foam,nails, etc.) is potentially dangerous and should therefore bekept away from children and recycled in compliance withthe local regulations in force.MAINTENANCEBefore performing any service operations, cut off the power.Perform the operations in conformity with the localregulations in force.PERIODICAL INSPECTIONSPerform periodical inspections to locate possible loosenedor broken parts. If the repairs are not performed, there willbe a higher risk for things and peoples to become damagedand injured.FAULT – POOR OPERATIONSwitch off the unit in the event of faults or poor operation.REPAIROnly have repairs carried out by a service centre authorisedby the manufacturer, and insist on the use of original spareparts only.Failure to comply with the above may compromise thesafety of the unit.MODIFICATIONSThe manufacturer will not accept any responsibility, and thewarranty will lapse, in the event of electric and/ormechanical modifications. Any modification which is notformally authorized, and which does not respect theinstructions given in this manual, will cause the warranty tolapse.GENERAL WARNINGSINTENDED USEThe unit must only be used for the specific purpose it wasdesigned :The unit is designed to cool/heat water or a water andglycol mix for air-conditioning, within the limits definedin the technical bulletin and this manual.Any use other than that specified does not imply anycommitment or constraint by the manufacturer in any waywhatsoever.ADDITIONAL SAFETY PRECAUTIONSThis unit has been especially designed and manufacturedso to prevent any risk to persons and health hazard.For this reason, design solutions fit to eliminate (wherepossible) any cause of risk and sensibly reduce theprobability of danger have been adopted.Please refer to the "Residual Risks" section of this manualand strictly observe the behaviour prescriptions listed therein order to prevent any possible risk that hasn’t beenpossible to avoid in the design stage.DATA UPDATINGThe manufacturer may be able to modify the data withoutprior notice as a consequence of constant improvements.M03Y40D9-01 09/04/10 page 5
Your VP-437xl Presentation Switcher / Scaler3.1 Recommendations for Best PerformanceTo achieve the best performance:• Connect only good quality connection cables, thus avoiding interference,deterioration in signal quality due to poor matching, and elevated noiselevels(often associated with low quality cables)• Do not secure the cables in tight bundles or roll the slack into tight coils• Avoid interference from neighboring electrical appliances and positionyour Kramer VP-437xl away from moisture, excessive sunlight and dust3.2 Recycling Kramer ProductsThe Waste Electrical and Electronic Equipment (WEEE) Directive2002/96/EC aims to reduce the amount of WEEE sent for disposal to landfillor incineration by requiring it to be collected and recycled. To comply withthe WEEE Directive, Kramer Electronics has made arrangements with theEuropean Advanced Recycling Network (EARN) and will cover any costs oftreatment, recycling and recovery of waste Kramer Electronics brandedequipment on arrival at the EARN facility. For details of Kramer’s recyclingarrangements in your particular country go to our recycling pages athttp://www.kramerelectronics.com/support/recycling/.4 Your VP-437xl Presentation Switcher / ScalerFigure 1, Table 1 and Table 2 define the VP-437xl Presentation Switcher /Scaler:4KRAMER: SIMPLE CREATIVE TECHNOLOGY
RESIDUAL RISKSGENERALThis section lists some of the more common situationswhich, being beyond the control of the manufacturer, couldbe a source of risk to persons or property.DANGER AREAThe figure below highlights the area in which onlyauthorised personnel may operate.External danger zone, identified by a precise areaaround the unit and its vertical projection on theground in the case of hanging unit.Internal danger zone, identified by the area that canbe entered only after having intentionally removed theprotecting panels or parts of these.DA = 2000mm B = 2000mmC = 2000mm D = 2000mmHANDLINGIf handling operations are undertaken without adopting allthe necessary safety procedures and exercising due care,the unit can fall or topple, causing damage — possiblyextremely serious — to persons and/or property, and tothe unit itself.Ensure the unit is handled and manoeuvred as directed onthe packing and in the present manual, and in accordancewith local regulations.In the event of refrigerant gas escaping, refer to the―Safety datasheet‖ for the particular refrigerant.INSTALLATIONIncorrect installation of the unit can result in water leaks,accumulation of condensate, escape of refrigerant, electricshocks, fire, as well as irregular operation or damage tothe unit itself.Make certain that the installation is carried out only by aqualified technician, also that the directions contained inthis manual are followed and local statutory regulationsobserved.In the event of the unit being installed in a site where thereis even the slightest risk of inflammable gas escapes andconsequently the possibility of such gases accumulating inarea around the unit, the risk of explosion and fire cannotbe discounted.Take every care and precaution when selecting theinstallation site.Installation on a structure not able to bear the weightand/or afford a secure anchorage of the equipment mayACBcause the unit to fall and/or topple, resulting in damage topersons or property, or to the unit itself. Make certain thatevery care and precaution is taken when positioning andsecuring the unit.If the unit is easily accessible to children, unauthorizedpersons or animals, this is a situation that can give riseaccidents and injuries, perhaps serious. Install the unit in aplace where access is allowed only to authorized persons,or install barriers or guards preventing unauthorized entry.GENERAL RISKSA smell of burning, smoke or other indications of seriousirregularity could signal the onset of situations liable tocause damage to persons or property or to the unit itself.Isolate the unit from the electrical power supply (red-andyellow)switch.Contact an authorized service centre so that the source ofthe problem can be identified and remedied.Accidental contact with heat exchange coils, compressors,pressure pipelines or other components can result inwounding or burns, or both.Always wear suitable clothing, including protective gloves,when working in the danger area.Maintenance or repairs carried out by unskilled operativescan result in harm or damage to persons and property, orto the unit itself. Always contact an authorized servicecentre.Failure to close the panels of the unit, or to check that allthe fixing screws of the panels are properly tightened, canresult in harm or damage to persons or property, or to theunit itself.Verify periodically that all panels are closed and madeproperly secure.In the event of fire, the temperature of the refrigerant canrise to the point that pressure will exceed safety levels andperhaps cause fluid to be projected. It may also happenthat parts of the circuit isolated by closed valves willexplode.Do not stand near safety valves, and never leave thevalves of the refrigerant circuit closed.ELECTRICAL SYSTEMIf the power line connecting the unit to the a.c. supply isincomplete, or if the connection is made with cables ofincorrect cross section and/or with insufficiently ratedprotective devices, this can result in electric shock, toxicityhazard, damage to the unit or fire.All work on the electrical system should be carried outreferring to the wiring diagram and to the directions givenin this manual, and the system itself must be dedicated.Failure to secure the cover enclosing electricalcomponents can lead to the infiltration of dust and water,ultimately causing electric shocks, damage to the unit, orfire.Always fasten the cover securely to the unit.If live metal parts of the unit are not connected properly tothe earth system, they can cause electric shock or evendeath by electrocution.M03Y40D9-01 09/04/10 page 7
RECEPTIONINSPECTION UPON RECEPTIONCheck on arrival that the unit has not suffered damageduring transit and that it is complete in every part asspecified in the order. In the event of visibledamage/deficiencies being discovered, make a noteimmediately on the delivery document with the comment:CONDITIONAL ACCEPTANCE — CLEAR EVIDENCE OFDEFICIENCIES/DAMAGE DURING TRANSITInform both the supplier and the carrier of the details byfax and by registered mail with advice of receipt not laterthan 8 days after taking consignment. Notifications sentafter 8 days have elapsed will be ignored.STORAGEShelter from: direct sunlight, rain, sand and wind<strong>Temp</strong>erature: maximum 60°C minimum -10°CMaximum humidity: 90%The respect of the instructions on the exterior side of thepackaging assures the physical and functional integrity ofthe unit for the final user’s advantage.It is recommended to:Handle carefullyKeep in a dry placeAvoid putting other objects on top of the unit (respectthe limits of levels of superimposition shown in thepackage)Avoid placing the unit with thermoretractableprotection under the sun since the pressure of thecircuits can assume values which activate the safetyvalves.HANDLINGThe operation of handling the unit must be carried outrespecting the instructions of the safety norms in force(Legislative Decree 626/94 and following modifications)Before starting the handling operations:Value the critical points during handling (stairs, flights,disconnected routes, doors, etc)Verify that the lifting capacity of the means used isadequate to the unit weightConsider that the barycentre could be moved withrespect to the center of the unitBefore starting to lift, verify that the unit is at a stablebalanceThe following examples are indications; the choice of themeans and of the handling modes will depend on factors,such as:The unit weightType and overall dimensions of the unitPlace and route for the handling (dirt yard, asphaltedsquare, etc)Condition of the place of destination (roof, square, etc)Handling distance characteristics (distances, flights,steps, doors)LABELS / YELLOW BRACKETS SHOW THE LIFTING POINTS= =ABCD!BaricentrobarycentreA < BC > DHow to balance the chargeMove the upper hook or the lower hooks, according to the spring equalizerrocker arm typeuse a spacer barto avoid damaging the unitDepending on the type of unit, the holes and/or the brackets for lifting may be located in different places2 lifting pointsuse 2-arm uprights(2 slopes/chains/slings per each side of the unit)Lifting bracketREMOVING THE PACKINGFor removing the packaging, use specificpersonal protection for the operator(gloves, glasses, etc.).While removing the packaging, payattention not to damage the unit.Check for any visible damage.Dispose of the packaging by taking it tospecialist collection or recycling centres inaccordance with local regulations.M03Y40D9-01 09/04/10 page 10
POSITIONINGGENERALFor installing air-conditioning systems, it is necessary toconsider the following:the technical spaces necessary for the machine andsystemthe place where the machine will be installedthe transport of thermal carrier fluids and relevantconnections to the unit:o watero airo refrigerant (unit in more sections)electrical connectionsIf these aspects are not evaluated carefully, they canaffect the performances and the working life of the unit.FUNCTIONAL CLEARANCESWhen placing the unit, please respect the functionalclearances indicated in DIMENSIONS section.The functional spaces need to be observed because of thefollowing:to guarantee the good operation of the unitto allow the performance of all maintenanceoperationsto protect the authorized operators and exposedpeopleIf more units are placed close to one another, thefunctional spaces must be doubled.POSITIONING1. The units are designed for INDOOR installations,performed in fixed positions and in areas accessibleonly to qualified and authorized personnel2. SAFETY VALVE (only if present on the unit) : theinstaller is responsible for evaluating the opportunityof installing drain tubes, in conformity with the localregulations in force ( EN 378 )3. Install the unit raised from the ground4. avoid installations in places subject to flooding5. Verify that the fixing/supporting points are level andsuitable to support the weight of the unit (see theweight and the weights distribution)6. It is recommended to put the unit on specificantivibration devicesEach support point of the unit sustains a differentweight. Therefore, each anti-vibration device is sizedfor a specific support point, and can only be placedthere. The anti-vibration devices must therefore beplaced in accordance with the instructions providedwith them and with the dimensional drawings inwhich the support points are indicated by W1 , W2 ,W3 etc .On each anti-vibration device (if provided byCLIVET), its identifying code is stamped, for exampleC6100100Flexible joints are necessary on all the hydraulic/aeraulic connections (the joints are not supplied byClivet)M03Y40D9-01 09/04/10 page 11
WATER CONNECTIONSGENERALPiping must be designed with the least possible number ofbends and head variations. If the pressure chute of theinstallation is above the useful prevalence of the pump, thewater delivery capacity is reduced as well as, as aconsequence, the thermal exchange and the yield.INTERCEPTING VALVESInstall on the input and output of the user parts(exchangers, coils, humidifiers, etc) So that it will bepossible to carry out all the service operations and possiblesubstitutions without emptying the installation.PRESSURE AND TEMPERATURE INDICATORInstall on the input and output of the user parts(exchangers, coils, humidifiers, etc) So that it will bepossible to carry out all the service operations.AUTOMATIC OR MANUAL ESCAPE VALVESInstall the highest points of tubes in a way that the air canescape form the circuit.BLEEDING COCKInstall them at the lowest points of the circuit, so as to allowemptying.LEAKAGE TESTSBefore performing the insulation of the tubes, carry out aleakage test.TUBE INSULATIONAll tubes of water must be insulated so that to avoid theformation of condensation and thermal dispersions alongthe tubes themselves. Verify that the insulation is thevapour coil type. The connections for the air escape and forthe emptying must be out of the insulating thickness toassure the accessibility.CONNECTIONS SUPPORTSThe weight of the hydraulic connections must be supportedin the exterior of the unit so as not to stress the connectionsof user devices (exchangers, coils, humidifiers, etc ) .ANTI-VIBRATION DEVICESIn case of units with anti-vibration devices, it is necessary toassemble elastic joints, even on water connections.RISK OF FREEZEIf the unit and the relevant water connections are subject totemperatures near 0°C:mix the water of the system with glycolprotect the tubes with heating cables under the tubesinsulationempty the system by verifying that:oono taps are closed so they can not trap the water,even after emptyingthere are no low points where the water canstagnate even after emptying; blow if necessaryINSTALLATION EMPTYINGThe refilling of the water present in the installation increasethe oxidation phenomena and lime deposits.If necessary empty only the interested system section andanyway empty or refill the installation if necessary .EXPANSION TANKThe installation must be kept at the right pressure by bothan expansion tank and a combined valve of pressurereduction and discharge; if the components are present onthe unit, they must be installed on the installation. Theexpansion tank must be dimensioned in function of thewater in the installation.MAX. WORKING PRESSURE10,5 bar evaporator16 bar condenserARIES EFFECTS AND AIR BUBBLES CAN PRODUCETHE OVERCOMING AND CAUSE WATER DROPS.EXCHANGER USE SIDEFILTERIt is very important for the water to be free of impurities. If itis not, the efficiency of thermal exchange is diminished. Inworst cases, the exchanger can be irreparably damaged. Ifthe filter is not present on the machine, it must beimmediately installed upstream from the unit, in a positionwhich can be easily reached for cleaning.The filter mesh must be :< 1 mm unit with 1 compressor< 1.5 mm multicompressor unit.FLOW SWITCHThe flow switch must be present as a component of thesystem, so as to ensure shutdown of the unit if water is notcirculating. It must be installed in a straight tract of thetubes, not near the elbows, which can generate harmfulturbulenceUNFREEZABLE LIQUIDSIf the unit is used when the water temperature is lower than+ 4°C, avoid the formation of ice by using unfreezableliquids (ex. Ethilenic Glycol) in the necessary percentage.The use must also be determined for ambient temperaturesnear 0°C .ANTIFREEZE RESISTANCESIf the unit is equipped with antifreeze resistances on theexchanger side (standard or optional according to themodels), verify that they are electrically fed during periodsthat the machine is stopped (night, weekends, long stops)WASHING THE SYSTEMCarefully wash the system by using clean water anddischarge it before connecting the unit.M03Y40D9-01 09/04/10 page 12
DIAGRAM OF RECOMMENDED USE SIDE CONNECTIONDepending on the type of machine and the selected setup, some components may be integrated into the unit.The accumulation tank is necessary in the event of the following:the water in the system is very lowthe unit will not be used in a private house (in an industrial process or other)81PP112123475136F71489101. Charged system pressure switch2. vent3. circulating pump / pump4. expansion tank5. safety valve6. flow switch7. pressure switch / thermometer8. filter9. filling valve10. antivibration joints11. user side exchanger12. Differential pressure switch13. Discharge cock14. inertial storage tankRECOMMENDED SOURCE SIDE CONNECTION SCHEMA123104F5 6P897P 81. Antivibration joints2. Shut-off valve3. Safety valve4. Flow switch5. System min. pressure manostat6. Pressure switch / thermometer7. vent8. Differential pressure switch9. Pump10. FilterSYSTEM MEASURES ON SOURCE SIDEFILTERIt is very important for the water to be free of impurities.If it is not, the efficiency of thermal exchange isdiminished. In the worst cases, the exchanger can beirreparably damaged. The filter, if not present on-boardthe machine, must be installed immediately upstreamfrom the unit, in a position that is easily accessible forcleaning.FLOW SWITCHSince it is a system component, it must always beincluded, in order to ensure unit shutdown in the event offailure of water circulation. It is to be installed in astraight section of the pipes, and not near curves whichgenerate harmful turbulence.ANTI-FREEZE SOLUTIONSFor use of the unit with ambient temperatures near 0°C,use antifreeze solutions such as ethylene glycol toprevent the formation of ice. Its use is also requiredwhen geothermal probes are used.SYSTEM WASHINGBefore connecting the unit, carefully wash the system by fillingit and emptying it several times with clean water.CUT-OFF VALVEThis allows cut-off of water on the source side whenever thecompressor is not running.It is therefore advisable for systems with disposable water, ifthere is no modulating valve.PR8C1M03Y40D9-01 09/04/10 page 13
REVERSAL ON WATER CIRCUIT - OPTIONThe hydraulic system must be plan to allow the inversion use-evaporator / use-condenser:in cooling modality the use is connected to the outlet water from the evaporatorin heating modality the use is connected to the outlet water from the condenserThe diagram is to be considered merely approximate. Define the components needed based on the characteristics of theplant.COOLINGHEATINGuse OUT use IN use OUT use INsource OUT source IN source OUT source INIn this configuration the control system on board machine has :an input for the remote control of season changeover (terminals 18-39)an outlet for inversion on the hydraulic circuit (terminals 85-86)an additional probe for make the thermoregulation on the condenserThe control system manages the heating set point, with the related logics of thermoregulation and security.OPERATION IN HEAT PUMP - OPTIONIn the unities equipped with this option, the inversion is effected onthe refrigerating system. In the hydraulic system the deviation members indicated in the previous scheme are not required.The control system manages as well the heating set point, with the relatedlogics of thermoregulation and security.RECOVERY EXCHANGER (OPTIONAL)The unit can be equipped with exchangers to recover the condensation heat.with 20% recoveryThe customer is responsible for the management of the circulation pump,valves, thermostats, etc.The recovery input water must not be below 25°C, in the event that, wrongfuloperations and breakages of the unit can occur.Water connections must be performed carefully as for the evaporator (filter, circuitwashing, etc).Perform all necessary interventions to avoid the RISK OF FREEZING (tubesinsulation, emptying of circuit, addition of glycol, anti-freeze resistances).Water temperature can reach high temperatures (up to 100°C), therefore:avoid the RISK OF BURNS by adopting the necessary precautions(insulation of tubes, temperature detecting station on water if the sanitaryuse is foreseen, etc.)Install safety valves and specifically dimensioned expansion tanks in thehydraulic circuit.OUTINM03Y40D9-01 09/04/10 page 14
HYDROPACK - OPTIONALOPTIONALThe equipment of refrigerant groups with the Hydropackaccessory allows the supply of the necessary rate/headwith different solutions:HYDROPACK with 1 pumpfor low-power units you can choose the basic solution with1 pump.HYDROPACK with 1 pump + 1 standbyalso for low-power units you can include a second pumpfor complete reliability. If one pump shuts down, the otherone automatically starts up and the unit control signals theshutdown of the pump that is out of order. The microprocessorautomatically balances the hours of operationof both pumpsHYDROPACK with 2 pumpsPer less power units, the standard solution with 2 pumpscan be chosen. If a pump gets blocked, the unit will go onworking till about 80% of the charge. This solution is morereliable than the traditional ones with a single great powerpump.HYDROPACK with 2 pumps + 1 stand-by,2 reserve pump can be foreseen for assuring a totalreliability.So the design water rate is assured (in fact, in the event ofa failure, the reserve pump is automatically activated andthe unit control signals if the broken pump is blocked).HYDROPACK with 3 pumpsfor units of greater power; with the solution of 3 pumpswhich are always activated, the possible blocking of apump always assures the regular working up to 80% ofthe charge (always with the signalization of the blocking).In this case, it is possible, upon request, to supply areserve pump (not connected). The replacement isperformed in few minutes time, thanks to the simpleforeseen connections.The modular pumping system allows for the automaticreduction of the water rate, in case the temperature isabove the operating limit.This device is very useful during starts-up, weekendpauses, and after a long period of inactivity.When the water temperature of the hydronic circuit is veryhigh, possible blocks for overcharging are avoided, as wellas the consequent interventions of specialized personnelfor the assisted start-up.Multi pump hydronic group including:R = shut-off valvesF = steel mesh filter(optional)M = manometersVS = safety valve (6 Bar)P = high efficiency single-structure and single-rotor electricpumpsVR = check valvesPRS = safety pressure switch (avoids pumps operation in case ofwater absence)PHE = evaporator-kit including two blind plugs needed in case ofpump removal for maintenance operationsOPTIONAL1 – 3 pompePHEPRS MRMR FRVRPVSVICTAULIC CONNECTIONS1. Take away the supplied connection union by actingon the connection joint Victaulic.2. Weld the union to the installation pipe.3. Perform the connection between the installation pipeand the evaporator, using the joint.Do not weld the system pipe with the Victaulicconnection joint attached.The rubber gasket might be irreparably damagedM03Y40D9-01 09/04/10 page 15
REFRIGERANT CONNECTIONPRESSOSTATIC VALVES - OPTIONAssembling and connection performed by customer.M03Y40D9-01 09/04/10 page 16
ELECTRICAL CONNECTIONGENERALThe characteristics of the electrical lines and relevantcomponents must be determined by SPECIALIZEDPERSONNEL ABLE TO DESIGN ELECTRICALINSTALLATIONS; moreover, the lines must be inconformity with professional procedures and the regulationsin force.All electrical operations should be performed by trainedPERSONNEL HAVING THE NECESSARY REQUISITESUNDER LAW and being informed about the risks relevantto these activities.Before performing any operation on the electrical system,make sure that the unit supply line is SELECTED ATSTART.The earth connection must be made prior to other electricalconnections.For all electrical type operations, REFER TO THEELECTRICAL DIAGRAM ATTACHED TO THE UNIT; thenumber of the diagram is shown on the registration platepositioned on the electrical board or next to it.The electrical diagram should be carefully kept togetherwith this manual and should be AVAILABLE FOR FUTUREINTERVENTION ON THE UNIT.LINE OF UNIT POWER SUPPLYThe ELECTRICAL DATA OF THE UNIT are shown in thetechnical chart of this manual and on the unit registrationplate. The presence of accessories can vary according tothe unit; the electrical data shown in the technical chartrefer to standard units. In the event of differences betweenthe data of the registration plate and the data shown in thismanual, as well as in the technical chart, please refer to theDATA SHOWN IN THE REGISTRATION PLATE.The protection device of the unit power supply line shouldbreak off the short circuit power whose value should bedetermined according to the plant features.The section of supply cables and protection cable must beseized according to the characteristics of the protectionsused.SIGNALS / DATA LINESDo not overpass the maximum power allowed, whichvaries, according to the type of signal.Lay the cables far from power cables or cables having adifferent tension and that are able to emit electromagneticdisturbances.Do not lay the cable near devices which can generateelectromagnetic interferences.Do not lay the cables parallel to other cables; cablecrossings are possible, only if laid at 90°.Connect the screen to the ground, only if there are nodisturbancesAssure the continuity of the screen during the entireextension of the cable.Observe, if any, the requirements about impendency,capacity, attenuation.STANDARD UNIT ELECTRICAL DATASize <strong>65D</strong> <strong>70D</strong> <strong>75D</strong> <strong>80D</strong> <strong>85D</strong> <strong>90D</strong> <strong>100D</strong> <strong>110D</strong> 115D 120D 135E 150F 165F 180FF.L.A. - FULL LOAD CURRENT AT MAX ADMISSIBLE CONDITIONSF.L.A. - Total A 132.4 141.7 153 164.3 170.9 177.5 196.3 218.9 225.5 232.1 270.2 308.3 328.1 347.9F.L.I. FULL LOAD POWER INPUT AT MAX ADMISSIBLE CONDITIONF.L.I. - Total kW 79.3 85.7 90.8 95.9 102.2 108.5 121.3 131.5 137.9 144.2 167.5 178.2 197.2 216.2M.I.C. MAXIMUM INRUSH CURRENTM.I.C. - Value A 309.5 318 365 373.4 448 454.6 473.4 496 502.6 509.2 547.3 517 605.2 625power supply: 400/3/50 Hz +/-6%voltage unbalance: max 2 %The F.L.A. data is to be considered in order to correctly size the supply line, whereas the M.I.C. data is used for the sizing of the protectiondevice up the line.Certain accessories and operations may entail a significant variation in the absorptions illustrated here. Contact our technical department.CONNECTION TO THE MAINS1. Make sure that the sectioning device at the beginning ofthe unit’s power line is opened, locked and equippedwith a signal.2. Open the general line disconnecting switch (if present)3. Verify that the net is in conformity with the data shownin the registration plate placed on the electrical board.4. Check the dimensional drawing for the input of theelectrical lines5. Take away the closing plate placed on the electricboard (ONLY IF PRESENT) and drill a hole through itto pass the cables through)6. Protect the cables, using the fairlead of an adequatesize.7. Using the layout of the electrical diagram, single out theconnecting terminals of the electrical supply cables, ofthe neutral (if foreseen) and the PE protection cable8. Connect the cables to the relevant terminal boards9. Before supplying power to the unit, make sure that allthe safety devices that were removed during electricalconnections are positioned again.M03Y40D9-01 09/04/10 page 17
FUNCTIONAL CONNECTIONSONC O O LSTEP:03 / 04F1I15 / 02 / 03 08:03:51MODE ALARM SETUP STATEF2F3? ESC12.2 °C IN Use voltage-free remote control devices that are suitable to commutate very low loads9.3 °C OUT(12V, 10mA)7.0 °C SETF4HOMEfew functionalities and inputs must be activated by configuration parameters whoseaccess is reserved to authorized assistance centres (in order to avoid unauthorizedmodifications)HEATING function is active only in units with options:reversal on water circuitoperation in heat pump(see WATER CONNECTIONS section)ON / OFF FROM REMOTE CONTROLIt allows the remote start and stop, not by keypad.It can be used to disable the unit during the night, theweekend etc., so with ON or OFF periods relativelylongs (some hours).It has not to be used with ON or OFF cycles too muchshorts: they compromise the operating logic and theycan cause malfunctions or faults. In summer operating,for example, ON –OFF cycles lower than one hour cancompromise the thermoregulation logic, that implementsan integral check.If this function is not used, jump therespective terminals.SECOND SET-POINTIt allows the use of a secondary set-point, such as, forexample, for a night operation, which can be activatedby a remote contact.When the contact is CLOSED, the secondary set-pointis activated.CHANGING FROM SUMMER TO WINTER USINGTHE REMOTE CONTROLIt allows the remote changing COOLING/HEATING,rather than by keypad.Generally the unit is delivered with disabled input andthe changing can be activated from keypad.If this function is used, it is necessary to set theparameter 12 accessible only to the service centre; inthis way the changing by keypad is no mere possible.With selection switch open, the unit operates in heating,with selection switch closed it operates in cooling.INVERSION CONTROL ON HYDRAULIC CIRCUITCOMPRESSOR OPERATION SIGNALSIGNAL CUMULATIVE SHUTDOWNM03Y40D9-01 09/04/10 page 18
FLOW SWITCH :EVAPORATOR – SQ1, CONDENSER– SQ2CONDENSER MODULATING VALVE – YV 5PUMP CONTROL:EVAPORATOR , CONDENSERFRESH AIR TEMPERATURE PROBE - OPTIONALIt allows the automatic correction of the set-point according tothe external air temperature.For example, the summertime with low external temperatures,it is possible to have the internal comfort even with set-pointshigher than the standard.The parameter configuration must be carried out by anassistance center.compextthermoregulationparametersMENU NUM parameter name meaningparameters- configuration- sensors1 EnCompExtEnable outside compensation0=no ; 1=solo COOL ; 2=solo HEAT; 3=always4 MaxCExtC Maximum outside compensation value in cooling5 MaxCExtH Maximum outside compensation value in heating93 CextMaxH94 CextMinH106 CextMaxC107 CextMinCSUMMEROutside temperature for maximum compensation inheatingOutside temperature for minimum compensation inheatingOutside temperature for maximum compensation incoolingOutside temperature for minimum compensation incooling9 ProbeText Enable outside temperature probe: 0=yes ; 1=noWINTERset COMPENSATOp 5p4set point COMPENSATOp106 p107 Text °Cp 94 p 93 T ext °CM03Y40D9-01 09/04/10 page 19
EXTERNAL AIR HUMIDITY PROBE - OptionalIt allows the automatic correction of the set-point, according toexternal air enthalpy .Nel funzionamento invernale la correzione avviene sulla solatemperatura.The working process is similar to the above mentionedprocess. The parameter configuration is necessary.MENU NUM parameter name meaningcompext thermoregulationparametersparameters- configuration -sensors4 MaxCExtC Max value of Summer correction110 HexMinC Ext Enthalpy Min Correction111 HexMaxC Ext Enthalpy Max Correction23 ProbeURExt Enable external humidity probe: 1=YESI / 0=NOWATER RESET - OptionalIt allows the automatic correction of the set-point, according toan external signal of 4-20 mA or 0-10 vcc.The working process is similar to the above mentionedprocess.The parameter configuration is necessary.MENU NUM parameter name meaningcompext thermoregulationparametersparameters- configuration -sensorspar11°C11 MaxCWRC Maximum value of WR correction in Cooling24 MaxCWRH Maximum value of WR correction in Heating75 WaterResetEnable water reset::0=no ; 1= COOL only ; 2=HEAT only; 3=always102 SWRMaxH Signal corresponding to MAX correction in Heating104 SWRMinH Signal corresponding to MIN correction in Heating105 SWRMaxC Signal corresponding to MAX correction in Cooling108 SWRMinC Signal corresponding to MIN correction in Cooling83 TypeWR Type of input signal: 0=0-10V ; 1=4-20mASUMMERset point COMPENSATOWINTERset point COMPENSATOp 24par 108 par 1054 mA 20 mAp 102 p 104 T ext °CDEMAND LIMITIt is possible to limit the absorbed electric power with anexternal signal of 10 Vcc or 4-20 mA. The higher the signal is,the lower the number of compressors available to meet thethermal need. Only an authorised service centre can performthe parameter configuration.MENU NUM parameter name meaningthermoregulation -demandlimit 7 DmandLimitEnparameters- configuration -sensors82 TypeDlEnable function :0 = diseabled1 = by signal2 = by parametersignal type: 0=0-10 V ; 1=4-20mAM03Y40D9-01 09/04/10 page 20
1ON12VACGND1212AL G HSHILDREMOTE TERMINALcod PE1W0005The remote keyboard has the same functions of the keyboard on board of the machine.The connection of the remote keyboard to the system on board of the machine is carried out, using the ―CAN to CAN‖converter, which must be placed in the electric board of the machineThe REMOTE KEYBOARD must be configured with the software address = 27 (only an authorised service centre canperform this operation).If the unit is managed by timetables, they must be activated only on one of the two keyboards of the machine, better ifthe remote keyboard.CONNECTIONS: refer to the electric diagram and to the SIGNAL/DATA LINES paragraphQE unità 1XCL HCAN to CANC5110675Can 0Can 1H L230/1/50230/ 1/ 502 X 0.34 mm2+ schMODBUS - CONVERTER CAN TO MODBUS RS 485Interfacing via RS 485 is performed using a converter for each unit.The converter must be mounted on the electric board of the unit and connected, following the electric diagram attachedto the unit.CONNECTIONS: refer to the electric diagram and to the SIGNAL/DATA LINES paragraph.dip switch for the serial address of the moduleLED 1 : signalization of gatewayworking81ONLED 2 : signalization of gateway inprogrammingjumper for activating thefirmware rewriting of thegatewayC5110676 C5110770RS 485+-sRS 485 serial portdip switch for the configurationof the CAN OPEN addressesCAN 0Connection to the CAN network of themachine12 VacPower supplyterminator NOT activatedTerminator activatedM03Y40D9-01 09/04/10 page 22
UNIT NETWORK – MINI NETWORK – MASTER SLAVEThe CLIVET TALK Local Network system allows to connect up to 6 machines in a network which all serve the sameinstallation. To interact with the network which controls the working of the system, it is necessary to have a CAN to CANconverter code C5110692 for each machine.Each single machine is equipped with the standard electronic devices: if necessary, it can function as an independentunit.At useMode remotoUR% Ext<strong>Temp</strong>. ExtWater ResetUnit MASTERSpinChillerCAN 0Unit #1SpinChillerCAN 0Unit #2SpinChillerCAN 0Unit #3CAN 1CAN 1CAN 1L max. singlederivation =20cmL max. singlederivation =20cmL max. singlederivation =20cmCavo CAN OPENMax. extension 200mt with a twisted and shielded pairPE1W0009(C5110692)Master #1PE1W0009(C5110692)Slave #2PE1W0009(C5110692)Slave #3CONNECTION CABLE :Section (nominal)HeaterImpedancePropagation delayLength MAX0.34mm270mΩ/meter120mΩ/meter5nS/metrer200metersDATALOGGER cod PE1W0006CONNECTIONS : make reference to the electrical panel and to SIGNALS/DATA LINES paragraphM03Y40D9-01 09/04/10 page 23
Vin+GNDNCSHLDNet ANet BNet ANet BKIT LONWORKSUpon request, the unit is equipped with the kit already mounted on the electric board; it can eventually be mounted later.Refer to the electric diagram and to the LONWORKS MANUAL.For information about cables for the Lonworks network, visit the web site www.echelon.com.LONWORKS technology is a complete platform to implement the network system control. These networks consist ofintelligent control instruments, or nodes, which interact with their environment and communicate to each other by usinga common message based on the (LonTalk®) protocol. A LONWORKS network can have up to 32,385 nodes subdividedinto 255 sub-networks (127 nodes/sub-network).The Gateway device is already configured, according to the Echelon classification for the type of the unit it is designedfor, with a number of managed variables, which is a sub-array of those managed originally by the machine and able toaccept the Echelon standard profiles. The supply of this device does not include the activity of configuration andmanagement of the LonWorks network to which it is connected; as usual, they are supplied by the Supervision Systemsupplier.CAN TO MODBUSGATEWAY LON-WORKSSignalization led of gateway inprogrammingLon Works SIDE17 18 19 20 21 22 23 2412 VacDip switch for setting the moduleserial addressLiteConnectorLonWorksModule StatusSerial StatusServiceRS485Signalization led of gatewayoperation81ON1 2 3 4jumper to activate the gatewayfirmware rewritingC5110676terminator INSERTEDDip switch configuration of CANOPEN addressesTerminator NOT ACTIVATED1NO485 + -SLCAN 0 GH12 VacM03Y40D9-01 09/04/10 page 24
START-UPALL THE EQUIPMENT MUST BE COMMISSIONED BY AUTHORISED SERVICE CENTRES.THIS SERVICE IS LIMITED TO START-UP OF THE UNIT ONLY AND NOT THE CONNECTIONS OR INSTALLATION OFTHE SYSTEM.ONLY QUALIFIED TECHNICIANS MUST PERFORM THE FOLLOWING OPERATIONS.PRELIMINARY CHECKSBefore checking, please verify the following1. the unit should be installed properly and in conformitywith this manual.2. the electrical power supply line should be sectioned atthe beginning.3. the sectioning device is locked and the proper warning―not to operate‖ sign is placed on the handle.4. make sure no tension is presentREFRIGERANT SYSTEMCarefully check the refrigerating circuit: the presence of oilstains can mean leakage caused by transportation,movements or other).Open the cocks of the refrigerator circuit, if there are any.Using the unit manometers, if present, or servicemanometers, verify that the refrigerating circuit is inpressure.Make sure that all the service outlets are closed with propercaps; if caps are not present a leak of refrigerant can bepossible.WATER SYSTEMEnsure that the plumbing system has been washed. Drainthe wash water before connecting the unit to the system.Check that the water circuit has been filled and pressurised.Perform a seal check at max. working pressure checkingthat no leaks are present.Check that the shut-off valves in the circuit are in the"OPEN" position.Check that there is no air in the circuit. If required, bleed itusing the vent valves in the system.Check that there are no ARIES EFFECTS in the transient(pump and / or valve activation/deactivation)When using antifreeze solutions, make sure the glycolpercentage is suitable for the type of use envisaged.% weight of ethyleneglycol10 % 20 % 30 % 40 %Freezing point - 4 °C - 9 °C - 15 °C - 23 °CSafety temperature - 2 °C - 7 °C - 13 °C - 21 °CELECTRICAL SYSTEMCheck the proper tightening of the screws that fix theconductors to the electrical components in the board(during handling and transportation, the vibrations couldhave loosened them).Verify that the unit is connected to the ground plant.Control that all panels and protection devices of the unit arerepositioned and blocked.Charge the unit by closing the sectioning device, but leaveit on OFF.Make sure that the tension and net frequency values arewithin the limit of:230 +/- 10% single phase unit; 400/3/50 +/- 10% three-phaseunitControl the unbalancing of the phases: it must be lower than 2% .Example:L1 - L2 = 388 V, L2 - L3 = 379 V, L3 - L1 = 377 Vaverage of the measured values = (388 + 379 + 377) / 3 = 381maximum deviation from the average = 388-381= 7VUnbalancing = (7/381) x 100 = 1.83% = ACCEPTABLEOperating out of the indicated limits causes the loss of theguarantee as well as very serious damages.IF THE CRANKCASE RESISTANCES ARE FITTEDwhen the unit is started up for the first time and following allprolonged periods of inactivity is OBLIGATORY to connectthe oil resistances on the compressor crankcase at least 8hours before the compressor is to be starter.BEFORE POWERING THE RESISTANCES, OPEN THECOMPRESSORS COCKS, IF PRESENT.To supply the resistances is necessary to switch off theisolator switch on the unit.To make sure that hte resistances are working, check thepower input with amperometic pliers.At start-up the compressor cranckase temperature on thelower side must be higher at least of 10°C than the outsidetemperature.DO NOT START THE COMPRESSOR WITH THECRANKCASE OIL BELOW OPERATING TEMPERATURE.Check that the circulator pumps are not blocked. In fact,their motor shaft may seize up, especially after longshutdowns. Unblocking can be accomplished with ascrewdriver using the purge hole.M03Y40D9-01 09/04/10 page 25
VERIFY TENSIONS – ABSORPTIONSCheck that the temperatures of the fluids are included in theWORKING LIMITS.If the controls of the previous paragraphs are positive, it ispossible to restart the unit.For information on the control panel, refer to the paragraphCONTROL.While the unit is working (ATTENTION ELECTRIC RISK:WORK SAFETLY) check:Power supply tensionPhase unbalanceTotal absorption of the unitAbsorption of the single electric loadsREMOTE INPUT CONFIGURATIONSCheck used remote inputs are activated (ON-OFF etc.) asgiven in the instructions in the ELECTRIC WIRING chapter.SETTING THE SET-POINTCheck if it is necessary to modify the set-points shown inthe CONTROL chapterEVAPORATOR WATER FLOW RATECheck that the difference between the temperature ofexchanger return and supply water corresponds to poweraccording to this formula:unit cooling power (kW) x 860 = Dt (°C) x flow rate (L/h).The cooling power is shown in the TABLE ON GENERALTECHNICAL DATA included in this manual, referred tospecific air/water conditions, or in the tables on coolingPERFORMANCE IN THE TECHNICAL BULLETIN referredto various conditions of use.Check for water side exchanger pressure drops:Determine the water flow rate.Measure the difference in pressure betweenexchanger input and output and compare it with thegraph on WATER SIDE EXCHANGER PRESSUREDROPS.The measurement of pressure will be easier if pressuregauges are installed as indicated in the DIAGRAM OFSUGGESTED WATER CONNECTIONS.CONDENSER WATER FLOW RATECheck that the difference between the temperature ofexchanger return and supply water corresponds to poweraccording to this formula:unit cooling power + power absorbed by compressors (kW)x 860 = Dt (°C) x flow rate (L/h).The data is shown in the table on GENERAL TECHNICALDATA included in this manual, referred to specific air/waterconditions, or in the tables on COOLING PERFORMANCEin the TECHNICAL BULLETIN referred to variousconditions of use.Check for water side exchanger pressure drops:Determine the water flow rate.Measure the difference in pressure betweenexchanger input and output and compare it with thegraph on WATER SIDE EXCHANGER PRESSUREDROPS.The measurement of pressure will be easier if pressuregauges are installed as indicated in the DIAGRAM OFSUGGESTED WATER CONNECTIONS.REFRIGERANT CIRCUIT PARAMETERCHECKDetecting the operational conditions is useful to control theunit along time: the performed records must be kept and beavailable during maintenance interventions.When the unit works in stable conditions and according tothe operating limits, take note of the following data:1. compressor diacharge temperature (WARNING –BURN DANGERI)2. condensing pressure3. liquid temperature4. dehydrator filter upstream and downstreamtemperature5. return pressure6. return temperature7. exchanger input water temperature8. exchanger output water temperatureM03Y40D9-01 09/04/10 page 26
CONTROLCONTROL INTERFACECOOL coolingHEAT heatingunit status (ON – ECO – OFF )Enabled timing bandsINLET temperaturealarm ; OKinserted steps on totalALARM menu accessOUTLET temperatureCurrent set pointHEAT / COOLchangementSET POINT, TIMINGBANDS, CLOCK accessoff = unit OFFon = unit ONStata MENU accessON / OFF unitHELP parameterdescriptionsBack to previous shieldBack to main menuHEATING function is active only in units with options:reversal on water circuitoperation in heat pump(see WATER CONNECTIONS section)UNIT START-UPTo turn the unit on or off, hold the ON/OFF switch down for a few seconds. When the unit is on, the ―ON‖ message isdisplayed; when the unit is off, the ―OFF‖ message is displayed.It is also possible to access the different menus when the unit is in the ―OFF‖ mode.It is possible to check the ON/OFF condition at a distance, using a remote device (see the ELECTRICAL CONNECTIONSchapter).THERMOREGULATIONThe thermal regulation is based on the INLET temperature.The unit is set for a specific TOTAL DIFFERENCE between the inlet and outlet water temperatures.Usually the designed difference is 5°C, in the event that a different value is foreseen, the 17 and 18 parameters must be setagain by the assistance center.According to the total difference, the system defines the level of difference that each compressor can give : the STEPDIFFERENCE.The regulations tend to gradually insert the compressors when the inlet temperature is over the set-point + the step difference.The compressors are activated one per time at the end of the SCANNING TIME.This time varies according to the gap between the water inlet temperature and the Set-point value. The higher the gap value is(both negative and positive), the shorter the interval among the scanning points will be.The value of the scanning time is displayed at the status 6; when the status 7 has reached the value of the status 6, therequest of operation of the compressor is activated.The counting of the scanning time starts together with the activation of the compressor.The compressor to be activated is chosen to make the shut circuits operate in order to minimize the wear of the entirerefrigerating circuit, as well as the single compressor.At the end of the counting, if the inlet temperature is higher than the step difference, another compressor is inserted.temp. H2O > set-point + step difference.What above described is referred to the COOLING operating, in HEATING the logici s the same but overturned (compressorinsertion for outlet temp. < set-point – step jump).M03Y40D9-01 09/04/10 page 27
SET-POINT COMPENSATIONSThe compensations are evolved functions that aim at protecting the compressors and fit as much as possible, the operation ofthe unit to the characteristics of the system and its use.The compensations make the time of the compressors’ operation longer and limit the number of starts-up, to make them delaythe insertion time by adding an offset.The compensation on the DURATION is useful when the water contained in the system is limited.The compensation on the CHARGE is useful when a variable charge is present.Optional components are necessary; the modifications of the parameters performed by the assistance centers have to beperformed to enable and configure. In industrial applications, where a precise control of the temperature is necessary, it ispossible to deactivate the COMPENSATIONS. The Status menu displays the value of the compensations on ext. temp. (status9) and WR (status 10).SET-POINT CORRECTIONSThe correction aim at optimising the energetic efficiency of the unit.To do this, the corrections dynamically modify the set-point according to some variables. For example, in the summertime withvery low external temperatures, therefore with a reduced load, it is possible to obtain the internal comfort even with set-pointshigher that the standard with a consequent higher energetic efficiency.The static set-point can therefore be modified dynamically with two CORRECTIONS based on two factors external to the unit:Correction based on the External temp. / enthalpyCorrection based on the Water reset (4-20 mA signal supplied by the Customer)The correct set-point, to which all corrections have been added or detracted, is called PRESENT set-point and is visible atstatus 2.For further details, see the ELECTRICAL CONNECTIONS chapter.MAINTENANCE SET POINTIt can be used to maintain the installation inside the working limits, even if the unit is deactivated.The MAINTENANCE Set Point checks the water temperature when the unit is put on OFF or Stand-by.To do this, it periodically activates the circulation pump, tests the water temperature and even activates one or morecompressors. It is necessary to modify the parameters with access reserved to the assistance centresMENU NUM Parameter name meaningPARAMETERCONTROLMAINTENANCEDEMAND LIMIT25 MantCoolEn It enables Summer Maintenance114 SetMantCool Summer maintenance set-pointThe function of the DEMAND LIMIT allows the limit of power so that the electric consumptions can be controlled by a signalexternal to the unit supplied by the customer.On the STATUS menu, no. 22, the external signal of DEMAND LIMIT is displayed.For further information,see the ELECTRICAL CONNECTIONS chapter.SECOND SET-POINTThe secondary set point is activated by remote authorization (see the ELECTRICAL CONNECTIONS chapter).It is possible to limit the minimum power which can be delivered during the time in which the secondary set point is activatedby configuring the 276 MinPot2Set parameter (access reserved to the assistance centres).TIME TABLESThe system is factory equipped with a clock function, found on the board.By activating the timetables, it is possible to set up to 6 events for each day of the week.If there is also a remote keyboard, the operations relative to the time and the date must be repeated on both keyboards, sothat the two clocks (which are different) are synchronized.M03Y40D9-01 09/04/10 page 28
ACCESSIBLE PARAMETERSPARAMETER MENU STRUCTUREPARAMETERS Set LISTThermoreg. Antifreeze LISTMaintenanceLISTSet - pointLISTSCHEDULING Enscheduling LISTConfigureLISTCLOCK SETUP Clock LISTDataLISTmenu: PARAMETERS – THERMOREG. – SET POINTDEFAULT values90 / CEN SecondSetC Secondary cooling Set Point 1291 / CEN SecondSetH Secondary heating Set Point 35118 / CEN SetCool Cooling Set Point 6.5119 / CEN SetHeat Heating Set Point 45272 / CEN SetRecovery NOT USED 35menu: PARAMETERS – THERMOREG. – MAINTENANCE117 / CEN SetMantHeat Winter maintenance setpoint 30114 / CEN SetMantCool Summer maintenance setpoint 15menu: PARAMETERS - THERMOREG.– ANTIFREEZE115 / CEN AllFreeze Antifreeze alarm set 4121 / CEN PreAF Antifreeze pre-alarm set 4.5261 / CEN SetResist Antifreeze heater set 4menu: PARAMETERS – SET – UNIT - EVAPORATORS37 / EVAP SetResist Antifreeze heater set 439 / EVAP ALLFreeze Antifreeze alarm set 441 / EVAP PreAF Antifreeze pre-alarm set 4.5M03Y40D9-01 09/04/10 page 29
I ? ESCHOMEI ? ESCHOMEI ? ESCHOMEI ? ESCHOMEI ? ESCHOMEI ? ESCHOMEI ? ESCHOMEI ? ESCHOMEI ? ESCHOMEI ESCHOMEI ? ESCHOMEI ? ESCHOMEKEYPAD USESET UP menu:To enter in the SETUP menubutton F3 SETUPPARAMETERSset point modificationTo select the submenubuttons ▲▼ F2 – F3SCHEDULINGenables/disables timingbandsTo accessbutton F1 ENTERCLOCK SETUPSet the clockTo scrolling voicesbuttons ▲▼ F2 - F3ID Tast-Cen(ATC ONLY)To go back a level of the menubutton ESCPASSWORD(ATC ONLY)To go back to the main menubutton HOMESETUP – PARAMETERS:To enter in the SETUP menubutton F3 SETUPTHERMOREG.Set the setpoint and theoperating modesTo select the submenubuttons ▲▼ F2 – F3SET(ATC ONLY)To accessbutton F1 ENTERTo access the desiredparameter ?buttons ▲▼ F1 – F2To modify the parameter valuebuttons + - F3 – F4To go back to the main menubutton HOMEM03Y40D9-01 09/04/10 page 30
I ? ESCHOMEI ESCHOMEI ? ESCHOMEI ? ESCHOMEI ? ESCHOMEI ESCHOMEI ? ESCHOMEI ESCHOMEI ? ESCHOMEI ? ESCHOMEI ? ESCHOMEI ESCHOMEI ? ESCHOMEI ESCHOMEI ESCHOMEI ? ESCHOMEI ESCHOMEI ESCHOMEI ESCHOMESETUP – SCHEDULING:EnSCHEDULINGenables/disablestiming bandsTo enter in the SETUP menuTo select the CONFIGUREsubmenu?button F3 SETUPbuttons ▲▼ F2 – F3CONFIGURESet the timing bandsTo accessbutton F1 ENTERTo select DAYbuttons ▲▼ F1 – F2To change week daybutton F3To select one of the 6available daily events?button F4To select TIMEbuttons ▲▼ F1 – F2To set the event hour andminutes?buttons + + F3 – F4To select STATEbuttons ▲▼ F1 – F2Select ON/OFF/ECO modebutton F4To select Setpointbuttons ▲▼ F1 – F2Set the manual setpoint ofthe event ?buttons + - F3 – F4To go back to the main menubutton HOMESETUP – CLOCK SETUPCLOCKSet the clockDATASet the daterTo enter in the SETUPmenu ?To select the CLOCKSETUP submenu ?To access to CLOCKbutton F3 SETUPbuttons ▲▼ F2 – F3button F1 ENTERTo set HOURS MINUTESSECONDS ?buttons F2 F3 F4To confirm the singlesetting?button F1 ENTERTo go back to the mainmenu ?button HOMEM03Y40D9-01 09/04/10 page 31
I ? ESCHOMEI ? ESCHOMEI ? ESCHOMEI ? ESCHOMEI ? ESCHOMEI ? ESCHOMEUNIT STATUSA sub-menu is associated with each electronic module of the unit. It displays the system status.According to the unit configuration, and then with electronic modules and options, some sub-menus and statuses can not beused.STATA STRUCTUREGeneralsLISTUnit_1 Mod_comp1 LISTMod_comp2LISTMod_comp3LISTMod_EvapLISTUnit_2 Mod_comp1 LISTMod_comp2LISTMod_comp3LISTMod_EvapLISTexampleVisualized stata referring toUNIT 1COMP 2 MODULEsubmenu:GENERALSUNIT 1mod_comp1To enter in the STATA menuTo select the modulebutton F4 STATEbuttons ▲▼ F2 – F3mod_comp2mod_comp3mod_evapTo accessbutton F1 ENTERUNIT 2mod_comp1To scroll the statabuttons ▲▼ F2 - F3mod_comp2mod_comp3To go back a level of the menubutton ESCmod_evapTo go back to the main menubutton HOMEM03Y40D9-01 09/04/10 page 32
Index GENERAL stata UM0 Machine status 1=ON / 0=OFF1 Machine mode 0=Cool, 1= Heat2 Actual set point °C ( tenths )3 Inlet temperature °C (tenths)4 Outlet temperature °C (tenths)5 Number of steps activated6 Current step value (compensations) °C (tenths)7 Step activation timer sec8 Step activation dynamic TimeScan sec9 CompExt °C (tenths)10 CompWR °C (tenths)11 CompCar °C (tenths)12 CompSpunti °C (tenths)13 CompDuty °C (tenths)14 Ambient temperature °C (tenths)15 Ambient humidity %16 Free Cooling valve percentage %17 Free Cooling flow percentage %18 Free Cooling valve control 1=ON / 0=OFF19 Pump 1 status 1=ON / 0=OFF20 Pump 2 status 1=ON / 0=OFF21 Water Reset %22 Demand Limit %60 Digital input bit map of a byte68 Water flow analogic out69 Pump module digital out bit map of a byte71 BitMap connected nodes MS bit map of a byte72 Hours pump 1 PMP73 Hours pump 2 PMP74 Hours pump 3 PMPIndex UNIT_1 – MOD COMP_1 Stata UM29 Compressor 1 1=ON / 0=OFF30 Compressor 2 1=ON / 0=OFF31 Compressor 3 1=ON / 0=OFF32 Cp 1 timer status 1=ON / 0=OFF33 Cp 2 timer status 1=ON / 0=OFF34 Cp 3 timer status 1=ON / 0=OFF35 Valve 1 c1 status 1=ON / 0=OFF36 Valve 2 c1 status 1=ON / 0=OFF37 Valve 3 c1 status 1=ON / 0=OFF38 Valve 1 c2 status 1=ON / 0=OFF39 Valve 2 c2 status 1=ON / 0=OFF40 Valve 3 c2 status 1=ON / 0=OFF41 Valve 1 c3 status 1=ON / 0=OFFIndex UNIT_1 – MOD COMP_1 Stata UM42 Valve 2 c3 status 1=ON / 0=OFF43 Valve 3 c3 status 1=ON / 0=OFF44 Liquid solenoid 1=ON / 0=OFF45 Coil temperature °C ( tenths)46 Recovery temperature °C ( tenths)47 Condensation pressure bar48 Evaporation pressure bar49 Fan Status bar50 Defrost Status 1=ON / 0=OFF51 Defrost count time sec52 Compressor 1 operating time53 Comp. 1 starts54 Compressor 2 operating time55 Comp. 2 startsM03Y40D9-01 09/04/10 page 33
I ? ESCHOMEI ? ESCHOMEI ? ESCHOMEI ? ESCHOMEI ? ESCHOMEI ? ESCHOMEIndex UNIT_1 – MOD COMP_1 Stata UM56 Compressor 3 operating time57 Comp. 3 starts58 Recovery valve 1=ON / 0=OFF59 Recovery PREHP delay sec61 Digital input bit map of a byte75 Daikin calculated power %76 PEvapOp bar77 Taspirazione °C(tenths)78 Tscarico °C(tenths)79 Valve opening %80 SuperHeat °C(tenths)81 SuperHeatSPOperativo °C(tenths)82 <strong>Temp</strong>SaturaCondensazione °C(tenths)Index UNIT_1 – MODEVAP_1 Stata UM23 Tout1 °C (tenths)24 Tout2 °C (tenths)25 Tinput °C (tenths)26 Pump 1 status 1=ON / 0=OFF27 Pump 2 status 1=ON / 0=OFF28 Heater status 1=ON / 0=OFF62 Digital input bit map of a byteALARMSBEFORE RESETTING THE ALARM, IDENTIFY AND ELIMINATE THE CAUSE OF ITS ACTIVATION.REPEATED RESETS CAN CAUSE IRREVERSIBLE DAMAGES.The presence of an alarm is signaled by the icon flashing .The cumulative block relay activates simultaneously, according to the type of alarm.Alarms can be reset once the conditions that caused them to trip have been removed.ALARMS and faults show a potentially dangerous situation for the machine integrity. An immediate analysis is necessary todetect the causes of the block. A repeated reset can provoke irreversible damage. That is why reset is MANUAL.PRE-ALARMS AND SIGNALIZATIONS show a situation similar to that one described above. The occurrence of an alarm isacceptable if it is occasional and/or in transitory situations (for example, when the plant starts). In uncertain cases, pleasecontact the authorized assistance center.VIEW ALARMTo visualize the alarm inprogressTo enter in the ALARM menuI ? ESCHOMEbutton F2 ALARMSTORE ALARMTo visualize the historicalalarmTo select VIEW ALARMbuttons ▲▼ F2 –F3DEL STORETo delete the historicalalarmTo accessTo scroll the active alarmsbutton F1 ENTERbuttons ▲▼ F2 -F3To reset the alarm in progressbutton F1 ENTERTo go back a level of the menubutton ESCTo go back to the main menubutton HOMEAn alarm list is associated with the inputs of each electronic module of the unit.According to the unit configuration, and then with electronic modules and options, some lists and/or ALARMS can not be used.M03Y40D9-01 09/04/10 page 34
ALARM STRUCTURECENTRALUnit_1Mod_comp1Mod_comp2Mod_comp3Mod_EvapUnit_2Mod_comp1Mod_comp2Mod_comp3Mod_EvapPUPMS – PMPRECOVERY – REC1exampleCEN : central module alarm14 : alarm identificative stringE014 : alarm descriptionCENTRAL MODULEStr Name0 E001 H2O IN temp. probe fault on control module1 E002 H2O OUT temp. probe fault on control module2 E003 Outside air temp. probe fault3 E004 Water Reset input fault4 E005 Outside RH% probe fault5 E006 Thermal cut-out alarm pump 1 on control module6 E007 Thermal cut-out alarm pump 2 on control module7 E008 Flow switch alarm on control module8 E009 System pressure alarm9 E010 Phase monitor alarm10 E011 Antifreeze alarm on control module11 E012 Antifreeze pre-alarm on control module12 E013 Change CENTRAL pump13 E014 Unit configuration alarm14 E015 Demand Limit input fault15 E016 Can net disconnectedness on control module59 E017 Inhibits control in heating60 E018 Incongruent deltaT alarm62 E019 Ext low temperature alarmM03Y40D9-01 09/04/10 page 35
COMPRESSOR MODULEStr Name16 E101 Cond./ Evap. temp. probe fault17 E102 Condensing pressure probe fault18 E103 Evaporation pressure probe fault19 E104 Recovery temp. probe fault20 E105 High pressure alarm21 E106 Low pressure alarm22 E107 Fan/Pump thermal cut-out alarm23 E111 Cond. / Evap. H2O flow alarm24 E112 High pressure pre-alarm 125 E113 High pressure pre-alarm 226 E114 Low pressure pre-alarm27 E115 Force defrost alarm28 E116 Max Press. diff. alarm29 E117 Recovery H2O flow alarm30 E118 Heat recovery HP pre-alarm31 E108 Compressor 1 thermal cut-out alarm32 E109 Compressor 2 thermal cut-out alarm33 E110 Compressor 3 thermal cut-out alarm47 E213 Module not connected49 E119 Oil differential pressure alarm58 E120 Condenser frost alarm61 E121 BP2 prealarm63 E123 TA TEE alarm64 E124 TS TEE alarm65 E125 max TS TEE prealarm66 E126 max TS TEE prealarm67 E127 power fail alarm68 E128 stepper motor error alarmPUMP MODULEStr Name53 E501 Water flow probe fault54 E502 Thermal pump 1alarm Pump Module55 E503 Thermal pump 2alarm Pump Module56 E504 Thermal pump 3alarm Pump Module57 E505 Max flow-rate signal Pump ModuleRECOVERY EXPANSION MODULEStr Name50 E301 Out recovery probe alarm51 E302 Gas temperature probe alarmEVAPORATOR MODULEStr Name34 E201 Evaporator inlet probe fault35 E202 Evaporator outlet probe 1 fault36 E202 Evaporator outlet probe 2 probe fault37 E203 Programmable evaporator input alarm38 E204 Thermal cut-out alarm, evaporator pump 139 E205 Thermal cut-out alarm, evaporator pump 240 E206 Evaporator flow switch alarm41 E207 Evaporator system fill alarm42 E208 Change pumps on evaporator43 E209 Antifreeze alarm on evaporator44 E210 Tout 1, antifreeze pre-alarm on evaporator45 E211 Tout 2, antifreeze pre-alarm on evaporator46 E212 System pump lockout48 E214 Module not connectedM03Y40D9-01 09/04/10 page 36
ROUTINE MAINTENANCEBEFORE UNDERTAKING ANY SORT OF MAINTENANCE OR CLEANING, DISCONNECT THE ELECTRICALPOWER SUPPLY TO THE UNIT, AND ENSURE THAT OTHER PEOPLE CANNOT RE-CONNECT IT .All equipment is subjected to wear out.The maintenance makes :1. keeps the unit efficiency2. the components last longer3. keeps their efficiency and limits breakdownsTherefore, it is fundamental to perform periodical checks:a few controls can be performed by the user(AUTONOMOUS MAINTENANCE) and they are mainlycleaning activities; otherwise, controls have to beperformed by specialized technicians (INSPECTIONS).The machine should have a log book used to keep trackof the performed controls. This will make fixing upbreakdowns easier.Take note of the date, type of control (autonomousmaintenance, inspection or fixing up), description of thecontrol, actions taken and so on.SERVICESParts subject to interventionSTRUCTURECheck the condition of the parts making up the structure.Paint so as to eliminate or reduce oxidation at the points in the unit where this problem may occur. Check that the panelling isfastened correctly. Poor fastening may give rise to malfunctions and abnormal noise and vibration.WATER EXCHANGERIt is very important for the exchanger to be able to provide the maximum thermal exchange. Therefore, it is essential for theinner surfaces to be clean of dirt and incrustations.Periodically check the difference between the temperature of the supply water and the condensation temperature. If thedifference is greater than 8°C–10°C it is advisable to clean the exchanger.M03Y40D9-01 09/04/10 page 37
MAINTENANCE INSPECTIONSForesee inspection assistance carried out by authorizedcenters or by qualified personnel.The inspections should be carried out at least:- Every year for only the cooling units- Every six months for the cooling and warmingunitsThe frequency, however, depends on the use: in the eventof frequent use (continuous or very intermittent use, nearthe operating limits, etc) or critical use (service necessary)it is recommended to plan inspections at close intervals.For units equipped with safety valves, follow theManufacturer’s instructions.Verify periodically the cleaning of the safety valves andthat oxidative / corrosive phenomena are not present, inparticular for installations near the sea, in industrial areasor in rooms with a corrosive atmosphere.The inspections to be performed are as follows:verify the power supply tension (when emptied or filled)inspect the electrical board (status of solenoid startercontacts, terminal closings, the status of wiring andrelevant insulations)inspect the absorption of the single electrical loadsverify the cleaning and the efficiency of the exchangersinspect the cleaning of the filters (air/water)verify the leakage from the refrigerating circuitVerify the protection devices (safety valves, pressureswitches, thermostats, etc.), the adjustment systems,the control devices (alarm signalizations, probes,manometers, etc)check the operating parameters of the refrigeratingcircuit (see the following REFRIGERANT TABLES andthe START-UP section)97/23 CE PED DIRECTIVE97/23 CE PED DIRECTIVE gives instructions for installers, users and maintenance technicians as well. Refer to localactuation norms; briefly and as an example, see the following :COMPULSORY VERIFICATION OF THE FIRST INSTALLATION only for units assembled on the installer’s building site(for ex. Condensing circuit + direct expansion unit)CERTIFICATION OF SETTING IN SERVICE for all the unitsPERIODICAL VERIFICATIONS to be executed with the frequency indicated by the Manufacturer (see the MAINTENANCEINSPECTIONS section)PUT AT RESTIf a long period of inactivity is foreseen, for example thewinter for the cooling unit, the following is recommended:to turn the power off in order to avoid electrical risks ordamages by lightning striketo avoid the risk of frosts as shown in the HYDRAULICCONNECTIONS section, and, in particular- to empty or add glycole in the plant sectionssubjected to temperatures below zero- to empty or add glycole in the water heating coils,also in summer- to power antifreeze resistances if presentIf the period of inactivity is particularly long or in the eventof extremely low temperatures, the external fans can beblocked temporarily; therefore, it is recommended toswitch them on every month in order to avoid seizures orelectrical overloads when the unit will be switched on.The restarting of the unit has to be carried out by qualifiedpersonnel, in particular, after the winter break for coolingunits or when seasonal switching should be performed.When restarting, refer to the SWITCHING ON section.Schedule technical assistance in advance to avoidhitches and be able to use the installation whennecessary.M03Y40D9-01 09/04/10 page 38
REFRIGERANT TABLESTHIS SECTION IS DEVOTED ONLY TO QUALIFIED TECHNICIANS THAT KNOW THE FOLLOWING:THE OPERATIONAL PRINCIPLES OF THE REFRIGERATING CIRCUIT OPERATIONTHE MODES OF DETECTING TEMPERATURE AND PRESSURETHE RISKS RELEVANT TO THESE OPERATIONSThe data of the tables allow the testing of the refrigerating circuit operation by the detection of a few objective parameters.The data are significant if they are detected simultaneously and while the refrigerating circuit is running.OVERHEATING=return temperature – Saturation temperatureSUBCOOLING=condensing temperature (pressure *) – liquid temperatureReturn pressure 7.2 bar Condensing pressure 29.6 barReturn temperature 7.3 °C Liquid temp. 45 °Coverheating 7.3 – 0.8 = 6.5 °C subcooling 49.91 – 45 = 4.91 °C* It is important that the condensation pressure is detected as close as possible to the point where the liquid temperature isdetected, in the event that the calculation will be effected by the losses of charge (and, therefore, of temperature) causedby the refrigerating circuit components placed between the two measurement points.Pg = P gauge = relevant pressure (read on the pressure gauge) , Ts : saturation pressureFor R410A the glide was not considered, since it is close to 0Pg Ts [°C] Pg Ts [°C] Pg Ts [°C] Pg Ts [°C] Pg Ts [°C] Pg Ts [°C] Pg Ts [°C] Pg Ts [°C] Pg Ts [°C]0.0 -51.66 5.0 -8.69 10.0 10.42 15.0 23.74 20.0 34.22 25.0 42.95 30.0 50.47 35.0 57.10 40.0 63.020.2 -48.02 5.2 -7.73 10.2 11.03 15.2 24.20 20.2 34.59 25.2 43.27 30.2 50.75 35.2 57.35 40.2 63.250.4 -44.83 5.4 -6.79 10.4 11.63 15.4 24.66 20.4 34.97 25.4 43.59 30.4 51.03 35.4 57.60 40.4 63.470.6 -41.98 5.6 -5.87 10.6 12.23 15.6 25.12 20.6 35.34 25.6 43.90 30.6 51.31 35.6 57.85 40.6 63.690.8 -39.40 5.8 -4.97 10.8 12.82 15.8 25.57 20.8 35.71 25.8 44.22 30.8 51.59 35.8 58.09 40.8 63.921.0 -37.03 6.0 -4.10 11.0 13.40 16.0 26.01 21.0 36.08 26.0 44.53 31.0 51.86 36.0 58.34 41.0 64.141.2 -34.84 6.2 -3.24 11.2 13.97 16.2 26.46 21.2 36.44 26.2 44.85 31.2 52.14 36.2 58.58 41.2 64.361.4 -32.81 6.4 -2.40 11.4 14.54 16.4 26.90 21.4 36.81 26.4 45.16 31.4 52.41 36.4 58.82 41.4 64.581.6 -30.90 6.6 -1.57 11.6 15.10 16.6 27.33 21.6 37.17 26.6 45.47 31.6 52.68 36.6 59.07 41.6 64.791.8 -29.10 6.8 -0.77 11.8 15.66 16.8 27.76 21.8 37.52 26.8 45.77 31.8 52.95 36.8 59.31 41.8 65.012.0 -27.39 7.0 0.02 12.0 16.20 17.0 28.19 22.0 37.88 27.0 46.08 32.0 53.22 37.0 59.55 42.0 65.222.2 -25.78 7.2 0.80 12.2 16.74 17.2 28.62 22.2 38.23 27.2 46.38 32.2 53.49 37.2 59.78 42.2 65.442.4 -24.24 7.4 1.56 12.4 17.28 17.4 29.04 22.4 38.58 27.4 46.69 32.4 53.75 37.4 60.02 42.4 65.652.6 -22.76 7.6 2.31 12.6 17.81 17.6 29.45 22.6 38.93 27.6 46.99 32.6 54.02 37.6 60.26 42.6 65.872.8 -21.35 7.8 3.05 12.8 18.33 17.8 29.87 22.8 39.28 27.8 47.28 32.8 54.28 37.8 60.50 42.8 66.083.0 -20.00 8.0 3.77 13.0 18.85 18.0 30.28 23.0 39.62 28.0 47.58 33.0 54.54 38.0 60.73 43.0 66.293.2 -18.69 8.2 4.48 13.2 19.36 18.2 30.69 23.2 39.96 28.2 47.88 33.2 54.80 38.2 60.96 43.2 66.503.4 -17.44 8.4 5.18 13.4 19.87 18.4 31.09 23.4 40.30 28.4 48.17 33.4 55.06 38.4 61.20 43.4 66.713.6 -16.22 8.6 5.87 13.6 20.37 18.6 31.49 23.6 40.64 28.6 48.46 33.6 55.32 38.6 61.43 43.6 66.923.8 -15.05 8.8 6.55 13.8 20.86 18.8 31.89 23.8 40.98 28.8 48.76 33.8 55.58 38.8 61.66 43.8 67.134.0 -13.91 9.0 7.22 14.0 21.36 19.0 32.28 24.0 41.31 29.0 49.05 34.0 55.84 39.0 61.894.2 -12.81 9.2 7.88 14.2 21.84 19.2 32.68 24.2 41.64 29.2 49.33 34.2 56.09 39.2 62.124.4 -11.74 9.4 8.53 14.4 22.32 19.4 33.07 24.4 41.97 29.4 49.62 34.4 56.34 39.4 62.354.6 -10.69 9.6 9.16 14.6 22.80 19.6 33.45 24.6 42.30 29.6 49.91 34.6 56.60 39.6 62.574.8 -9.68 9.8 9.79 14.8 23.27 19.8 33.84 24.8 42.62 29.8 50.19 34.8 56.85 39.8 62.80M03Y40D9-01 09/04/10 page 39
TROUBLESHOOTINGTHE OPERATIONS MUST BE CARRIED OUT BY TECHNICAL QUALIFIED PERSONNEL HAVING THE REQUISITESUNDER LAW REQUISITES AND IN CONFORMITY WITH THE SAFETY REGULATIONS IN FORCE.THE INTERVENTIONS WITHIN THE WARRANTY PERIOD WILL BE CARRIED OUT BY AUTHORIZED SERVICECENTERS.BEFORE RESETTING AN ALARM, IDENTIFY AND ELIMINATE ITS CAUSE.REPEATED RESETS MAY CAUSE SERIOUS DAMAGES.In certain machine configurations, some safeties may be placed in series and lead back to a single input on the electronicmodule.Therefore, check on the electrical diagram whether the device to which the alarm corresponds has other devices orsafeties connected in series.Below is a list of the possible causes of alarms.HIGH PRESSURE1. high water temperature (see operating limits)2. insufficient water flow to the exchanger (highthermal difference between input and output)3. not CONSTANT flow (for example, if the pumpsare turned off, certain areas of the plant areexcluded or included, other uses are isolated,etc)4. Water filter clean / valves open /air bubbles in theplant5. dirty exchanger6. Manostat/transducer: loose electriccontacts/terminals, wiring cables interrupted7. condensation gas in the cooling circuit8. Too much refrigerant9. Check the trigger point for the manostat andtransducer10. Check the manostat or transducer pressurecontrol point (deposits of oil, dirt, pin blockedmechanically)LOW PRESSURE1. low water temperature (see operating limits)2. insufficient water flow to the exchanger (high thermaldifference between input and output)3. not CONSTANT flow (for example, if the pumps areturned off, certain areas of the plant are excluded orincluded, other uses are isolated, etc )4. Water filter clean / valves open /air bubbles in theplant5. dirty exchanger6. Manostat/transducer: loose electriccontacts/terminals, wiring cables interrupted7. refrigerant circuit empty, visible leaks ofrefrigerant/oil, insufficient charge8. Blocked dehydrator filter9. thermostatic device not operating correctly10. Check the trigger point for the manostat andtransducer11. Check the manostat or transducer pressure controlpoint (deposits of oil, dirt, pin blocked mechanically)FAULTY PROBE1. Identify the part on the wiring diagram.2. Loose electric contacts/terminals, leads broken3. Check the correct probe ohmic level (using atester)4. Change the probe.5. Check the electronic module configuration (onlyan authorised service centre can do this)6. Change the electronic moduleFAULTY PRESSURE TRANSDUCER1. Identify the part on the wiring diagram2. Loose electric contacts/terminals, leads broken3. Check the pressure test points are in workingorder4. Change the part5. Check the electronic module configuration (onlyan authorised service centre can do this)6. Change the electronic moduleCOMPRESSOR PROTECTION1. Identify the part on the wiring diagram2. Loose electric contacts/terminals, leads broken3. electrical windings interrupted4. Vacuum power voltage below the limits5. power contactors / contacts defective6. start-up power voltage lower than the limits7. electrical absorption high / unbalanced8. High compressor discharge temperature >thermostatic device needs calibrating, insufficientrefrigerant chargeM03Y40D9-01 09/04/10 page 40
DECOMMISSIONING OF THE UNITDISCONNECTING THE UNITThe units must be disconnected by authorised personnel,who before proceeding must first read the Residual Riskssection in this manual.Before disconnecting the unit, the following must berecovered, if present:the refrigerant (if the circuits cannot be isolated):the refrigerant must be removed using suctiondevices operating in a closed circuit, so as toensure that none of the compound is releasedinto the atmosphere.the antifreeze in the circuits: when removing thisfluid, make sure that it does not leak and that it isnot released into the environment. The antifreezefluid must be stored in special containers.When recovering the substances present in the unit, allmeasures must be taken to avoid damaging persons andthings and polluting the surrounding area.Awaiting dismantling and disposal, the unit can also bestored outdoors, as bad weather and rapid changes intemperature will not cause damage to the environment, ifelectric, cooling and hydraulic circuits of the unit areintegral and closed.DISMANTLING AND DISPOSALTHE UNIT MUST ALWAYS BE SENT TO AUTHORISEDCENTRES FOR DISMANTLING AND DISPOSAL.When dismantling the unit, the fan, the motor and the coil,if operating, may be recovered by the specialist centres forreuse.All the materials must be recovered or disposed of incompliance with the corresponding national standards inforce.For further information on the decommissioning of the unit,contact the manufacturer.M03Y40D9-01 09/04/10 page 41
TECHNICAL DATASIZE <strong>65D</strong> <strong>70D</strong> <strong>75D</strong> <strong>80D</strong> <strong>85D</strong> <strong>90D</strong> <strong>100D</strong> <strong>110D</strong> 115D 120D 135E 150F 165F 180FCOOLINGCooling capacity 1 kW 195 207 223 234 251 286 312 334 353 371 406 440 497 560Compressor power input kW 41.2 44.2 47.3 50 53.4 59.5 65.1 70.2 75.4 79.3 86.1 93.7 106 119Total power input 2 kW 41.5 44.5 47.6 50.3 53.7 59.8 65.4 70.5 75.7 79.6 86.6 94.2 106 120Heating capacity totalrecovery3 kW 224 237 257 269 289 327 356 383 407 428 466 506 574 646Heating capacity partialrecovery3 kW 47 50 54 57 61 69 75 81 86 90 98 107 121 136EER 4.7 4.65 4.68 4.65 4.67 4.78 4.77 4.74 4.66 4.66 4.69 4.67 4.69 4.67ESEER 6.11 6.15 5.87 6.03 5.88 6.02 5.99 6.15 6.09 6.07 6.1 6.28 6.21 6.24HEATINGHeat output 3 kW 224 237 257 269 289 327 356 383 407 428 466 506 574 646Compressor power input kW 50.9 54.7 57.9 61.3 64.6 72.9 79.6 86.3 92.8 97.9 106 115 130 147Total power input kW 51.2 55 58.2 61.6 64.9 73.2 79.9 86.6 93.1 98.2 107 115 130 147COP 4.38 4.31 4.42 4.37 4.45 4.47 4.46 4.42 4.37 4.36 4.36 4.4 4.42 4.39COMPRESSORType of compressorsSCROLLNo. of Compressors Nr 4Rated power (C1) HP 30 35 35 40 40 45 50 55 55 60 60 75 75 90Nominal Power (C2) HP 35 35 40 40 45 45 50 55 60 60 75 75 90 90Std Capacity control steps Nr 4 4 4 4 4 4 4 4 4 4 5 6 6 6Oil charge (C1) l 7 8 8 10 10 9 10 10 12 11 11 20 20 17Oil charge (C2) l 8 8 10 10 9 9 10 12 11 11 20 20 17 17Refrigerant circuits Nr 2INTERNAL EXCHANGERType of internal exchanger 4PHEWater flow rate l/s 9.3 9.9 10.7 11.2 12 13.7 14.9 16 16.9 17.7 19.4 21 23.7 26.8internal exchangerpressure dropkPa 47 43 43 47 31 40 36 40 45 49 47 46 45 56Water content l 11 13 14 14 25 25 29 29 29 29 34 38 47 47EXTERNAL EXCHANGERType of externalexchanger4 PHEWater flow rate l/s 11.3 12 12.9 13.6 14.5 16.5 18 19.3 20.5 21.5 23.5 25.5 28.8 32.4External exchangerpressure dropkPa 46 51 52 51 32 40 33 37 36 39 46 49 52 65Water content l 14 14 16 18 29 29 38 38 43 43 43 47 56 56CONNECTIONSWater fittings 5 2" 1/2 2" 1/2 2" 1/2 2" 1/2 3" 3" 3" 3" 3" 3" 3" 3" 3" 3"Water fittings 6 2" 1/2 2" 1/2 2" 1/2 2" 1/2 3" 3" 3" 3" 3" 3" 3" 3" 3" 3"POWER SUPPLYStandard power supply V 400/3/50(1) data referred to the following conditions :internal exchanger water = 12/7°Cexternal exchanger water = 30/35°C(2) According to EUROVENT the Total Power Input does not consider the pump share,required to overcome the pressure drop for the solution circulation inside theexchangers.(3) external exchanger water = 40/45°Cinternal exchanger water = 12/7°C(4) PHE = plates(5) internal exchangerinlet / outlet(6) External exchangerinlet / outletOPERATING LIMITS (COOLING)SIZE <strong>65D</strong> <strong>70D</strong> <strong>75D</strong> <strong>80D</strong> <strong>85D</strong> <strong>90D</strong> <strong>100D</strong> <strong>110D</strong> 115D 120D 135E 150F 165F 180FEXTERNAL EXCHANGERMax water inlet temperature 1 °C 51 50 51 51 52 52 52 51 51 51 50 50 51 51Max water inlet temperature 2 °C 52.5 51.5 52.5 52.5 53.5 53.5 53.5 52.5 52.5 52.5 51.5 52 53 53Max water inlet temperature 3 °C 62 62 62 62 62 62 62 62 62 62 62 62 62 62Min. water outlet temperature °C 23 23 23 23 23 23 23 23 23 23 23 23 23 23INTERNAL EXCHANGERMax water inlet temperature °C 23 23 23 23 23 23 23 23 23 23 23 23 23 23Min. water outlet temperature 4 °C 5 5 5 5 5 5 5 5 5 5 5 5 5 5Min. water outlet temperature 5 °C -8 -8 -8 -8 -8 -8 -8 -8 -8 -8 -8 -8 -8 -8(1) unit at full load: internal exchanger water 12/7°C(2) capacity-controlled unit (automatic capacity control)(3) unit not operating(4) Standard Version(5) Low temperature versionFluid with ethylene glycol of 40%M03Y40D9-01 09/04/10 pag 42
CORRECTION FACTOR FOR ANTIFREEZE SOLUTIONSInternal exchanger (evaporator)% ethylene glycol by weight 5% 10% 15% 20% 25% 30% 35% 40%Freezing temperature °C -2.0 -3.9 -6.5 -8.9 -11.8 -15.6 -19.0 -23.4Safety temperature °C 3.0 1.0 -1.0 -4.0 -6.0 -10.0 -14.0 -19.0Cooling Capacity Factor Nr 0.995 0.990 0.985 0.981 0.977 0.974 0.971 0.968Compressor input Factor Nr 0.997 0.993 0.990 0.988 0.986 0.984 0.982 0.981Internal exchanger Glycol solution flow Factor Nr 1.003 1.010 1.020 1.033 1.050 1.072 1.095 1.124Pressure drop Factor Nr 1.029 1.060 1.090 1.118 1.149 1.182 1.211 1.243The correction factors shown refer to water and glycol ethylene mixes used to prevent the formation of frost on the exchangers in the watercircuit during inactivity in winter.External exchanger (condenser)% peso glicole etilenico 5% 10% 15% 20% 25% 30% 35% 40%Freezing temperature °C -2.0 -3.9 -6.5 -8.9 -11.8 -15.6 -19.0 -23.4Safety temperature * °C -0.3 -0.6 -0.9 -1.3 -1.8 -2.2 -2.7 -3.3Cooling Capacity Factor Nr 1.00 0.99 0.99 0.98 0.97 0.97 0.96 0.95Compressor input Factor Nr 1.01 1.01 1.02 1.02 1.03 1.04 1.05 1.06Internal exchanger Glycol solution flow Factor Nr 1.01 1.02 1.04 1.05 1.07 1.09 1.11 1.13Pressure drop Factor Nr 1.02 1.05 1.08 1.12 1.16 1.21 1.26 1.32The correction factors shown refer to water and glycol ethylene mixes used to prevent the formation of frost on the exchangers in the watercircuit during inactivity in winter.* MAX. REDUCTION EXTERNAL EXCHANGER INLET WATER TEMPERATUREFOULING CORRECTION FACTORINTERNAL EXCHANGEREXTERNAL EXCHANGERm² °C/W F1 FK1 F2 FK20.44 x 10^(-4) 1.00 1.00 1.00 1.000.88 x 10^(-4) 0.97 0.99 0.97 1.081.76 x 10^(-4) 0.94 0.98 0.92 1.05F1 = Cooling capacity correction factorsFK1 = Compressor power input correction factorF2 = Cooling capacity correction factorsFK2 = Compressors input power correction factorsEXCHANGER OPERATING LIMITSINTERNAL EXCHANGEREXTERNAL EXCHANGERDPr DPw DPr DPwkPa kPa kPa kPaCLIVET (C) 4500 1000 4500 1000PED (CE) 4500 1000 4500 1000DPr = Maximum operating pressure on refrigerant sideDPw = Maximum operating pressure on water sidefor different approvals contact our sales officeOVERLOAD AND CONTROL DEVICE CALIBRATIONAPRE CHIUDE VALOREHigh pressure switch kPa 4050 3300 -Low pressure switch kPa 450 600 -Low pressure switch (Brine) kPa 200 350 -Antifreeze protection °C 3 5.5 -High pressure safety valve kPa - - 4500Low pressure safety valve kPa - - 3000Max no. of compressor starts per hour Nr - - 10High compressor discharge temperature safetythermostat°C - - 120M03Y40D9-01 09/04/10 pag 43
P kPaP [kPa]P [kPa]EVAPORATOR PRESSURE LOAD: ST STANDARD - SC - EN807060504030<strong>65D</strong><strong>70D</strong><strong>75D</strong> - <strong>80D</strong><strong>85D</strong> - <strong>90D</strong><strong>100D</strong> - <strong>110D</strong> - 115D - 120D135E205 10 15 20 25 30 40Q [l/s]150F165 - 180FQmin[l/s]Qmax[l/s]<strong>65D</strong> 5.9 12.4<strong>70D</strong> 6.6 13.9<strong>75D</strong> 7.0 14.9<strong>80D</strong> 7.0 14.9<strong>85D</strong> 9.4 20.0<strong>90D</strong> 9.4 20.0<strong>100D</strong> 10.9 23.1<strong>110D</strong> 10.9 23.1115D 10.9 23.1120D 10.9 23.1135E 12.2 25.8150F 13.4 28.3165F 15.5 32.4180F 15.5 32.4EXTERNAL EXCHANGER PRESSURE DROP (CONDENSER): ST (STANDARD)- EN807060504030<strong>65D</strong> - <strong>70D</strong><strong>75D</strong><strong>80D</strong><strong>100D</strong> - <strong>110D</strong>115D - 1120D - 135E150F<strong>85D</strong> - <strong>90D</strong>165F - 180F205 10 15 20 25 30 40Q [l/s]Qmin[l/s]Qmax[l/s]<strong>65D</strong> 7.3 15.3<strong>70D</strong> 7.3 15.3<strong>75D</strong> 7.8 16.1<strong>80D</strong> 8.4 17.2<strong>85D</strong> 11.4 23.8<strong>90D</strong> 11.4 23.8<strong>100D</strong> 13.9 29.2<strong>110D</strong> 13.9 29.2115D 15.0 31.4120D 15.0 31.4135E 15.0 31.4150F 15.9 33.2165F 17.4 36.1180F 17.4 36.1ACCESSORIESWATER FILTERPressure drop of the "water filter" accessory to be added to the pressure drop of the unit.6050403020100AB8 10 12 14 16 18 20 22 24 26 28 30 32 34Q = l/sQ = water flowdP = pressure dropCInternal exchanger (evaporator)A <strong>65D</strong>-<strong>70D</strong>-<strong>75D</strong>-<strong>80D</strong>-<strong>85D</strong>B <strong>90D</strong>-<strong>100D</strong>-<strong>110D</strong>-115D-120D-135E-150FC165F-180FExternal exchanger (condenser)A <strong>65D</strong>-<strong>70D</strong>-<strong>75D</strong>-<strong>80D</strong>-<strong>85D</strong>B <strong>90D</strong>-<strong>100D</strong>-<strong>110D</strong>-115D-120DC 135E-150F-165F-180FM03Y40D9-01 09/04/10 pag 44
P [kPa]P [kPa]EXCHANGER PRESSURE DROP PARTIAL ENERGY RECOVERY5045AB C D E F G H I403530252015A = <strong>65D</strong>B = <strong>70D</strong>-<strong>75D</strong>-<strong>80D</strong>C = 115D-120DD = 135EE = <strong>85D</strong>F = 150FG = 165FH = <strong>90D</strong>-<strong>100D</strong>-180FI = <strong>110D</strong>102 3 4 5 6 7 8 9 10Q [l/s]Q = water flowdP = pressure dropEXCHANGER PRESSURE DROP TOTAL ENERGY RECOVERY807570A B C D E F G H I J656055504540353025A = <strong>65D</strong>-<strong>70D</strong>B = <strong>75D</strong>C = <strong>80D</strong>D = <strong>85D</strong>E = <strong>90D</strong>-<strong>100D</strong>F = <strong>110D</strong>G = 115DH = 120DI = 135EJ = 150F-165F-180F208 10 12 14 16 18 20 22 24 26 28 30 32 34 36Q [l/s]Q = water flowdP = pressure dropSOUND LEVELSAcoustic configuration: Standard (ST)Acoustic configuration: Extremely low noise (EN)Sound Power Level (dB)Sound SoundSound Power Level (dB)Sound SoundOctave band (Hz)pressure powerOctave band (Hz)pressure powerlevel levellevel levelSize 63 125 250 500 1000 2000 4000 8000 dB(A) dB(A) Size 63 125 250 500 1000 2000 4000 8000 dB(A) dB(A)<strong>65D</strong> 81 62 75 90 84 86 80 74 73 91 <strong>65D</strong> 71 53 70 83 73 74 69 64 64 82<strong>70D</strong> 84 63 75 89 84 87 80 74 74 92 <strong>70D</strong> 74 54 71 83 73 76 70 65 64 83<strong>75D</strong> 87 62 74 91 85 86 80 74 74 92 <strong>75D</strong> 77 54 70 84 74 75 69 65 65 83<strong>80D</strong> 88 62 74 92 85 84 79 73 74 92 <strong>80D</strong> 78 53 69 85 74 73 68 64 65 84<strong>85D</strong> 90 63 74 93 86 85 79 73 74 93 <strong>85D</strong> 80 54 70 86 75 74 69 64 66 85<strong>90D</strong> 90 63 75 93 87 85 80 74 74 93 <strong>90D</strong> 80 54 70 87 76 74 69 65 66 85<strong>100D</strong> 89 67 78 91 87 92 84 78 76 95 <strong>100D</strong> 79 58 74 84 76 80 73 69 67 85<strong>110D</strong> 94 66 75 96 89 88 82 76 76 96 <strong>110D</strong> 84 57 71 89 78 76 71 67 68 88115D 94 66 75 96 89 88 82 76 76 96 115D 84 57 71 89 78 76 71 67 68 88120D 94 66 75 96 89 88 82 76 76 96 120D 84 57 71 89 78 76 71 67 68 88135E 94 65 75 95 89 87 81 75 76 95 135E 84 57 71 89 78 76 71 66 68 87150F 94 65 75 95 89 87 81 75 76 95 150F 84 57 71 89 78 76 71 66 68 87165F 95 66 76 96 90 88 82 76 77 96 165F 84 57 72 90 79 77 71 67 68 88180F 95 67 77 97 91 89 83 77 77 97 180F 85 58 73 91 80 78 72 68 69 89Measures according to ISO 3744 regulations, with respect to the EUROVENT 8/1 certification.the sound levels refer to the unit at full load, in the rated test conditions.The sound pressure level refers to a distance of 1m from the external surface of the units operating in an open field.data referred to the following conditions :internal exchanger water = 12/7°Cexternal exchanger water = 30/35°CM03Y40D9-01 09/04/10 pag 45
O1000 700P194 3691886DIMENSIONSSIZE <strong>65D</strong>-<strong>70D</strong>-<strong>75D</strong>-<strong>80D</strong>954101 19 919 94 - 75 - 631 111452OD13OD17648381317 8 747254739 8 772 8 39245 360 2458501315001215 100011800132W11W21103W3W414(1) COMPRESSOR(2) INTERNAL EXCHANGER (EVAPORATOR)(3) EXTERNAL EXCHANGER (CONDENSER)(4) INTERNAL EXCHANGER WATER INLET(5) INTERNAL EXCHANGER WATER OUTLET(6) EXTERNAL EXCHANGER WATER INLET(7) EXTERNAL EXCHANGER WATER OUTLETMN(8) HOLE TO HANG UNIT(9) LIFTING BRACKETS(10) ELECTRICAL PANEL(11) POWER INPUT(12) MINIMUM DIMENSION ON THE ELECTRICALSWITCHBOARD SIDE.(13) MINIMUM DIMENSION FOR A SAFE PASSAGE.(14) MINIMUM DIMENSION FOR MAINTENANCE.(15) MINIMUM DIMENSION FOR WATER CONNECTIONS.SIZE <strong>65D</strong> <strong>70D</strong> <strong>75D</strong> <strong>80D</strong> <strong>65D</strong> <strong>70D</strong> <strong>75D</strong> <strong>80D</strong>STM mm 1314 1323 1289 1272 1271 1293 1264 1246N mm 1233 1224 1258 1275 1276 1254 1283 1301O mm 404 398 402 399 404 399 402 400P mm 446 452 448 451 446 451 448 450OD mm 76 76 76 76 76 76 76 76OD1 mm 76 76 76 76 76 76 76 76Length mm 2547 2547 2547 2547 2547 2547 2547 2547Depth mm 850 850 850 850 850 850 850 850Height mm 1886 1886 1886 1886 1886 1886 1886 1886W1 kg 187 192 216 229 223 222 246 260W2 kg 398 422 423 423 410 440 442 440W3 kg 208 221 244 262 248 254 277 296W4 kg 444 485 477 484 457 504 498 501Operating weight kg 1238 1320 1360 1397 1337 1420 1464 1496Shipping weight kg 1212 1292 1329 1364 1311 1392 1433 1463Particular accessories, executions or versions can bring about a great variation of the mass represented here. Please contact our Technical epartment.ENM03Y40D9-01 09/04/10 pag 46
1000OP700204 5681886SIZE <strong>85D</strong>-<strong>90D</strong>-<strong>100D</strong>-<strong>110D</strong>-115D-120D954101 19 919 94 - 7 472 33OD OD1111 15 - 65 68 8488 1317 747255239 8 772 8 39245 360 2458501315001215 1000800132W11W21103W3W414(1) COMPRESSOR(2) INTERNAL EXCHANGER (EVAPORATOR)(3) EXTERNAL EXCHANGER (CONDENSER)(4) INTERNAL EXCHANGER WATER INLET(5) INTERNAL EXCHANGER WATER OUTLET(6) EXTERNAL EXCHANGER WATER INLET(7) EXTERNAL EXCHANGER WATER OUTLET(8) HOLE TO HANG UNITMN(9) LIFTING BRACKETS(10) ELECTRICAL PANEL(11) POWER INPUT(12) MINIMUM DIMENSION ON THE ELECTRICAL SWITCHBOARD SIDE.(13) MINIMUM DIMENSION FOR A SAFE PASSAGE.(14) MINIMUM DIMENSION FOR MAINTENANCE.(15) MINIMUM DIMENSION FOR WATER CONNECTIONS.STSIZE <strong>85D</strong> <strong>90D</strong> <strong>100D</strong> <strong>110D</strong> 115D 120D <strong>85D</strong> <strong>90D</strong> <strong>100D</strong> <strong>110D</strong> 115D 120DM mm 1233 1248 1217 1228 1221 1221 1211 1224 1197 1207 1202 1202N mm 1319 1304 1335 1324 1331 1331 1341 1328 1355 1345 1350 1350O mm 398 400 399 396 394 394 398 400 399 396 394 394P mm 452 450 451 454 456 456 452 450 451 454 456 456OD mm 89 89 89 89 89 89 89 89 89 89 89 89OD1 mm 89 89 89 89 89 89 89 89 89 89 89 89Length mm 2552 2552 2552 2552 2552 2552 2552 2552 2552 2552 2552 2552Depth mm 850 850 850 850 850 850 850 850 850 850 850 850Height mm 1886 1886 1886 1886 1886 1886 1886 1886 1886 1886 1886 1886W1 kg 266 260 297 304 312 313 297 291 327 335 342 344W2 kg 426 437 451 479 480 482 442 452 467 494 496 498W3 kg 306 296 340 354 367 368 341 331 375 390 402 404W4 kg 490 497 516 557 564 567 509 515 534 574 583 585Operating weight kg 1489 1490 1604 1694 1723 1731 1589 1589 1703 1793 1823 1830Shipping weight kg 1435 1436 1537 1627 1651 1659 1535 1535 1636 1726 1751 1758Particular accessories, executions or versions can bring about a great variation of the mass represented here. Please contact our Technicalepartment.ENM03Y40D9-01 09/04/10 pag 47
1000OP700204 5681886SIZE 135E-150F-165F-180F954101 19 9119 94 - 7 472 33OD OD1111 115 - 65 6690815738799306239 8 772 8 39245 360 2458501315001215 1000800132W111W21103W3W414MN(1) COMPRESSOR(2) INTERNAL EXCHANGER (EVAPORATOR)(3) EXTERNAL EXCHANGER (CONDENSER)(4) INTERNAL EXCHANGER WATER INLET(5) INTERNAL EXCHANGER WATER OUTLET(6) EXTERNAL EXCHANGER WATER INLET(7) EXTERNAL EXCHANGER WATER OUTLET(8) HOLE TO HANG UNIT(9) LIFTING BRACKETS(10) ELECTRICAL PANEL(11) POWER INPUT(12) MINIMUM DIMENSION ON THE ELECTRICALSWITCHBOARD SIDE.(13) MINIMUM DIMENSION FOR A SAFE PASSAGE.(14) MINIMUM DIMENSION FOR MAINTENANCE.(15) MINIMUM DIMENSION FOR WATER CONNECTIONS.SIZE 135E 150F 165F 180F 135E 150F 165F 180FSTM mm 1509 1464 1470 1461 1493 1459 1459 1457N mm 1553 1598 1592 1601 1569 1603 1603 1605O mm 388 400 401 400 390 403 403 403P mm 462 450 449 450 460 447 447 447OD mm 89 89 89 89 89 89 89 89OD1 mm 89 89 89 89 89 89 89 89Length mm 3062 3062 3062 3062 3062 3062 3062 3062Depth mm 850 850 850 850 850 850 850 850Height mm 1886 1886 1886 1886 1886 1886 1886 1886W1 kg 398 496 523 527 434 536 560 567W2 kg 511 567 607 598 534 605 632 636W3 kg 483 564 592 600 520 601 628 635W4 kg 620 645 687 681 640 678 708 713Operating weight kg 2012 2272 2409 2406 2128 2419 2528 2552Shipping weight kg 1935 2190 2325 2318 2051 2337 2444 2464Particular accessories, executions or versions can bring about a great variation of the mass represented here. Please contact our Technical epartment.ENM03Y40D9-01 09/04/10 pag 48
O1000 700P194 3691087 250 146 2501886SIZE <strong>65D</strong>-<strong>70D</strong>-<strong>75D</strong>-<strong>80D</strong>954109295 76 76 29518OD2171019OD3169 1 9 119189 94 - 75 - 631 111452OD13OD17648381317 8 7472547* 273439 8 772 8 39245 360 2458501315001215 10001180013W1W21011W3W414MN(1) COMPRESSOR(2) INTERNAL EXCHANGER (EVAPORATOR)(3) EXTERNAL EXCHANGER (CONDENSER)(4) INTERNAL EXCHANGER WATER INLET(5) INTERNAL EXCHANGER WATER OUTLET(6) EXTERNAL EXCHANGER WATER INLET(7) EXTERNAL EXCHANGER WATER OUTLET(8) HOLE TO HANG UNIT(9) LIFTING BRACKETS(10) ELECTRICAL PANEL(11) POWER INPUT(12) MINIMUM DIMENSION ON THE ELECTRICALSWITCHBOARD SIDE.(13) MINIMUM DIMENSION FOR A SAFE PASSAGE.(14) MINIMUM DIMENSION FOR MAINTENANCE.(15) MINIMUM DIMENSION FOR WATER CONNECTIONS.(16) HYDROPACK UTILITY SIDE(17) HYDROPACK SOURCE SIDE(18) PUMPS SUCTION(19) PUMPS SUPPLY(*) UNIT LENGTH WITH ACCESSORIES CEHU / CEHS"EXCHANGER - HYDRONIC UNIT CONNECTION SET"SIZE <strong>65D</strong> <strong>70D</strong> <strong>75D</strong> <strong>80D</strong> <strong>65D</strong> <strong>70D</strong> <strong>75D</strong> <strong>80D</strong>STM mm 1314 1323 1289 1272 1271 1293 1264 1246N mm 1233 1224 1258 1275 1276 1254 1283 1301O mm 404 398 402 399 404 399 402 400P mm 446 452 448 451 446 451 448 450OD mm 76 76 76 76 76 76 76 76OD1 mm 76 76 76 76 76 76 76 76OD2 mm 89 89 89 89 89 89 89 89OD3 mm 89 89 89 89 89 89 89 89Length mm 2547 2547 2547 2547 2547 2547 2547 2547Depth mm 850 850 850 850 850 850 850 850Height mm 1886 1886 1886 1886 1886 1886 1886 1886W1 kg 285 289 314 325 330 329 353 366W2 kg 409 433 434 434 422 454 456 454W3 kg 316 329 351 369 360 367 389 407W4 kg 453 493 486 492 460 506 502 504Operating weight kg 1462 1544 1584 1621 1572 1655 1699 1731Shipping weight kg 1436 1516 1553 1588 1546 1627 1668 1698Particular accessories, executions or versions can bring about a great variation of the mass represented here. Please contact our Technical epartment.ENM03Y40D9-01 09/04/10 pag 49
O1000 700P204 5681087 250 146 2501886SIZE <strong>85D</strong>-<strong>90D</strong>-<strong>100D</strong>-<strong>110D</strong>-115D-120D954109295 76 76 295OD2OD3917161 9 110181919189 94 - 7 472 33OD OD1111 15 - 65 648881317 8 74739 8 772 8 392552 245 360 245* 27408501315001215 10001180013W1W21011W3W414MN(1) COMPRESSOR(2) INTERNAL EXCHANGER (EVAPORATOR)(3) EXTERNAL EXCHANGER (CONDENSER)(4) INTERNAL EXCHANGER WATER INLET(5) INTERNAL EXCHANGER WATER OUTLET(6) EXTERNAL EXCHANGER WATER INLET(7) EXTERNAL EXCHANGER WATER OUTLET(8) HOLE TO HANG UNIT(9) LIFTING BRACKETS(10) ELECTRICAL PANEL(11) POWER INPUT(12) MINIMUM DIMENSION ON THE ELECTRICAL SWITCHBOARD SIDE.(13) MINIMUM DIMENSION FOR A SAFE PASSAGE.(14) MINIMUM DIMENSION FOR MAINTENANCE.(15) MINIMUM DIMENSION FOR WATER CONNECTIONS.(16) HYDROPACK UTILITY SIDE(17) HYDROPACK SOURCE SIDE(18) PUMPS SUCTION(19) PUMPS SUPPLY(*) UNIT LENGTH WITH ACCESSORIES CEHU / CEHS "EXCHANGER -HYDRONIC UNIT CONNECTION SET"STSIZE <strong>85D</strong> <strong>90D</strong> <strong>100D</strong> <strong>110D</strong> 115D 120D <strong>85D</strong> <strong>90D</strong> <strong>100D</strong> <strong>110D</strong> 115D 120DM mm 1233 1248 1217 1228 1221 1221 1211 1224 1197 1207 1202 1202N mm 1319 1304 1335 1324 1331 1331 1341 1328 1355 1345 1350 1350O mm 398 400 399 396 394 394 398 400 399 396 394 394P mm 452 450 451 454 456 456 452 450 451 454 456 456OD mm 89 89 89 89 89 89 89 89 89 89 89 89OD1 mm 89 89 89 89 89 89 89 89 89 89 89 89OD2 mm 89 114 114 114 114 114 89 114 114 114 114 114OD3 mm 89 114 114 114 114 114 89 114 114 114 114 114Length mm 2552 2552 2552 2552 2552 2552 2552 2552 2552 2552 2552 2552Depth mm 850 850 850 850 850 850 850 850 850 850 850 850Height mm 1886 1886 1886 1886 1886 1886 1886 1886 1886 1886 1886 1886W1 kg 363 357 393 401 409 410 403 397 433 442 449 450W2 kg 438 448 463 490 492 494 456 466 481 507 510 512W3 kg 413 403 446 462 475 477 452 442 485 503 515 516W4 kg 499 507 526 564 572 574 513 519 539 576 585 587Operating weight kg 1713 1714 1828 1918 1947 1955 1824 1824 1938 2028 2058 2065Shipping weight kg 1659 1660 1761 1851 1875 1891 1770 1770 1871 1961 1986 2001Particular accessories, executions or versions can bring about a great variation of the mass represented here. Please contact our Technical epartment.ENM03Y40D9-01 09/04/10 pag 50
1000OP700204 5681087 250 146 2501886SIZE 135E-150F-165F-180F954109295 76 76 295OD3OD2917161 19110181919189 94 - 7 472 33OD OD1111 115 - 65 66908157387993062* 337239 8 772 8 39245 360 2458501315001215 100080013W1W210111W3W414MN(1) COMPRESSOR(2) INTERNAL EXCHANGER (EVAPORATOR)(3) EXTERNAL EXCHANGER (CONDENSER)(4) INTERNAL EXCHANGER WATER INLET(5) INTERNAL EXCHANGER WATER OUTLET(6) EXTERNAL EXCHANGER WATER INLET(7) EXTERNAL EXCHANGER WATER OUTLET(8) HOLE TO HANG UNIT(9) LIFTING BRACKETS(10) ELECTRICAL PANEL(11) POWER INPUT(12) MINIMUM DIMENSION ON THE ELECTRICAL SWITCHBOARDSIDE.(13) MINIMUM DIMENSION FOR A SAFE PASSAGE.(14) MINIMUM DIMENSION FOR MAINTENANCE.(15) MINIMUM DIMENSION FOR WATER CONNECTIONS.(16) HYDROPACK UTILITY SIDE(17) HYDROPACK SOURCE SIDE(18) PUMPS SUCTION(19) PUMPS SUPPLY(*) UNIT LENGTH WITH ACCESSORIES CEHU / CEHS "EXCHANGER -HYDRONIC UNIT CONNECTION SET"SIZE 135E 150F 165F 180F 135E 150F 165F 180FSTM mm 1509 1464 1470 1461 1493 1459 1459 1457N mm 1553 1598 1592 1601 1569 1603 1603 1605O mm 388 400 401 400 390 403 403 403P mm 462 450 449 450 460 447 447 447OD mm 89 89 89 89 89 89 89 89OD1 mm 89 89 89 89 89 89 89 89OD2 mm 114 114 114 114 114 114 114 114OD3 mm 114 114 114 114 114 114 114 114Length mm 3062 3062 3062 3062 3062 3062 3062 3062Depth mm 850 850 850 850 850 850 850 850Height mm 1886 1886 1886 1886 1886 1886 1886 1886W1 kg 523 621 637 641 558 661 685 692W2 kg 508 562 601 592 530 600 627 632W3 kg 617 695 718 726 654 731 758 765W4 kg 600 629 678 671 621 663 693 698Operating weight kg 2247 2507 2633 2630 2363 2654 2763 2787Shipping weight kg 2170 2425 2549 2542 2286 2572 2679 2699Particular accessories, executions or versions can bring about a great variation of the mass represented here. Please contact our Technical epartment.ENM03Y40D9-01 09/04/10 pag 51