


You also want an ePaper? Increase the reach of your titles
YUMPU automatically turns print PDFs into web optimized ePapers that Google loves.
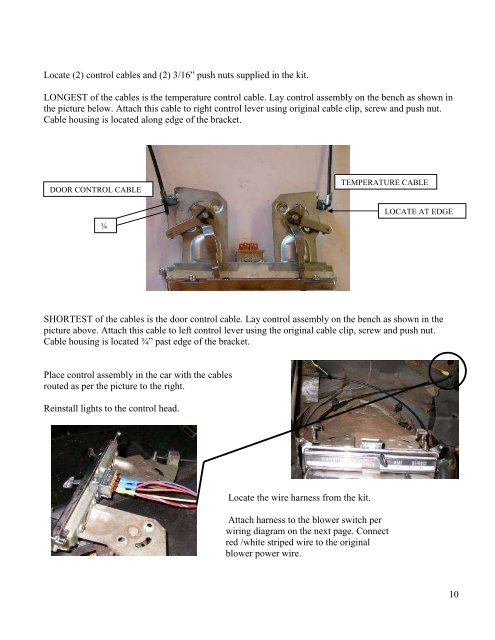
Locate (2) control cables and (2) 3/16” push nuts supplied in the kit.LONGEST of the cables is the temperature control cable. Lay control assembly on the bench as shown inthe picture below. Attach this cable to right control lever using original cable clip, screw and push nut.Cable housing is located along edge of the bracket.DOOR CONTROL CABLE¾”TEMPERATURE CABLELOCATE AT EDGESHORTEST of the cables is the door control cable. Lay control assembly on the bench as shown in thepicture above. Attach this cable to left control lever using the original cable clip, screw and push nut.Cable housing is located ¾” past edge of the bracket.Place control assembly in the car with the cablesrouted as per the picture to the right.Reinstall lights to the control head.Locate the wire harness from the kit.Attach harness to the blower switch perwiring diagram on the next page. Connectred /white striped wire to the originalblower power wire.10


