


Create successful ePaper yourself
Turn your PDF publications into a flip-book with our unique Google optimized e-Paper software.
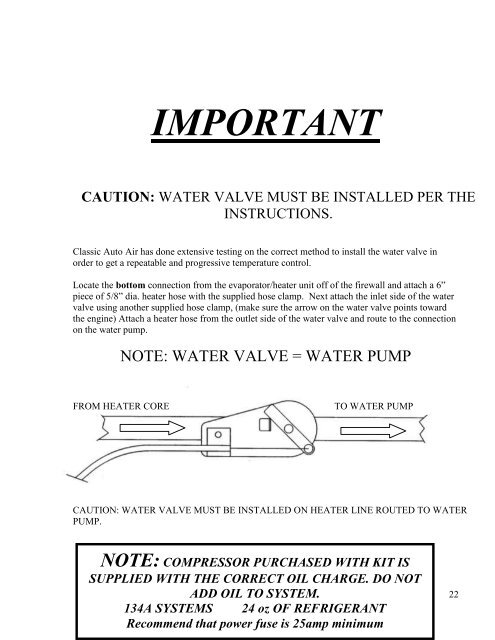
IMPORTANTCAUTION: WATER VALVE MUST BE INSTALLED PER THEINSTRUCTIONS.<strong>Classic</strong> <strong>Auto</strong> <strong>Air</strong> has done extensive testing on the correct method to install the water valve inorder to get a repeatable and progressive temperature control.Locate the bottom connection from the evaporator/heater unit off of the firewall and attach a 6”piece of 5/8” dia. heater hose with the supplied hose clamp. Next attach the inlet side of the watervalve using another supplied hose clamp, (make sure the arrow on the water valve points towardthe engine) Attach a heater hose from the outlet side of the water valve and route to the connectionon the water pump.NOTE: WATER VALVE = WATER PUMPFROM HEATER CORETO WATER PUMPNOTE:COMPRESSORIS SUPPLIEDWITH THECORRECT OILCHARGE. DONOT ADD OILTO SYSTEM.CAUTION: WATER VALVE MUST BE INSTALLED ON HEATER LINE ROUTED TO WATERPUMP.NOTE: COMPRESSOR PURCHASED WITH 134a SYSTEMS KIT ISSUPPLIED WITH THE CORRECT OIL CHARGE. 24 oz DO OF NOTADD OIL TO SYSTEM. REFRIGERAN134A SYSTEMS 24 oz OF REFRIGERANT TRecommend that power fuse is 25amp minimum Recommendthat power fuse22


