


You also want an ePaper? Increase the reach of your titles
YUMPU automatically turns print PDFs into web optimized ePapers that Google loves.
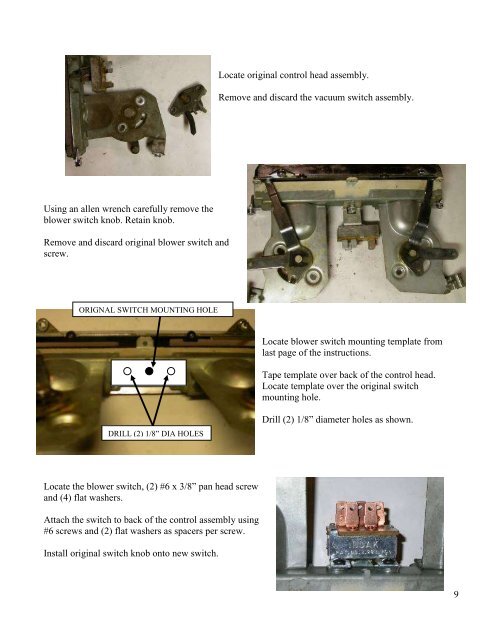
Locate original control head assembly.Remove and discard the vacuum switch assembly.Using an allen wrench carefully remove theblower switch knob. Retain knob.Remove and discard original blower switch andscrew.ORIGNAL SWITCH MOUNTING HOLELocate blower switch mounting template fromlast page of the instructions.Tape template over back of the control head.Locate template over the original switchmounting hole.DRILL (2) 1/8” DIA HOLESDrill (2) 1/8” diameter holes as shown.Locate the blower switch, (2) #6 x 3/8” pan head screwand (4) flat washers.Attach the switch to back of the control assembly using#6 screws and (2) flat washers as spacers per screw.Install original switch knob onto new switch.9


