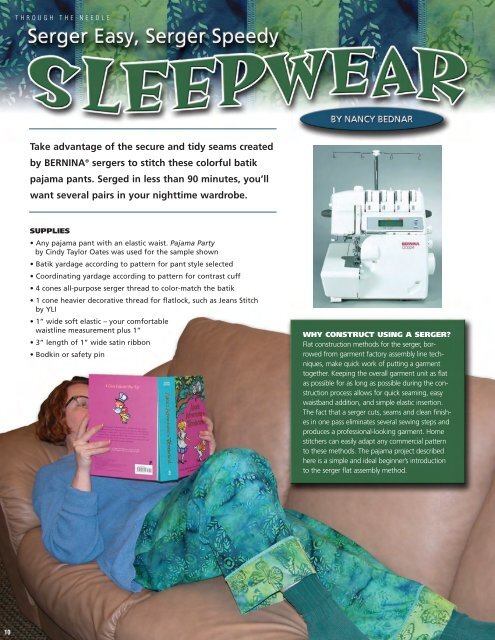
THROUGH THE NEEDLETake advantage of the secure and tidy seams createdby BERNINA ® sergers to stitch these colorful batikpajama pants. Serged in less than 90 minutes, you’llwant several pairs in your nighttime wardrobe.SUPPLIES• Any pajama pant with an elastic waist. Pajama Partyby Cindy Taylor Oates was used for the sample shown• Batik yardage according to pattern for pant style selected• Coordinating yardage according to pattern for contrast cuff• 4 cones all-purpose serger thread to color-match the batik• 1 cone heavier decorative thread for flatlock, such as Jeans Stitchby YLI• 1” wide soft elastic – your comfortablewaistline measurement plus 1”• 3” length of 1” wide satin ribbon• Bodkin or safety pinWHY CONSTRUCT USING A SERGER?Flat construction methods for the serger, borrowedfrom garment factory assembly line techniques,make quick work of putting a garmenttogether. Keeping the overall garment unit as flatas possible for as long as possible during the constructionprocess allows for quick seaming, easywaistband addition, and simple elastic insertion.The fact that a serger cuts, seams and clean finishesin one pass eliminates several sewing steps andproduces a professional-looking garment. Homestitchers can easily adapt any commercial patternto these methods. The pajama project describedhere is a simple and ideal beginner’s introductionto the serger flat assembly method.10
SPECIAL CLASSROOM EDITIONCUTTING AND MARKINGCut two fronts and two backs from main batik fabric. Note: If an elastic casingallowance is included on the pant pattern you selected, fold it down and do notinclude it when you cut. Review the instructions to see if this allowance hasbeen drafted into the pattern. A separate serged-on elastic casing will be addedlater in the construction process. For easy identification, chalk mark CF and CB(center front and center back) on the wrong side of each pant piece, close to thewaistline edge.STEP ONE: Seaming Fronts and BacksSet the serger for a 4-thread basic overlock stitch.With right sides together, pin the raw edges of thecasing to the top of the pants unit. Serge-seamtogether. Press the seam allowance down, away fromthe waistband.Cut a piece of 1” elastic a comfortable waistlinemeasurement plus 1”. Using a bodkin or a safety pin,thread the elastic through the casing, extending theelastic out each edge by 1 /4”. Pin in place. Using asewing machine, stitch the elastic in place throughthe casing to secure.BackFrontFrontBackSerge-seam the pants units to each other in thefollowing order – think of it as a “laundry line”of pants pieces:• Pants Back side seam to Pants Front side seam• Pants Front to Pants Front at center crotchseam• Pants Front side seam to Pants Back side seamSTEP FOUR: Final SeamingWith right sides together, match and seam the centerback crotch seam. Begin serging at the lower crotchedge, ending at the elastic waistline. Tip: Slide thegathers of the elastic away from the center backseamline to allow for the flattest possible seamingover the thickest part of this seam.Press all seams to one side. Note: Illustration atleft includes casing from Step Three.STEP TWO: Adding Flatlocked Contrast BandsHold up the pants to your body and determine if the pant legs need to be shortenedin order to accommodate the 3 1 /4” contrast cuff. Measure and shorten eachpant leg unit as needed.Measure the width of the seamed front/back pantleg unit. Cut 2 cuff pieces this width by 7 1 /2” tall.Fold these cuff pieces in half across the width,wrong sides together, and press.Reset the serger for a wide 2-thread flatlockstitch.Match all raw edges and pin the cuff to thewrong side of the lower pant leg. Note:Remove pins as you serge, being careful notto serge over them. Flatlock the two unitstogether, having the pant leg fabric facing upwhile serging. (This will allow the flatlock bandto fold downwards, simulating a tuck.) Pull thetwo pieces away from each other allowing thestitches to lie flat. The flatlocking creates a smooth, color accent on the pant leg.STEP THREE: Adding a Waistline CasingReset the serger for basic 4-thread overlock seaming.Measure the width of the seamed waistline at the pants upper edge. Cut a strip offabric this measurement x 3” tall. Fold the casing piece in half across the width,wrong sides together, and press.Refold the pants legs to match the inner leg seams.You will be seaming one pant front to one pant backon each side.Begin seaming at one cuff, up the inner leg, throughthe center seams and down the second pant leg.Leave long thread tails at the beginning and end ofthe seam.Press the leg seams to one side. Using a large-eyedhand-sewing needle, draw the serger thread tailsinside the seam allowance.A FINAL TOUCH….Using a sewing machine, stitch a piece of ribbon overthe top of the center back seam to cover the end ofthe serger seam. Not only does this attractively markthe center back of your new PJ’s, but eliminates theneed for weaving in one set of thread tails!4-ThreadOverlock Stitch• Left and right needles:All-purpose sergerthread: tension 4-5• Upper and Lower loopers:All-purpose sergerthread: tension 4-5• Stitch length: 2 1 /2• Cutting Width: 2 1 /22-ThreadFlatlock Stitch• Left Needle: All-purposeserger thread – 0 – 1 /2• Right Needle: Removed• Upper Looper:Converter cap installed• Lower Looper:Decorative thread –tension 4-5• Stitch Length: 1 1 /2• Cutting Width: 2 1 /211