
Create successful ePaper yourself
Turn your PDF publications into a flip-book with our unique Google optimized e-Paper software.
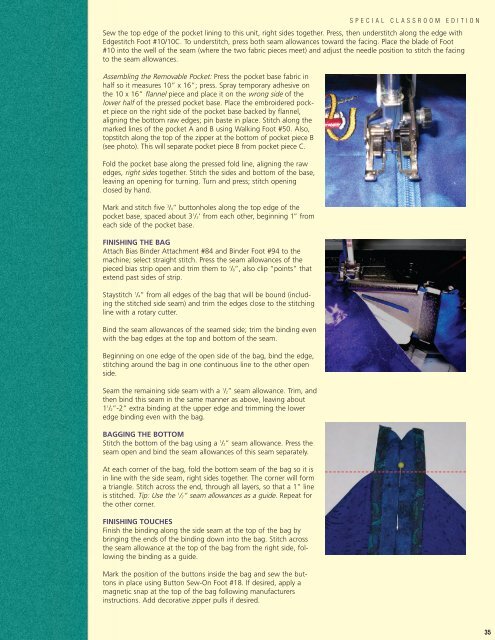
Sew the top edge of the pocket lining to this unit, right sides together. Press, then understitch along the edge withEdgestitch Foot #10/10C. To understitch, press both seam allowances toward the facing. Place the blade of Foot#10 into the well of the seam (where the two fabric pieces meet) and adjust the needle position to stitch the facingto the seam allowances.Assembling the Removable Pocket: Press the pocket base fabric inhalf so it measures 10” x 16”; press. Spray temporary adhesive onthe 10 x 16” flannel piece and place it on the wrong side of thelower half of the pressed pocket base. Place the embroidered pocketpiece on the right side of the pocket base backed by flannel,aligning the bottom raw edges; pin baste in place. Stitch along themarked lines of the pocket A and B using Walking Foot #50. Also,topstitch along the top of the zipper at the bottom of pocket piece B(see photo). This will separate pocket piece B from pocket piece C.Fold the pocket base along the pressed fold line, aligning the rawedges, right sides together. Stitch the sides and bottom of the base,leaving an opening for turning. Turn and press; stitch openingclosed by hand.Mark and stitch five 3 /4” buttonholes along the top edge of thepocket base, spaced about 3 1 /2’ from each other, beginning 1” fromeach side of the pocket base.FINISHING THE BAGAttach Bias Binder Attachment #84 and Binder Foot #94 to themachine; select straight stitch. Press the seam allowances of thepieced bias strip open and trim them to 1 /8”, also clip “points” thatextend past sides of strip.Staystitch 1 /4” from all edges of the bag that will be bound (includingthe stitched side seam) and trim the edges close to the stitchingline with a rotary cutter.Bind the seam allowances of the seamed side; trim the binding evenwith the bag edges at the top and bottom of the seam.Beginning on one edge of the open side of the bag, bind the edge,stitching around the bag in one continuous line to the other openside.Seam the remaining side seam with a 1 /2” seam allowance. Trim, andthen bind this seam in the same manner as above, leaving about1 1 /2”-2” extra binding at the upper edge and trimming the loweredge binding even with the bag.BAGGING THE BOTTOMStitch the bottom of the bag using a 1 /2” seam allowance. Press theseam open and bind the seam allowances of this seam separately.At each corner of the bag, fold the bottom seam of the bag so it isin line with the side seam, right sides together. The corner will forma triangle. Stitch across the end, through all layers, so that a 1” lineis stitched. Tip: Use the 1 /2” seam allowances as a guide. Repeat forthe other corner.FINISHING TOUCHESFinish the binding along the side seam at the top of the bag bybringing the ends of the binding down into the bag. Stitch acrossthe seam allowance at the top of the bag from the right side, followingthe binding as a guide.Mark the position of the buttons inside the bag and sew the buttonsin place using Button Sew-On Foot #18. If desired, apply amagnetic snap at the top of the bag following manufacturersinstructions. Add decorative zipper pulls if desired.SPECIAL CLASSROOM EDITION35