OneRoof - CyperCafePro – Client User Manual - CyberCafePro
OneRoof - CyperCafePro – Client User Manual - CyberCafePro
OneRoof - CyperCafePro – Client User Manual - CyberCafePro

You also want an ePaper? Increase the reach of your titles
YUMPU automatically turns print PDFs into web optimized ePapers that Google loves.
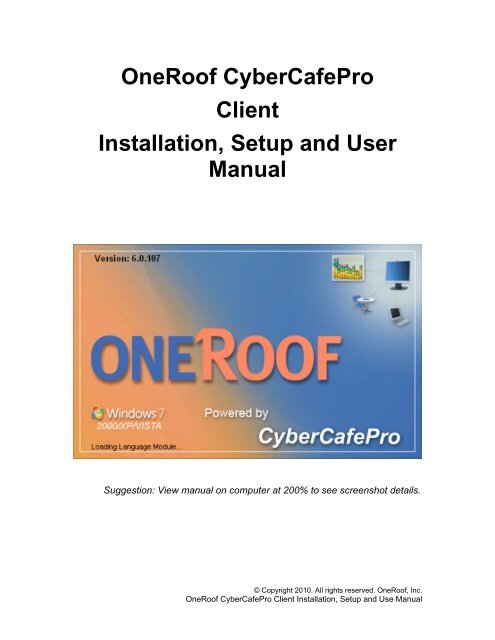
<strong>OneRoof</strong> <strong>CyberCafePro</strong><br />
<strong>Client</strong><br />
Installation, Setup and <strong>User</strong><br />
<strong>Manual</strong><br />
Suggestion: View manual on computer at 200% to see screenshot details.<br />
© Copyright 2010. All rights reserved. <strong>OneRoof</strong>, Inc.<br />
<strong>OneRoof</strong> <strong>CyberCafePro</strong> <strong>Client</strong> Installation, Setup and Use <strong>Manual</strong>
<strong>Client</strong> <strong>Manual</strong>: Version 6.0.x <strong>–</strong> March 15, 2010<br />
<strong>OneRoof</strong> <strong>CyberCafePro</strong> <strong>Client</strong> Installation, Setup and Use <strong>Manual</strong><br />
© Copyright 2010, <strong>OneRoof</strong>, Inc.<br />
All rights reserved.<br />
© Copyright 2010. All rights reserved. <strong>OneRoof</strong>, Inc.<br />
<strong>OneRoof</strong> <strong>CyberCafePro</strong> <strong>Client</strong> Installation, Setup and Use <strong>Manual</strong>
Table of Contents<br />
(When viewing in PDF, click any Table of Contents entry to jump to that section.)<br />
Installation of <strong>CyberCafePro</strong> 6.0 <strong>Client</strong> 1<br />
Logon Screen for all <strong>Client</strong> Computers 10<br />
Logon <strong>–</strong> <strong>User</strong> Account 11<br />
First Time Logon 12<br />
Setting Up the Launch Pad 13<br />
Program Button Settings for LaunchPad 18<br />
Sub-Groups 19<br />
License Key Management 22<br />
Game /App Profile Settings 23<br />
Lock Session 25<br />
Reservations 26<br />
Desktop Timer 27<br />
Chat & Order Window 28<br />
Floating Promotional Textual Marquee Ads 30<br />
Logo Customization 31<br />
Copying <strong>Client</strong> Settings (i.e. “cloning” to all other <strong>Client</strong>s) 32<br />
Admin <strong>–</strong> Access to the <strong>Client</strong> Computer Controls 33<br />
Connection Settings 34<br />
Control Panel Items 35<br />
Auto-Login Settings (i.e. Automatic <strong>Client</strong> Skin Boot-up) 36<br />
Wallpaper Settings 38<br />
Reset All Settings 39<br />
Exit CCP to Windows 39<br />
Shutting Down the <strong>Client</strong>s at Days End 40<br />
© Copyright 2010. All rights reserved. <strong>OneRoof</strong>, Inc.<br />
<strong>OneRoof</strong> <strong>CyberCafePro</strong> <strong>Client</strong> Installation, Setup and Use <strong>Manual</strong>
Installation of <strong>CyberCafePro</strong> 6.0 <strong>Client</strong><br />
Install <strong>CyberCafePro</strong> <strong>Client</strong> on every <strong>Client</strong> computer the public will access.<br />
To install <strong>CyberCafePro</strong> <strong>Client</strong>, for each <strong>Client</strong> computer:<br />
1. Make sure that all LAN computers are setup to be able to communicate with<br />
each other.<br />
Windows 7 <strong>User</strong>s Only: Windows 7 users need their ‘Network Location’ to<br />
be set up as a ‘Home’ or ‘Work’ Network (and not as a ‘Public Network’).You<br />
can change this setting in Windows 7 by following these steps for both the<br />
CCP <strong>Client</strong>s and MCS (Server) PCs:<br />
a. Click the Windows Start button, and go to Control Panel and select<br />
Network and Sharing Center.<br />
1<br />
© Copyright 2010. All rights reserved. <strong>OneRoof</strong>, Inc.<br />
<strong>OneRoof</strong> <strong>CyberCafePro</strong> <strong>Client</strong> Installation, Setup and Use <strong>Manual</strong>
. In the Network and Sharing Center window that opens, look at the<br />
hyperlink under your Internet NIC adapter. Make sure it does not say<br />
‘Public Network’. If it does say ‘Public Network’, click the ‘Public Network’<br />
hyperlink to change it.<br />
c. Then click ‘Home network’ or ‘Work network’. The network setting will then<br />
be updated and the <strong>OneRoof</strong> <strong>CyberCafePro</strong> <strong>Client</strong> software will then be<br />
able to communicate with the <strong>OneRoof</strong> <strong>CyberCafePro</strong> Main Control<br />
Station (“Server”) software.<br />
2. Download the <strong>CyberCafePro</strong> <strong>Client</strong> application software for <strong>CyberCafePro</strong> 6.0<br />
and then double-click the <strong>Client</strong> setup program.<br />
© Copyright 2010. All rights reserved. <strong>OneRoof</strong>, Inc.<br />
<strong>OneRoof</strong> <strong>CyberCafePro</strong> <strong>Client</strong> Installation, Setup and Use <strong>Manual</strong><br />
2
3. From the drop-down list, choose the language you want to use for the installation<br />
instructions and click OK.<br />
Note: Even if you select a language for installation that is different than what is already<br />
set within the MCS Server software (set via Admin>System Settings>Store<br />
Configuration on the MCS), the next time the <strong>Client</strong> is booted, the language used in the<br />
<strong>Client</strong> application will automatically reset to the MCS settings.<br />
4. Close all other applications and click Next to start the installation.<br />
© Copyright 2010. All rights reserved. <strong>OneRoof</strong>, Inc.<br />
<strong>OneRoof</strong> <strong>CyberCafePro</strong> <strong>Client</strong> Installation, Setup and Use <strong>Manual</strong><br />
3
5. Review the End <strong>User</strong> License Agreement, select I accept the agreement and<br />
then click Next.<br />
© Copyright 2010. All rights reserved. <strong>OneRoof</strong>, Inc.<br />
<strong>OneRoof</strong> <strong>CyberCafePro</strong> <strong>Client</strong> Installation, Setup and Use <strong>Manual</strong><br />
4
6. Review the Copyright notice and then click Next.<br />
© Copyright 2010. All rights reserved. <strong>OneRoof</strong>, Inc.<br />
<strong>OneRoof</strong> <strong>CyberCafePro</strong> <strong>Client</strong> Installation, Setup and Use <strong>Manual</strong><br />
5
7. Confirm (or browse and select) the standard destination folder location where the<br />
<strong>Client</strong> software should be installed, and then click Next.<br />
© Copyright 2010. All rights reserved. <strong>OneRoof</strong>, Inc.<br />
<strong>OneRoof</strong> <strong>CyberCafePro</strong> <strong>Client</strong> Installation, Setup and Use <strong>Manual</strong><br />
6
8. Confirm (or browse and select) Start Menu folder location for shortcuts and click<br />
Next.<br />
© Copyright 2010. All rights reserved. <strong>OneRoof</strong>, Inc.<br />
<strong>OneRoof</strong> <strong>CyberCafePro</strong> <strong>Client</strong> Installation, Setup and Use <strong>Manual</strong><br />
7
9. Confirm to create a desktop icon and select if you want a Quick Launch icon and<br />
then click Next.<br />
© Copyright 2010. All rights reserved. <strong>OneRoof</strong>, Inc.<br />
<strong>OneRoof</strong> <strong>CyberCafePro</strong> <strong>Client</strong> Installation, Setup and Use <strong>Manual</strong><br />
8
10. Click Finish to complete the install; your system will restart and automatically<br />
launch the <strong>CyberCafePro</strong> <strong>Client</strong> software.<br />
© Copyright 2010. All rights reserved. <strong>OneRoof</strong>, Inc.<br />
<strong>OneRoof</strong> <strong>CyberCafePro</strong> <strong>Client</strong> Installation, Setup and Use <strong>Manual</strong><br />
9
Logon Screen for all <strong>Client</strong> Computers<br />
The logon screen is presented to customers as they sit down before a public-access<br />
<strong>Client</strong> computer. They then click the Start button and enter their <strong>User</strong> Account name<br />
and password.<br />
The <strong>OneRoof</strong> <strong>CyberCafePro</strong> Logon screen<br />
Note: If you would like to hide the Admin button on all <strong>Client</strong>s, go to the Advanced<br />
Settings tab (Navigation: Admin icon>Setup><strong>Client</strong> Settings) and then select (check) the<br />
Hide the Admin button on startup check box, as pictured below. (Ctrl-Shift-A in that<br />
same area will then toggle visibility of the Admin button when needed.)<br />
© Copyright 2010. All rights reserved. <strong>OneRoof</strong>, Inc.<br />
<strong>OneRoof</strong> <strong>CyberCafePro</strong> <strong>Client</strong> Installation, Setup and Use <strong>Manual</strong><br />
10
Logon <strong>–</strong> <strong>User</strong> Account<br />
This is the basic logon screen presented on each <strong>Client</strong>, requesting a <strong>User</strong>name and<br />
Password <strong>–</strong> and (if enabled) allowing each account holder to change their password<br />
every time they log on.<br />
<strong>User</strong>name and Password logon screen<br />
© Copyright 2010. All rights reserved. <strong>OneRoof</strong>, Inc.<br />
<strong>OneRoof</strong> <strong>CyberCafePro</strong> <strong>Client</strong> Installation, Setup and Use <strong>Manual</strong><br />
11
First Time Logon<br />
<strong>User</strong>s will be prompted to voluntarily enter more details about themselves on initial<br />
logon to the Main Control Station via any <strong>Client</strong> (but only the first time).<br />
Account Details prompt<br />
To set whether a new account user can modify his fields (and which ones), use check<br />
boxes shown below.<br />
Note: This is set on the Main Control Station (MCS), not on the client. (Navigation:<br />
Admin icon>Setup>Accounts/Codes.)<br />
Settings on the MCS control whether a user can modify fields<br />
© Copyright 2010. All rights reserved. <strong>OneRoof</strong>, Inc.<br />
<strong>OneRoof</strong> <strong>CyberCafePro</strong> <strong>Client</strong> Installation, Setup and Use <strong>Manual</strong><br />
12
Setting Up the Launch Pad<br />
Turning on the Launch Pad is done on the MCS universally for all or no clients by<br />
clicking Launch Pad under each of the three modalities in the MCS store configuration<br />
(Navigation (in the MCS): Admin icon>System Settings>Store Configuration).<br />
Configuring the store settings in the MCS<br />
© Copyright 2010. All rights reserved. <strong>OneRoof</strong>, Inc.<br />
<strong>OneRoof</strong> <strong>CyberCafePro</strong> <strong>Client</strong> Installation, Setup and Use <strong>Manual</strong><br />
13
Here is an Example of the Launch Pad as it appears on the right of the <strong>Client</strong> computer<br />
screen:<br />
The Launch Pad<br />
© Copyright 2010. All rights reserved. <strong>OneRoof</strong>, Inc.<br />
<strong>OneRoof</strong> <strong>CyberCafePro</strong> <strong>Client</strong> Installation, Setup and Use <strong>Manual</strong><br />
14
To set up the Launch Pad on the <strong>Client</strong> computer:<br />
1. Click the Admin button on the <strong>CyberCafePro</strong> <strong>Client</strong> computer skin.<br />
Note: In the Main Control Station, you must set the Master <strong>Client</strong> Password so that if the<br />
Admin button is clicked when the <strong>Client</strong> is not yet connected to the Server or Main<br />
Control Station, the Master <strong>Client</strong> Password will properly be required to access the<br />
<strong>Client</strong> Admin screen. Once the MCS is connected to the <strong>Client</strong>, then any Employee<br />
logon name and password with Admin access may be used.<br />
Master <strong>Client</strong> Password setting location shown above via MCS: Admin>Setup><strong>Client</strong> Settings<br />
© Copyright 2010. All rights reserved. <strong>OneRoof</strong>, Inc.<br />
<strong>OneRoof</strong> <strong>CyberCafePro</strong> <strong>Client</strong> Installation, Setup and Use <strong>Manual</strong><br />
15
The Administration Screen opens when you click Admin on the <strong>Client</strong> skin<br />
2. In the Administration Screen, use the Program Settings Export/Import Control<br />
section at the top right to set up a path where you will save settings, images,<br />
icons, and sound files. This allows you to easily copy Launch Pad settings to<br />
other <strong>Client</strong>s.<br />
Use this area to set up a path so that you can import Launch Pad settings to other <strong>Client</strong>s<br />
© Copyright 2010. All rights reserved. <strong>OneRoof</strong>, Inc.<br />
<strong>OneRoof</strong> <strong>CyberCafePro</strong> <strong>Client</strong> Installation, Setup and Use <strong>Manual</strong><br />
16
3. Then click Setup under LaunchPad (see below):<br />
The Setup button under LaunchPad Settings takes you to the Program Administration box, where<br />
you set up Launch Pad programs in the side-bar area of the <strong>Client</strong> window<br />
© Copyright 2010. All rights reserved. <strong>OneRoof</strong>, Inc.<br />
<strong>OneRoof</strong> <strong>CyberCafePro</strong> <strong>Client</strong> Installation, Setup and Use <strong>Manual</strong><br />
17
Program Button Settings for LaunchPad<br />
If you choose to deploy the Programs LaunchPad, this is where you configure the<br />
choices.<br />
Setting up the 2 nd button called Games below for applications is illustrated.<br />
Actually you can rename any of the 6 buttons as you wish.<br />
You can also enable CD-License Key management (so your # of paid licenses<br />
can be used at any <strong>Client</strong>, if available), present Ad-like screens (and brief<br />
descriptions) for each game, and set game parameters for each. (This can be<br />
done for all 6 Categories, and named as you choose <strong>–</strong> not just “Games.)<br />
© Copyright 2010. All rights reserved. <strong>OneRoof</strong>, Inc.<br />
<strong>OneRoof</strong> <strong>CyberCafePro</strong> <strong>Client</strong> Installation, Setup and Use <strong>Manual</strong><br />
18
LaunchPad Administration box, where Programs available on <strong>Client</strong> and Launch Pad options are<br />
set<br />
Sub-Groups<br />
Sub-Groups are setup for pull-down at the bottom of the Launch Pad by clicking the<br />
Sub-Groups button below the program group buttons <strong>–</strong> which opens the Window for<br />
additions and edits of Sub-Groups (see Launch Pad with Sub-Categories shown below).<br />
Sub-Groups are used for filtering by creating a set of Sub-Groups within each main<br />
Group, and then setting each program to a specific Sub-Group. <strong>User</strong>s can then 'filter'<br />
each group in the Launch Pad to one of these Sub-Groups (e.g. one has a Games<br />
group and then creates Sub-Groups of '1st Person Shooter', ‘Sports', 'MMORPG'...You<br />
could have the game Call of Duty assigned as Sub-Group '1st Person Shooter',<br />
'Madden NFL' assigned the Sub-Group 'Sports' and World of Warcraft assigned the<br />
Sub-Group 'MMORPG'. When looking at the Launch Pad, users can then select the<br />
Games group where he will see all of the mentioned games, but if he selects the Sub-<br />
© Copyright 2010. All rights reserved. <strong>OneRoof</strong>, Inc.<br />
<strong>OneRoof</strong> <strong>CyberCafePro</strong> <strong>Client</strong> Installation, Setup and Use <strong>Manual</strong><br />
19
Group 'Sports' he will then only see the 'Madden NFL' game as it is the assigned to the<br />
'Sports' Sub-Group.<br />
© Copyright 2010. All rights reserved. <strong>OneRoof</strong>, Inc.<br />
<strong>OneRoof</strong> <strong>CyberCafePro</strong> <strong>Client</strong> Installation, Setup and Use <strong>Manual</strong><br />
20
Sub-Categories in the Launch Pad<br />
© Copyright 2010. All rights reserved. <strong>OneRoof</strong>, Inc.<br />
<strong>OneRoof</strong> <strong>CyberCafePro</strong> <strong>Client</strong> Installation, Setup and Use <strong>Manual</strong><br />
21
Editing the categories for a group<br />
License Key Management<br />
License Key management and other advanced settings are accessed in the Program<br />
Administration screen.<br />
You should first select the Games button and then select the specific game for which<br />
you wish to Enable CD Key Management <strong>–</strong> by selecting the Enable CD Key<br />
Management for this program button in section 4 of the Program Administration screen<br />
<strong>–</strong> and showing the path in the drop-down box in section 2 of the same screen.<br />
When adding new games, use Add and then Caption to name the new games or<br />
programs being added.<br />
You can also disable settings for the Taskbar, Timebar and CCP <strong>Client</strong> Interface while<br />
each program is running (if so checked).<br />
For Profile and CD Key management to work from the shortcuts in the Windows Start<br />
© Copyright 2010. All rights reserved. <strong>OneRoof</strong>, Inc.<br />
<strong>OneRoof</strong> <strong>CyberCafePro</strong> <strong>Client</strong> Installation, Setup and Use <strong>Manual</strong><br />
22
menu, the paths they use in the setup in the <strong>Client</strong> admin screen should match the<br />
paths specified in the Target field of that shortcut in Windows.<br />
Advanced settings in the Program Administration screen<br />
The <strong>OneRoof</strong> <strong>Client</strong> program provides direct access to the Desktop. This means that all<br />
your applications can be launched traditionally by pointing to Windows Start ><br />
Programs.<br />
However, for gaming applications, which require CD Key License management and/or<br />
Profile Management for <strong>User</strong>s, both options are included.<br />
The control choices within this window for games should be self-evident. Contact<br />
<strong>OneRoof</strong>/<strong>CyberCafePro</strong> on our forums if you have any questions. <strong>CyberCafePro</strong> runs<br />
some of the largest-seat gaming centers worldwide.<br />
Click Save after each game entry or setting change.<br />
Game /App Profile Settings<br />
You can save <strong>User</strong> Game/App Profile settings to the MCS so the logins from different<br />
<strong>Client</strong>s for the same users will be accessible.<br />
To save the profile settings:<br />
1. In the Program Administration screen, click Setup near the bottom left of the box:<br />
Use the Setup button to save profile settings to the MCS<br />
© Copyright 2010. All rights reserved. <strong>OneRoof</strong>, Inc.<br />
<strong>OneRoof</strong> <strong>CyberCafePro</strong> <strong>Client</strong> Installation, Setup and Use <strong>Manual</strong><br />
23
Saving a profile<br />
2. Select the game and whether profiles are to be saved for account users and/or<br />
timecode users (if you offer timecodes). Specify the path where the Profile<br />
settings are to be stored, taking note of the warning about using a valid,<br />
accessible, shared path.<br />
3. Select the Recursive check box (if subfolders are used).<br />
4. Choose the zip compression level.<br />
5. Click Save.<br />
© Copyright 2010. All rights reserved. <strong>OneRoof</strong>, Inc.<br />
<strong>OneRoof</strong> <strong>CyberCafePro</strong> <strong>Client</strong> Installation, Setup and Use <strong>Manual</strong><br />
24
Lock Session<br />
The Lock Session button<br />
The Lock Session button on the <strong>Client</strong> Timer screen allows a user to lock the computer<br />
during a break (so no one else can use it or view the screen), though the time will<br />
continue to be run (and thus be deducted from the user’s remaining time).<br />
Locking the session lets the user take a break while keeping the session<br />
locked and private; timer continues to run<br />
The user or account holder will be prompted for their password upon return <strong>–</strong> and upon<br />
entering correctly, the <strong>Client</strong> computer will be unlocked <strong>–</strong> and again available for use.<br />
If a user is in Play & Pay mode and clicks Lock Session, they will be prompted to enter<br />
a password to later use to unlock it. If a customer is using an Account, their password<br />
will unlock the <strong>Client</strong>. If the customer is using a timecode, then entering the timecode<br />
itself will also unlock the screen<br />
© Copyright 2010. All rights reserved. <strong>OneRoof</strong>, Inc.<br />
<strong>OneRoof</strong> <strong>CyberCafePro</strong> <strong>Client</strong> Installation, Setup and Use <strong>Manual</strong><br />
25
Reservations<br />
Reservations are set up on the MCS system by clicking the “People” icon on the MCS,<br />
as shown below.<br />
As shown below, setting up Reservations is easy to do whether for the same day or<br />
future date, and defining the rules (e.g. reserve the computer # minutes ahead of time ).<br />
Setting up reservations on the MCS<br />
The figure below shows a <strong>Client</strong> Logon screen reserved for an individual:<br />
Make reservations for a user from the MCS; <strong>Client</strong> screen shows as Reserved<br />
© Copyright 2010. All rights reserved. <strong>OneRoof</strong>, Inc.<br />
<strong>OneRoof</strong> <strong>CyberCafePro</strong> <strong>Client</strong> Installation, Setup and Use <strong>Manual</strong><br />
26
Desktop Timer<br />
The figure below shows the icon (enlarged) located at the top of all <strong>Client</strong> Desktops<br />
after an Account Holder logs on, which gives a snapshot of the time remaining on the<br />
Account and a Click to End Session button for quick logoff.<br />
Area at the top of the <strong>Client</strong> desktop allows easy logoff and provides access to session details<br />
If the user double-clicks on the Time Remaining (grey) area, it brings up the details of<br />
the session, as shown below.<br />
Session details<br />
© Copyright 2010. All rights reserved. <strong>OneRoof</strong>, Inc.<br />
<strong>OneRoof</strong> <strong>CyberCafePro</strong> <strong>Client</strong> Installation, Setup and Use <strong>Manual</strong><br />
27
Chat & Order Window<br />
If Chat is turned on, this permits communication between the <strong>Client</strong> customer and the<br />
employee seated at the Main Control Station. The access button for Chat is shown if the<br />
control Allow user to initiate chat is selected (checked) (Admin>Setup><strong>Client</strong><br />
Settings>System Settings).<br />
Chat & Order button shows on the <strong>Client</strong> if set up on the MCS<br />
© Copyright 2010. All rights reserved. <strong>OneRoof</strong>, Inc.<br />
<strong>OneRoof</strong> <strong>CyberCafePro</strong> <strong>Client</strong> Installation, Setup and Use <strong>Manual</strong><br />
28
Chat & Order Window<br />
© Copyright 2010. All rights reserved. <strong>OneRoof</strong>, Inc.<br />
<strong>OneRoof</strong> <strong>CyberCafePro</strong> <strong>Client</strong> Installation, Setup and Use <strong>Manual</strong><br />
29
Floating Promotional Textual Marquee Ads<br />
Via the Main Control Station, Promotional Text Marquee Ads (or float-line banners) may<br />
be set to float across <strong>Client</strong> Logon screens (below the logo area) as shown in orange in<br />
the illustration below. (See MCS <strong>Manual</strong> for settings.)<br />
Promotional banners can be set up (on the MCS) to scroll across the <strong>Client</strong> Logon screen<br />
© Copyright 2010. All rights reserved. <strong>OneRoof</strong>, Inc.<br />
<strong>OneRoof</strong> <strong>CyberCafePro</strong> <strong>Client</strong> Installation, Setup and Use <strong>Manual</strong><br />
30
Logo Customization<br />
To replace the <strong>OneRoof</strong> logo in the <strong>Client</strong> computer Logon screen, first create a .jpg,<br />
.bmp, .wmf, .emf, .swf, or .gif format image of your own logo sized 468 x 60 pixels. Then<br />
drop the image into the Banners folder. Re-boot the <strong>Client</strong> and you should see your logo<br />
appear (see pathway in the illustration below).<br />
Display your own logo on the <strong>Client</strong> computer Logon screen by putting it in the Banners folder<br />
© Copyright 2010. All rights reserved. <strong>OneRoof</strong>, Inc.<br />
<strong>OneRoof</strong> <strong>CyberCafePro</strong> <strong>Client</strong> Installation, Setup and Use <strong>Manual</strong><br />
31
Copying <strong>Client</strong> Settings (i.e. “cloning” to all other <strong>Client</strong>s)<br />
Navigation: Main Control Station (not in <strong>Client</strong>): Admin icon>Setup><strong>Client</strong><br />
Settings>Security<br />
This provides an important timesaving shortcut on the MCS to copy (or clone) from a<br />
specific <strong>Client</strong> that has individually been set-up all its <strong>Client</strong> settings to ALL other <strong>Client</strong>s<br />
within your network.<br />
Note: On the <strong>Client</strong>, you can also save Launch Pad settings and then import them to<br />
other <strong>Client</strong>s. For more information, see the discussion of the Program Settings<br />
Export/Import Control section on page 16.<br />
This is a KEY shortcut. Below are the instructions for setting-up your first <strong>Client</strong>.<br />
Once done <strong>–</strong> you can copy to all other <strong>Client</strong>s (highlight them first) <strong>–</strong> and then quickly<br />
and easily copy by selecting the “Paste to All” selection.<br />
If you later make a change to a <strong>Client</strong> <strong>–</strong> simply save and then Copy via “Paste to All” to<br />
all other <strong>Client</strong>s again.<br />
Fig.9<br />
In the list, you will see every client that has the <strong>CyberCafePro</strong> <strong>Client</strong> software installed <strong>–</strong><br />
and that are connected to your MCS. Once they appear, you can easily copy settings<br />
from any one to ALL.<br />
© Copyright 2010. All rights reserved. <strong>OneRoof</strong>, Inc.<br />
<strong>OneRoof</strong> <strong>CyberCafePro</strong> <strong>Client</strong> Installation, Setup and Use <strong>Manual</strong><br />
32
Admin <strong>–</strong> Access to the <strong>Client</strong> Computer Controls<br />
On <strong>Client</strong> computers, click the Admin button (lower right on Logon screen), leave<br />
Administer workstation selected and click OK to bring up the choices to manage the<br />
<strong>Client</strong> PC.<br />
Click the Admin button to manage the <strong>Client</strong> PC<br />
Note: If the Admin button is set to be not visible per settings in the MCS (Advanced tab<br />
under <strong>Client</strong> settings), use Ctrl-Shift-A to toggle the visibility of the Admin button so it<br />
can be clicked.<br />
These same functions can be administered from the MCS (if the logged on employee<br />
has the Administrative permissions enabled to permit them to do so), but should<br />
connectivity to the <strong>Client</strong> be lost, this Admin button on each <strong>Client</strong> provides an override.<br />
The <strong>User</strong>name and Password are usually those of an employee with Admin status (if<br />
MCS is connected); otherwise, the <strong>Client</strong> PC’s password is used.<br />
When you click OK, the Administration Screen for the <strong>Client</strong> opens, as illustrated below.<br />
© Copyright 2010. All rights reserved. <strong>OneRoof</strong>, Inc.<br />
<strong>OneRoof</strong> <strong>CyberCafePro</strong> <strong>Client</strong> Installation, Setup and Use <strong>Manual</strong><br />
33
Administration Screen<br />
Connection Settings<br />
Auto Search Now should automatically find the Main Control Station on your network.<br />
We suggest you use the first option, Always search for server on start (Dynamic IP).<br />
If the IP address of the MCS is not automatically found, use the Server IP option (as<br />
shown) and fill in the IP address of the Main Control Station (MCS). If you don’t know<br />
the IP address of the MCS, you can easily get it if you have Admin rights by using the<br />
pull-down under Help on the MCS and then selecting SaaS Configuration. [If your MCS<br />
has a Static IP this option would also be preferred (and a bit faster).]<br />
© Copyright 2010. All rights reserved. <strong>OneRoof</strong>, Inc.<br />
<strong>OneRoof</strong> <strong>CyberCafePro</strong> <strong>Client</strong> Installation, Setup and Use <strong>Manual</strong><br />
34
Use the SaaS Configuration command, under Help on the MCS, to get the MCS IP<br />
The SaaS Information box, showing the IP Address of the MCS, accessed via help pull-down<br />
In addition, the Server Port is usually set for default of 9499 or 9500 in section 3 of the<br />
Administration Screen.<br />
Control Panel Items<br />
Choices in the pull-down list in the Control Panel Items section provide shortcuts to the<br />
Windows Control Panel functions.<br />
Note: Some of these items may not be accessible depending on the logged on account<br />
you are running under, so you may need to log on to an admin account in Windows.<br />
© Copyright 2010. All rights reserved. <strong>OneRoof</strong>, Inc.<br />
<strong>OneRoof</strong> <strong>CyberCafePro</strong> <strong>Client</strong> Installation, Setup and Use <strong>Manual</strong><br />
35
Control Panel Items area in the Administration screen<br />
Auto-Login Settings (i.e. Automatic <strong>Client</strong> Skin Boot-up)<br />
Enter settings here for auto-login<br />
© Copyright 2010. All rights reserved. <strong>OneRoof</strong>, Inc.<br />
<strong>OneRoof</strong> <strong>CyberCafePro</strong> <strong>Client</strong> Installation, Setup and Use <strong>Manual</strong><br />
36
Administrator <strong>User</strong>name<br />
In order to be able to secure and control the system, <strong>CyberCafePro</strong> <strong>Client</strong> requires the<br />
login credentials of a Windows Administrative account. By default, as shown will appear<br />
the ‘Administrator’ account and the password may be blank.<br />
If you leave it blank, you should then select the option to Allow blank password as it<br />
modifies a system setting to allow auto-logging into Windows with a blank password<br />
field.<br />
We however recommend that you instead open the Windows <strong>User</strong> Account<br />
administration window (access it by using the Manage Accounts button shown above, or<br />
through Windows Control Panel), and setup a password for the Administrative account<br />
you will be using in order to increase the overall security of the system.<br />
Administrator <strong>User</strong>name: This is the login username of the administrative Windows<br />
Account that <strong>CyberCafePro</strong> will use to auto logon to the system with, and which then<br />
allows <strong>CyberCafePro</strong> the control it requires to manage the system.<br />
Administrative Password<br />
This is the password for the selected Administrative account. We recommend you set<br />
one up in Windows and then repeat it in the <strong>CyberCafePro</strong> <strong>Client</strong> window (and do the<br />
same for all <strong>Client</strong>s).<br />
Domain<br />
If using a Domain Controller such as Active Directory, you may need to enter this<br />
information in order to login to the domain controller.<br />
Administrators’ Group Name<br />
In non-English Windows installations, the name of the Administrators group may not be<br />
‘Administrators’ -- which will cause issues with the verification process <strong>CyberCafePro</strong><br />
uses for accounts. If you have problems setting the account and password, you may<br />
need to modify this value to match the name of the Administrators group on your<br />
Windows installation.<br />
Alternate Account<br />
We recommend that you enter a non-Administrative Employee account for the second<br />
field which will be the account used to launch applications and desktop access. In so<br />
doing, any programs accessed from the desktop would also be launched under this<br />
non-Administrative Employee account. [Some programs may not like being launched<br />
under this non admin account, but you can select the option for those individual<br />
programs (if needed) to launch as the administrative account.]<br />
© Copyright 2010. All rights reserved. <strong>OneRoof</strong>, Inc.<br />
<strong>OneRoof</strong> <strong>CyberCafePro</strong> <strong>Client</strong> Installation, Setup and Use <strong>Manual</strong><br />
37
Force auto login button<br />
Once the <strong>Client</strong>s and <strong>CyberCafePro</strong> MCS are operating properly and consistently, we<br />
suggest you select (check) this function on each <strong>Client</strong>. It will ensure the <strong>Client</strong> boots<br />
automatically, logs into Windows and does not bypass logon and go to the Windows<br />
logon screen. This is more of a convenience feature should you have customers trying<br />
to bypass the login screen -- forcing you to manually have to go to the client computer<br />
and log it into Windows. [No security is compromised either way.]<br />
Bypass verification of Accounts (Correct information entered but the<br />
fields are still red)<br />
In very rare cases due to some abnormal Windows setups, you may find that the<br />
username and password are not being accepted as valid by <strong>CyberCafePro</strong>, even<br />
though you are certain they are correct. In these cases you can select to bypass the<br />
account verification and accept the usernames and passwords as entered…but make<br />
sure you are 100% sure of the information. Worst case is that you will have to manually<br />
logon to the PC each time, but that can also be annoying.<br />
Once all the details have been entered, select OK and the <strong>CyberCafePro</strong> <strong>Client</strong> will<br />
automatically startup and be in control of the system.<br />
Wallpaper Settings<br />
Here you can select a different background for your Desktop on <strong>Client</strong>s. Click Setup<br />
under Wallpaper Settings,<br />
If you choose to not use Wallpaper, you can instead choose or re-set the Desktop Color<br />
by clicking Do not use a wallpaper and then click the Desktop Color button, choose a<br />
color and click OK.<br />
© Copyright 2010. All rights reserved. <strong>OneRoof</strong>, Inc.<br />
<strong>OneRoof</strong> <strong>CyberCafePro</strong> <strong>Client</strong> Installation, Setup and Use <strong>Manual</strong><br />
38
Setting wallpaper<br />
Reset All Settings<br />
Do not use this without being an expert at setting up <strong>CyberCafePro</strong>. It will revert all<br />
setting to defaults <strong>–</strong> and wipe away custom entries you have already made in your setups<br />
for a <strong>Client</strong>.<br />
Exit CCP to Windows<br />
This button exits the <strong>CyberCafePro</strong> <strong>Client</strong> software and provides access to the Windows<br />
Desktop. This can also be initiated from the Main Control Station (if the logged on<br />
Employee has been given the Admin permission to set <strong>Client</strong>s to Desktop).<br />
© Copyright 2010. All rights reserved. <strong>OneRoof</strong>, Inc.<br />
<strong>OneRoof</strong> <strong>CyberCafePro</strong> <strong>Client</strong> Installation, Setup and Use <strong>Manual</strong><br />
39
Shutting Down the <strong>Client</strong>s at Days End<br />
At the end of the day when you are ready to shutdown all the computers, right-click the<br />
<strong>Client</strong> icon or the desktop workspace on the MCS. Important:<br />
• Select to either Shutdown <strong>Client</strong> or Shutdown all unused. These actions shut<br />
down Windows so that when rebooted, the <strong>CyberCafePro</strong> <strong>Client</strong> program will run<br />
after the system auto-logs in.<br />
• DO NOT select Set to Windows or Set All <strong>Client</strong>s to Windows as this will prevent<br />
the <strong>CyberCafePro</strong> <strong>Client</strong> software from loading again until manually started.<br />
Note that if you have Wake-On-LAN network cards in the <strong>Client</strong> PCs, you can easily<br />
turn them all on again right from the <strong>CyberCafePro</strong> MCS by clicking the workspace area<br />
and selecting Wake All <strong>Client</strong>s.<br />
© Copyright 2010. All rights reserved. <strong>OneRoof</strong>, Inc.<br />
<strong>OneRoof</strong> <strong>CyberCafePro</strong> <strong>Client</strong> Installation, Setup and Use <strong>Manual</strong><br />
40