


You also want an ePaper? Increase the reach of your titles
YUMPU automatically turns print PDFs into web optimized ePapers that Google loves.
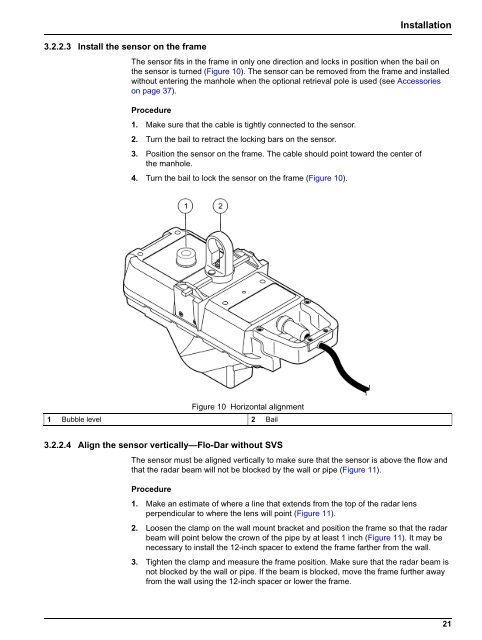
3.2.2.3 Install the sensor on the frameInstallationThe sensor fits in the frame in only one direction and locks in position when the bail onthe sensor is turned (Figure 10). The sensor can be removed from the frame and installedwithout entering the manhole when the optional retrieval pole is used (see Accessorieson page 37).Procedure1. Make sure that the cable is tightly connected to the sensor.2. Turn the bail to retract the locking bars on the sensor.3. Position the sensor on the frame. The cable should point toward the center ofthe manhole.4. Turn the bail to lock the sensor on the frame (Figure 10).Figure 10 Horizontal alignment1 Bubble level 2 Bail3.2.2.4 Align the sensor vertically—<strong>Flo</strong>-Dar without SVSThe sensor must be aligned vertically to make sure that the sensor is above the flow andthat the radar beam will not be blocked by the wall or pipe (Figure 11).Procedure1. Make an estimate of where a line that extends from the top of the radar lensperpendicular to where the lens will point (Figure 11).2. Loosen the clamp on the wall mount bracket and position the frame so that the radarbeam will point below the crown of the pipe by at least 1 inch (Figure 11). It may benecessary to install the 12-inch spacer to extend the frame farther from the wall.3. Tighten the clamp and measure the frame position. Make sure that the radar beam isnot blocked by the wall or pipe. If the beam is blocked, move the frame further awayfrom the wall using the 12-inch spacer or lower the frame.21


