


Create successful ePaper yourself
Turn your PDF publications into a flip-book with our unique Google optimized e-Paper software.
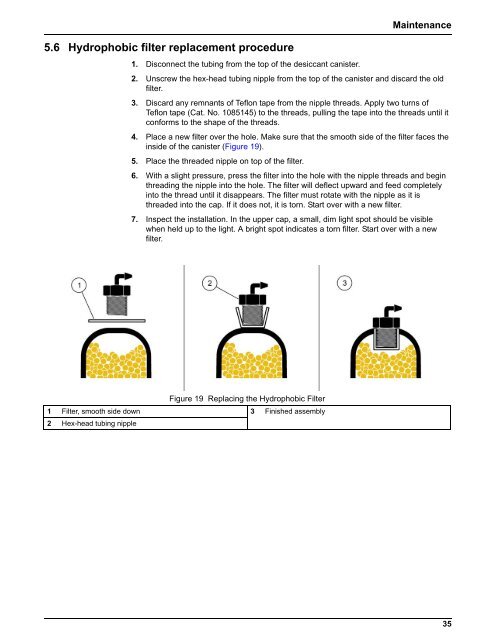
5.6 Hydrophobic filter replacement procedureMaintenance1. Disconnect the tubing from the top of the desiccant canister.2. Unscrew the hex-head tubing nipple from the top of the canister and discard the oldfilter.3. Discard any remnants of Teflon tape from the nipple threads. Apply two turns ofTeflon tape (Cat. No. 1085145) to the threads, pulling the tape into the threads until itconforms to the shape of the threads.4. Place a new filter over the hole. Make sure that the smooth side of the filter faces theinside of the canister (Figure 19).5. Place the threaded nipple on top of the filter.6. With a slight pressure, press the filter into the hole with the nipple threads and beginthreading the nipple into the hole. The filter will deflect upward and feed completelyinto the thread until it disappears. The filter must rotate with the nipple as it isthreaded into the cap. If it does not, it is torn. Start over with a new filter.7. Inspect the installation. In the upper cap, a small, dim light spot should be visiblewhen held up to the light. A bright spot indicates a torn filter. Start over with a newfilter.Figure 19 Replacing the Hydrophobic Filter1 Filter, smooth side down 3 Finished assembly2 Hex-head tubing nipple35


