Operating Manual LUXOR S 400
Operating Manual LUXOR S 400
Operating Manual LUXOR S 400

You also want an ePaper? Increase the reach of your titles
YUMPU automatically turns print PDFs into web optimized ePapers that Google loves.
<strong>LUXOR</strong> S <strong>400</strong><br />
Maintenance and repair 9<br />
Maintenance work<br />
� Prepare the dry air generator for maintenance (see “Maintenance and repair“ on Page 46<br />
� “Maintenance and repair“ on Page 46<br />
� Remove the back panel of the unit.<br />
� Open the protective enclosure over the insulation [3].<br />
� Separate the insulation [2] at the joint.<br />
� Remove the screws on the filler opening cover [1] and remove the cover with the gasket.<br />
� Remove the silicone residues on the filler opening, cover and gasket.<br />
� Extract the adsorption agent [4] completely with a vacuum cleaner.<br />
Structure<br />
� Add new adsorption agent (35 kg / 77 lb per drying agent cartridge).<br />
� Check that the gasket is undamaged. Replace a damaged gasket.<br />
� Screw the filler opening cover [1] in place and seal the filler opening with silicone.<br />
� Seal the insulation [2] with aluminum foil.<br />
� Close the protective enclosure over the insulation [3].<br />
� Attach the rear panel of the unit.<br />
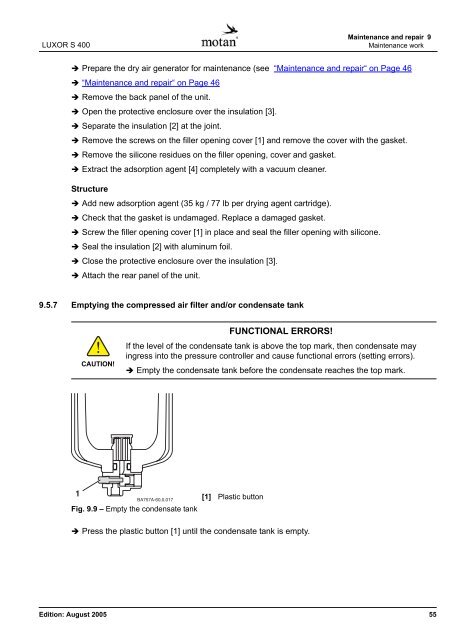
9.5.7 Emptying the compressed air filter and/or condensate tank<br />
CAUTION!<br />
FUNCTIONAL ERRORS!<br />
If the level of the condensate tank is above the top mark, then condensate may<br />
ingress into the pressure controller and cause functional errors (setting errors).<br />
� Empty the condensate tank before the condensate reaches the top mark.<br />
[1] Plastic button<br />
Fig. 9.9 – Empty the condensate tank<br />
� Press the plastic button [1] until the condensate tank is empty.<br />
Edition: August 2005 55